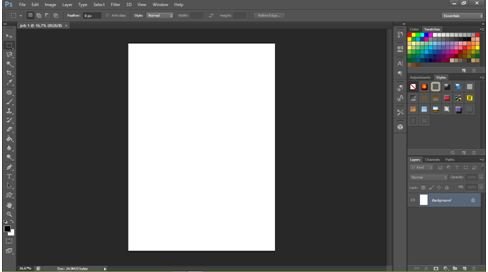
1. Open a new document
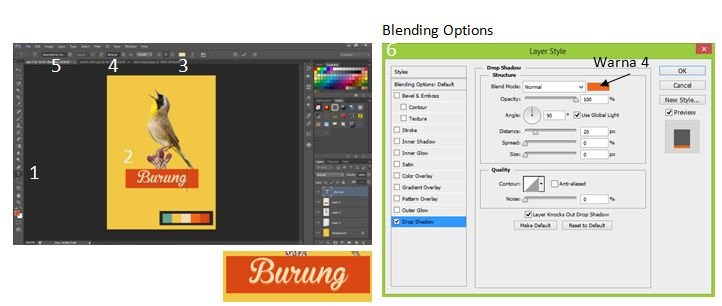
How to: file - new - change name (job 2) - create A4 size (present change to international paper and select size A4)
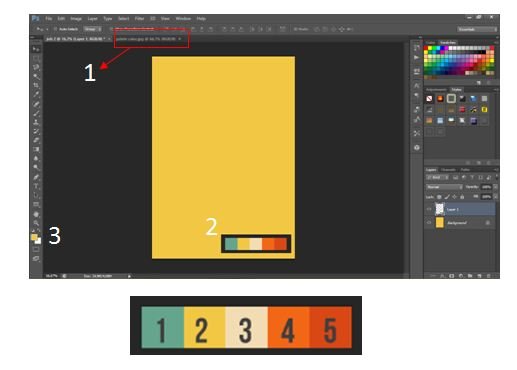
2. Change background color (choose color with pelate calor)
How to: - open the palette calor file - move the pelate calor worksheet to the job2 spreadsheet - point the pointer to the foreground color and grab a sample of 2 colors then ok.
- Change background by pressing Alt + backspace
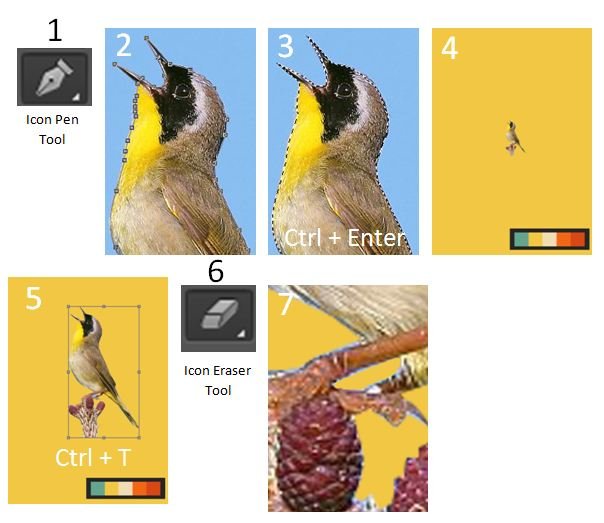
3. Selecting objects with the pen tool command
How to: open the image file Bird singing - click the icon of the pen tool - selection of the bird object (click on the selected object boundary, from the start of the motorcycle boundary to the end of the boundary) - press Ctrl + Enter - point the pointer to the selected object and move the work twin job 2- enlarge the image by press Ctrl + T (to make the object become symmetrical hold Shift key).
Delete unwanted objects by clicking the Eraser tool icon and deleting objects carefully.
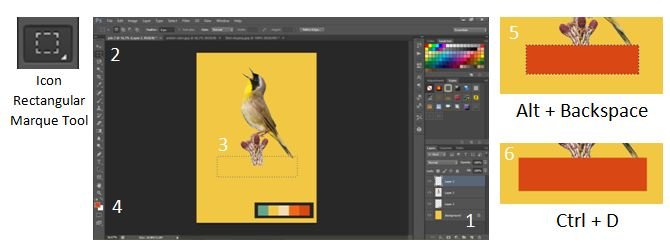
4. Create a rectangular rectangular marque tool
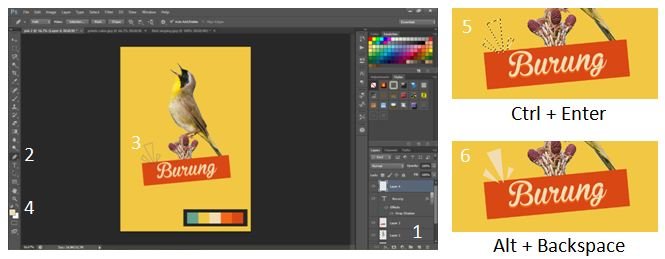
How to: Create a new layer - Click the rectangular marque tool icon - click and hold on the desired field - click on foreground and grab sample color 5 - press Alt + Backspace to fill the rectangle and end by pressing Alt + D.
5. Make the text "bird"
How to:
- Press the text icon - type "Bird" - change color to color 3 - change text size - change text type.
- Right click on layer and select blending option - drop shadows - change color to color 4 - change angle: 90 - change dintance: 20 - spread and size become
6. Tilt the rectangle as well as text "Bird"
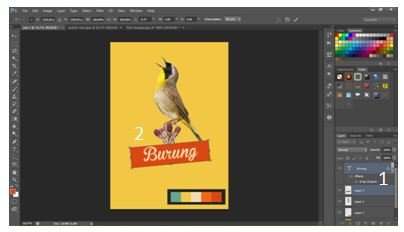
How to: Select the text layer and rectangle at once (click on the rectangle layer and hold Ctrl while clicking the text layer) - press Ctrl + T and tilt the object.
7. Create objects with the pen tool
How to: Create a new layer - click the icon of the tool pen - create the object by clicking the desired field - grab sample color 3 - press Ctrl + Enter to end - press Alt + Backspace to fill the color of the object.
8. Create text
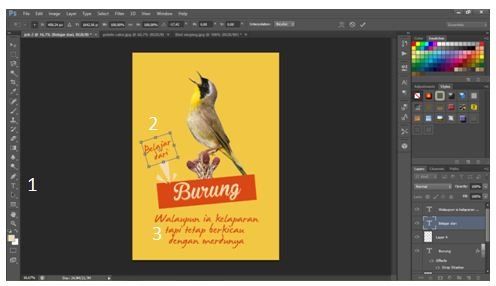
How to: - Click the text icon - create the text "learn from" and select the James Fajardo text type and the color 5 - and rotate the text.
- Click the text icon - create a text "Although he is starving but still singing with his merdunya" and select the type of text James Fajardo and color 5.
9. Make effects on bird objects
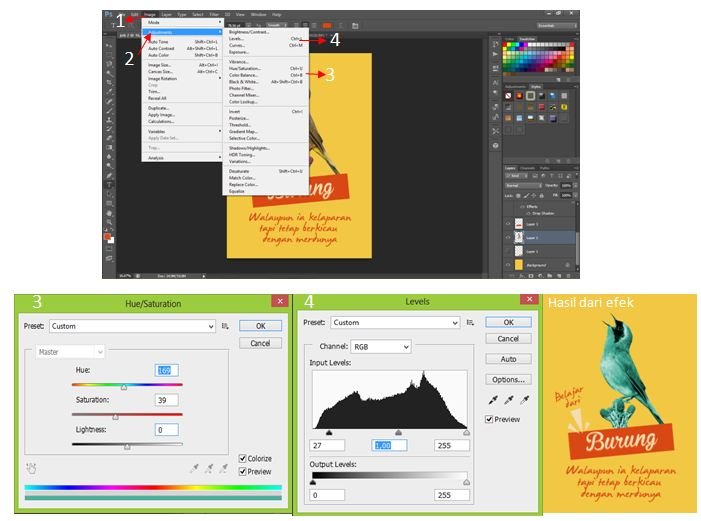
How to: Click on image - navigate to adjustment - click on Hue / Saturation and set as illustrated below (no.3) - click on level and set as illustrated below (no.4).
10. Make a bird tail out
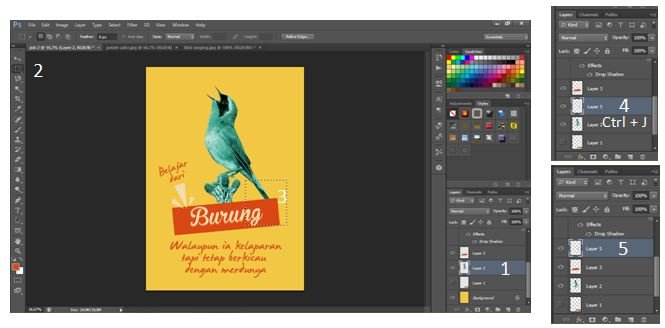
Click on the bird object layer - Click on the rectangular marque tool image - select the selection on the bird's tail - copy the selected layer by pressing Ctrl + J - and raise the tail layer above the rectangular layer by holding the mouse up.
11. Make a bird tail out
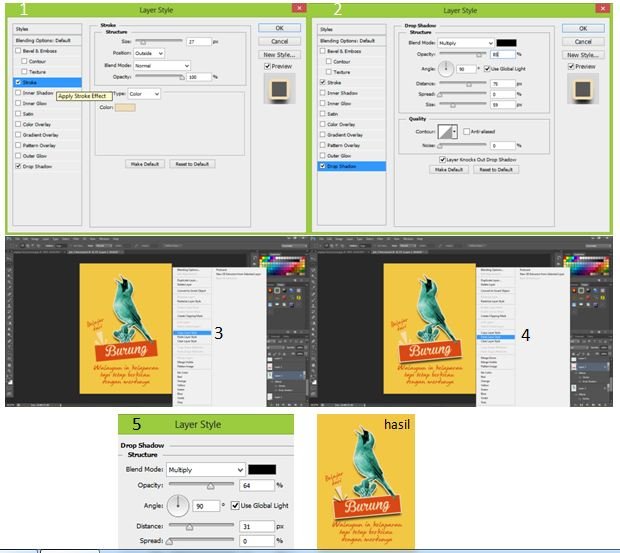
- Click on the bird layer - right click and select blending option - tick the stroke and set it like the illustration below (no 1) - check the drop shadow and atue like the illustration below (no 2) and ok.
- To copy the layer settings, right-click on the bird layer and select copy layer style - point the pointer to the rectangle layer and right click and select paste layer style.
- Create also drop shadow on triangle layer and set according to illustration below (no 5) and ok.
12. Adding wood background
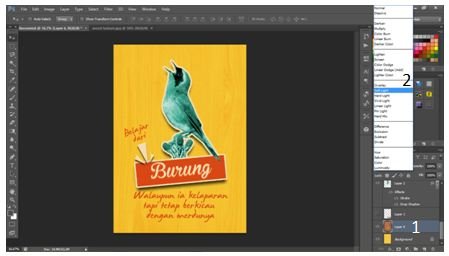
Click on the background layer - open the wood texture file - move to worksheet 2 - adjust the size - select soft light.

nice