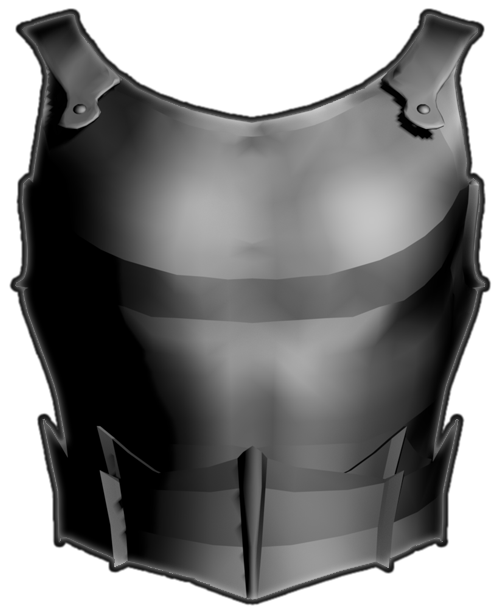
In this post i will show you how i model a chest piece / armor by following the shape of the human body (torso) while modeling this piece of armor. It's not that hard, you can litterally copy - paste part of the torso to use it as a base for continuing to model and design around it.
.png.jpg)

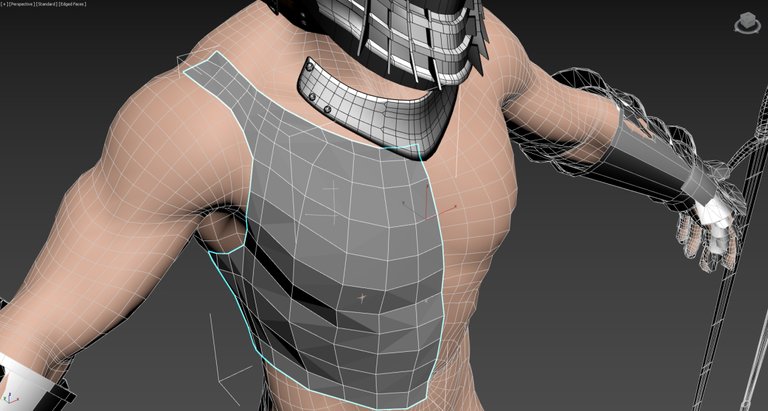
For this, let's just totally select polys from the torso, and paste them to a new object in front of it : (also apply a neutral grey material so you can see what you are doing, or at least, you can see the edges clearly )

You can also go to the viewports options and activate "show edges of the selected object" it can help for retopology purposes.
Speaking of retopology, we are going to use the freeform function of 3DS max to draw new polys on the surface of the body, just by selecting the new object, and being on the modifier stack of the object, go to the freeform panel / ribbon by clicking on freeform, and change the grid option to surface, then, select the human body, you should have surface and below it, the name of the mesh of the body under it, so we can start using "shift" to create a new poly that we can drag from an edge, ctrl shift alt to adjust a vertex on top of the body, also, use at least 0,1 offset so it doesn't clip through the body mesh when extending edges.
.png.jpg)
Following the body structure we can simplify the mesh a little bit.
.png.jpg)
Following the body volume is pretty simple with this technique, just drag / extend edges with shift, or reconfigure vertexes by using ctrl alt shift, you can also choose to create a full row of new edges by using ctrl shift and click-drag with the mouse.
(oh yeah, i forgot to tell you, when you use shift only for one edge, of course you need to keep shift pressed, and then click on the edge you want to extend while moving it in place )
.png.jpg)
We need to model the place where the chestplate is going to connect to the backplate and some mechanical / moving parts on top of them that are used not only to keep the two pieces together but also as partial support for hinge / rotative parts that helps / support shoulders and also allow them to move. (yes you have to keep some things in mind while modelling and also, allways look at reference pictures for more accuracy )
.png.jpg)
Now we just copy paste this part on the same element to make a cover plate on top of this section of the model.
.png.jpg)
The purpose is to make a first joint for the shoulder armor to come on top of it and clips / connect to that in some way later.
.png.jpg)
Beveling this whole mesh to give it a little bit of metal thickness.
.png.jpg)
And a second time to chamfer it slightly.
.png.jpg)
It's pretty basic but we are going to give this area a little bit more level of detail in terms of border edges because it's a little bit too pointy and angular to my taste.
.png.jpg)
Let's just re arrange / re position vertexes by using "local" orientation so it still follow the natural angle of this piece.
.png.jpg)
You can tell that i used "cut" in the polygon editable modifier list to divide this part a little bit to add more definition to it. Also, the edges flow more naturally / better on the surface now. It's also a matter of feel / looks and some kind of... heh... "logic" of shapes i believe... Don't worry it comes with the times, experience, and observation xD ( stahp )
.png.jpg)
Let's use one of these simplified rivets for the hinge / moving area.
.png.jpg)
Aaaand let's already apply a metallic looking material to have a first feel of the shapes and how it goes.
.png.jpg)
Adding a little bit of extension down there, it's often shown on some armors and i believe it prevent some piece of armor to clip or slide along some part of the under arm, or as a stop of some sort, it has to be a practical thing maybe even made so the ring mails slide out there nicely without limiting movement. Also for freedom of movement probably !
.png.jpg)
.png.jpg)
Let's already have a look at what we've done here and adding a symmetry modifier to have it complete from both sides.
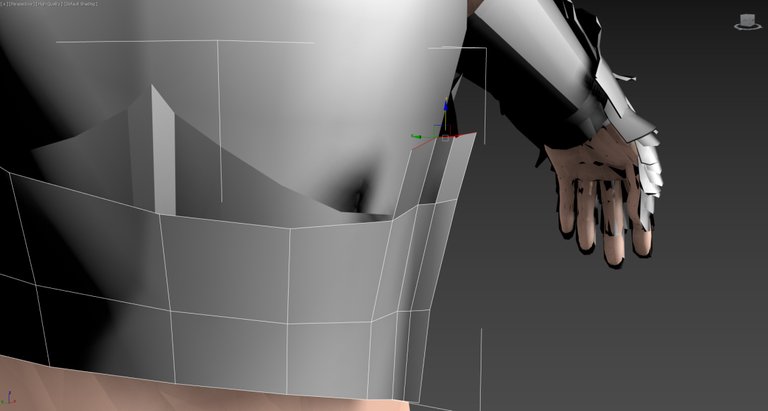
Ok, not too bad, let's select polys and copy paste them in front of the last polys rows of the armor to add details :
.png.jpg)
Let's re arrange vertexes in ways that it makes it a little bit more interesting, we try to block out a center piece protection for the belly that can be slightly articulated / moving.
.png.jpg)
.png.jpg)
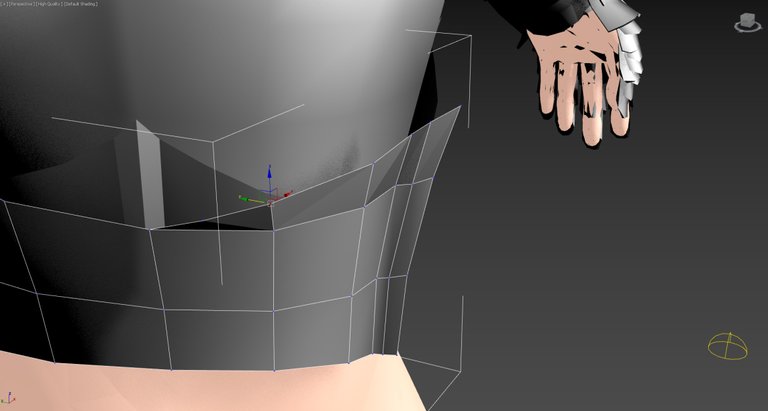
Shaping it around the waist and extending edges by hand this time, modelling it's volume and following the lower part of the armor.
.png.jpg)
Copy pasting this part to add inner platings.
.png.jpg)
Again, shaping them up by moving vertexes around.
.png.jpg)
And cuting polys with new edges to add some pointy elements that get out the general volume of this part.
.png.jpg)
Moving them and shaping them out of the surface.
.png.jpg)
That's what extending edges look like when you select a row of them and extend with shift pressed + mouse draging along an axis :
.png.jpg)
.png.jpg)
Re positionning all these vertexes.
.png.jpg)
Adding another pointy rail so the inner plates are allowed to slide along it if need be.
.png.jpg)
Doesn't look so bad after selecting some polys and adding smoothing groups so it adds nice reflections to the object that make it look more metallic / hard surface.
.png)
Maybe i'll do other tutorials like these, and you appreciate it ?
Please follow me if you like video games, drawings, comics and 3D modelling tutorials, and upvote me if you like what i do.
Thank you.
I enjoy watching these kind of posts actually. But I would never be able to make that kind of thing myself. I don't understand these programs lol. So I'll stick to the normal drawing and painting myself :) But in the meantime enjoy these kind of posts. Thank you for sharing!
This post was shared in the Curation Collective Discord community for curators, and upvoted and resteemed by the @c-squared community account after manual review.
Amazing work! For me 3d and animation are like magic. So I started to learn animation and now thinking of 3d (modeling and animation). In what programs do you work?
3DS Max, with a licence given to me by Jason Brubaker, he sent me a bunch of 3D modelling / designing softwares with licenses keys, i was very lucky ^^ All thanks to him i can improve a lot.
You are lucky! I saw his YouTube channel, he is good!
Have you heard anything about Cinema 4D? I'm thinking of starting from it.
I don't usually model on those softwares but I need to tell you did a good work with it! Thanks a lot for sharing your knowledge, It gave me an idea about how to draw those armours, sometimes I need to draw a knight or something like that and I get stuck with the armour :(
I loved your post :). Thanks! You have a new follower
Thank you Karlys, i'm glad it could provide you some inspiration to draw armour design as i made this one completely custom and inspired from some references ^^
I allways appreciate people commenting and giving their opinion !
You got a 9.67% upvote from @dailyupvotes courtesy of @imaginalex!