Summary: This GIMP(version 2.8.22) tutorial shows how to create crystal ball effect.
Do you believe the magic of crystal ball? Hope it takes good luck for everyone in coming New Year. follow me...
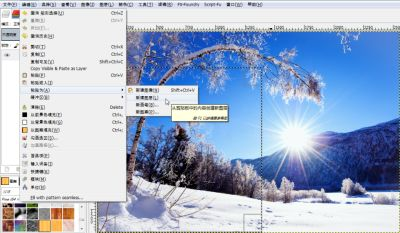
Result image:

Original image:

步骤1:打开背景图片:

步骤2:选择一个矩形选区:

步骤3:复制然后粘贴为新图层:

步骤4:隐藏原图片,并且摈弃选区:

步骤5:使用旋转与挤压滤镜:

设置如下:

结果如下:

步骤6:使用应用透镜滤镜:

设置如下:

结果如下:

步骤7:显示原图像图层,将水晶球缩小并移动到合适的位置:

步骤8:创建新的透明图层:

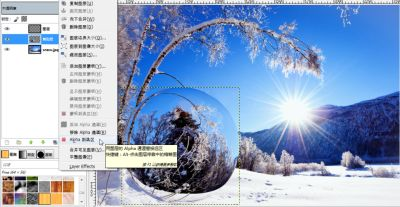
步骤9:选择水晶球图层,应用Alpha到选区选中水晶球:

步骤10:选择新建的透明图层,并且选择勾画选区:

设置如下:

步骤11:将新图层的透明度设置为12:

步骤12:在新图层上选择向下合并将其与水晶球图层合并:

步骤13:新建透明背景的shadow图层,并做椭圆选区:

步骤14:用黑色填充选区:

步骤15:将shadow图层的透明度设置为30,做出淡黑色的水晶球的影子:

步骤16:再新建透明背景图层light:

步骤17:选择light图层,应用超新星滤镜:

设置及效果如下:

最终结果如下:

Posted on Utopian.io - Rewarding Open Source Contributors
Thank you for the contribution. It has been approved.
You can contact us on Discord.
[utopian-moderator]
Hey @alanzheng I am @utopian-io. I have just upvoted you!
Achievements
Suggestions
Get Noticed!
Community-Driven Witness!
I am the first and only Steem Community-Driven Witness. Participate on Discord. Lets GROW TOGETHER!
Up-vote this comment to grow my power and help Open Source contributions like this one. Want to chat? Join me on Discord https://discord.gg/Pc8HG9x