Summary: This GIMP(version 2.8.22) tutorial shows how to create snow/ice text effects.
Christmas will coming soon, let me show you how to create a Xmas snow/ice text, follow me...
result

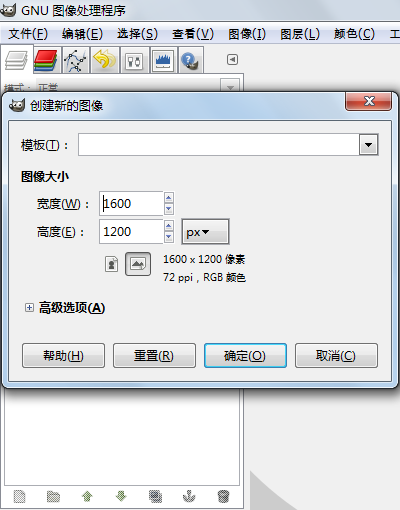
步骤1:设置前景色为白色,背景色为黑色,创建新图像
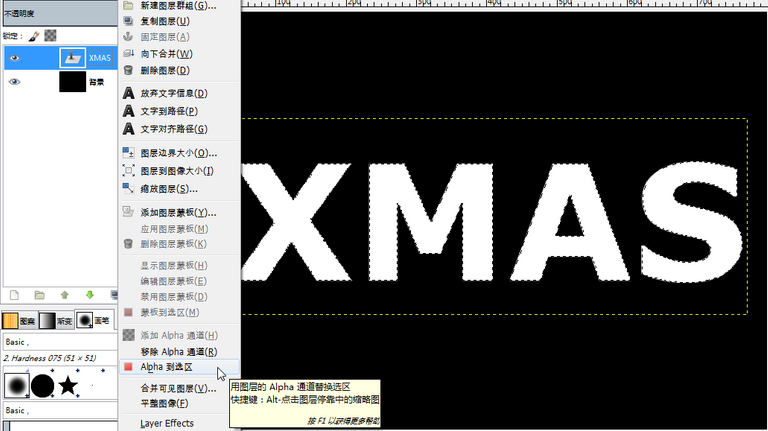
步骤2:使用文字工具,创建文字:

步骤3:选择XMAS图层,右键菜单选择Alpha到选区
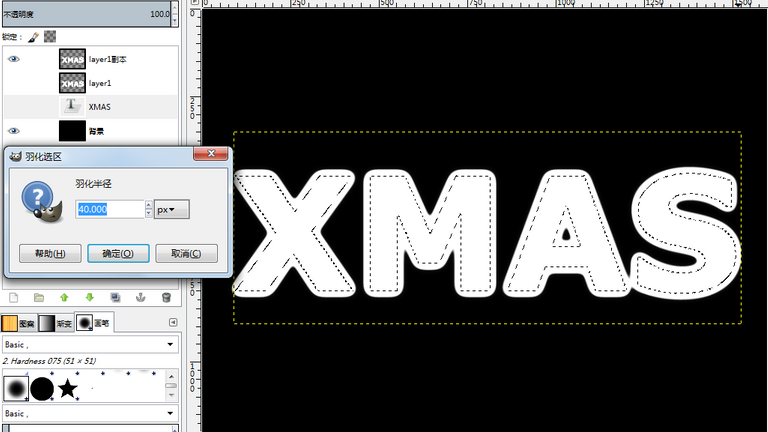
步骤4:羽化文字选区:
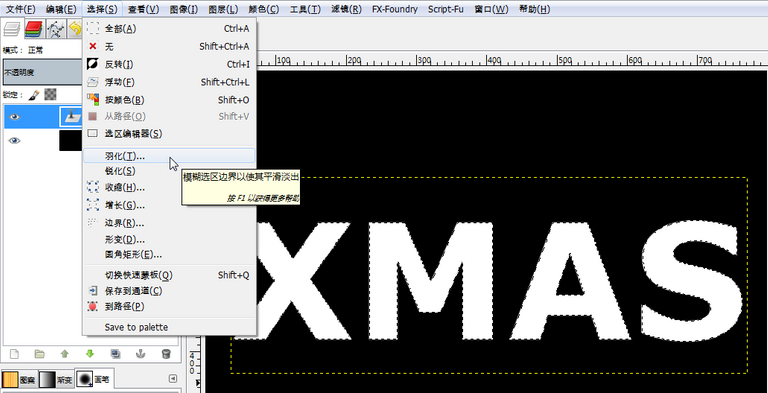
步骤5:设置羽化半价为40

步骤6:隐藏XMAS图层,并创建新的透明背景图层layer1:

步骤7:选择layer1图层,用油漆桶工具做白色填充
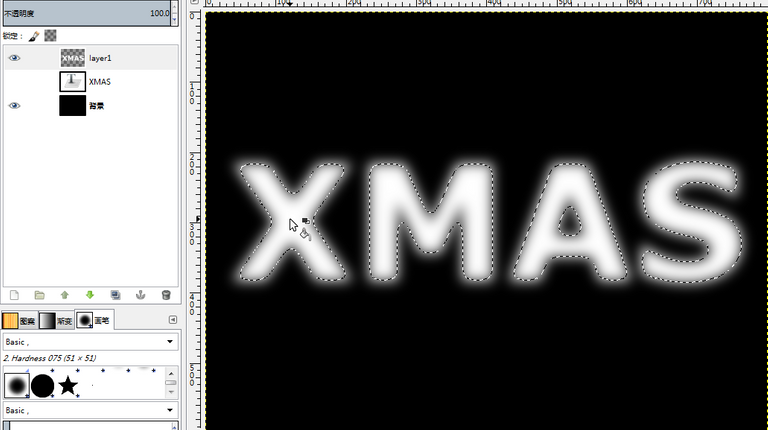
步骤8:选择layer1,用颜色选择工具选择黑色区域
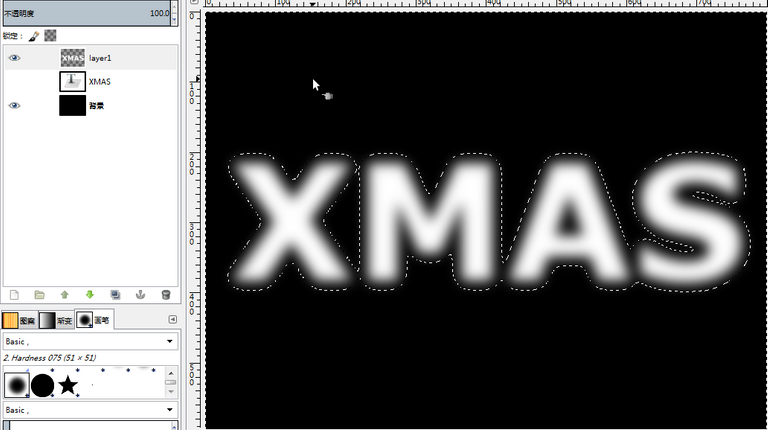
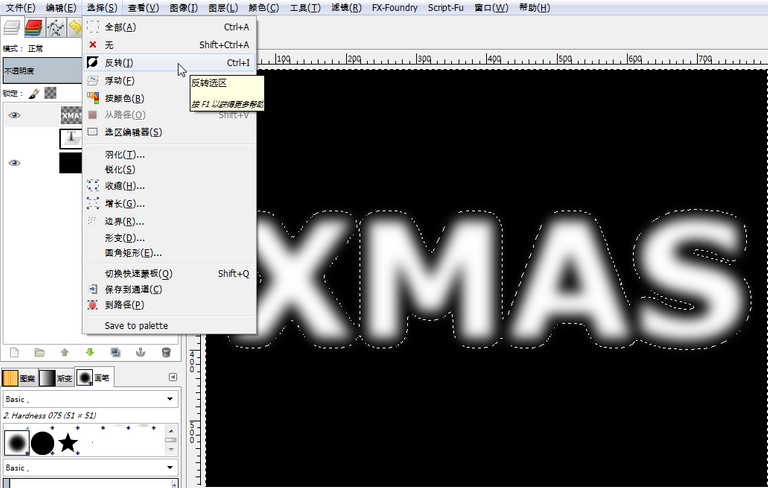
步骤9:反转选区
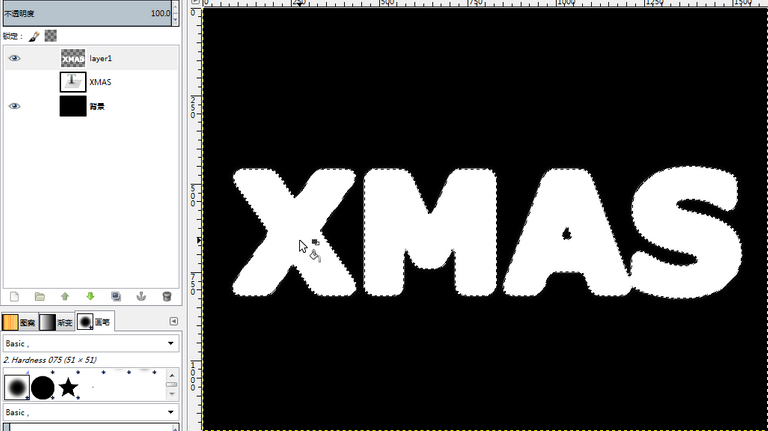
步骤10:用白色填充选区
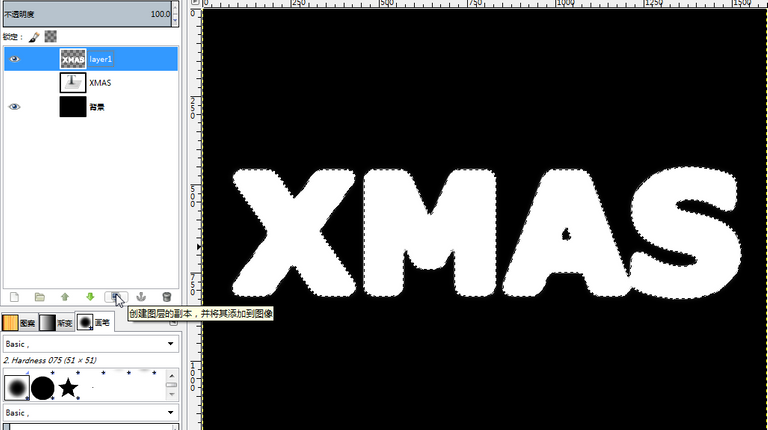
步骤11:复制layer1图层
步骤12:隐藏layer1图层,选择XMAS图层,选择Alpha到选区

步骤13:羽化选区
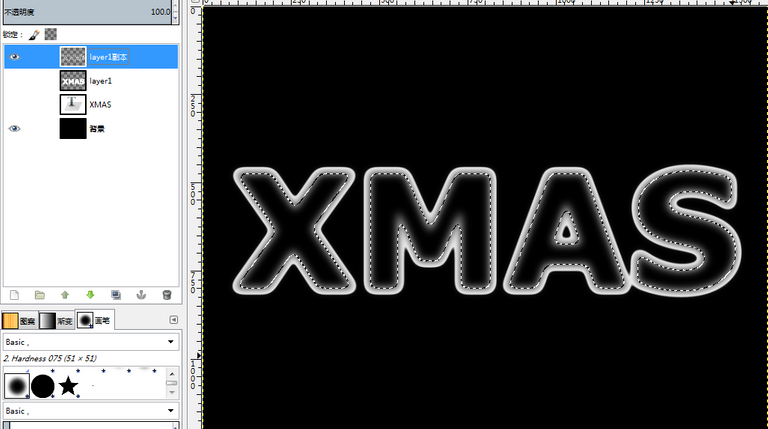
步骤14:选择layer1副本图层,按键盘的Delete
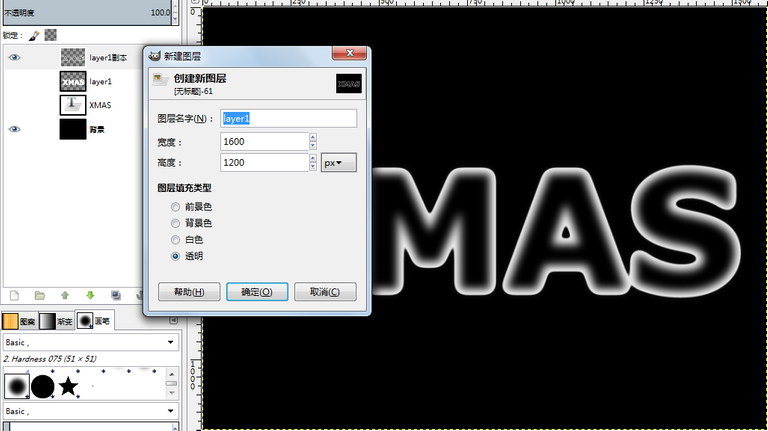
步骤15:创建透明图层layer1 #1:
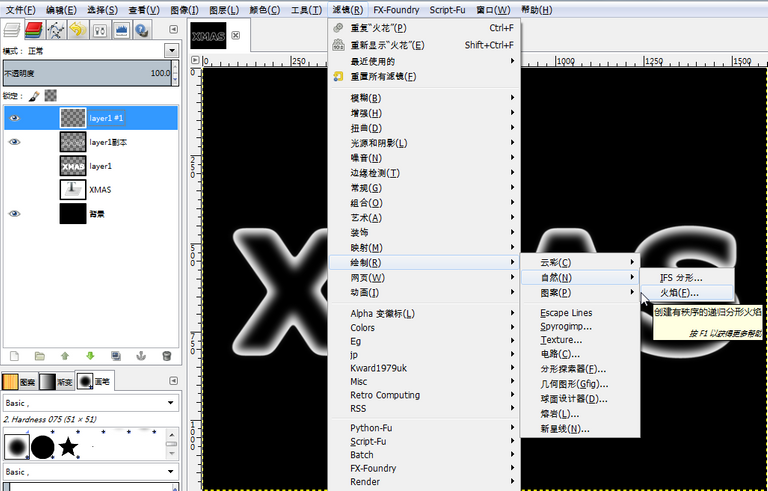
步骤16:选择新创建的透明图层layer1 #1,应用火焰滤镜:
步骤17:火焰滤镜设置如下:
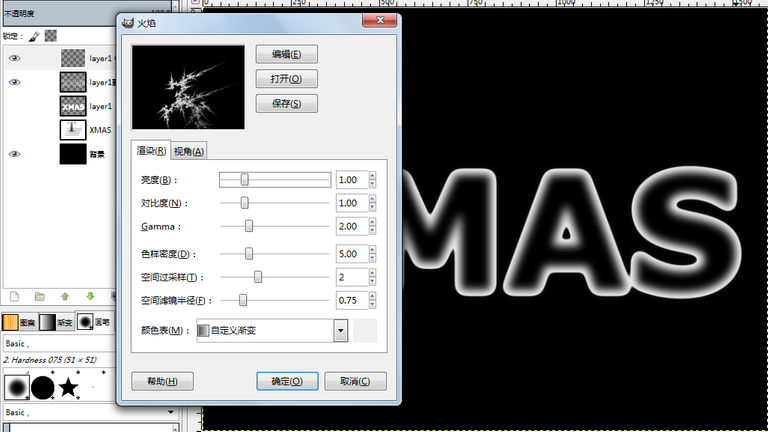
火焰滤镜结果如下:

步骤18:选择图层layer1 #1,应用sobel滤镜:

sobel滤镜设置如下:
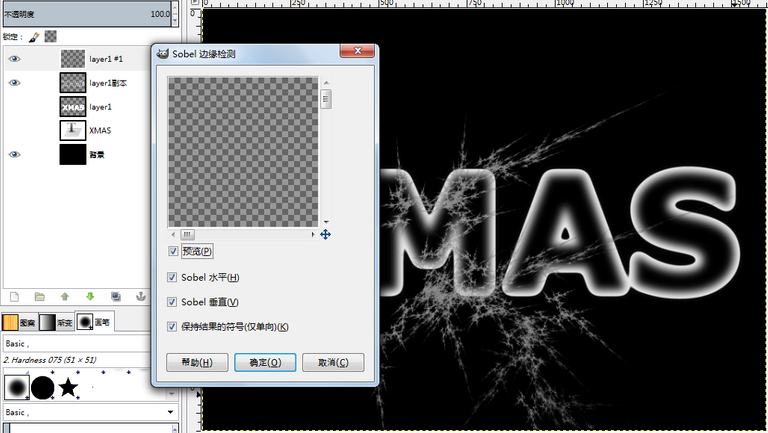
sobel滤镜结果如下:
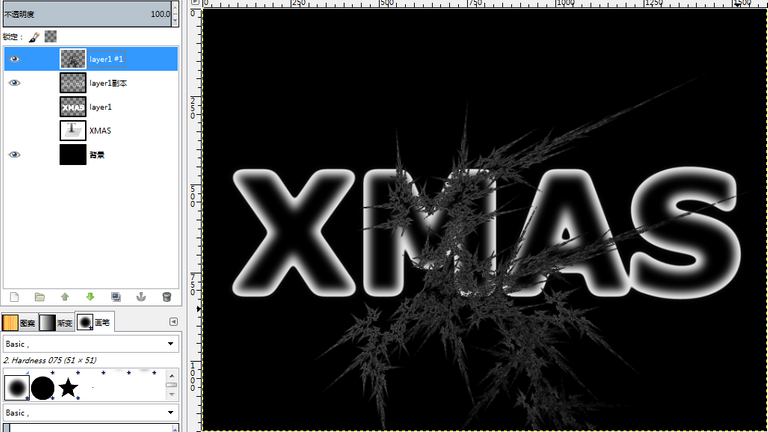
步骤19:选择图层layer1 #1,做颜色反转,结果如下:
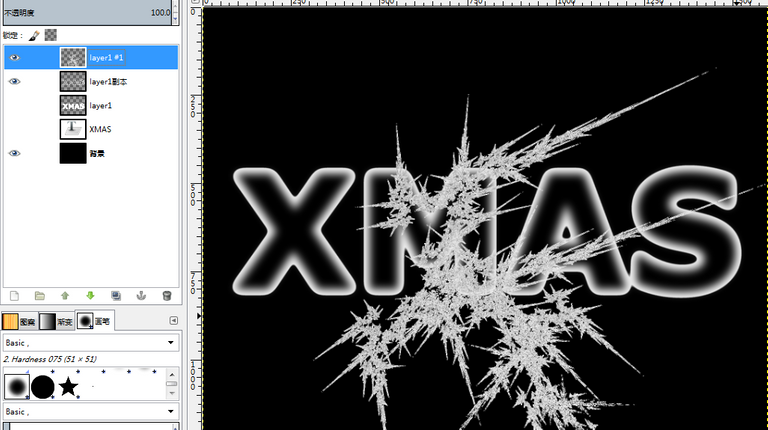
步骤20:选择图层layer1,选择Alpha到选区
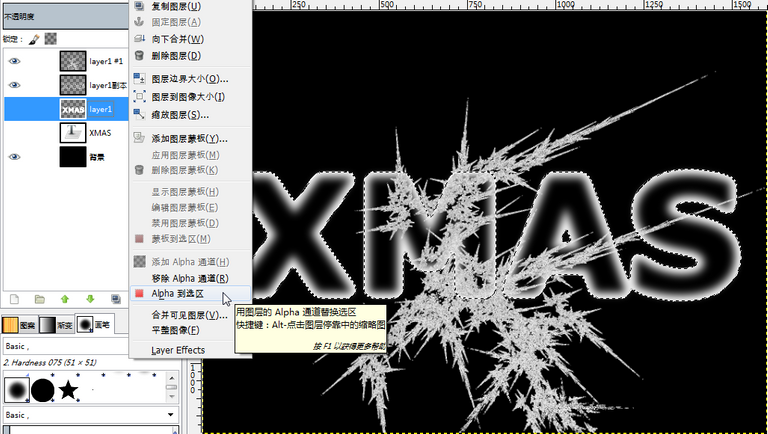
步骤21:选择图层layer1 #1,应用克隆工具,选择克隆源:
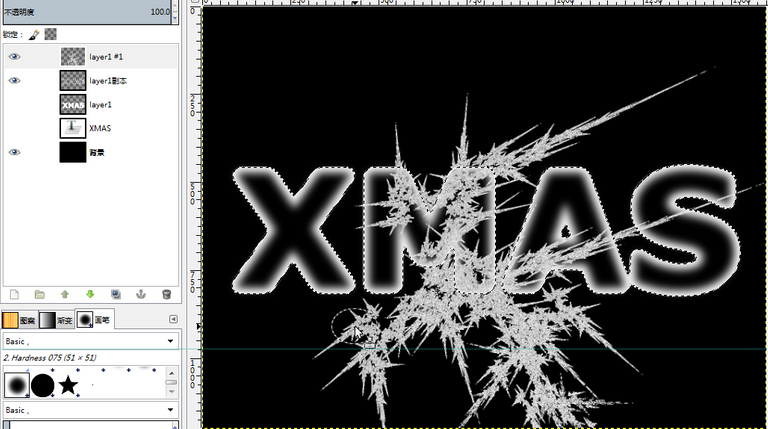
步骤22:隐藏图层layer1 #1,选择layer1副本,将克隆源复制到该图层的选区中:

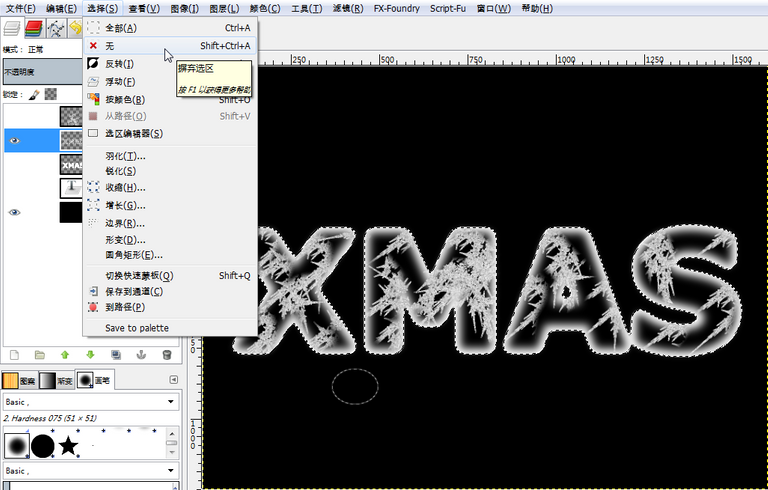
步骤23:摈弃选区:
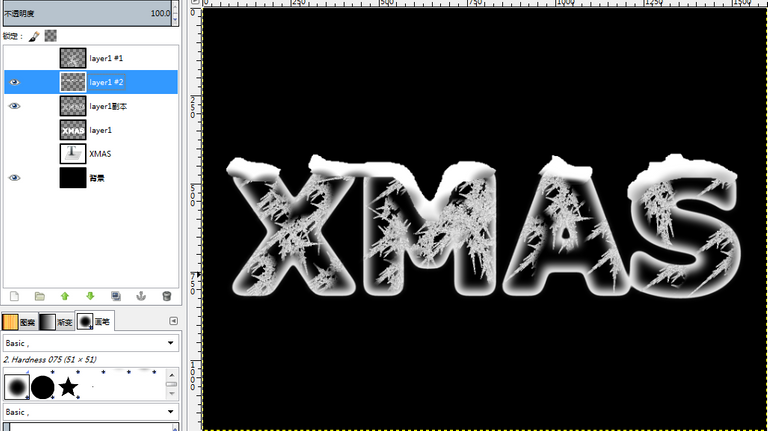
步骤24:创建新图层layer1 #2,并在XMAS字母上面画一些雪:
步骤25:选择背景图层,应用混合工具:
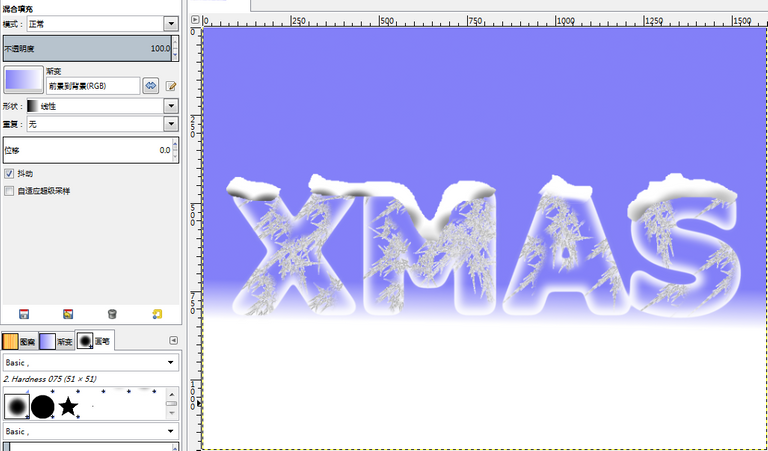
步骤26:创建新的透明图层layer1 #3,将其移动到图层列表的最上面,并且填充为黑色,应用HSV噪音滤镜:
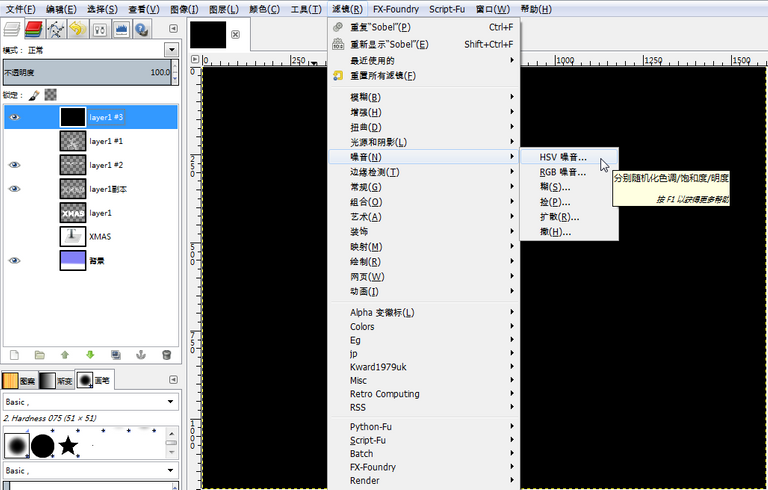
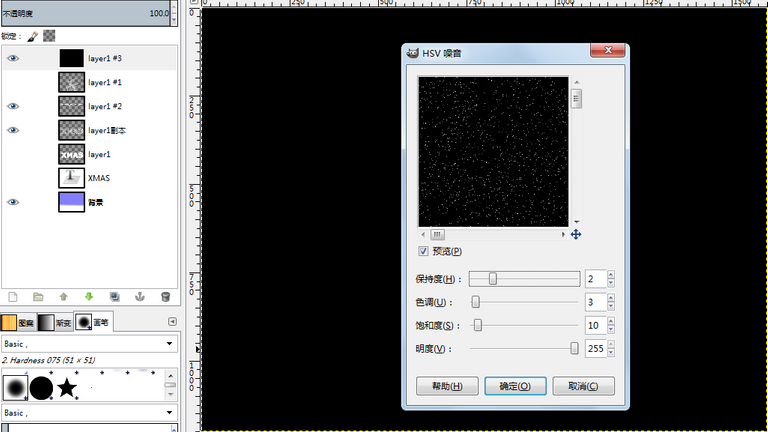
HSV噪音滤镜设置如下:
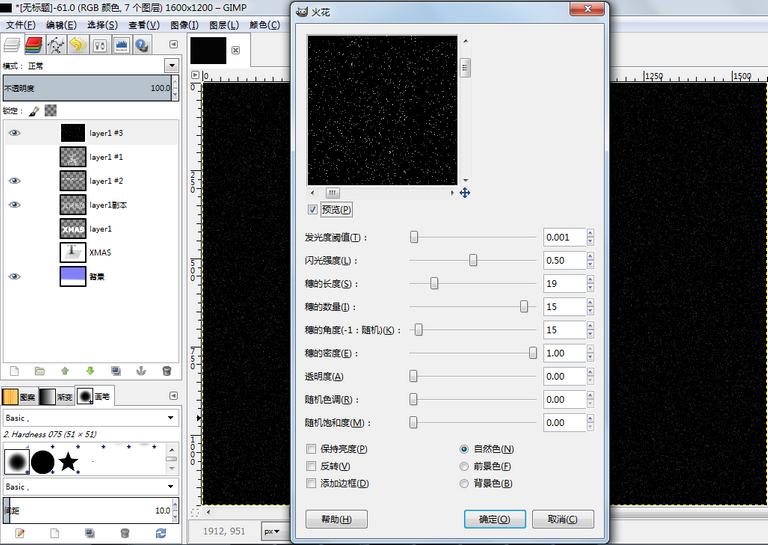
步骤27:再应用火花滤镜:

火花滤镜设置如下:
步骤28:将图层layer1 #3的图层模式改为减淡。如下:

最终效果如下:

Posted on Utopian.io - Rewarding Open Source Contributors
Nice effect. I always like to see GImp tutorials, I use it a lot.
@miniature-tiger, thanks! I followed you. I also have others gimp effect, for example: https://steemit.com/utopian-io/@alanzheng/gimp-or-gimp-tutorial-shadow-text, if you have free time please have a look at it, any suggestion will really appreciation!
Thanks @alanzheng, I will check them out!
Thank you for the contribution. It has been approved.
You can contact us on Discord.
[utopian-moderator]
@slempase, thanks for reviewing!
That looks very nice! You should use that image as the first image.
@fathin-shihab, thanks for suggestion!
Hey @alanzheng I am @utopian-io. I have just upvoted you!
Achievements
Suggestions
Get Noticed!
Community-Driven Witness!
I am the first and only Steem Community-Driven Witness. Participate on Discord. Lets GROW TOGETHER!
Up-vote this comment to grow my power and help Open Source contributions like this one. Want to chat? Join me on Discord https://discord.gg/Pc8HG9x