Programming A Quantum Emoticon:
A Quantum Computer's "Hello World"
Self Generated Image
Repository
https://github.com/Qiskit/qiskit-terra
What Will I Learn?
- You will learn a good amount of the more basic operations, that are included inside of the Qiskit, Including standard classical computations, as well as a few quantum ones.
- You will learn how to impose superposition on qubits, as well as to entangle them with others.
- You will learn how to use Python, and the Qiskit, to create a quantum emoticon, and print out to the screen.
Requirements
- A standard PC, with at least 8 GB of ram, running a Windows/Linux OS. I have not verified Mac Sources for this.
- EAn average knowledge of python, as well as an IDE of choice installed on said OS.
- The Qiskit Repository installed along with Python3.6. (Pip is the simplest way.)
Difficulty
- Intermediate
How to Program A Quantum Emoticon
Allright guys :) This is the first time I will be doing a Utopian-io styled Tutorial, and I must say I'm very excited to be doing so. As you have probably already gotten from the title, today we will be using the Qiskit to create our very first quantum program! Now, in most programming languages, the first program you will learn to do, is known as the 'Hello World' program. This is a very simple tool that we create, simply to test out the environment, and learn how data is handled by the language as well as how output is printed to the screen.
While we are working with these quantum devices, one thing we must take into consideration is that they are in such early developmental stages, that they are near comparable to an early 1960's computer. I don't necessarily mean that in which the power they posses is similar, but that our understanding of them, at this time, is quite similar to then. None the less, the world needs people like you to push the boundaries of what we know, and nothing can be accomplished without simple experimentation! Now that you are informed, and inspired :P, lets get started with this tutorial.
The Problem:
As mentioned earlier, these devices are in early stages. For a regular computer to print out the string 'Hello world', it would take something like 100 bits of data to handle that string. For a regular PC in the modern era, this is no problem, however IBM's current best Quantum Computer Boasts a mere 50 qubits, which though an amazing feat that is, unfortunately 50 qubits is nowhere near enough to handle a string of that size. Thankfully, Researchers at IBM have developed a shortcut around this - The Quantum Emoticon. A fun way of displaying real world application for these devices.
Source: Wikimedia Commons
Now, IBM already has documentation out there on making a quantum emoticon, and you can find it in the 'hello world' section of their tutorials repository, however, as there are a couple carbon copies of this program on sites like medium, etc, I thought it would be fun to change it up a bit. I have developed my own formula for a Quantum Emoticon, and I would love to see the best ones you can come up with. Might even be holding a contest for this very shortly. The more people playing and experimenting with these devices, the faster research will go, and the sooner innovation will come.
The Emoticon:
An emoticon, in this case particularly, generally consists of 2 characters, that compose a face or express an emotion of some sort. This is handy, as 2 characters, will only require 16 qubits to handle. Now, printing out an emoticon to a screen, would be a bit of a waste on a quantum computer, so to make this really interesting, we put our emoticon into a state of superposition. This means that it will be both one, and another emoticon, at the very same time. IBM chose these emoticons, ;) , and 8) . These two emoticons have one shared character, and one differing character. The binary representation of these two ASCII characters is as follows.
The Emoticon 8) = '00111000 00101001'
The Emoticon ;) = '00111011 00101001'
As you can see, the first 8 bits of these strings differ, and the second 8 bits agree. Now, I have chosen my own set of emoticons, and the key to you making your own, will be finding similar binary representations of usable characters, much like the one above. I have chosen the :O, and the :P smiley faces. The have the following binary representations.

Screenshot
The ':' ASCII character = '00111010'
The 'O' ASCII character = '01001111'
The 'P' ASCII character = '01010000'
The :O Face = '00111010 01001111'
The :P Face = '00111010 01010000'
You will see very clearly in the following steps, why it is crucial to find an emoticon with a similar representation, though put simply, to make this emoticon truly quantum, we will need to superimpose and entangle bits, and this can get quite complicated, so it is best to keep things simple along the way. Now lets get on with the tut, and get our IDEs of choice out. I will be using Pycharm for the purposes of this project, as well as many other, though Anaconda is a suitable option as well.
The Project:
So once you have chosen your target emoticons, lets create a new project in our IDE, and get to work. First thing we will need to get done, is to import our required modules for this project.
import sys
sys.path.append("../../qiskit-sdk-py/")
from qiskit import QuantumProgram
import Qconfig
import math
import matplotlib.pyplot as plt
Next, we will need to initiate/declare our quantum program, as well as configure our API data. By now you should have an account with IBM, but I will Include a sample Qconfig File at the bottom of this lesson, for those of you having trouble. You will need this set up properly to use IBM's machines.
qp = QuantumProgram()
qp.set_api(Qconfig.APItoken, Qconfig.config["url"]) # set the APIToken and API url
Declare our Quantum, and Classical Registers, as well as how many Qubits we will be using in this experiment. Finally,
create the circuit.
qr = qp.create_quantum_register('qr', 16)
cr = qp.create_classical_register('cr', 16)
qc = qp.create_circuit('Quantum_Emoticon', [qr], [cr])
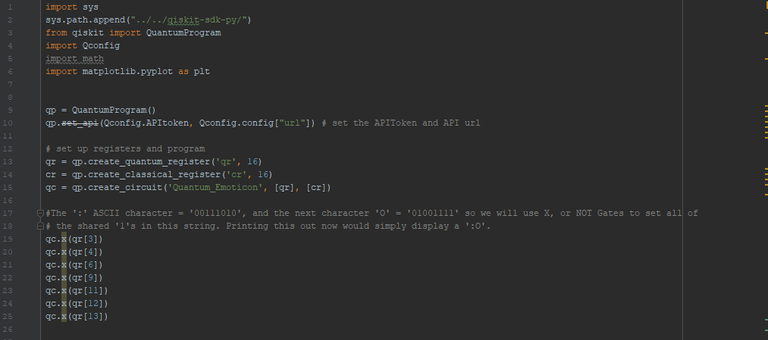
The ':' ASCII character = '00111010', and the next character 'O' = '01001111' so we will use X, or NOT Gates to set all of the shared '1's in this string. Printing this out now would simply display a ':O'.
qc.x(qr[3])
qc.x(qr[4])
qc.x(qr[6])
qc.x(qr[9])
qc.x(qr[11])
qc.x(qr[12])
qc.x(qr[13])
Screenshot
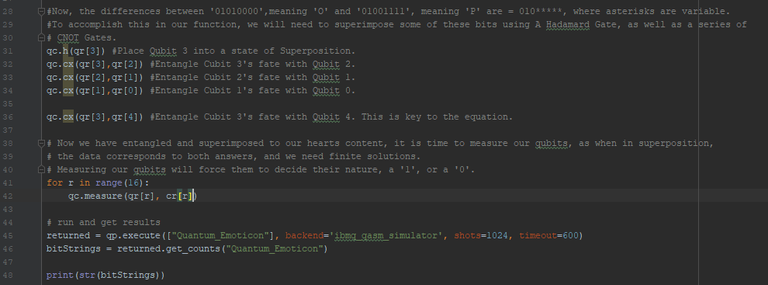
Now, the differences between '01010000',meaning 'O' and '01001111', meaning 'P' are = 010*****, where asterisks are variable. To accomplish this in our function, we will need to superimpose some of these bits using A Hadamard Gate, as well as a series of CNOT Gates.
Place Qubit 3 into a state of Superposition.
Entangle Cubit 3's fate with Qubit 2.
Entangle Cubit 2's fate with Qubit 1.
Entangle Cubit 1's fate with Qubit 0.
qc.h(qr[3])
qc.cx(qr[3],qr[2])
qc.cx(qr[2],qr[1])
qc.cx(qr[1],qr[0])
Entangle Cubit 3's fate with Qubit 4. This is key to the equation.
qc.cx(qr[3],qr[4])
Now we have entangled and superimposed to our hearts content, it is time to measure our qubits, as when in superposition, the data corresponds to both answers, and we need finite solutions. Measuring our qubits will force them to decide their nature, a '1', or a '0'.
for r in range(16):
qc.measure(qr[r], cr[r])
Here we will execute our quantum program, on either a live machine, or in the simulator. Shots can be adjusted, as well as backend, though timeout should never be reduced. Data will be stored into variables, and then printed to terminal for visual confirmation.
returned = qp.execute(["Quantum_Emoticon"], backend='ibmq_qasm_simulator', shots=1024, timeout=600)
bitStrings = returned.get_counts("Quantum_Emoticon")
print(str(bitStrings))
Screenshot
For each string in 'Bitsrings' We will convert first 8 bits of data to a single ASCII character, stored in a variable,and do the same for the final 8 bits.
StringDictionary = {}
for bits in bitStrings:
char1 = chr(int( bits[0:8] ,2))
char2 = chr(int( bits[8:16] ,2))
StringDictionary[ char1 + char2 ] = bitStrings[bits] / 1024
Finally, we will graphically plot the output, so as to get a nice visual on what is happening. The combating characters will be overlayed on top of each other, according to how often they crop up in our returned data. (Code in Markup is strange here. 'plt.annotate( char, (0.5,0.5), va="center", ha="center", color = (0,0,0,StringDictionary[char]), size = 250)' is all on one line.
plt.rc('font', family='monospace')
for char in StringDictionary.keys():
plt.annotate( char, (0.5,0.5), va="center", ha="center", color = (0,0,0,StringDictionary[char]), size = 250)
plt.axis('off')
plt.show()
The Backend can be changed to (backend='ibmqx5') to run on a real quantum device at IBM Headquarters, though this will use your credits, and all testing should be done within the simulator. Credits are returned to us in short time, but they are an excellent way of ensuring system health for everyone.

Screenshot
At this point, the program is ready to be run on any backend that you please, and once run, will provide you with a fairly awesome quantum emoticon! An emoticon that is both ':P' as well as ':O' at once.
Curriculum
These are earlier works, but not necessarily tutorials, so you need not read these unless you are having massive trouble with this tutorial. Most of this earlier information can be found in the Qiskit Documentation, and I do suggest you check that out.
- Quantum Information Science Kit - Preparation:
- Quantum Programming Using The Quantum Information Science Kit -
Proof of Work Done
Now, though this is fun and rather cool IMO, this is a bit of a silly use for a quantum computer to be truthful, but we must not let that get in the way of us experimenting, and we must also consider the power in what we are doing with these two/three characters. We have represented 3 ASCII Characters, with only 16 Qubits, which is just incredible as a fact alone. Currently the IBM Quantum Experience, boasts a decent user base of 75,000, with over 2.5 Million experiments conducted though this number is nothing out of all of the programmers in the world.
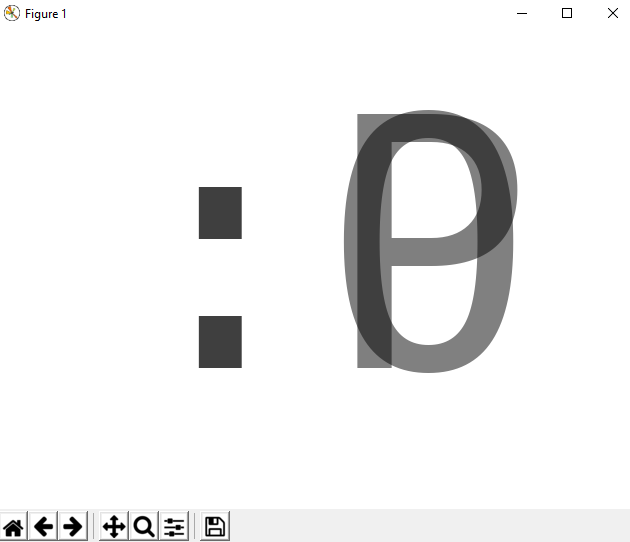
Screenshot
The more people we can get doing any sort of experimentation with these machines, the more researchers will learn and the further the science and tech will progress. I hope you have all enjoyed this, and Like I mentioned earlier, I absolutely want to see what kind of emoticons you can make out of this! I will be going to the Bitcoin ATM in a day or two, and once that happens, I plan to hold a contest to try and get as many people using these machines as possible. I can only imagine what some of you Utopian/Steemstemers can do with this tech.
Happy Hunting,
Cerulean
Thank you for your contribution.
Your contribution has been evaluated according to Utopian policies and guidelines, as well as a predefined set of questions pertaining to the category.
To view those questions and the relevant answers related to your post, click here.
Chat with us on Discord.
[utopian-moderator]Need help? Write a ticket on https://support.utopian.io/.
Thank you @portugalcoin, I will do my best to include this next time. I am very new to github, but will be getting better each post I'm sure :)
Thanks for contributing on Utopian.
We’re already looking forward to your next contribution!Hey @ceruleanblue
Want to chat? Join us on Discord https://discord.gg/h52nFrV.
Vote for Utopian Witness!
Woot! Thanks so much @utopian-io, you guys always inspire me to bring my best to the table! Always nice to come home and see your name on one of my posts :)
good analysis sir...thanks for share your inportant concept..
Thanks @binoy, glad to hear people out there are interested :)
Nice tutorial, thanks for sharing it :) Quantum Computers are so amazing!
Thank you @sargoon, You're awesome. Glad to see I managed to keep it interesting :)and I most definitely agree with you there, Quantum Computers are certainly going to change the world as we know it.
Thank you :) You're so right, I totally agree with you. It will change the world and our life very quickly. I am very excited for the future and the future is coming! :)
This post has been voted on by the steemstem curation team and voting trail.
There is more to SteemSTEM than just writing posts, check here for some more tips on being a community member. You can also join our discord here to get to know the rest of the community!
Thank you steemstem! Ever supportive, and I can't wait to be able to show my appreciation. :)
As a follower of @followforupvotes this post has been randomly selected and upvoted! Enjoy your upvote and have a great day!