
How to install Desktop Environment On Arch Linux
On this occasion I will share Arch Linux tutorial, This tutorial I shared is my brother's assignment given by my lecturer on campus "How to install Desktop Environment On Arch Linux". Before I discuss more about this tutorial, I introduce a bit about Arch Linux.
What is Arch Linux?
Arch Linux is a binary-based Linux distribution, which means that application packages are distributed in compiled form.
Unlike other Linux distributions such as Debian, Fedora, Ubuntu and others, Arch Linux does not create its own release schedule for a certain time, but uses the "Rolling release" system. Arch Linux provides new packages every day. In other words, to update the system, the user only needs to update the packages in his system and in the form has been compiled.
Advantages And Disadvantages Arch Linux
Advantages:
- Arch presents a simple installation environment (no GUI), compiled for i686 / x86-64 architecture.
- Arch is light, flexible, and simple.
- The design philosophy and its implementation make it easy to develop and build into any system you create from a minimalist console to a feature-rich luxury desktop.
- Arch provides power users, the ability to build the system from the base without any configuration.
- With Rolling Release model that allows you to do a one-time installation and will be upgraded on an ongoing basis without having to re-install or upgrade on a large scale.
Deficiency:
- Many additional steps in complex system settings.
- Less suitable for students like us.
- The installation process takes a long time.
- The installation process must be connected to the internet.
I think it's enough to explain a bit about Arch Linux, now we will go directly to the tutorial.
How to install Desktop Environment On Arch Linux
1. System Update
First step, open terminal, then upgrade your linux arch package:
pacman -Syu
2. Install Xorg
Before we install any desktop environment, we need to install the server displays and packages needed with respect to the display and input devices (touchpad / mouse). And the most popular linux server display in the linux world is xorg. On linux arch we can install it in xorg and xorg-server group.
pacman -S xorg xorg-server
3. Install GNOME
Next we have to install the basic applications needed by GNOME in the gnome package group with the command:
pacman -S gnome
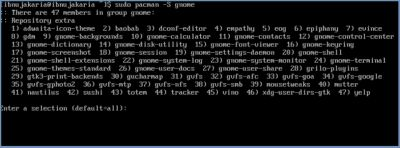
Next, Press Enter
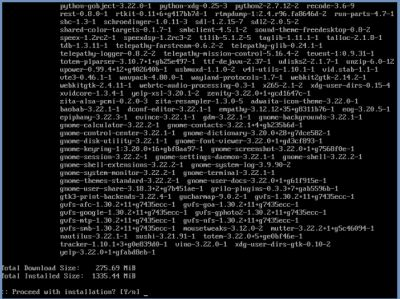
After that the system will download the application packages needed to run the gnome desktop. And this will take some time depending on the internet connection.
4. Install Lightdm
In the boot process, from the start of the BIOS -> boot loader -> initframs -> kernel -> and besides, the most recent process run from the boot process sequence is: run x server (ie graphical user interface) to then activate our user session with login username and password) and load our preferred desktop environment.
And of course, we need Desktop Manager software to do this, and one of the lightest apps is lightdm.
Immediately, install lightdm with the following command:
pacman -S lightdm
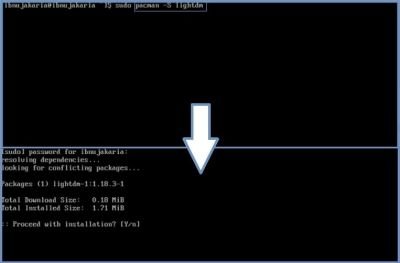
5. Run Lightdm at startup
As mentioned earlier, the desktop manager application is one of the most recent applications called on the linux system boot circuit before the user session is actually built. So we have to set lightdm to run at startup with the command:
systemctl enable lightdm
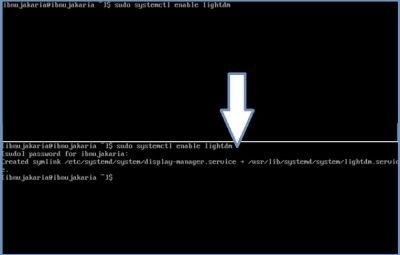
6. Install Lightdm Gtk Greeter
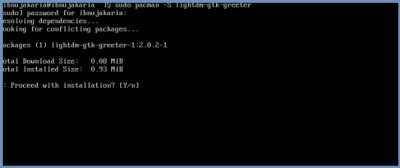
Lightdm requires a greeter (greeter / welcome / reception) as a theme / display that provides features so that we can choose the user, then choose the desktop, and can login into our desktop. There are a lot of lightdm greeter official and non-official, so we can choose which login login that suits us. And in this example, I will install lightdm-grk-greeter as the default login screen.
pacman -S lightdm-gtk-greeter
7. Set Greeter Session
Set lightdm to load the greeter we want.
Open the lightdm config file in /etc/lightdm/lightdm.conf.
sudo nano /etc/lightdm/lightdm.conf
In the [Seat: *] section, find the greeter-session keyword, then fill in lightdm-gtk-greeter. If you do not find it, you can write it yourself manually.
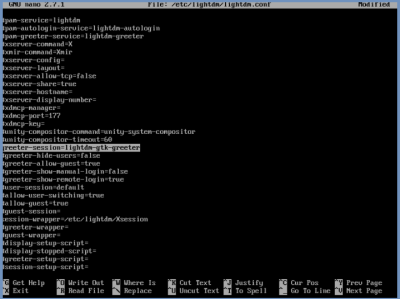
After that save with the command ctrl + X, and press Y and Enter.
You can see the lightdm you have installed by running the command lightdm --test-mode --debug . If no error occurs, the lightdm installation has been successful and you can try it by restarting your system with reboot command.
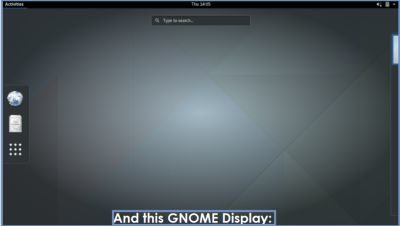
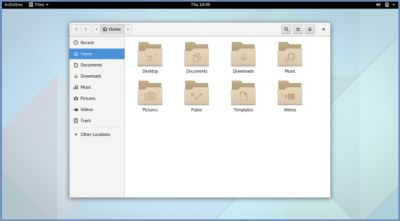
And this is the appearance of GNOME:
Screenshot #1
Screenshoot #2
Hopefully the "Tutorial" can provide a solution for those of you who need it. Please resteem if this post is useful!!. and Follow me @farahnabilla
THANK YOU
Posted on Utopian.io - Rewarding Open Source Contributors
Thank you for the contribution. It has been approved.
You can contact us on Discord.
[utopian-moderator]
thank sir @shreyasgune
Hey @farahnabilla I am @utopian-io. I have just upvoted you!
Achievements
Suggestions
Get Noticed!
Community-Driven Witness!
I am the first and only Steem Community-Driven Witness. Participate on Discord. Lets GROW TOGETHER!
Up-vote this comment to grow my power and help Open Source contributions like this one. Want to chat? Join me on Discord https://discord.gg/Pc8HG9x
thanks @utopian-io
Great article, I started also my blog about linux, let's see what else we can do about it