
After getting to know the project and it's owner (@techtek), i became very excited to work on integrating the work i did to the blinkit project, specialy because the Logitech products are world wide sold and it's probably the most famous brand for keyboards and mice, so it would be wonderful to add it to the Blinkit project. This first integration provide the basic functions but more settings will be added in the future.
What is Blinkit?
Blinkit is a notification software that can be used to give to regular and widely available devices a Steem purpose.

Supported devices/features:
- USB Sticks (status light)
- Philips HUE lamps
- Sonoff devices
- Arduino boards (LED's and RGB LED's)
- Camera status LED blink
- Take photos on upvote/post/follow
- Logitech RGB/Backlight Keyboards (new)
Blinkit is a free and open source project created by @techtek
and can be downloaded from his Github page:
https://github.com/techtek/Blinkit
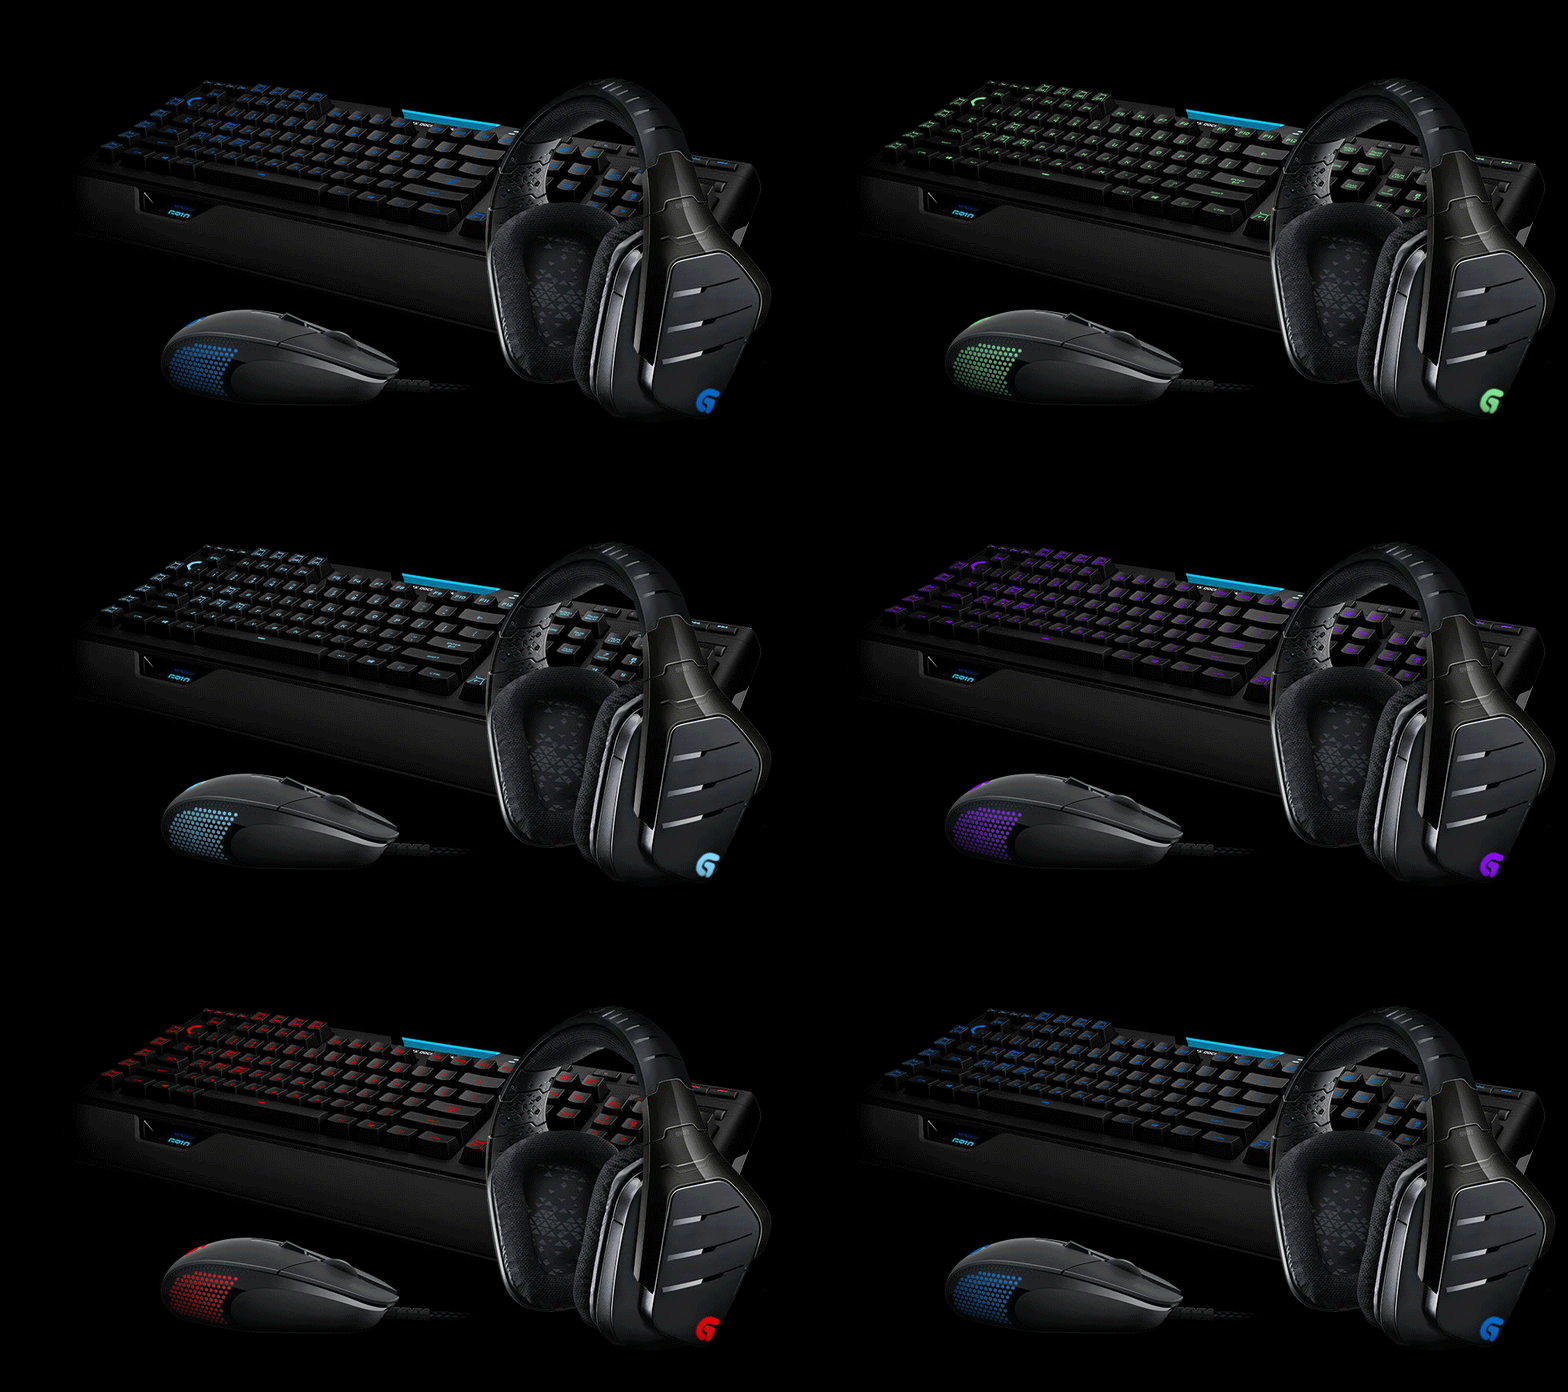
New features:
- Blink your Logitech RGB/Backlight devices on new upvotes, follows, posts
- The colors and the number how often the keyboard should blink
can be set for each event individually - Also the delay between the keyboard turn on and off can be set
- To make it compatible to every setup the path to the logitech driver can be changed
Requirements
To be able to use this new feature it is necessary to have a Logitech device which has either rgb or normal light.
Also you need to have the Logitech Gaming Software installed. Download
Compatible Logitech products
The following Logitech devices are supported:
Keyboards
- G910 Orion Spark
- G810 Orion Spectrum
- G610 Orion Brown
- G710+
- G510/ G510s
- G110
- G19 / G19s
- G105 / G105 Call Of Duty
- G11
- G13
- G15 v1 / v2
Mice
- G600
- G300
- G900 Chaos Spectrum
- G303 Daedalus Apex
Headsets
- G633 & G933

How is it implemented
What the code does is that it reads all information it needs from there related config .txt files, which are created, modified and used by the main program and translated into commands to make the supported device blink.
To make the device blink, the program has to:
- connect to the keyboard
- turn on and off the colors -> make it blink
- disconnect
Logitech provides functions in a Dll called "LogitechLed.dll".
The dll can be found in the installation directory of the Logitech Gaming Software
(Standard: C:\Program Files\Logitech Gaming Software\SDK\LED\x86)
But it would make no sense to hardcode the path into the program because everyone can have the software installed in a different location.
So what the program does it firstly declares a function from the "kernel32" library

The "SetDllDirectoryA" function adds the given path to a list in which windows tries to find the dll it wants to load.
The path will be added in the main function.
To get the functions from the LogitechLed.dll the Dllimport function from the System.Runtime.InteropServices library has to be used.
The LogitechLed.dll is not a .net compiled dll
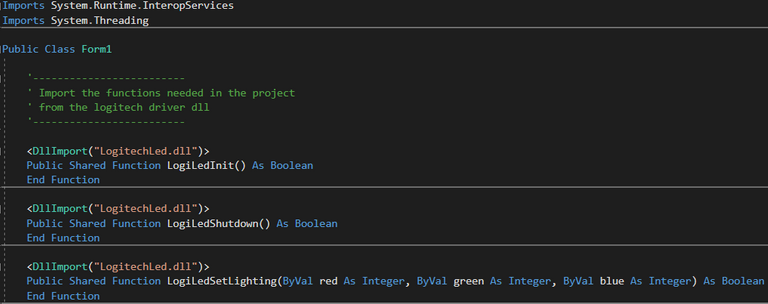
In these lines of code we first specify the name of the .dll. See there is no path given because the path has been added before with the "SetDllDirectoryA" function.
But why the path is not directly put into this function you may ask.
Sure it works, but only if the path is a constant... But I want the path to be read out of a file. If done like this there is an error:

Next we have to specify the function with name, parameters and return values.
These information can also be found in the SDK.
In addition a new Thread is created to make the form and the main logic run seperatly
Private trd As Thread
Also two Handles have to be made to get the information if the form is loaded and closed
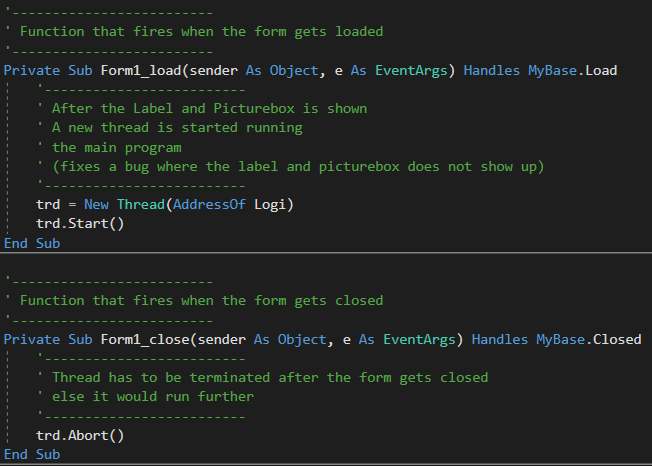
The MyBase.Load handle only starts the new thread with the main function ("Logi"). The MyBase.Closed kills the thread so it can be canceled everytime.
Thats all about the preparatory work. The code now looks like this:
Imports System.Runtime.InteropServices
Imports System.Threading

Public Class Form1

    '-------------------------
    ' Import the functions needed in the project
    ' from the logitech driver dll
    '-------------------------

    <DllImport("LogitechLed.dll")>
    Public Shared Function LogiLedInit() As Boolean
    End Function

    <DllImport("LogitechLed.dll")>
    Public Shared Function LogiLedShutdown() As Boolean
    End Function

    <DllImport("LogitechLed.dll")>
    Public Shared Function LogiLedSetLighting(ByVal red As Integer, ByVal green As Integer, ByVal blue As Integer) As Boolean
    End Function

    ' Load function from the kernel32 library to set the path to the dll used
    ' because the dll from the Logitech driver can be installed in different
    ' locations.
    Public Declare Function SetDllDirectoryA Lib "kernel32" (ByVal lpPathName As String) As Long

    '-------------------------
    ' Define new Thread
    '-------------------------
    Private trd As Thread

    '-------------------------
    ' Function that fires when the form gets loaded
    '-------------------------
    Private Sub Form1_load(sender As Object, e As EventArgs) Handles MyBase.Load
        '-------------------------
        ' After the Label and Picturebox is shown
        ' A new thread is started running
        ' the main program
        ' (fixes a bug where the label and picturebox does not show up)
        '-------------------------
        trd = New Thread(AddressOf Logi)
        trd.Start()
    End Sub

    '-------------------------
    ' Function that fires when the form gets closed
    '-------------------------
    Private Sub Form1_close(sender As Object, e As EventArgs) Handles MyBase.Closed
        '-------------------------
        ' Thread has to be terminated after the form gets closed
        ' else it would run further
        '-------------------------
        trd.Abort()
    End Sub
Main logic
Firstly all used variables have to be defined (sorted by type):
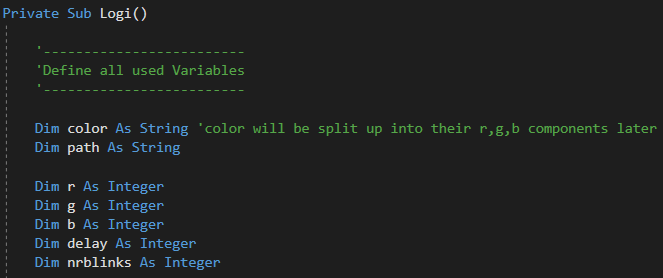
After that the variables need to be initialized

All values are stored in a separate txt file created by the BlinkIT software.
The "color" variable holds a string with the rgb values devided with spaces and each value is always three digits long.
e.g.: 255 005 200
The next step is to get the r,g and b values seperatly
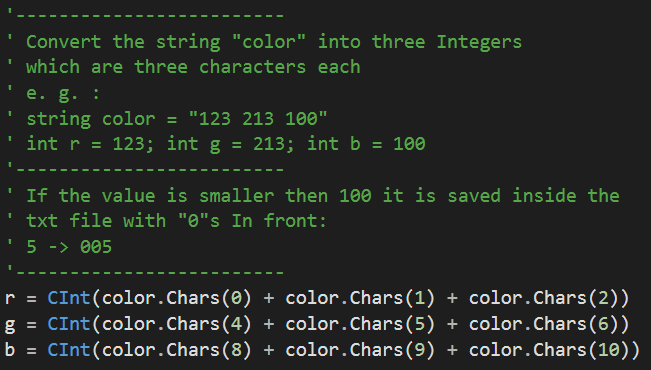
As shown in the documentation the function to set the color "LogiLedSetLighting" of the keyboard takes values from 0 to 100 (% of brightness instead of rgb values). So we have to convert them.

Before be able to work with the keyboard the "SetDllDirectoryA" function is called with the "path" parameter read from the txt file before. So now everytime a function from the LogitechLed.dll is called and the dll hasn't been loaded already it checks the "path" first.
Start controlling the keyboard
First the program initialises the keyboard.

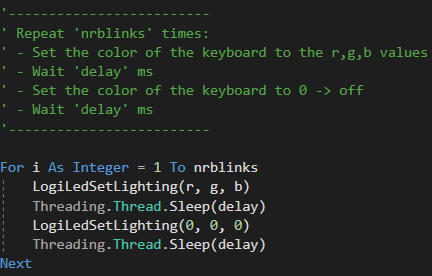
Main blink logic. Pseudocode describes what it does exactly
At the end the connection is shut down and the program gets closed.
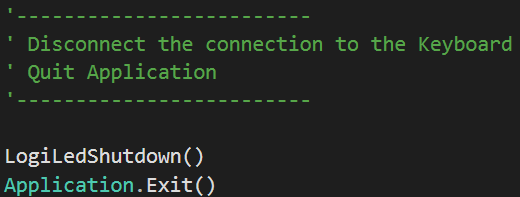
The hole code as one piece can be seen and downloaded on my github page
Testing the code while developing it
I own the Logitech G510 RGB keyboard and tested it only with this model while creating the software.
But the Logitech Gaming Software features a virtual keyboard:
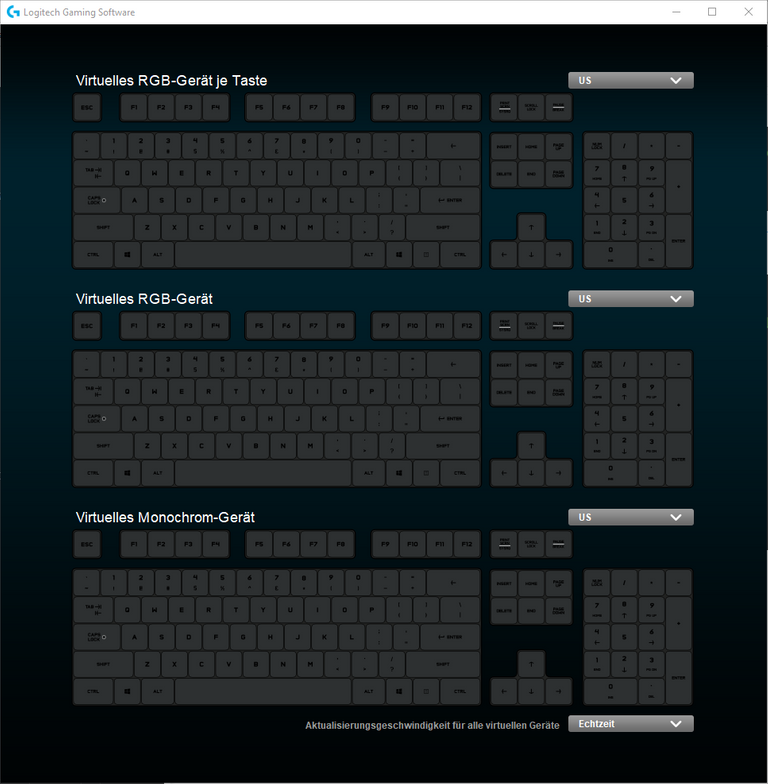
rgb keyboard where every single key can be set to a specific color.
normal rgb keyboard (all keys have the same color)
monochrome keyboard (it features only one color and three different levels of brightness)
-> LogiLedSetLighting works with this kind of keyboards too. (See documentation)
If you have this window open and run the program the changes can be seen on all different keyboards. So even if you dont own all different kinds of keyboards you can test the program.
Collaboration, and testing tuning
To make sure the made code is working as expected the final work is tested on 4 different systems and with 3 different keyboards.
One of them was from @dmxmaster. Thanks to him.
The blink values presented to the user are tested and adjusted in collaboration with @techtek to have logical and usefull values. The RGB colors are tuned to present the most real colour acording to there name.
It took us quite some time to get everything working (frontend, backend testing supported devices, fixing bugs).
In a previous post here I made the first attempt to get it working.
But now around one month later I made it almost completely new.
Added all functions needed and the feature to control the color, no. of blinks and the delay as required for this integration. And this is not where we will stop more is on the planning already suchs as, display text on the already supported logitech devices that have a display, add a color picker, and a fading effect.
The following files where added to my repository
The logitechblink.exe code is also used and compiled by @techtek and added to his Blinkit repository
The new interface
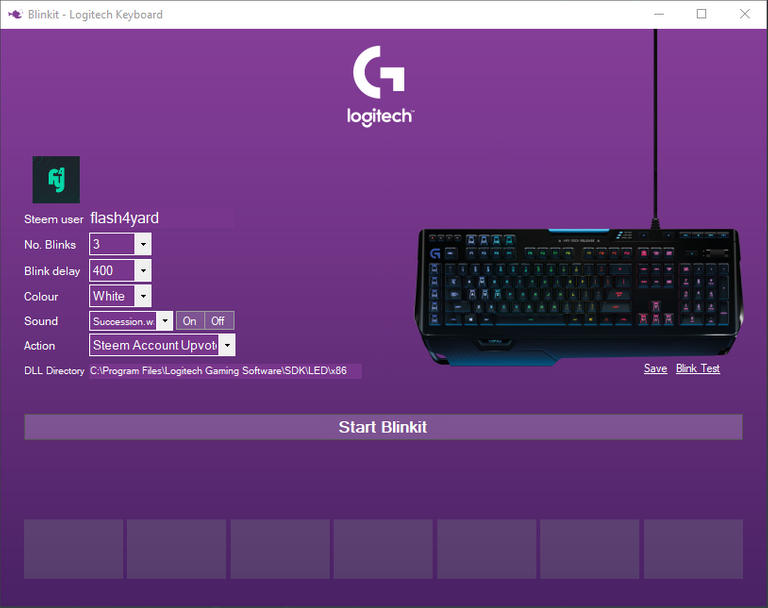
Example blink (looped)

Thanks for working together on this new integration, was a lot of fun!
You have a minor misspelling in the following sentence:
It should be separate instead of seperate.Thanks for noticing it's updated.
Your contribution has been evaluated according to Utopian policies and guidelines, as well as a predefined set of questions pertaining to the category.
To view those questions and the relevant answers related to your post, click here.
Need help? Write a ticket on https://support.utopian.io/.
Chat with us on Discord.
[utopian-moderator]
Thanks for the feedback!
There were only upload commits and I deleted 4 files that were so leftover parts from the testing. Because I uploaded the hole project folder....
Also there aren't any pull requests.
There are two posts because I did only the backend -> describing how everything works.
The other one described the way how it is implemented -> describing how it is implemented.
So each of us presets his own work done.
So you did the work on the backend post (this one) and the other one shows the work of @techtek ?
Oh maybe you missunderstand me.
I did the post about the backend and I reesteemed the post from @techtek. So maybe it confused you because they are side by side.
I presented my work in this post and @techtek his work on his post.
Got it, all is good.
Thanks for your open ear and your work :D
Hey @flash4yard
Thanks for contributing on Utopian.
We’re already looking forward to your next contribution!
Contributing on Utopian
Learn how to contribute on our website or by watching this tutorial on Youtube.
Want to chat? Join us on Discord https://discord.gg/h52nFrV.
Vote for Utopian Witness!