In this digital age the importance of having a website for any business cannot be overstated, from already made brands to growing brands, every company has some form of internet presence and a lot of that presence comes from having a website.
Having a website opens a business up to a wider range of audience and a well optimized website is bound to be an instrument in profit generation for the business.
Websites feature a lot of functionalities, some websites more functional some websites less.
This is why in this post I’m going to be sharing with you a practical guide on how you can design a simple business website.
The rest of this post will be based on a case study of a fictional brand
“Golden Magic Properties”
Let us assume Golden Magic is a real estate company that specializes in buying, selling and leasing of properties.
Six steps
==========
1. Getting a Domain Name, Host and Installing WordPress
I won't be going into details on how to do this in this post, instead I will recommend two good sources for that
This post from bluehost is a tutorial on how to host and install a WordPress website using bluehost.
Nowgoblog also has a very detailed guide on the same topic.
2. Installing WordPress Theme
After WordPress is installed we need to install a WordPress theme. For the sake of those who are new to WordPress I'll briefly describe what a WordPress theme is.
For every WordPress application installed on a website to perform its function, there must be a theme installed on that application.
Themes are used to modify how a WordPress website is displayed without modifying the WordPress software itself.
In other words WordPress themes are used to customize the front end and contents of a WordPress website.
Every WordPress software comes pre-installed with default WordPress theme.

Pre installed WordPress themes
To learn more about WordPress themes, visit the WordPress codex.
There are lots of free and paid themes available for WordPress websites. To install a theme on your WordPress website
- Go to your WordPress Dashboard and hover on Appearance in the sidebar
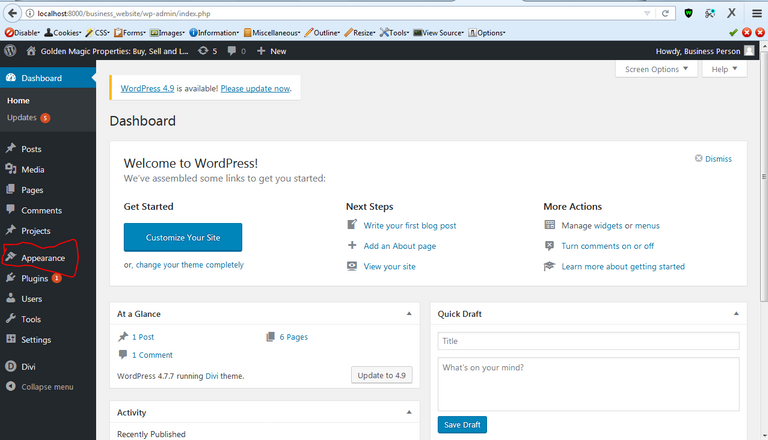
- From the options available click "Themes" and you'll be taken to this page

- Click on "Add New" in the top left corner to add a new theme. After clicking the "Add New" button you'll be taken to this page
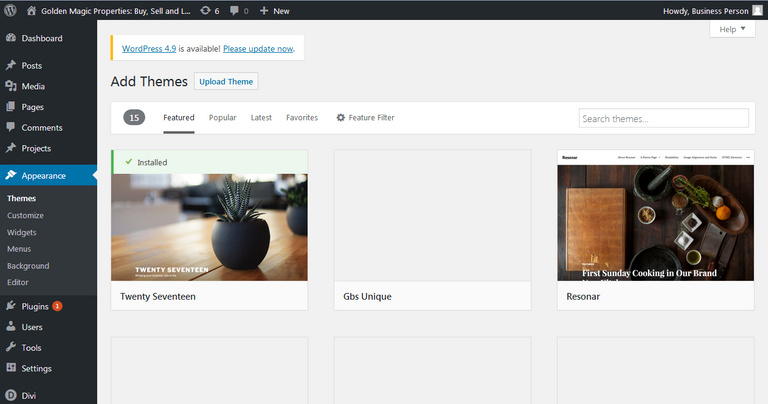
On this page you can choose to install any theme of you choice either by searching through the list of themes present on the page and choosing the one you like or by uploading directly from your computer, to upload a theme just click the upload theme button on the top left and you'll get this prompt.
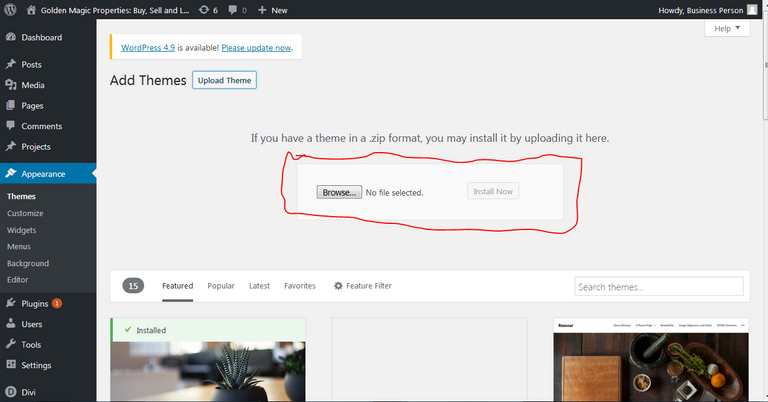
By clicking the "Browse" button you can upload any theme from any folder on your computer.
For this guide I will be using the Divi wordpress theme.
Divi is a premium WordPress theme from Elegant Themes with nice functionalities.
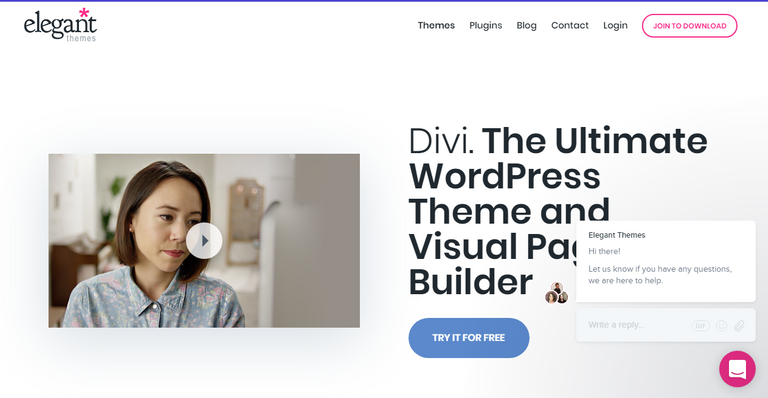
Divi's most notable feature is the Divi Builder plugin. This plugin is a fully customizable web page builder. We'll be using it throughout the rest of this tutorial to customize the contents of all the pages on the website.
I have already pre-installed Divi on the website by uploading from my computer so I won't be going over that again since I've already explained how to do that earlier.
3. Planning Website Content
The company website will focus on supplying the following information for anyone who visits the website
General Overview of the business: Home Page
About the company: About Page
A blog to keep subscribers, customers, partners and other website visitors updated: Blog
Available Properties: Properties Page
Contact information: Contact Page
All of these makes up the content of the website and will be divided into different pages.
4. Getting a Logo for the Website
Logos are one of the things that creates the first impression about a business. Any seeing your business logo for the first time should immediately have a positive opinion about your brand.
There are different ways to get logo for your website, you can contract a graphic designer to get one or if you feel you are up to the task, you can make one yourself.
I designed a simple logo for this project using Canva.
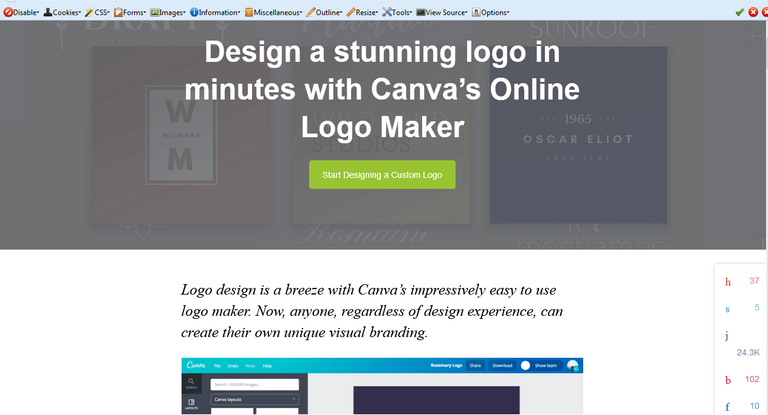
Canva is a free online logo design tool with robust features, it's very easy to use.
The first thing I like to do when designing a logo is to sort out these details
- What is the overall objective of the logo
- What type of vibe should it give off on appearance
In my opinion these two questions serve as the foundation for any logo design.
If you need a guide on how to create logos for brands check out this check out this guide.
5. General Website Customization
As mentioned above, we are going to be dividing our website content into different pages.
In total our website is going feature five pages which are
- Homepage
- About
- Blog
- Properties
- Contact
The first step would be to add all the pages. If you have read the post I recommended and used the information from it, then you should have WordPress installed now.
If WordPress is installed correctly on your host you should now have access to the WordPress dashboard. If not, read this post on how to set up WordPress hosting on a bluehost account.
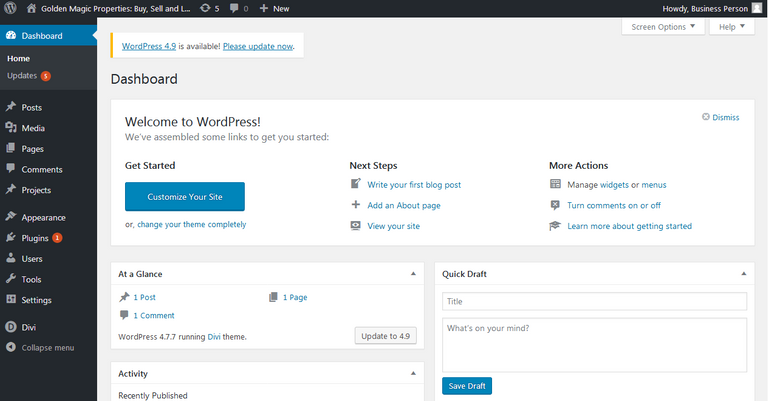
WordPress Dashboard
The wordpress dashboard is the main page of a wordpress website's back end. From the dashboard the admin of the website can add and remove any feature, customization or content material.
Right now, we'll add the pages for the website. To add pages in WordPress
- On the left sidebar there is a link named Pages
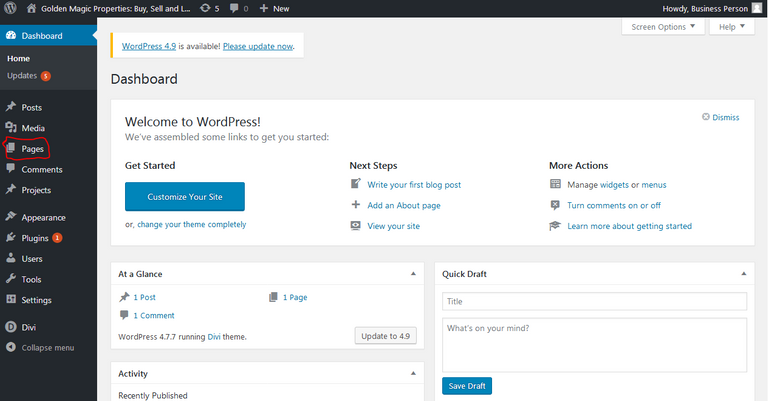
Click on the "Pages" option, it will take you to this page

On the page, we'll delete the sample page before adding ours. To do that, hover on the link that says "Sample Page", there'll be a list of options, click on "Trash".
If you have done as described, you should get a confirmation page like the one below

Now to add new pages, on the previous interface there is an option "Add New". Click on it
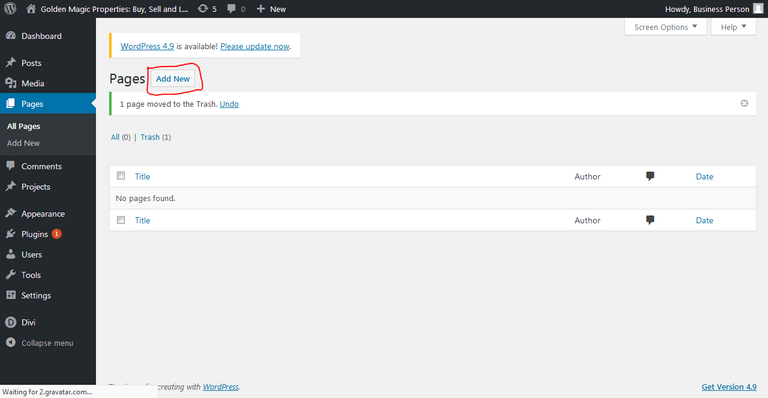
By clicking on add new, you'll be taken to this page

Here, we'll fill in the some details to get started with publishing the page. We'll only add the page title here for all the pages we'll create after which we'll come back to add the page content.
The first textbox is where the page title will be so for the first page I'll add the page title "HOME" and click publish, remember we are not adding the page contents yet.
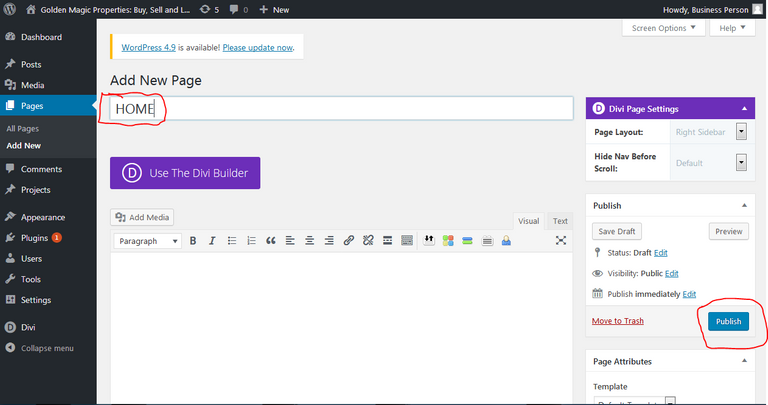
After the homepage has been published, repeat the process for all other pages, that is add page page title and publish About, Services, Blog, Properties and Contact Pages.
After repeating the process for adding all new pages, we need to confirm the existence of those pages. Hover on the "Pages" option in the sidebar, click on "All Pages" and you'll be take to a page like this

Page Customization
After all that has been done, now we'll do a general customization of the front end, to do that go to the WordPress dashboard, hover on appearance, then click customize to go to the customization pagcan set values for every customizable feature available. Every feature we'll work on here is going to affect the entire front end of the website.
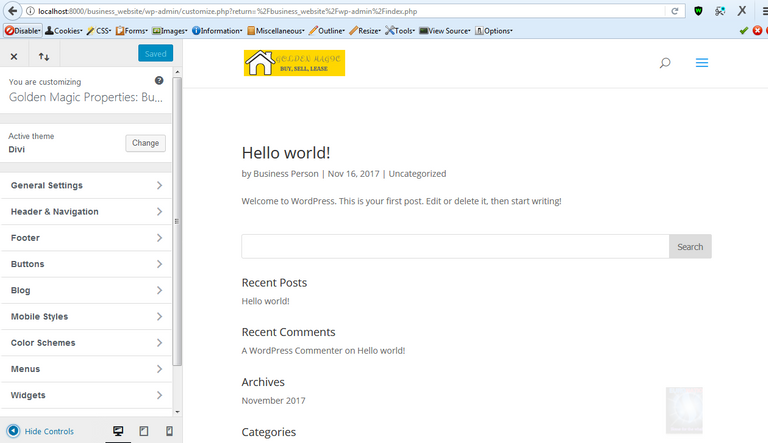
On the customization page we can set values for every customizable feature available. Every feature we'll work on here is going to affect the entire front end of the website.
The features we'll work on include
- General Settings
- Header and Navigation
- Footer
- Buttons
- Blog
- Mobile Styles
- Color Schemes
- Menus
- Widgets
- Static Front Page
- Additional CSS
We will customize the front end of the website for all the features available on this page
General Settings
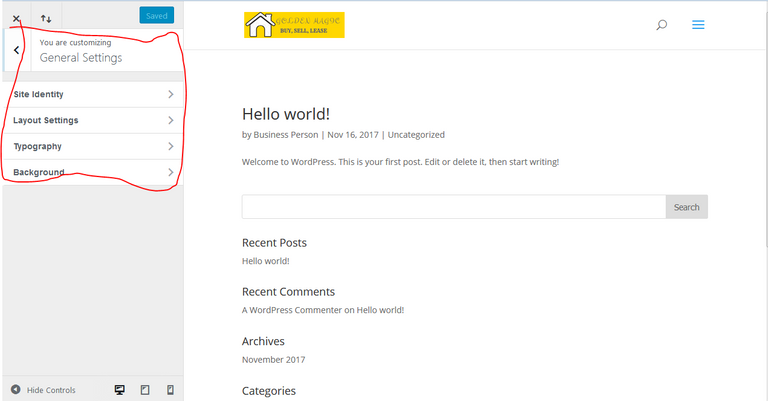
This section features a good deal of settings that focuses on the general outlook of the website.
In this section we can customize and set values for
- Site Identity
- Layout Settings
- Typography
- Background
Header and Navigation
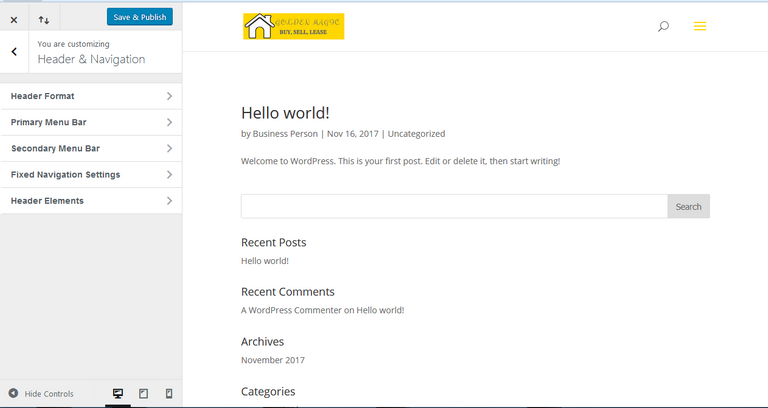
The settings featured in this section will cover all aspects of the website navigation and headers. We will be customizing
In this section we can customize values for
- header format
- primary menu bar
- secondary menu bar
- fixed navigation settings
- header elements
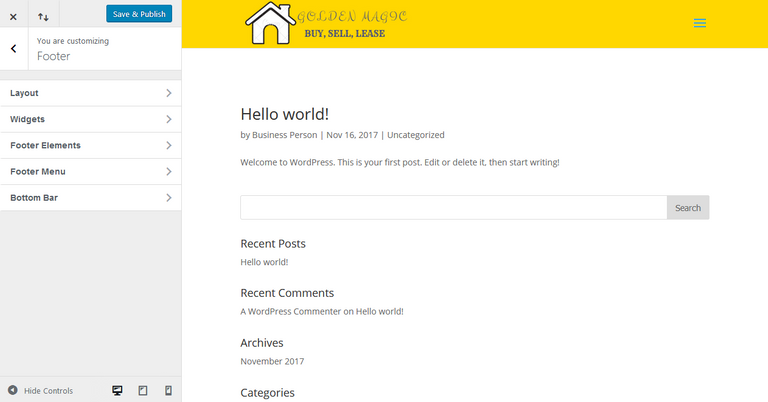
Footer
The footer section focuses on customizing the website footer and the features involved include
- Layout
- Widgets
- Footer Elements
- Footer Menu
- Bottom Bar
Buttons
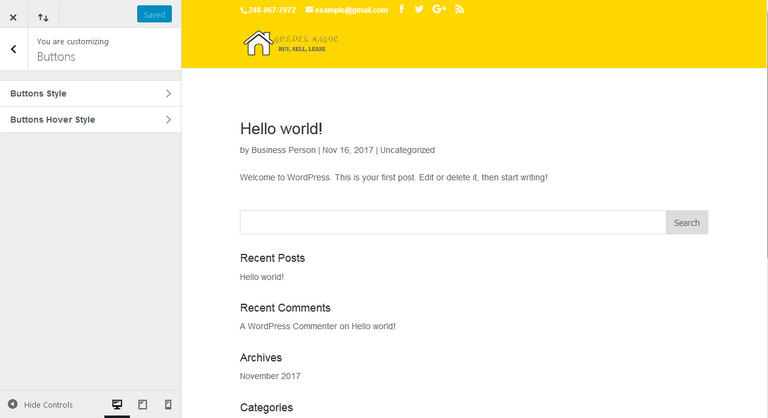
This section can be used to customize the way buttons appear on the site
In this section we can customize
- Buttons style
- Buttons hover style
Blog
This section can help create, read, update and delete features for the website blog.
In this section we can create customizations for all blog posts generally.
- Post

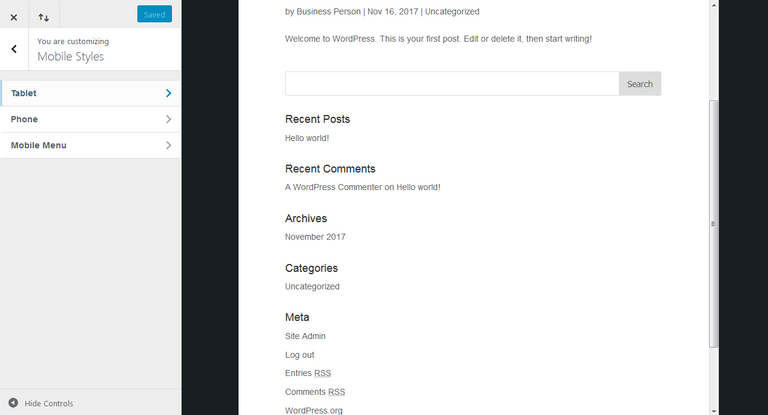
Mobile Styles
The customizable settings in this section can be used to determine how the front end of the website turns out on other devices other than a laptop
Menus
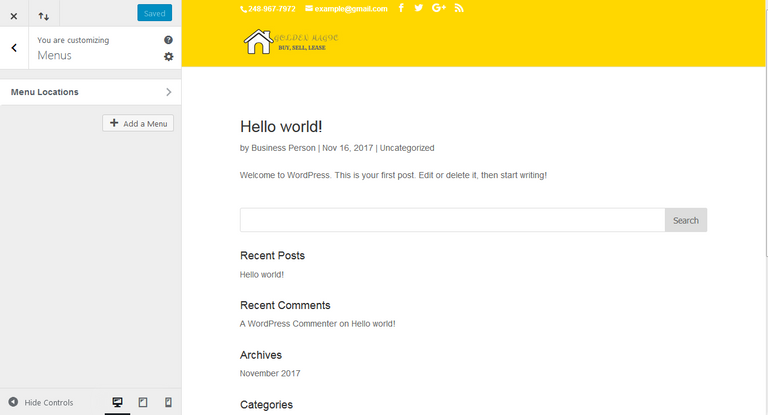
This section can be used to create and add pages to the website menus
Menu Locations
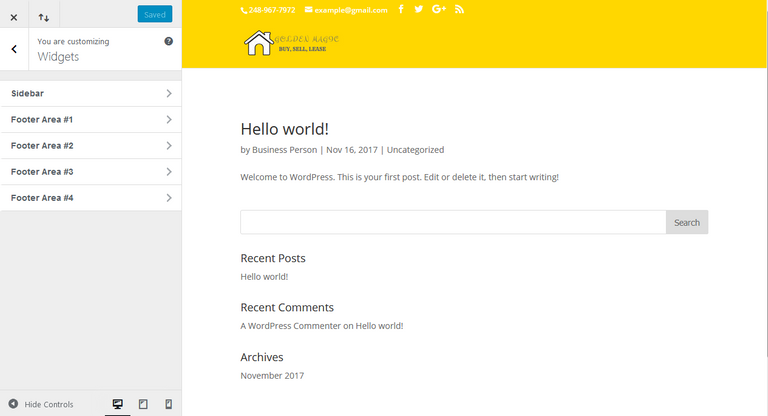
Widgets
We can set attributes and values for all website widgets here
- Sidebar
- Footer Area 1
- Footer Area 2
- Footer Area 3
- Footer Area 4
Static Front Page
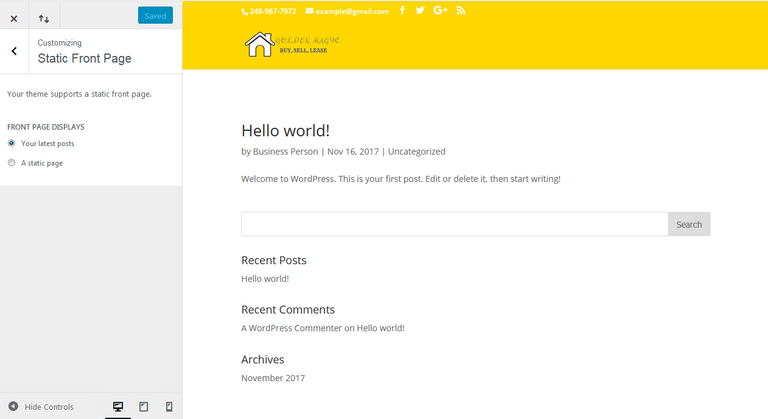
Every WordPress website has a default homepage which is the blog page. To set a static homepage this section can help with that
- Setting a default homepage
6. Adding Page Content
We are almost done with our website, at this point we'll be adding content to all the pages on our website.
To add dynamic content to our pages we'll be making use of the Divi builder plugin which has lots of customizable features.
To add content to any page, we will go back to the Pages section and click on the page you need to add new content
On the resulting page click on "Use The Divi Builder"

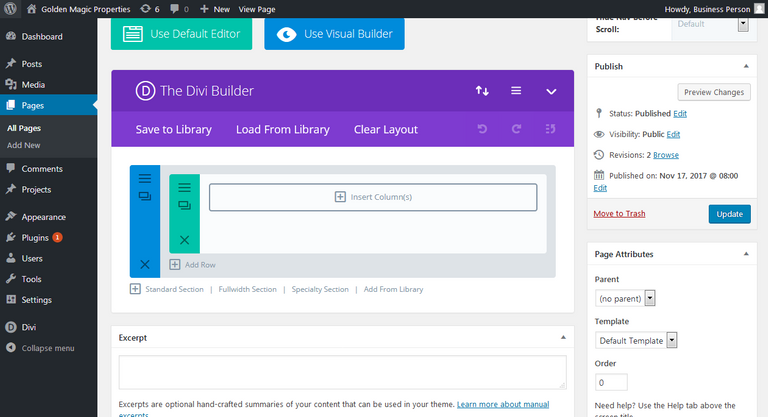
Firstly, we'll add a new column and to do that click insert column to have an overview of available options

After adding the column, we'll be prompted to add any content to the rows specified.
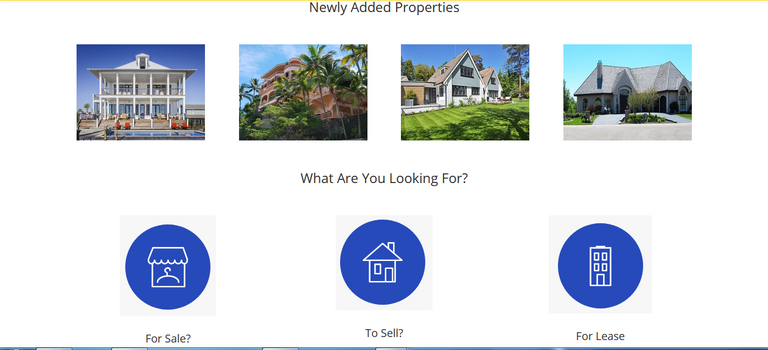
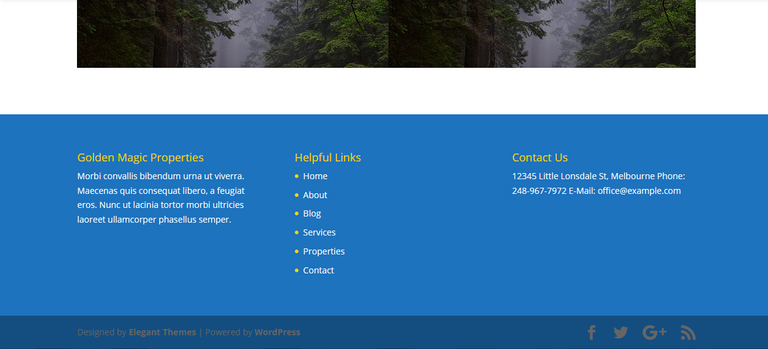
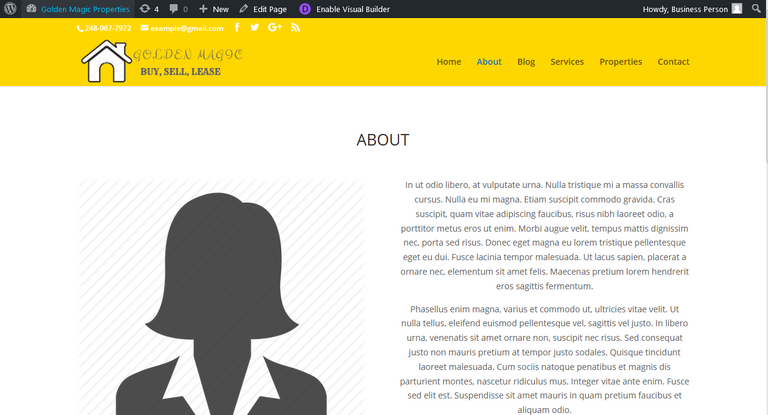
Following is the full outlook of the website after content has been added to all pages
Home


About
The about page will contain

Blog
To add a new content to the blog we won't be using the Pages section instead, the blog will be updated through the Post section.
From the WordPress dashboard click Posts, you will be taken to this page
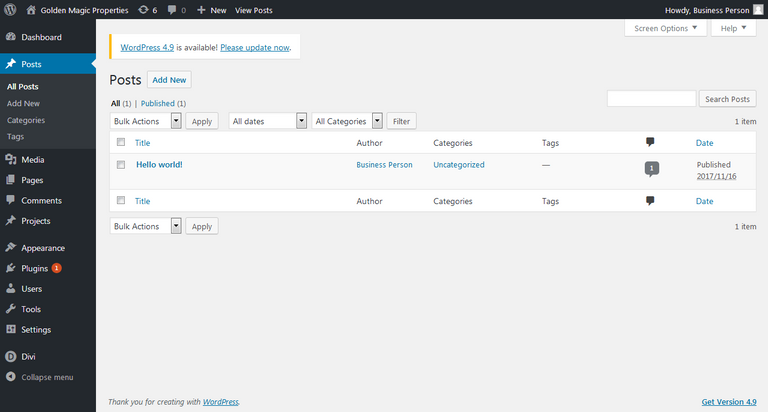
Adding new posts entails a similar protocol with adding pages, the difference being that all new posts will be displayed on the blog instead of it being a standalone page.
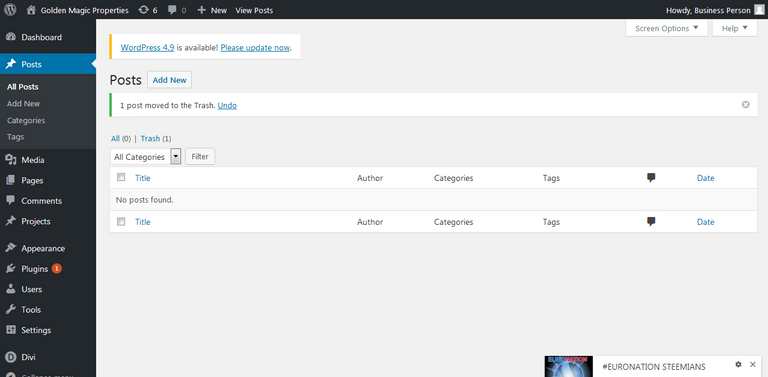
To delete the old post(Hello world), hover on it and click Trash. The resulting page will look like this
To add a new post click Add New
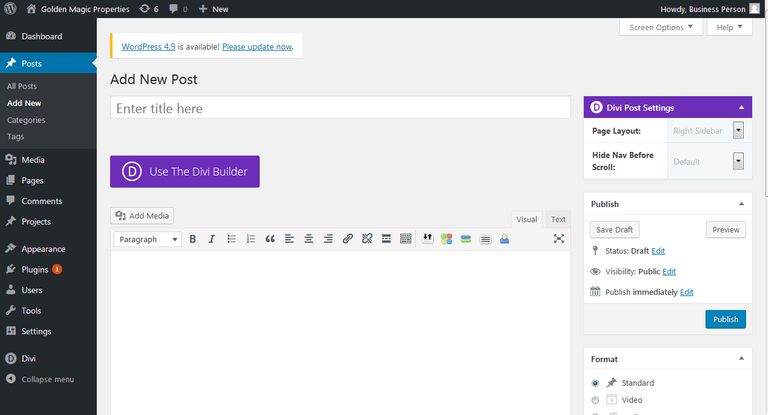
Add any new blog post with the details and click Publish
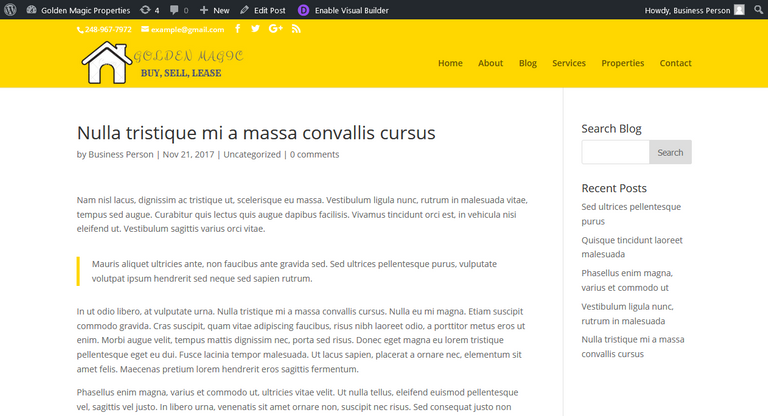
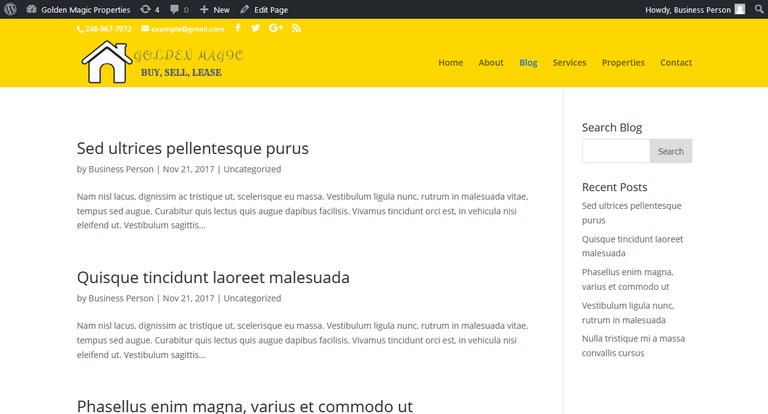
Contact


Properties

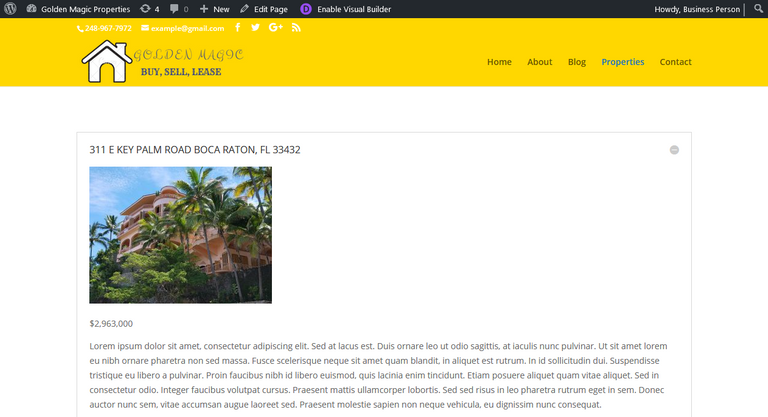
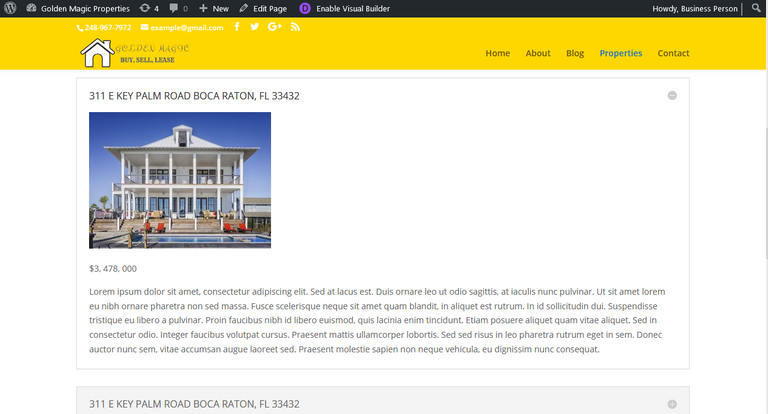
The basic website design has been established but not complete yet, but from this point it should be easy to update and make future improvements
There are lots of functionalities to be added to the website to make it profitable, most of these functionalities come from plugins, we'll be stopping here since tis post is mostly about customizations.
This post is a contribution to utopian.io, a community of open source developers where they can get rewarded for sharing their contributions to certain open source projects with other members.
Posted on Utopian.io - Rewarding Open Source Contributors
This post upvoted 5% power by Utopy - [Support Contributors ]

Comprehensive guide.
I recently build two websites for the company i work for.
Also with divi. It's a great theme.
Feel free to contact me if you'd like to work together on future posts like this.
Cheers
I have another thing to add in terms of Utopian rules: Divi is no open source and 90% of the post is about Divi. I love Divi and use myself for many years. But Utopian is open source only. Luckily you got some super upvotes here already. Great post for sure!
Double comment to address two different people
Your contribution cannot be approved yet. See the Utopian Rules. Please edit your contribution to reapply for approval.
Rule:
Your contribution is very long and has many pictures, unfortunately there are no important intermediate steps to enable the readers to follow this guide.
You may edit your post here, as shown below:
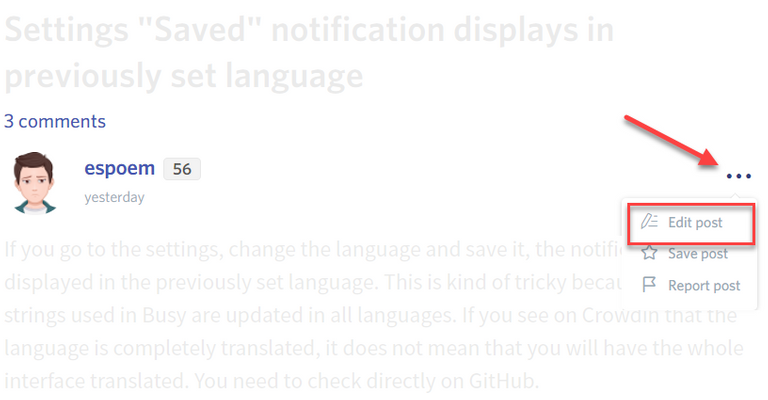
You can contact us on Discord.
[utopian-moderator]
I have another thing to add in terms of Utopian rules: Divi is no open source and 90% of the post is about Divi. I love Divi and use myself for many years. But Utopian is open source only. Luckily you got some super upvotes here already. Great post for sure!
I understand that Divi is not open source, but the post is about building a business website on WordPress, Divi is just one of the tools to complete the process.
The reason why Divi was mentioned a lot is because it played a big role in making the website come to life.
The post is not about Divi
I disagree. Half of the post is impossible to do without paying money to get a premium theme. That is against the Utopian rules. This post without mentioning Divi would be amazing.
@flauwy i'm actually agreeing with you. But the author has improved and extended the article and even without the Divi part the article is understandable.
@gotgame next time, please send only the contributions that are mostly related to Open Source.
Hello, I just finished editing the post as directed. I have made changes in the content, reduced the pictures and restructured the entire post... Kindly review
Thank you for the contribution. It has been approved.
You can contact us on Discord.
[utopian-moderator]
And the award for today's most detailed blog goes too...
Good job man, this looks like a great resource!
Indeed, anyone who has to create a business page with WP will be happy to find this.
This would have profited from anchors. :)
Dude i thought the same yesterday!
Nice idea on the submission to Utopian!
Nice post @snug anchors
Thanks
Very detailed explanation. Thanks dear.
You know I had that in mind but I guess I was lazy and didn't have the time. Great job man. Awesome!
Thanks
Thank you for this very detailed and informative guide This is a real life saver I have been struggling with what to do to get a web site for my business interest set up and completed but even with my hosts supposed point and click I was lost, truthfully on the verge of taking a hammer smashing my computer to bit and calling it quits ( a little mellow dramatic humor) But in all seriousness your guide has given me hope to hold out and soldier on . Thank you
Thank you for the kind words, I'm glad you were able to find it useful
Hey @gotgame I am @utopian-io. I have just upvoted you at 7% Power!
Achievements
Suggestions
Human Curation
Community-Driven Witness!
I am the first and only Steem Community-Driven Witness. Participate on Discord. Lets GROW TOGETHER!
Up-vote this comment to grow my power and help Open Source contributions like this one. Want to chat? Join me on Discord https://discord.gg/Pc8HG9x
Thank you for the contribution. It has been approved.
You can contact us on Discord.
[utopian-moderator]
Outstanding. Divi is a platform I have not yet used. I'm marking this guide as high value. Thanks.
Congratulations! - As you follow @fisheggs bot your post has randomly been selected for an upvote.

The @OriginalWorks bot has determined this post by @gotgame to be original material and upvoted(1.5%) it!
To call @OriginalWorks, simply reply to any post with @originalworks or !originalworks in your message!
Interesting post @gotgame
Congratulations @gotgame! You have completed some achievement on Steemit and have been rewarded with new badge(s) :
Click on any badge to view your own Board of Honor on SteemitBoard.
For more information about SteemitBoard, click here
If you no longer want to receive notifications, reply to this comment with the word
STOPSonrie, ¡Dios te ama!
As a follower of @followforupvotes this post has been randomly selected and upvoted! Enjoy your upvote and have a great day!
good work i was it resteem and upvote