As some of you have gathered from my various posts I'm a big proponent of security and privacy. Because I work in the cybersecurity field I'm a little more paranoid than most. So I like any product that uses encryption. One thing I've always had a problem with is encrypting emails. At its core, email is a plaintext protocol. Once you hit that send button there is no guarantee in the protocol that your email server will set up an encrypted tunnel to your recipient's email server. Additionally, there is no guarantee that an administrator on your recipient's email server won't go snooping and read your email.
This is why I love encryption because I can now take a message and encrypt it to make sure that only the intended recipients have the ability to read it. So today I want to go over a plugin I've been using for a while now called Mailvelope. Mailvelope is an opensource browser plugin that allows anyone using webmail to encrypt messages and files using PGP (Pretty Good Privacy).
What is PGP anyways?
Well, PGP is an encryption method that uses public/private key (also known as PKI) encryption to ensure that messages are encrypted and readable only by the intended recipients. It works by ensuring that everyone has two encryption keys. The Public key is one that you publish to the world, everyone can see it and look it up. The other key is your private key, this is the one that you need to keep safe and secure. It's the key that you will use to decrypt messages that are sent to you. If you are not familiar with what PKI is, let me try to explain how it works using the old Bob and Alice analogy.
Bob and Alice are two imaginary characters in our little world. Alice has a secret she'd like to send to Bob but she want's to make sure that no one other than Bob can read it. First thing Alice has to do is ask Bob for his public key. This is where the process get's really tricky, but let's assume that Alice was able to get Bob's public key and that she verified it is the right one. So Alice takes her secret message and encrypts it with Bob's public key (there are a few other things that happen, but that is a little too deep in the weeds for today). So now Alice has a blob of encrypted text that she can email to Bob. Once Bob gets the email he can take that encrypted blob of text and decrypt it using his private key. This type of encryption assures Alice that only Bob can read her message and no one else because it is assumed that Bob hasn't shared his private key with anyone.
That was a very simplistic example of how public and private key encryption works.
Installing Mailvelope in Chrome
Mailvelope can easily be installed on Chrome by browsing to https://chrome.google.com/webstore/category/extensions?hl=en. There you can search for Mailvelope in the search bar.
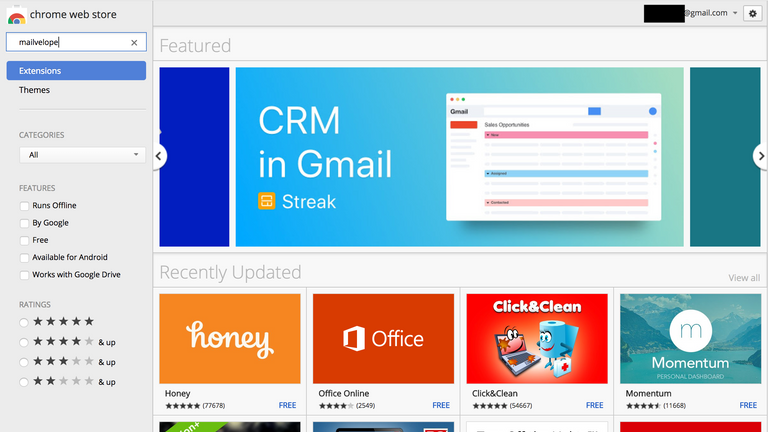
Then click on the "Add to Chrome" button and it will be installed and ready to use.
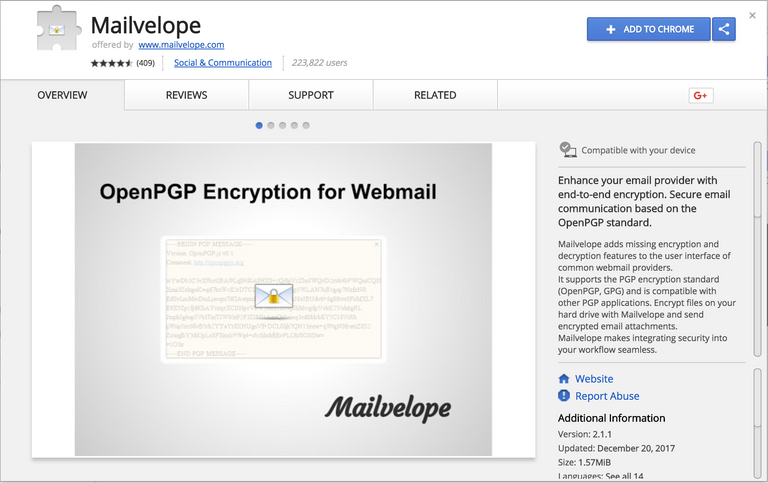
Chrome will confirm that you want to give mailvelope permission to read and change all your data on the websites you visit. This allows mailvelope to open up an editor on any site you choose and paste in the encrypted text.

Once you have it installed, you will be presented with this page welcoming you to mailvelope and asking you to set it up.

Generating your first keypair
Now that you have Mailvelope installed, let's go about creating your first public-private keypair. This step is incredibly important because it will determine how people send you encrypted messages and how secure those messages are. You will be generating a private key, and like your Steem private keys, it is essential that you keep the private key a secret.
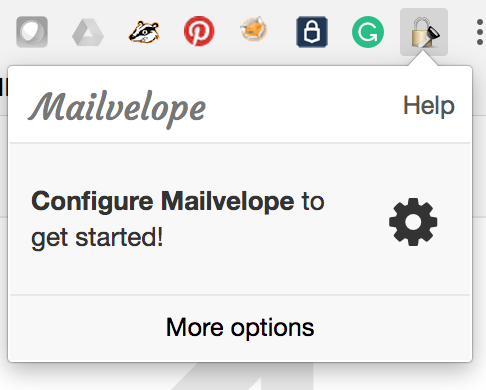
The first step is to click on the mailvelope icon in your Chrome toolbar. It will ask you to start configuring Mailvelope.
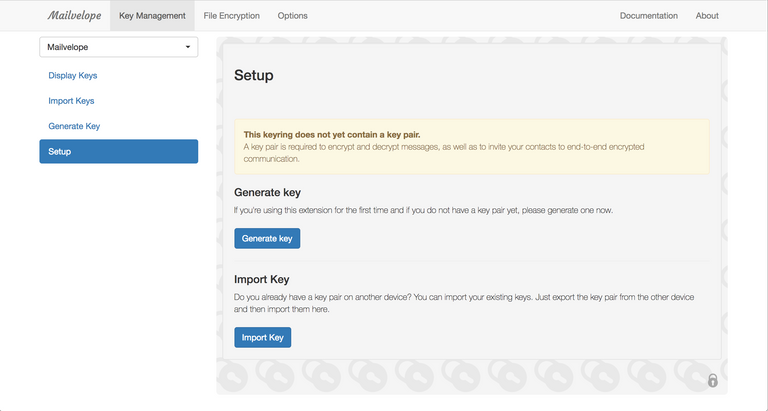
Once here you will need to click on the "Generate Key" button to start the generation process.
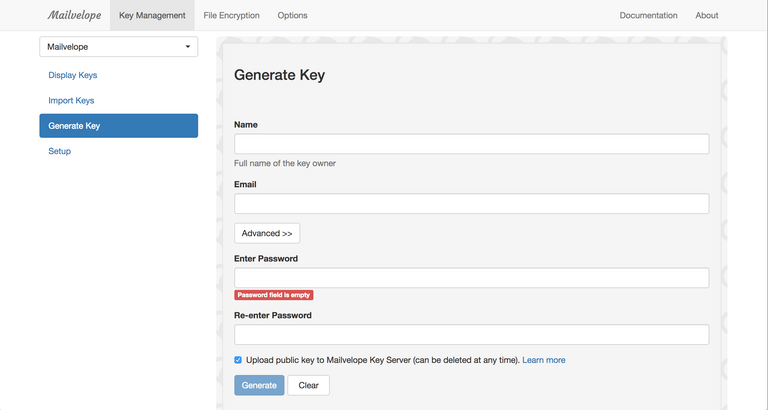
From here it's almost as easy as filling out the form and clicking generate. However, there are a few things to note here. One is that I highly recommend that setting a password, while it's not required what this does is encrypts your private key with that password. This way if for some reason someone were to get your private key they would not be able to use it without the password. This is really important for people who are storing their private keys on their hard drive and not in a physical token (but don't worry too much about that right now, just set the password to be a strong password).
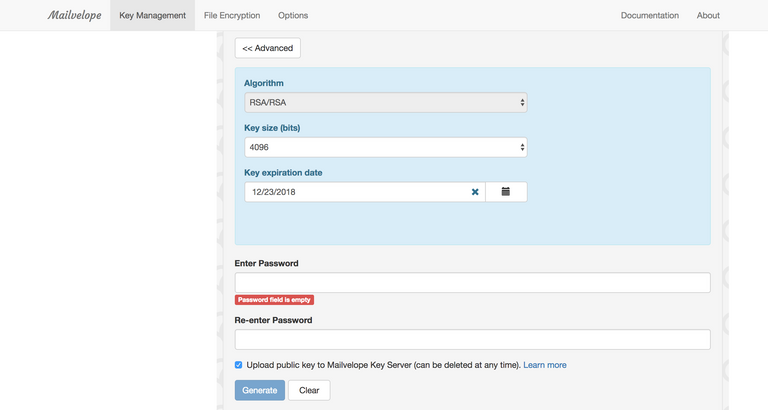
Optionally, you can open the advanced menu and change the key size for your PGP keys. At the time of this tutorial, the largest key in Mailvelope you can choose is 4096 bits. This is the default choice and I highly recommend keeping it that way. The larger the key size the harder it is for a computer to brute force the key.
But one thing I do that is optional is to set a key expiration date. This forces me to generate a new secure key every year which makes it much harder for bad guys to steal my key because they will have to choose the right key. But I'm pretty paranoid about my security and privacy.
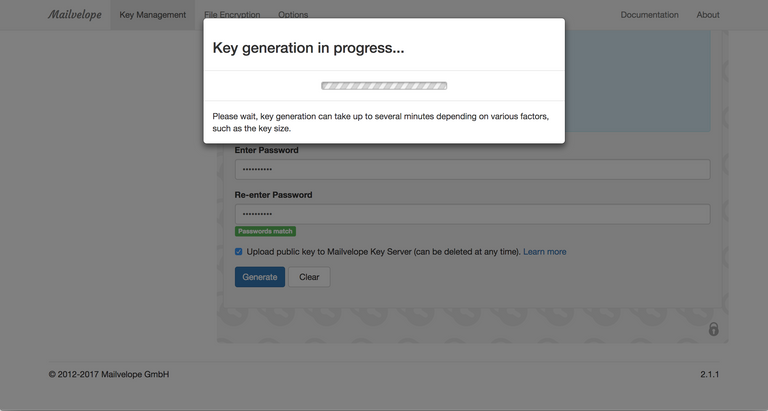
Once you hit generate the system will generate a public and private key for you. This can take a few minutes depending on the computer you are using.

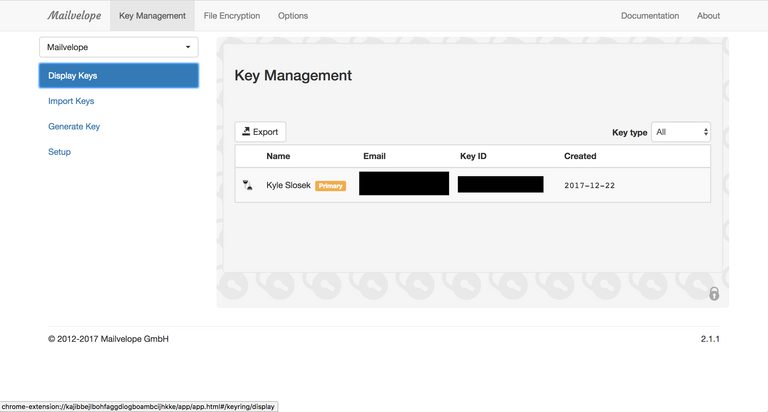
Once it is done generating your new key, you can see it by clicking on "Display Keys" menu on the left side of your screen.
Verifying your Key with Mailvelope's Keyserver and Decrypting a Message
If you kept the "Upload public Key to Mailvelope Key Server" box checked when you created your keypair you should receive an encrypted email from them asking you to verify your email address. The process of decrypting this message will be the same as if any other person were to send you an encrypted message.
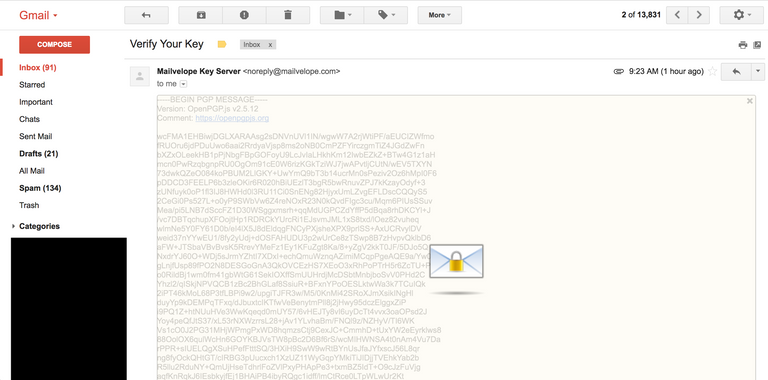
You'll notice in the email above that the data is encrypted, mailvelope picks up on the header "-----BEGIN PGP MESSAGE-----" and will ask you if you want to decrypt it. By clicking on the envelope icon in the middle of the message you are telling Mailvelope to decrypt the message.
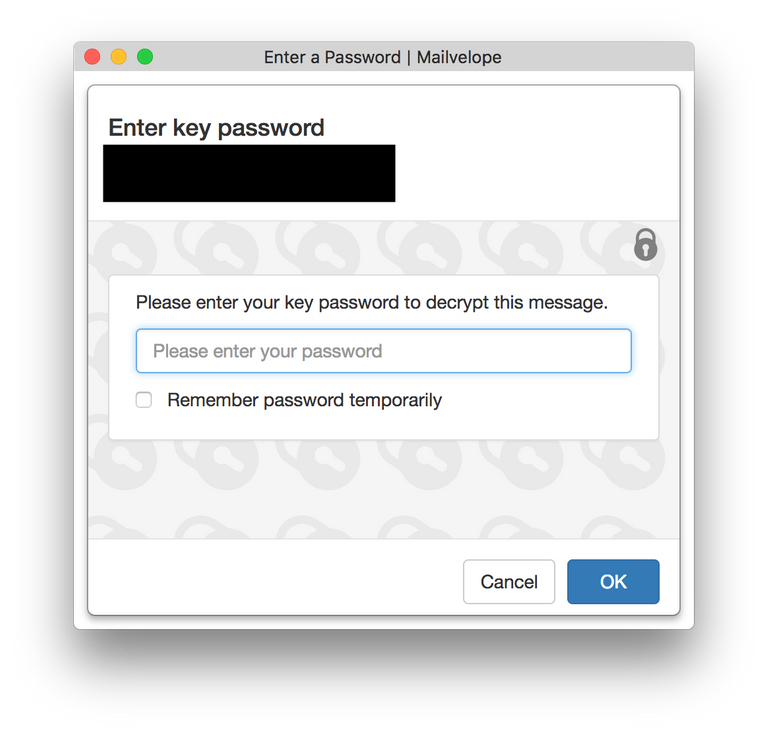
If you set a password when you generated your keys then mailvelope will ask you for that password here before decrypting your message.
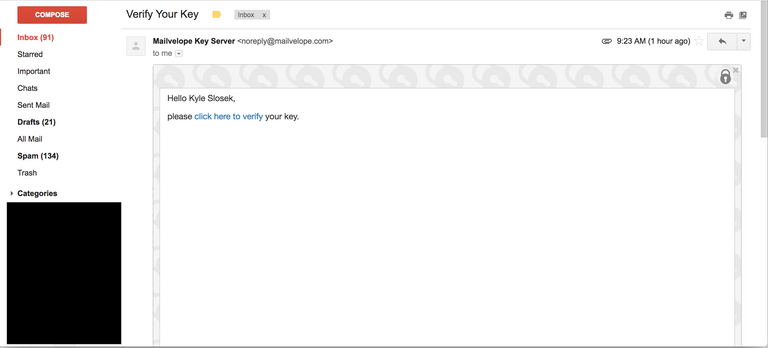
By clicking on this link you are proving to Mailvelope that you own this email address and that you created this public/private keypair. This will now allow other people to look you up on their key server and send you an encrypted email. Remember that Mailvelope only sends your public key to the keyserver. This is the key you can give to anyone. Your private key is used to decrypt any message coming in.
Finding People's Public Keys
In order to encrypt an email to someone, you must first have their public key. Luckily for us, there are plenty of public key servers out there where you can look up and download people's public keys. To find other people's keys you must click on the Mailvelope icon in your plugin tray and choose "Key Ring: manage public and private keys"
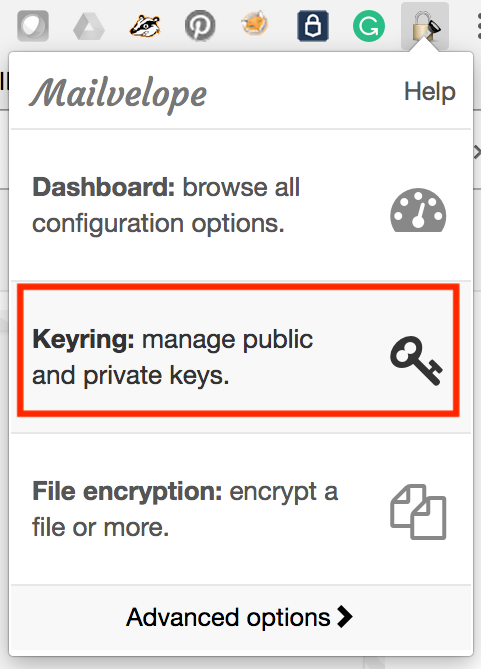
Then click on the "Import Keys" menu option on the left. This will bring you to a page where you can find people's public keys. The first option is to search for someone by email address, the second is to import a public key if someone has sent you their key in a file and the third is to paste in someone's key.
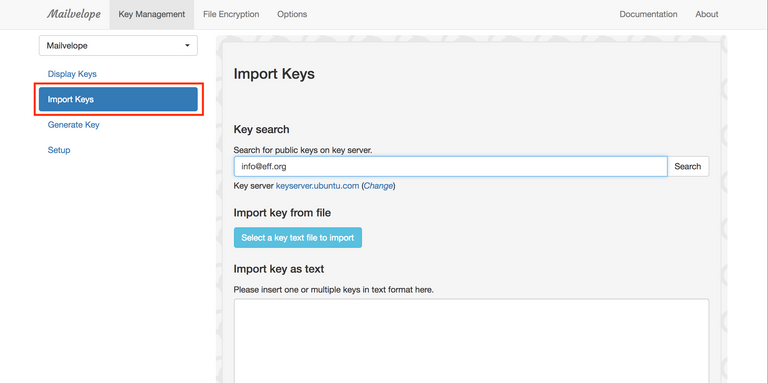
In our example here we are going to send an email to the EFF, so I'm going to type in their email address in the search box and click search. This will bring me to another site where the results of my search will be shown.

When I click on the keyID I am presented with the public key in text form.
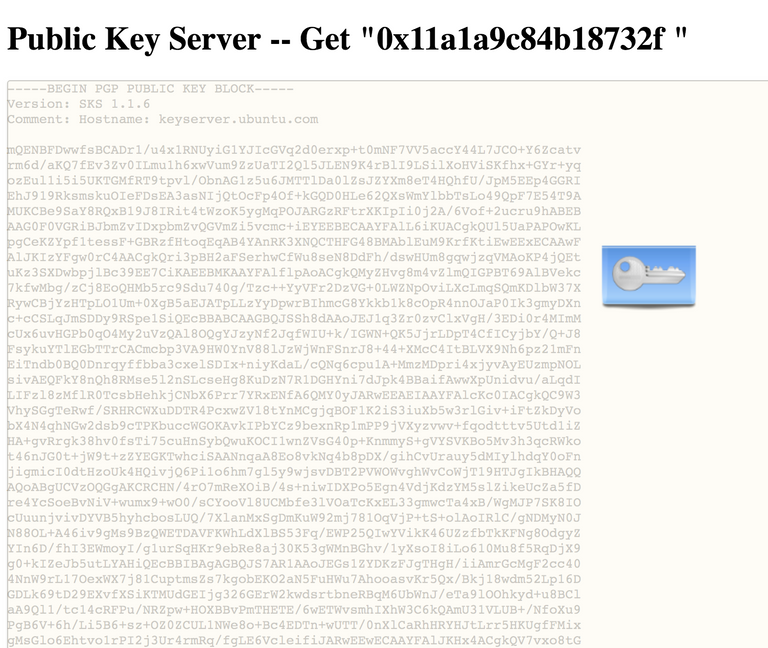
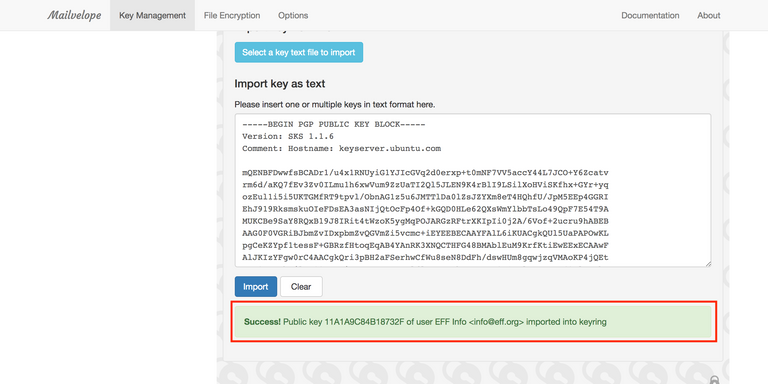
Mailvelope should recognize this and give you blue key icon. When you click on that it imports the key into your personal key ring and you should see a success page after that.
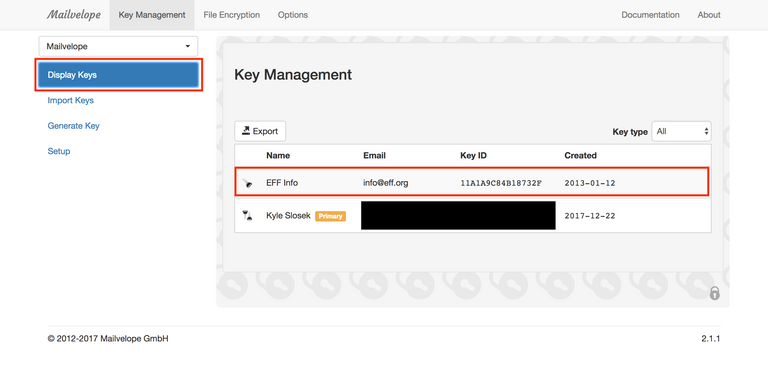
You can verify that the public key was successfully imported by clicking on the "Display Keys" menu item on the left-hand menu. You will see that the key is displayed on your key ring.
Encrypting Your First Email
To start off encrypting an email you must click on the Mailvelope icon in your draft email pane.
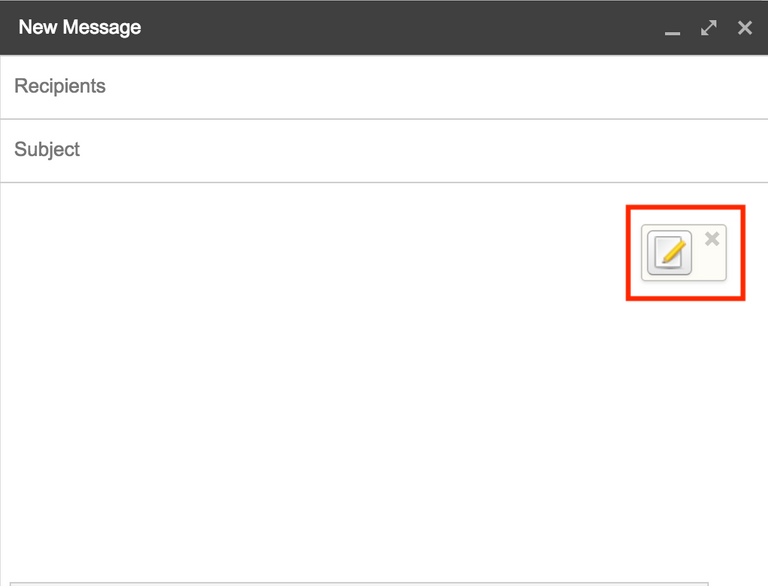
This will open up another window where you will be able to add recipients and type the message you want to encrypt. Make sure that you have added your recipient's public key to your key ring before writing your email.
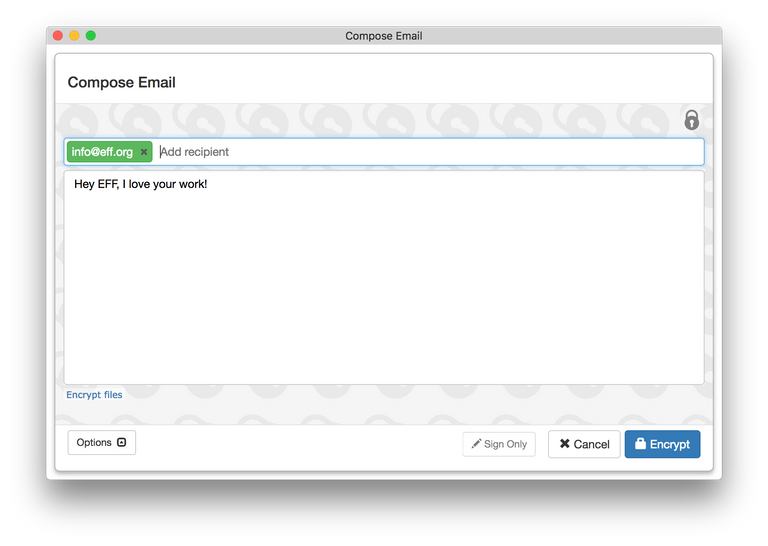
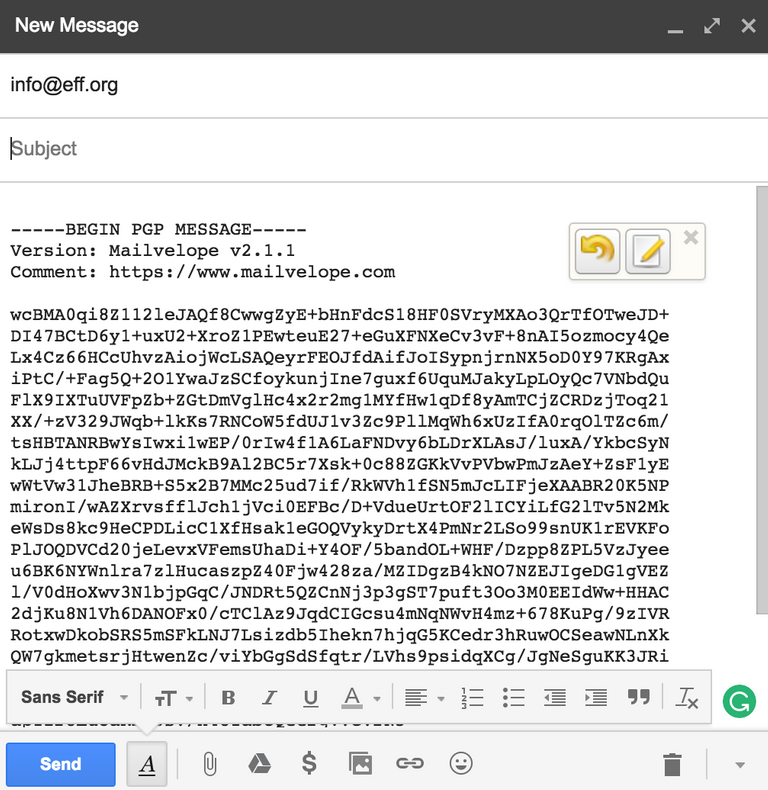
Once you are finished you can click the "Encrypt" button at the bottom and the Mailvelope app will fill the body of your email with the encrypted text using your recipient's public keys. At this point, all you have to do is send and your recipient will decrypt the message on the other end.
Conclusion
So as you can see Mailvelope is a very convenient way to encrypt and decrypt messages using PGP. It works very well with any webmail client. If you have any other questions or have used Mailvelope before I'd love to hear from you in the comments section.
Posted on Utopian.io - Rewarding Open Source Contributors
Thank you for the contribution. It has been approved.
You can contact us on Discord.
[utopian-moderator]
Thanks!
Peace, Abundance, and Liberty Network (PALnet) Discord Channel. It's a completely public and open space to all members of the Steemit community who voluntarily choose to be there.Congratulations! This post has been upvoted from the communal account, @minnowsupport, by kslo from the Minnow Support Project. It's a witness project run by aggroed, ausbitbank, teamsteem, theprophet0, someguy123, neoxian, followbtcnews/crimsonclad, and netuoso. The goal is to help Steemit grow by supporting Minnows and creating a social network. Please find us in the
If you would like to delegate to the Minnow Support Project you can do so by clicking on the following links: 50SP, 100SP, 250SP, 500SP, 1000SP, 5000SP. Be sure to leave at least 50SP undelegated on your account.
Congratulations @kslo! You have completed some achievement on Steemit and have been rewarded with new badge(s) :
Click on any badge to view your own Board of Honor on SteemitBoard.
For more information about SteemitBoard, click here
If you no longer want to receive notifications, reply to this comment with the word
STOPHey @kslo I am @utopian-io. I have just upvoted you!
Achievements
Suggestions
Get Noticed!
Community-Driven Witness!
I am the first and only Steem Community-Driven Witness. Participate on Discord. Lets GROW TOGETHER!
Up-vote this comment to grow my power and help Open Source contributions like this one. Want to chat? Join me on Discord https://discord.gg/Pc8HG9x
Congratulations @kslo! You have completed some achievement on Steemit and have been rewarded with new badge(s) :
Click on any badge to view your own Board of Honor on SteemitBoard.
For more information about SteemitBoard, click here
If you no longer want to receive notifications, reply to this comment with the word
STOP