Lesson Objectives
A. Introduction to State Management
B. Exploring Client Management Options
C. Based State Management Options
D.Using ViewState
Needs are;
A.Asp.NET
B. Visual Studio
C. C#
The difficulty level of commands we use is middle.
Introduction to State Management
The ASP.NET web application has to store information of the user. For example a user logs into a shopping cart and browses various products in different web pages. He adds the products he would like to buy to the shopping cart. He may go back to the previous pages and view the products he has added. Finally he will submit the order and view his order information. The entire information for the user from the time of login to the time of logout has to be stored in the web application.
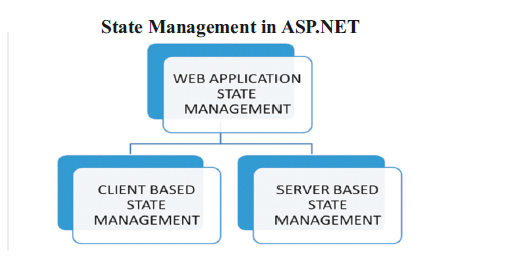
State Management helps store the information entered by a user when he traverses from one
page to another in the web site. The web pages are served to the client through the Hypertext Transfer Protocol (HTTP protocol). The HTTP protocol is stateless. It cannot store the information of the user between requests. ASP.NET provides various state management techniques to handle the state management efficiently and effectively in a web application.The types of state management are Client-Based State Management and Server-Based State management as shown below.
Client-Based State Management
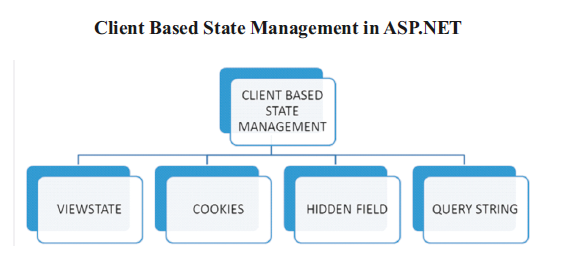
Client-Based State Management stores the user information on the client computer. It provides great scalability as the clients store the required information instead of storing it on the server's memory. It is efficient when a request is made for a page which may be available on multiple servers. There are several mechanisms of storing the Client-Based State Information such as ViewState, Cookies, Hidden Field and Query String as shown below.
ViewState
The information about the various controls in a web page is stored with the help of ViewState. ViewState stores information about a particular page, between post backs. Every web page has a ViewState object associated with it.The ViewState for a page is enabled by default. The ViewState information is sent by the client to the server and the server processes the information in the view state.
The ViewState is hashed and stored in a hidden field. The ViewState for a page can be disabled by setting the "EnableViewState" property of the "@page" attribute to "false". It should be taken care that large amounts of information are not stored in the view state as the web page would become slow. It increases network traffic as the view state information is submitted from the client to the server for each request.
Demonstration: Using ViewState
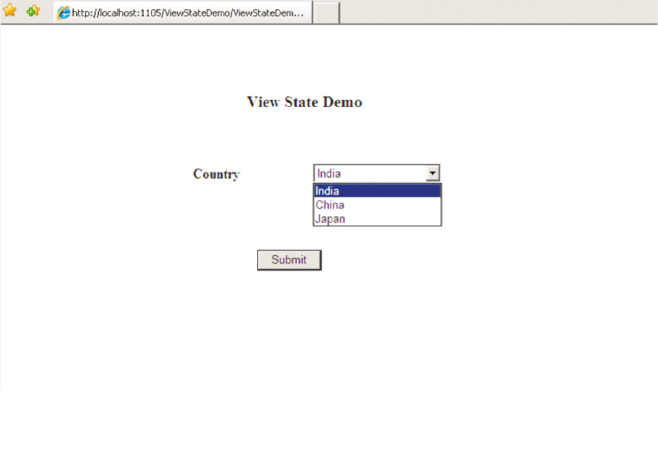
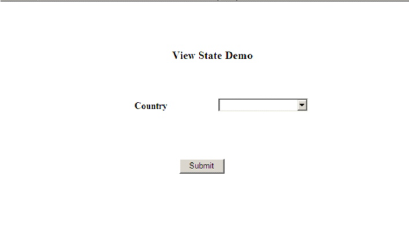
Let us consider a scenario in which a drop-down is populated dynamically with a list of countries. When a user submits the form and the page is displayed for the second time, the drop down-list would contain the countries populated initially. This occurs as a result of ViewState being enabled for the Page and the DropDownList.
Steps to create the Demo:
1 ) Create a New Web Project named “ViewStateDemo”.
2 ) Add a new Web Form named as “ViewStateDemo.aspx”.
3 ) Design the form as below:
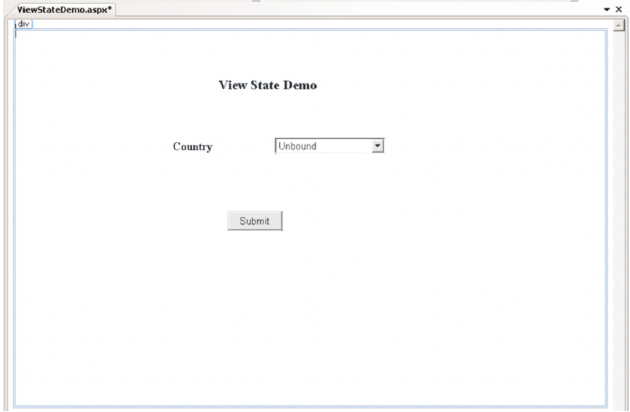
The code for the source view is given below:
<%@PageLanguage="C#"AutoEventWireup="true"CodeFile="ViewStateDemo.aspx.cs"I
nherits="ViewStateDemo"%>
<!DOCTYPEhtmlPUBLIC"-//W3C//DTD XHTML 1.0
Transitional//EN""http://www.w3.org/TR/xhtml1/DTD/xhtml1-transitional.dtd">
<htmlxmlns="http://www.w3.org/1999/xhtml">
<headid="Head1"runat="server">
<title></title>
</head>
<body>
<formid="form1"runat="server">
<divstyle="height: 505px">
<asp:LabelID="lblTitle"runat="server"Font-Bold="True"Font-Size="Large"
style="z-index: 1; left: 283px; position: absolute; height: 28px; width: 141px; top: 78px;
font-weight: 700"
Text="View State Demo"></asp:Label>
<asp:DropDownListID="ddlCountry"runat="server"
style="z-index: 1; left: 359px; top: 159px; position: absolute; height: 31px; width: 148px">
</asp:DropDownList>
<asp:ButtonID="btnSubmit"runat="server"
style="z-index: 1; top: 258px; position: absolute; left: 295px; width: 74px;"
Text="Submit"/>
<asp:LabelID="lblCountry"runat="server"
style="z-index: 1; left: 221px; top: 161px; position: absolute; height: 24px; font-weight:
700; right: 540px;"
Text="Country"></asp:Label>
</div>
</form>
</body>
</html>
4 ) Enter the code below in the code behind file:
protectedvoid Page_Load(object sender, EventArgs e)
{
if (!Page.IsPostBack)
{
ddlCountry.Items.Add("India");
ddlCountry.Items.Add("China");
ddlCountry.Items.Add("Japan");
}
}
5 ) Right-Click the “ViewStateDemo.aspx” files and selects “Set as Start Page” and execute the project.
6 ) View the Output 1 below :
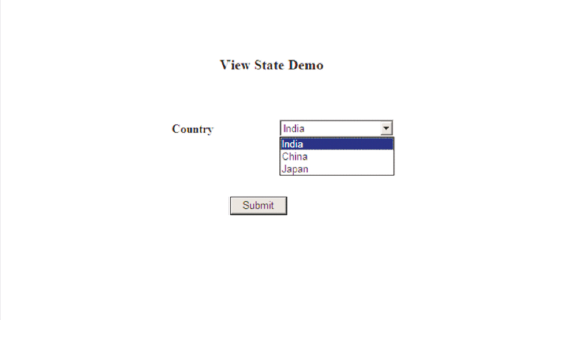
7 ) Click the Submit button and view the Output 2 below:
8 ) Let us disable ViewState for the Page by EnableViewState="false"of the Page directive.The page directive after the change would look as follows:
<%@PageLanguage="C#"EnableViewState="false"AutoEventWireup="true"CodeFile="
ViewStateDemo.aspx.cs"Inherits="ViewStateDemo"%>
9 ) Run the project and view the output 3 as below :
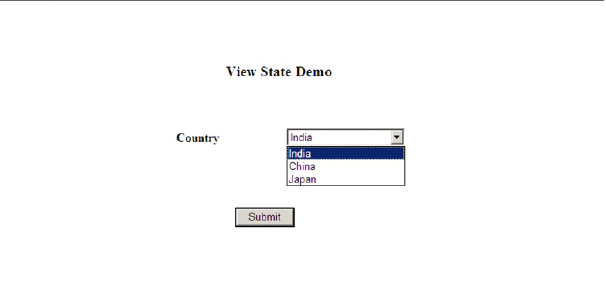
10 ) Click the Submit button and view the Output 4 below:
Posted on Utopian.io - Rewarding Open Source Contributors
Thank you for the contribution. It has been approved.
You can contact us on Discord.
[utopian-moderator]
Hey @mrsmalue I am @utopian-io. I have just upvoted you!
Achievements
Suggestions
Get Noticed!
Community-Driven Witness!
I am the first and only Steem Community-Driven Witness. Participate on Discord. Lets GROW TOGETHER!
Up-vote this comment to grow my power and help Open Source contributions like this one. Want to chat? Join me on Discord https://discord.gg/Pc8HG9x