When working on a web application, there needs to be a way for users to upload their files to the database,files could be in various formats such as jpeg, gif, png...,all depend on the purpose could be a picture relating to a post, or just a screenshot of a payment, scorecard, a pdf ...
So when developing a web application it is important you give users means to upload files to your web server.
What Will I Learn?
- You will learn to store files in your database
- You will learn to control the formats and size of files that go into your database
- You will learn to direct where your files are been stored on your database
Requirements
- A web server, I will be using XAMPP
- A web browser
- Notepad
Difficulty
- Intermediate
Tutorial Contents
Setting up the database
We start by setting up our database, this is unavoidable if you want to store files on your web application. The database determines where all our files will be stored. On this tutorial I will be working with MySQL as this makes database management quite easy.
After setting up MySQL locally we access it on a web browser using phpmyadmin
Then go further to create a database, I will name my database php_tutorial using this simple code
CREATE DATABASE php_tutorial
we go further to create a table in the database I will name my table tutorial_files,the table in this tutorial will have just a single column called 'imagefiles' ,this is where all our files will go,here is the code to do this
CREATE TABLE `tutorial_files` (
  `imagefiles` VARCHAR(64)
);
The method VarChar is used to determine the amount of variables and charactera that can be held by the table,
Once this is done we go further to creating our HTML form
  <html>
<head>Upload an image file</head>
<body>
  <form enctype="multipart/form-data" method="post" action="<?php echo $_SERVER['PHP_SELF']; ?>">
    <input type="hidden" name="MAX_FILE_SIZE" value="98034" />

    <label for="pictures">Image File:</label>
    <input type="file" id="screenshot" name="screenshot" />
    <hr />
    <input type="submit" value="Add" name="submit" />
  </form>
</body>

</html>

- For this form we used method="post" ,due to the fact that we are sending a file into the database
Create the PHP script
- Connect to the database
this will connect our Web page to the database
 <?php
   $dbc = mysqli_connect('localhost', 'username', 'password', 'tutorial_files');
?>
To connect to our database we need to make use of the mysql_connect function, followed by its login details, for this tutorial my webserver name is 'localhost' ,username is 'username' , password is 'password' and lastly the name of the database we working with ,for this tutorial its 'tutorial_files'.
- Collect the file data from the post
    $imagefiles = $_FILES['userfile']['name'];
    $imagefiles_type = $_FILES['userfile']['type'];
    $imagefiles_size = $_FILES['userfile']['size'];

    if (!empty($imagefiles)) {
      if ((($imagefiles_type == 'image/gif') || ($imagefiles_type == 'image/jpeg') || ($imagefiles_type == 'image/pjpeg') || ($imagefiles_type == 'image/png'))
        && ($imagefiles_size > 0) && ($imagefiles_size <= 98034)) {
        if ($_FILES['userfile']['error'] == 0)
This code grabs the files data from the post,and analyzes it to check if it meets the agreement for the web application, it collects the name and sends it to the table, checks the size if it falls within the given range which is 0-95.74KB for this tutorial and lastly check for the file type, if it meets the requirement the file, it will be sent to the database , else it pops up an error message.
- Moving the file to the Upload Folder
$target = FILE_UPLOADPATH . $imagefiles;
if (move_uploaded_file($_FILES['userfile']['tmp_name'], $target)) {
$dbc = mysqli_connect('localhost', 'username', 'password', 'tutorial_files');
$query = "INSERT INTO tutorial_files VALUES ('$imagefiles')";
mysqli_query($dbc, $query);
echo '<p>Thanks for adding a new file</p>';
echo '<img src="' . FILE_UPLOADPATH . $imagefiles . '" alt=" image file" /></p>';
echo '<p><a href="test.php"><< Add another file</a></p>';
$imagefiles = "";
mysqli_close($dbc);
}
else {
echo '<p class="error">Sorry, there was a problem uploading your files image.</p>';
}
}
}
else {
echo '<p class="error">The image files must be a GIF, JPEG, or PNG image file no greater than ' . (98034 / 1024) . ' KB in size.</p>';
}
@unlink($_FILES['userfile']['tmp_name']);
}
else {
echo '<p class="error">Please enter an image file.</p>';
}
}
?>
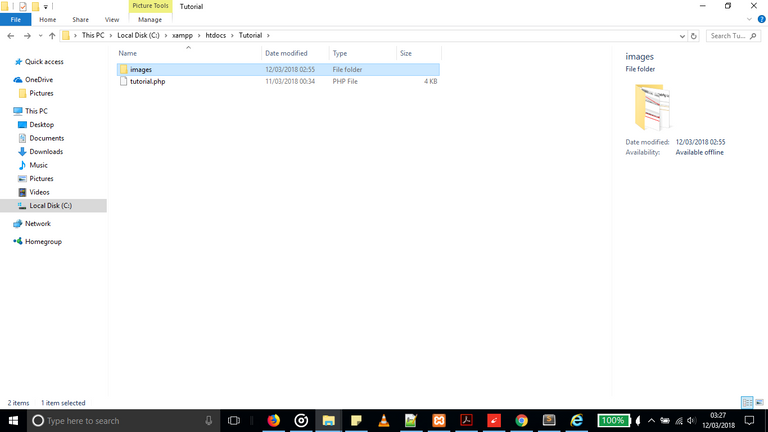
An image file will be created where all the files will be moved from the temporary storage to the given folder we created, define('FILE_UPLOADPATH', 'images/'); ' this code moves the file to the target file which we have created known as 'images' .

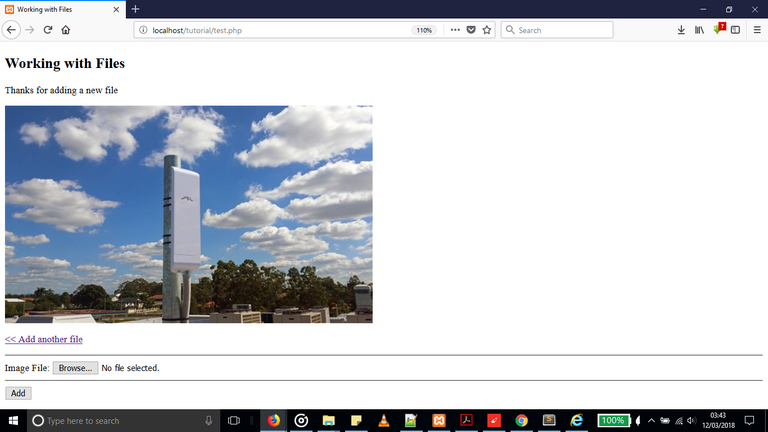
echo '<p>Thanks for adding a new file</p>';
When the file has been successfully uploaded after meeting all the requirements, this message is shownn which lets the user know the file upload was successful.

Conclusion
This tutorial has given you an introduction into working with files and shown you how to control the type of files that go into your database,There are many other functions you can use when working with files – this article has covered some of the most commonly used. Thanks for reading, hope you learnt from it.
Posted on Utopian.io - Rewarding Open Source Contributors
Your contribution cannot be approved because it does not follow the Utopian Rules.
You can contact us on Discord.
[utopian-moderator]