What Will I Learn?
This tutorial covers the topics on creating packages for Python language like programmers.
- First of all you will learn how to setup JetBrains PyCharm Community Edition 2017.3.4 x64 upon request the mod @scipio.
- Then, you will learn what are the functions of requests and beautifulsoup4 packages which is tried to explain (not much) in our Tutorial#1 upon request the mod @scipio.
- Then you will learn some subpackages for beautifulsoup4 packages to intensify the Tutorail#1 upon request the mod @scipio.
- Then you will learn how to create packages for Python by giving examples.
- Then you will learn how to create subpackages for Python by giving examples.
- Then we will write an easy example package which calculates the even numbers into given numbers.
Requirements
For this tutorial, you need Python 3.6.4 (actually you do not need newest version but always updating the Python is useful for you. For example for beautifulsoup4 package you need Python3) and PyCharm Community Edition 2017.3.4 x64 which is script program to work Python language easily.
- For Python 3.6.4 => you can download here for free.
- For PyCharm Community Edition 2017.3.4 x64 program => you can download here for free
Difficulty
This tutorial has an indermadiate level.
Tutorial Contents
Before starting, we want to thank @scipio for his valuable comments and encouragement. Therefore, we want to go over his comments, firstly.
You could have easily discussed in a few steps PyCharm Community Edition
In the Tutorial#1 we used JetBrains PyCharm 2017.3.4 Professional version which is not free so we convert our script program to free one which is PyCharm Community Edition. So, after setup Python3.6.4 which s given here we will setup PyCharm Community Edition (free version). Here you can see how to download and setup.
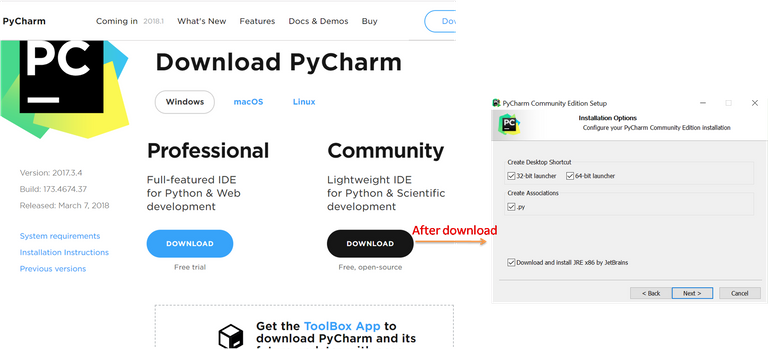
When you setup the PyCharm Community Edition 2017.3.4 x64 you will see:
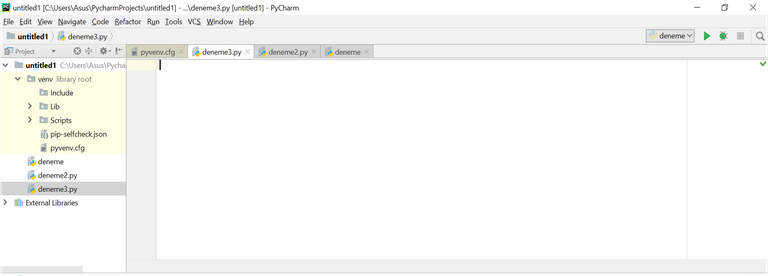
Then you can check our Tutorial#1 to create a Python file to write your codes.
you forgot to explain to the user they first need to (pip) install both requests and beautifulsoup4 before they are able to import it: you are (probably) not using a virtual environment, meaning you've installed them at an earlier date. But users who have not installed them, or are using a new virtual environment per project, would get errors and can therefore not complete the tutorial;
Actually to use Python on PyCharm Community Edition we do not need to write (pip) to download requests and beautifulsoup4 packages. We showed here:
Anyway, let's learn how to download packages. You need to choose File>Settings then there will be a pop-up menu which is related to general settings and also Project Interpreter menu. You can see the dowloaded packages and also you can add all packages here.
Reveal spoiler
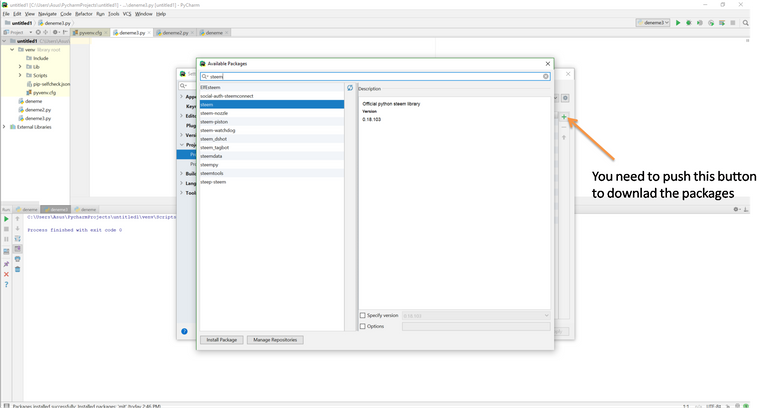
requests and beautifulsoup4 packages.After these @scipio wanted to us explain the
Ok, we can start to explain with what is a package for Python language. If you are familiar with MATLAB or such kind of program you know function command. Packages are exactly a file to call a function. You can call this function if you create a package. For example, you wrote a package, let's say, addition and this package is calculating the sum of the integers by using .sum function. If you call this package with the function of .sum then it calculates the sum of the integers. For example, requests.get function for requests package and it gives us package is a simple HTTP library for Python as @scipio mentioned. We used
import requests
SteemitURL= "https://steemit.com/@onderakcaalan"
r= requests.get(SteemitURL)
print(r)
<Response [200]>
print(r.content)
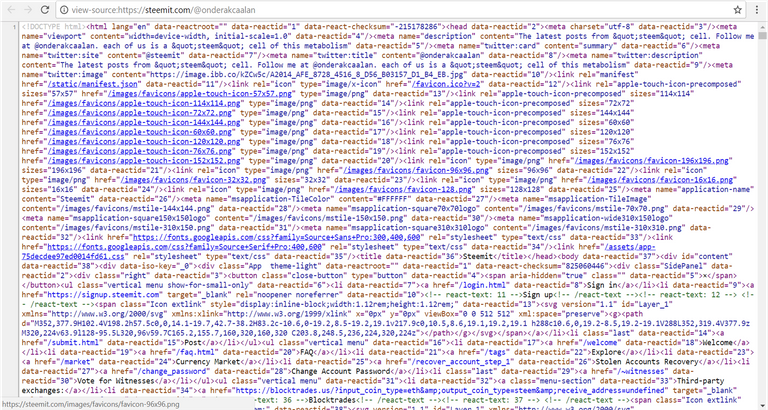
Now, variable "r" contains all information about URL. We mean that when you right click the webpage and choose view page source, the all writings is appointed into variable "r". Then you can take what you need from this variable.
To understand subpackages we can move on beautifulSoup4beautySoup subpackage we need to import bs4 package (as you understand bs4 contains lot of subpackages). package. beautifulsoup4 is an HTML parsing library as @scipio mentioned. To import
from bs4 import BeautifulSoup
We will work on BeautifulSoup subpackage so not to write each time bs4.BeautifulSoup we wrote it in the beginning and we are in the .BeautifulSoup subpackage. We can write it like this also:
import bs4
...
...
bs4.BeautifulSoup(variables)
bs4 package. In Tutorial#1 we used a function called .find_all() like "dataTaken.soup2.find_all("a")". This function search inside
soup2 and finds names start with the letter "a" (actually betweem "<a" and "a>", such asAccording to @scipio requests, we will give some example about
import requests
import bs4

SteemitURL= "https://steemit.com/@onderakcaalan"
r= requests.get(SteemitURL)
soup2 = bs4.BeautifulSoup(r.content,"html.parser")
print(soup2)
dataTaken=soup2.find_all("a")
print("**************")
print(dataTaken)
Some part of result:
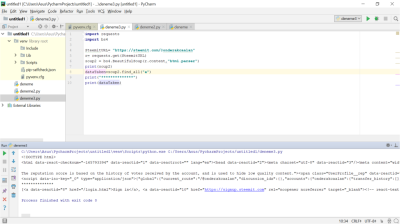
For example, if we change "dataTaken.soup2.find_all("a")" to "dataTaken.soup2.find_all("script")"then:
import requests
import bs4

SteemitURL= "https://steemit.com/@onderakcaalan"
r= requests.get(SteemitURL)
soup2 = bs4.BeautifulSoup(r.content,"html.parser")
print(soup2)
dataTaken=soup2.find_all("script")
print("**************")
print(dataTaken)
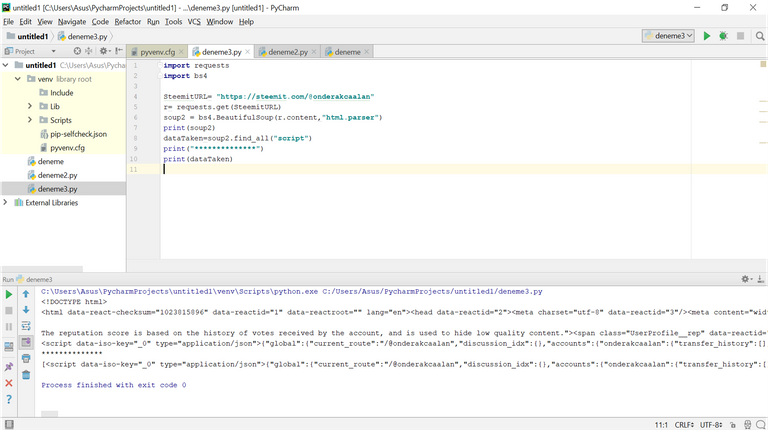
Here actually, "soup2" variable is just "soup2=bs4.BeautifulSoup(r.content,"html.parser")". When we write, "dataTaken=soup2.find_all("script")" this is exactly "dataTaken=bs4.BeautifulSoup(r.content,"html.parser").find_all("script")".
import requests
import bs4

SteemitURL= "https://steemit.com/@onderakcaalan"
r= requests.get(SteemitURL)
soup2 = bs4.BeautifulSoup(r.content,"html.parser")
print(soup2)
dataTaken=bs4.BeautifulSoup(r.content,"html.parser").find_all("script")
print("**************")
print(dataTaken)
As a result, each dot (".") calls another subpackage and the last dot calls the function. bs4 is a package, BeautifulSoup is subpackage, and find_all is a function.
Ok, now we can create our package and subpackage. First of all let's create package. We want to give a name "DenemePackage". To create a package into PyCharm Charm Community script you can add directly to site packages into your folder such that:
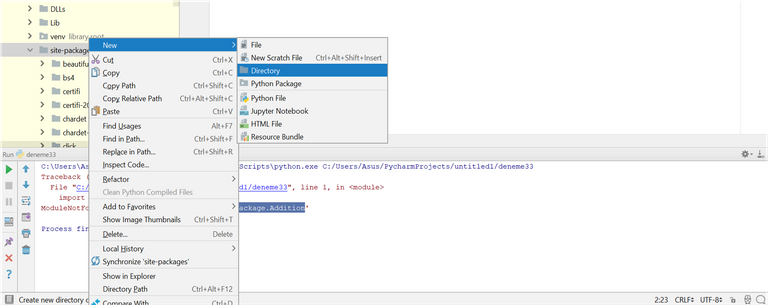
Then you need to add "init.py" and your package file "DenemeDemo".
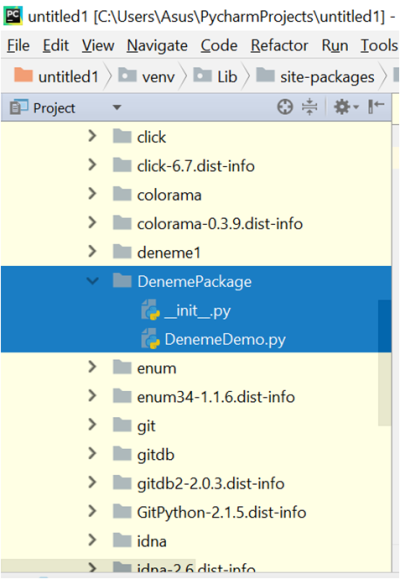
Into your "DenemeDemo" file, we can write our codes such that when we call it it will give a nice "Hi Steemians. Utopian-io is the best community" welcome.
def DenemePrint():
    print('Hi Steemians. Utopian-io is the best community')
Ok, now our package is ready and interpreted into our folder. So we can call the package and see what will be:
import DenemePackage.DenemeDemo
DenemePackage.DenemeDemo.DenemePrint()
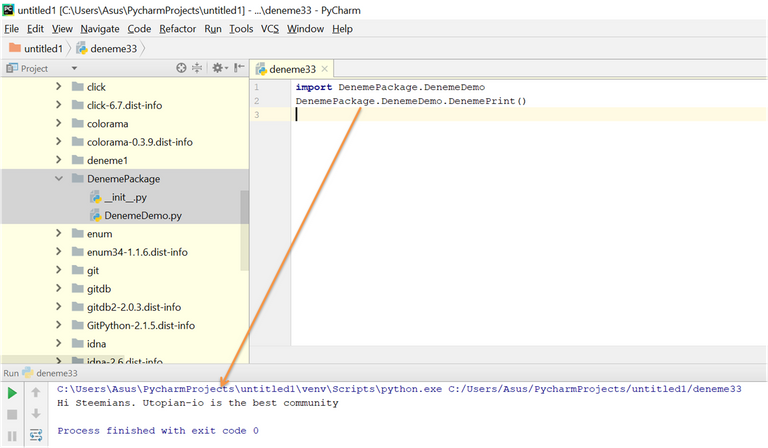
As you see the, commands "DenemePackage" is the folder name, "DenemeDemo" is just the package name and "DenemePrint" is the function to write "Hi Steemians. Utopian-io is the best community".
Ok lets try to add subpackage then. The way is similar with the first package. Right now, we will add a folder (DenemeSubpackage) into our main folder then we will add files "init.py" and your package file "DenemeSubdemo". Into the "DenemeSubdemo" file we will write:
def DenemeSubprint():
    print('Hi Steemians. Utopian-io is the best community and @scipio is really nice moderator')
Then try it:
import DenemePackage.DenemeSubpackage.DenemeSubdemo
DenemePackage.DenemeSubpackage.DenemeSubdemo.DenemeSubprint()
And the result is:
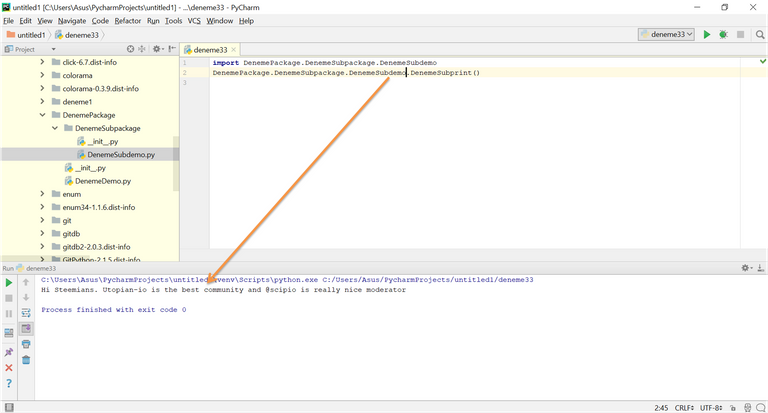
As you see, "DenemePackage" is the folder name "DenemeSubpackage" is the subfolder name "DenemeSubdemo" is subpackage file into the subfolder and "DenemeSubprint()" is the function.
Ok lets write an easy package example. First of all, we need to
def DenemePrint(a, b, c, d, e):
    Integers = (a, b, c, d, e)
    Nums = []
    for index in range(0, 4):
        if Integers[index] % 2 == 0:
            Nums.append(Integers[index])
    print(Nums)
The command window
from DenemePackage import DenemeDemo
DenemeDemo.DenemePrint(3, 4, 5, 6, 7)
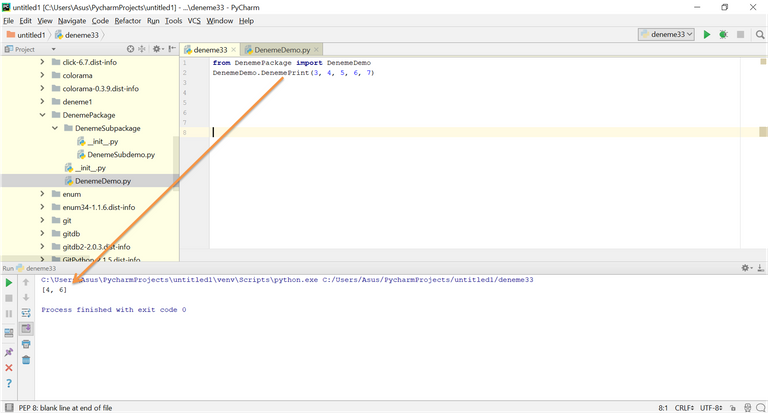
NOT: @arcange, please make free the statistics for Steemits
Curriculum
Here is the list of related tutorials we have already shared on Utopian that make up a Course Curriculum
Posted on Utopian.io - Rewarding Open Source Contributors
Thank you for the contribution. It has been approved.
i think you should directly add this related part to the last tutorial but not recreate the new tutiorial , which may bring some difficulty to the readers . https://utopian.io/utopian-io/@onderakcaalan/example-of-steemit-analysis-by-using-python-tutorial-1 .
You can contact us on Discord.
[utopian-moderator]
Hey @onderakcaalan I am @utopian-io. I have just upvoted you!
Achievements
Community-Driven Witness!
I am the first and only Steem Community-Driven Witness. Participate on Discord. Lets GROW TOGETHER!
Up-vote this comment to grow my power and help Open Source contributions like this one. Want to chat? Join me on Discord https://discord.gg/Pc8HG9x
Congratulations @onderakcaalan! You have completed some achievement on Steemit and have been rewarded with new badge(s) :
Click on any badge to view your own Board of Honor on SteemitBoard.
For more information about SteemitBoard, click here
If you no longer want to receive notifications, reply to this comment with the word
STOPPeace, Abundance, and Liberty Network (PALnet) Discord Channel. It's a completely public and open space to all members of the Steemit community who voluntarily choose to be there.Congratulations! This post has been upvoted from the communal account, @minnowsupport, by onderakcaalan from the Minnow Support Project. It's a witness project run by aggroed, ausbitbank, teamsteem, theprophet0, someguy123, neoxian, followbtcnews, and netuoso. The goal is to help Steemit grow by supporting Minnows. Please find us at the
If you would like to delegate to the Minnow Support Project you can do so by clicking on the following links: 50SP, 100SP, 250SP, 500SP, 1000SP, 5000SP.
Be sure to leave at least 50SP undelegated on your account.