
Repository
React
https://github.com/facebook/react
Material-ui
https://github.com/mui-org/material-ui
My Github Address
This Project Github Address
https://github.com/pckurdu/Build-A-Blog-Site-With-React-Redux-Firebase-And-MaterializeCSS-Part-11
What Will I Learn?
- You will learn how to create user in firebase by using redux structure.
- You will learn createUserWithEmailAndPassword() function.
- You will learn to add data to firestore using the redux structure.
- You will learn to capture the connection error between firestore and react-redux application.
Requirements
- text editor (I used visual studio code editor)
- Basic javascript information
- Basic react information
Difficulty
- Basic
Tutorial Contents
In this tutorial we will learn how to register user firebase with redux.
In action we will write a function that records the user in firebase and if the user registration is successful, we will enter the user information into the firestore.
We will access the values entered in the SignUp component and execute the function in action within the redux structure.
Let's start
We divided the subject into 4 sections:
- Sign Up Operations With Redux
- Accessing Data In The SignUp Component
- Accessing Action In SignUp Component
- Capture Error While Registering
1- Sign Up Operations With Redux
In this section we will create the action and reducer codes that are necessary to perform signup operations in the application.
We'll keep users' information in the database, so when we create the user we'll create a document in firestore using user.uid. In this document we will keep the user's name and surname, and we will create and store the user's monogram information.
Thus, in this section we will learn both firebase authentication processes and firebase-firestore operations.
Let's start by creating the function to perform sign up for the authAction.js file.
//action to use component
export const signUp=(userNew)=>{
    return (dispatch,getState,{getFirebase,getFirestore})=>{
  //for firebase authentication
        const firebase=getFirebase();
        //for firebase firestore
        const firestore=getFirestore();
    }
}
The signUp function will take an object containing the user information as a parameter.
With getFirebase, we'll add users to the firebase's authentication part and add document to firestore with getFirestore.
//action to use component
export const signUp=(userNew)=>{
    return (dispatch,getState,{getFirebase,getFirestore})=>{
…
        //We are adding users to firebase.
        firebase.auth().createUserWithEmailAndPassword(
            userNew.email,
            userNew.password
        )
    }
}
Using the createUserWithEmailAndPassword() function we add users to firebase. If the user is successfully created in firebase, then we can catch it with the then() function. Then we can add this user information to firestore if the user addition is successful.
//We are adding users to firebase.
firebase.auth().createUserWithEmailAndPassword(
      userNew.email,
     userNew.password
   ).then((res)=>{
   //Collection and document creation in firestore
   return firestore.collection('users').doc(res.user.uid).set({
     //create field in document
     firstName:userNew.firstName,
     lastName:userNew.lastName,
     monogram:userNew.firstName[0]+userNew.lastName[0]
   })
})
We created a collection named users in firestore with collection('users').
We can access the information of the user added to the firebase with the then() function. Since we can access the user information with the res variable, we are accessing the user uid information with res.user.uid. We define the id of the document as the user's id with doc(res.user.uid).
With the set() function, we can create and define the fields of the firestore document. We use the initials of the user's name and initials of the user's lastname to create a monogram field.
We need to report the result of these operations to reducer. So we have notified the store.
firebase.auth().createUserWithEmailAndPassword(
            userNew.email,
            userNew.password
        ).then((res)=>{
            //Collection and document creation in firestore
            return firestore.collection('users').doc(res.user.uid).set({
                //create field in document
                firstName:userNew.firstName,
                lastName:userNew.lastName,
                monogram:userNew.firstName[0]+userNew.lastName[0]
            })
        //if success
        }).then(() => {
            dispatch({ type: 'SIGNUP_SUCCESS' });
            //if error
          }).catch((err) => {
            dispatch({ type: 'SIGNUP_ERROR', err});
      });
We created a type of action using dispatch and forwarded to the reducer.
authReducer.js
case 'SIGNUP_SUCCESS':
    console.log('signup success')
    return {
     ...state,
     authError: null
}

case 'SIGNUP_ERROR':
   console.log('signup error')
   return {
     ...state,
     authError: action.err.message
}
Since we used the switch-case structure in authReducer, we put these action types in the appropriate places.
2- Accessing Data In The SignUp Component
In this section, we will perform access to the values entered in the inputs in the SignUp.js file.
We will define the component state and create the necessary functions. Let us create a state to meet the input fields.
In SignUp.js
//for inputs field
  state = {
    email: '',
    password: '',
    firstName: '',
    lastName: '',
  }
We have created such a state for keeping email, password and name information in signUp component.
//for change in input
  handleChange = (e) => {
    this.setState({
      [e.target.id]: e.target.value
    })
  }
  //If the form is submitted, it will work.
  handleSubmit = (e) => {
    e.preventDefault();
    console.log(this.state);
  }
We have defined the handleChange() function for any changes to be made to the inputs. We changing the corresponding state value by looking at which input works.
The handleSubmit() function will work in the submit event of the form. Let's print the state to the console when the form is submitted.
return (
    …
      <form className="white" onSubmit={this.handleSubmit}>
        …
          <input type="email" id='email' onChange={this.handleChange} />
        …
          <input type="password" id='password' onChange={this.handleChange}/>
        …
          <input type="text" id='firstName' onChange={this.handleChange}/>
        …
          <input type="text" id='lastName'onChange={this.handleChange} />
        …
      </form>
    …
)
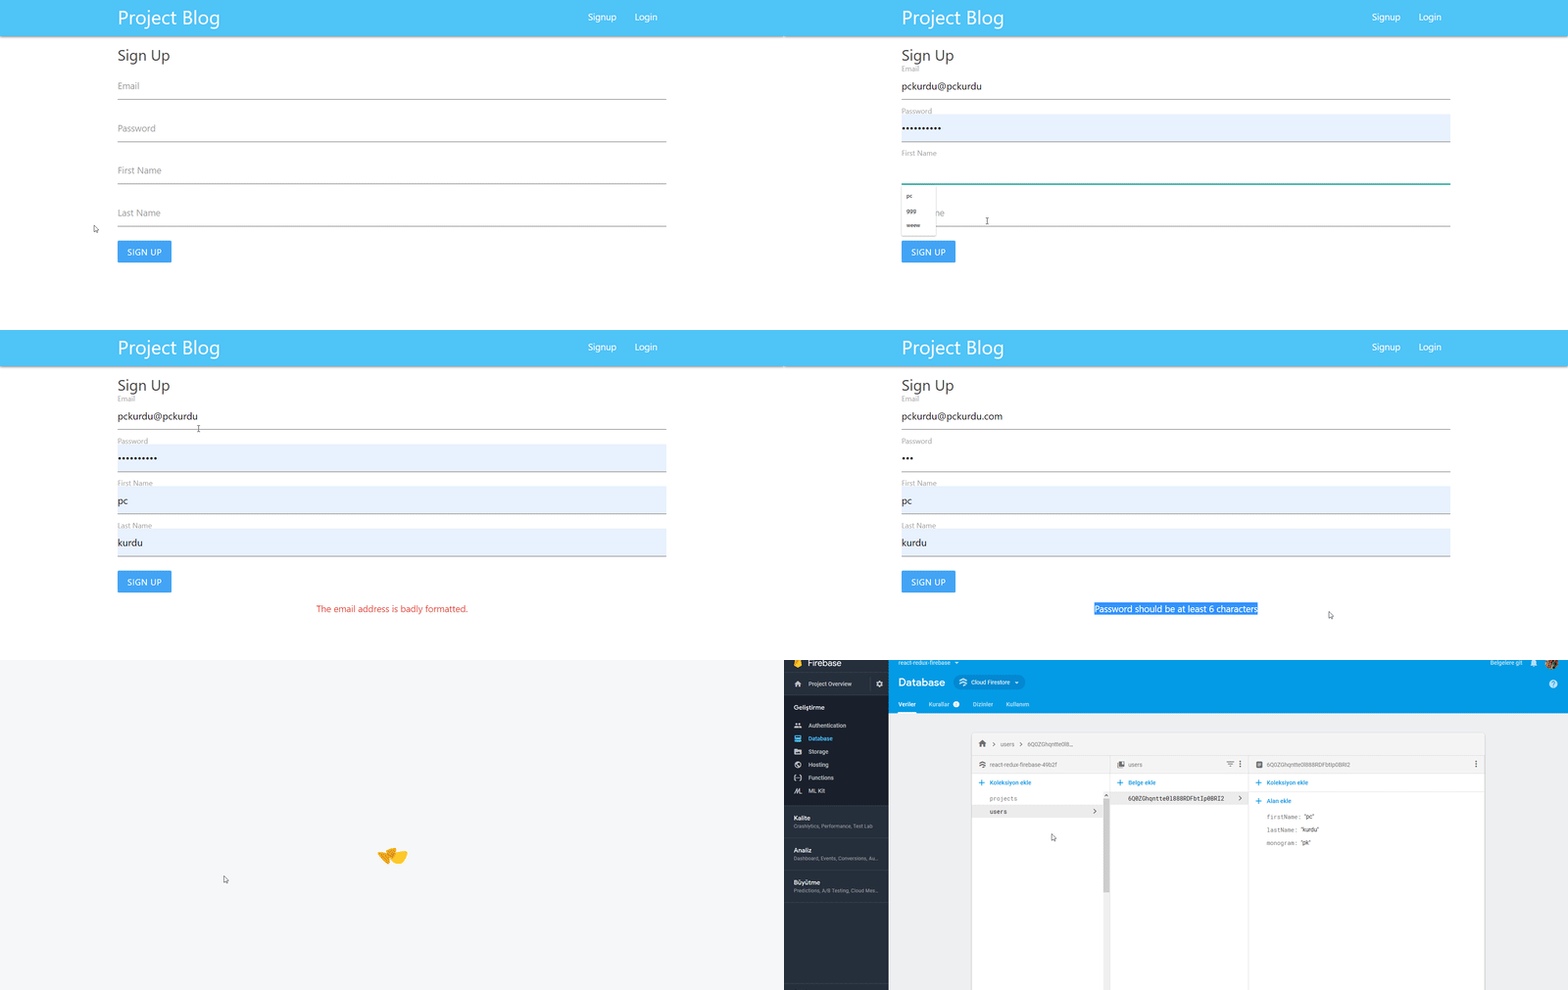
When we define these functions to the required inputs and forms, we print the state to the console as follows.
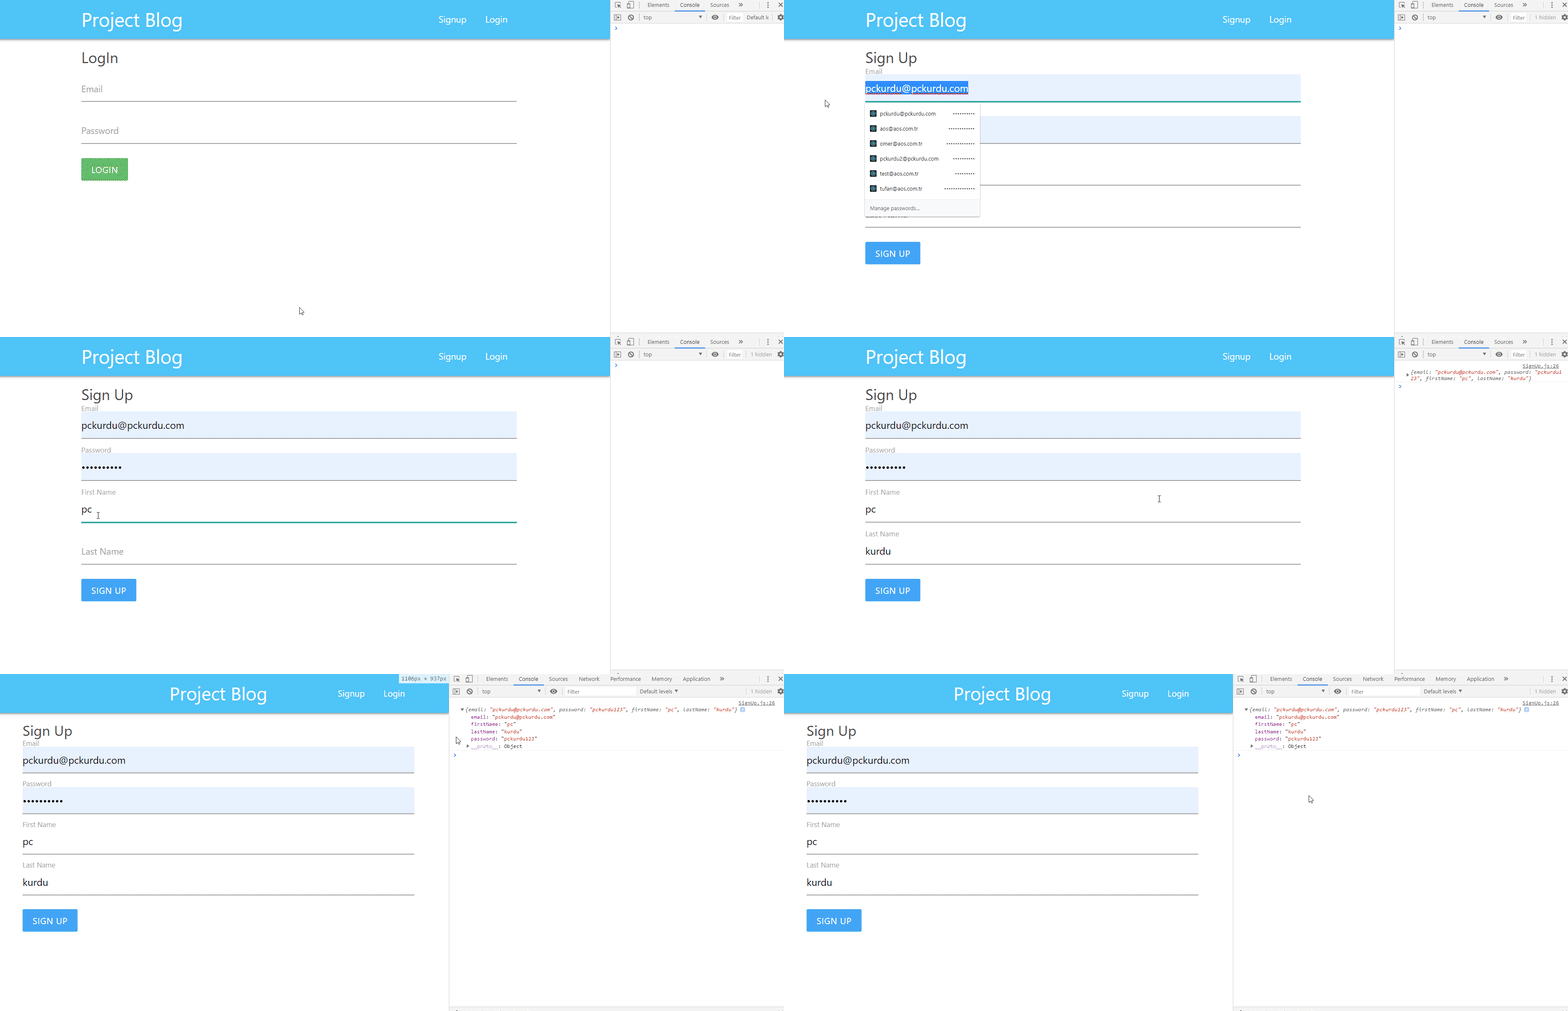
3-Accessing Action In SignUp Component
In this section we will complete the registration process on the application to firebase.
In the authAction we were registering with the signUp function in firebase and saving the users information to the firestore. We can access the user's information within the state information in the signUp component.
Then let's reach action and complete the registration.
In SignUp.js
//for action connection
import {connect} from 'react-redux';
import {SignUp} from '../../store/actions/authActions';

…

//Function to access store
const mapDispatchToProps=(dispatch)=>{
  return {
    signUp:(creds)=>dispatch(signUp(creds))
  }
}
…
export default connect(mapStateToProps,mapDispatchToProps)(SignUp)
We have defined a function to access the action. With this function, we have access to the signUp function in authAction, and we have made this function the component's props.We can now access this function as props.signUp.
//If the form is submitted, it will work.
handleSubmit = (e) => {
    e.preventDefault();
    //console.log(this.state);
    this.props.signUp(this.state);
}
Since the signUp function takes user information as a parameter, we put the state inside it.
Thus, we have completed the registration process of firebase.
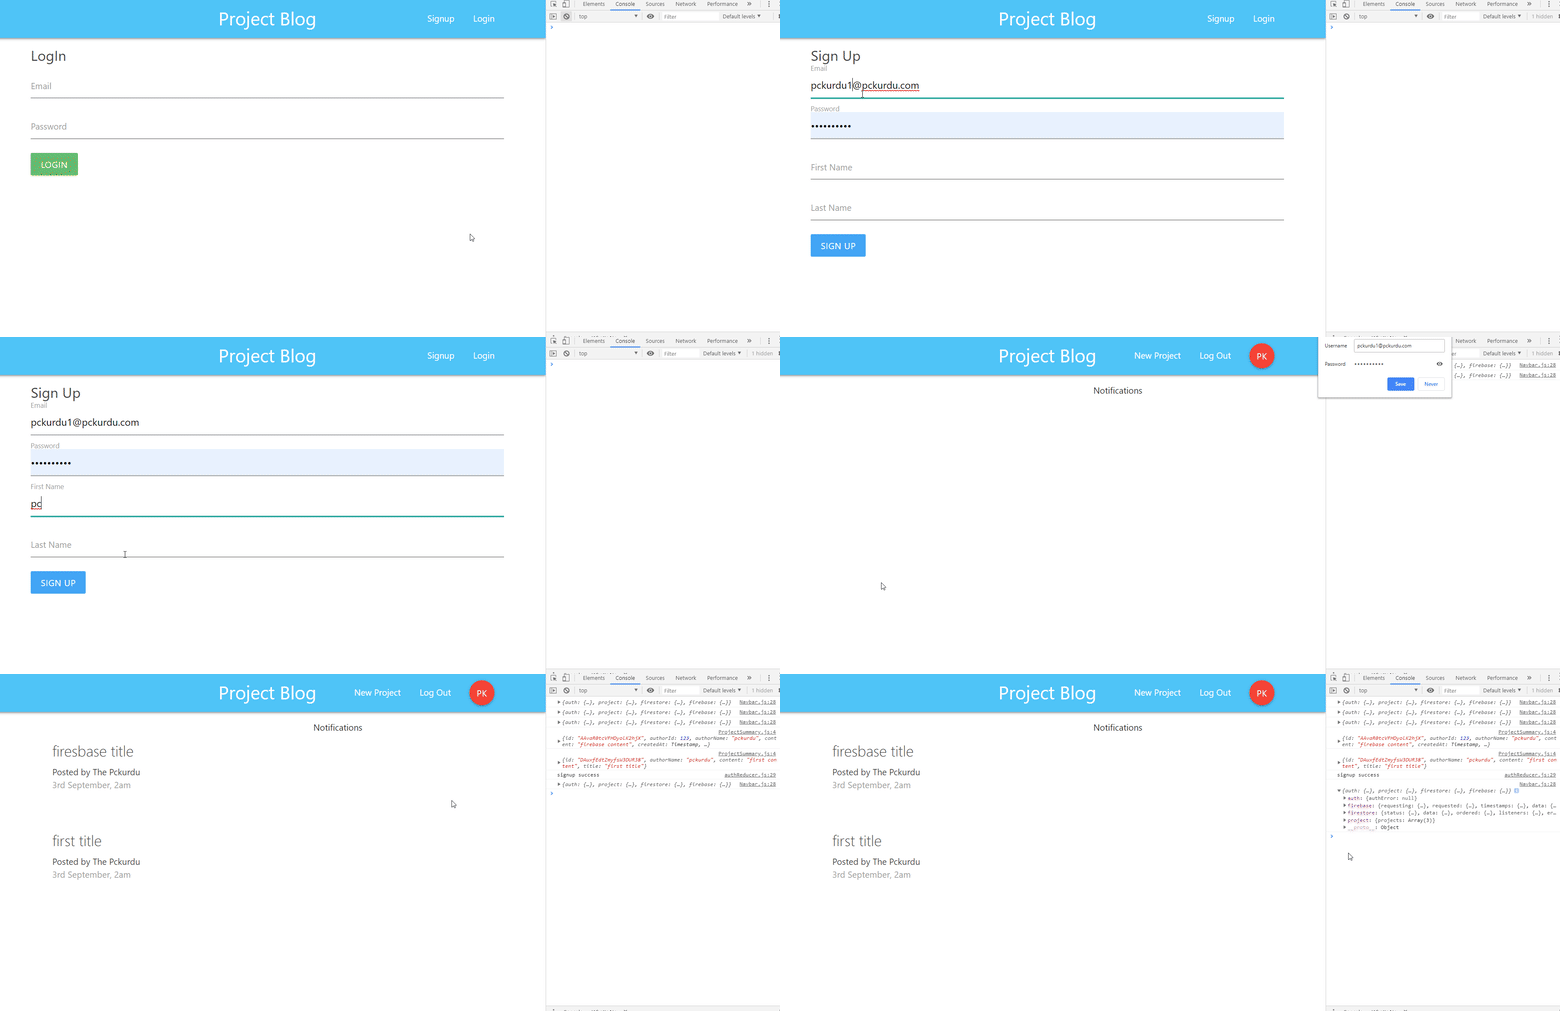
So that the user consists of firebase and consists of users collection.

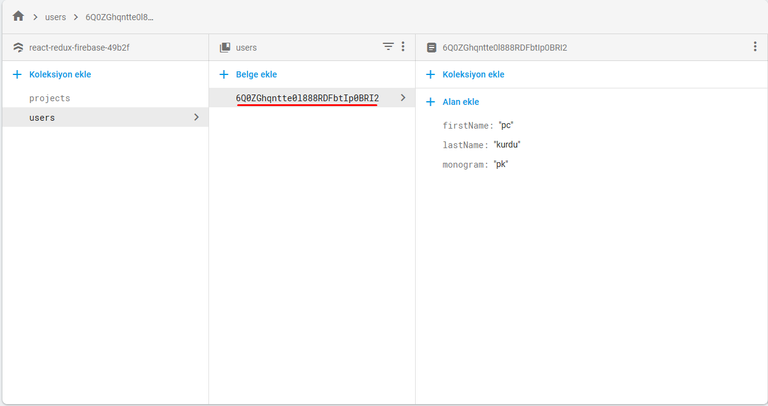
As seen in the images, the user's uid value is equal to the id value of the document in the users collection.

And
4-Capture Error While Registering
In this section, we will perform the process of showing the occurs errors to the user when registering.
We were saving the error in the authError object at the time of an error, and this authError object was in the store. Thus we must access authError in the function that accesses the store within the signUp component.
//Function to access store
const mapStateToProps=(state)=>{
  return {
    //We are accessing the auth object in firebaseReducer.
    auth:state.firebase.auth,
    //We are accessing the authError object.
    authError:state.auth.authError
  }
}
The authError object is contained within the componentin props.
const {auth,authError}=this.props;
console.log(authError);
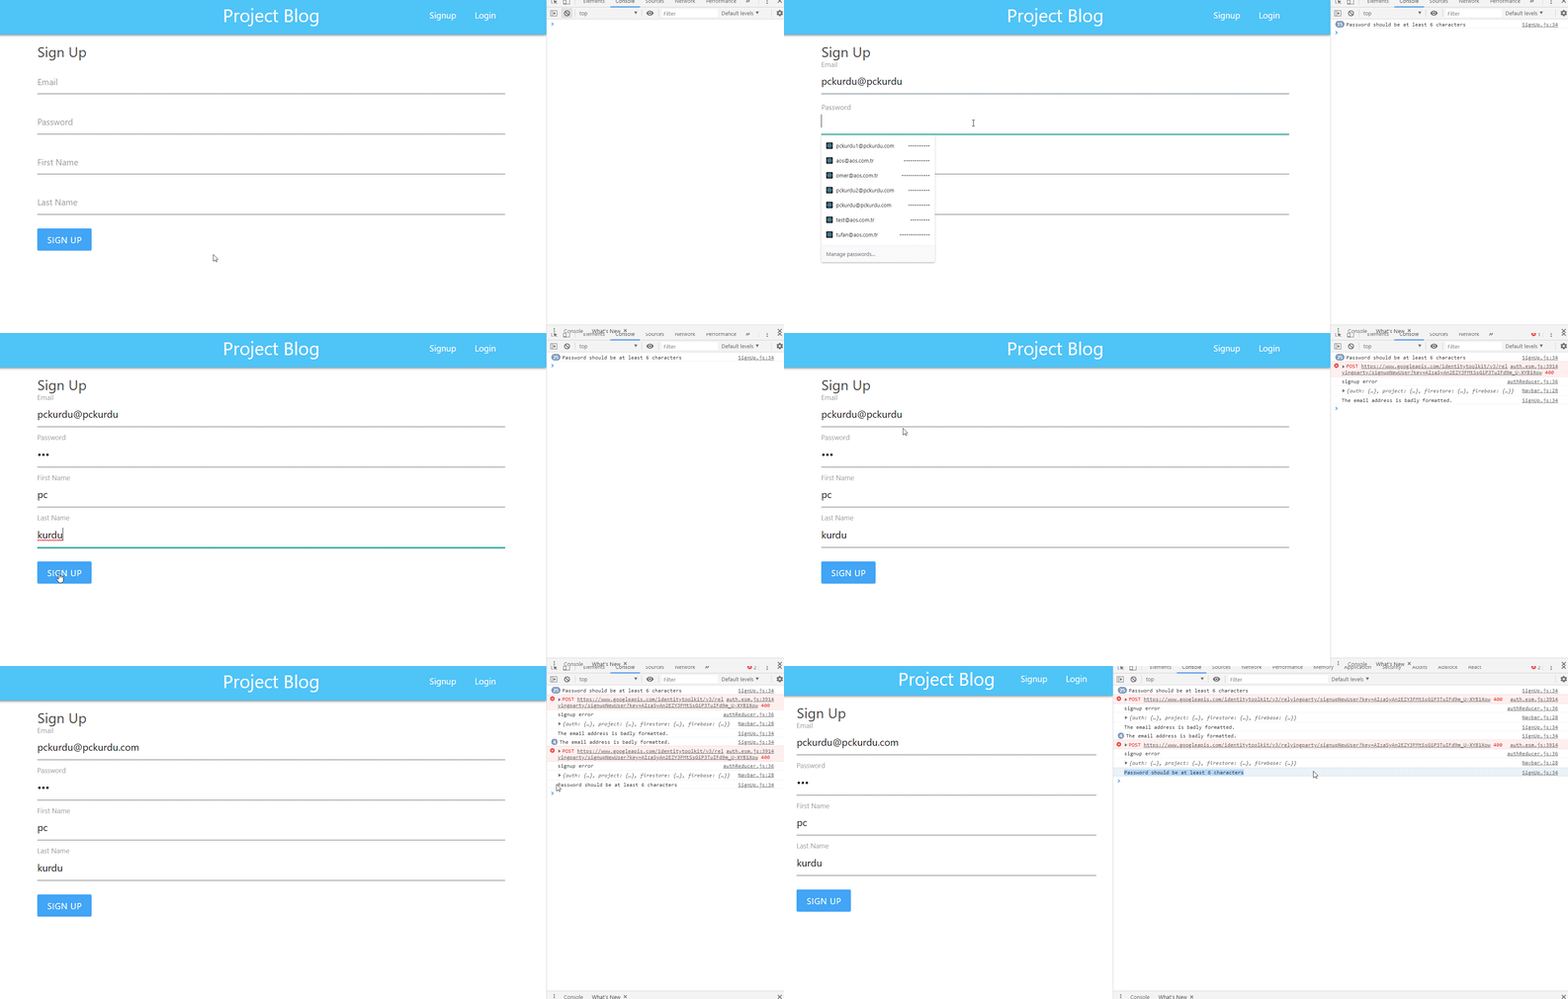
The authError object informs us of this error when an error occurs on the firebase. Then let's show these errors on the screen.
<div className="red-text center">
            {/* If there is data in authError, it means that it has received an error. */}
   {authError ? <p>{authError}</p>: null}
</div>
Now users can see errors.
Curriculum
Part 1 - Part 2 - Part 3 - Part 4 - Part 5 - Part 6 - Part 7 - Part 8 - Part 9 - Part 10
Proof of Work Done
https://github.com/pckurdu/Build-A-Blog-Site-With-React-Redux-Firebase-And-MaterializeCSS-Part-11
Thank you for your contribution @pckurdu.
After reviewing your tutorial we suggest the following points listed below:
Thank you for your work in developing this tutorial.
Looking forward to your upcoming tutorials.
Your contribution has been evaluated according to Utopian policies and guidelines, as well as a predefined set of questions pertaining to the category.
To view those questions and the relevant answers related to your post, click here.
Need help? Chat with us on Discord.
[utopian-moderator]
Thank you for your review, @portugalcoin! Keep up the good work!
Hi @pckurdu!
Your post was upvoted by @steem-ua, new Steem dApp, using UserAuthority for algorithmic post curation!
Your post is eligible for our upvote, thanks to our collaboration with @utopian-io!
Feel free to join our @steem-ua Discord server
Hey, @pckurdu!
Thanks for contributing on Utopian.
We’re already looking forward to your next contribution!
Get higher incentives and support Utopian.io!
Simply set @utopian.pay as a 5% (or higher) payout beneficiary on your contribution post (via SteemPlus or Steeditor).
Want to chat? Join us on Discord https://discord.gg/h52nFrV.
Vote for Utopian Witness!