Repository
Electron GitHub Address
https://github.com/electron/electron
My GitHub Address
This Project GitHub Address
https://github.com/pckurdu/File-Drag-Drop-module-in-Electron-with-Text-Editing-Example
What Will I Learn?
- You will learn how to do file drag and drop operations in electron.
- You will learn what is the addEventListener() function.
- You will learn preventDefault() and stopPropagation() functions.
- You will learn e.dataTransfer.files properties.
- You will learn what are file types and how to use them.
- You will learn how to communicate between main and renderere in electron.
- You will learn how to read and write files in electron.
- You will learn how to use showSaveDialog and what it does.
Requirements
Difficulty
- Intermediate
Tutorial Contents
In this tutorial I will show you how to use file drag and drop operations in your electron applications.
Actually drag and drop operations are used by default in electron applications because chromium technology is used but we can not provide a true drag-and-drop performance without doing a little bit of work on it.
I figured could do more with the this performance and decided to do a text editing application.
With this application I will drag a text file into the electron application by drag and drop.
I will access the contents of this file and make the necessary arrangements.
I will do the saving of the new file when my edits are finished.
Of course, I have to use other properties of the electron to be able to develop this application.
Below is a list of properties I will use:
- Drag and Drop
- ipcRenderer and ipcMain
- File read operations
- showSaveDialog module
Let's start building our example.
First we code main.js file, which is necessary for our electron application to work.
In main.js
const {app,BrowserWindow}=require('electron')
const url=require('url')
const path=require('path')

let win;

function createWindow(){
  win=new BrowserWindow({
    width:900,
    height:700
  })

  win.loadURL(url.format({
    pathname:path.join(__dirname,'index.html'),
    protocol:'file:',
    slashes:true
  }))

  win.openDevTools()
}

app.on('ready',createWindow)
We set the window dimensions and set the index.html page as the renderer process of the application.
Now we can create the index.html page. I will use the bootstrap framework for the design.
<head>
    <meta charset="utf-8" />
    <meta http-equiv="X-UA-Compatible" content="IE=edge">
    <title>Page Title</title>
    <meta name="viewport" content="width=device-width, initial-scale=1">
    <link href="https://stackpath.bootstrapcdn.com/bootstrap/4.1.1/css/bootstrap.min.css" rel="stylesheet"
    integrity="sha384-WskhaSGFgHYWDcbwN70/dfYBj47jz9qbsMId/iRN3ewGhXQFZCSftd1LZCfmhktB" crossorigin="anonymous">


<body>
  <div class="container">
      <div class="jumbotron">
          <p class="alert alert-info" id="drag-file">Drag your file here.</p>
      </div>
        <textarea id="txtarea" style="width:700px;height:350px;" class="form-control"></textarea><br/>
        <button id="btn" class="btn btn-success">Save</button>
  </div>
</body>
I put a p-tag. I run my application for files dragged into this p tag field. Normally I can drag files to the whole application window, but I just want it to be valid for the p tag.
I will access the contents of the dragged files and write them into the textarea where I place the contents of the files to edit them.
I will save the contents that I edit with the save button.
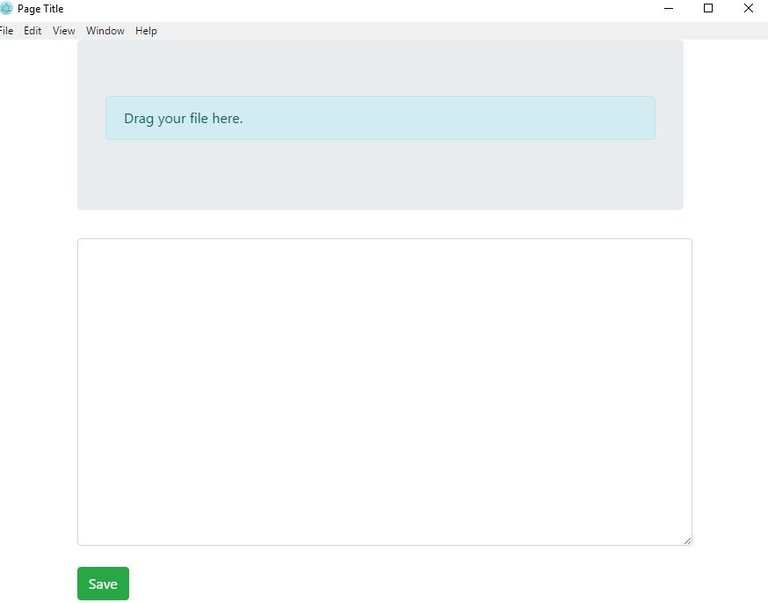
We get an display like the following picture when the application is run.
We can start file dragging now.
I'll use the addEventListener function to catch the drop event.
addEventListener() is used to listen to the element specified on the HTML document and execute a method when the desired event occurs.
The addEventListener function has one callback function, which takes the event object as a parameter.
With this event object, we can access the properties of the file being dragged.
Let's listen to the drag-file id element and write our code when the drop event takes place.
var dragFile= document.getElementById("drag-file");
dragFile.addEventListener('drop', function (e) {
      e.preventDefault();
      e.stopPropagation();

      for (let f of e.dataTransfer.files) {
        console.log('The file(s) you dragged: ', f)
        }
    });
I will use preventDefault() to prevent the tag's default event.
I used the stopPropagation() function to stop the current event when the operation is complete.
With e.DataTransfer.files, we can access the properties of the dragged files. The reason for not using the for loop here is that you can select more than one file.
The console screen looks like this when we drag the file.
So we can access the file's name, path, size, type and modification date.
I need two features here. I'll use the path property to access the file's contents, and I'll use the type property because I want it to be text only.
Let's check whether the file is text with the type attribute and send the path property to the main process using ipcRenderer.
We will access the contents of the file using the path property in main process.
In index.html
const {ipcRenderer}=require('electron')
//addEventListener()
for (let f of e.dataTransfer.files) {
        if(f.type=="text/plain"){
        console.log('The file(s) you dragged: ', f)
        ipcRenderer.send('ondragstart', f.path)
        }

      }
We can access the type properties of image, pdf and word files by dragging them into the application.
- jpeg image file:
image/jpeg - pdf file:
application/pdf - word file:
application/vnd.openxmlformats-officedocument.wordprocessingml.document
Let's also write down the events of the drag over operation.
dragFile.addEventListener('dragover', function (e) {
      e.preventDefault();
      e.stopPropagation();
    });
We can read the contents of the file using this path according to the way we send the path information to the main process, and send the contents to the renderer process to write the textarea.
In main.js
const { ipcMain } = require('electron')
let fs = require('fs')

//electron application codes
ipcMain.on('ondragstart', (event, filePath) => {

    readFile(filePath);

    function readFile(filepath) {
      fs.readFile(filepath, 'utf-8', (err, data) => {

         if(err){
            alert("An error ocurred reading the file :" + err.message)
            return
         }

         // handle the file content
         event.sender.send('fileData', data)
      })
   }

  })
We can now write the incoming information into the textarea.
In index.html
ipcRenderer.on('fileData', (event, data) => {
        $('#txtarea').text(data);
         })
As a result of these operations, the selected text file can be edited in the electron application.
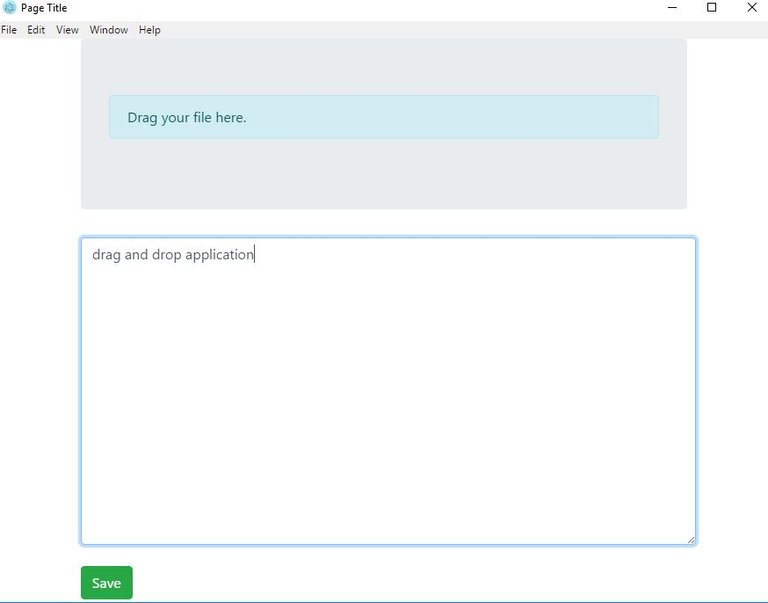
Create a sample.txt file and write drag and drop application in it.
When we drag and drop this file the application will be as follows.
We can now save the edited file.
I need to capture the click event of the save button and I need to download the jQuery files so I can do this using jQuery.
In the file where our code is located, type npm install --save Jquery command and download jQuery files.
After downloading the files we can use jqueryi let $ = require ('jquery') to load it with the command.
In index.html
$('#btn').on('click', () => {
      let txtarea=$('#txtarea').val()
      ipcRenderer.send('clickedbutton', txtarea)

    })
We send the textarea content to the main process so that we will save it using showSaveDialog.
In main.js
const {dialog}=require('electron')
//electron application codes

ipcMain.on('clickedbutton', (event, data) => {

      dialog.showSaveDialog({ filters: [

        { name: 'text', extensions: ['txt'] }

       ]},function (fileName) {

        if(fileName=== undefined) return
        fs.writeFile(fileName, data, function (err) {

        })

      });

  })
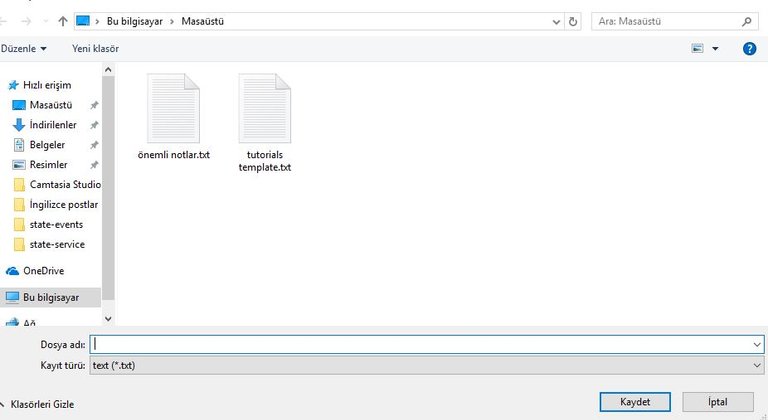
The file saving window will open.
Thus preserving the original file and saving the content we have edited.
Conslusion
With this tutorial, you learned more about the drag and drop properties of elctron applications and I think you understand it better with the text editor application.
Thank you for your interest.
Curriculum
File Synchronous Operation with Electron
What are Standart Dialogs in Electron
Proof of Work Done
https://github.com/pckurdu/File-Drag-Drop-module-in-Electron-with-Text-Editing-Example


Hi @pckurdu,
While reading your tutorial, I just notice something that I didn't found in the code, especially when you discussed about
drag-fileid element. In the code, it hase.preventDefault();but when you elaborate the code functions instead of havingpreventDefault(), you define this onepreventEvent()instead.As seen in this screenshot I took,
And additionally in this part of the tutorial,
It appears that
preventDefault()are found in those codes, but it is confusing since it wasn't defined. Please clarify, if itspreventDefault()orpreventEvent()so readers won't get confused.Thank you.
Thank you for your comment. the function name will be
preventDefault(). I made the necessary corrections.Hey @josephace135
Here's a tip for your valuable feedback! @Utopian-io loves and incentivises informative comments.
Contributing on Utopian
Learn how to contribute on our website.
Want to chat? Join us on Discord https://discord.gg/h52nFrV.
Vote for Utopian Witness!
Thank you for your contribution.
While I liked the content of your contribution, I would still like to extend few advices for your upcoming contributions:
Looking forward to your upcoming tutorials.
Your contribution has been evaluated according to Utopian policies and guidelines, as well as a predefined set of questions pertaining to the category.
To view those questions and the relevant answers related to your post, click here.
Need help? Write a ticket on https://support.utopian.io/.
Chat with us on Discord.
[utopian-moderator]
Thank you for your comment
Hey @pckurdu
Thanks for contributing on Utopian.
We’re already looking forward to your next contribution!
Contributing on Utopian
Learn how to contribute on our website or by watching this tutorial on Youtube.
Want to chat? Join us on Discord https://discord.gg/h52nFrV.
Vote for Utopian Witness!