Good evening everyone, hopefully you are always in a healthy condition and can perform daily activities and routines.
Meet me again, of course still about the discussion of tutorials using Inkscape software, on this occasion I want to share a tutorial to create a business card using Inkscape, as usual before I discuss one step at a tutorial, I will explain the outline of this Inkscape.
INKSCAPE
Inkscape is an open source software that is almost equivalent to corel draw, although not as famous as the corel draw itself. But this software already meets the standard XML, SVG and inkscape CSS can also run on windows operating system, so this graphic device is really friendly with you who have talent graphic designer.
With the ultimate goal of inkscape being presented is to be one of the current cutting-edge graphics tools. Okay friends, that's a glimpse of information about this inkscape, now we go into the tutorial season.
TUTORIAL
Create Business Cards Using Inkscape Software
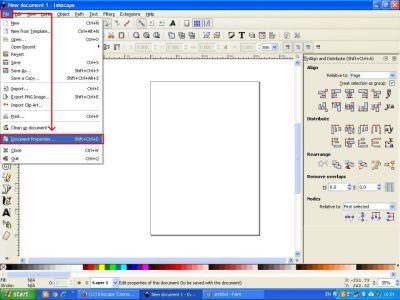
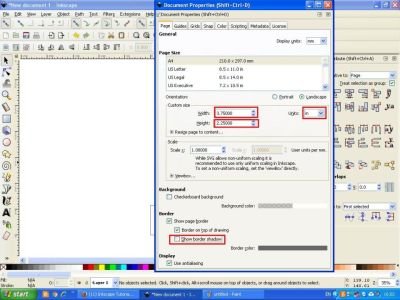
In the first step you should have Inkscape software, if you do not have it, please download on google.com, then open the Inkscape software and select the file on the menu bar, then select document properties, then set the size on width 375 and height 2.25 and make sure already select the in unit on the arrow next to the posts units. Then click the align and distributed icon on the menu bar then select the page on the arrow relative to
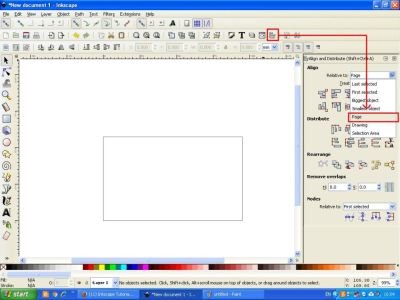
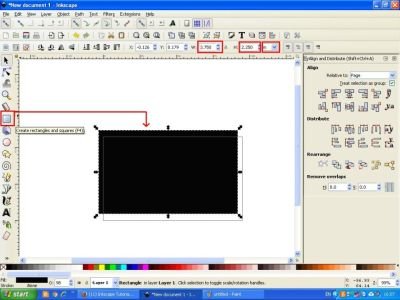
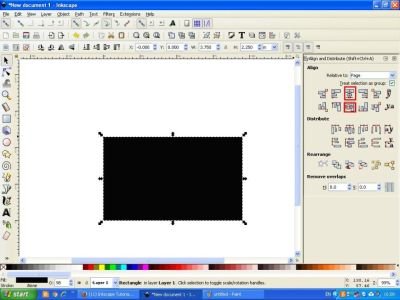
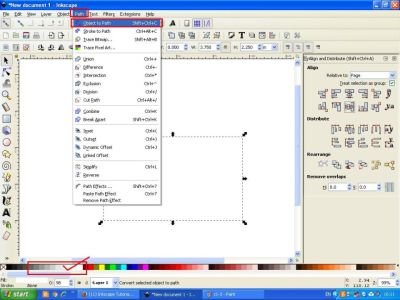
The second step begins to create a rectangular object by clicking the rectangles and squares icon on the side bar, then set the size on the width and height columns in the menu bar according to the size of the main layer. Next, set the position of the object by clicking the center icon on vertical axis and horizontal axis icon center on align and distributed object display screen. Then activate the object then click the path on the menu bar and select the object to path.
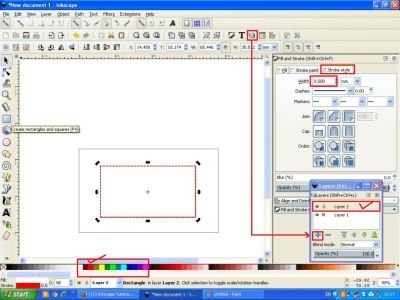
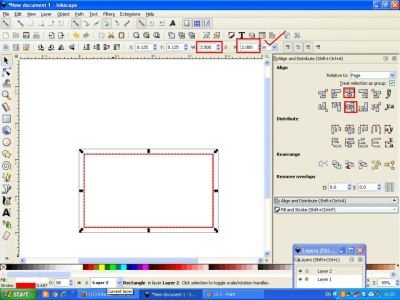
The third step, click the icon view layers in the menu bar, then click the + sign on the command screen to add one more layer, this layer can be given any name, here I still use layer2 name, then create object for layer two by click rectangles on the side bar as before, then set the size of the stroke style with the size of 0.5 mm, then set also the size on the menu bar for width 3.5 and for height 2.0 in. if it is finished, then click the padlock icon on the screen command layer so that object number two is not changed position. Then give a different color by clicking the object and hold the SHIFT key on the keyboard then select one of the colors you like on the task bar, this layer is useful as a reference for the settings of writing and other objects that we will put on the business card we are do it.
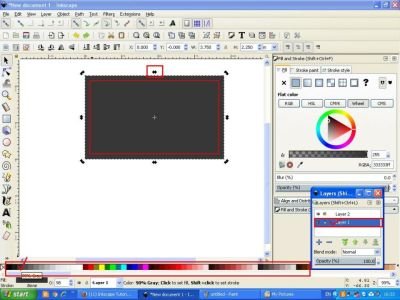
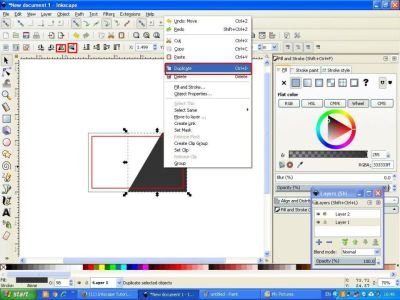
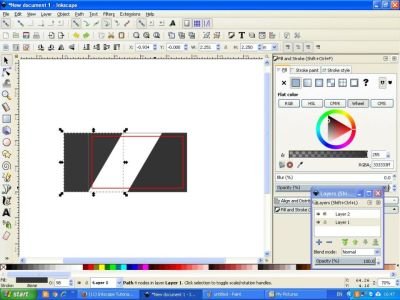
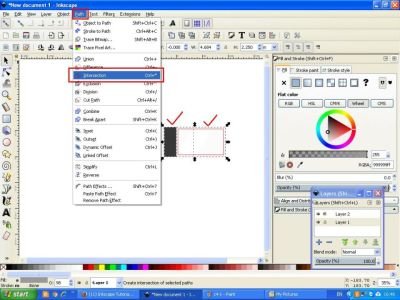
For the fourth step, right-click the first object and select duplicate, or by clicking the main object press CTRL + D on the keyboard, then give one color to the task bar, here I use 90% gray color, then click the arrow on the object then give the style, here I just tilt the object to the right side, then move the object slightly laterally, then click the main object again which is still white and duplicate once again, then activate also the grayish object, then click the path on the menu bar and spiral intersection, then the object will be truncated automatically.
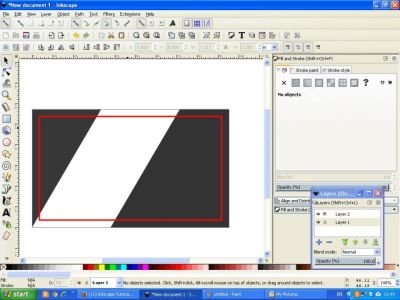
Then right click on the clipped object and then reverse its position by clicking the flip icon selected object vertically and horizontally on the menu bar, then move to the left side, then make duplicate the main object then activate the second object, click the path on the menu bar as before and select intersection, then the display will change with the business card style.
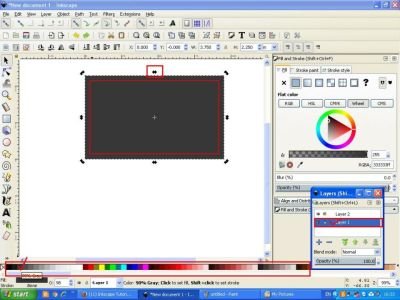
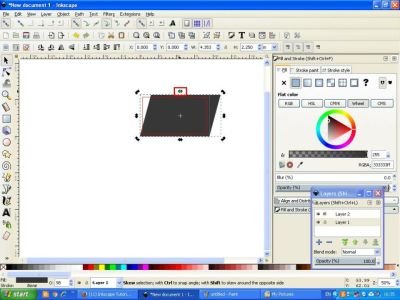
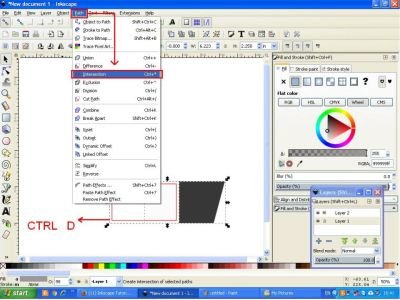
result
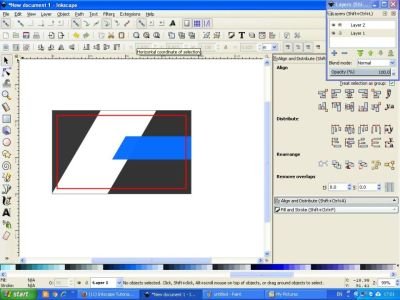
The fifth step, click create rectangels on the side bar, and make a rectangular object with a small size, or as desired, then give a different color, here I use royal blue color then click the path and select object to path. Then set the position by clicking the align right side icon on the screen align and distributed object command. Then activate the grayish object that is in the right position then duplicate then change the position by clicking the flip selected object then activate the blue rectangular object then click the path in the menu bar and select the difference.
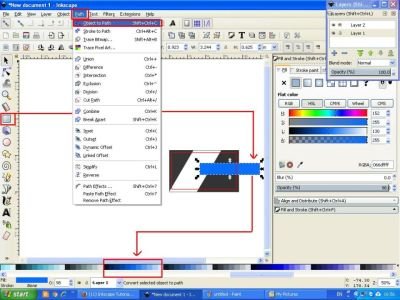
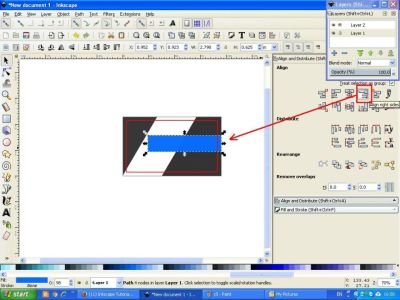
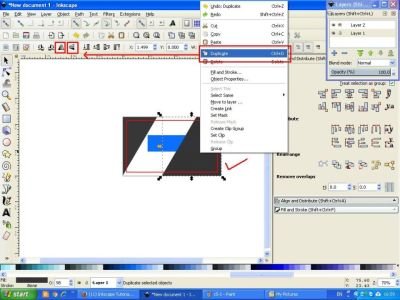
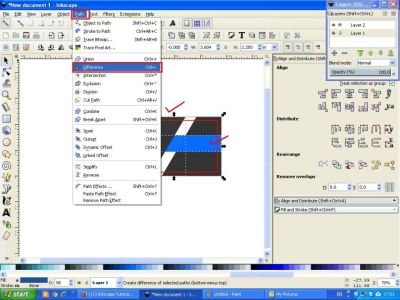
result
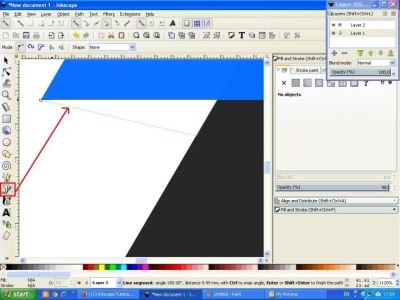
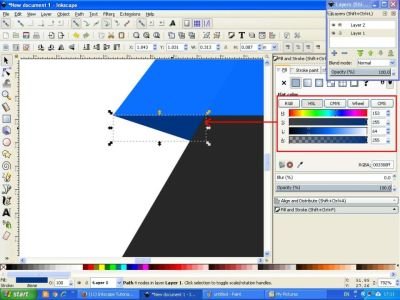
The next step is to create a shadow on the blue rectangular object, by clicking the Bezier draw icon on the side bar then create a line following the object, then select one of the corresponding colors and darker than the royal blue colored object.
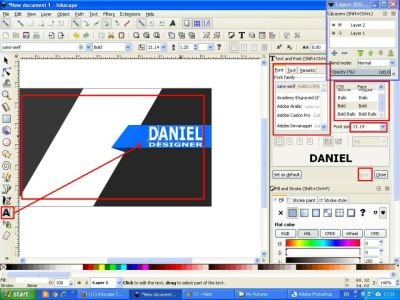
For the next step is to write the name, position, phone number, email address, and company website on the business card we created earlier, by clicking the icon create and edit the text object on the side bar, then set the size and font style on the screen text and font command on the right, arrange all the posts as you wish, or your customer if you work as a business card designer.
The next step is settings and edits, here you can play your imagination, want to make what kind of business card, insert additional objects by drag and drop and then adjust the size and put in the desired position. Then to remove the object here is colored red, click layer 2 then click eye icon next to padlock icon, then automatically red line will disappear by itself. When finished click the icon selected and transform the object on the side bar, then block the object thoroughly then click the icon group on the menu bar.
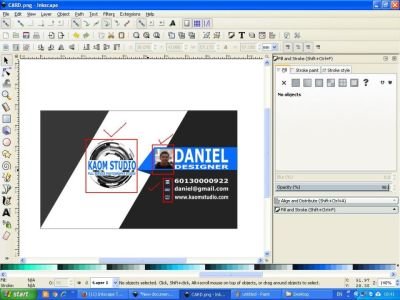
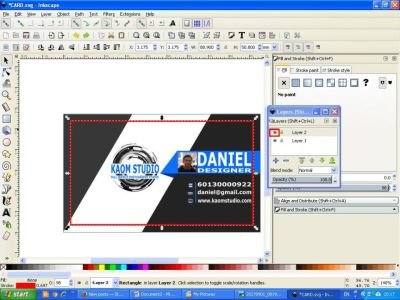
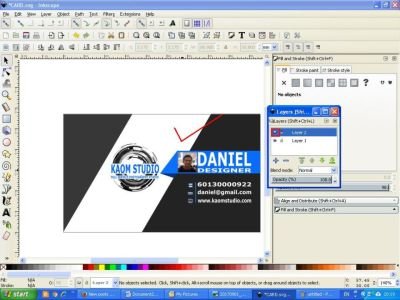
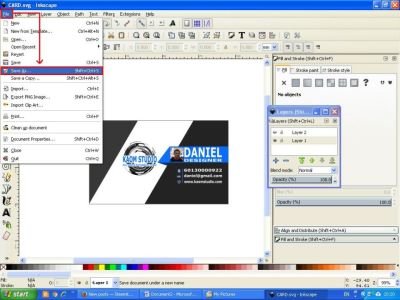
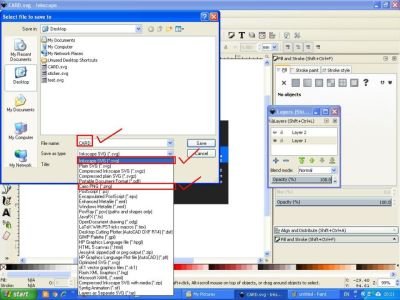
The last step is to save the file, to save the file in Inkscape software as usual, click the file on the menu bar then choose Save As, then give the file name as you wish, and save your file in two formats, first save it with SVG format, so that it can be edited again if needed additionally, and save it also in PNG format to be uploaded wherever you want, and easily readable by any device. Well, that's all the tutorial that I can share on this occasion, hopefully useful for all of us.Best regards @saini88
And below is the result of my tutorial on this occasion.

Posted on Utopian.io - Rewarding Open Source Contributors

Congratulations @saini88! You have completed some achievement on Steemit and have been rewarded with new badge(s) :
Click on any badge to view your own Board of Honor on SteemitBoard.
For more information about SteemitBoard, click here
If you no longer want to receive notifications, reply to this comment with the word
STOPThank you for the contribution. It has been approved.
You can contact us on Discord.
[utopian-moderator]
Thank you very much @arie.steem #utopian-moderator!
Hey @saini88 I am @utopian-io. I have just upvoted you!
Achievements
Suggestions
Get Noticed!
Community-Driven Witness!
I am the first and only Steem Community-Driven Witness. Participate on Discord. Lets GROW TOGETHER!
Up-vote this comment to grow my power and help Open Source contributions like this one. Want to chat? Join me on Discord https://discord.gg/Pc8HG9x
If you're not a professional designer it's quite hard to make cool business cards - better to offer here https://www.bizcallingcards.com/samples/food-drink-catering-restaurant-cafe/