Contribution Repository
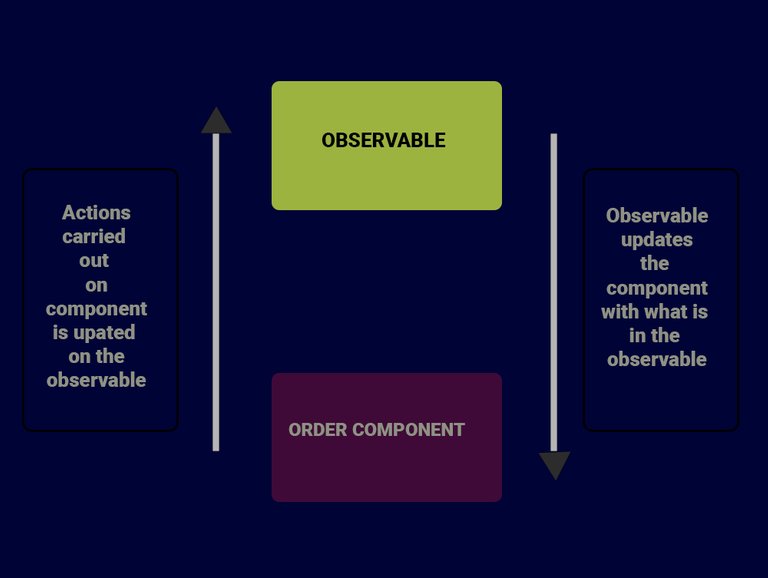
Previously on the series, we worked with observables which we used in pushing food items into cart and updating the counter icon on the Navbar component.
In this series, we are going to send the cart items clicked by the user into the order component and delete the cart items from the cart.
Rating
This tutorial is rated Intermediate.
What Will I learn?
- We are going to learn how to use a router link to add a new view/ component and send data to a new view.
- Using the data sent to the view to populate a feed by iteration.
- Removing Items from the observable and broadcasting the event.
Requirement.
- Typescript version 2.4.2
- Node version version 8.9.4
- Npm version 5.6.0
- Bootstrap 4.0
- Visual Studio Code IDE
- Voltront front client Repository
Introduction
Illustration for the tutorial

Welcome back to our new series on the food App, yeah we have been doing well, below is the last state or structure o our application.
- Voltron
- node_modules/
- src/
- app
- app-navbar/
- item/
- items-feed/
- signup/
- login/
- app-routing.module
- app.component.html
- app.component.sass
- app.component.ts
- app.module.ts
- auth.service.ts
- item.service
- cache.service
- cart.service
- asset/
- environments/
- item.ts
- user.ts
- auth.ts
- app
- .angular-cli.json
- .editorconfig
+.....
Recall, in the last series we added the code below which is a link with a routerLink
<a routerLink="/items/order"><i class="fa fa-cart-arrow-down"><span class="badge badge-light">{{ cartItemsCount }}</span></i></a>
The link on the navbar display the number of items in the cart while the routerlink when clicked adds a new link to the address bar. On this link, when linked we want to visit localhost:4200/items/order so lets go ahead and create a view for that address.
Add the path to the app.routing.module.ts file, find this file at voltron/src/app folder open and add the path to the routes array
{ path: 'items/order', component: OrderComponent},

The above simply means, when we visit the path localhost:4200/items/orders we want to render the order component. Remember, we have no order component so lets generate this component.
ng generate component order
Lets add some markup and styling for the order component,just like the item-feed component, the order component is a container that posses another component call the order-item component. Lets generate the child component for the order before adding the markup
ng g c order-item
Open the order.component.html and add the markup below
<div class="order__container">
    <section class="container">
      <div class="row align-items-center justify-content-center">
        <section class="col-md-6 offset-md-6">
          <h2 class="mb-3">Order</h2>
          <app-order-item></app-order-item>
        </section>
      </div>
    </section>
  </div>
If you noticed, in the markup we have the app-order-item tag which is a child of the order component. Now that we have our structure, we need to get the total numbers of items in the cart into the parent component "order"
Open the order.component .ts, import the cart service an the Item interface, inject the service into the constructor method of the component.
import { CartService } from '../cart.service';
import {Item} from '../../item';
Okay, lets make the cartItems in the service available to this component. To do this we are going to subscribe for the cartItems and set its value to an empty carItems in the component.
cartItems:Item[]

 constructor(private cartService: CartService) {
    this.getOrderItems();
  }

  getOrderItems() {
    this.cartItems =  this.cartService.getCartItem()
  }
Notice we added the getOrderItems method to the constructor, it is called whenever the component is initiated.
We have the cartItems, lets display it using the *ngFor which we have used in the previous series to iterate and show all the items in the cart.
Open order.component.html and update it with the directive to run the iteration.
<div class="order__container">
    <section class="container">
      <div class="row align-items-center justify-content-center">
        <section class="col-md-6 offset-md-6">
          <h2 class="mb-3">Order</h2>
          <app-order-item  *ngFor="let cartItem of cartItems" ></app-order-item>
        </section>
      </div>
    </section>
  </div>
Passing the item object from the order component into the order item component.
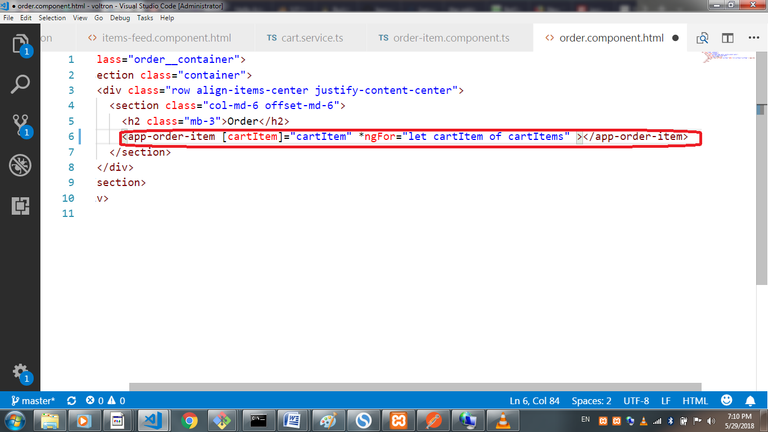
In this case, parent to child interaction is necessary for making the item object in the iteration available to order-item component. Lets add a binding directive which binds the cartItem from the iteration to @Input cartItem in the order-item component.
[cartItem]="cartItem"
To make this binding complete, we to import the Input Module in the order-item.component.ts and add

@Input() cartItem: any;
The above show that we are expecting an Input of cartItem which we bounded to the component.
The application is about to come alive, we need to use interpolation to show cartItems properties on the child component which is the order item component. In interpolation, we display a property from a component in the markup using double curly brace.
Lets update and create the markup for this component
<div class="card">
<div class="card-body" *ngIf="cartItem">
<div class="media">
<div class="media-body">
<section class="row">
<div class="col-xs-4 col-sm-4 col-md-4">
<a> <img class="mr-3 mb-3 img-fluid rounded img-responsive " [src]="cartItem.photo" alt="Generic placeholder image"></a>
</div>
<div class="col-xs-7 col-sm-7 col-md-7">
<h5 class="mt-0 clearfix">
{{ cartItem.title }}
<button class="float-right btn btn-danger text-info" (click)="removeItemFromCart(cartItem)">
<i class="fa fa-minus"></i>
</button>
<button class="float-right btn btn-success text-info">
<i class="fa fa-plus "></i>
</button>
</h5>
<small class="text-success">{{ cartItem.price }}</small>
</div>
</section>
</div>
</div>
</div>
</div>
You might be wondering what or how cartItems.title, cartItems.price and so on came about. Let console log the information from the cartItems in the order.component.ts We should get the result below showing an array of objects clicked into the cart, take note of each properties of the items.

Removing items from the cartItems
In the previous series, we were able to add into the cartItem, in the same process we want to dispatch an action to remove items from the cart.
We need to import the Output and the EventEmitter to bubble out the event and the item object.
@Output() onRemoveItemFromCart = new EventEmitter<object>();
onRemoveItemFromCart is set to a new EventEmitter, we need to create a method to return and bubble out the event. This method would accept the object(cartItem).

removeItemFromCart(cartItem) {
   return this.onRemoveItemFromCart.emit(cartItem);
}
On the order-item.component.html, we need to add a click method to the button that removes items from the cartItem
(click)="removeItemFromCart(cartItem)"
Let get to removing the items from the cart, we need to add this functionality to the cart.service.ts.
Open up the cart.service.ts and add the method to remove from the observable
announceCartItemRemoval (item) {
    this.cartItems = this.cartItems.filter(currentItem => currentItem !== item);

    return this.cartAnnouncerSource.next(this.cartItems);
  }
Here we are using the filter function to return every item except the one clicked in the observable, lastly, we return the cart items from the observable.
Next up, in the order.component.ts, once the button is clicked, we run a method to trigger the cart service to remove the cartItem.
 onRemoveItemFromCart(cartItem: Item) {
    this.cartService.announceCartItemRemoval(cartItem);
    this.getOrderItems()
  }
The onRemoveItemFromCart() method accept the cartItem and calls the method on the cartService that removes the cartItem from the cart.
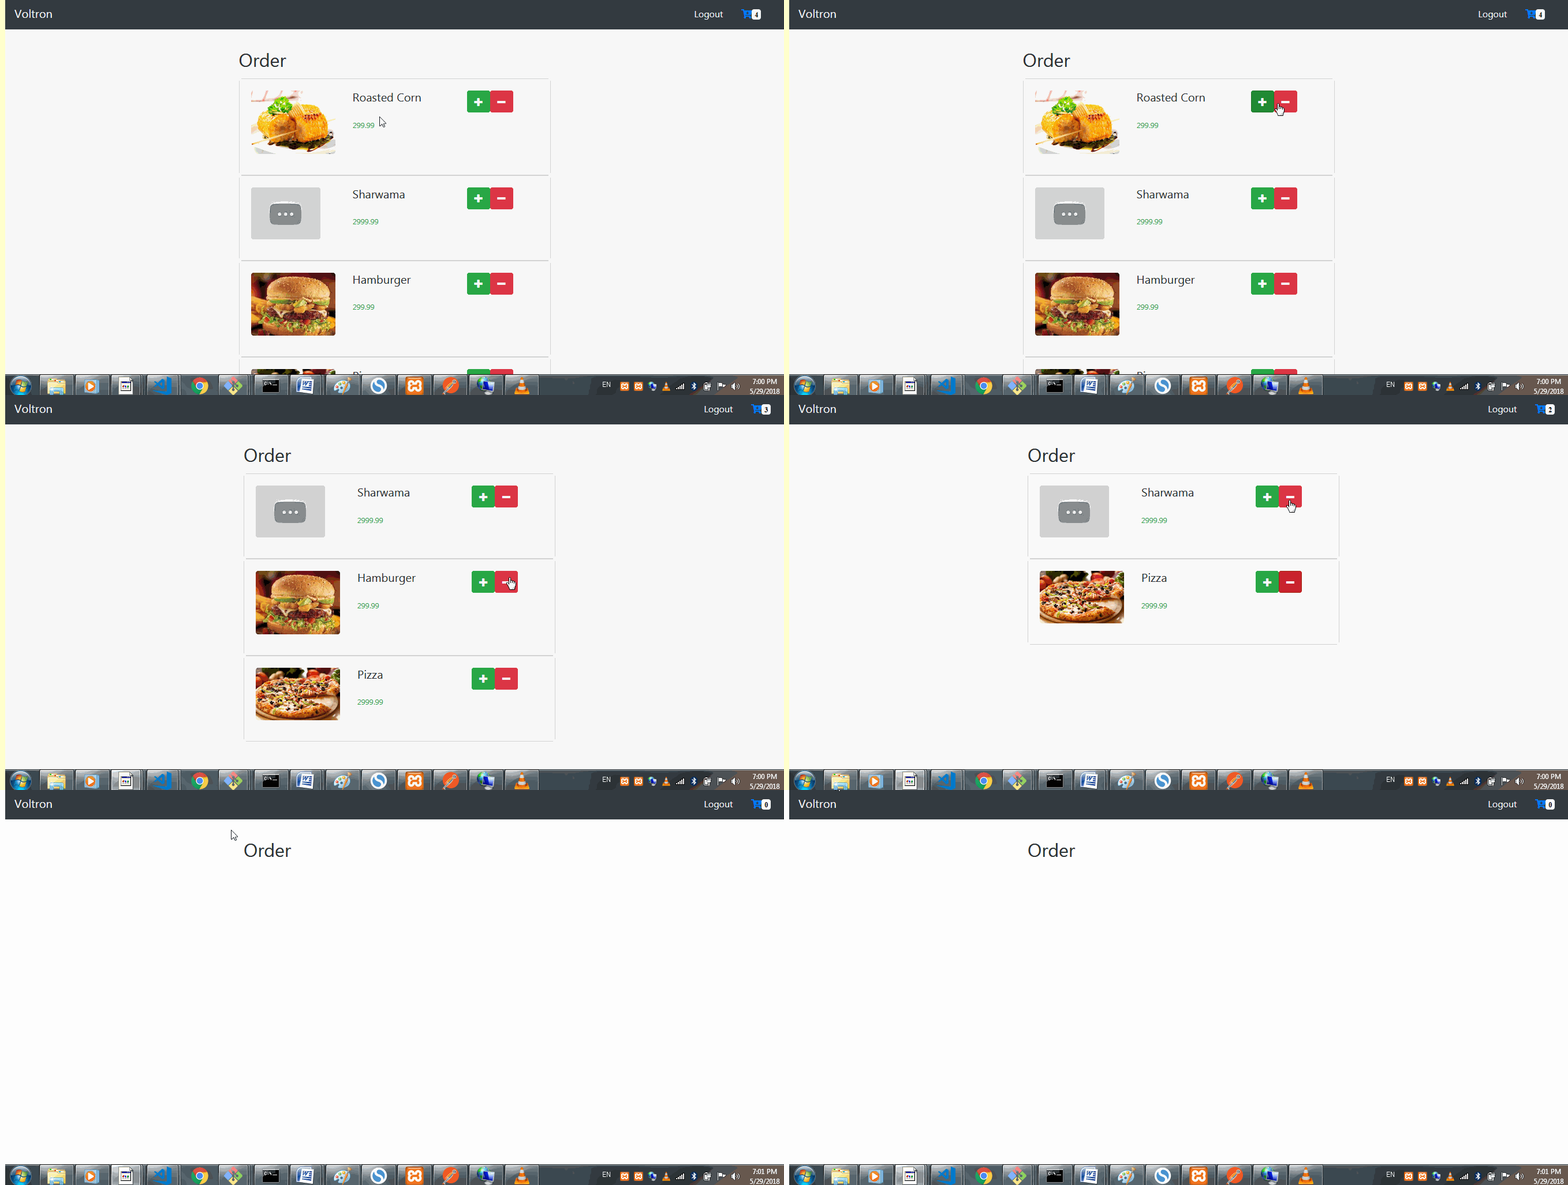
Final effect

Conclusion
In this series, we where able to remove items from the observable and also learn a little on routing and event emission. In the next series, we would be harnessing the power of the reduce function to increment the quantity of any item clicked in the cart/ order. Remember to check out the Repo for this project
Curriculum
- Building a food order system with MEAN Stack (MongoDB, Express, AngularJs and NodeJs). pt1.
- Building a food order system with MEAN Stack (MongoDB, Express, AngularJs and NodeJs). pt2.
- Building a food order system with MEAN Stack (MongoDB, Express, AngularJs and NodeJs). pt3.
- Pt4 Building a food order system with MEAN Stack (MongoDB, Express, AngularJs and NodeJs).
- Building the frontend Food order system with Angularjs. Part 5
- Building the frontend Food order system with Angularjs. Part 6
- Building the frontend Food order system with Angularjs. Part7
- Building the frontend Food order system with Angularjs (building angular authentication).Part8
+Building the frontend Food order system with Angularjs Part9
Resources
- Angular Docs
- Reactivex Observables
- Bootstrap 4 documentation
- Remember to check out the Repo for this project
- Official documentation on form validation
Thanks for the contribution! I think we are going to have a restaurant at the end of this tutorial if this quality keeps up! :D
Your contribution has been evaluated according to Utopian policies and guidelines, as well as a predefined set of questions pertaining to the category.
To view those questions and the relevant answers related to your post, click here.
Need help? Write a ticket on https://support.utopian.io/.
Chat with us on Discord.
[utopian-moderator]
Thats really funny, we can have it on the block chain.
Hey @sirfreeman
Thanks for contributing on Utopian.
We’re already looking forward to your next contribution!
Contributing on Utopian
Learn how to contribute on our website or by watching this tutorial on Youtube.
Want to chat? Join us on Discord https://discord.gg/h52nFrV.
Vote for Utopian Witness!