Hey!
Like I've said the other day, I would like to talk here about my travels and my adventures...
However, before to start traveling, there is always the time of preparation.
If going on an adventure without planning anything is an experience in itself, it is not forbidden sometimes to afford a little bit of comfort.
So in order to set my Road Trip, I decided to buy with my girlfriend a small van (very small in real life) and convert it in a small camping car. My choice was finally focused on a Peugeot Expert of 2002 ...
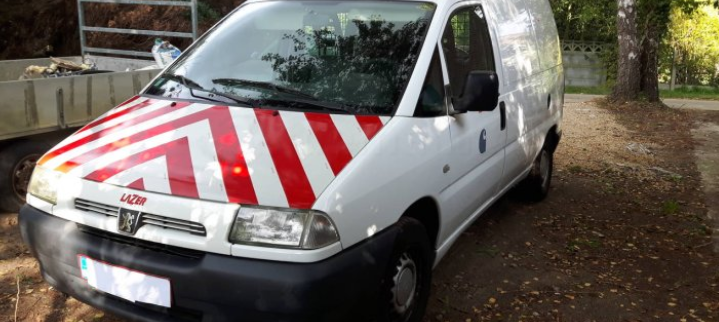
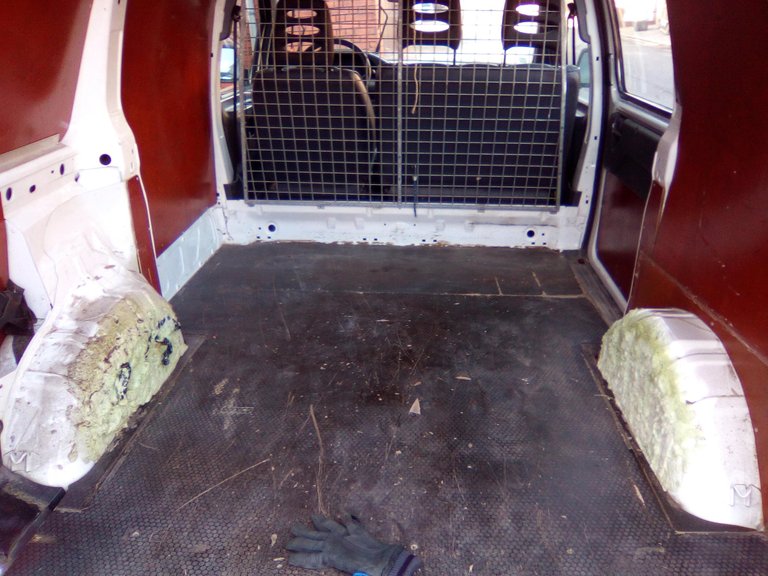
I will discover later that it was not the better purchase of the universe (timing belt to redo, brake disc to change too, a hose that will break during a trip to Hungary, ...).
But anyway, we love this minivan and despite small incidents, our brave little "Kroukrou" holds up and we still are very attached to our car.
From the beginning to te end, It's quite a project, because I have never tinkered, or even held in hand even a jigsaw ...
But nevermind, I've armed myself with courage, willingness, 2-3 good friends and I've embarked on this adventure.
So here we are going to quickly fly over the different steps of the development.
1) The insulation:
Cause I'm a skittish person, I learned a lot about optimal isolation via websites such as traffic-amenage.com or ooreka.
I have readed everything and it's opposite, ranging from "here is the perfect insulation! To "there is no point trying to thermally isolate a pile of scrap" ...
So, after spending LOTS of time reading, I decided to opt for:
- Cork 2mm on the metal walls
- wood wool 60mm in the "hollow" of the sheet + vapour barrier
- layer of aluminum insulation type Isobul
- Finally, put back the plywood, +/- 4 mm
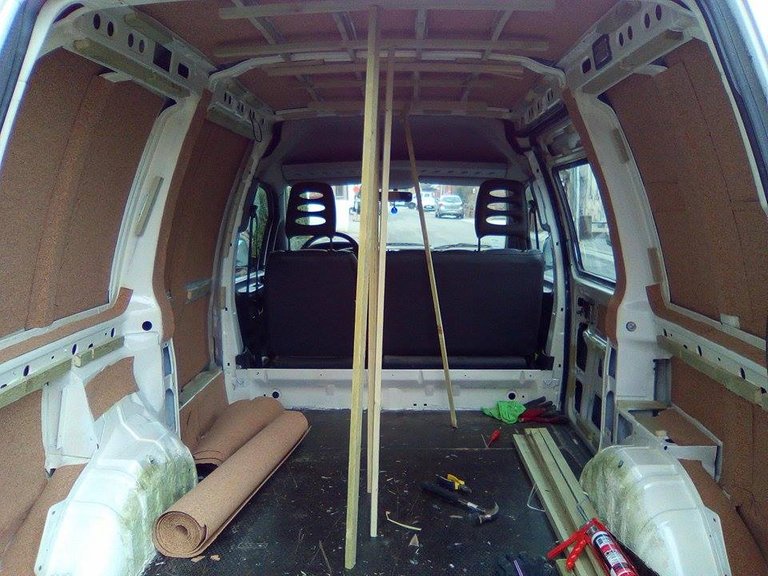

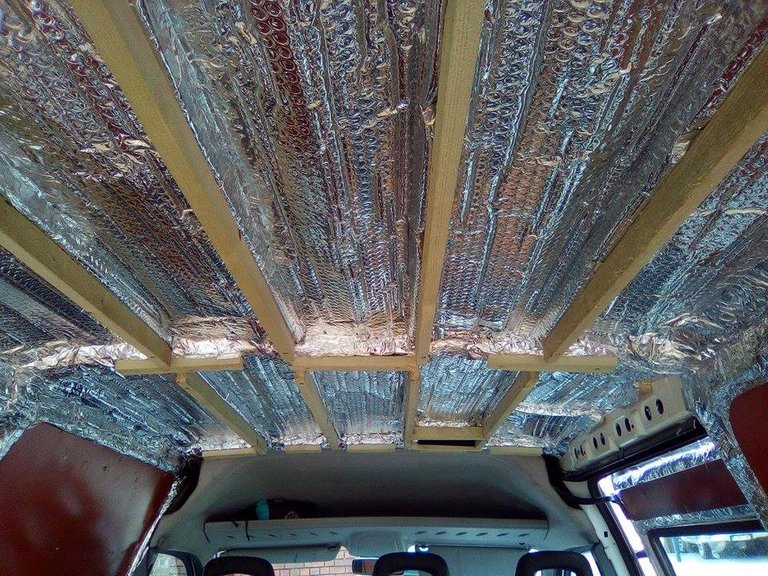
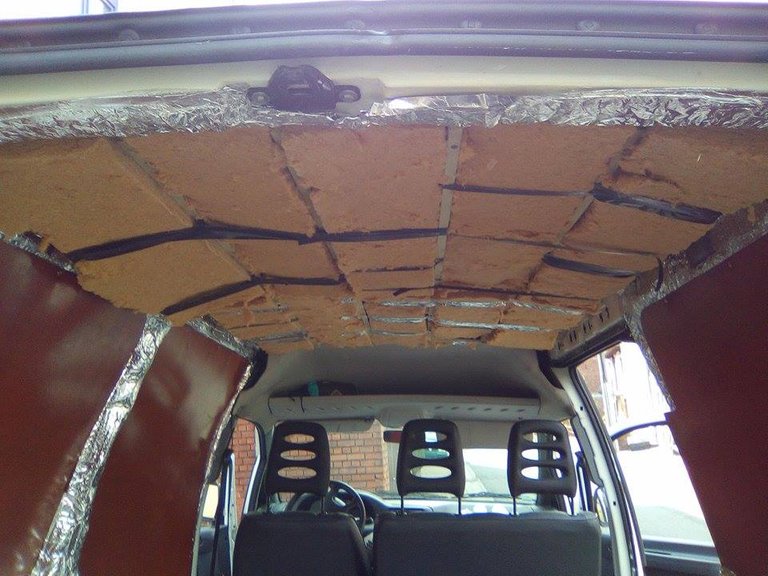

To comment on this choice, in the end, many people will tell me (and are right) that the cork was a bit useless in this case, since there is already the layer of isobulle to avoid condensation and the vapour barrier after wood wool ...
Besides, the cork is also really long and painful to put, so I think it is better to do without it if possible.
If today I should advise or re-choose, I would first put Armaflex (product with very good reputation) on the bulk of walls, then wood wool and brake- steam, with finally beautiful layers of plywood (or even paneling).
2) Aeration:
Here I bought a small solar fan.
It is a round model, very flat (practical to be able to pass under the barrier 2m), basicly planned for boats, but perfect here to put on the roof of our small van.
With a friend, we drill the top sheet ... My god that's a freaky moment!
But everything goes well ... We do the framing, a blow of mastic, and then here!
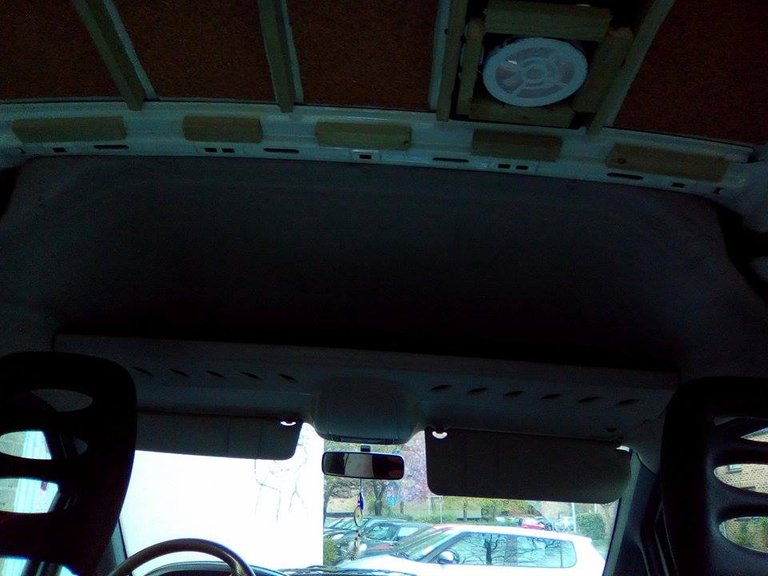
The small fan is installed, and he will provide us fresh air during the night.
Normally, it is advised to install another ventilation at the bottom. But here, I will use the part that is used to evacuate overpressures when closing the doors.
3) The interior design:
Place to the most fun part !!!
Because of the limited space we have, we will use a folding bed for sleeping.
So I found a slatted bed base, I made a support (the bottom will also serve as storage) and fixed at the bottom and with 2-3 strings.
The goal is that everything can be removed if needed a day soon.

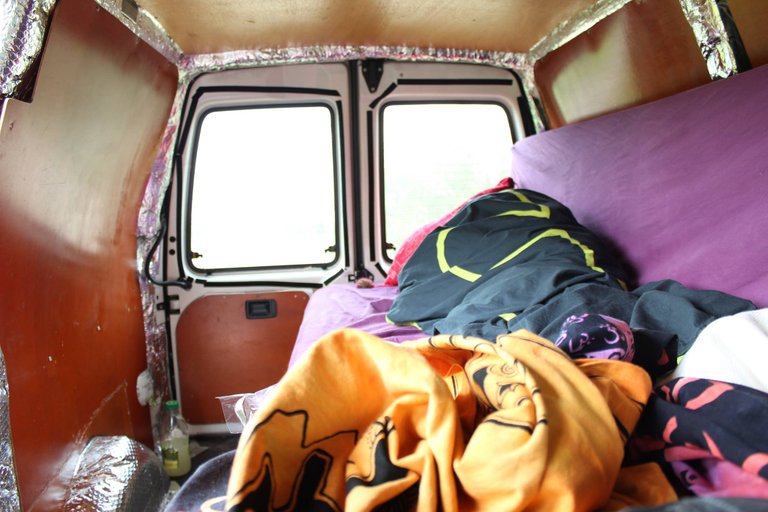
The weeks after, I will install a small piece of furniture that I built myself, with a table that will be fixed on it. We add some sheets, a can of water, 2-3 gas stove, ...
It's time to start for the south of France!
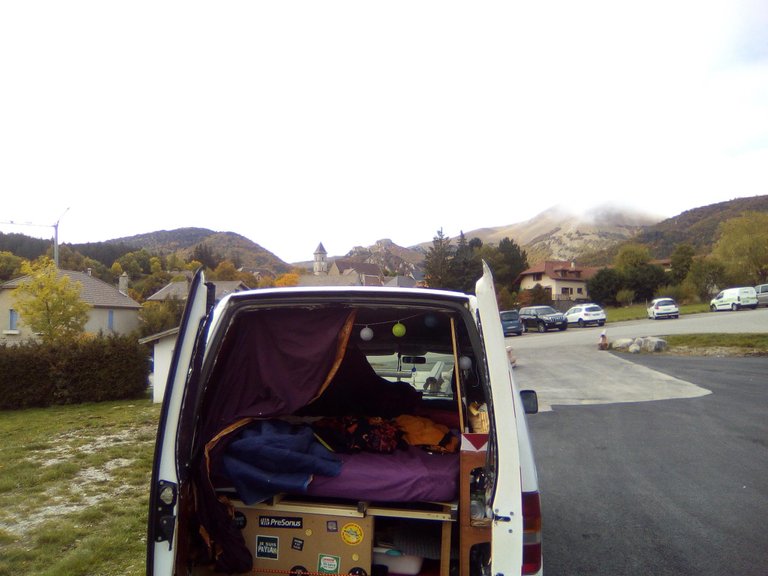
Here is, in outline, how we arranged our mini-van! :)
It was, for me, a real experiment. I had absolutely no experience, and I would probably never have done it without my friends.
I read a lot, notably on the forum of:
https://www.trafic-amenage.com/forum/
http://fourgonamenage.canalblog.com
http://www.lumieres-du-monde.com/blog/index.php/2013/10/27/fourgon-amenage/
I hope you enjoyed this article!
In any case, it is with pleasure that I share a little of the beginning of our adventure, and this challenge in itself that was the development of a van with limited means.
Thank you for reading,
And see you soon !
