Kinda crazy to consider huh? Well, you’ll be surprised to learn that yes! Even Millennials attending university can grow their own food, regardless of their dorm size. Raising worms is cheap, easy, reduces food waste, and can even get a hungry college kid some pocket change before the semester is out. Don’t believe me? I just checked Craigslist today and folks are selling their worms at $5 a pound!
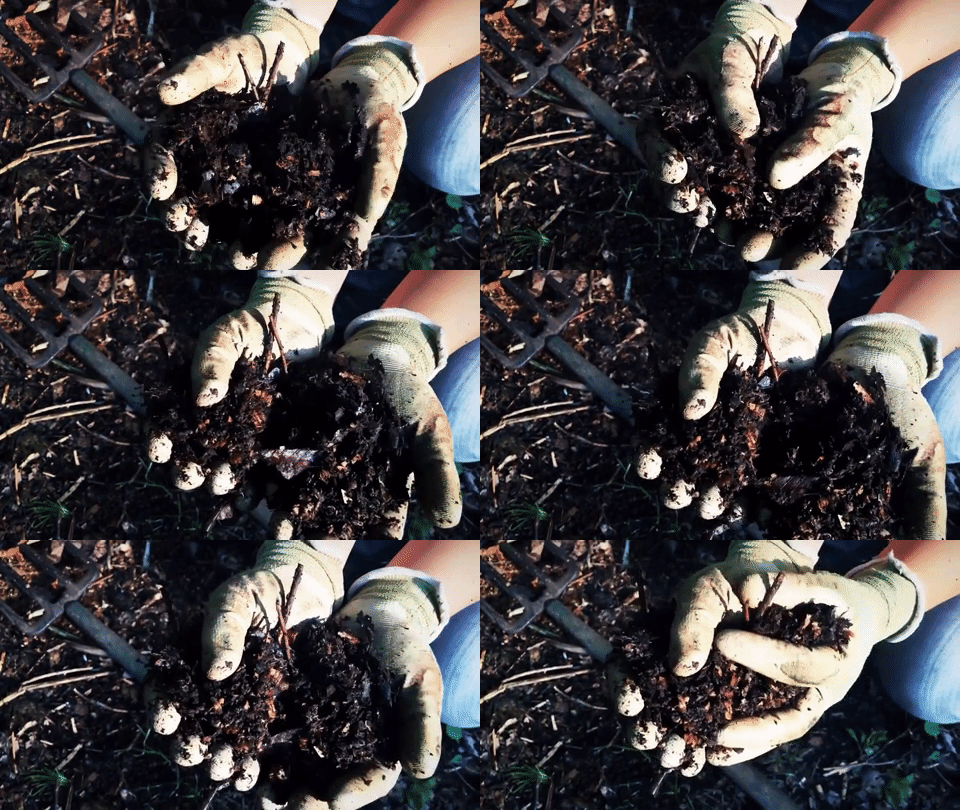
What makes worms and worm boxes so great? Worms, depending on the sub species, are relatively small decomposers, which means they burrow through the soil and munch on dead leaves and other plant matter. Worms breed quickly and in huge numbers, so you’ll only need to buy them once before they make a bunch of free worm babies for you to use later. Worms also produce worm castings, which is just a fancy way to say worm poop, but these castings are a garden’s favorite food! Highly prized in the eyes of permaculture folks, these worm castings are often referred to as “black gold” and gardeners are willing to pay a few bucks for it. Worm castings are great but if you can brew your own worm tea? Your garden will thank you!

They also don’t need a lot of space to get busy. Since worms are small, it’s super easy to make a three tier worm box system out of say, those 94 cent plastic bins at Walmart, and start raising them. If worm BOXES sound too lame, you can also raise worms in buckets, coolers, compost bins, even old Tupperware. Since I am living the tiny life in my tiny house, I am telling you that raising worms in tiny boxes don’t take up much space in your tiny place. I had a quail brooder in my closet this past month, which was twice the size of a worm bin. If you’re a fellow geek who gardens but live in an apartment or dorm, this is a great way to get a healthy worm population going, production of worm castings, and experience in using basic tools and raising creatures. It’s like you’re Hagrid raising his very first flobberworm!
Speaking of feeding… I’ve talked about how rad having a worm bin sounds, but how do you get started? Here’s some brief instructions below. Make sure to follow my source link for additional information and instructions.
How to Make a Worm Bin
Supplies:
Power drill
2 Rectangular plastic storage bin (pick the size that best fits you)
Shredded newspaper
2 cups of soil
Red worms or composting worms (can be purchased online, through Craigslist, garden nurseries, local worm farmers, etc)
Instructions:
Drill ventilations holes across the bottom of ONE plastic bin, 3 to 4 inches apart. Shoot for holes that are about 1/4 inch in diameter at maximum. Drill holes in your lid as well. This plastic bin, labeled Bin A in these instructions to clear up the confusion, will be where you will keep your worms, newspaper, food scraps, and soil. The holes on the bottom of the bin will allow for water drainage.
The second bin labeled Bin B in these instructions, will not have any holes drilled in it. Remove and set aside Bin B’s lid and stack Bin A over Bin B’s open mouth. Gravity will allow water from Bin A to trickle down into Bin B. This water can be used as fertilizer in your garden if you collect enough. Just dilute with water and pour Bin B’s contents into your garden once full.
Now to get the bedding prepared. Take some newspaper and shred it up, either with a shredder or just ripping it to pieces. Take the shredded paper and add a little water to make it wet. Take the wet newspaper and squeeze out any excess water. It’s recommended that the newspaper feel more like a wrung out sponge. Add the newspaper to the bottom of Bin A until you’ve got about 2 inches deep, then sprinkle the 2 cups of soil over it. Add your worms, a few tiny pieces of food scraps, and then cover your worms with a little damp newspaper to make them comfortable. Place a lid on Bin A and then place your worm bin in a dark place (like under a sink).
What to Feed Your Worms
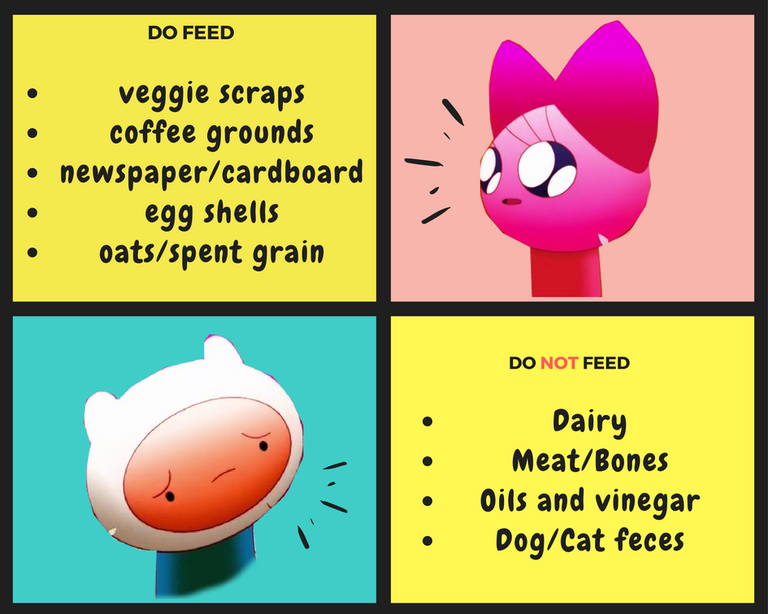
It’s actually easier to tell you what NOT to feed worms than list out everything they will eat. Worms are decomposers and break down most organic matter, converting it into enriching worm castings also known as black gold. For a full list of food worms can have, check out Mother Earth News’ post. Here’s just a quick summary of what we feed our worms and what we avoid:

Make sure the food scraps are small and try not to overfill your container. If the worms seem to be struggling with the amount of food they have, reduce the amount or build a second worm bin to eat the rest. A healthy bin will be void of bad smells, the bedding will have the consistency of a wrung-out sponge, and soon enough you’ll have baby worms and lotsa piles of worm castings. We had a worm bin similar to the instructions found on Mother Earth News while living in an apartment in Colorado. I had a lot of fun learning to maintain this little ecosystem and get comfortable with handling worms. I’m a bit squeamish so it was one heck of an opportunity to touch them. For additional details visit Mother Earth News, do a quick Google search, and don’t be afraid to do your own research.
As always, be kind and tender to one another.
Did you miss our latest feature? Say howdy to the Texas Boys! Check out the original post at the Toasted Rabbit.
Great article, it would have been cool if you would have included a drawing or photo of how a self build composer/worm bin would look like. It's hard to imagine if you have never seen one.
Your post reminds me of the worm farm that I grew when I was growing up 45 years ago. So funny. They are very easy to grow and multiply like crazy. I raised them for fishermen; my father.
This post has been voted on from MSP3K courtesy of @torico from the Minnow Support Project ( @minnowsupport ).
Bots Information:
Join the P.A.L. Discord | Check out MSPSteem | Listen to MSP-Waves
This post has been resteemed from MSP3K courtesy of @torico from the Minnow Support Project ( @minnowsupport ).
Bots Information:
Join the P.A.L. Discord | Check out MSPSteem | Listen to MSP-Waves
Love the post... I tried something similar and didn't have as much luck, but thanks to your post I figured out what I was doing wrong. Thanks and again, very nice article.
Congratulations @toastyrabbits! You have received a personal award!
Click on the badge to view your Board of Honor.
Do not miss the last post from @steemitboard!
Participate in the SteemitBoard World Cup Contest!
Collect World Cup badges and win free SBD
Support the Gold Sponsors of the contest: @good-karma and @lukestokes
Congratulations @toastyrabbits! You received a personal award!
You can view your badges on your Steem Board and compare to others on the Steem Ranking
Vote for @Steemitboard as a witness to get one more award and increased upvotes!