Here, I'll walk you through the Wallet section on Waivio and how to deposit funds into your Waivio account.
You will learn how to deposit funds on Waivio to start your social shop; what are liquid WAIV, WAIV Power and HIVE Power; how to swap, lend, and withdraw crypto.
You will find all your transactions and assets in the Wallet. Let’s take a look:
Overview:
1. WAIV
2. HIVE
3. Hive Engine
4. Rebalancing
5. Side Panel
\- TRANSFER

\- POWER UP

\- POWER DOWN

\- MANAGE DELEGATIONS

\- SWAP TOKENS

\- DEPOSIT

\- WITHDRAW
6. A Step-by-Step Walkthrough to Depositing Funds
Link to More Tutorials: Tutorials ****
Link to Rebalancing Article (you can also find it directly in the Rebalancing section): https://www.waivio.com/object/wxu-rebalancing-introduction/page
1. WAIV
The first section here is "WAIV" assets. These include liquid WAIV and WAIV Power.
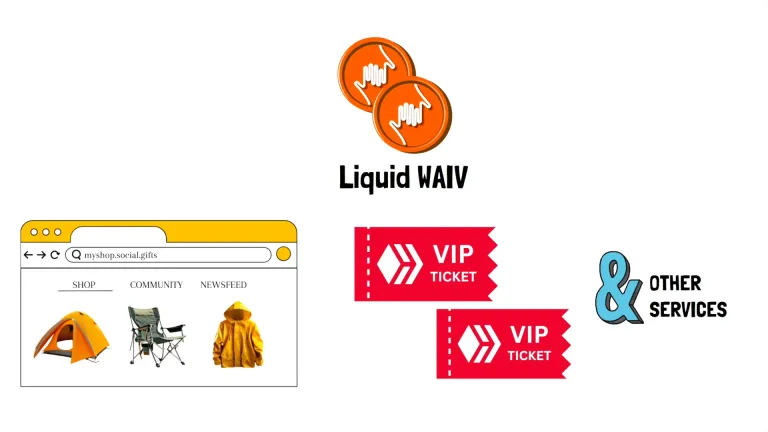
- Liquid WAIV is the main currency on Waivio. You can use it to pay for social shopping website hosting, buy VIP tickets for new HIVE accounts, and other services.
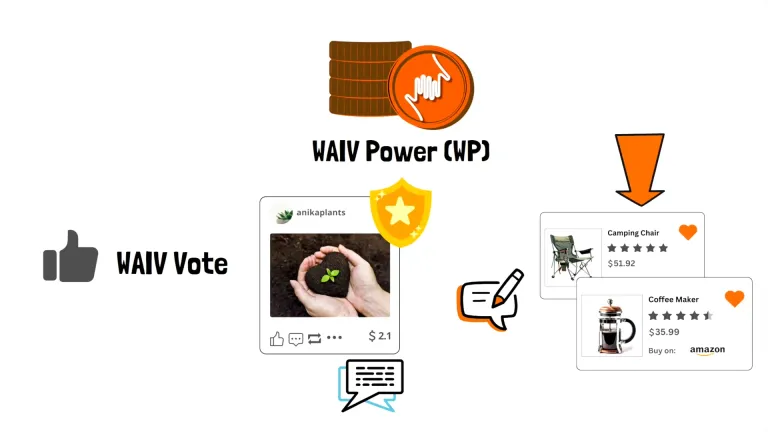
- WAIV Power is your voting power on Waivio. You need it to vote on posts and comments, which enhances your presence and authority. WAIV Power is also needed for creating objects and importing products for your social shop.
(html comment removed: -->
- You will also receive rewards for your posts and reviews in liquid WAIV tokens.
To convert liquid WAIV to WAIV Power, click "Power up," and staking is done instantly.
To convert WAIV Power to liquid WAIV, click "Power down." Keep in mind, powering down takes four weeks, with funds released every week in equal amounts.
2. HIVE
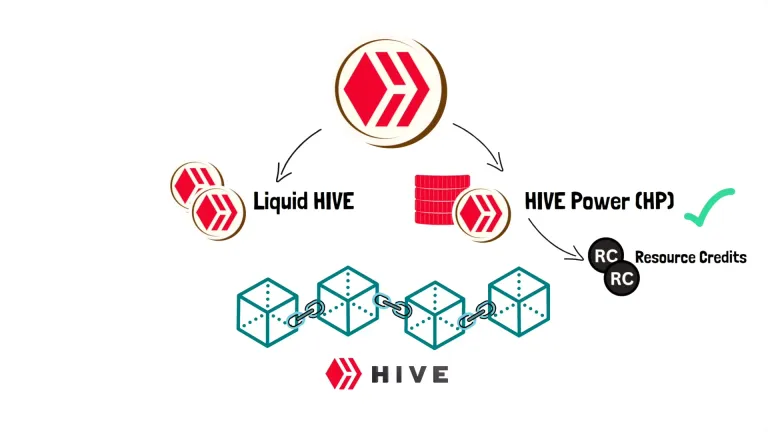
Now, let's look at the "HIVE" assets. Here you will find liquid HIVE, HIVE Power (HP), and HIVE-backed dollars (HBD).
- HIVE is the main token on the Hive blockchain, and having HIVE Power (specifically Resource Credits) is essential for doing anything on the blockchain, from sending payments to writing posts.
You might receive Hive Power and Hive-Backed Dollars as rewards for your posts. If you are interested in learning more about the rewards, check out the “About Waivio” video
.
To convert liquid Hive to Hive Power, click "Power up," and it happens instantly.
To convert Hive Power to liquid Hive, click “Power down.” For Hive Power, powering down takes 13 weeks, with funds being released weekly.
3. HIVE ENGINE
Next, we have the Hive Engine section. Here, you will find all the other tokens available on the Hive blockchain. This includes wrapped tokens such as swap.BTC and swap.ETH, as well as various other tokens used within the Hive ecosystem.
4. REBALANCING
There's also a Rebalancing section, which is a strategy to grow your crypto holdings. To learn more, make sure to check out our comprehensive article on it.
5. SIDE PANEL
Next, on the right panel, you'll find:
Transfer
Use this if you want to send crypto to another Hive user.
Power up
Here, you can power up not only liquid WAIV or liquid HIVE but also other tokens you have on the Hive blockchain.
Power down
Here, you can power down not just Waiv POWER or HIVE POWER but also other power tokens you own.
Manage Delegations
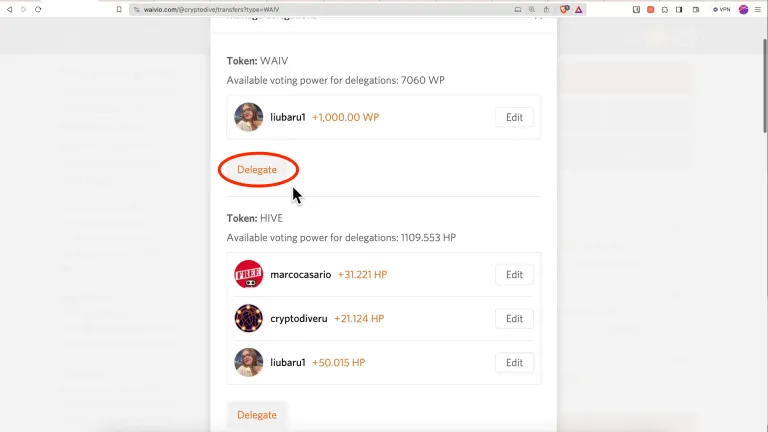
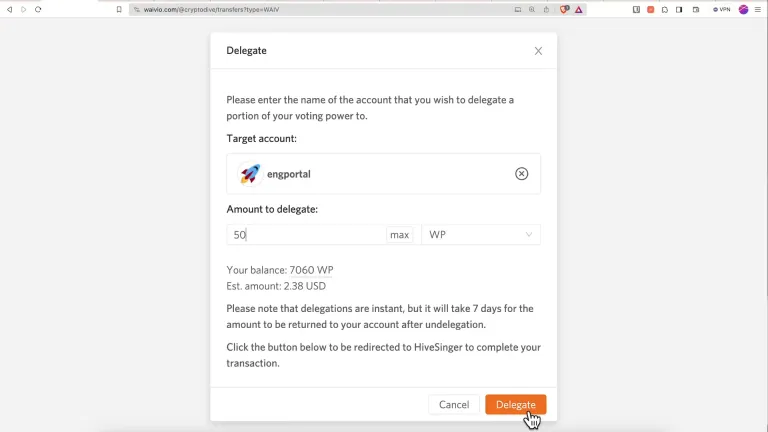
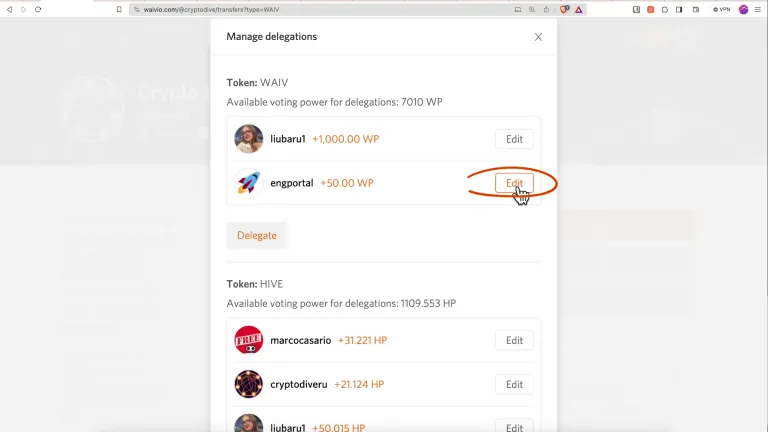
Here, you can lend your WAIV Power, HIVE Power, and more powered-up tokens to other Hive users. Choose the token you want to delegate, then a user, and an amount. The delegation happens instantly.
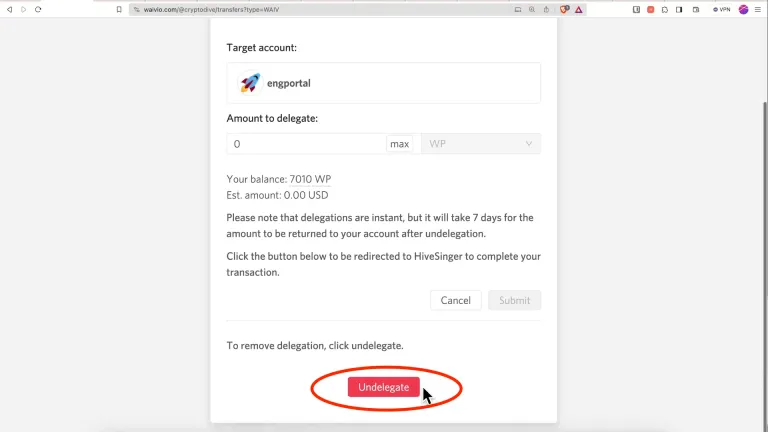
If you decide to undelegate, click edit. It's important to note that it will take 7 days for the funds to be returned to your account.
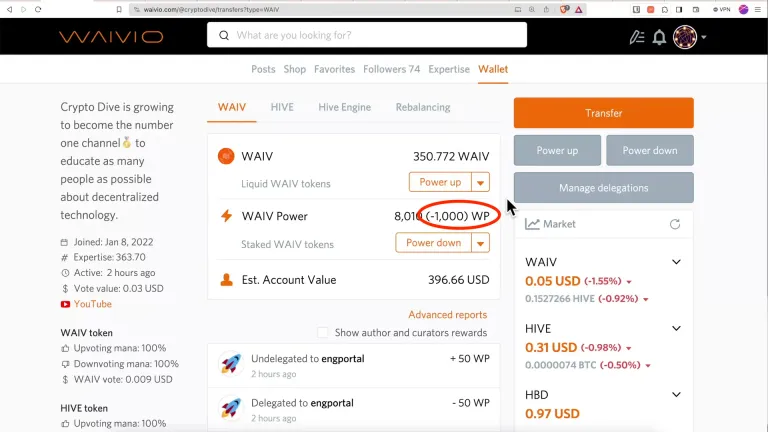
After you've delegated tokens, the delegated amount will be displayed as a negative balance in parenthesis, next to the respective token. You can click on it to view more details.
SWAP tokens
This is for converting one token into another (such as swap.BTC to WAIV or swap.HIVE to swap.LTC).
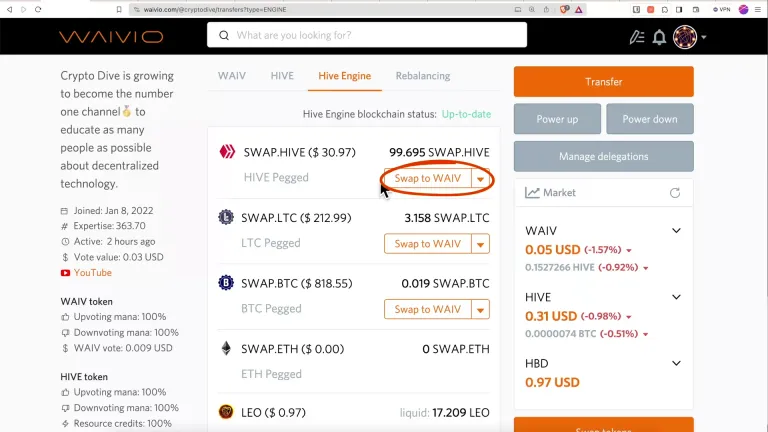
**You can also conveniently swap any token into liquid WAIV in the "Hive Engine section" by clicking “Swap to WAIV” next to the appropriate token.
Deposit
This is for depositing funds (e.g., BTC) into your account’s wallet.
Withdraw
This is to withdraw funds and transfer it to other wallets and blockchains, such as back to your Bitcoin wallet.
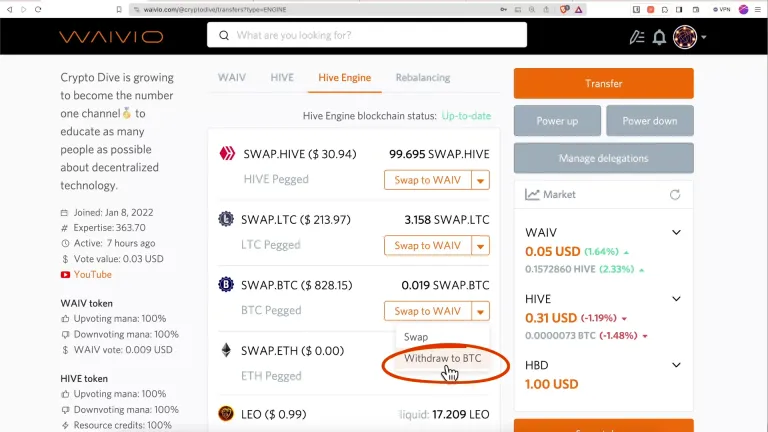
**You can also do this conveniently in the "Hive Engine section" by clicking the dropdown menu next to the desired token and selecting "withdraw to ___."
6. A Step-by-Step Walkthrough to Depositing Funds
Now Let me walk you through the entire process of depositing funds on Waivio.
To deposit funds on Waivio, you'll need some cryptocurrency. Here, is the list of cryptocurrencies you can deposit:
BLURT (BLURT)
Bitcoin (BTC)
Bitcoin Cash (BCH)
Dogecoin (DOGE)
EOS (EOS)
HBD (HBD)
Litecoin (LTC)
SAVVA (SAVVA)
SBD (SBD)
STEEM (STEEM)
SwiftCash (SWIFT)
TELOS (TLOS)
WAX (WAX)
**Make sure to check the most up-to-date list in the "Deposit".
If you don't have anything on the list, you can easily buy it on exchanges. For users in the US and Europe, I recommend Coinbase; for Canadian users, I recommend Newton.
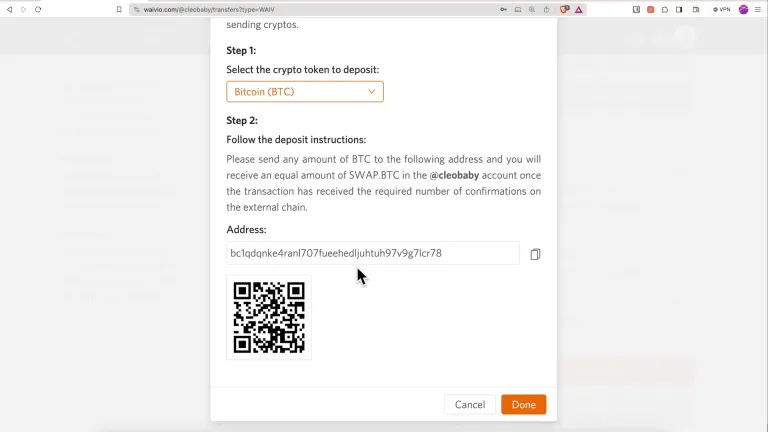
Click on "Deposit" (located on the side panel in Wallet), Choose the cryptocurrency you wish to deposit. In this example, I'll demonstrate the process with Bitcoin, but you can use any cryptocurrency from the list.
After selecting BTC, you'll see a BTC wallet address and a QR code. For example, in the image below is my BTC deposit address on the Hive Engine.
Copy & Paste the wallet address or scan the QR code to send funds; I recommend first testing it out with 10 dollars. You can monitor the transaction on a blockchain explorer. After the transaction is successful, you can send more funds.
To kickstart your social shop on Waivio, I recommend depositing around $400.
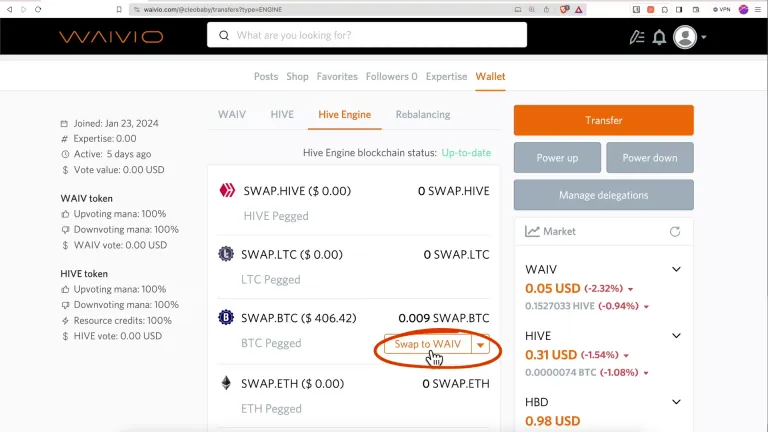
Once the transaction is complete, you'll see your funds in the swap.BTC wallet in the "Hive Engine" section. With just one click on the "SWAP to WAIV" button, you can convert your BTC holdings into liquid WAIV tokens.
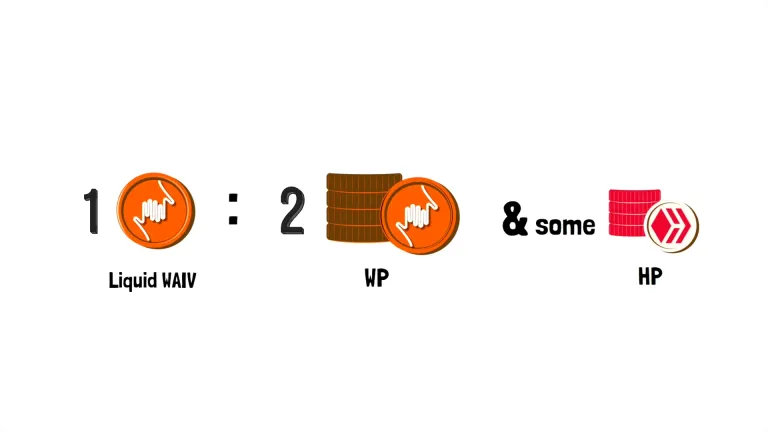
To make the most of the platform, I recommend a ratio of 1 liquid WAIV to 2 WAIV Power and a little bit of Hive Power. Since you already have liquid WAIV, getting WAIV Power and HIVE Power from it is straightforward.
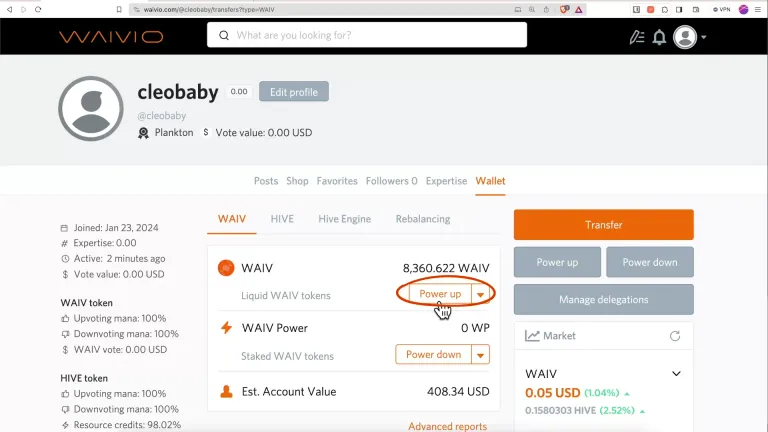
To convert liquid WAIV to WAIV Power, go to the WAIV section and click "Power Up." Choose the amount you want to power up (suggested amount: 250$) and click continue.
For example, with a $250 investment, you will have a vote value of approximately 0.006$, and you would be able to import around 15 products per day.
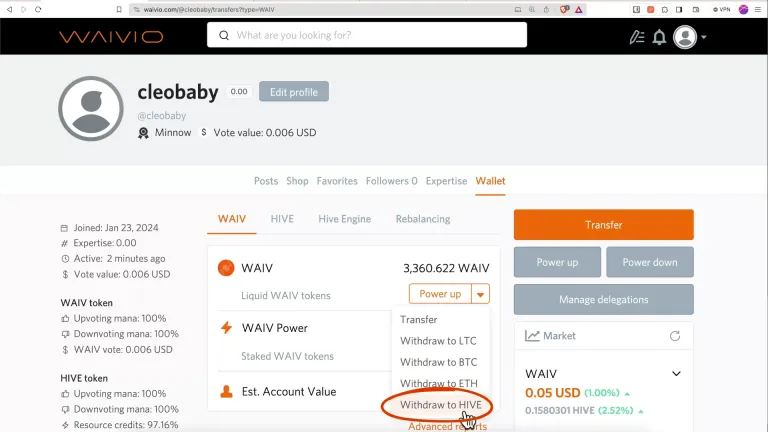
To convert liquid WAIV to Hive, click on the dropdown menu and choose "Withdraw to HIVE", select the amount (suggested amount: $50).
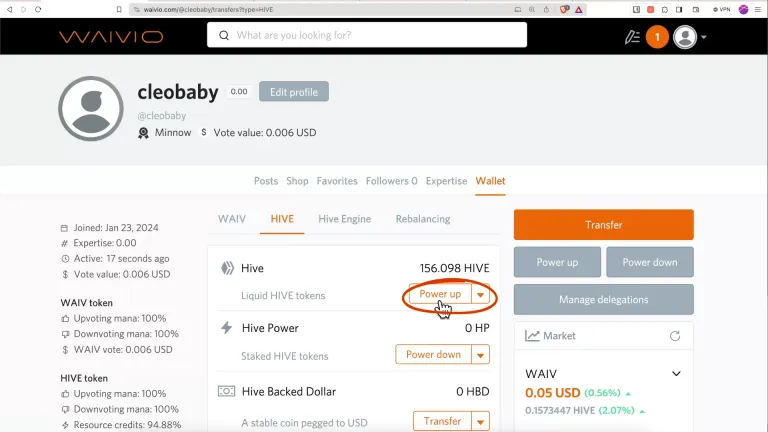
And now let's go to the Hive section, here you will see your liquid Hive. If not, then wait a little bit, it might take a few minutes for this transaction to complete, and the funds to appear in your wallet.
Click "Power Up" to convert liquid Hive to Hive Power.
Now, you're all set and can start using Waivio and the Hive Blockchain to its fullest, whether it's writing posts, sending funds, participating in sponsored rewards, building your social shop, and much more. For example, you can already begin building your dream social shop by importing a few products with the Waivio Extension and adding funds to run your social shop. To learn more, please check out our Social Shopping guide and tutorials: Tutorials
Warmest welcome to all the newcomers to WAIVIO – we're thrilled to have you on board! And to the HIVE veterans out there – hey, great to see you again!
#waivio #waiv #hive #wallet #hbd #hivebackeddollar #hivepower #liquidhive #cryptowallet #transactions #hiveblockchain #shop #hivetutorial #business #commerce #amazon #shop #ecommerce #hiveblockchain #crypto #cryptocurrency #features #hivefeatures #product #brand #marketing #entrepreneur undefined#hobby #leo #peakd #leofinance #items #shopping undefined#affiliatemarketing #leo #peakd #hive-engine #rewards #revenue #e-commerce #socialshopping
