Sometimes Honey Bees just need a little help to get them through those long winter months, or in the first of spring when there aren't many food sources out yet. Many beekeepers add an in hive feeder or hivetop feeder to give the bees easy access to additional food when it is needed. While these feeders are readily available, a high quality one can cost you around $70…so, why not build one yourself? We did just that and want to show you how;
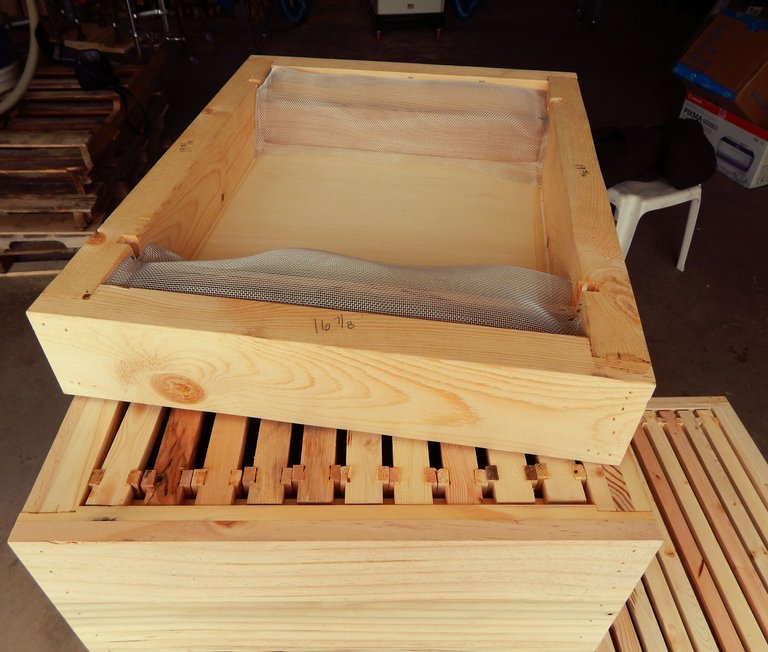 The Detail
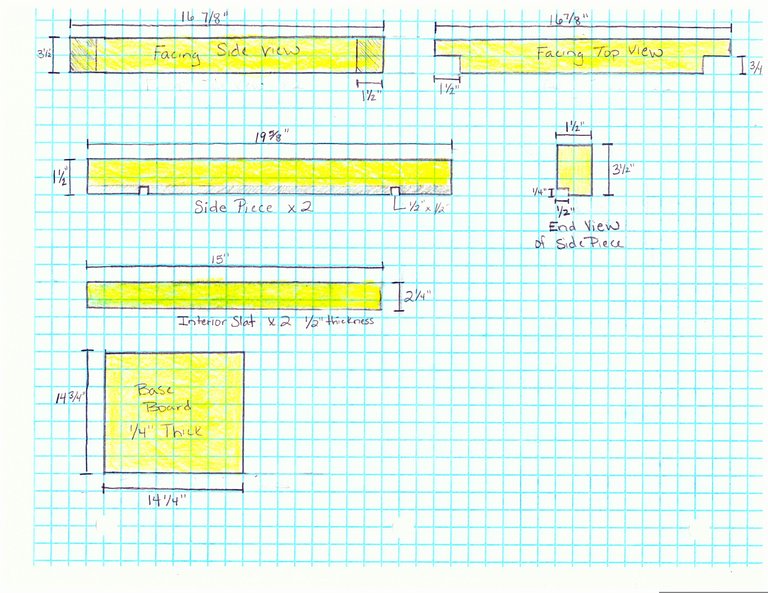 We are going to start with taking a simple 2x4 and cutting it into the following lengths;
- 19 5/8" x 2
- 16 7/8" x 2
Then for the interior slats we used a piece of pallet wood that had been planed down, but you could also rip them from the scraps left over from the 2x4 to the following dimensions;
- 15" x 2 1/4" x 1/2" x 2
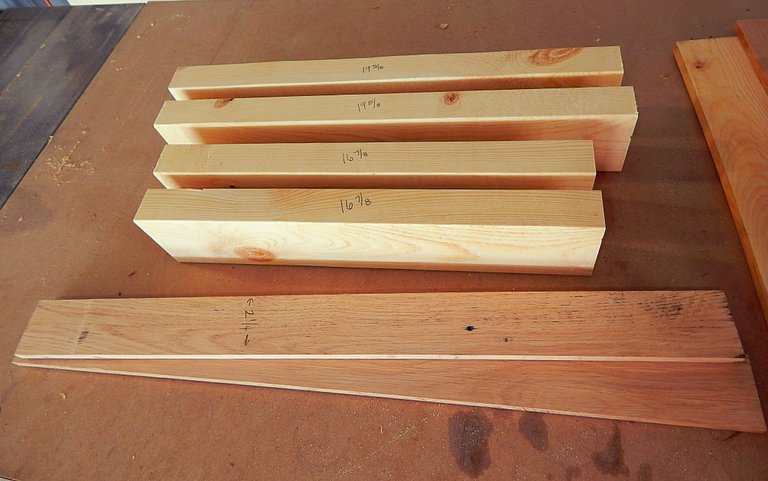
*****NOTICE TABLE SAW BLADE GUARD HAS BEEN REMOVED FOR DEMONSTRATION PURPOSES, WE DO NOT ADVISE USING YOUR TABLE SAW WITHOUT PROPER SAFETY ATTACHMENTS AND EQUIPMENT.****
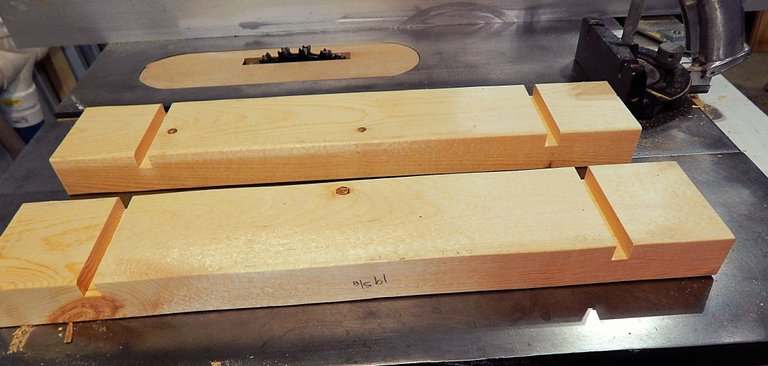
We then are going to set our 1/2" Dado Blade and set it to 1/2" up and 2 3/4" off the fence. Then run the 19 5/8" boards on both ends.
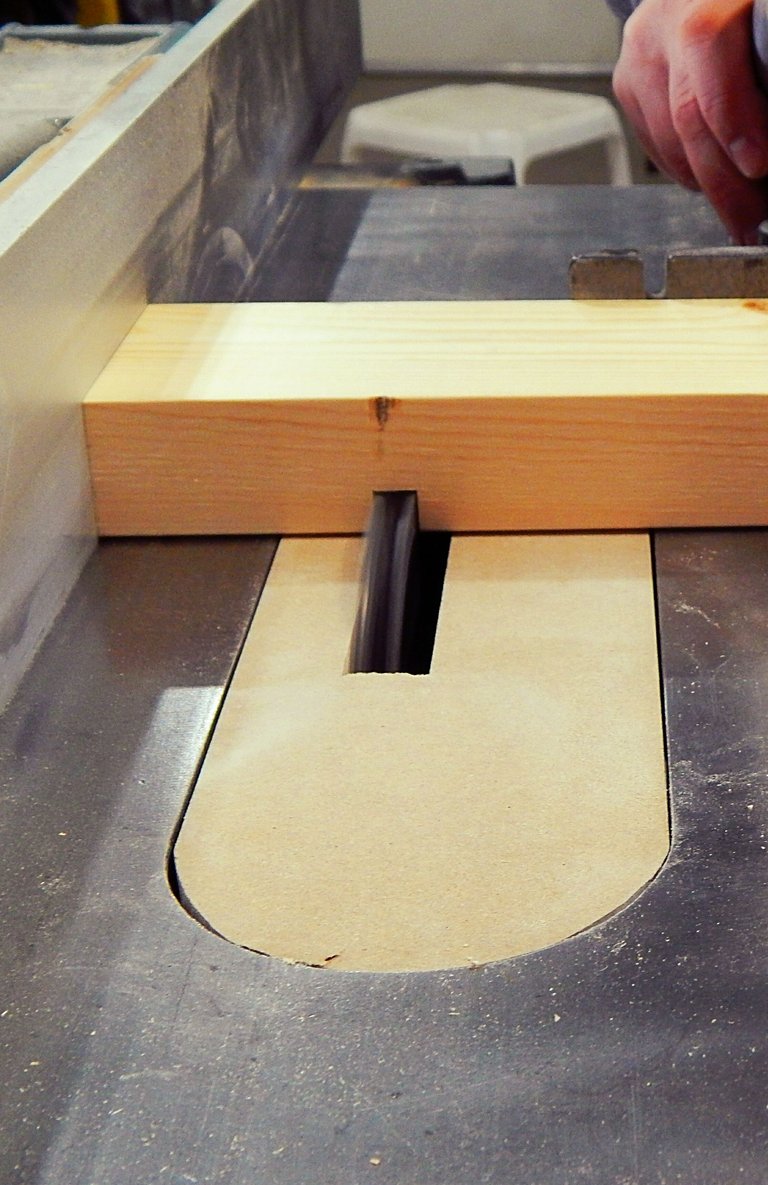
To get this..
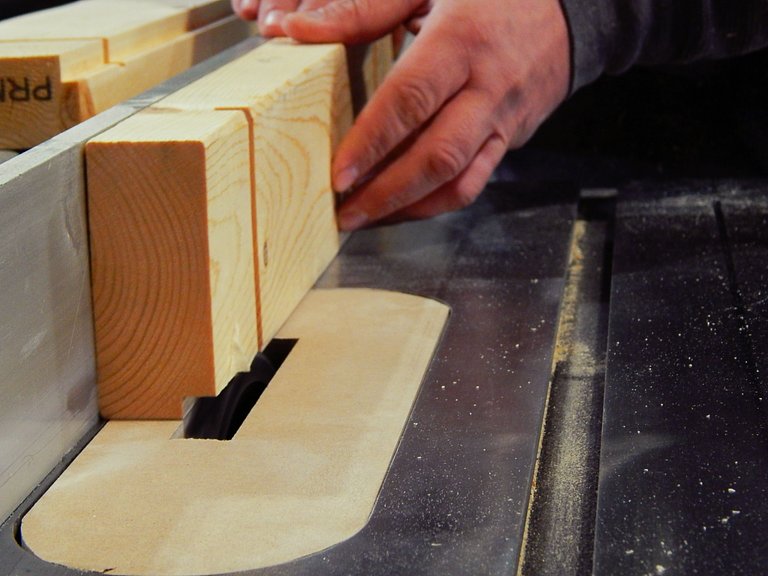
Next, we set our Dado Blade to 1" off the fence and raise it to 1/4" up and run the 19 5/8" board through with the 3 1/2" side up.
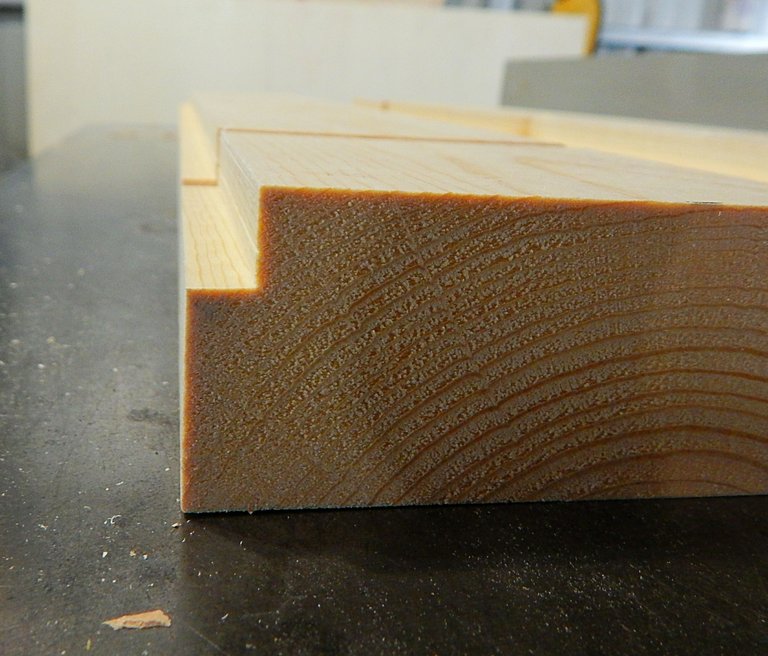
Which will give us the recess for our base board to set in.
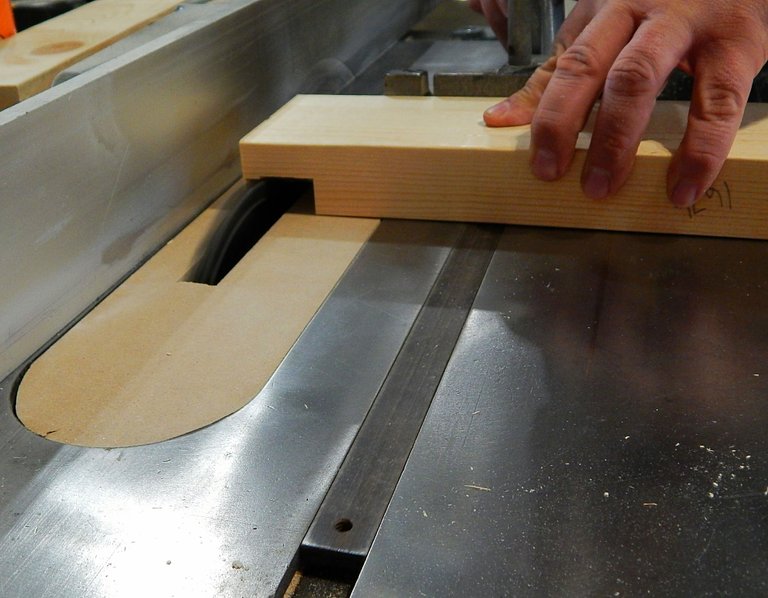
Then with our 1/2" Dado Blade still 1" off the fence we raise it to 3/4" up and run our 16 7/8" boards through on both ends, removing the 1 1/2" of material to make our rabbet joints.
Next we need to our base board. We used some scrap plywood we had and cut it to
- 14 3/4" x 14 1/4" x 1/4" thick
This piece will set in the bottom on the feeder like so...
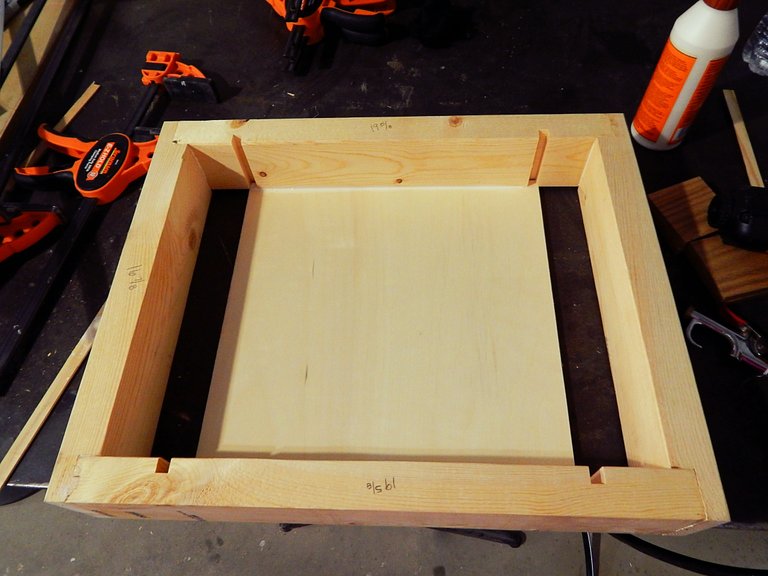
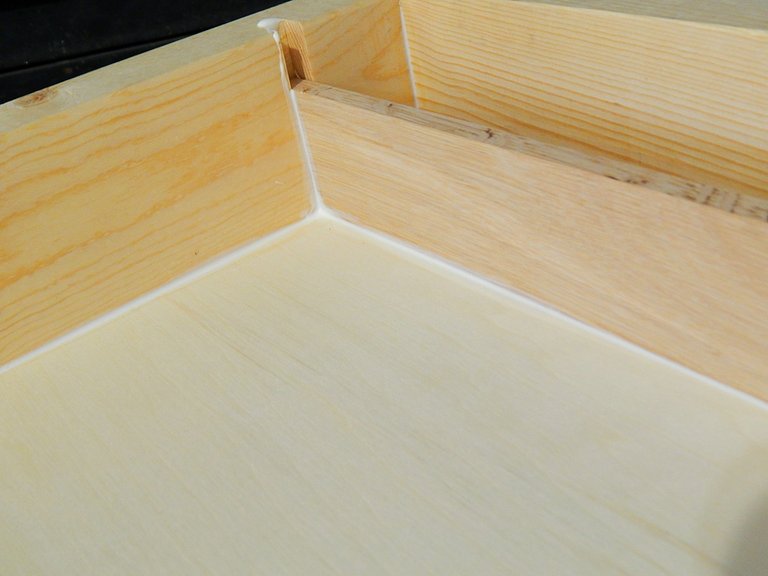
We then use an exterior wood glue to secure the base board into place, then insert our slat pieces. It is important to smooth the wood glue as you would if you were caulking a seam, to ensure there will be no leaks.
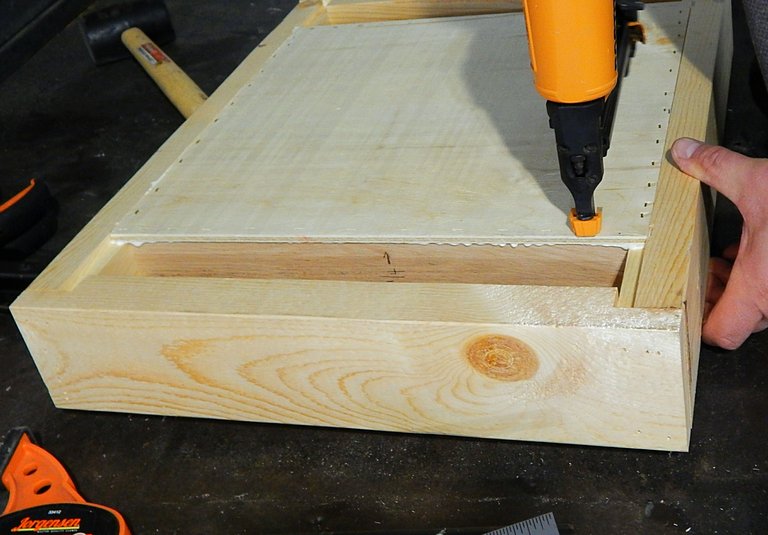
Then staple along the bottom of the base board and on each corner of the box to add strength.
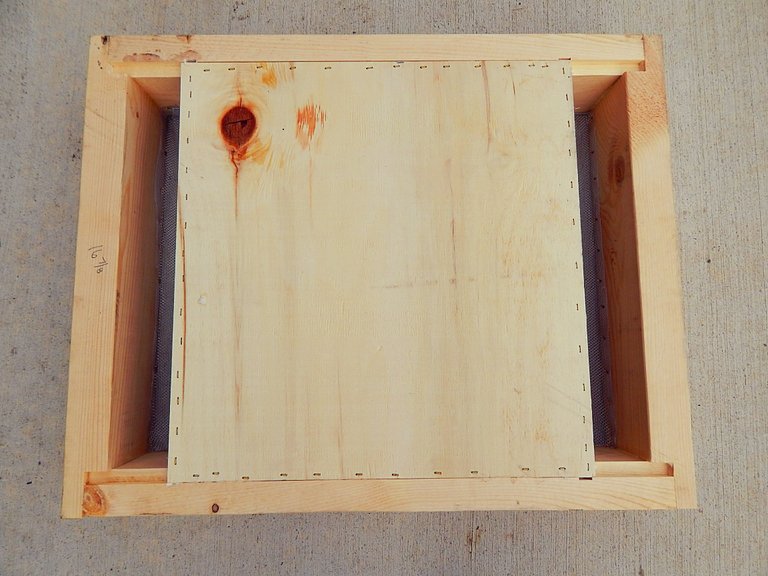
We used some left over screen material as a surface to allow the bees to climb to get access to the honey water and to ensure that they can safely get back out. We just simply stapled that into place over the slats and attached to the base board. You can simply remove this screen and use granulated sugar during the winter months.
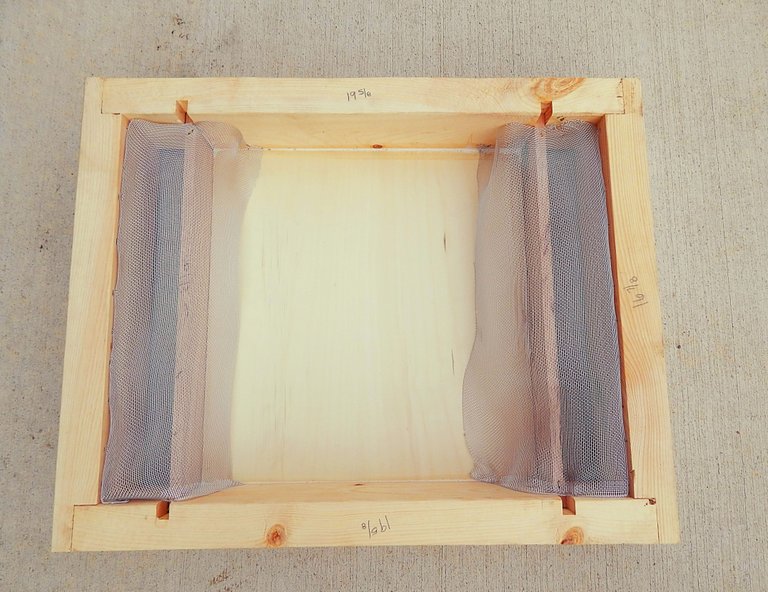
Leaving you with a sturdy, high quality hivetop feeder for a fraction of the cost. This feeder cost us right under $10 in materials vs the $70 one we had spotted online. Of course you can get a cheap version for about $20, but you will only get about a years use out of those. This is an extremely sturdy, well made, strong feeder that we will be able to use for years to come.

We hope you have found this post helpful!
Thank you for reading,
Happy Homesteading


I love this post! I've upvoted and resteemed! I would love to learn how to make these. Your instructions are wonderful.
Thank you ❤ We really appreciate the support!
wow, this is some high quality wood working! kinda makes me wish i were a bee ;)
Hahaha! Thank you ...bees are pretty special.
Great Job! I have never been very good at woodworking, I try just does not work out too well for me. It does not stop me from trying though, you make it look so easy. LOL
Lol! Awww thank you. Trying is the important thing...it gets easier the more you do it. Hopefully posts like this will help people give it a go, that is the goal! Thank you so much.
Love this thanks for posting because I would really like to keep bees someday and making our own hives would save a whole lot of money!
You're so welcome! We really enjoy our bees and encourage everyone to keep them, they are so easy and rewarding. We have saved a ton of money by making our hives ourselves. Make sure and check our blog for the other tutorials when you are ready to build. Thank you!
Great post again. Keep up the high quality!
Thank you so much!
Congratulations! This post has been upvoted by SteemMakers. We are a community based project that aims to support makers and DIYers on the blockchain in every way possible. Find out more about us on our website: www.steemmakers.com.
If you like our work, please consider upvoting this comment to support the growth of our community. Thank you.
Thank you guys!
Hola excelente trabajo, me encanta la apicultura pero todo lo tengo que comprar ya fabricado. Me gusto tu aporte tratare de hacer uno para mis abejas!
Maravilloso escuchar! Amamos a nuestras abejas también y hemos ahorrado mucho dinero haciendo colmenas nosotros mismos. También terminamos con un producto de mayor calidad al final también. ¡Gracias!
For under 20$ that is money saved with DIY. :)
It's great isn't it...love saving money by making it yourself.
Your post has been featured in my second Friday DIY Day curation post
CONGRATULATIONS!!
Good stuff. I can't wait to build one too
Thank you!
when I am ready to do this, I'll know where to look and who to ask for help.
;-)
Thanks!
Thank you! Yes we have a whole series going with plans and full tutorials and always feel free to ask questions!!
Thank you! If I remembered correctly, there is a discord group? what is the name?