Here are 5 easy steps to complete your Bitstamp registration and verification quickly. Register for Bitstamp, get verified and secure your account now.
I'll start by showing you step by step how to register your Bitstamp account. Then I'll go over your account security setup. That's where I'll show you how to use Two-Factor Authentication with Google Authenticator.
Once your account and account security are set up, I'll show you step by step how to get your Bitstamp account verified fast. By getting verified you'll gain the ability to deposit funds with an EU (SEPA) bank account.
Let's get started with registration.
Step 1: Bitstamp Registration
Start by heading over to bitstamp.net/account/register.
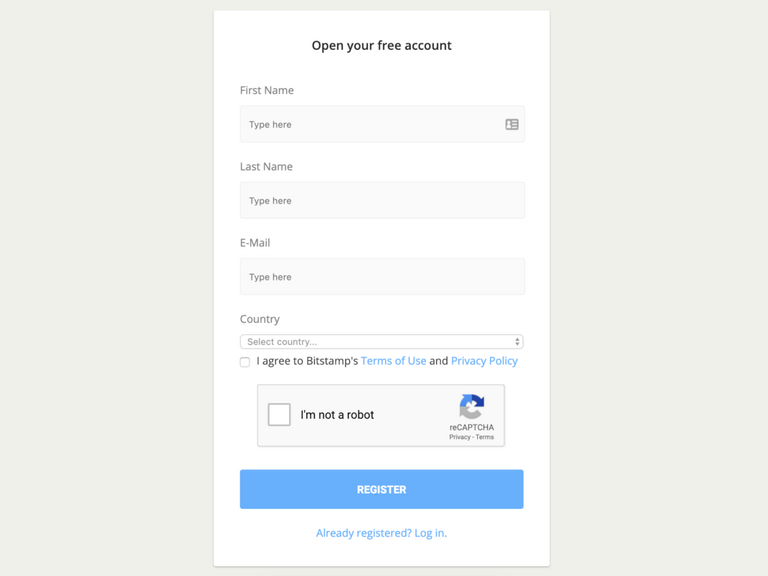
Here you'll enter your first name, last name, email, country and check the “I agree to Bitstamp's Terms of Use and Privacy Policy” box.
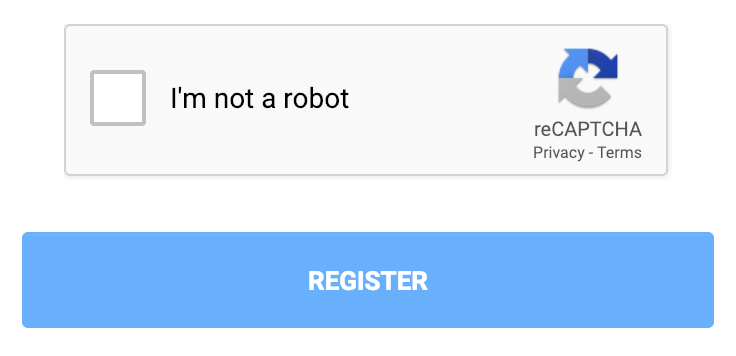
Now complete the Bitstamp registration by checking the “I'm not a robot” reCAPTCHA box and clicking the “REGISTER” button.
Upon successful registration you'll be given this message stating Bitstamp registration complete.
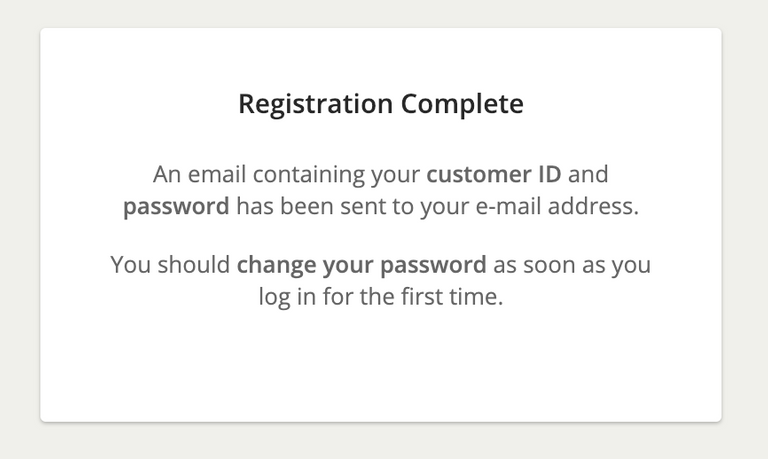
Continue by checking your inbox for an email from “Bitstamp” titled “Welcome to Bitstamp”. This email includes your client ID and password for logging into Bitstamp.
Keep this email open for the next step. You'll need both your client ID and password to login to your Bitstamp account.
Step 2: Login to Your Bitstamp Account
Visit bitstamp.net/account/login to log in to your account.
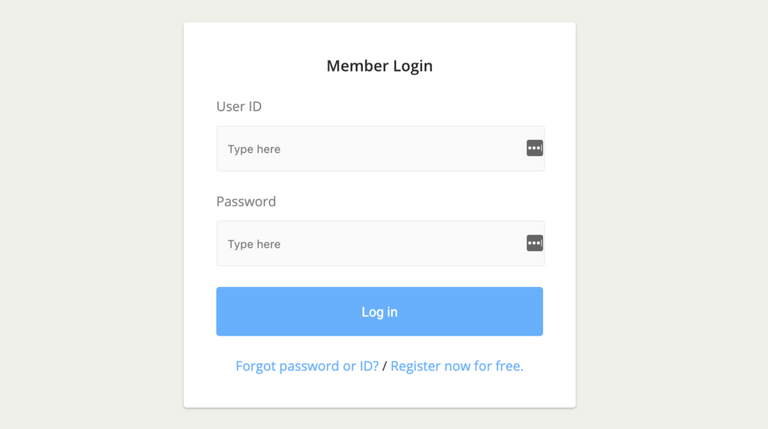
Now enter your client ID and password in the login form. Click the “Log in” button to access your Bitstamp account.
If you see an alert box like the one below, click the “Close” button. It's notifying you to complete two-factor authentication and account verification. You'll complete these things later on in this guide.
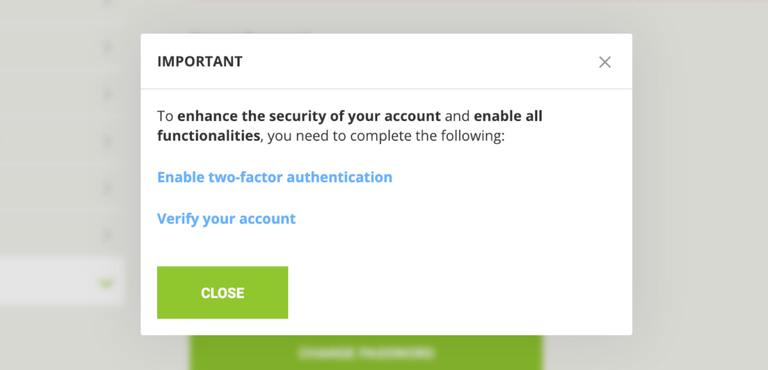
Bitstamp recommends changing your account password after logging in. Let's do that first.
Step 3: Change Your Bitstamp Password
Change your Bitstamp password by visiting bitstamp.net/account/change_password. At the Bitstamp Change Password page enter your current password. You'll find this in the “Welcome to Bitstamp” email.
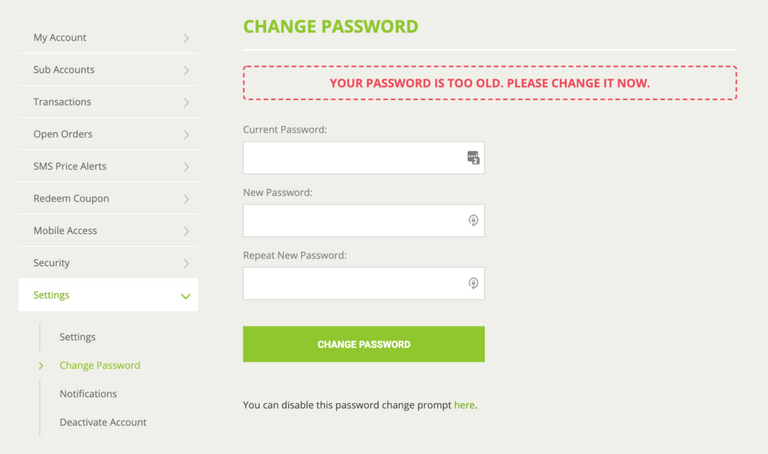
Complete the password change by typing your new desired password in the New Password field.
Bitstamp requires your new password to have at least 8 characters. In addition, it must contain one lower case character, one upper case character, and one digit.
Complete your password change by clicking the “CHANGE PASSWORD” button. Upon successful password change, you'll be taken back to the login page.
Log in with the client ID and your newly set password. You may see the two-factor-authentication and verification alert box.

This time, click the “Verify your account” link. In the event you don't see this message, you'll have the link on your account page as seen below.
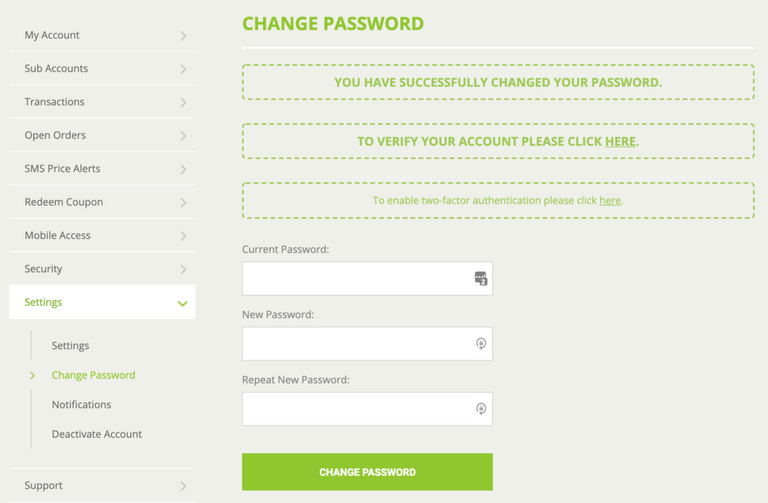
Start by clicking the link in the text “TO VERIFY YOUR ACCOUNT PLEASE CLICK HERE.” This will take you to the bitstamp.net/account/verify page.
Step 4: Bitstamp Verification Step by Step
Once you're on the Bitstamp Verify Account page, you'll be given two options. As seen in the screenshot below — there are options for a personal or corporate verification on Bitstamp.
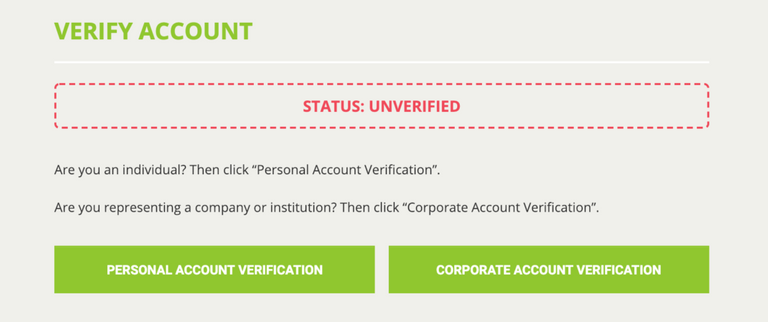
Choose the personal option if you are an individual. Choose the corporate option if you're representing a business or corporation.
Bitstamp Personal Account Verification
If you selected the personal verification option, your verification form looks like this. You will need your ID document and a proof of residence document ready to continue.
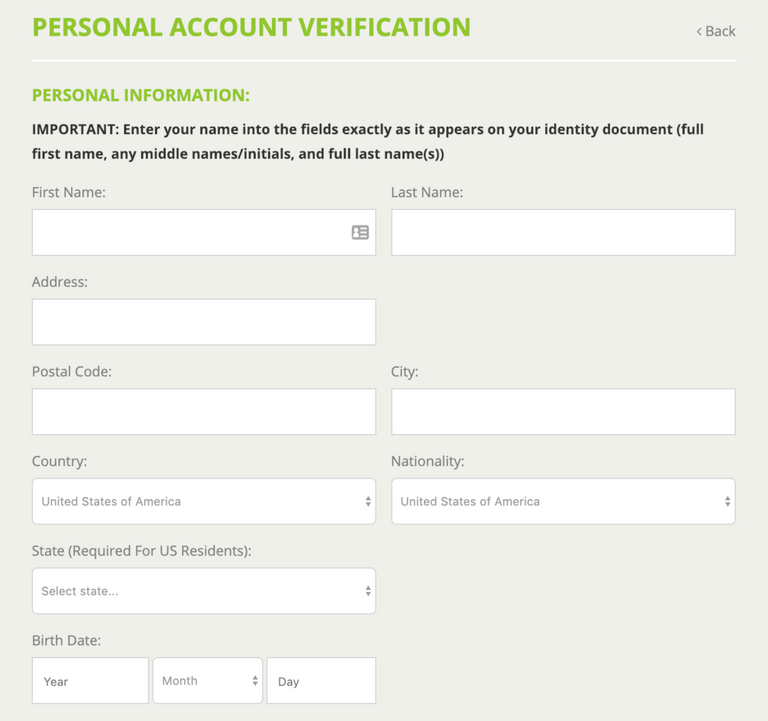
Go ahead and fill in your first name, last name, address, country, nationality, and birth date.
Additionally, in order to comply with the FATCA, Bitstamp asks you to provide the information below.
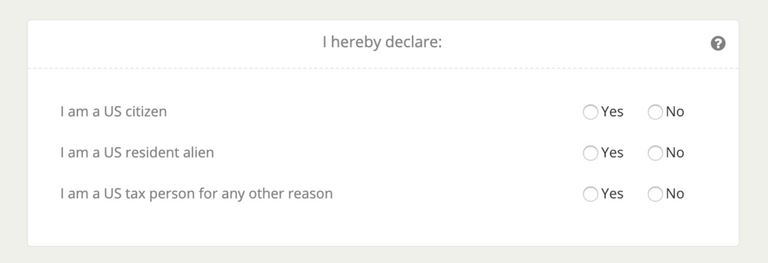
Select the “yes” or “no” option for each item in the FATCA form. Just below the FATCA form, fill in your TIN or SSN. This is a requirement for U.S taxpayers.
Bitstamp Verification ID Document
Now you're ready to submit your ID verification document for Bitstamp.
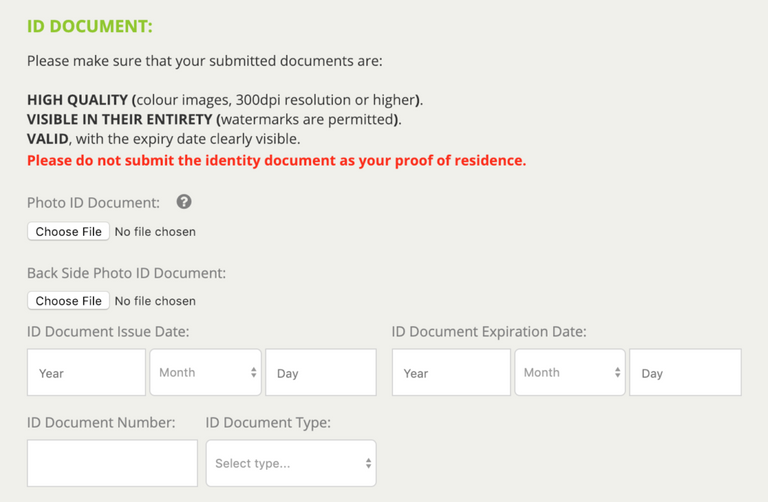
As noted in the screenshot above — use high-quality images for your ID document. I recommend using a scanner or scanner app for this step.
There are plenty of scanner apps available for IOS and Android devices. For IOS, try out Scanner App for IOS or CamScanner for Android. Just remember to share/export your scans as JPEG, not PDF.
For app scanning, I've found that sending the scans via email to yourself is the easiest option. Then you simply save the images from your email to your Desktop.
Now you can upload the front and back of your ID document to the form. Then fill in the ID issue date, expiration date, ID number and ID document type.
Bitstamp Verification Proof of Residence
If you haven't scanned your proof of residence document, do it now. Bitstamp allows you to use a bank statement, utility bill or government-issued document.
Keep in mind, Bitstamp will only accept proof of residence documents dated less than three months old.

When you're ready, upload your proof of residence document. Then click the “SUBMIT VERIFICATION REQUEST” button to complete your Bitstamp verification.
When your account gets verified, Bitstamp will give you a green message across the top of your account page. It's notifying you that you are now allowed to make deposits on Bitstamp.
This message will read “Your verification request has been confirmed and your account has been verified. You can make your first deposit here.”
Bitstamp Verification KYC Form
Know Your Customer (or KYC) is a standard operating procedure to help banks avoid money laundering activities.
Bitstamp requires you to give some additional information as part of their AML/CTF regulatory obligations. Make sure the submitted information is correct and up to date.
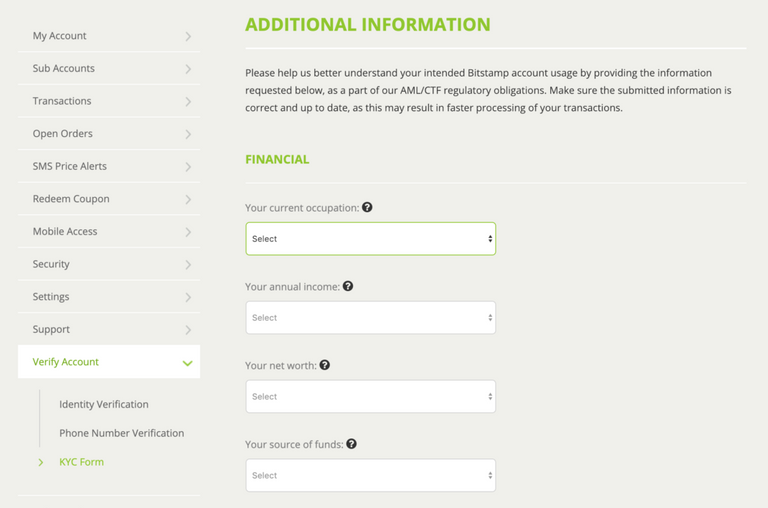
In the Bitstamp additional information form enter your current occupation, annual income, net worth and source of funds.
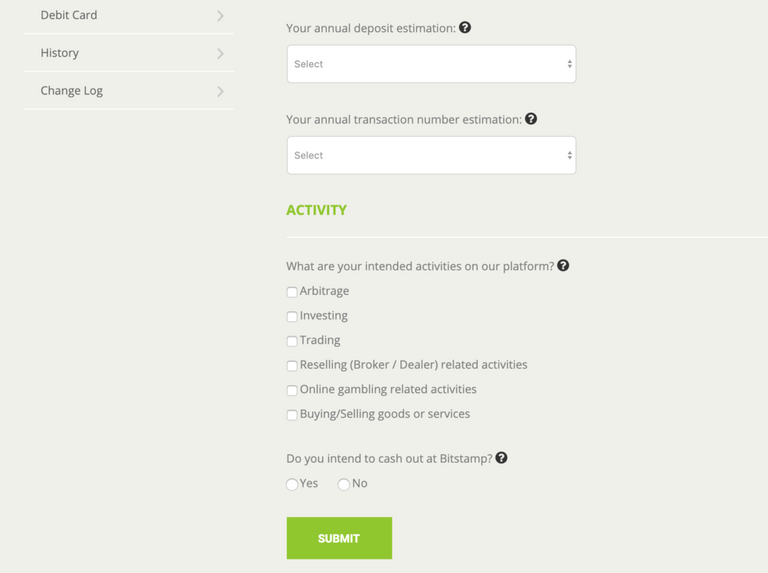
Then to complete the Bitstamp KYC form, enter your estimated annual deposit, transaction number and activity/activities.
To answer the final question — “Do you intend to cash out at Bitstamp?”. If you are looking to only use Bitstamp to deposit your crypto in order to cash out via FIAT, select “Yes”. Otherwise, select “No”.
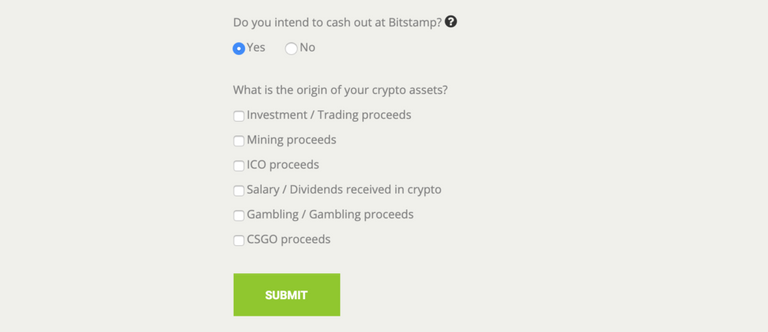
If you chose “Yes”, Bitstamp will ask the origin of your crypto assets. Check the options that apply. Click the “SUBMIT” button to complete your account verification process.

After submitting your information, Bitstamp will give you a confirmation message and a summary of your provided information.

You should now have a fully verified account at Bitstamp. Visit the bitstamp.net/account/verify page to see your current verification status.
This page can also be found on your Bitstamp account page under Verify Account > Identity Verification.
Bitstamp Corporate Account Verification
If you selected the corporate verification option, your verification form looks like this. You will be required to fill out this information, along with business details in a support ticket.
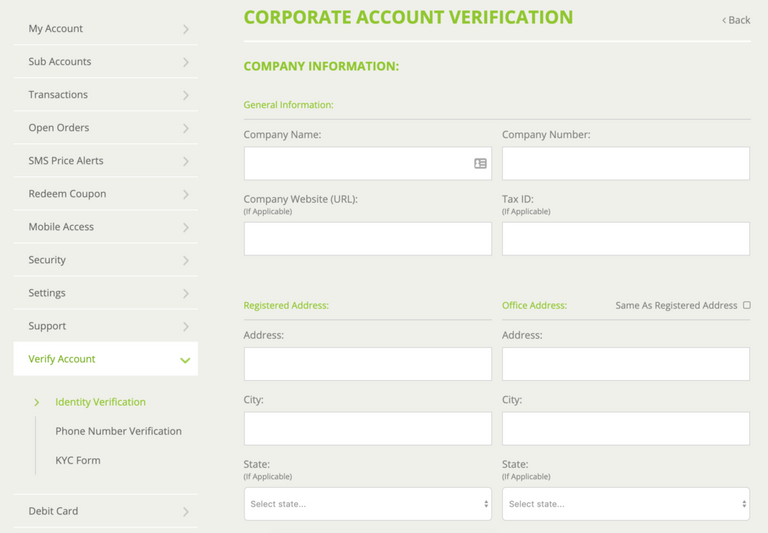
Start by entering your company name, phone number, website URL, and tax ID. Then enter your company registration and office addresses.
If your office address is the same as your registration, check the box labeled “Same As Registered Address”. Otherwise, fill out your office address information.

Now select the main purpose of your Bitstamp corporate account. Choose one of the following options or type your response to other business activity.
- Accepting or converting payments from customers for services rendered or goods sold.
- Depositing or withdrawing funds to business bank accounts.
- anaging funds of other individuals.
- Any other business activity (specify):
Click the “SUBMIT” button to complete your account verification process.

Upon successful submission you'll be taken to the verify page, notifying you to check your email to continue.
Open you inbox and look for an email from “Bitstamp” titled “Support message”. In this email you'll be given a link starting with “https://www.bitstamp.net/support/”.
Click the provided link to go to your generated support ticket. This support ticket requires that you submit more information.
Filling Out Your Bitstamp Corporate Support Ticket
Here's a list of documents Bitstamp requires you to upload.
- Certificate of Incorporation.
- Memorandum and Articles of Association; OR any other relevant founding documents.
- Annual return, listing company directors and beneficial shareholders of the last fiscal year; OR similar documents confirming company ownership and management.
- Resolution of the Board of Directors to open an account with Bitstamp.
- List of authorized persons to operate the account (if applicable).
- Authorization for other persons to manage your account (if applicable).
- Recently issued bank account statement addressed to your company name and office address.
- High resolution images of the international passport and proof of residency document of at least two members of the board of directors.
- High resolution images of the international passport and proof of residency document of all owners with a company share of 10% or higher.
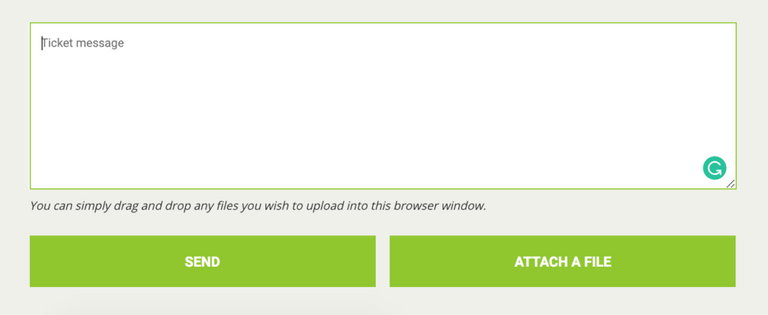
On the support ticket, there's an “ATTACH A FILE” button on the bottom of the form. Click that button to attach your document files.
To clarify, you don't have to write anything in the ticket message field, just attach the required documents. When you're done, click the “SEND” button to submit your documents.
Bitstamp will then review your documents to verify your corporate account. Be prepared to wait a few weeks to get your corporate account verified after submitting.

Upon successful verification, the bitstamp.net/account/verify page will display “STATUS: VERIFIED”.
Next, I'll show you how to secure your Bitstamp account with 2FA.
Step 5: Enable 2FA to Secure Your Bitstamp Account
What is Two-Factor Authentication?
Two-Factor Authentication (or 2FA) is used to better secure your account from potential hackers. By using 2FA, hackers will have to take it a step further to break into your account.
By using 2FA, you will confirm logins with your phone, email or sometimes an authenticator app.
In this case, Bittrex uses the Google Authenticator for 2FA protection. To continue with the next steps ensure you have the Google Authenticator app for IOS or Android.
Activating Bitstamp 2FA With Google Authenticator
In your Bitstamp account settings, you'll see a “Security” option in the left sidebar. Click this link to go to the Bitstamp Two-Factor Authentication page.

At the Bitstamp 2FA Setup Page, click the “ENABLE TWO-FACTOR AUTHENTICATION” button to continue.
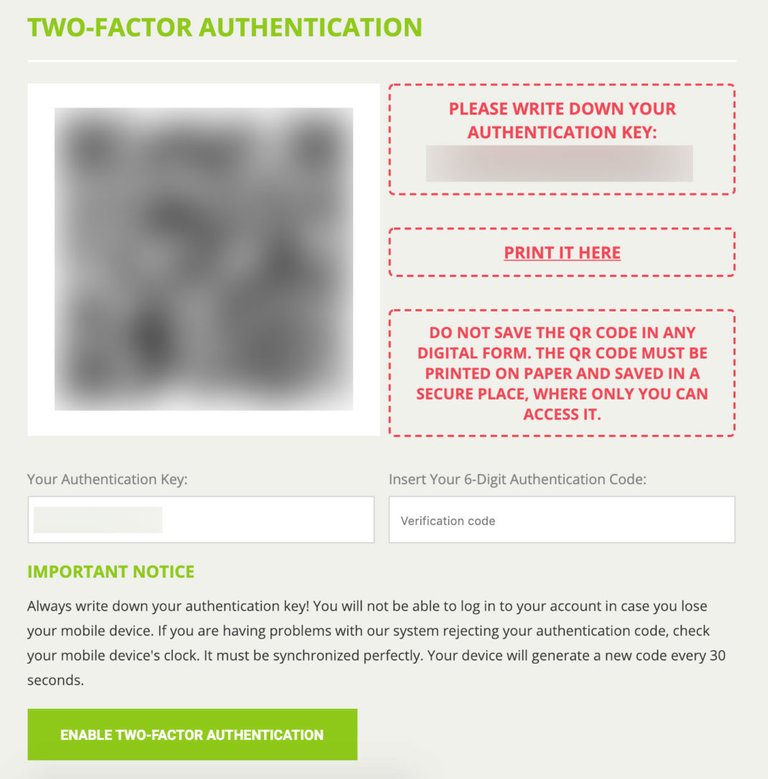
First, It's important that you backup your Bitstamp 16-digit Authentication Key. Write your Authentication Key down and store it somewhere safe.
By doing this, you can use your Authentication Key to restore your authenticator code if you ever lose your phone.
Add Your Bitstamp Secret Key to the Google Authenticator
Download the Google Authenticator app for IOS or Android if you haven't already. You're going to need it for this step.
Now, open the Google Authenticator app on your phone and tap the “+” plus symbol in the upper right corner. This will give you two options — “Scan barcode” or “Manual entry”.
- Scan barcode: Scan the barcode on the Bitstamp 2FA setup screen. This will capture your 16 digit Bitstamp Authentication Key and add your account to Google Authenticator.
- Manual entry: Enter the email used for signing up on Bitstamp in the “Email” field. Then type the 16 digit Bitstamp Authentication Key into the “Key” field. Hit the check mark in the upper right corner to complete setup.
Once you add your account to Google Authenticator, the app will begin generating Bitstamp authenticator codes. Copy the 6 digits from the Google Authenticator app into the Bitstamp “verification code” field.
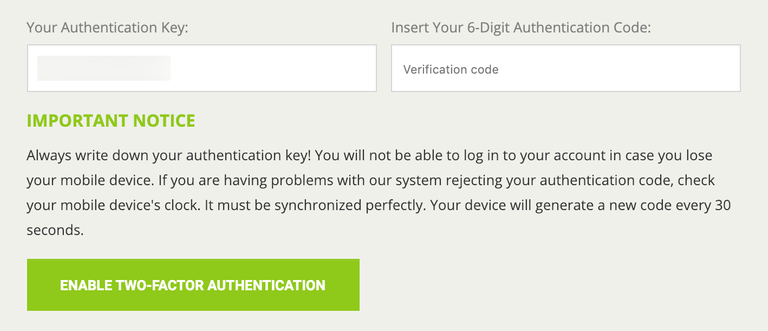
Finally, click the “ENABLE TWO-FACTOR AUTHENTICATION” button to complete your Bitstamp 2FA setup.
If you receive an error message stating that the code is incorrect, wait a minute and try a newly generated authentication code.
You'll now use this method of generating your 2FA verification code when logging in to your Bitstamp account.
Logging in to Bitstamp with 2FA
After enabling 2FA on your Bitstamp account, you'll be required to enter your verification code upon login. It's pretty similar to the normal login routine, but you must also enter a code to verify it's your account.
Start by visiting the Bitstamp login page.

Here, you'll enter your user ID and password. Click the “Log in” button to continue.
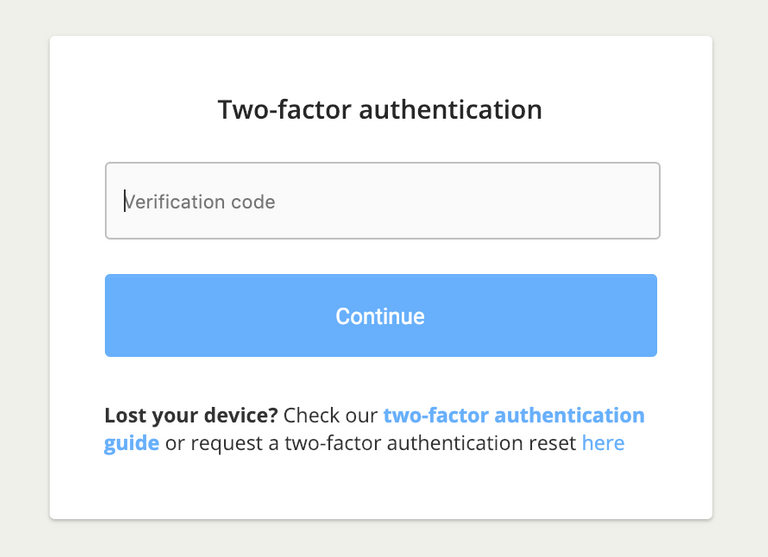
Then, you'll be presented with the Two-Factor Authentication form. Open the Google Authenticator app on your phone to get your verification code.
Enter the code generated from the Google Authenticator app into the “verification code“ field. If you have multiple accounts in your Authenticator app, find the one labeled “[USER ID]@Bitstamp”
Click the “Continue” button to log in to your account.
Adding Your Bank Account to Bitstamp
As of writing, the only way to add your bank account to Bitstamp is via EU bank (SEPA). SEPA (or Single Euro Payments Area) is a payment-integration initiative of the European Union.
SEPA was put in place to simplify bank transfers denominated in euro. If you're in a country listed below, you have access to SEPA bank Bitstamp deposits.
SEPA EU Eurozone Countries
- Austria
- Belgium
- Cyprus
- Estonia
- France
- Finland
- Germany
- Greece
- Ireland
- Italy
- Latvia
- Lithuania
- Luxembourg
- Malta
- Netherlands
- Portugal
- Slovak Republic
- Slovenia
- Spain
SEPA EU, Non-Eurozone Countries
- Bulgaria
- Croatia
- Czech Republic
- Denmark
- Great Britain
- Hungary
- Poland
- Romania
- Sweden
SEPA EEA Zone Countries (Charged the Standard Wire Fee)
- Iceland
- Norway
- Liechtenstein
- Monaco
- Switzerland
Bitstamp SEPA deposits are credited in 1-3 business days. EUR deposits credited to your EUR balance won't be converted. All funds transferred in EUR to your USD balance will be converted to USD, free of charge.
Check Bitstamp's current exchange rates here.
Countries Outside of SEPA Zone
USD international deposits are temporarily unavailable due to ongoing migration to a different service provider.
USD domestic deposits may run into minor delays.
Bitcoin Deposits
Bitcoin deposits are commision free.
Learn more about depositing money at Bitstamp at the Bitstamp Deposit page.
Accessing Your Bitstamp Account
You can access your Bitstamp account anywhere via the Bitstamp website, Bitstamp for Android and Bitstamp for IOS.
If you're always on the go, you may want to consider downloading the app for your phone to check your Bitstamp account balances and or make trades.
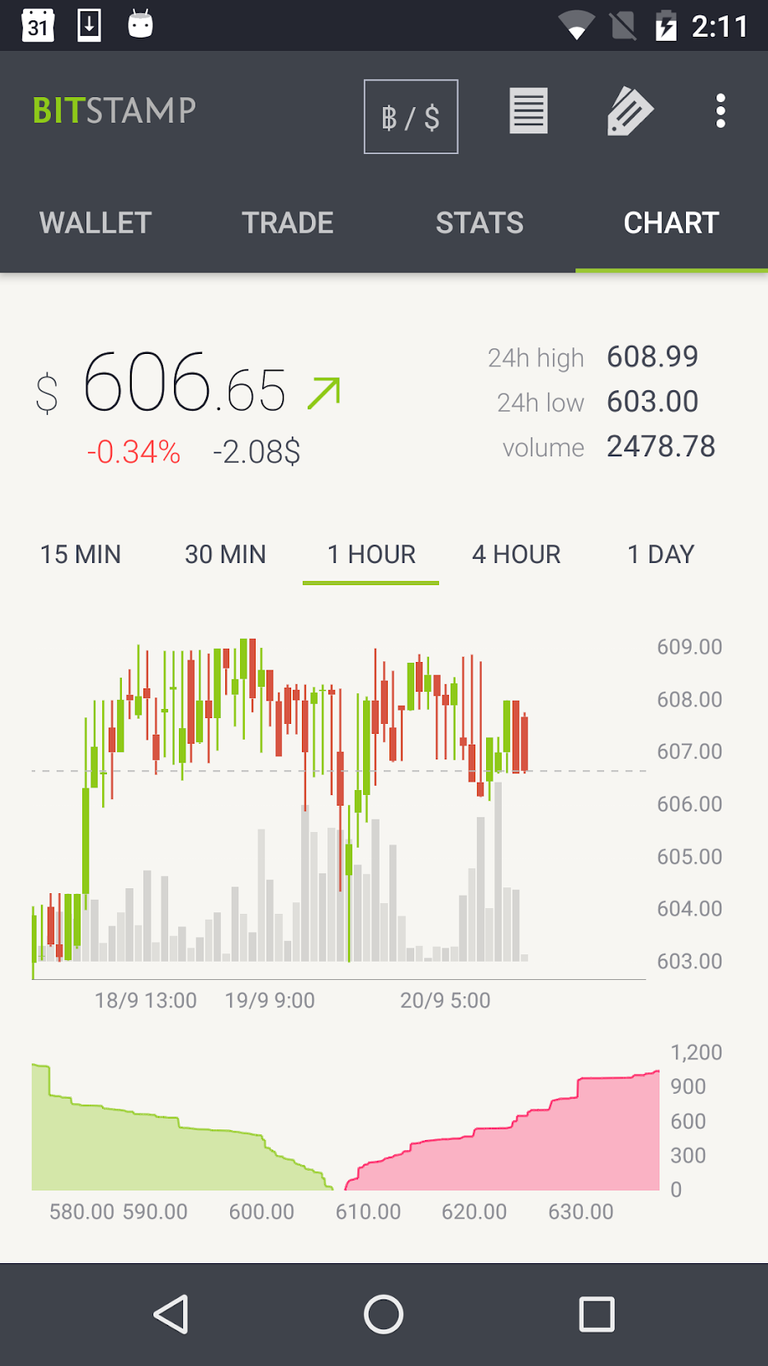
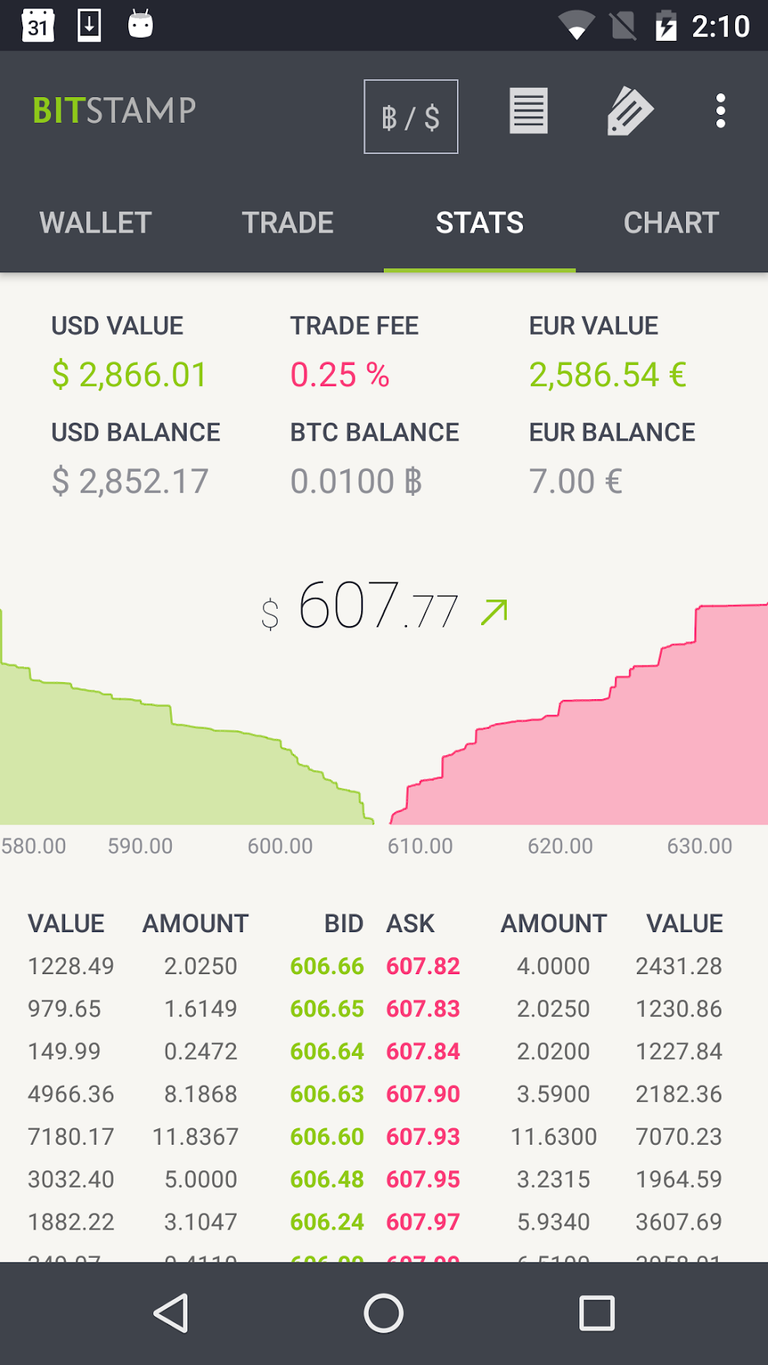
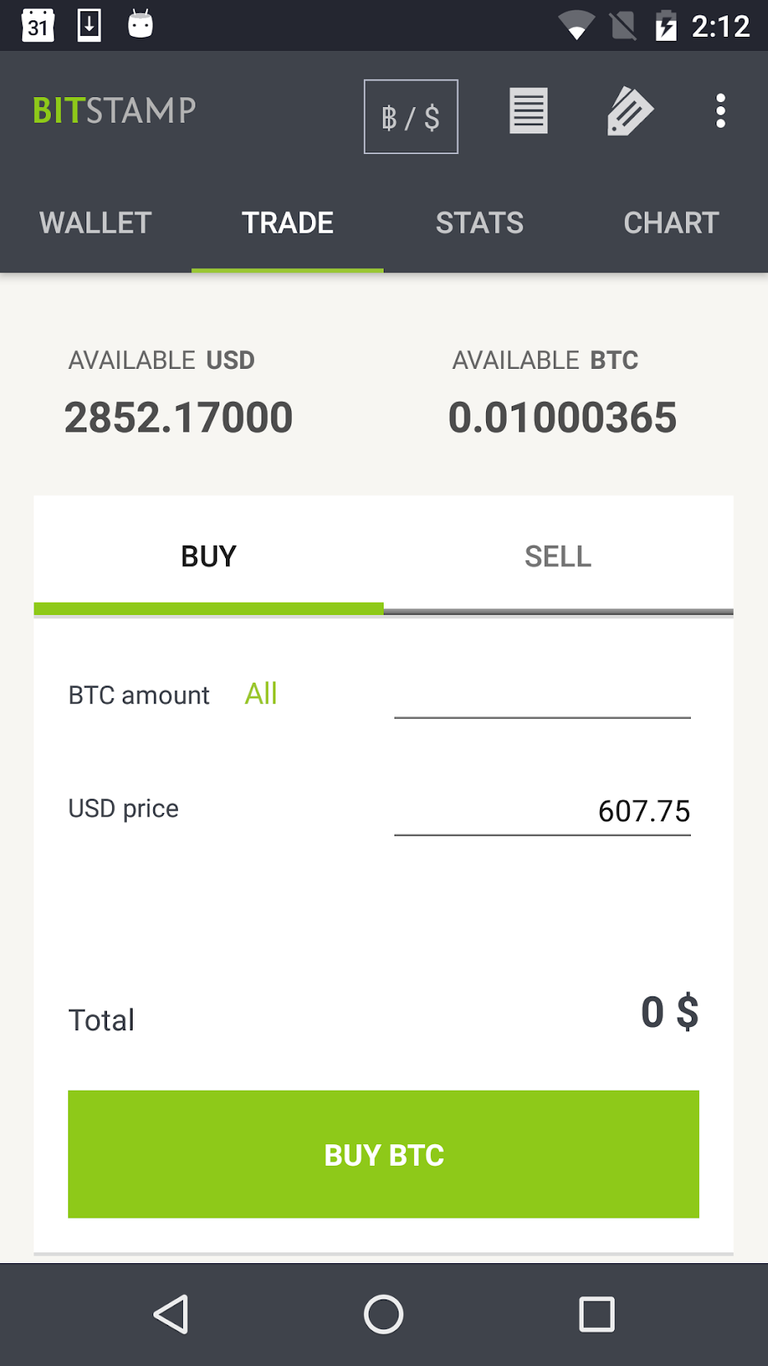
Additionally, the Bitstamp app will allow you to set up price alerts on different cryptocurrencies. Here's where you'll gain access to the current crypto market data, your order data, and crypto charts.
The Bitstamp crypto exchange has an official free to download the app for IOS and Android. You'll be able to trade cryptocurrency across all Bitstamp platforms.
Here are some screenshots of the Bitstamp mobile app below.
Conclusion
By now you should have a fully secured Bitstamp account created. Your account should also be set up with two-factor authentication.
You now know how to set up and use the Google Authenticator for two-factor authentication. Furthermore, you know how to login using your Google Authenticator code.
Additionally, your account should now be verified or in the process of becoming verified. You'll be able to make deposits with a SEPA bank account.
Finally, you learned which apps you can use to safely access your Bitstamp account on the go.
What are your goals for crypto asset investing? Which currencies do you invest in and why?
Posted from my blog with SteemPress : https://xrpontop.com/bitstamp-registration-verification-guide/
