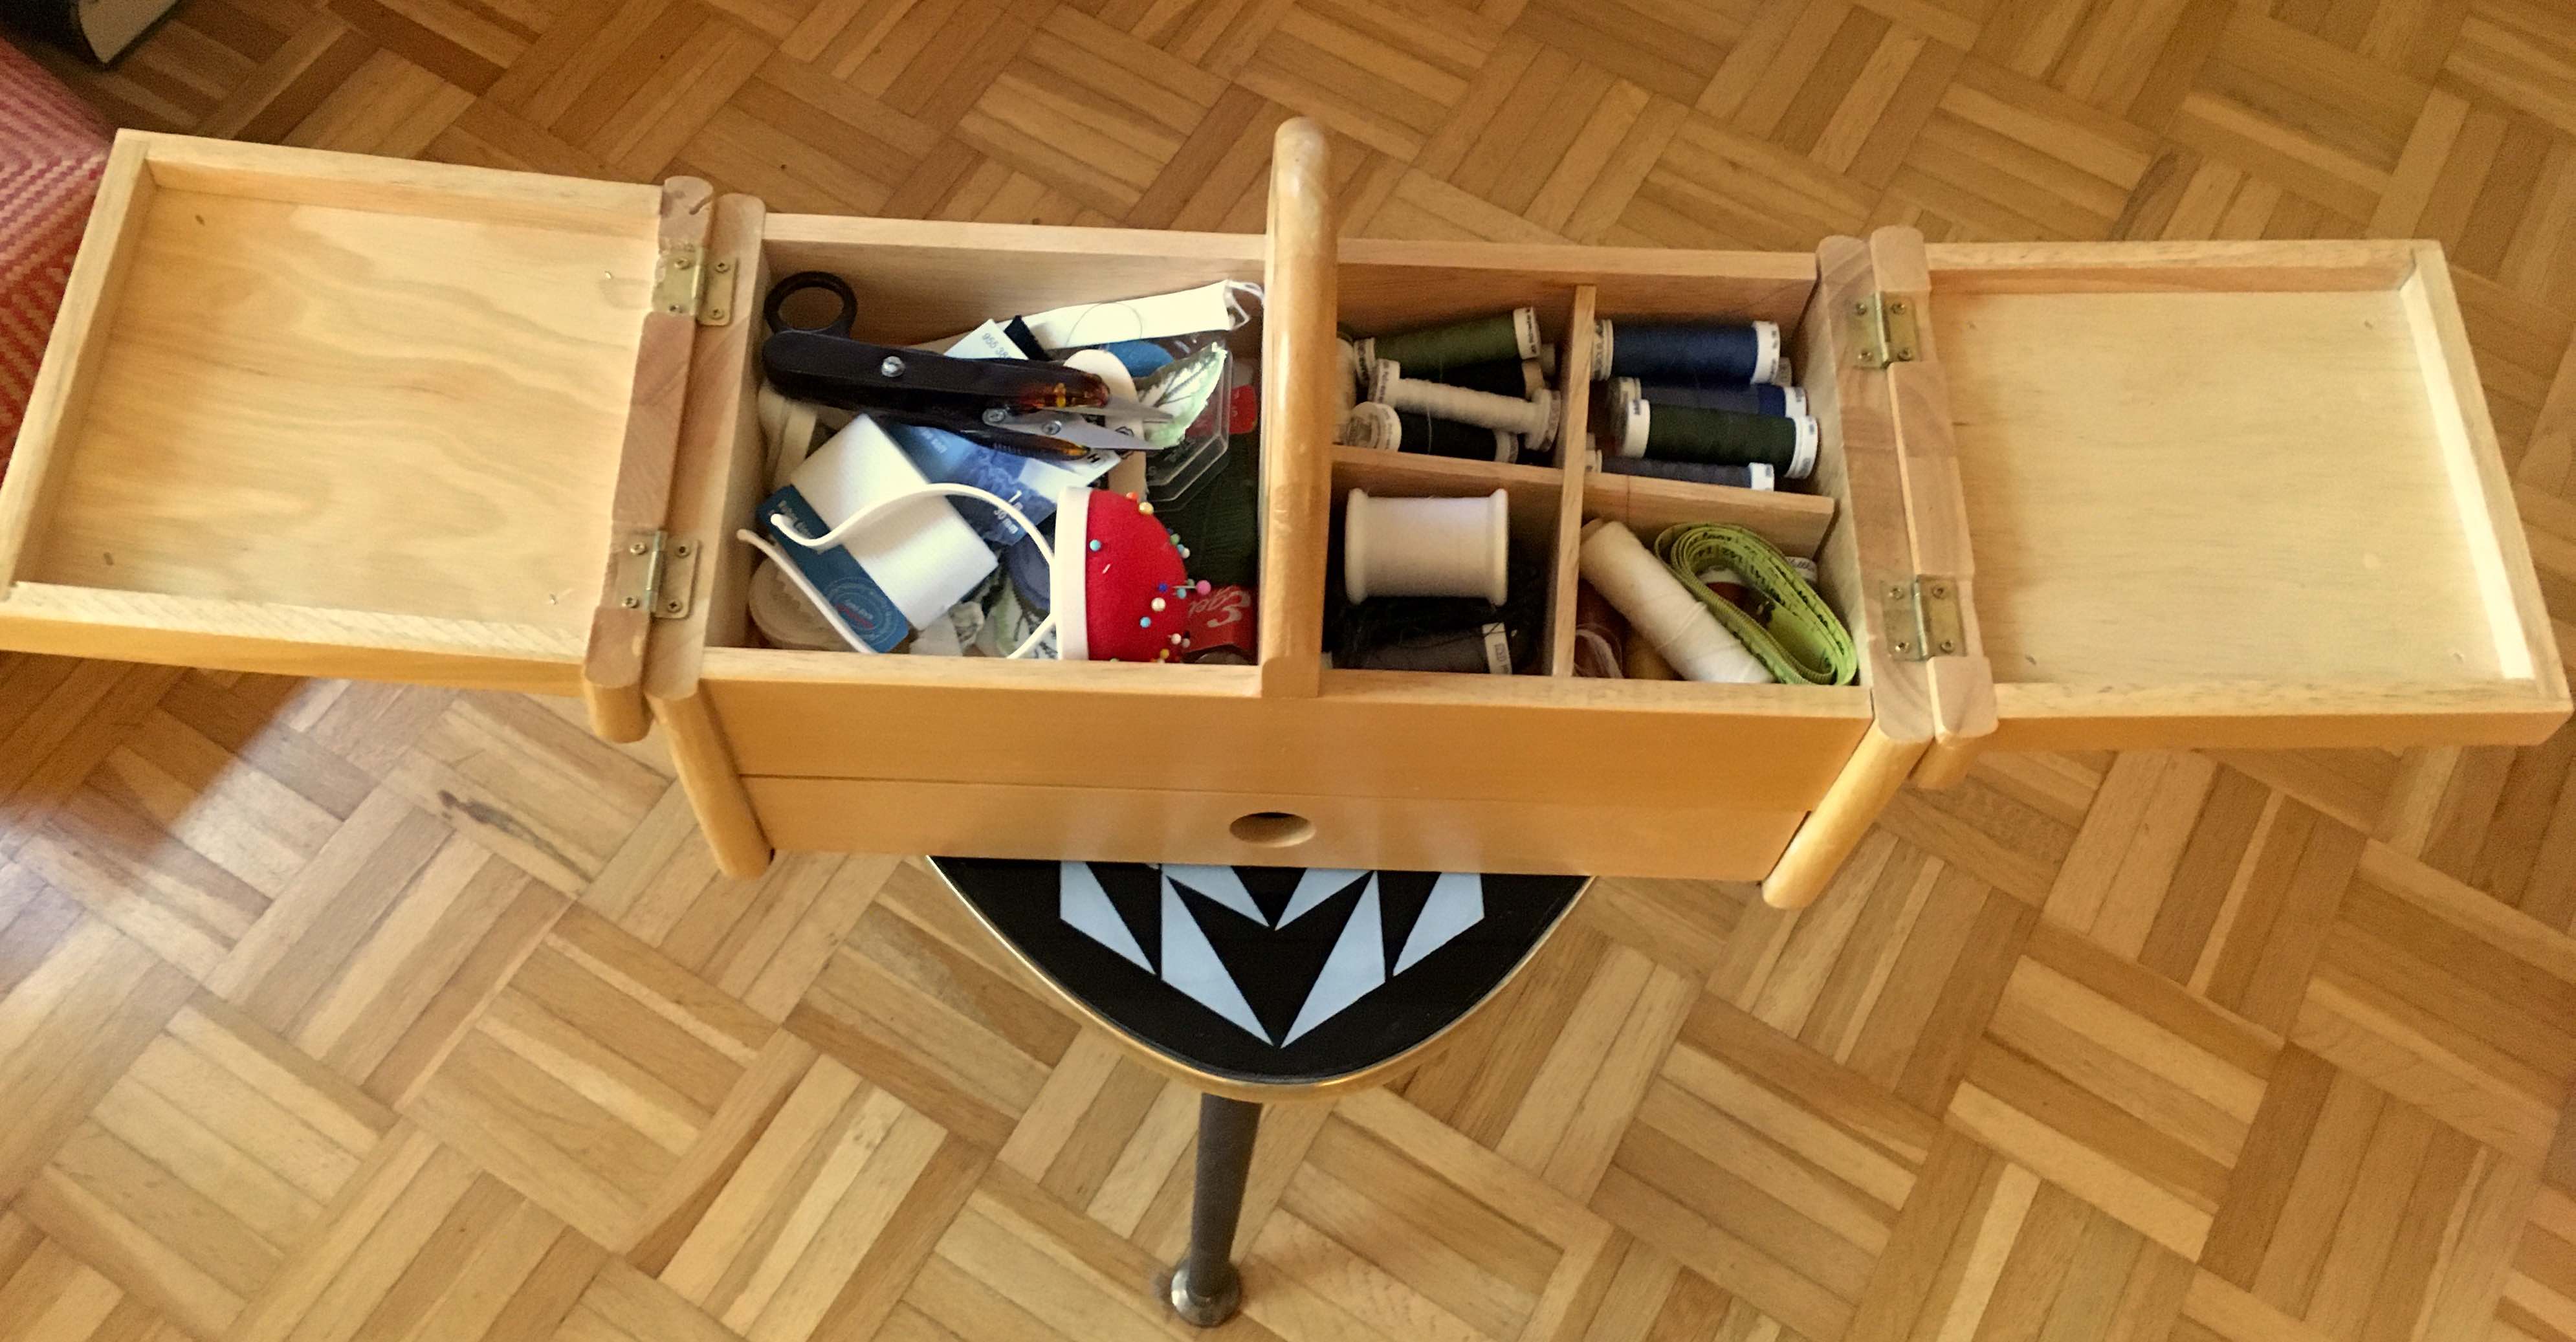
A tailor, hobbyist or professional, will have a sewing box.
I got mine (used one) last year and have been using it a lot ever since. On the top right are different coloured spools of sewing thread, next to it a compartment for the pincushion that I can put over my arm and various smaller sewing utensils.
Something of the collector's idiosyncrasy comes out here, the joy of small things that one wants to keep.
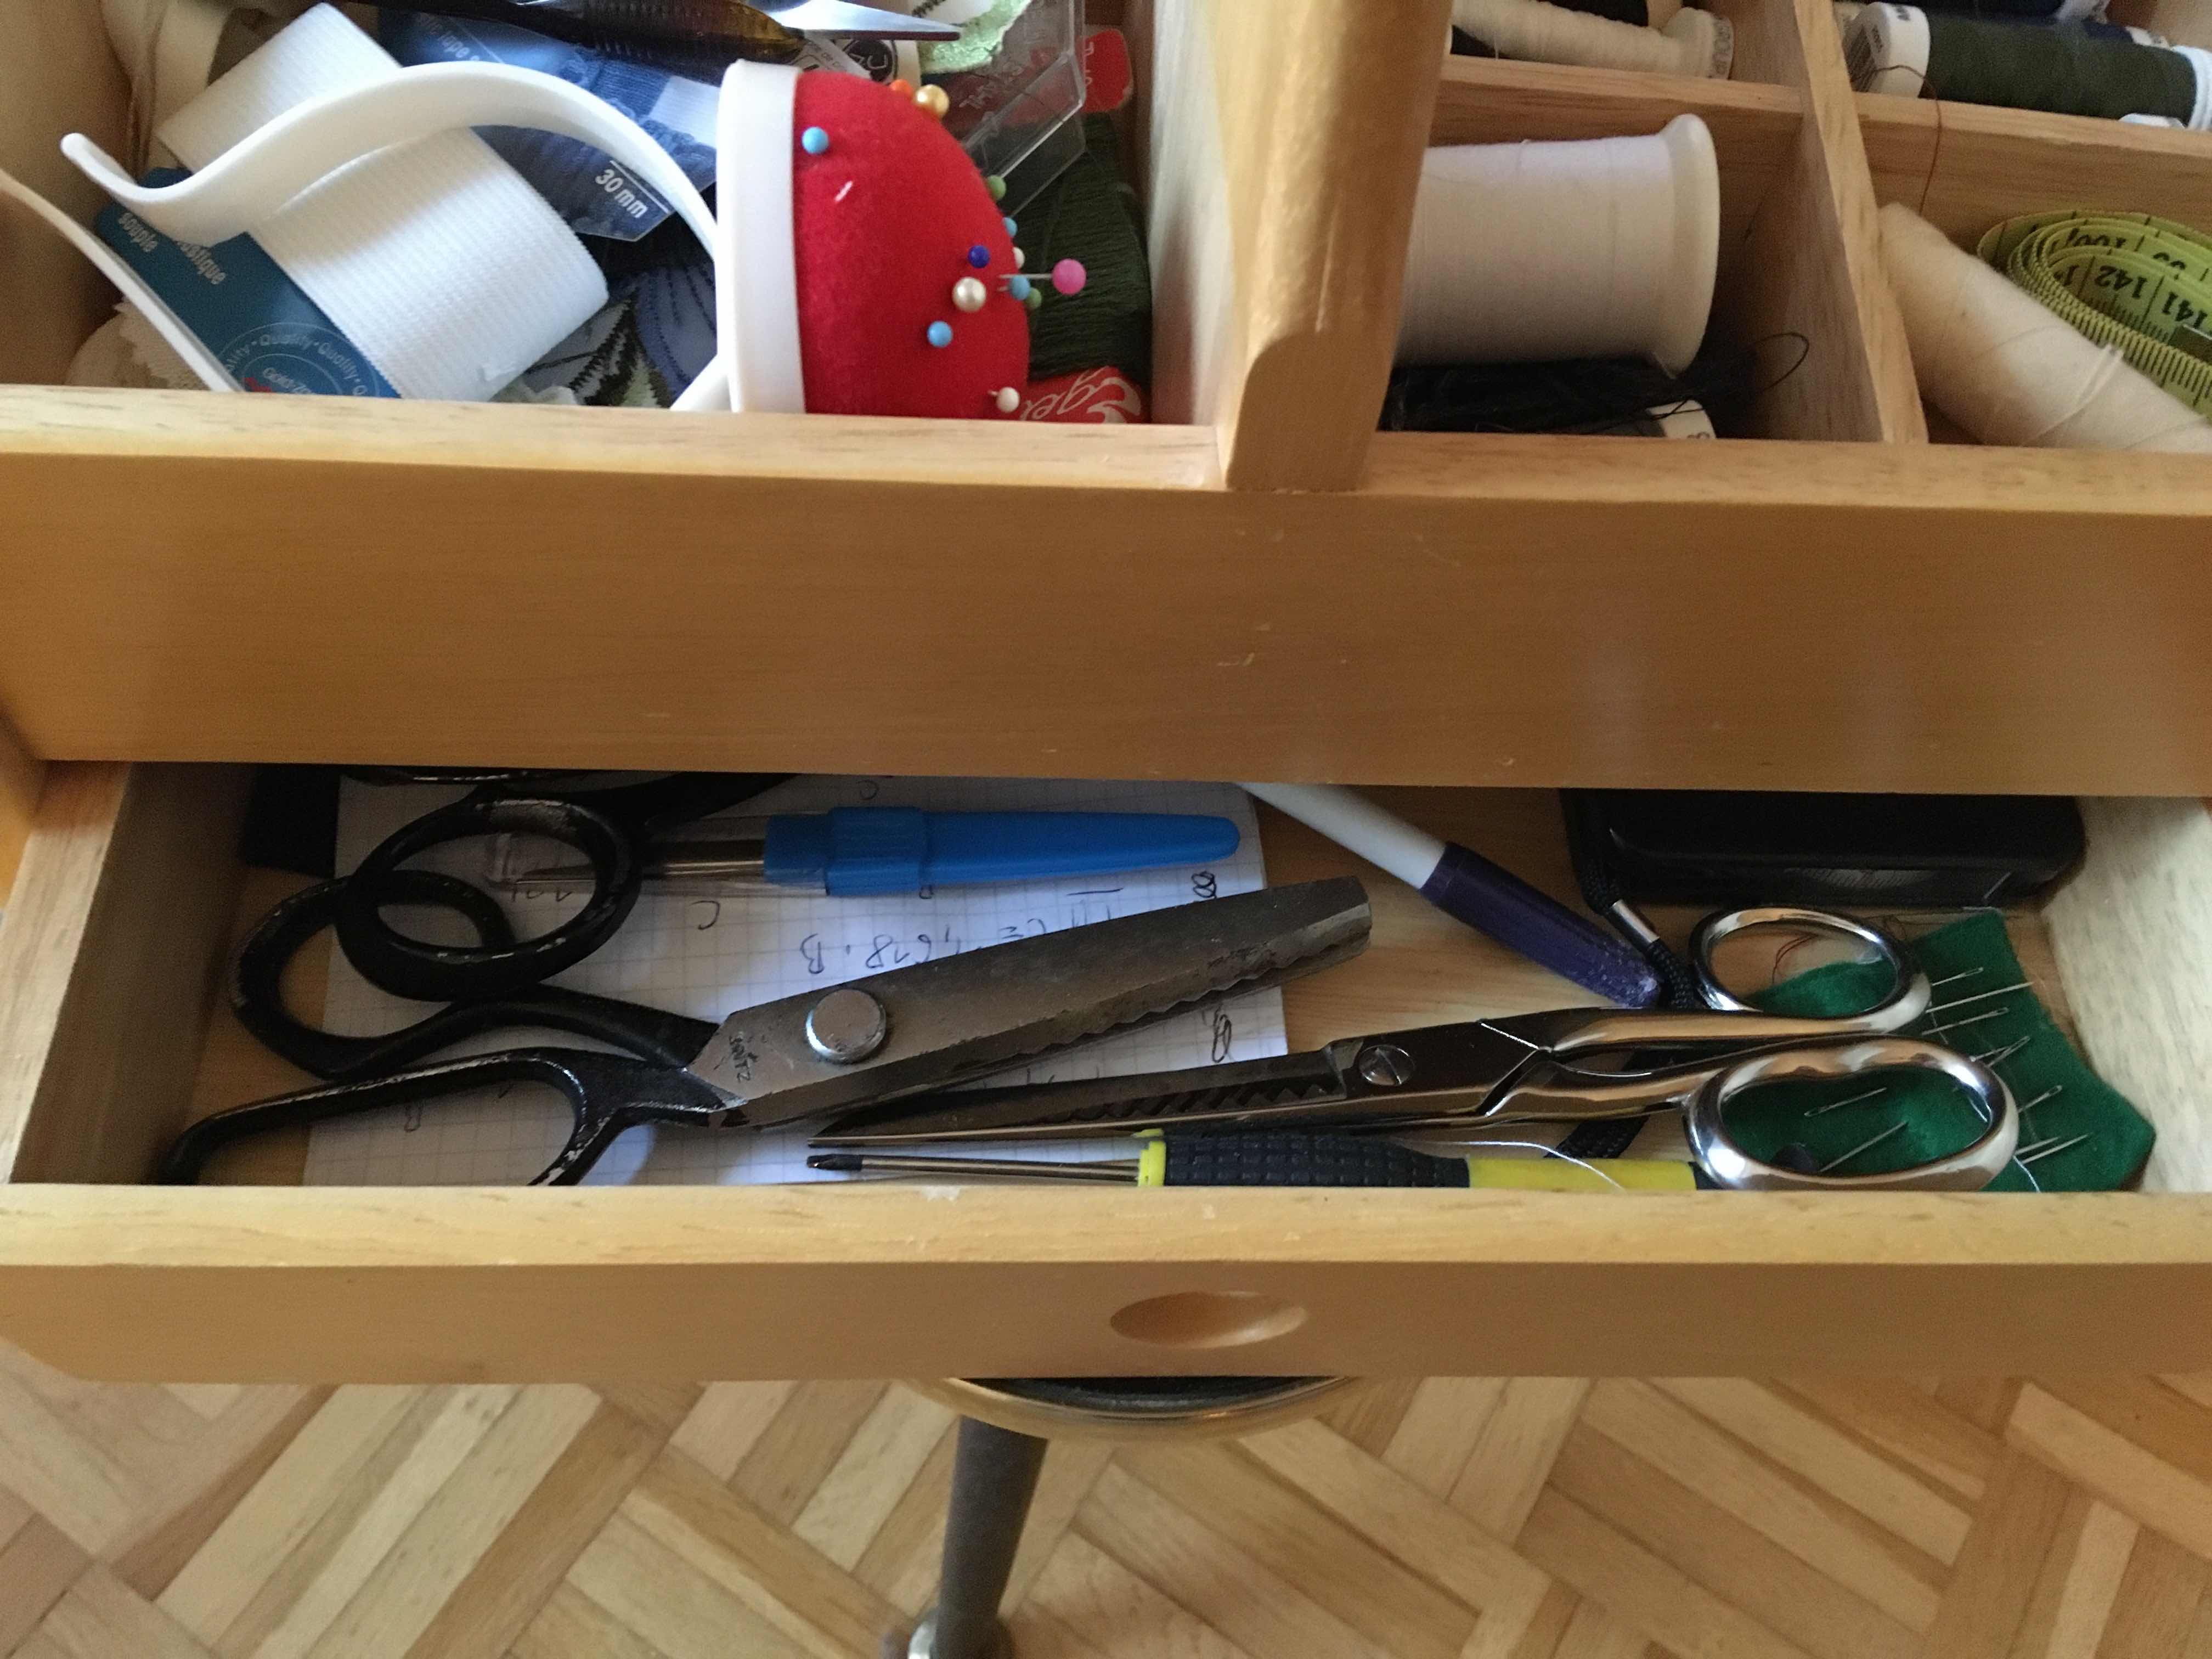
For those who don't know, the open seams are prevented from un-fraying by a zig-zag cut. Then some sewing needles. One thing to say about the needles: they don't last forever and eventually become blunt and unusable. I bought a lot of needles more than twenty years ago, but most of them are no good, except for a few. Since I hardly ever sewed by hand back then, I didn't notice. But that's the way it is with everything: if you use it more often, you notice whether it's of quality or not.
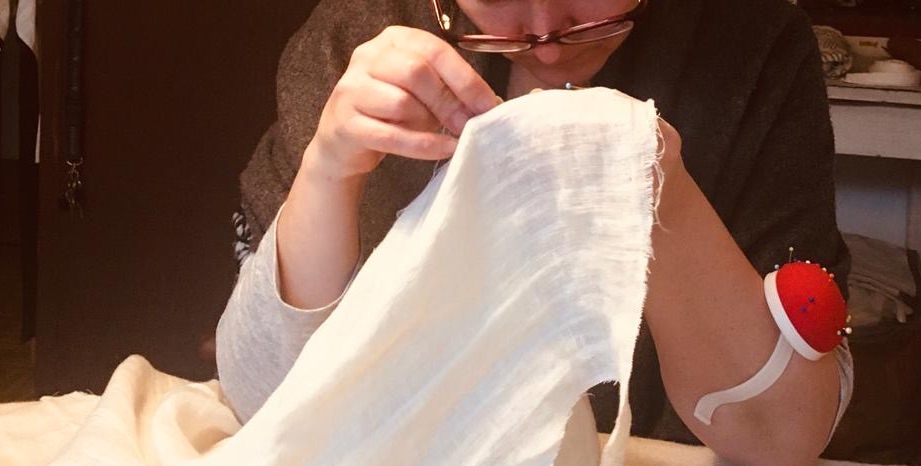
Me, hand sewing. I really hang my eyes over the fabric, while resting my elbows on the table. This partly protects me from adopting a slouching and painful posture while sewing. If I had better eyes, I would hold the piece further away.
Keeping something just because it looks nice, but basically only impresses the untrained observer, is something I have gotten out of the habit of doing, or am in the process of doing, with many things. The less I have, the better. But what I do have is then precious and useful to me. Those things are known as "quality products". Not easy to find nowadays and so I tend to buy old things and restore and renew them. A quite satisfying task.
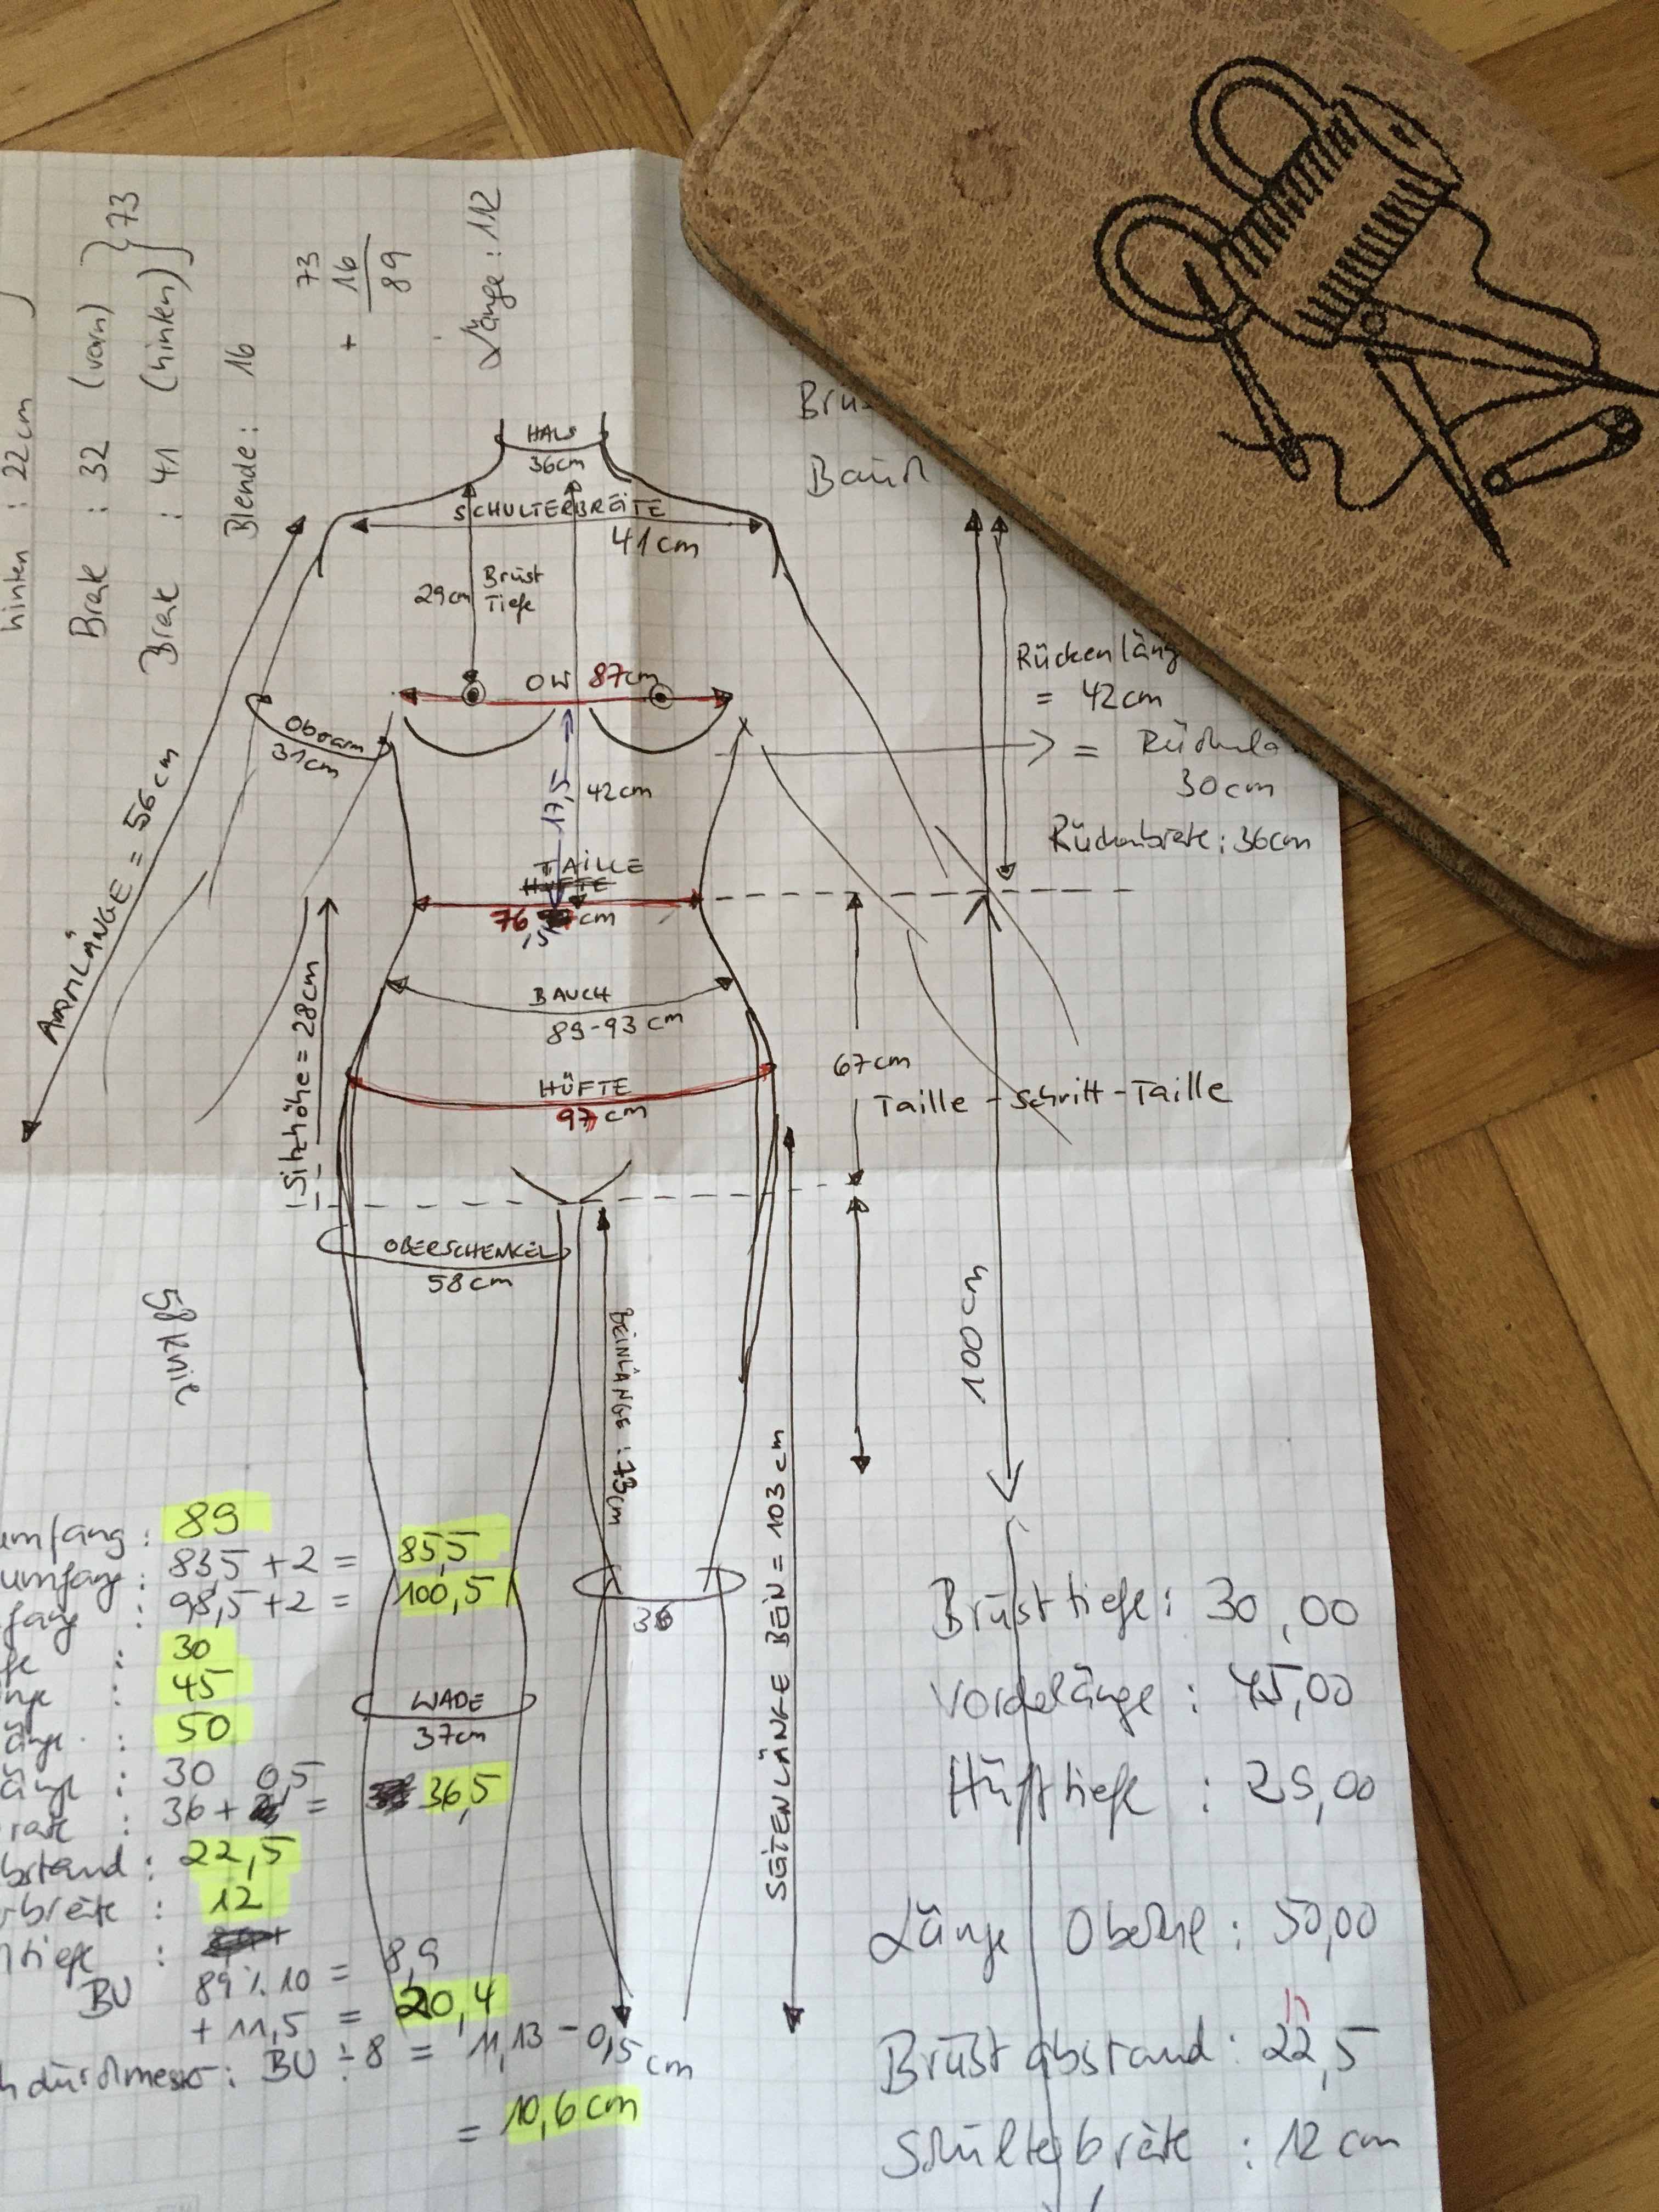
Body measurements recorded on paper.
However, the body actually changes frequently and I am surprised how often I have to re-measure. I wouldn't have guessed how many different measurements are needed for tops and trousers/skirts respectively.
The better you measure yourself, the more fitting the result will be. But it' s not so easy to transfer two dimensions to three. Trying to make a dressmaker's mannequin match your own body measurements is not really possible with standard mannequins. If you really want to be more precise, make a body replica. So far, however, this has been far too time-consuming for me. I think I'll just stick to gaining a feeling for myself and my physical dimensions over time, and let the habit and the security of repetitive activities do their thing.
I now show you a sewing product that I made a few weeks ago.
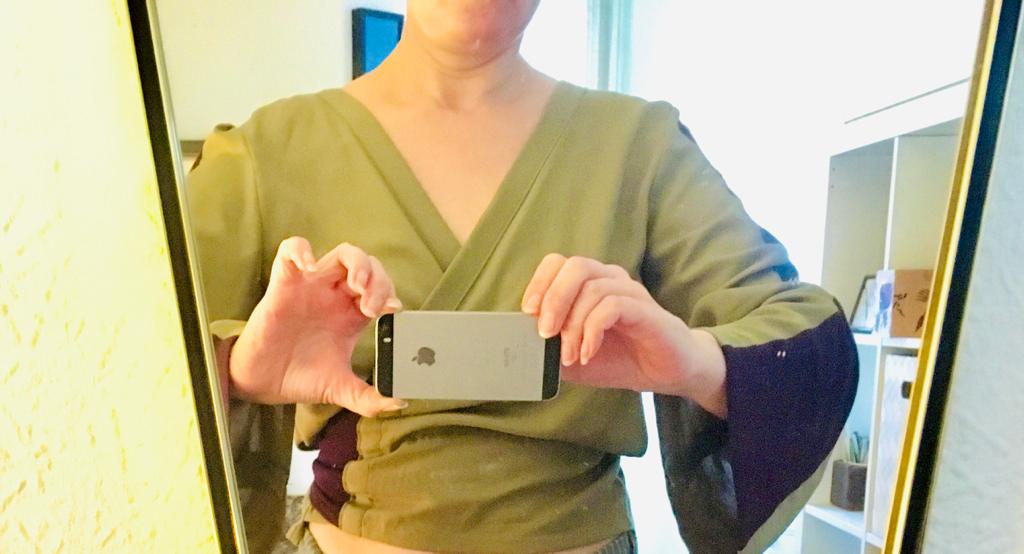
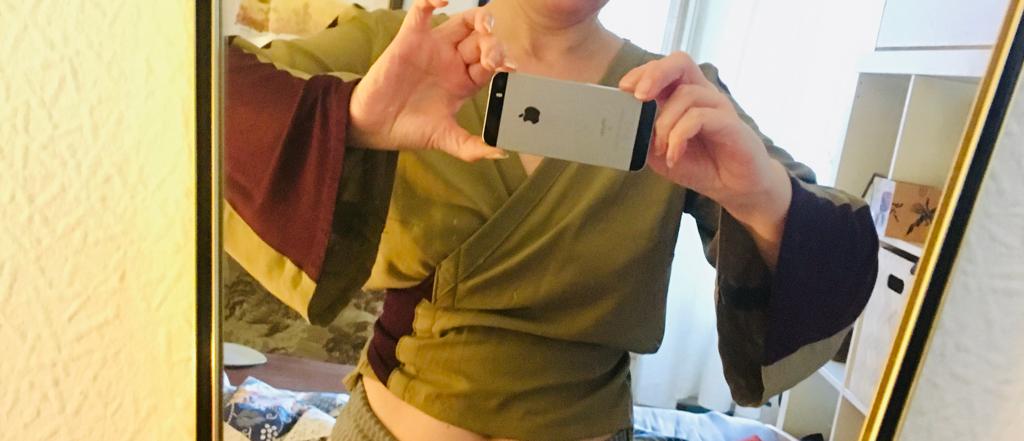
It is a blouse for the summer, which I created from two different fabrics. One from olive green viscose and one from a purple stretch t-shirt fabric.
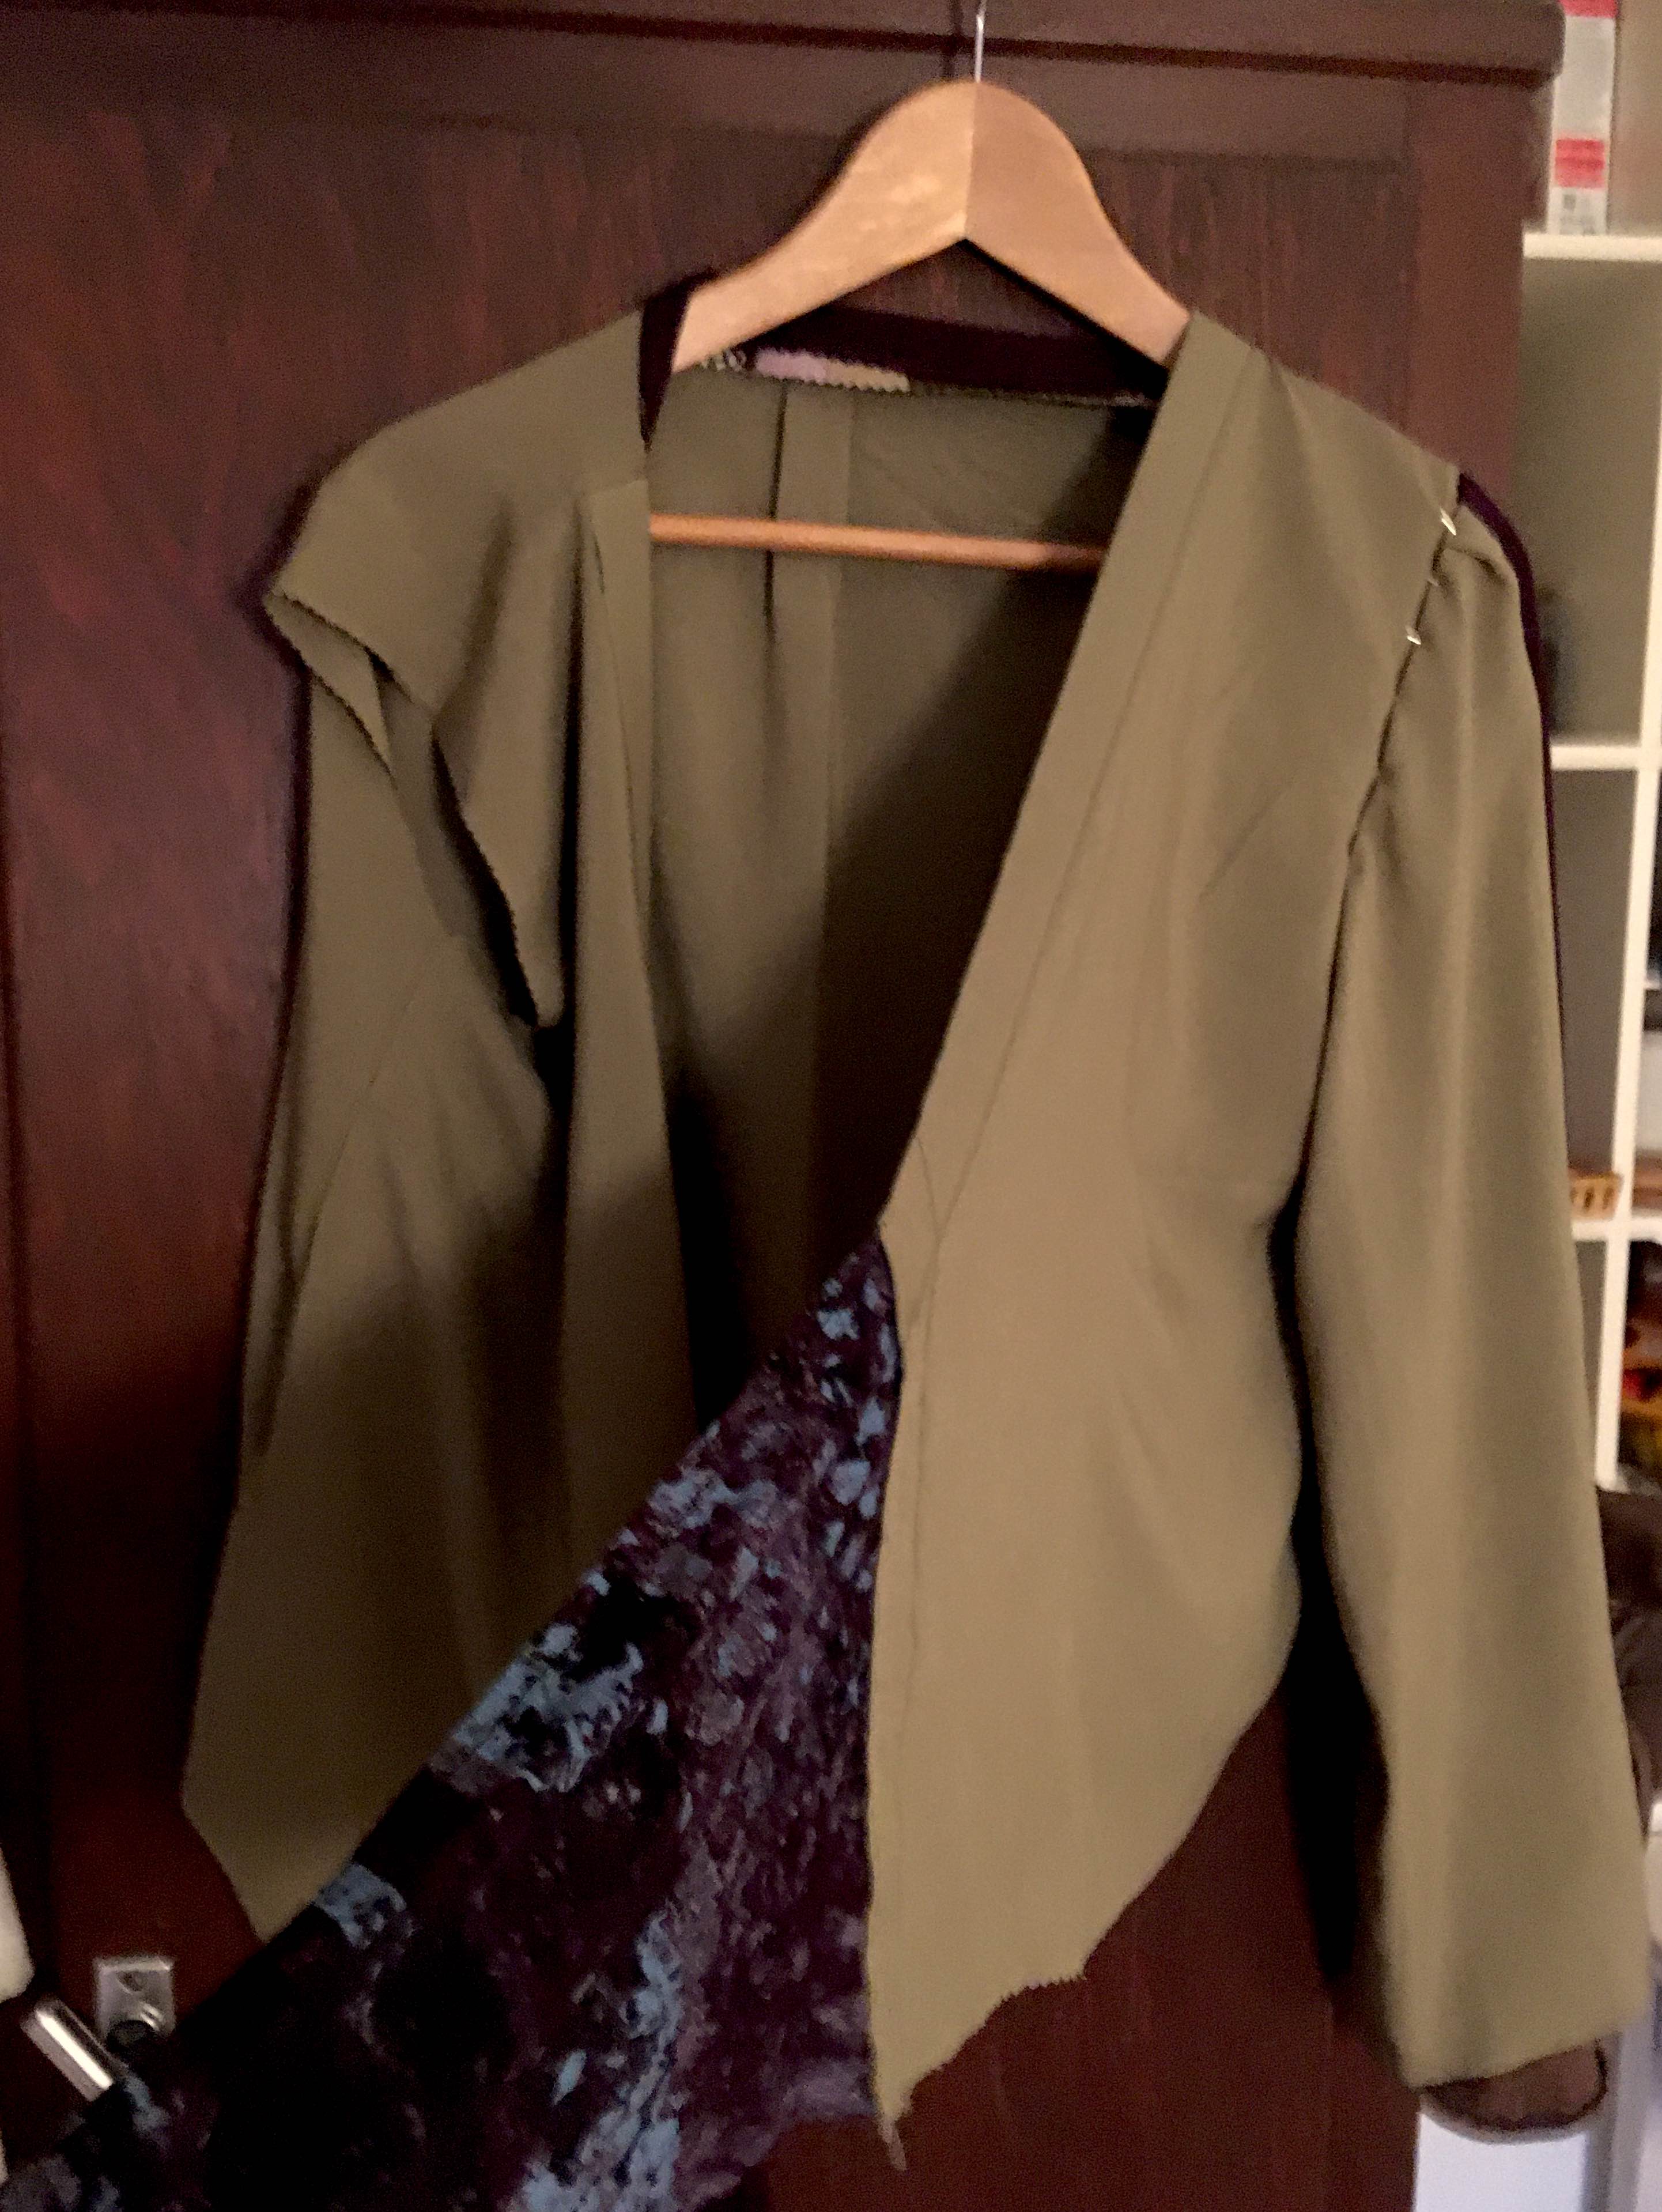
The blouse in the making. One sleeve is pinned with needles to see how it falls. The other side can still be seen with the raw edge unsewn. I keep the front binding stretched towards me, holding it with one hand, ... a little tough to see.
I acquired the viscose fabric from the remnant collection of a department store about two years ago, the other fabric I got by sacrificing an old shirt that I never wore and therefore it was not a pity to use it as extra yardage, which I urgently needed, as the viscose alone was not going to be enough for a whole blouse, at least not according to the design I had in mind. I constructed a wrap-around blouse out of it, which works similar to a kimono, so all without buttons.

Here you can see the sleeve construction.
I ripped the sleeve out of another blouse that had become too small for me, used it as a template, measured it a little larger for the current cut and then made the purple middle part just as wide as I wanted the bell sleeves to be overall. I then sewed these three pieces together to make one sleeve. The whole thing twice, of course.
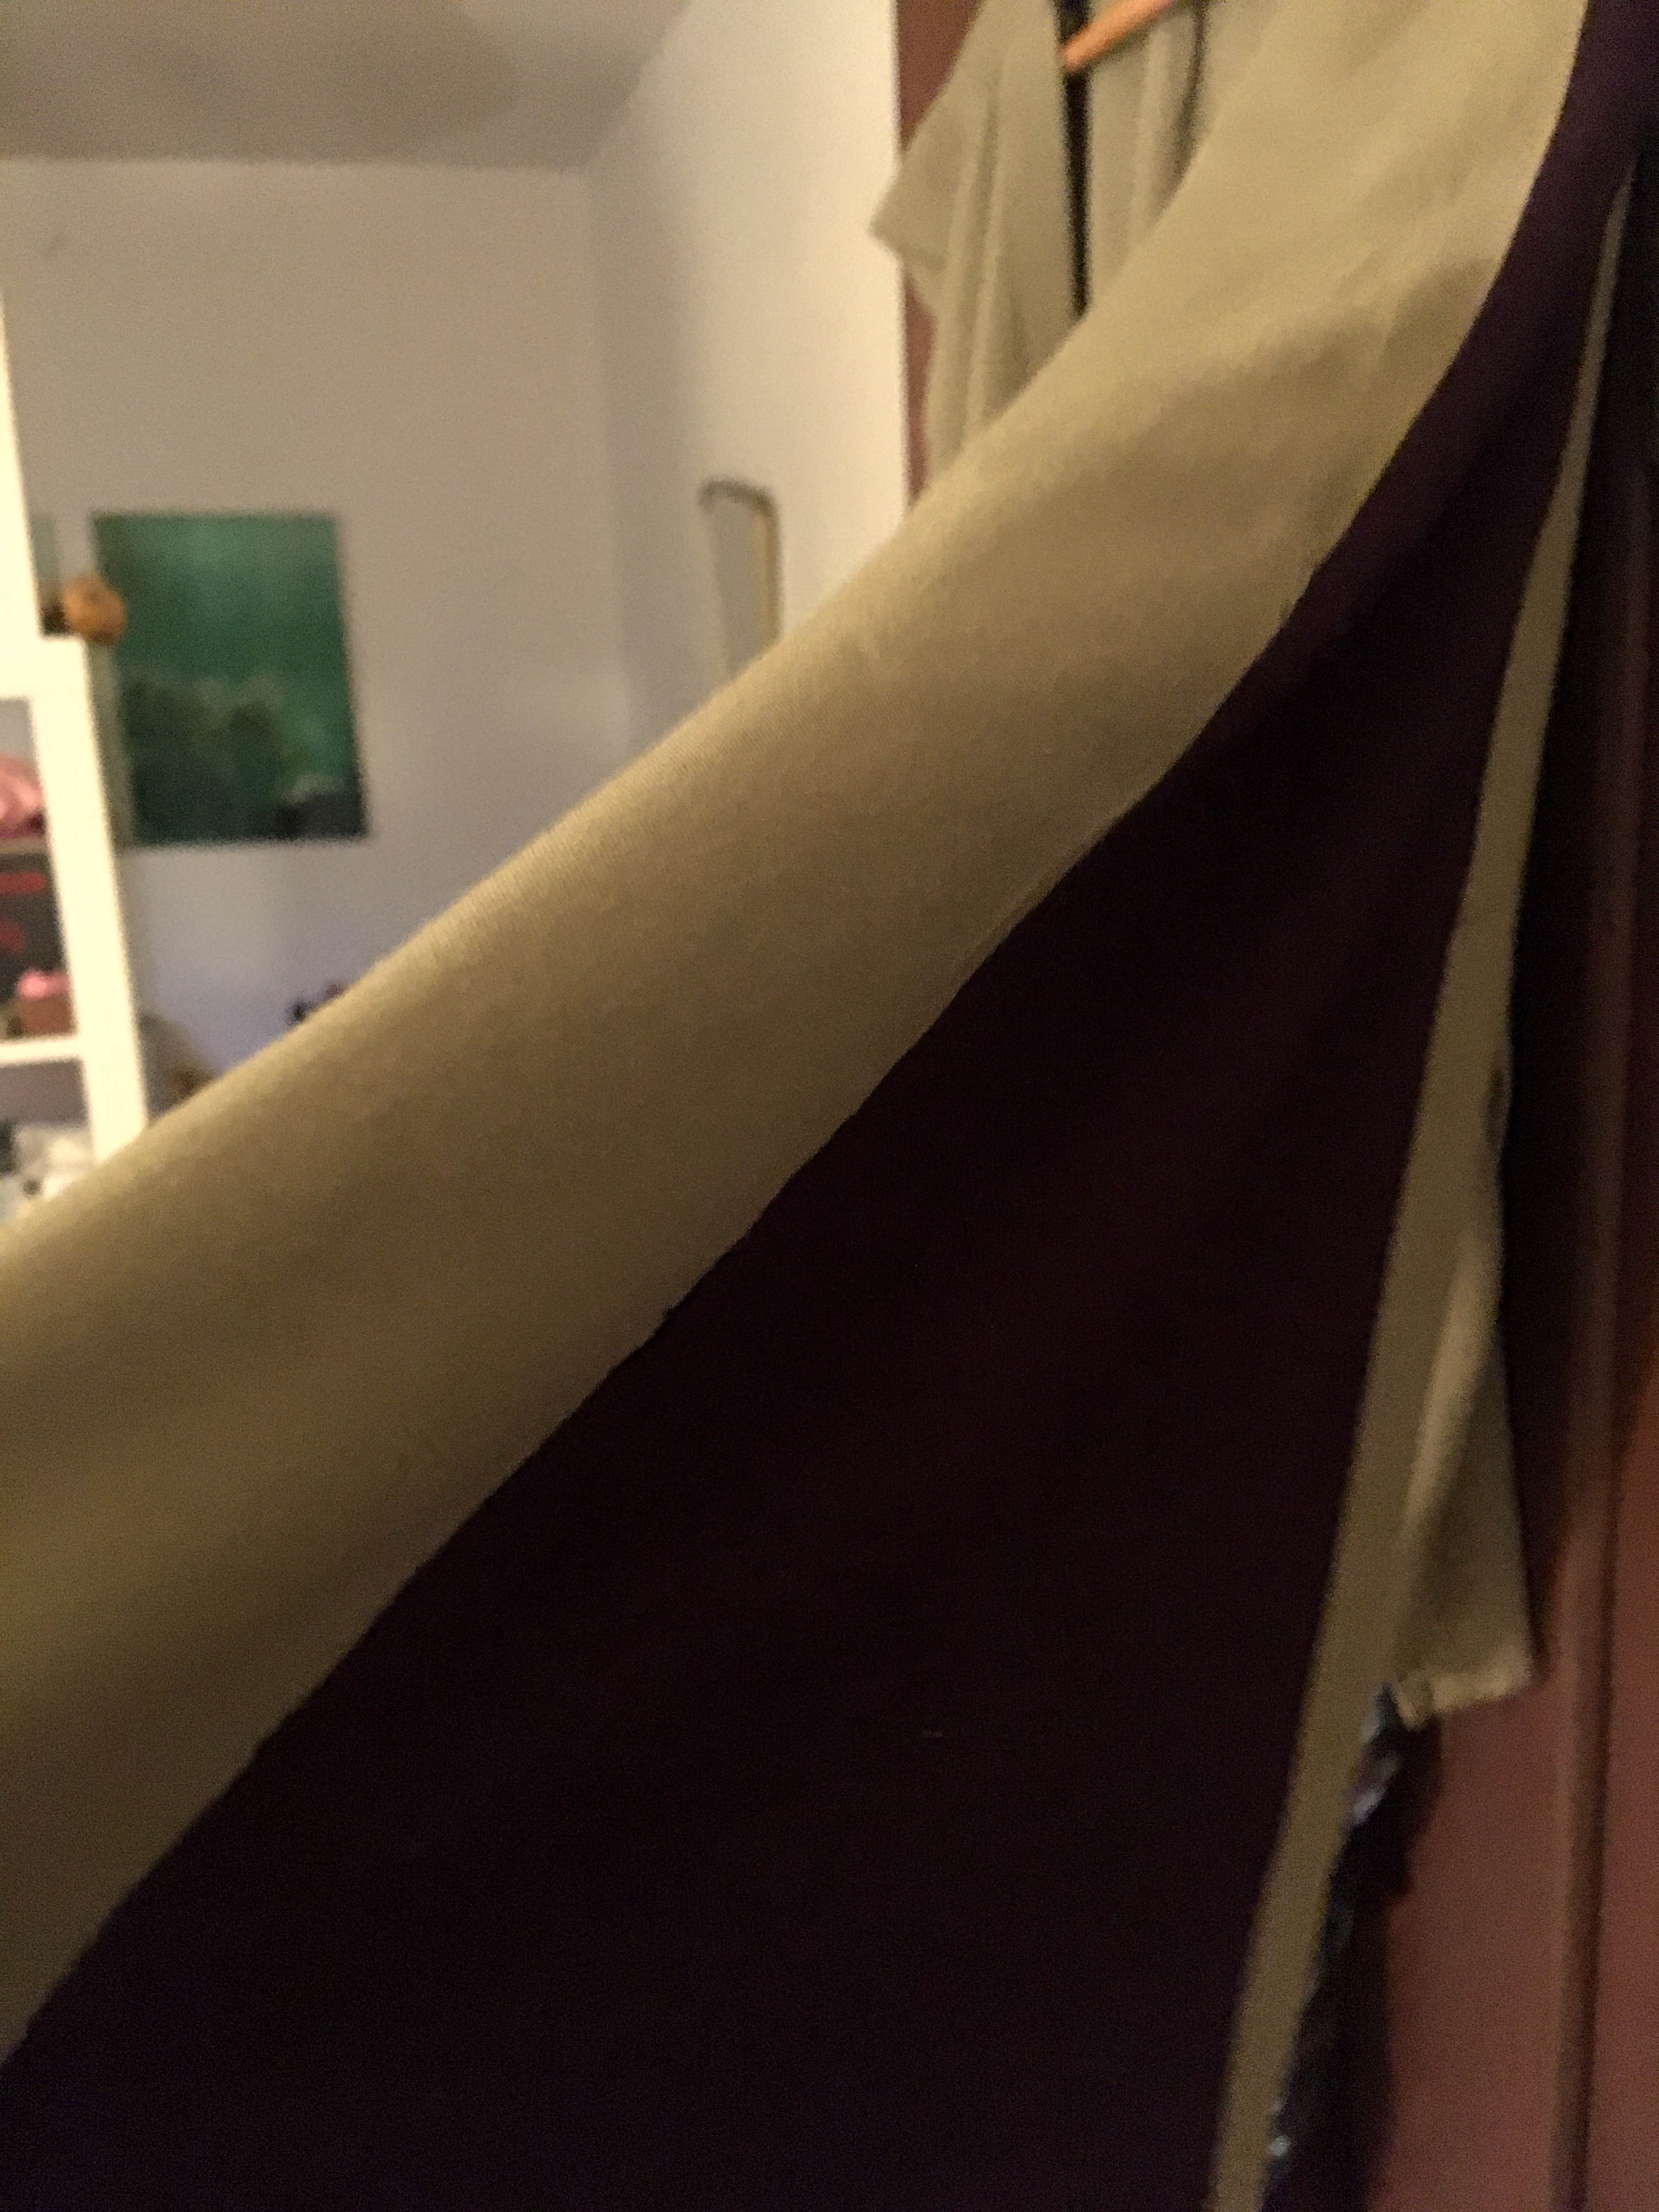
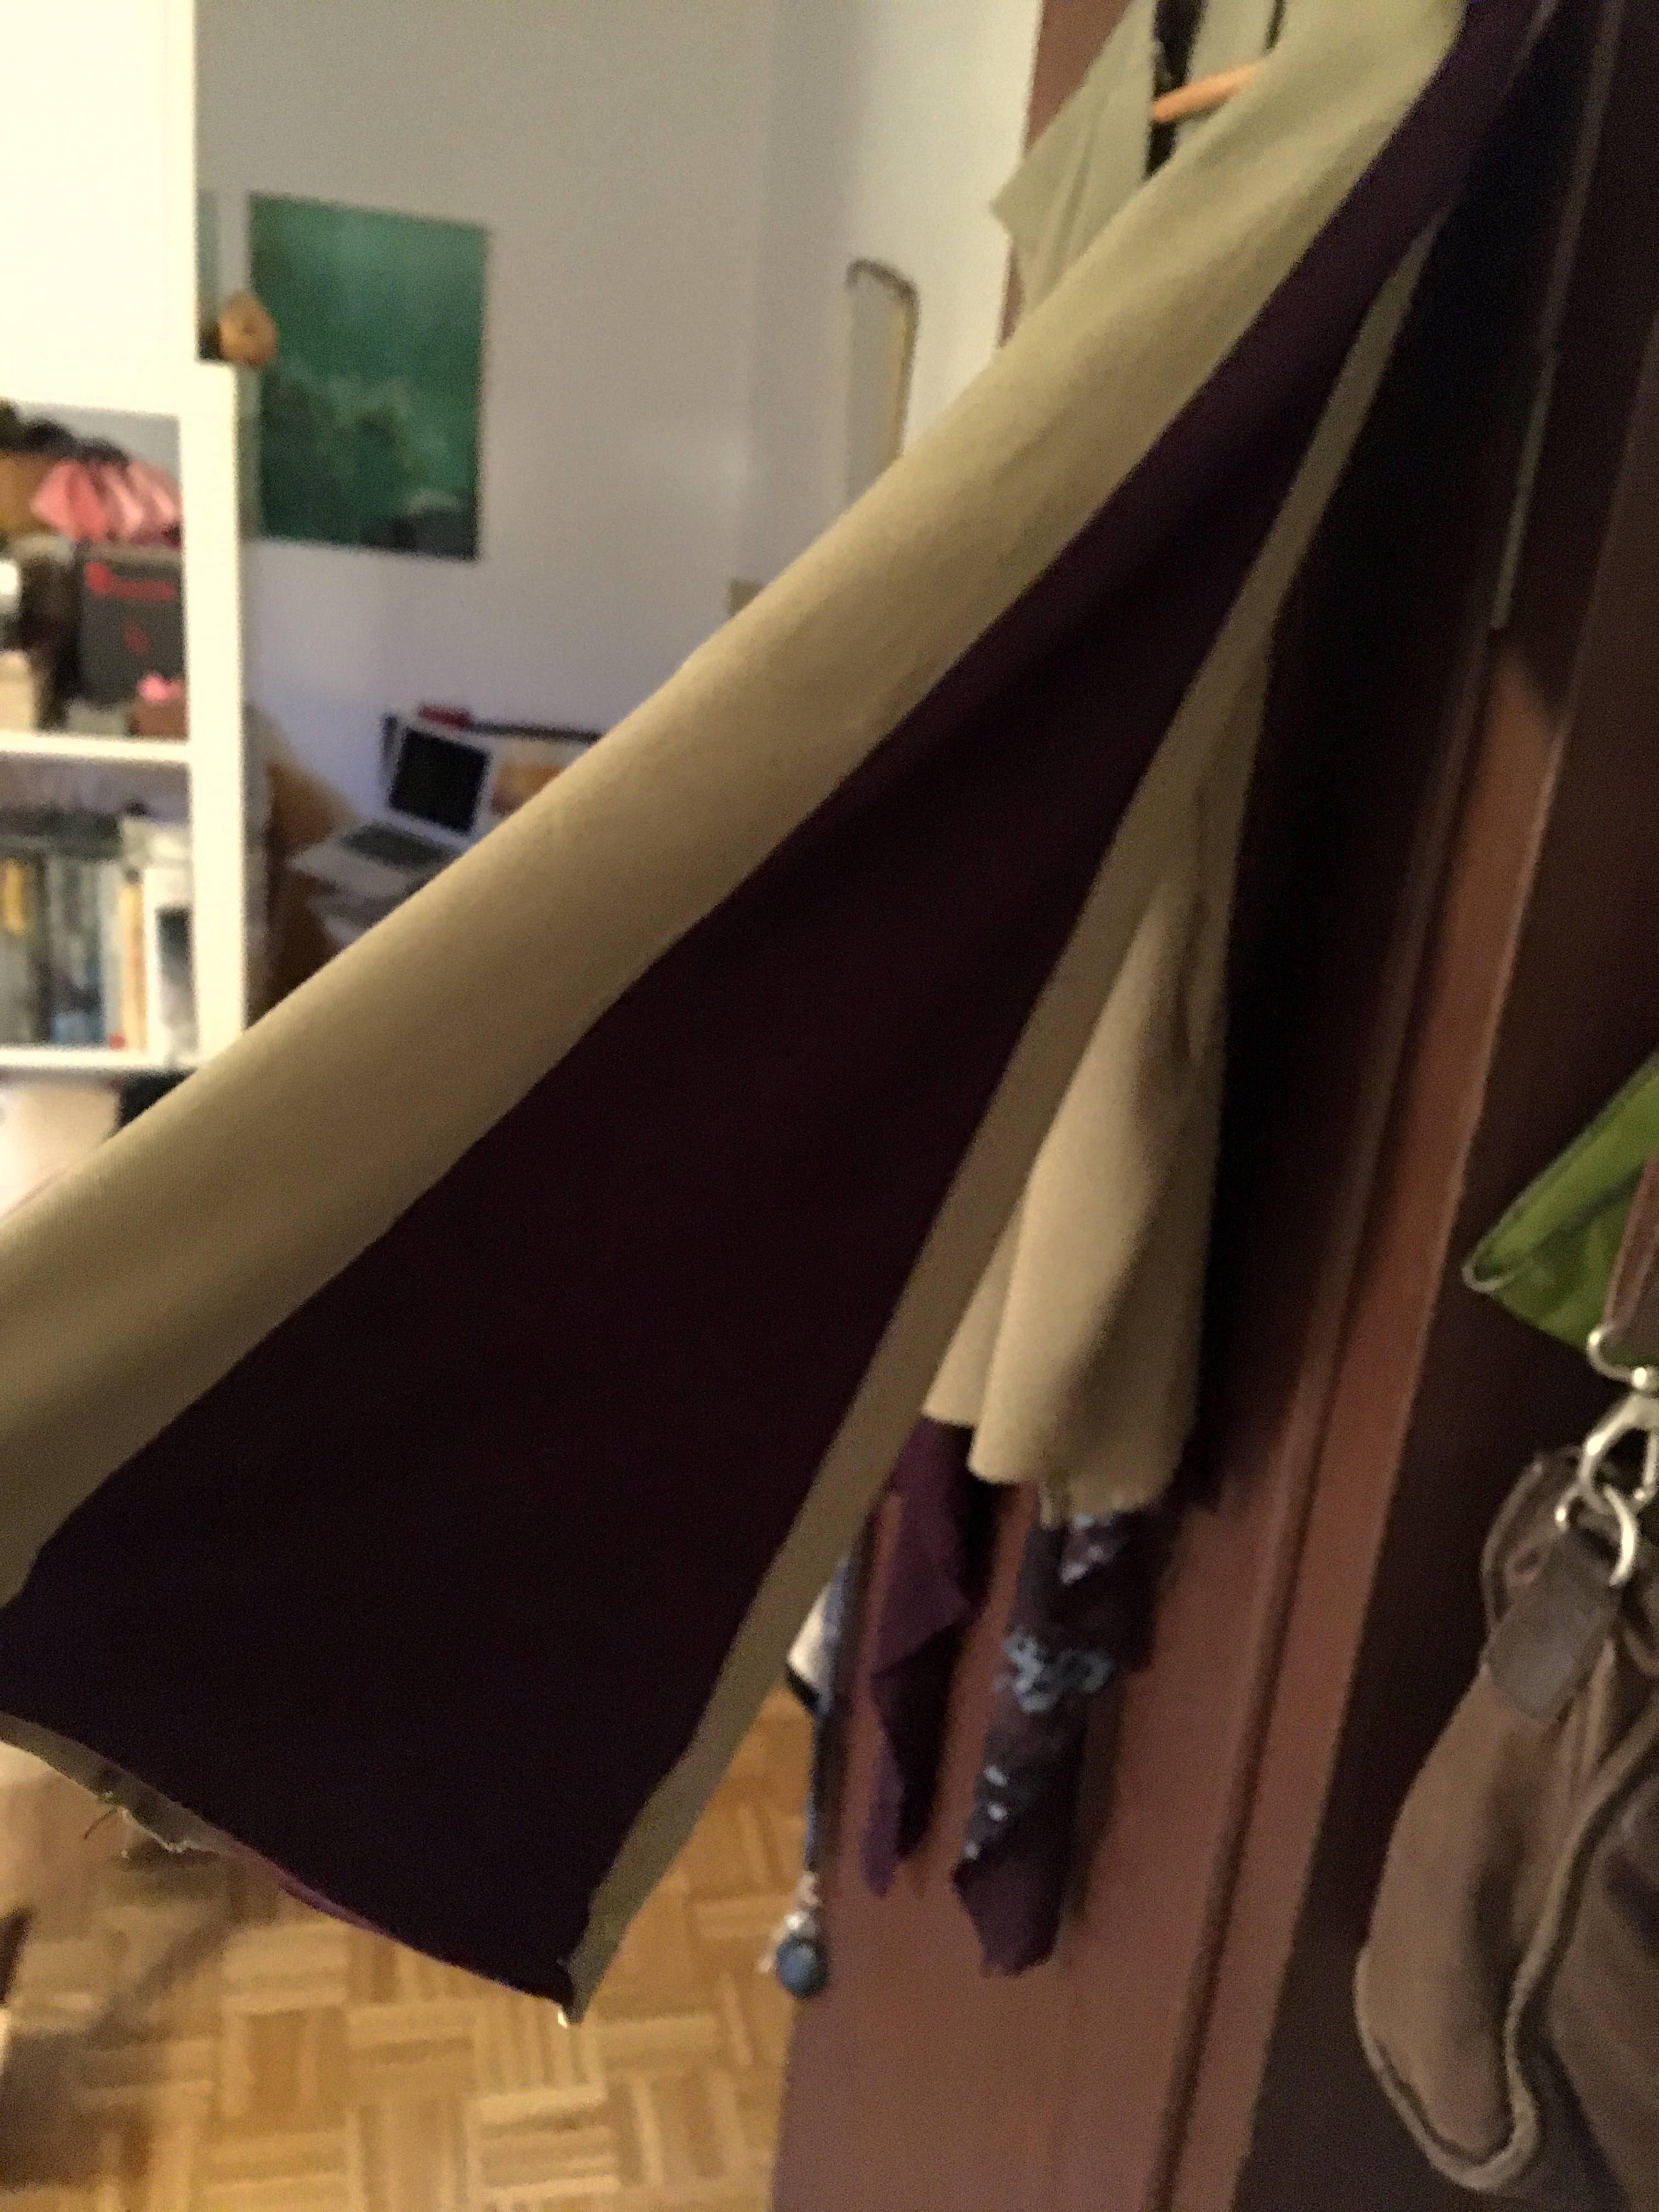
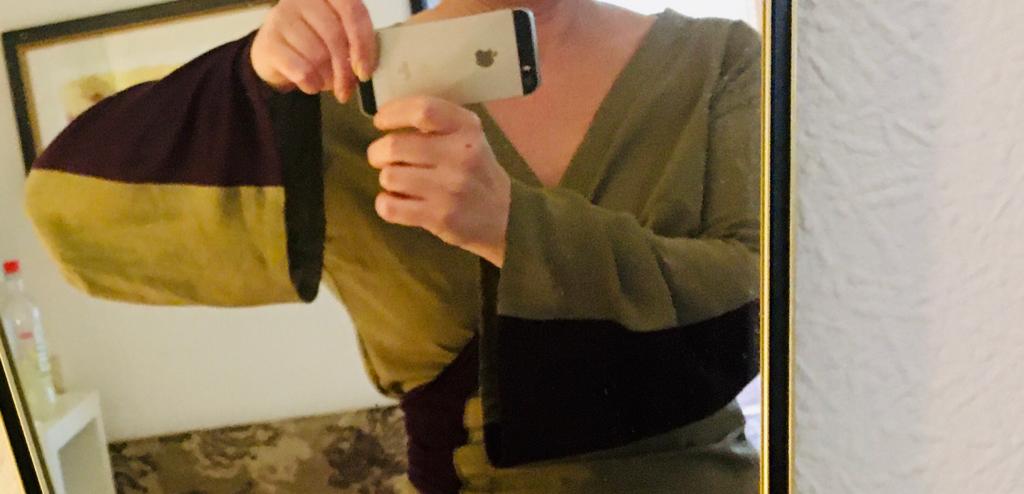
The very large sleeve, seen here close up and stretched out with one hand so that you can see the centre a little better. I have a particular fondness for large sleeves, whether they are open bell-shaped or closed and gathered.
I took the pattern for the front part from a kimono blouse that still fits me and transferred the measurements as best I could.
Sewing the t-shirt fabric onto the viscose fabric as a tie belt, which starts wide and then tapers very narrow, was a bit tedious, but I managed in the end. Both side seams are not completely closed but open in the middle of the body, so that the binding parts fit through and can be closed at the back with a knot.
I added a so-called "box pleat" to the rear part to make the back a little more interesting. I reinforced the collar with a double layer of fabric. For the back inner collar reinforcement I took some fabric from the detached sleeve of the too small blouse, here I had some difficulties which I tried to conceal by inserting an embroidered reinforcement seam which looks like a design element (I hope) but is actually to cover the mistake I made there.
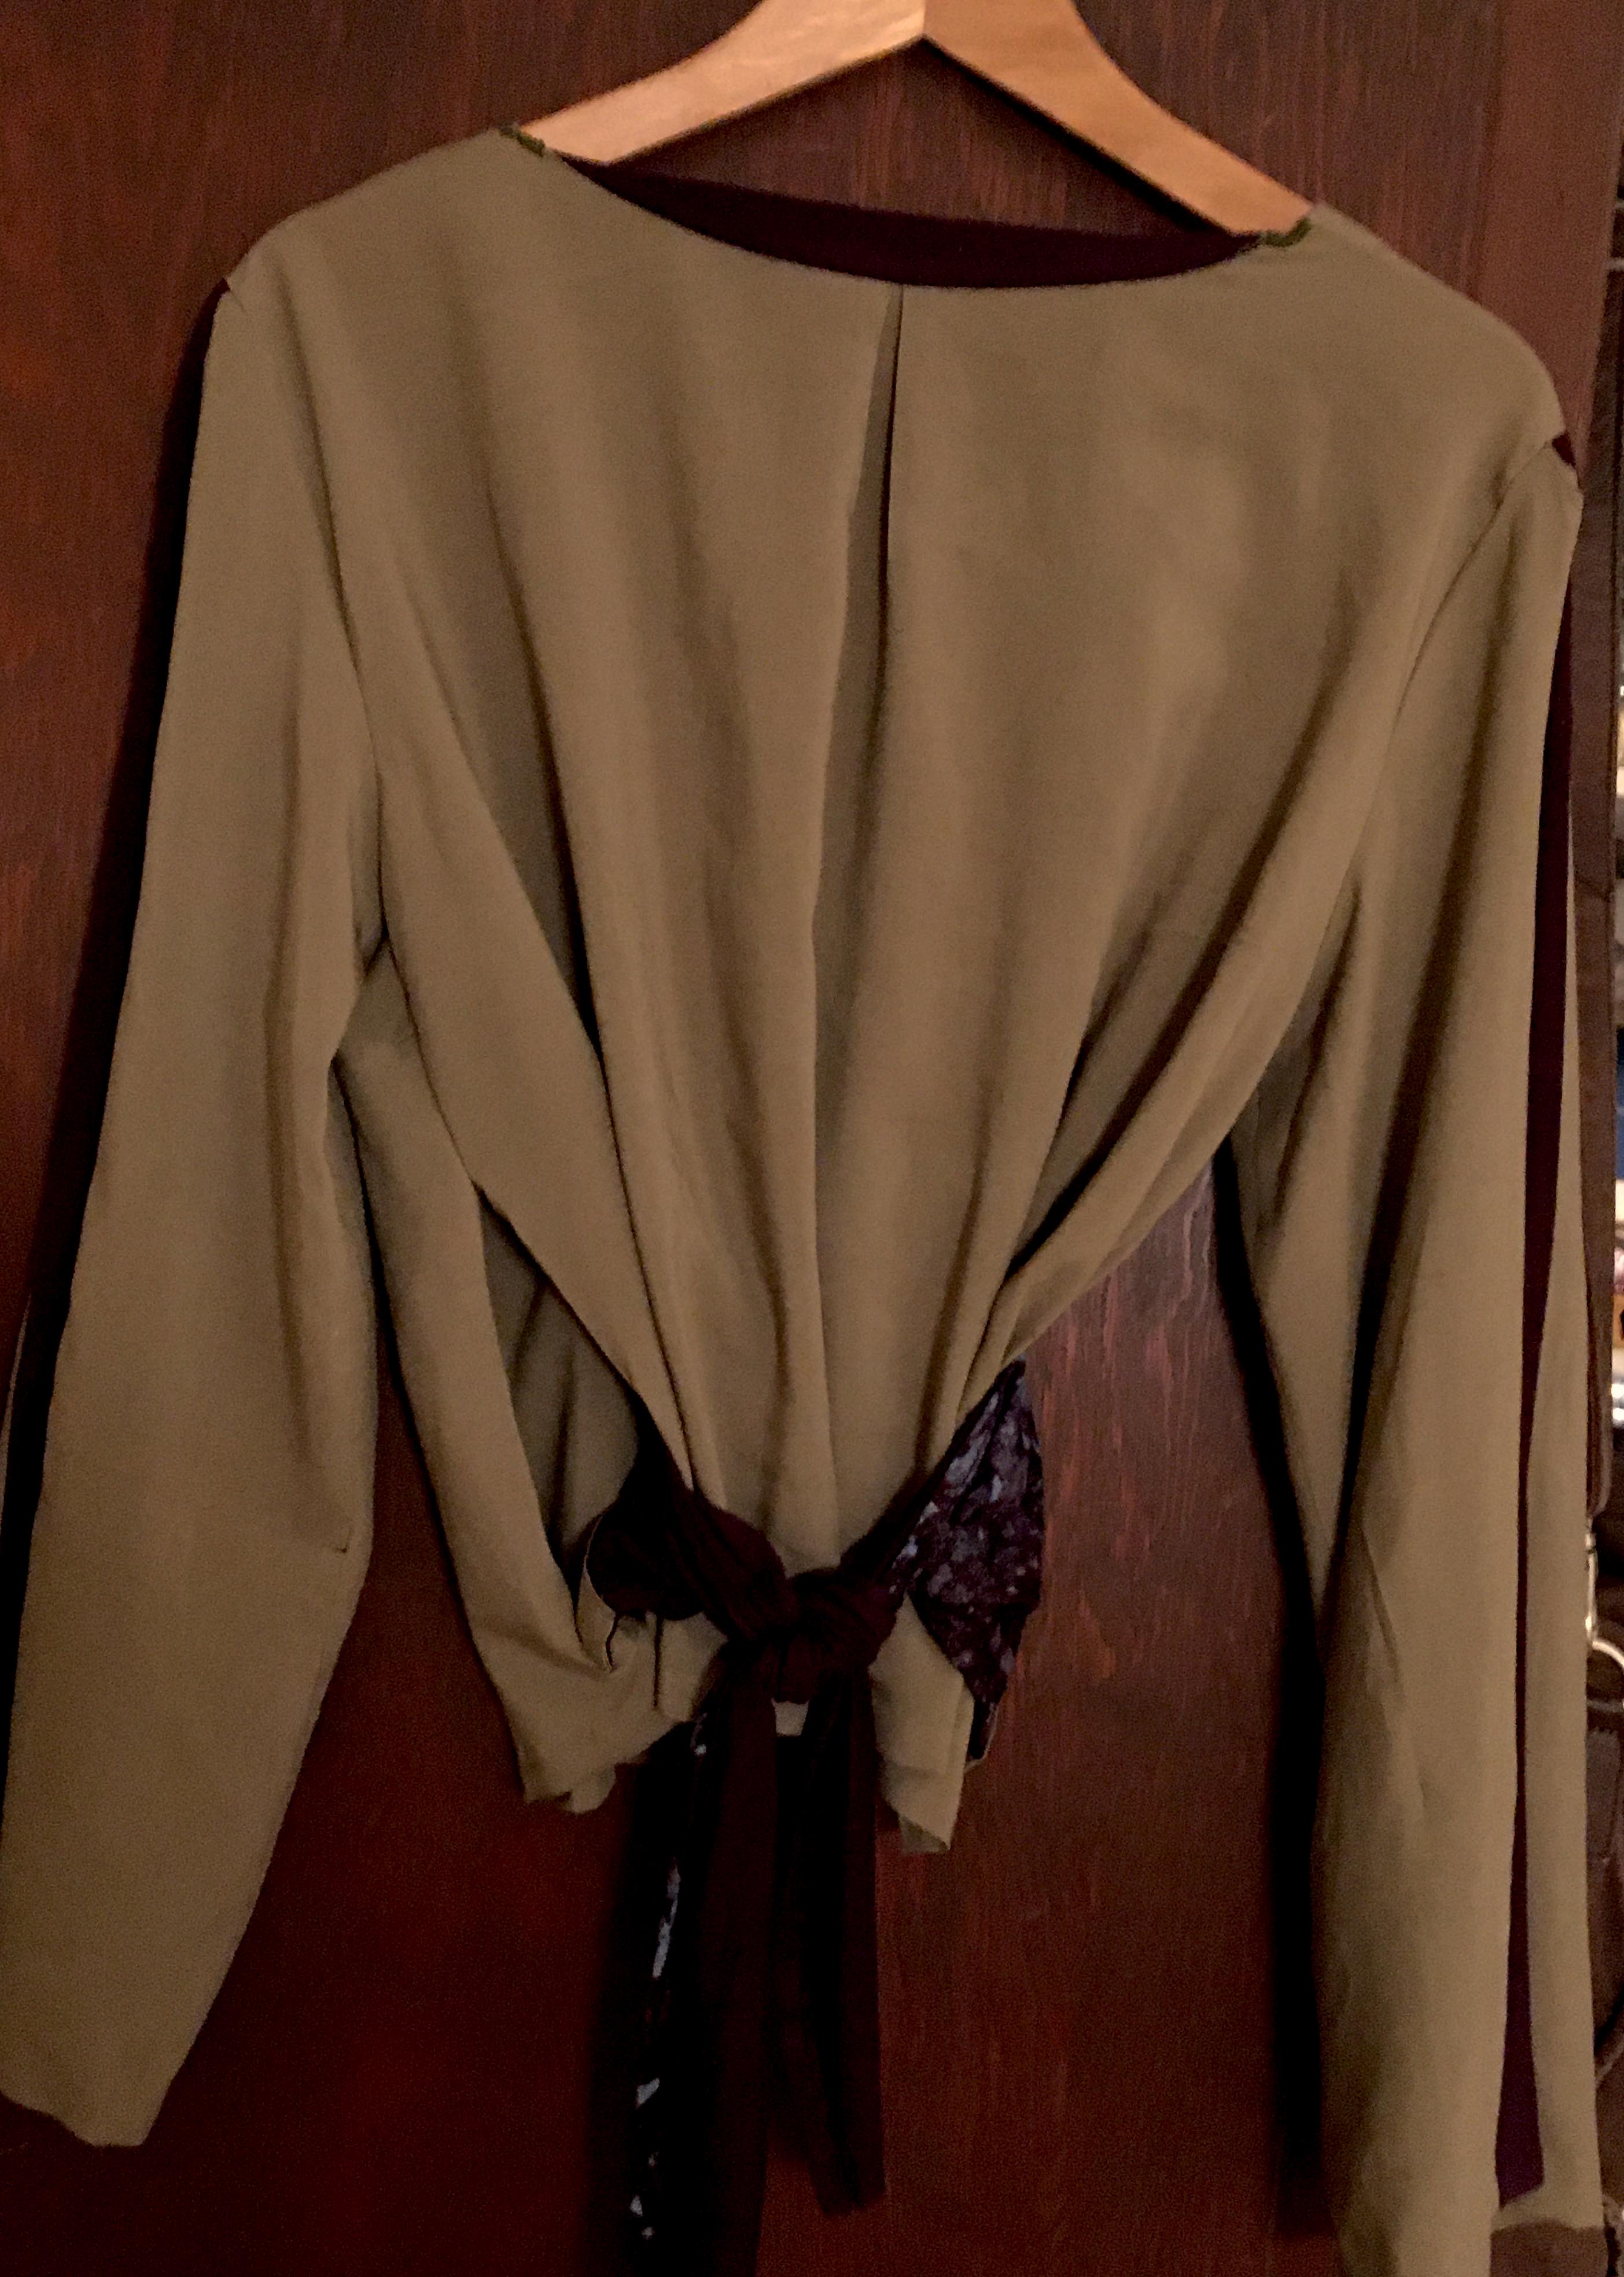
back side of the blouse
Overall, I am moderately happy with the result. The blouse looks good, the fabrics go surprisingly well together, I particularly like the colour combination. Unfortunately, it doesn't fit as well as I had hoped, which is because I hadn't paid enough attention to the exact fit. I had assumed that this would be less important for a kimono blouse, but I was obviously wrong. One of the bust darts is set too high, I should actually move it down, but I would have to cut open the entire side to do so. I can't bring myself to do that (yet). I'll first wear it in the summer and then see what happens.
I hope you have enjoyed following this little process of DIY. See you next time!
Sewn with:
- a 25 year old Pfaff electric sewing machine
- Hemming (sleeves and hem of blouse) all by hand with a so-called "invisible stitch".
- Pinning needles
- a lot of patience and actually some spit (all craftsmen will confirm this, somehow it is often helpful to slightly moisten the material you are working with. For small spots, a little spit will do:)
No special sewing machine feet used.
Photos all by me.
Ein Schneider, ob Hobbyist oder Profi, wird ein Nähkästchen haben.
Ich habe meins (gebraucht) letztes Jahr bekommen und benutze es seither sehr oft. Oben rechts sind verschiedenfarbige Spulen mit Nähgarn, daneben ein Fach für das Nadelkissen, das ich mir über den Arm stülpen kann, und diverse kleinere Nähutensilien.
Hier kommt etwas von der Sammler-Eigenart zum Vorschein, die Freude an kleinen Dingen, die man behalten möchte.
In der unteren Schublade bewahre ich meine Scheren auf, von denen ich vier habe: Eine Fadenschere, eine mittelgroße Stoffschere, eine große mit einer dicken Unterkante zum Auflegen auf den Tisch und eine Zickzackschere, wenn ich offene Nähte nicht beenden will oder kann.
Für die, die es nicht wissen: Offene Nähte werden durch einen Zick-Zack-Schnitt am Aufreißen gehindert. Dann noch ein paar Nähnadeln. Eines muss man zu den Nadeln sagen: Sie halten nicht ewig und werden irgendwann stumpf und unbrauchbar. Ich habe vor mehr als zwanzig Jahren eine Menge Nadeln gekauft, aber die meisten taugen nichts mehr, bis auf ein paar wenige. Da ich damals kaum mit der Hand genäht habe, ist es mir nicht aufgefallen. Aber so ist das mit allem: Wenn man es öfter benutzt, merkt man, ob es von Qualität ist oder nicht.
Sammeln
Etwas zu behalten, nur weil es schön aussieht, aber im Grunde nur den ungeschulten Betrachter beeindruckt, habe ich mir bei vielen Dingen abgewöhnt oder bin dabei, es zu tun. Je weniger ich habe, desto besser. Aber das, was ich habe, ist dann wertvoll und nützlich für mich. Diese Dinge werden als "Qualitätsprodukte" bezeichnet. Heutzutage nicht leicht zu finden, und so neige ich dazu, alte Dinge zu kaufen und sie zu restaurieren und zu erneuern. Eine ziemlich befriedigende Aufgabe.
Körpermaße festhalten
Allerdings verändert sich der Körper tatsächlich häufig und ich bin überrascht, wie oft ich nachmessen muss. Ich hätte nicht gedacht, wie viele verschiedene Maße für Oberteile bzw. Hosen/Röcke benötigt werden.
Je besser man misst, desto passender wird das Ergebnis sein. Aber es ist nicht so einfach, zwei Dimensionen auf drei zu übertragen. Der Versuch, eine Schneiderpuppe mit den eigenen Körpermaßen in Einklang zu bringen, ist mit Standard-Puppen nicht wirklich möglich. Wenn man es wirklich genauer haben will, muss man eine Körperreplik anfertigen. Bisher war mir das aber viel zu zeitaufwändig. Ich denke, ich bleibe dabei, mit der Zeit ein Gefühl für mich und meine Körpermaße zu bekommen, und lasse die Gewohnheit und die Sicherheit von sich wiederholenden Tätigkeiten ihren Teil tun.
Hier ein Video, wie man es anstellt, von sich selbst eine Replik zu machen:
Die oberen Bilder im Englischsprachigen Teil dieses Blog-Posts zeigen eine Bluse, die ich vor ein paar Wochen genäht habe. Es ist eine für den Sommer, die ich aus zwei verschiedenen Stoffen fertigte. Einer aus olivgrüner Viskose und einer aus einem lila Stretch-T-Shirt-Stoff.
Den Viskosestoff habe ich vor etwa zwei Jahren aus der Restesammlung eines Kaufhauses erworben, den anderen Stoff erhielt ich durch das Opfern eines alten Shirts, das ich nie getragen habe, und deshalb war es nicht schade, es als zusätzlichen Meterstoff zu verwenden, den ich dringend brauchte, denn die Viskose allein hätte nicht für eine ganze Bluse gereicht, zumindest nicht nach dem Entwurf, den ich im Kopf hatte. Ich konstruierte daraus eine Wickelbluse, die ähnlich wie ein Kimono funktioniert, also ganz ohne Knöpfe.
Die Ärmelkonstruktion machte mir besonderen Spaß,
aber auch viel Arbeit. Beim linken Ärmel musste ich sogar den grünen Stoff noch einmal zusammenstückeln, da ich kein ganzes Stück in der Länge mehr zur Verfügung hatte. Man sieht es eigentlich aber kaum am fertigen Ergebnis.
Ich trennte einen Ärmel von einer anderen Bluse ab, die mir zu klein geworden war, verwendete ihn als Schablone für den aktuellen Schnitt, maß ihn etwas größer ab und machte dann das lila Mittelteil genau so breit, wie die Glockenärmel insgesamt sein sollten. Diese drei Teile nähte ich dann zu einem Ärmel zusammen. Das Ganze natürlich zweimal.
Ich hege eine besondere Vorliebe für große Ärmel, egal ob sie offen, glockenförmig oder geschlossen und gerafft sind.
Das Schnittmuster für das Vorderteil nahm ich von einer Kimonobluse ab,
die mir noch passt, und übertrug die Maße, so gut es ging. Das Aufnähen des T-Shirt-Stoffes auf den Viskosestoff als Bindegürtel, der breit anfängt und sich dann sehr schmal verjüngt, war etwas mühsam, aber ich am Ende schaffte ich es. Die beiden Seitennähte sind nicht ganz geschlossen, sondern in der Mitte des Körpers offen, so dass die Bindeteile durchpassen und hinten mit einem Knoten geschlossen werden können.
Ich fügte dem hinteren Teil eine sogenannte "Kellerfalte" hinzu, um den Rücken ein wenig interessanter zu gestalten. Den Kragen habe ich mit einer doppelten Lage Stoff verstärkt. Für die hintere innere Kragenverstärkung verwendete ich etwas Stoff vom abgetrennten Ärmel der zu kleinen Bluse; hier hatte ich einige Schwierigkeiten, die ich versucht habe zu kaschieren, indem ich eine gestickte Verstärkungsnaht einfügte, die wie ein Designelement aussieht (hoffe ich), aber eigentlich den Fehler, den ich dort machte, verdecken soll.
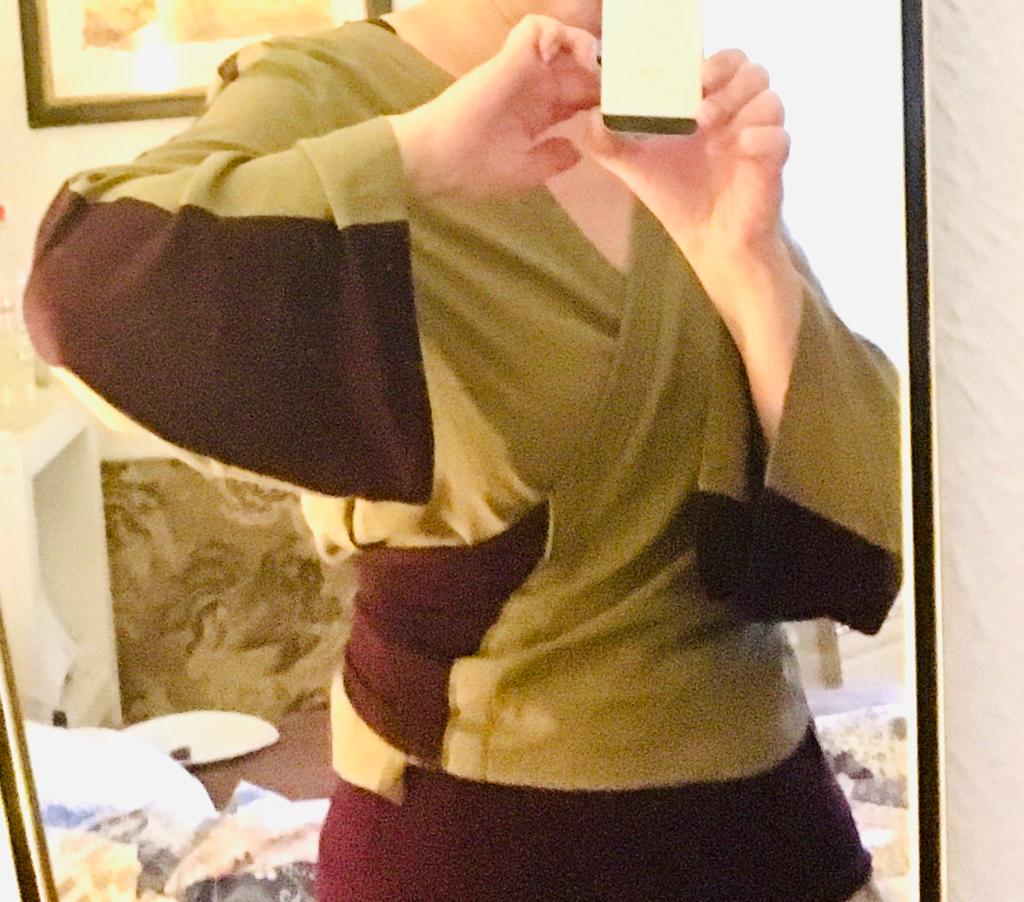
Insgesamt bin ich mit dem Ergebnis mäßig zufrieden.
Die Bluse sieht gut aus, die Stoffe passen erstaunlich gut zusammen, besonders die Farbkombination gefällt mir. Leider passt sie nicht so gut, wie ich gehofft hatte, was daran liegt, dass ich nicht genau genug auf die Passform geachtet hatte. Ich hatte angenommen, dass dies bei einer Kimono-Bluse weniger wichtig ist, aber da habe ich mich offensichtlich getäuscht. Einer der Brustabnäher ist zu hoch angesetzt, ich sollte ihn eigentlich nach unten verlegen, aber dazu müsste ich die ganze Seite auftrennen. Dazu kann ich mich (noch) nicht durchringen. Ich werde sie erst einmal im Sommer tragen und dann sehen, was passiert.
Ich hoffe, es hat euch Spaß gemacht, diesen kleinen Prozess des Selbermachens zu verfolgen. Bis zum nächsten Mal!
Genäht mit:
- einer 25 Jahre alten Pfaff elektrischen Nähmaschine
- Säume (Ärmel und Blusensaum) alle von Hand mit einem so genannten "unsichtbaren Stich"
- Pinn-Nadeln
- viel Geduld und tatsächlich auch etwas Spucke (das werden alle Handwerker bestätigen, irgendwie ist es oft hilfreich, das Material etwas anzufeuchten, mit dem man arbeitet. Für kleine Stellen tuts eben etwas Spucke:)
Keine besonderen Nähmaschinenfüße verwendet.
Fotos alle von mir.
So nice to have you here!!! Not sure if you ever got the “official” needleworkmonday invitation with the most important details, so I will post it here (but I think you know those things already :-D)
Naturally I also have a Nähkästchen :-DDD I got mine as a gift but seldom use it. Contrary to my knitting and crochet habit I own less sewing tools, most of them fit into the two small drawers of my sewing table. The rest is in tiny boxes which sit on the windowsill beside this table.
But to your blouse: I love fit and color and I hope you will get a bit of wear out of it. With the bust dart being to high, this is (for me) on the photo not visible, but I understand that this annoys you. Changing this afterwards is difficult I fear but I am not the best person to ask, as I always have huge fit problems.
I also pondered to build an individualised dressform but not sure if it really helps. My measurements are very consistent over the years but far away from the “norm” body, so I tried the sewing patterns from tailornova (you can read more about my experience here and here) where you buy a self designed pattern with your individual measurements.
My first dress was in my eyes a success and I am currently trying out a second pattern from this platform (the first two are free, so no loss in trying)
I hope you are well and I will see more of your lovely sewing projects <3
So, here the official invitation:
I would like to extend an invitation for you to join the NeedleWorkMonday Community!
Every week needleworkers from around the globe get together to share our work, patterns, tips, ideas and shortcuts as we support one another. Our goal is to inspire the Hive blockchain to give crafting a try.
We encourage our members to share the process of their work through photos. This not only validates your work but it takes us along the creative journey with you :)
For more information about what we do and for our posting guidelines please visit our FAQs. On Monday’s we use the #needleworkmonday tag and on all other days we use the #needlework tag without the word Monday attached. We share and post our work directly from the Community page.
Was für eine Überraschung, Danke für deine Antwort und deine Bemerkungen zur Bluse :) Ich freue mich darüber. Und auch über die Tipps und Links. Ich werde einen Blick hineinwerfen. Ja, der falsch sitzende Aufnäher ist mir ein Dorn im Auge, auch wenn es äußerlich nicht so auffällt, es sitzt einfach nicht gut.
So etwas wie einen Standard-Körper gibts ja in Wirklichkeit nicht, nur in der Werbung und in der Fantasie:)
Ich finde alle handwerklichen Arbeiten interessant, egal ob Nähen, Stricken oder Schmieden, Töpfern usw. - ich wünschte, ich hätte mehr davon gelernt. Wie bist du überhaupt aufs Stricken und Häkeln gekommen?
Ich werde sicher noch das ein oder andere veröffentlichen, leider habe ich bisher wenige der Sachen fotodokumentiert, die ich gemacht habe, aber ein paar Aufnahmen werden sich vielleicht rausgraben lassen.
Liebe Grüße!
Nicht wundern, dass ich auf English geschrieben habe, aber bis auf zwei Teilnehmende am needleworkmonday kann keiner deutsch :-D und so ist es einfacher für alle anderen mit zu lesen und zu kommentieren.
Ich kenne das mit den Brustabnähern, da ich einen sehr kurzen Oberkörper habe und wenig Oberweite (A) sitzen die Abnäher immer verkehrt bei gekauften Schnittmustern (bei mir zu tief) oder stehen ab wie Tüten :-DD
Und das mit dem vermeintlich Standart stimmt natürlich, da es bei einem Körper extrem viele Möglichkeiten gibt besonders zu sein. Aber weniger Kurven helfen in der Regel schon das Nähen zu vereinfachen (für mich), so kann ich z.B. für meinen Mann alles ohne Änderung aus der Packung nähen. Ihm passt auch alles aus dem Laden.... bei mir sieht das doch recht anders aus :-D
Wie bin ich zum Handarbeiten gekommen...
Wie vermutliche viele von meiner Mutter gelernt, die sehr gut stricken konnte. Generell waren/sind meine Eltern sehr kreativ und handwerklich interessiert (von Töpfern übers Backen zum Garten bis zum Schreinern). Aber ich fand das alles total doof als ich jünger war und hatte vermutlich auch nicht genug Geduld. Ich hab erst mit Mitte dreißig von meinem Mann häkeln gelernt und dann während meiner langen Zugfahrten und Aufenthalte fürs Unterrichten eine intensive Abhängigkeit entwickelt :-DDD Da ich überwiegend Kleidung gehäkelt habe kam dann irgendwann der Wunsch auch stricken wieder zu erlernen und zack, da hatte ich ne neue Sucht.
Und dann habe ich eine Nähmaschine gewonnen (echt jetzt) aber nähen ist für mich eher Arbeit und stressig, da ich es noch nicht gut kann und eigentlich weniger den Prozess mag, denn das ich nette Kleidung haben mag.
So und jetzt du :-DDDD
Lustig, dass du das Häkeln von deinem Mann gelernt hast. Aber wie du auch sagst, kommt es von der Herkunftsfamilie, ich denke, das ist in den meisten Fällen so, dass die frühe Kindheit sehr prägt, auch wenn man viele Jahre etwas völlig anderes interessant findet. Man findet sozusagen zurück zu den Wurzeln. Jedenfalls nach meinem Eindruck:)
Bei mir war es ähnlich, es wurde daheim sehr viel selbst gewerkt, gebaut, repariert, gepflanzt und gearbeitet. Ich stand als hochnäsiger Teenager natürlich auch über diesen Dingen und fand "kaufen" viel besser als selbermachen. Bin dann Anfang der zwanziger mit Nähen kurz mal angefangen, dann aber durch andere Dinge abgelenkt und erst spät wieder damit begonnen. Die Nähmaschine stammt eben auch aus der Zeit und ich habe sie einfach aufgehoben, nach dem Motto "man weiß ja nie".
Weibliche Kurven sind einfach aufregender :D LOL, auch beim Herstellen von Kleidung.
Sei herzlich gegrüßt!
Nice.
I'm actually impressed at how good DIY clothing can look from scratch (almost?).
I do enjoy watching how your creative process develops.
Thank you. Yes, sewing clothes from scratch is very satisfying, especially when there is the challenge of making something from too little fabric that fits in the end. I re-cut old things into new ones, which is a bit more complicated than when you have straight lengths of fabric available. So I made a pair of trousers out of a skirt and sewed a nice new jumper out of two old ugly ones. I don't mind if you can see that the pieces are homemade. It also makes them unique and you can play with your own design ideas, which is the most fun.
For me, it's important not to waste resources and not to support the clothing industry even more.
I am glad that you can enjoy the process of making things. I wish I'd have a garage or something like that. I would learn to work with woods. It's my most favourite material. The biggest dream is to own land and build a house out of wood and clay. But this probably will remain a dream.
Agree, uniqueness and originality are pluses. Although what do I know, I have black and white solid colored shirts :)
You shouldn't give up on that dream by the way, I just say, as long as there is hope, there will always be a chance.
Anyway, see ya.
Nice work
Thanks.