
This is a write-up on exporting trades from the BitShares blockchain. It is a compilation of information I found in other places as well as things I figured out myself. Many thanks and much respect to Oxarbitrage whose Bitshares Account Exporter tool is the only way I found to get the basic information off the blockchain to start.
Exporting
Go to bitshares-explorer.io and click on Search in the top menu bar.

In the Search Account area, enter your account name and click Go.
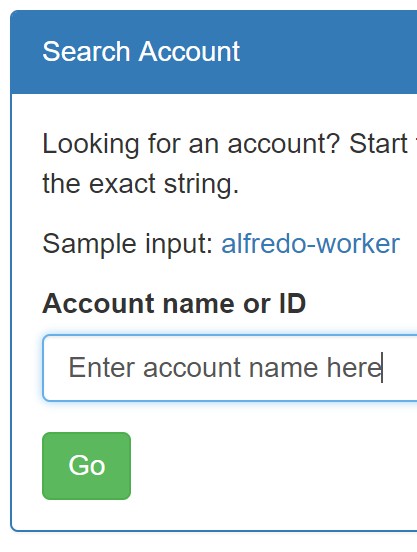
This will spit you to a new page that shows information for your account. You need your ID, which is not your account name. Your ID is found in the upper righthand corner under General Account Information. Note it down.

Now scroll down the page to see Full Account History. In the upper right-hand side of this area is a link saying Click here for a CSV account exporter. Click it.

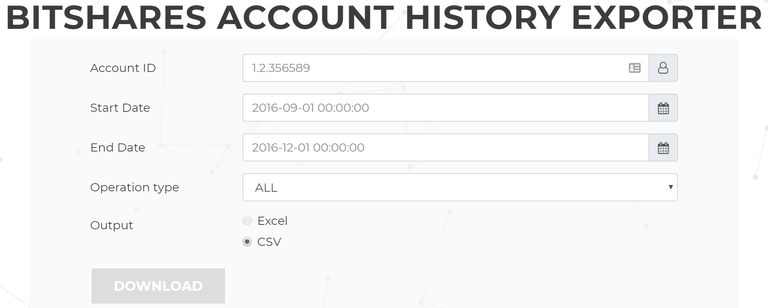
On the page that opens, enter your ID, date range, and file type. Make sure that the Operation type is set to All before clicking the big Download button and saving your file. To get all of 2017, for example, use 2017-01-01 00:00:00 as the starting date/time and 2017-12-31 23:59:59 as the ending.
Once saved, open the file in Excel or another spreadsheet and scroll over to column ‘M’, titled Operation History - Raw Operation. Copy all the data in column ‘m’ and paste it in to your favorite text processor. I use notepad++, but anything that allows you to search and replace will work. When you paste the CSV data into your text processor, it will paste in as a series of lines, each line being a JSON package. Since you’re involved with crypto, you may know what a JSON package is, but if not, don’t worry – It’s just a standardized way of putting information into a text string so that other programs can easily read it out.
In this case, we want to bulk-convert all of this data into a format that our spreadsheet can more easily handle. To do that, we need to extract the data from the JSON package and get it into a standard CSV format that the spreadsheet can handle.
JSON packages all start with a left square-bracket “[“ and end with a right square-bracket “]”. If you look at each line, you can see that is how they start and end. One nice thing about JSONs, however, is that you can nest them. We are going to nest all of these into one larger JSON so that we can create a single CSV out of them.
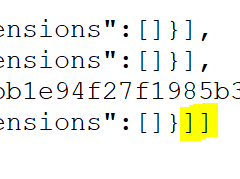
Step 1: In your text processor, open up the search and replace function. In the search field, enter the right square-bracket, or “]” (without quotation marks). In the replace field enter a right square-bracket and a comma “],” (without the quotation marks). This will make each line end with “],” instead of just “]”. Once that is done, scroll all the way to the end of your text file so that you are on the last line of your JSON. It will end with “],” like all the other lines. Replace that last comma with another right square-bracket so that it looks like “]]”. Here is an example:
Now go to the very first character in your file, at the left-hand side of the top line, and add a right square-bracket so that the line starts with “[[“. After you are done, the first two characters of your text fill will look like this:
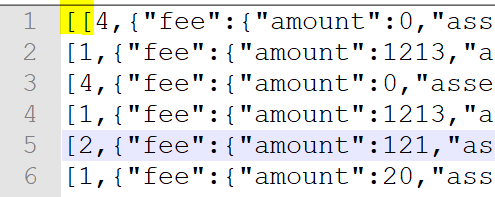
Why did we do this? We just nested our JSONs into one big JSON! The outermost “[]” at the front and the end define the start and stop of the big JSON, while the interior nested JSONs are now separated by a comma, which is how JSON needs to have this formatted. Now to make your JSON into a CSV that can go back into your spreadsheet. To do that we are going to use a free online utility at www.convertcsv.com to do all the hard work.
Click that link and open the page. Now go back to your text processor and copy the entire text of your file (You could also save the file and import it, but copy/paste works well.). Return to the webpage and paste it into the Step 1 Option 3 box. It will look something like this:
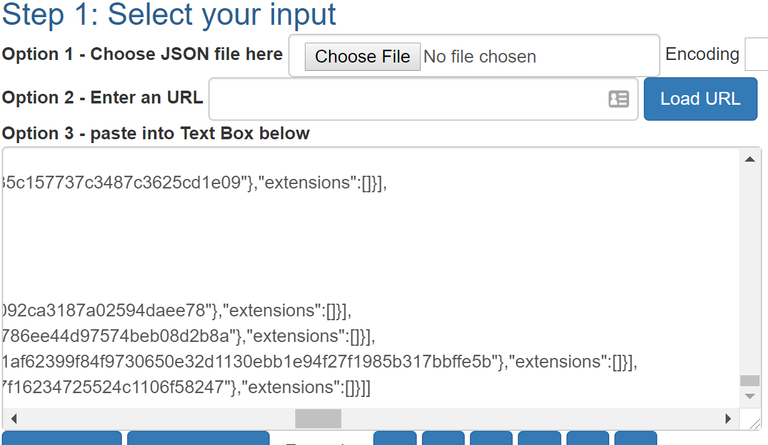
Drop down to Step 3 and click either of the two buttons to make the conversion for you into the format of your choice.

Now drop down below that, enter a filename, and Download Result to get the finished file on to your PC.

OK – The hard work is done. Now it is just a matter of cleaning up the file for whatever tax preparation service you use. I use tokentax.us, so the instructions here will be specifically for that service. However, most of what is done here will be required for other services, so it should be a good reference.
After your newly-created JSON-CSV is loaded back into your spreadsheet, go back to the original CSV you downloaded from bitshares-explorer.io. Go to column “K”, titled Block Data - Block Time and copy it.
Now go to your JSON-CSV and insert this column in before column “A” so that it becomes the new column “A”. This provides us with the timestamp we need to keep everything organized by date. You will have a lot of information there that you really don’t need. You can erase it, hide, or ignore it. In any case, you don’t need, it so don’t let everything there overwhelm you. I recommend just hiding those columns so that they don’t clutter up your screen, that way if for some reason you come across a situation where you need that information, you can just unhide the data. In any case, for tokentax.us, these are the columns you need:

Table Explanation
Block Data – Block Time
This data is critical but it’s not in a form that Tokentax understands. Different tax services may require different formats, but I think that most should accept what Tokentax does.
To get to this acceptable format:
- Highlight all cells in the Block Data – Block Time column except the title cell. Do not highlight the title cell.
- Use the Search and Replace command to search for “T” (No quotations.) and replace with “ “ (Space. No quotations.) In Excel, when you do this, Search and Replace will only happen in the highlighted area. Excel will also see the new format and automatically treat it as a timestamp. In other spreadsheets you may have different results. You need to get this data into a date/time format.
0
Leave this column alone for now. We’ll come back to it.
1/fee/rightamount
The first thing you may notice is that there is a column called 1/fee/amount, but not one called 1/fee/rightamount. The number shown in 1/fee/amount is shown without decimal points. For us to make use of it, we need to convert them to the right format. For now, just go to your spreadsheet and insert a column between the 1/fee/amount and 1/fee/asset_id columns. Title it 1/fee/rightamount. Leave the cells in the column blank except for the title.
1/fee/asset_id
This code represents the asset traded. The code “1.3.121”, for example, means “bitUSD”. For your tax software to make sense of this, you will likely need to change the code to the currency shorthand using search and replace. Find the search and replace function in your spreadsheet, search for the code (Example: 1.3.121), and replace with the currency shorthand (Example: bitUSD). You can find the currency shorthand for each code by entering the code into the search box at the top of the Cryptofresh website. Do this until you have replaced all of the code numbers with the currency shorthand. Note that in order for our instructions in the next step to work, you have to use the exact currency shorthand shown at Cryptofresh: Don’t shorten “bitUSD” to “USD”, for example.
Back to --> 1/fee/rightamount
As mentioned above, the numbers in 1/fee/amount are shown without decimal points, so we need to enter the decimal point at the correct location for each one. Unfortunately for us, BitShares hasn’t standardized the number of decimal points used, so the conversion rate is different for each asset. Fortunately for us, Steemit user Keyshenay did some work to figure out the rates on different assets and wrote a slick little formula to paste into your spreadsheet to make the conversion. Here is Keyshenay’s formula to use, updated with a few more assets by me. Highlight it, copy it, and then follow the instructions below.
=IFS(D2="","",D2="OPEN.BTC",B2/100000000,D2="BTS",B2/100000,D2="bitUSD",B2/10000,D2="bitCNY",B2/10000,D2="NINJASOUL",B2/10000,D2="bridge.BCO",B2/10000000,D2="OBITS",B2/10000,D2="OPEN.HEAT",B2/1000000,D2="ICOO",B2/1000000,D2="OBITS.WARRANT",B2/1000000)- Go to your spreadsheet column 1/fee/rightamount.
- Paste the formula into this column for every line. It will look something like this after you are done:
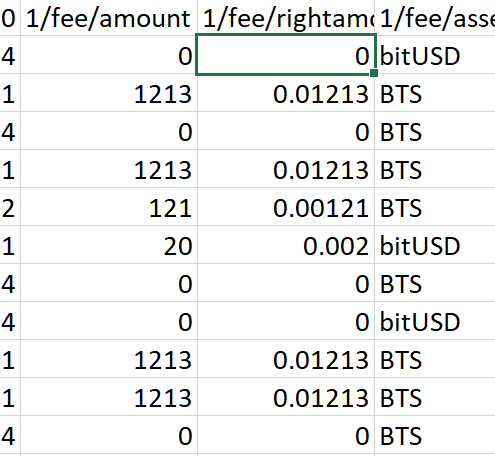
You may also see something like the following. In this case it means that our formula doesn’t cover the asset you used, so you will need to determine the right conversion factor. Once you do that, you could update the formula, or, perhaps more easily, just type in the correct amount into 1/fee/rightamount. If you leave a comment below with the correct rate to help out others, that would be great.
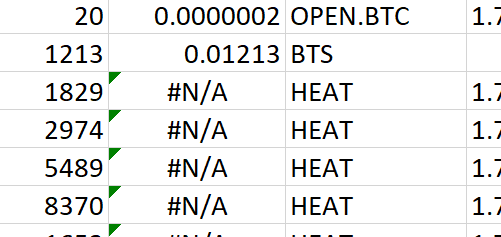
Determining the conversion factor isn’t hard, but it takes a bit of time. The easiest way is generally to go to BitShares (Or OpenLedger.) and create a dummy trade for that asset. Don’t execute the trade – Just look at the fee for the trade and use that to guide you on the conversion factor, Many are 10,000 or 100,000, meaning that the amount in 1/fee/amount needs to be divided by that factor to get the right amount for us to use.
1/pays/rightamount
Just as above, this column doesn’t exist, but 1/pays/amount does. Also just like above, we need to use our formula to convert the original number into the real number we need. Create a new column to the right of 1/pays/amount, label it 1/pays/rightamount, and copy/paste the same formula into all the rows in the column just as we did above. If you end up with any #N/A cells, fix them before proceeding.
1/pays/asset_id
Again, as above, these are the assets. If any column has a numerical asset code such 1.3.121 in it, it must be first converted to the currency shorthand.
Now keep doing this same thing for:
1/receives/rightamount
1/receives/asset_id
1/fill_price/base/rightamount
1/fill_price/base/asset_id
1/fill_price/quote/rightamount
1/fill_price/quote/asset_id
1/amount_to_sell/rightamount
1/amount_to_sell/asset_id
1/min_to_receive/rightamount
1/min_to_receive/asset_id
Back to --> 0
All the way back at the left side of your spreadsheet is the 0 column we passed by on our first round. Go back to it and inset a column to the right of it just as you did for all the /rightamount columns. Title this new column TransactionType. We will now use a formula like we did above to convert the 0, 1, 2, 3, or 4 to a transaction type. Unfortunately, for the life of me I cannot figure out what type “0” is. It’s some kind of fee, but I cannot figure out what it is. It’s up to you if you want to include these as a deductible expense on your tax filing. Here’s the formula:
=IFS(B1878=0,"SomeFee??",B1878=1,"PlaceOrder",B1878=2,"CancelOrder",B1878=4,"Trade")That’s it for creating and getting your data ready. You can go in and do a lot of other things in your spreadsheet program, but this is all that is necessary. I would suggest that you perhaps remove all of the uncorrected value columns from view by using the hide command. This will just help keep you from getting confused and making a mistake. You can also use various data filtering commands to select a particular range of dates.
Moving the Data Into tokentax.us
Tokentax provides a simple template for importing data from exchanges outside of its standard set. Here is the layout of that template with some sample data in it.

We are going to fill up this template with data from our newly-created spreadsheet of OpenLedger data.
- The first column is the transaction type. Go to the column in our spreadsheet named TransactionType, copy it, and paste it here. In Excel and many other spreadsheets you will need to Paste as Values so that you get the results of our formula in the Tokentax template, not the formulas. Do that here and for all following copy/paste operations.
- The second column is BuyAmount. This is the quantity of the purchased or received asset or cryptocurrency. We get that by copying the data from our 1/received/rightamount column and pasting it here.
- In the third column we define the BuyCurrency, which we get from 1/received/asset. Copy/paste it over.
- Next is SellAmount, which is from the 1/pays/rightamount. Copy/paste.
- Next is SellCurrency, which is form the 1/pays/asset. Copy/paste.
- FeeAmount come from 1/fee/rightamount, and FeeCurrency is from 1/fee/asset, so copy/paste those over.
- Leave Group and Comment columns blank.
- Copy the data in Block Data – Block Time into the Tokentax Date column.
- Save
That’s it! (/s)
You’ll notice that we didn’t use all of the data we extracted and normalized from the JSONs. Other software may use them, even if Tokentax doesn’t, so I kept it for myself and would recommend that you keep it as well.
Taxes suck, but the good news is that you don’t pay taxes unless you make money. Go render unto Ceasar that which is Ceasar’s and then get on with it.
✅ @uetani, I gave you an upvote on your first post! Please give me a follow and I will give you a follow in return!
Please also take a moment to read this post regarding bad behavior on Steemit.
Great work @uetani that is a very comprehensive summary on how to export all this data. It still looks to me pretty complicated to get the right information from the data. Do you think there is going to be something more user-friendly in the future?
Oof -- Just saw this! As you can see, I'm not on Steemit much.
What I did could easily be done with a Python script, so If BitShares sticks around I'd hope that they would make a tool to at least get it into a CSV file with the right columns named correctly and codes switched out to token symbols.
Coins mentioned in post:
Congratulations @uetani! You received a personal award!
You can view your badges on your Steem Board and compare to others on the Steem Ranking
Do not miss the last post from @steemitboard:
Vote for @Steemitboard as a witness to get one more award and increased upvotes!