FULL ENGLISH VERSION
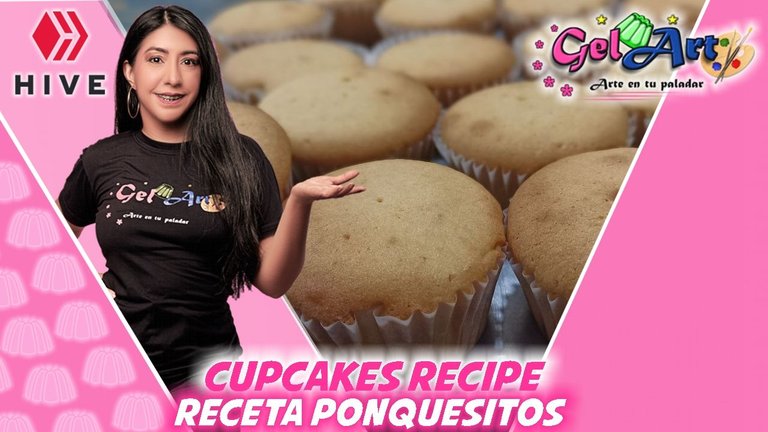
Welcome to a new recipe 👩🍳
Hello hello dear HIVERS ❤️ especially to the food lovers of this beautiful community of @foodiesbehive in this opportunity I want to share with you a recipe for some cupcakes that I learned to make many years ago in a baking course.
Some people use to make cupcakes with the same mixture of the cakes, but sometimes the result is not as expected because it is a different mixture, a little less dense and they tend to spike, so they are not plump and puffy.
This recipe that I am going to share here will not only allow you to make perfect cupcakes/ponquesitos in presentation and flavor, but they are also cupcakes that last for many days and keep their softness like new, I used to make these to sell in a bodega I had and they lasted perfect for days.

Materials:
- 4 and a half cups of leavening flour.
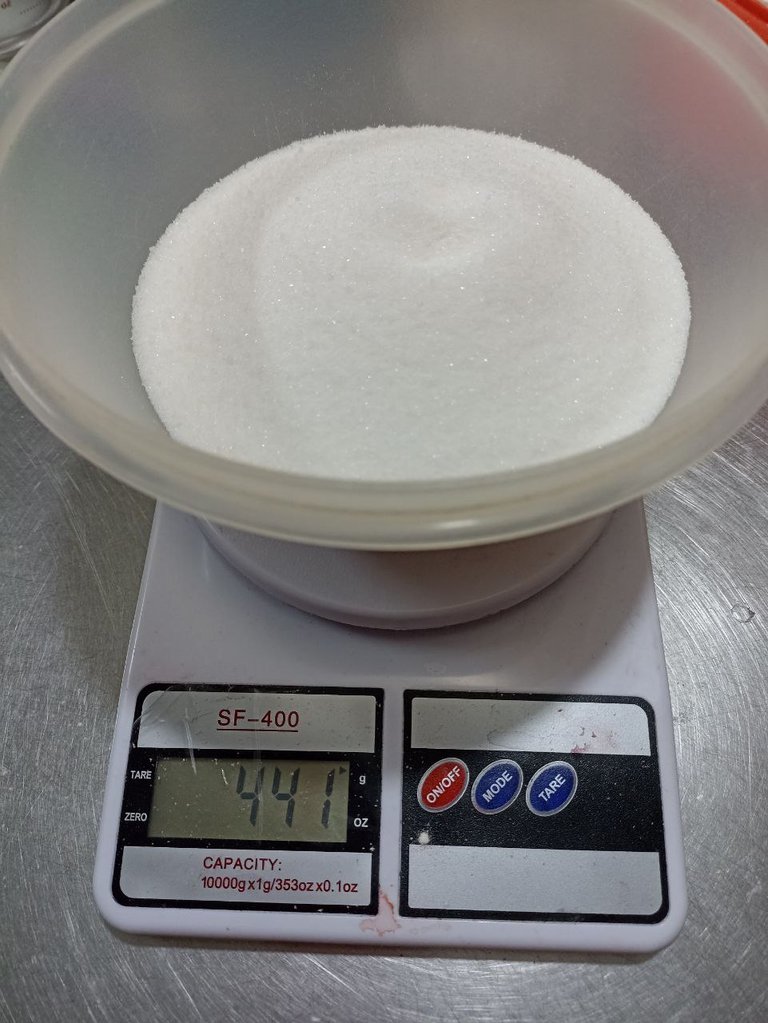
- 2 and a half cups of sugar.
- 6 eggs.
- 1 and a half cups of liquid milk.
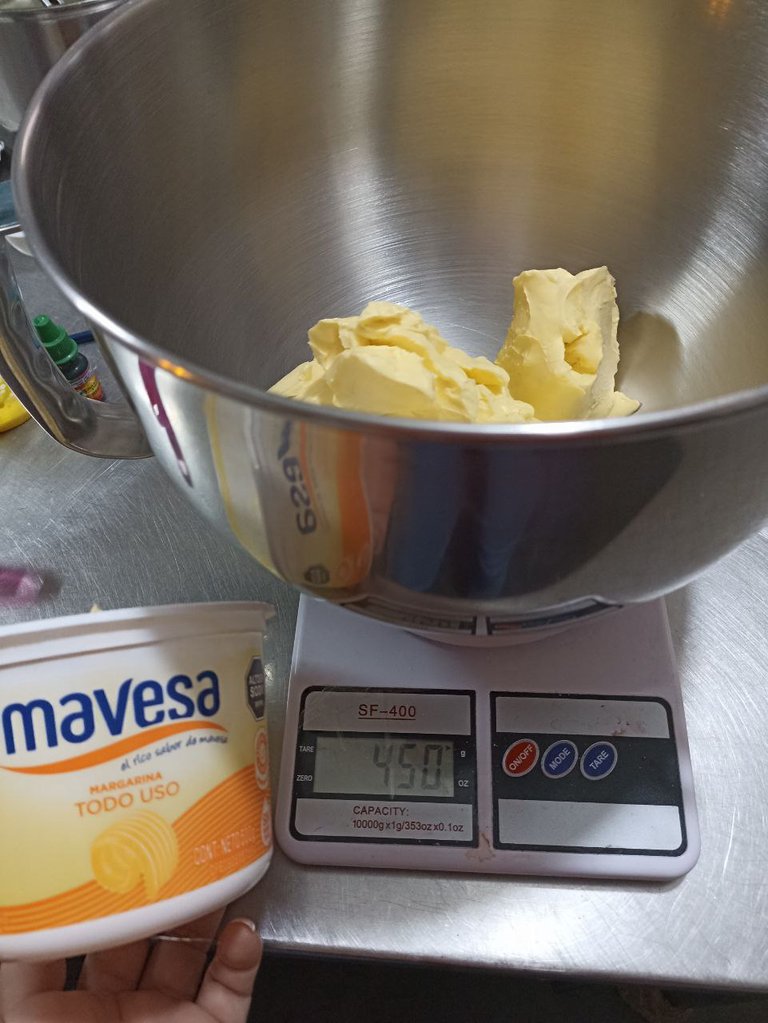
- 450 grams of margarine.
- 1 and a half tablespoons vanilla.
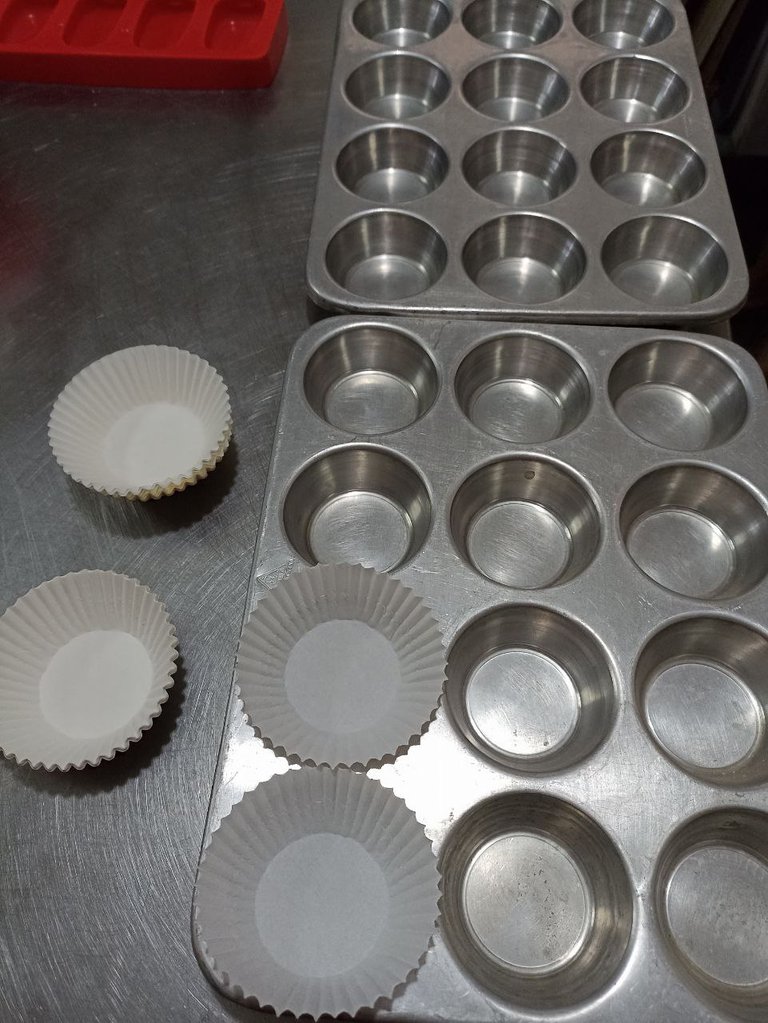
- #11 cups.
- Ponquesera (mold to bake cupcakes).

Although I measure the ingredients by cups and I only weighed the margarine, I am going to post here some photos I took of the weight of the materials.
 |  |  |
|---|
Preparation:
The first thing to do is to preheat our oven to 180° C. After turning on the oven and at temperature we proceed with the preparation.
Add the butter and sugar to the mixer bowl and mix well until creamy.
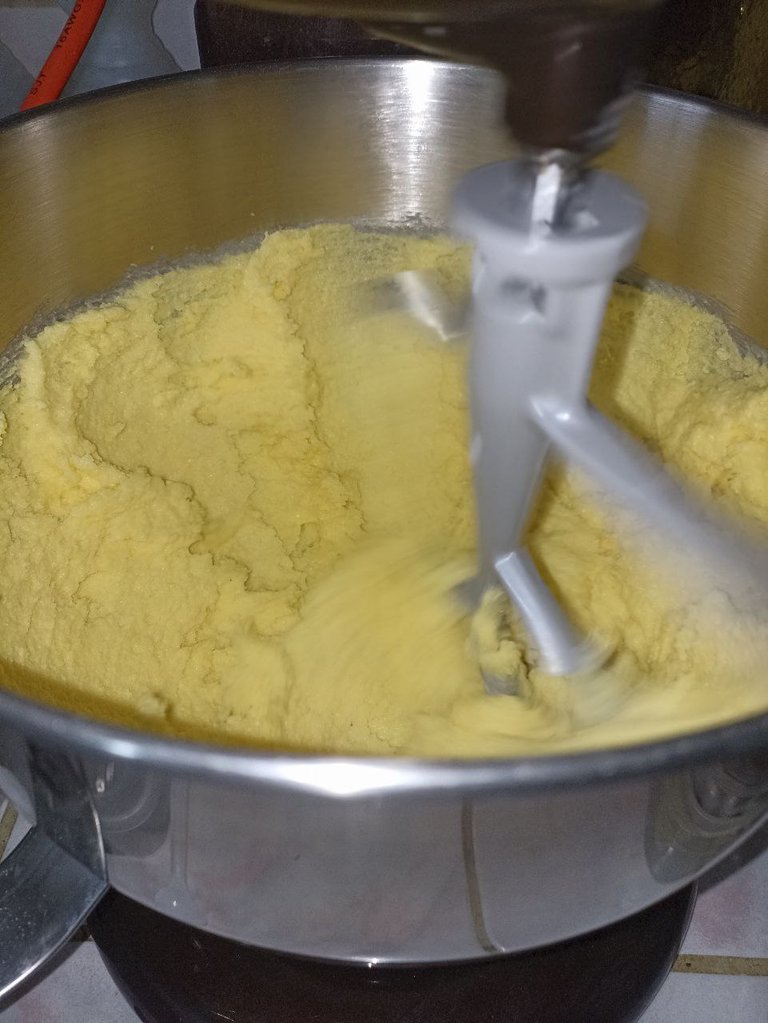
After the butter with the sugar is very creamy, when it goes from that intense yellow tone to a light yellow, at this point add one by one the eggs, continue beating at good power (in my mixer I used speed 6, in lower power mixers or hand mixers it would be at maximum speed).

Then we add the flour and the milk, we add alternately, we start with a little flour, then a little milk and so on until the end, finishing with the flour. I was taught that you always start and end with the flour.
To finish with the preparation of the mixture add the vanilla essence and the baking powder, the latter is optional because the flour is leavening, I did not add it.
 |  |  |
|---|
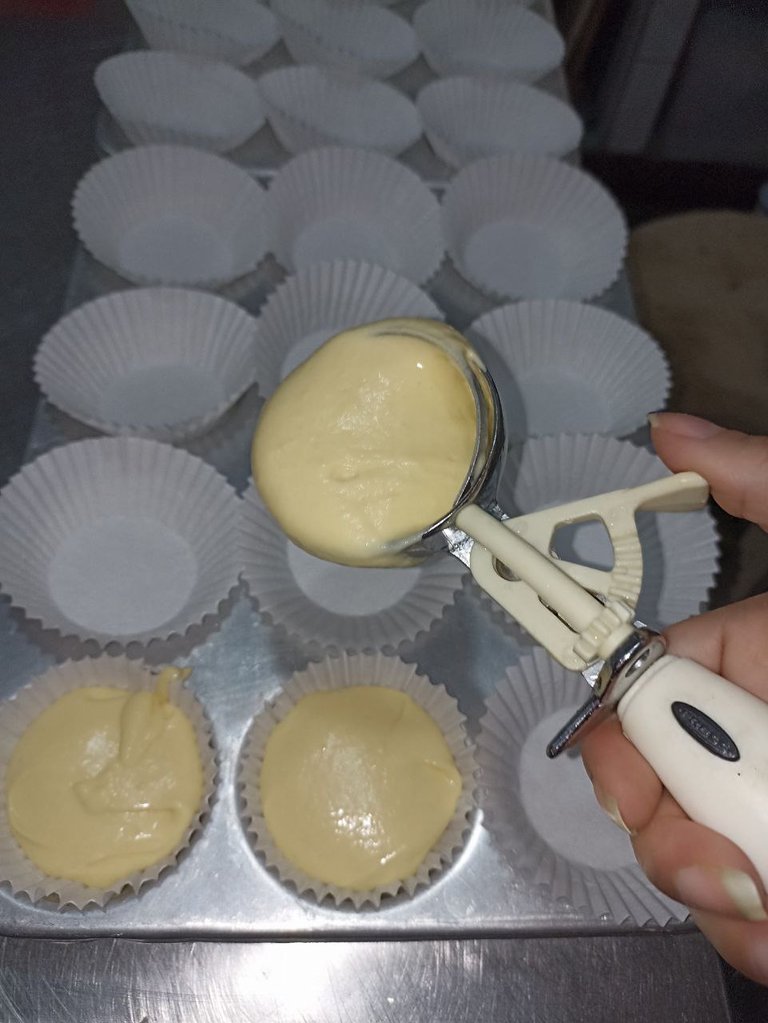
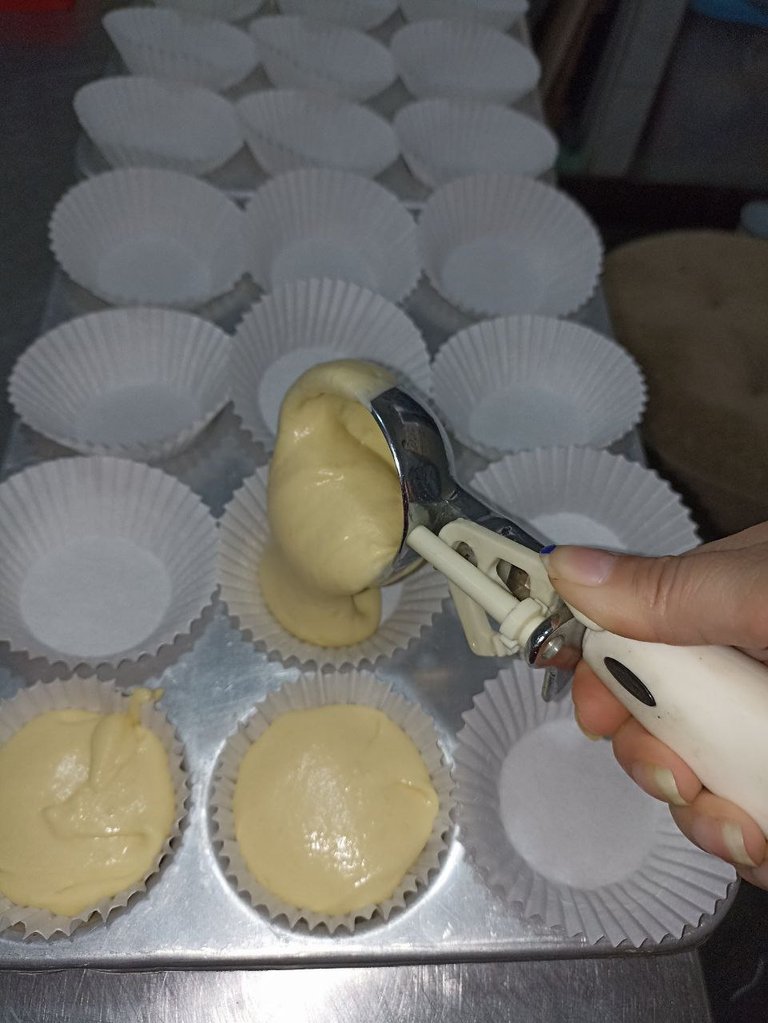
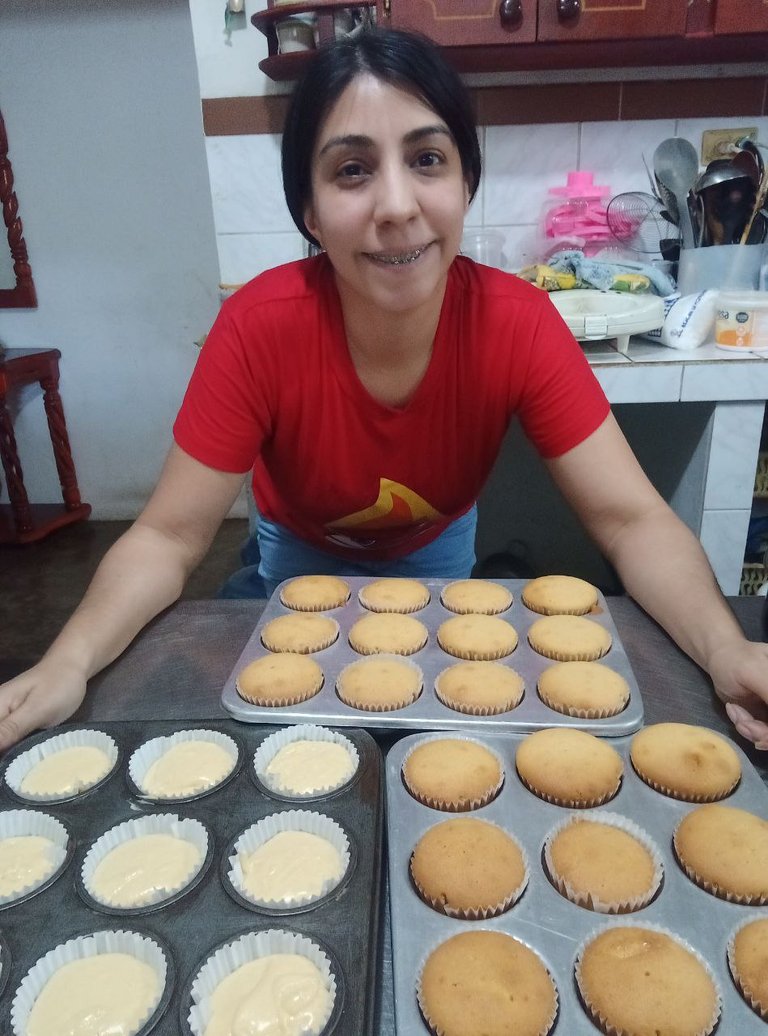
Once the mixture is ready, place it in the layers, which should be in a mold for baking cupcakes. Place the mixture in relatively equal amounts, I do it with a funderelele, the spoon to make ice cream balls, this is perfect to manipulate the mixture more easily and gives a fair measure for this size of cupcakes.
 |  |
|---|
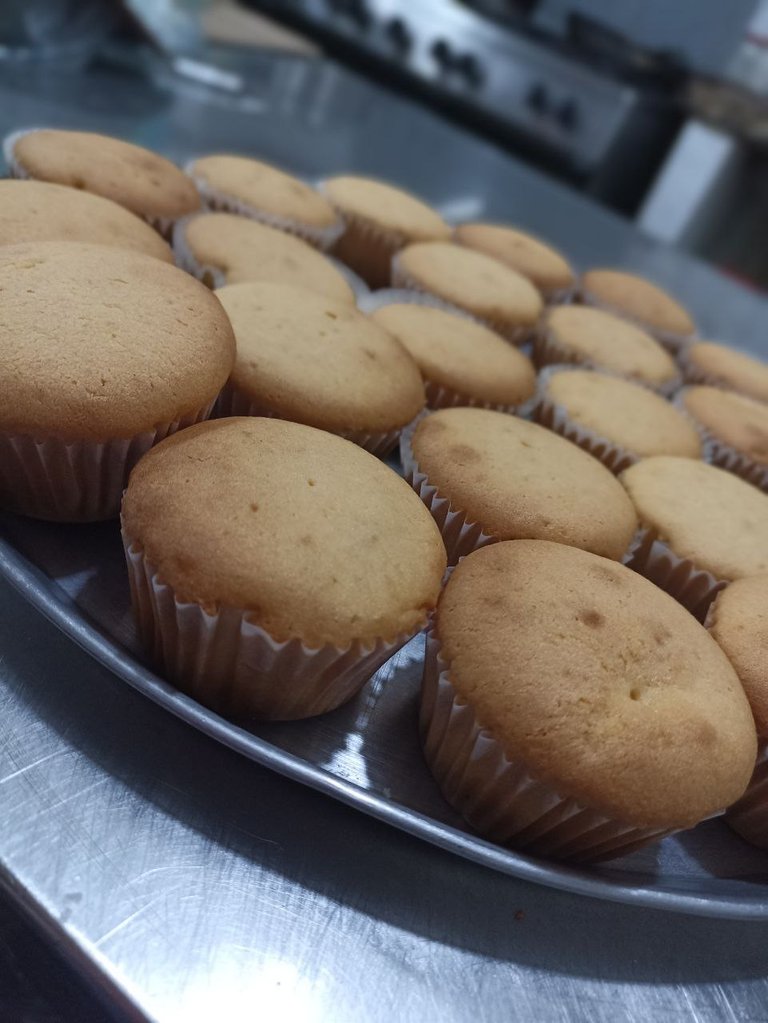
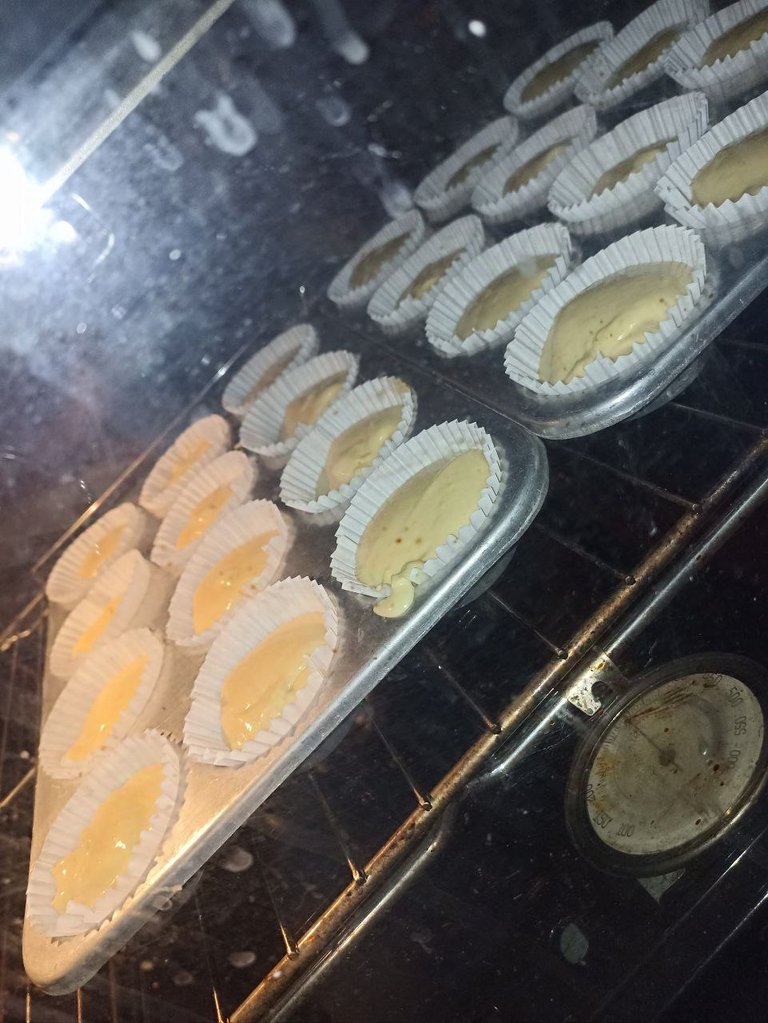
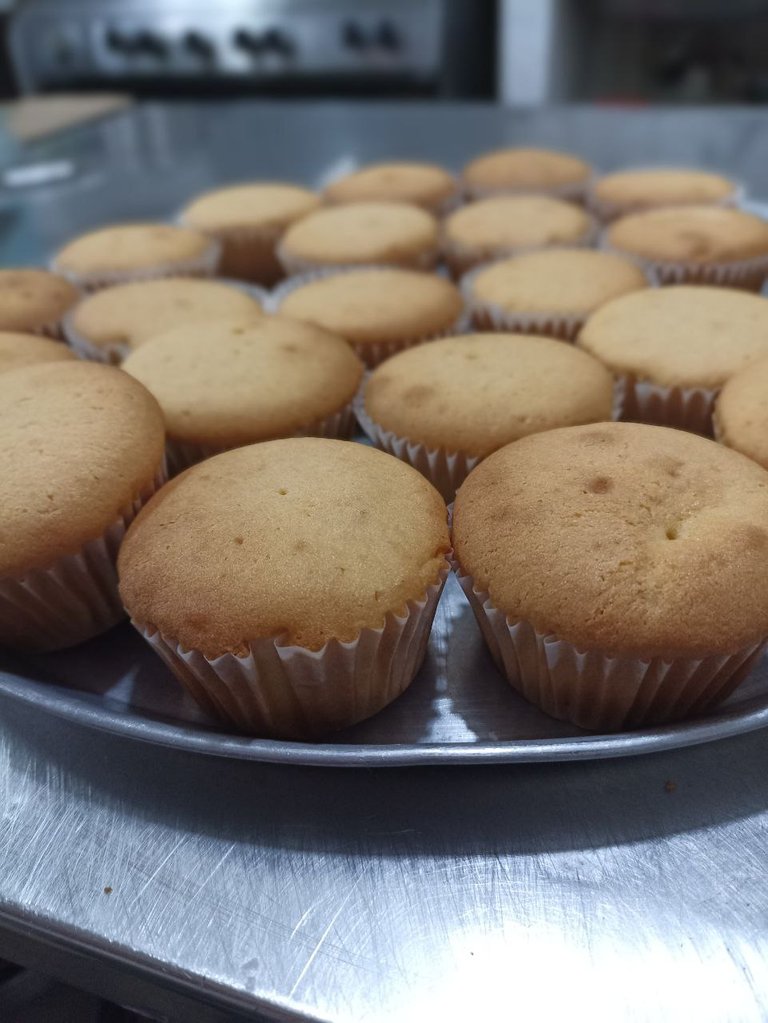
We put them in the oven for about half an hour, the time can always vary depending on each oven, in mine it took 40 minutes, here the sign that they are ready is when they begin to look golden brown and when you insert a toothpick it comes out clean.

This recipe yielded a total of 48 cupcakes, and I tell you that in the guide it said for 24 cupcakes, I had many years without making it and yesterday I had an order for 20 cupcakes and I made it and wow although I remembered that it yielded a little more I did not remember that it yielded so much, here in my house everyone was excited because there were a few extra cupcakes.
In fact I couldn't take pictures of the whole production because we were eating them 🤭 and besides that day I had a crazy day, I had many orders and I missed that detail.
However, almost to say goodbye here I leave you a picture with the first round coming out of the oven and the second round in process, I baked them in two batches of 24 and 24.
I highly recommend this recipe, it is delicious, it yields a lot and they stay soft for a long time, I have another recipe over there that are a little cheaper but in two days they are hard hehehehe these that I showed you today, these hold a long time soft as new.
This recipe is excellent to start a business with cupcakes, I learned it in a course I did with a very popular pastry chef from the city of Barinas, her Instagram account is Dulceycreativa.
I hope you liked my post today, thank you very much for reading me 🙏 see you in a next post, a sweet hug, greetings and blessings to all.
The photos used throughout the post were taken with my Redmi 10S phone.
Banners & Signatures Made in Corel Draw Photo-Paint
Translation to English with DeepL
Publication free of AI.
My Social Media


Español
Bienvenidos a una nueva receta
Hola hola queridos HIVERS ❤️ en especial a los amantes de la comida de esta bella comunidad de @foodiesbehive en esta oportunidad les quiero compartir una receta de unos ponquesitos que aprendí a hacer hace muchos años en un curso de repostería.
Algunas personas suelen hacer ponquesitos con la misma mezcla de las tortas, pero a veces el resultado no es el esperado ya que es una mezcla diferente, un poco menos densa y se tienden a espichar, entonces no nos quedan gorditos y abombados.
Está receta que les voy a compartir acá no sólo les permitirá hacer cupcakes/ponquesitos perfectos en presentación y sabor, sino que también son unos ponques que aguantan muchos días y conservan su suavidad como nuevos, yo hacía de estos para vender en una bodega que tenía y me duraban días perfectos.
Materiales:
- 4 tazas y media de harina leudante.
- 2 tazas y media de azúcar.
- 6 huevos.
- 1 taza y media de leche líquida.
- 450 gramos de margarina.
- 1 cucharada y media de vainilla.
- Capacillos #11.
- Ponquesera (Molde para hornear ponquesitos).
Aunque los ingredientes los mido por tazas y sólo pesé la margarina, les voy colocar por acá unas fotos que tomé al peso que tuvieron los materiales.
| | |
|---|
Preparación:
Lo primero es poner a precalentar nuestro horno a 180° C. Luego de prendido el horno y en temperatura procedemos con la preparación.
Agregamos al bowl de la batidora la mantequilla con el azúcar, mezclamos muy bien hasta que esté cremoso.
Luego que la mantequilla con el azúcar esté bien cremosa, cuando pasa de ese tono amarillo intenso a un amarillo claro, en este punto agregamos de uno en uno los huevos, seguimos batiendo a buena potencia (en mi batidora use velocidad 6, en batidoras de menor potencia o de mano sería a máxima velocidad).
Luego agregamos la harina y la leche, vamos agregando alternadamente, comenzamos con un poco de harina, luego un poquito de leche y así hasta finalizar, terminando con la harina. A mí me enseñaron que se comienza y se termina siempre con la harina
Para finalizar con la preparación de la mezcla le agregamos la esencia de vainilla y el polvo de hornear, esto último es opcional porque la harina es leudante, yo no le agregué.
| | |
|---|
Una vez lista la mezcla la colocamos en los capacillos los cuales deben estar en un molde para hornear ponquesitos. Colocamos la mezcla en cantidades relativamente iguales, yo lo hago con un funderelele, la cuchara para hacer bolas de helados, está es perfecta para manipular la mezcla de forma más fácil y da una medida justa para este tamaño de ponquesitos.
| |
|---|
Metemos al horno por aproximadamente media hora, el tiempo siempre puede variar dependiendo de cada horno, en el mío tardaron 40 minutos, acá la señal de que están listos es cuando se comienzan a ver doraditos y al insertar un palillo este sale limpio.
Está receta me rindió para un total de 48 ponquesitos, y les cuento que en la guía decía que para 24 cupcakes, yo tenía muchos años sin hacerla y para el día de ayer tenía un encargo de 20 ponquesitos y la hice y wow aunque recordaba que rendía un poco más no recordaba que rendía tanto, acá en mi casa todos estaban bravos porque quedaron unos cuantos ponquesitos extra.
De hecho no pude tomar fotos a la producción completa porque nos los fuimos comiendo 🤭 y a parte que ese día yo tuve un día de locos, tenía muchos pedidos y se me escapó ese detalle.
Sin embargo ya casi para despedir por acá les dejo una fotito con la primera ronda saliendo del horno y la segunda ronda en proceso, los hornee en dos tandas de 24 y 24.
Les recomiendo ampliamente esta receta, queda deliciosa, rinde muchísimo y se mantienen suavecitos por bastante tiempo, tengo por allí otra receta que son un poco más económicos pero en dos días están duros jejej estos que les enseñé hoy no, estos aguantan mucho tiempo suavecitos como nuevos.
Está receta es excelente para emprender negocio con ponquesitos, la aprendí en un curso que hice con una repostera muy cotizada de la ciudad de Barinas su cuenta de Instagram es Dulceycreativa.
Espero que les haya gustado mi post de hoy, muchas gracias por leerme 🙏 nos vemos en un próximo post, un dulce abrazo, saludos y bendiciones para todos.
Las fotos usadas a lo largo del post fueron tomadas con mi teléfono Redmi 10S.
Banners y Firma Hechos en Corel Draw Photo-Paint
Traducción al Inglés con DeepL
Publicación libre de I.A.
Mis Redes Sociales
Se ven provocativos esos ponquecitos y si ya me imagino tu familia brava xq no les gusta verdad jajaja excelente receta amiga😋❤️
Gracias nohe por pasarte por acá, si estaban muy molestos, tanto que acabaron con ellos jajaja
Waoh! This cup cakes must taste delicious friend. Happy Sunday and enjoy 😊
I assure you they are 👌super delicious, thank you for your comment ❤️🙏 happy Sunday to you too 🤗
Always beautiful 😻. Hope you enjoyed. Happy start to this new week 🥰💕🌺
Que bien te quedaron muy esponjosos, gracias por tu receta muy bien explicada. Ya me antoje. Saludos
Gracias por tu comentario ❤️🙏 esa receta queda muy bien si te animas a hacerla seguro te van a quedar muy buenos también. Saludos 🤗