
Hello, how are you all in the needleworkmonday community? How are you? Today I am here to share with you the beautiful sewing I made: a mustard yellow ribbed fabric blouse. I want to show you step by step, I hope you understand why. I get confused when explaining but well with practice I hope to improve so I can continue sharing with you my ideas in sewing because as you know that's what I dedicate myself to and I have my business and thanks to the effort and care that I put into my designs I have I have been able to move forward, and also thanks to that I have been able to help my children and each one has their own clothes made by me and they love them thank goodness because I put love into each garment I make for them, the same love that I put into this blouse that I I'll show you. I hope you will join me in this process.
The purpose of this blouse itself was to place it on the mannequin, and of course to have new clothes and show it to new clients and I also shared it on social networks and it just so happens that I got a client who told me let me have that blouse please and even I paid for it that quickly, and I was really impressed, I didn't think that would happen, and now that I think about it, the mannequin was empty again. The fabric I choose is ribbed fabric in a beautiful mustard color and the design is a type of shirt guard with a shirt collar, I think it's something like that, well I've already talked too much, now I'll start the making.
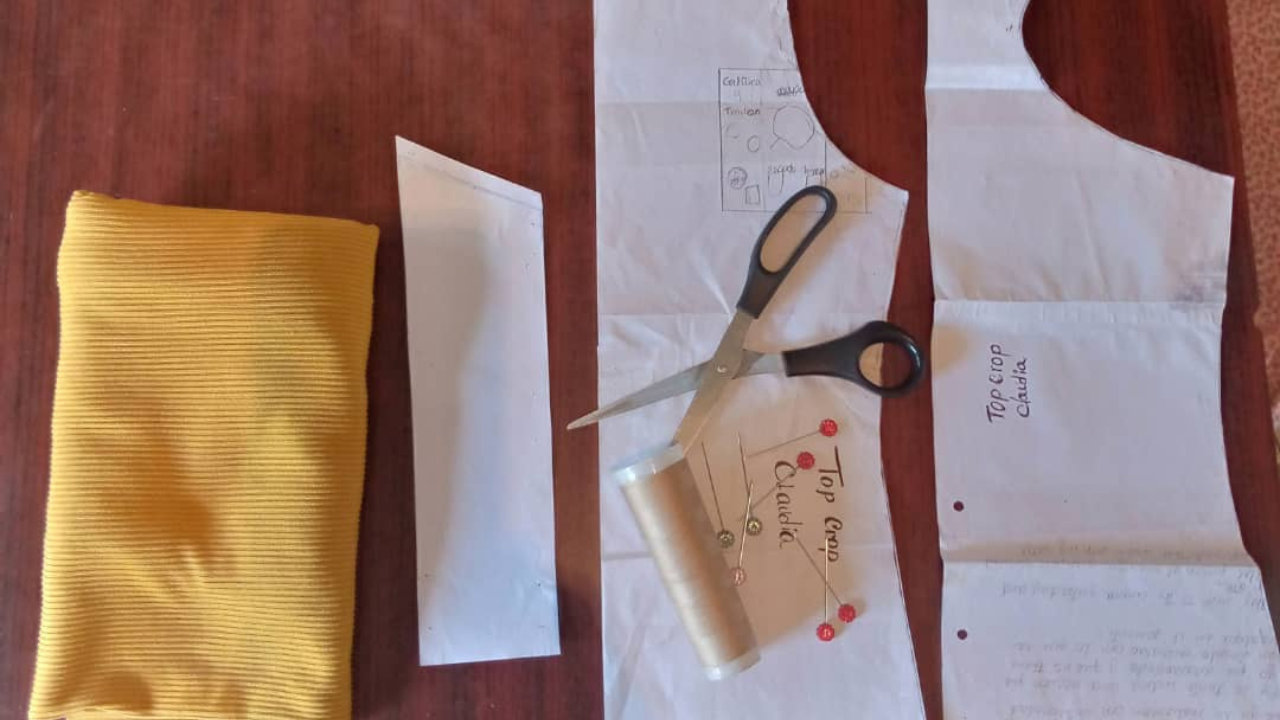
(Materiales📝:)||(Materials📝:)
- 1 metro de tela acanalada color mostaza
- Hilo color mostaza, blanco o amarillo
- Tijeras
- Alfileres
- Patrón
- Máquina de coser
- 1 meter of mustard ribbed fabric
- Mustard, white or yellow thread
- Scissors
- Pins
- Pattern
- Sewing machine
(Procedimiento:)||(Procedure:)
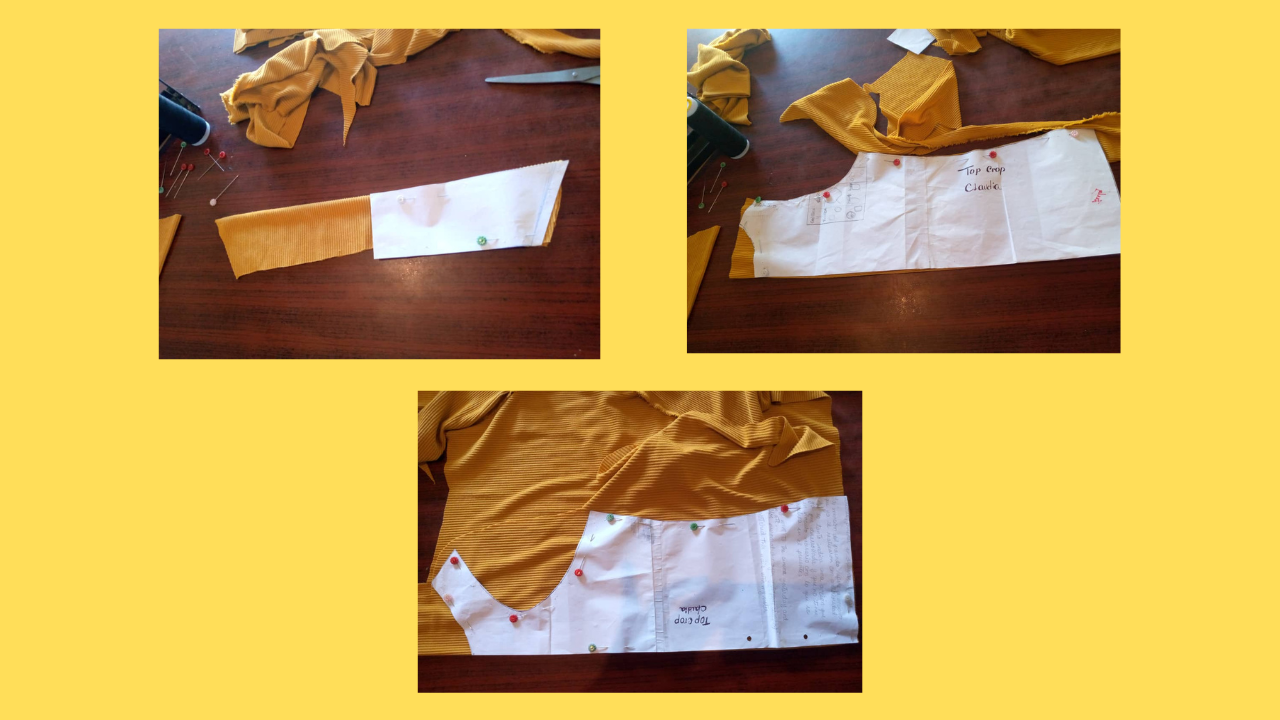
Paso nro 1
Paso nro 1
In the first step, cut the fabric according to the pattern and holding it with the pin cushions, cut carefully to have the most precise cut, cut the front and back part, the piece that would be the collar, and having everything ready, now You can proceed to sew.
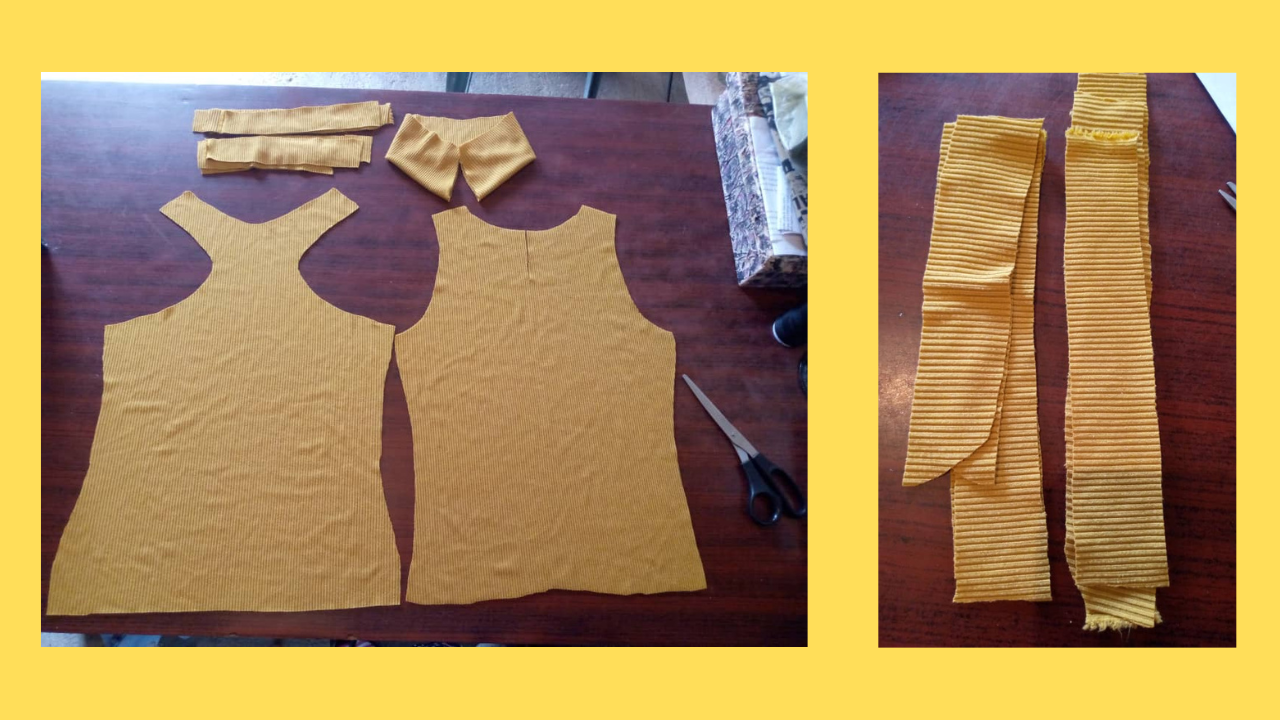

Paso nro 2
Paso nro 2
I started sewing the shoulder part and then the sides, I sewed this with the overlock machine, since I want a seam with a better finish
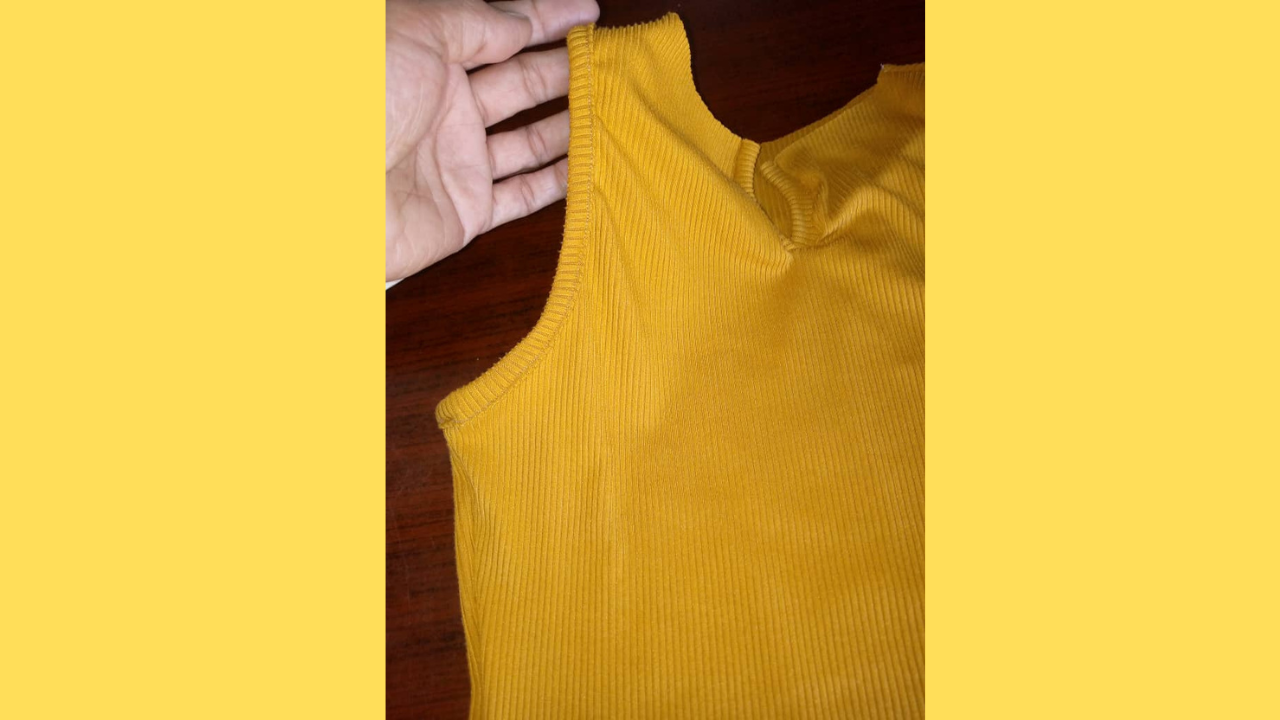
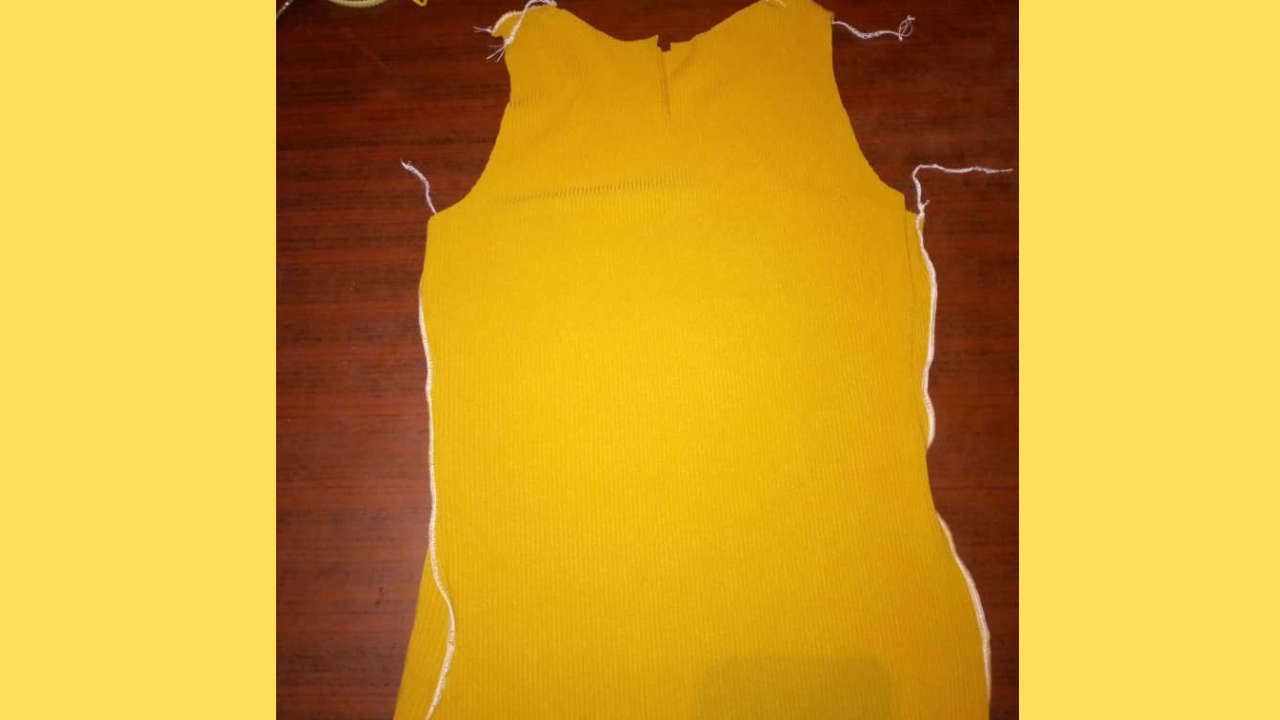
Paso nro 3
Paso nro 3
Now it's time to place the collar, I sew it around the entire collar held with pins so that it does not move and thus not ruin the seam and the fabric, I always started chopping when finishing the garments and that way it is more appreciated the details.
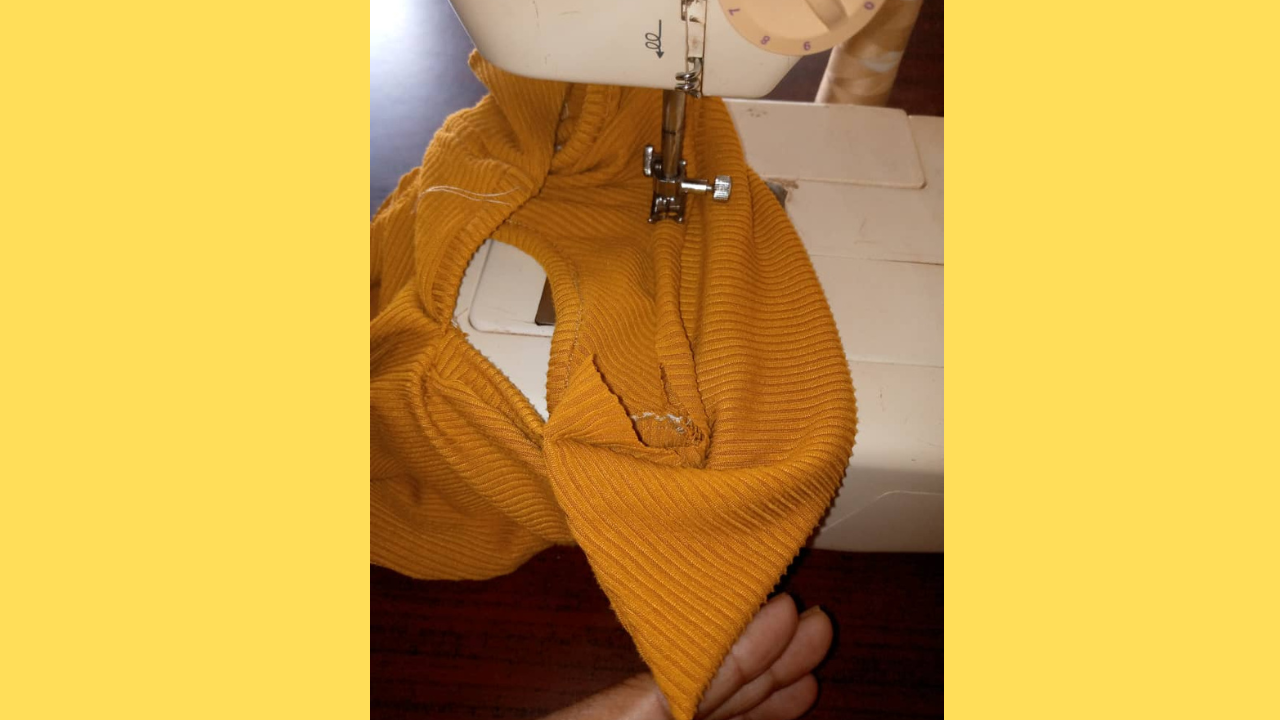
Paso nro 4
Paso nro 4
Lastly, I will be sewing the hem with the straight machine, and fixing some details to finish the blouse.
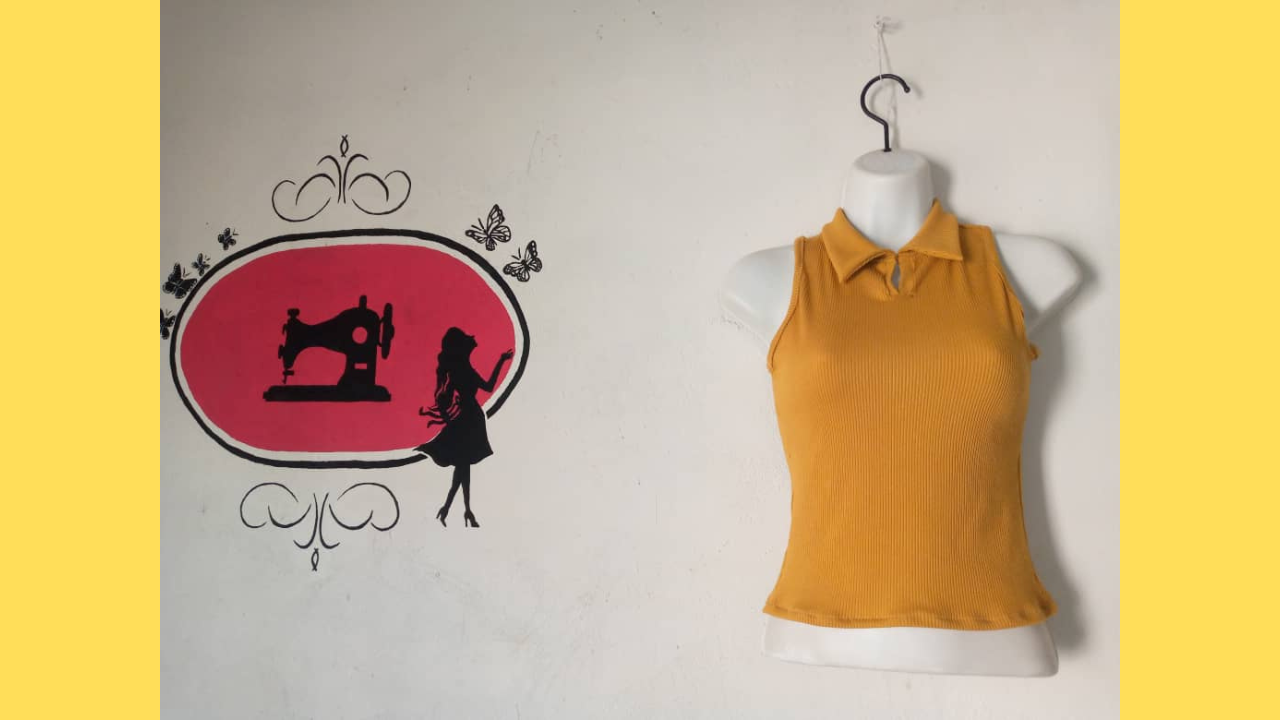
(Resultado final:)||(Bottom line:)
The photos presented in this blog are my responsibility. The images have been edited using Canva. The photographs were taken with my Infinix hot 10 cell phone. The content has been translated with Google translator.
Excelente gracias por compartir
Hermoso proyecto Bet, me gusta mucho ese color y el diseño que le diste a esta blusa. Se ve cómoda y elegante. Te recuerdo que no es necesario hacer un tutorial paso a paso detallado en caso de que se te complique, por el contrario, siempre resultan más interesantes aquellas publicaciones que no son tan mecánicas, sino que muestran un poco más de toque personal, es decir contando cómo te sentiste con este proyecto, que te pareció fácil o dificil o algún detrás de escena :)
Te mando un saludo, que estés bien!
Congratulations @bet1977! You have completed the following achievement on the Hive blockchain And have been rewarded with New badge(s)
Your next target is to reach 4000 upvotes.
You can view your badges on your board and compare yourself to others in the Ranking
If you no longer want to receive notifications, reply to this comment with the word
STOPCheck out our last posts:
Te quedo muy bonita, aunque no uso mucho este tono, me gusta el diseño.