Hello dear people of Hive, I hope you have had a very good start of the week, this Tuesday I woke up with the desire to make a blouse that had been hanging around in my head for a few weeks, today was the day to make it, I had the necessary fabric, my willingness and time to devote to it, so I bring you a brief explanation of how I made this nice blouse, if you are interested in knowing how I made it, stay a moment and I'll show you.
Hola querida gente de Hive, espero hayan tenido un muy buen inicio de semana, este martes me levante con ánimos de hacer una blusa que venía rondando en mi cabeza desde hace algunas semanas, hoy era el día para realizarla, tenía la tela necesaria, mi disposición y tiempo para dedicarme a ello, así que les traigo una breve explicación de cómo realice esta linda blusa, si estas interesado o interesada en saber cómo la hice, quédate un momento y te enseño.
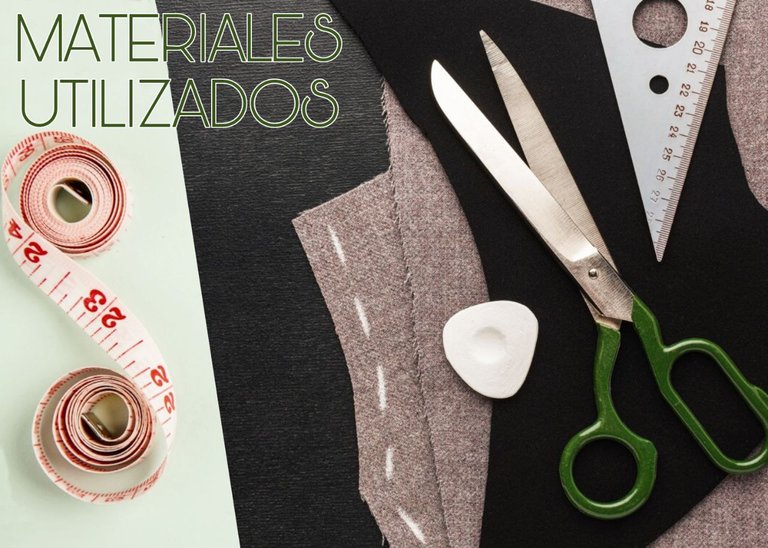
📌 60cm of Fabric, Peach or Mimossa Skin.
📌 Scissors.
📌 Sewing tape measure.
📌 Ruler.
📌 Sewing chalk.
📌 60cm de Tela, Piel de Durazno o Mimossa.
📌 Tijeras.
📌 Cinta métrica de costura.
📌 Regla.
📌 Tiza para marcar costura.
👀:
-It does not necessarily have to be the fabric I mentioned.
-The amount of fabric will depend on your measurements.
-If you don't have sewing chalk you can use regular chalk or a pencil depending on the color of the fabric.
-No necesariamente tiene que ser la tela que mencione.
-La cantidad de tela dependerá de tus medidas.
-Si no tienes tiza de costura puedes utilizar tiza normal o un lápiz dependiendo del color de la tela.
To make this blouse I did not make a pattern, I wanted it to be something quick and easy to make, I started by taking a blouse that I already had as a reference, which meets the right measures, this would be ideal when taking a blouse to serve as a guide. Once this is achieved we can proceed with the next step, we will extend our fabric, either on the floor or on a table, but it must be a place where it is comfortable to work and you can extend your fabric completely.
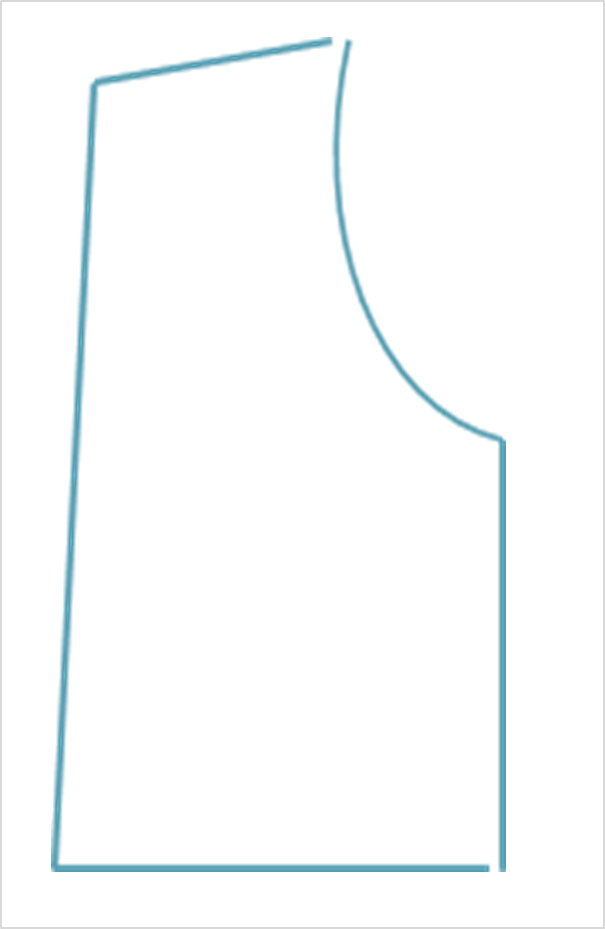
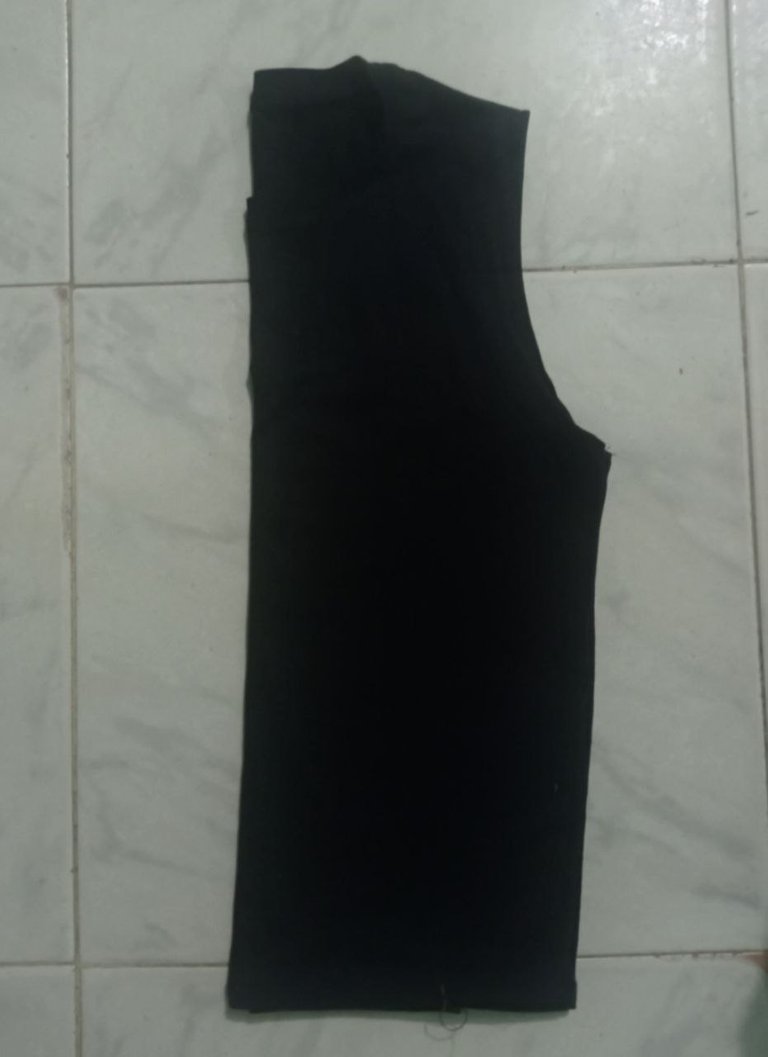
Now we will fold our reference shirt in half, like this.
Para hacer esta blusa no realice un patrón, quería que fuera algo rápido y sencillo de elaborar, comencé tomando una blusa que ya tenía como referencia, la cual cumple con las medidas justas, esto sería lo ideal al tomar una blusa que nos sirva de guía. Una vez conseguido esto podemos proseguir con el siguiente paso, extenderemos nuestra tela, ya sea en el piso o sobre una mesa, pero debe ser un lugar donde sea cómodo trabajar y puedas extender tu tela por completo.
Ahora doblaremos nuestra camisa de referencia a la mitad, de esta manera.
 |  |
|---|
We leave it aside for a moment, and proceed to fold our fabric in two times for this we will fold the first time according to the width of our reference as reflected in this image:
La dejamos por un lado un momento, y procederemos a doblar nuestra tela en dos veces para esto doblaremos la primera vez según el ancho de nuestra referencia cómo se refleja en esta imagen:
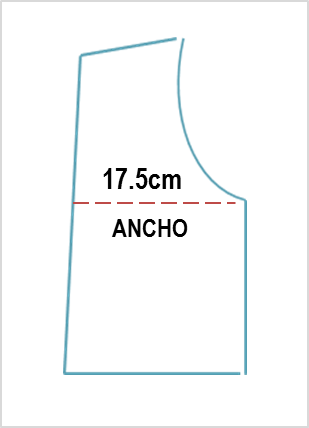
in my case it would be about 17.5cm to this amount we would add the same quantity plus 2cm to be added to the piece to be cut, this 17.5cm would become 37cm exactly.
en mi caso serían unos 17.5cm a esta cantidad le sumariamos la misma cantidad más 2cm que se le agregaran a la pieza que cortaremos, estos 17.5cm pasarían a ser 37cm exactamente.
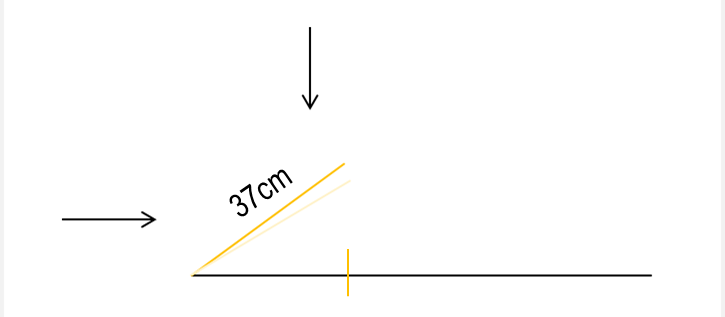
Now we would fold our fabric for the second and last time just at the end of where our first double ends.
Ahora pasaríamos a doblar nuestra tela por segunda y última vez justo al final de donde termina nuestro primer dobles.
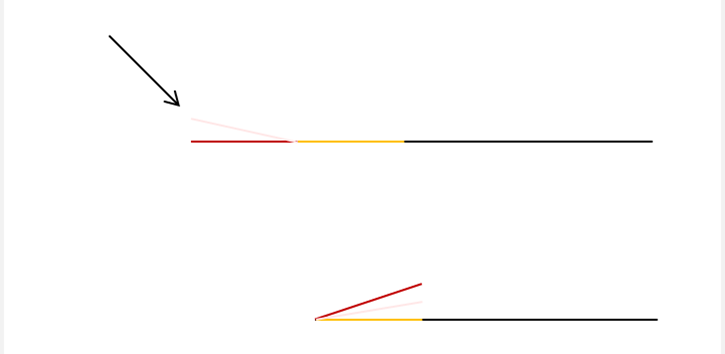
The second fold would be represented by the red line.
Now that we have our fabric folded, we position our blouse on top of the fabric in this way:
El segundo dobles estaría representado por la línea roja.
Ya teniendo nuestra tela doblada, pasamos a posicionar nuestra blusa encima de la tela de esta manera:
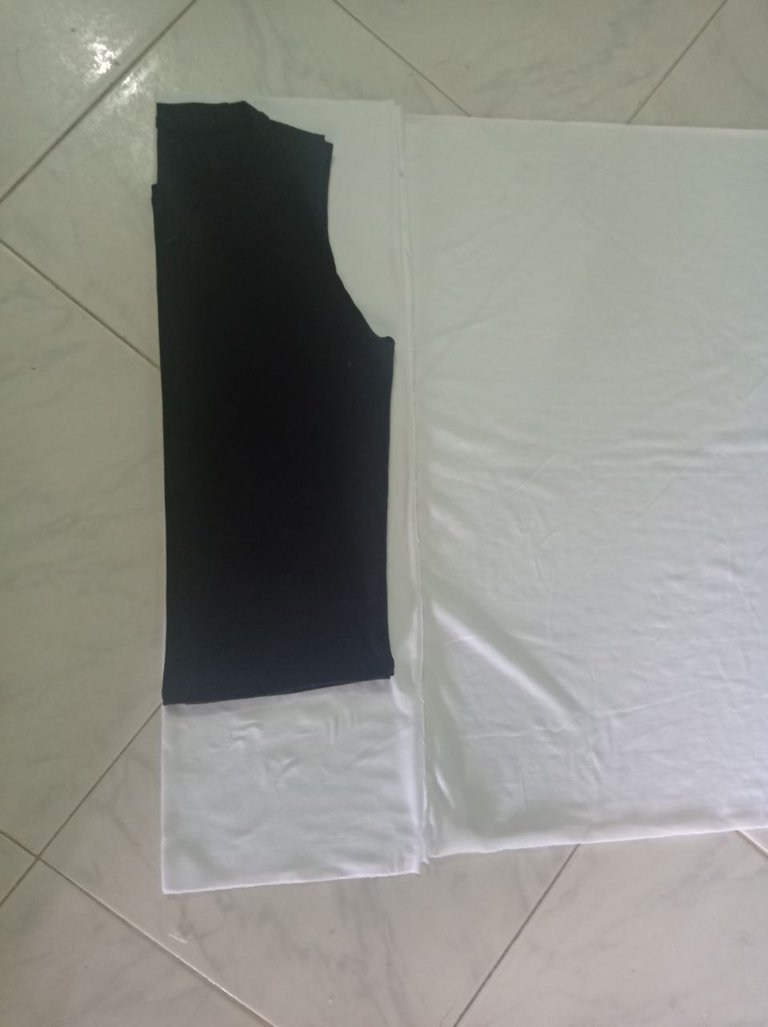
This is my way of explaining but you can also do this without measuring, with the same procedure, folding the fabric twice.
Esta es mi forma de explicarte pero esto también lo puedes hacer sin necesidad de medir, con el mismo procedimiento, doblando la tela dos veces.
You should know that you must place the pattern or reference blouse to the fabric thread, as the final appearance and drape of the garment depends on it.
Debes saber que debes colocar el patrón o la blusa de referencia al hilo de la tela, ya que depende de ello la apariencia y caída final de la prenda.
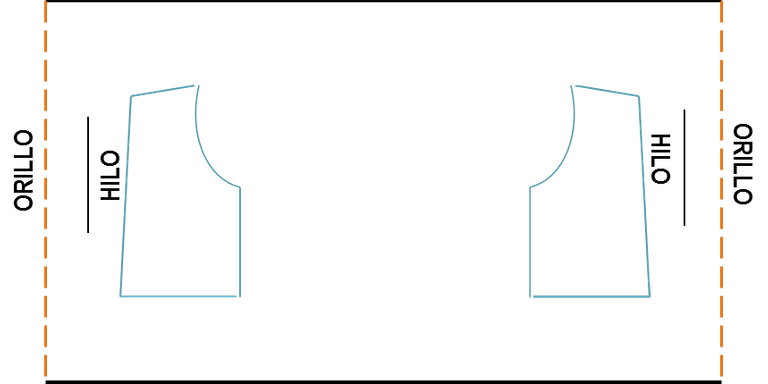
With this image I will try to explain better, we have marked in orange what is known as selvedge these borden are those that delimit the width of the fabric, and the direction of the thread is parallel to the selvedge, in most cases the garments are cut to the thread as it does not stretch and is maintained, except for elastic fabrics. From this is that we will place our pattern or in this case our reference blouse in the same position as shown in the image.
Con esta imagen tratare de explicarme mejor, tenemos marcado de naranja lo que se conoce como orillo estos borden son los que delimitan el ancho de la tela, y la dirección del hilo esta paralela al orillo, en la mayoría de los casos las prendas se cortan al hilo ya que no estira y se mantiene, a excepción de telas elásticas. A partir de esto es que colocaremos nuestro patrón o en este caso nuestra blusa de referencia en la misma posición que muestra a imagen.
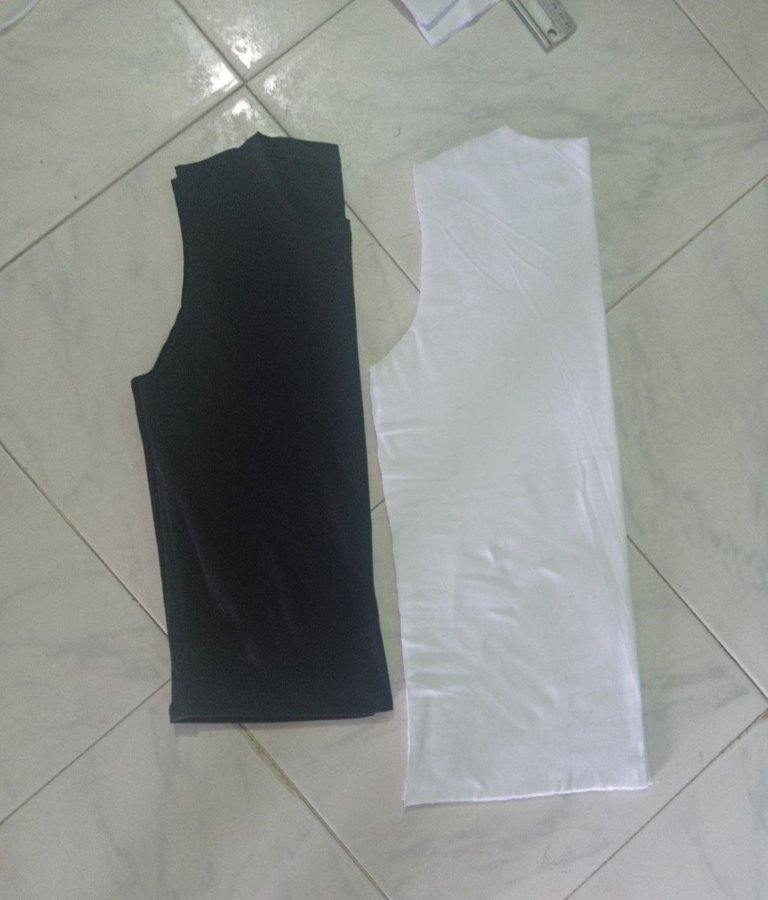
Ok? So far so good, with our fabric already folded when cutting we will have the first two pieces of the shirt, the front and the back. When cutting it can't be just the size of the reference blouse, you will cut 1 or 2 cm of the width of the blouse, leaving this 2cm for the seam.
Ok? Hasta ahora todo bien, con nuestra tela ya doblada al cortar tendremos las dos primeras piezas de la camisa, la parte delantera y la trasera. Al cortar no puede ser justo a la medida de la blusa de referencia, cortaras 1 o 2 cm del ancho de la blusa, dejando estos 2cm para la costura.
 |  |
|---|
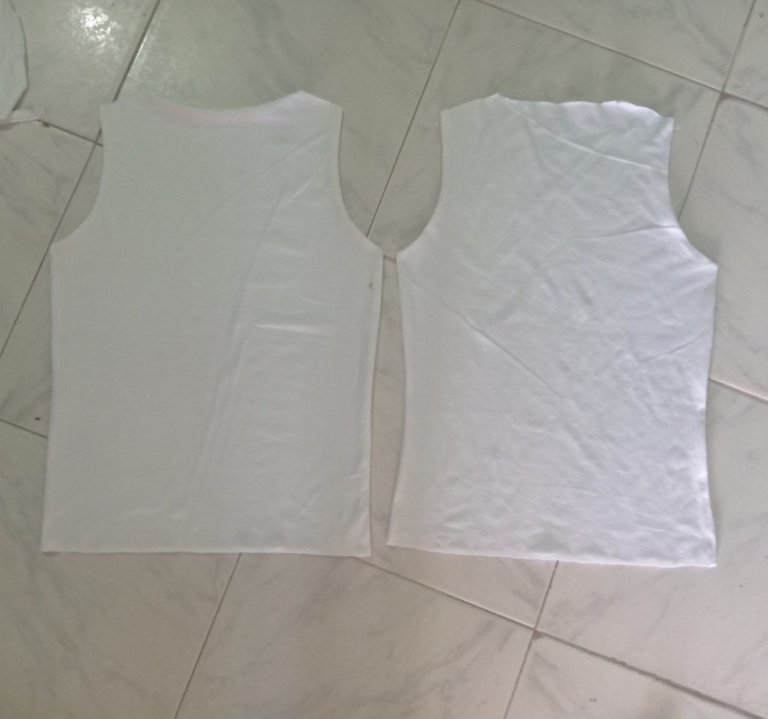
As you will see in my case I made the shirt a little longer than the blouse I used as a reference, you could also do this according to your preference, either longer or shorter.
Once you unfold what you cut there will be two equal pieces, we will take one of these two and take as a reference the height of the neck of the blouse you used to guide you, in my case it was about 7.5 cm I marked it with a pencil and fold the piece as I folded the blouse the first time and made the cut of the neck.
Como veras en mi caso hice la camisa un poco más larga que la blusa que use de referencia, esto también podrías hacerlo según tu preferencia, ya sea más larga o más corta.
Una vez desdobles lo que cortaste quedaran dos piezas iguales, agarraremos una de estas dos y tomaremos como referencia la altura del cuello de la blusa que usaste para guiarte, en mi caso fueron unos 7.5 cm lo marque con un lápiz y doble la pieza como doble la blusa la primera vez e hice el corte del cuello.
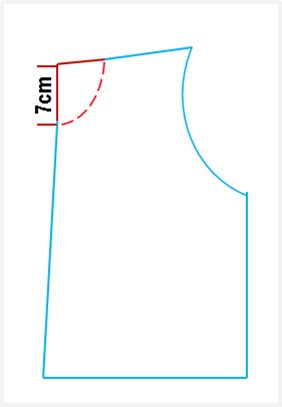
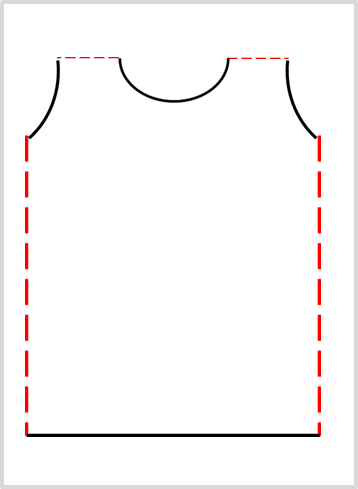
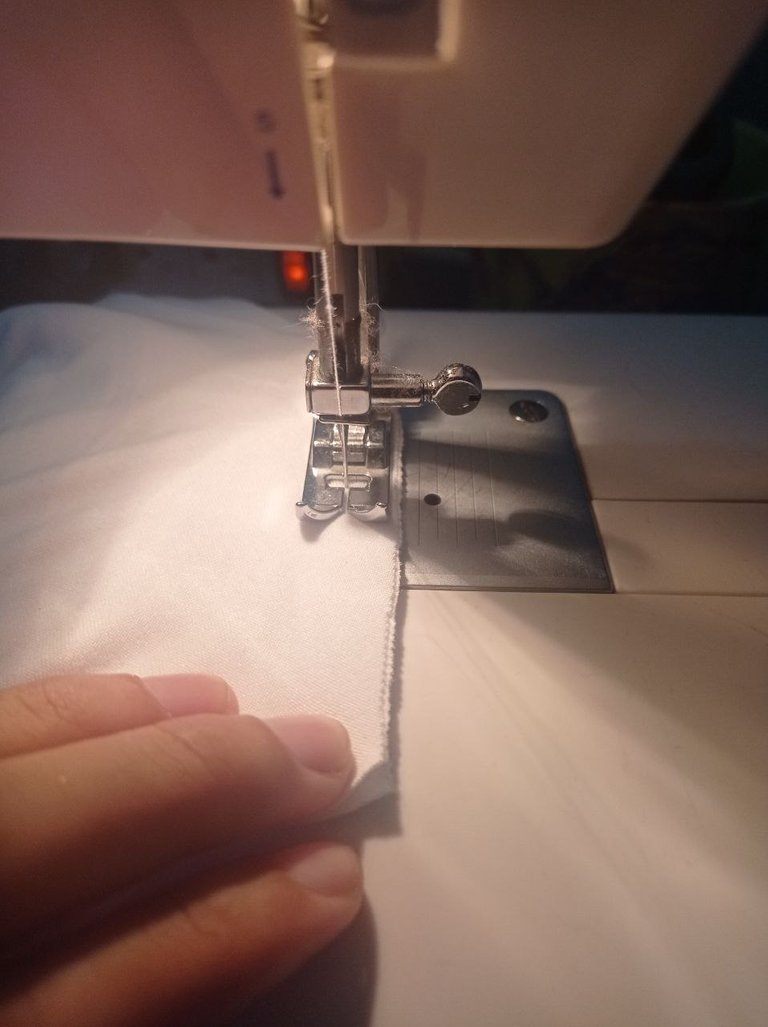
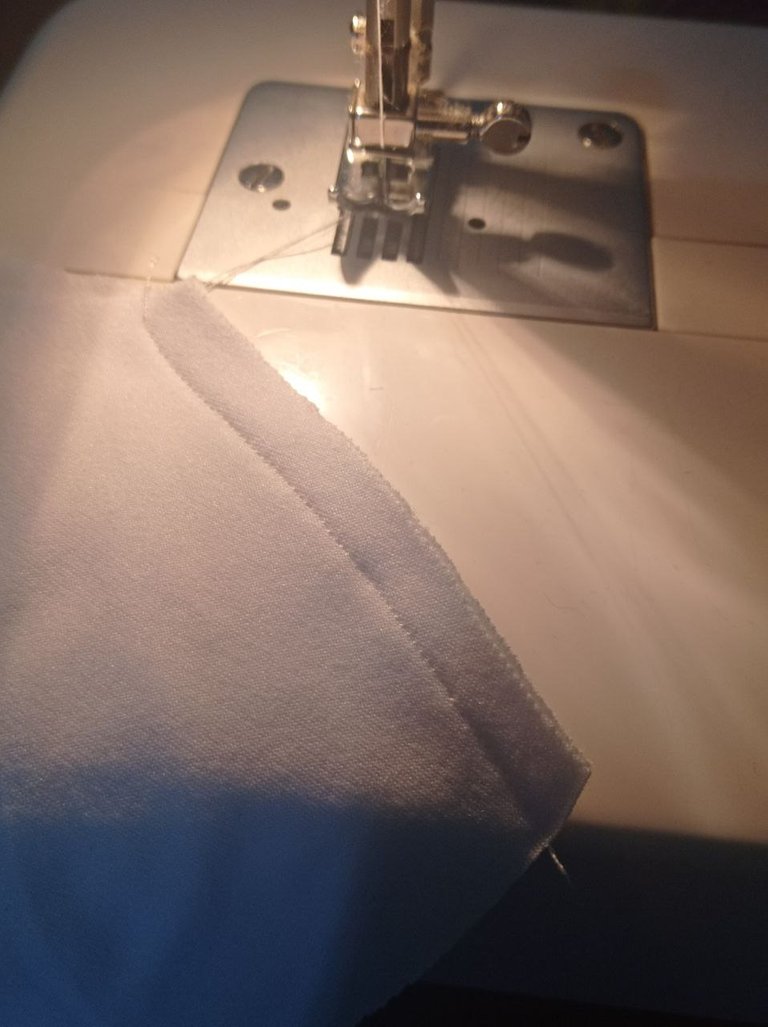
Now with this ready we can start sewing these two pieces, we put them facing each other and sew the shoulder and side parts of the shirt. In the following image the area to be sewn is marked in red:
Ahora con esto listo podemos empezar a coser estas dos piezas, las ponemos una frente a la otra y cosemos la parte de los hombros y los laterales de la camisa. En la siguiente imagen la zona a coser está marcada en rojo:
 |  |
|---|
Once you have joined these two pieces, test that it fits well, and if so we can continue with the neck, we are almost done.
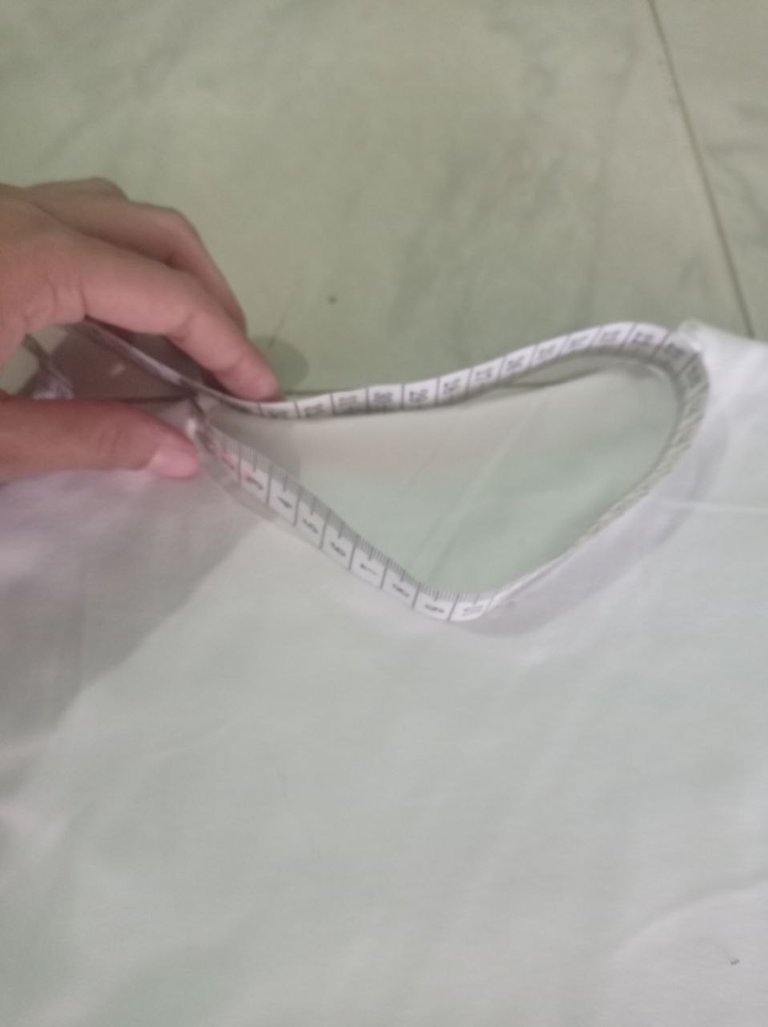
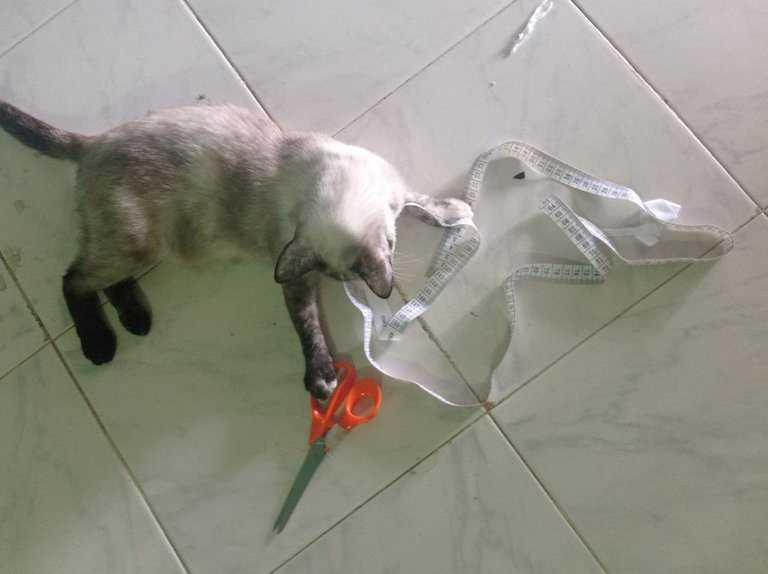
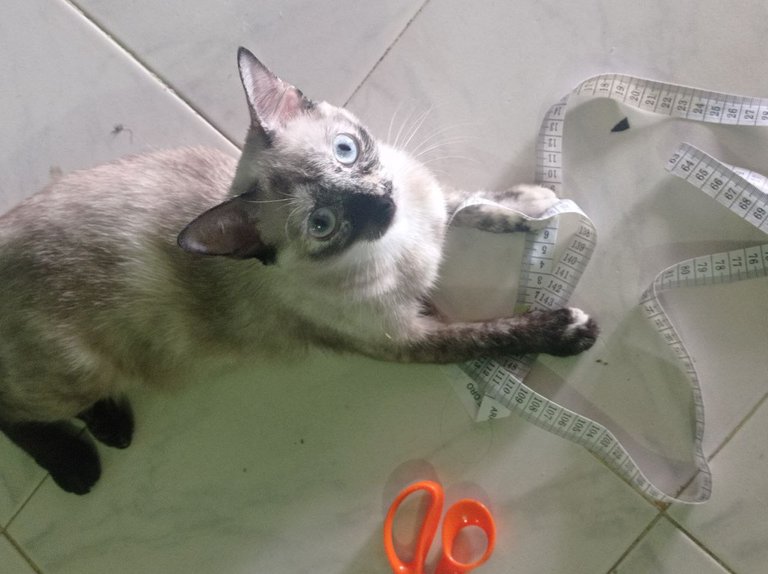
To make the collar we will first measure with our tape measure all the contour of the collar of the two pieces that we join, in this way:
Una vez hayas unido estas dos piezas, prueba que te quede bien, y si fue así podemos continuar con el cuello, ya casi terminamos.
Para realizar el cuello primero mediremos con nuestra cinta métrica todo el contorno del cuello de las dos piezas que unimos, de esta manera:
The little gray one also wanted to help, but honestly wasn't much help.
La pequeña gris también quería ayudar, pero sinceramente no fue de mucha ayuda.
 |  |
|---|
With this we can now know the length of the neck we will make, in my case it was 39 cm and I decided that I wanted a width of 4 to 3 cm, if you choose 3 cm you have to mark double that plus 1 cm for the seam, that is 7 cm wide in this case.
Ya con esto podemos saber el largo del cuello que haremos, en mi caso fueron 39 cm y decidí que quería un ancho de 4 a 3 cm, si escoges que sean 3 cm tienes que marcar el doble de eso más 1cm para la costura, es decir 7 cm de ancho en este caso.
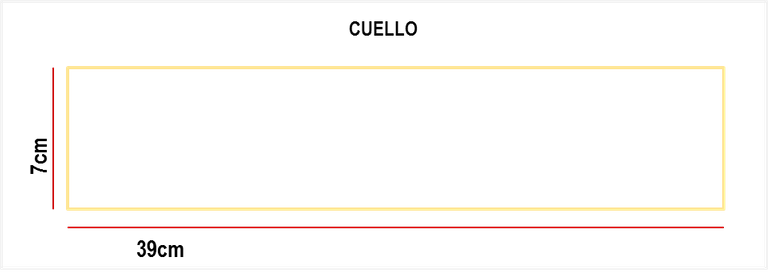
Once the collar is cut, we sew the two ends facing each other. Once this is done, we fold the collar in half.
Una vez cortes el cuello, cosemos los dos extremos frente con frente. Ya hecho esto doblamos el cuello a la mitad.

Our shirt should have the seam side facing out, so we put the collar from the inside facing to the front to sew it.
Stretch the neck slightly but not too much when sewing.
Nuestra camisa debe tener la parte de las costuras hacia afuera, de manera que pongamos el cuello desde la parte de adentro frente con frente para coserlo.
Estira un poco no mucho el cuello al coser.
And now you need to give the finishing touches to your blouse, sew the sleeve cuffs without stretching this time and guide yourself by the foot of the machine to have better precision, also the bottom of the shirt, take your time, and with this you should be done.
You can also secure the seam on the sides of the blouse with a zigzag.
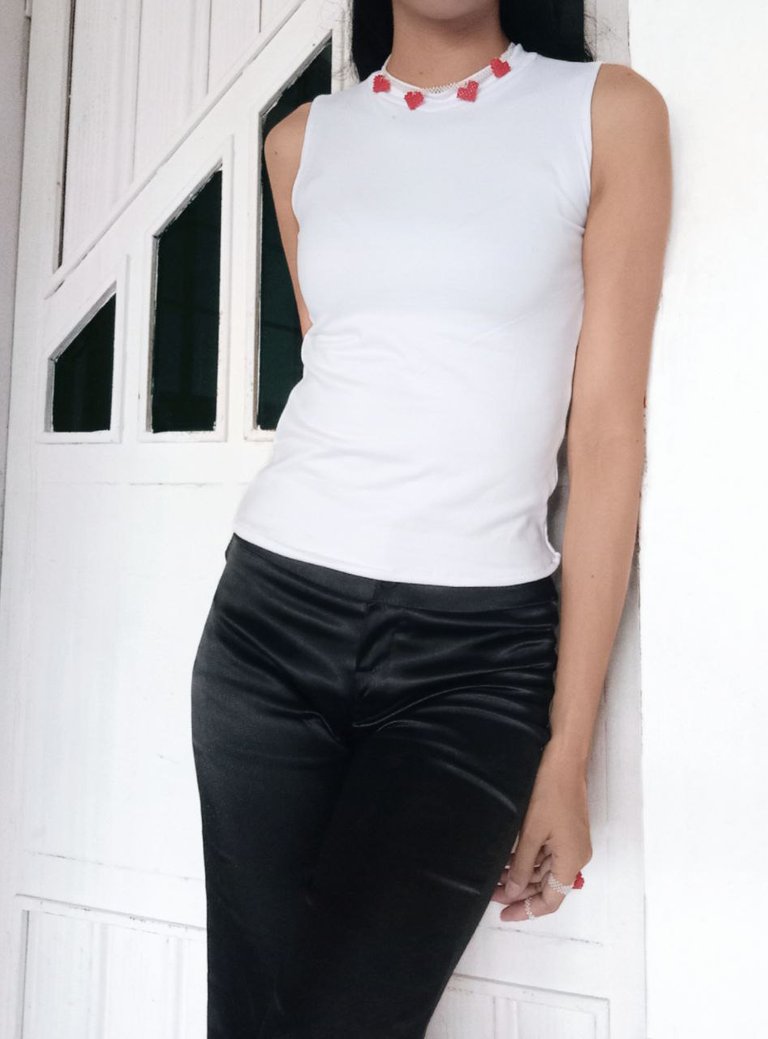
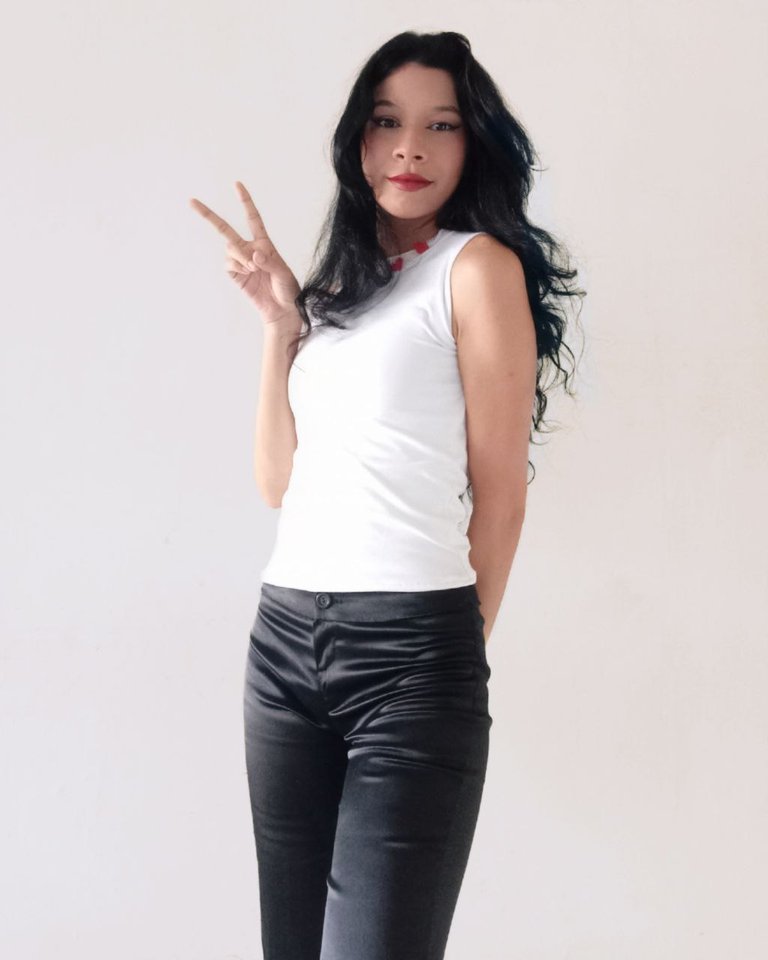
This was my result:
Y listo te falta dar los últimos toques a tu blusa, cose las horillas de las mangas sin estirar esta vez y guíate del pie de la máquina para tener mejor precisión, también la parte inferior de la camisa, tomate tu tiempo, ya con esto terminarías.
También puedes asegurar la costura de los laterales de la blusa con un zigzag.
Este fue mi resultado:
 |  |
|---|
I hope you liked the post✨ and it will help you at some point, don't be afraid to make mistakes, you learn from them, just have fun in the process, it's never too much to try.
I say goodbye dear people of Hive, I hope you have a good week.
espero te haya gustado el post✨ y te sirva en algún momento, no tengas miedo de errar ya que de los errores se aprende amigos, solo diviértete en el proceso, nunca esta demás intentarlo.
me despido querida gente de Hive, espero tengan una buena semana.💖
Hi @dulcineadas
Do you know you could have used #diy tag for this post to earn some BUIDL tokens in addition to Hive crypto?
In case you are not aware, read this post to know the kinds of content, among others, you could post using #diy tag.
You could also use the #diy tag when you share content showcasing your DIY skills.
Because most people are not aware of the potential of BUIDL token, it can still be bought at very cheap price now.
Wow @dulcineadas I love that sleeveless shirt, especially the collar you put on it is so cute.
aww thanks so much honey, I'm glad you were able to read it.💖
Congratulations @dulcineadas! You have completed the following achievement on the Hive blockchain and have been rewarded with new badge(s):
Your next target is to reach 50 comments.
You can view your badges on your board and compare yourself to others in the Ranking
If you no longer want to receive notifications, reply to this comment with the word
STOPTo support your work, I also upvoted your post!
Check out the last post from @hivebuzz:
Support the HiveBuzz project. Vote for our proposal!
Qué buen tutorial tan detallado. La blusa te quedó muy linda y el diseño es super elegante🌸🌷🌹 te felicito
ay muchísimas gracias por el cumplido chica 💖
waooo, solo puedo decir waooo. Tu post es perfecto, explicas muy bien cada detalle. me encanta la foto principal. Gracias por compartir con nosotros tus conocimientos, espero que te vaya bien en Hive.
que bella, muchas gracias por tus deseos chica 💖
Excelente publicación, detallado cada paso. Este diseño tiene tantas posibilidades, me encantó.
Gracias por compartir 🤗🤗
gracias a ti por leerlo y comentar, me alegra que te gustara 💖
Que lindo verte por aquí @dulcineadas espero que puedas sacarle mucho provecho a esta Blockchain! Te mando un enorme abrazo, y no dude contactarme para cualquier duda!
omg lili jaja muchas gracias, éres un amor 💖
Hola amiga, bienvenida a la comunidad Needle Work Monday! Esta blusa te quedó perfecta y a la medida, eso es lo bueno de saber confeccionar nuestros propios patrones.
Cada semana los trabajadores de la aguja de todo el mundo compartimos nuestro trabajo, patrones, consejos, ideas y atajos mientras nos apoyamos unos a otros. El objetivo es inspirar a Hive blockchain a darle una oportunidad a la artesanía.
Los lunes usamos la etiqueta #needleworkmonday y los demás días usamos la etiqueta #needlework sin la palabra lunes. Compartimos y publicamos nuestro trabajo directamente desde la página de la Comunidad.
Animamos a nuestros miembros a que compartan el proceso de su trabajo a través de fotos. Esto no sólo valida su trabajo sino que nos lleva al viaje creativo con ustedes.
Para más información sobre lo que hacemos y para nuestras pautas de publicación por favor visita nuestras FAQs.
También te invito a unirte a nuestro Discord! https://discord.gg/UuWpkRdY
Gracias :D.
ay chica muchas gracias por el cumplido y haber comentado, está bien 💖
Hola @dulcineadas, bienvenida a la comunidad.
Debo decir que me fascinó el estilo y presentación de tu publicación, todo está muy bien ordenado y explicado.
Me gustaron mucho las fotografías, buen trabajo!
Espero sigas compartiendo tus proyectos con nosotros. Saludos.