| Crochet flower-rimmed cup holders. | Apoya vasos con borde de flores a crochet. |
|---|---|
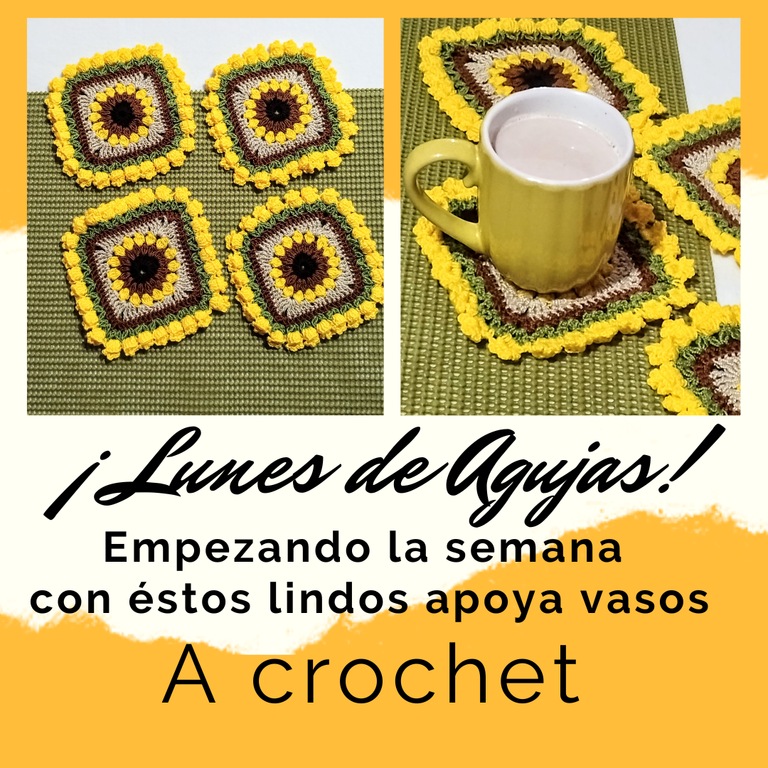
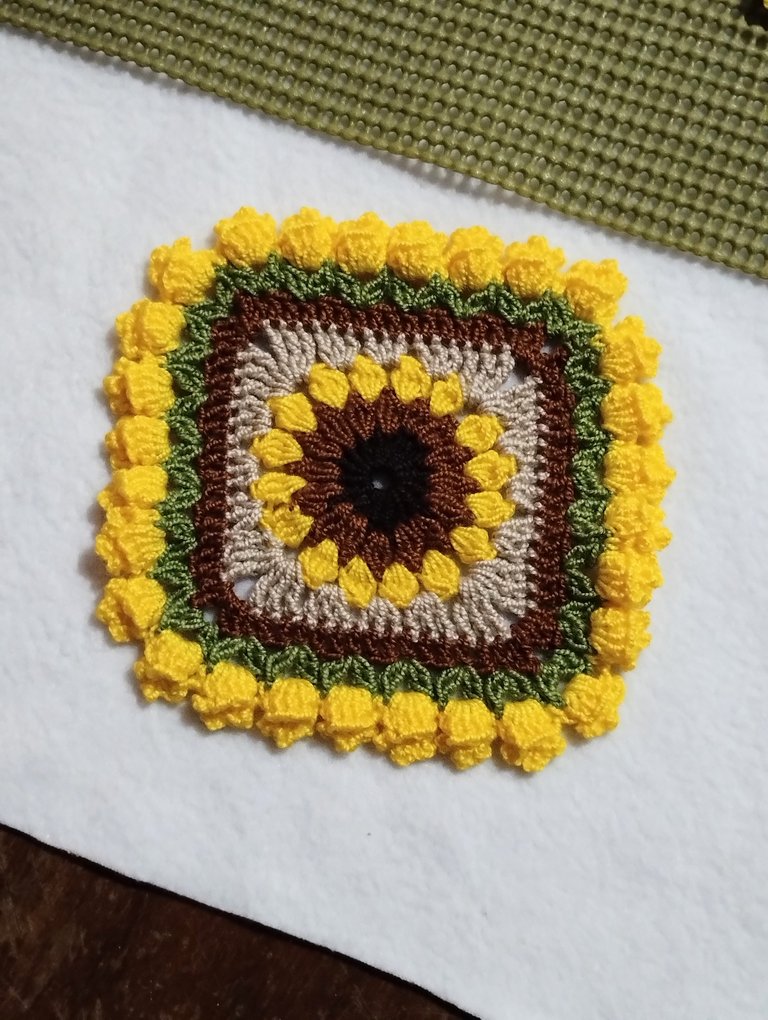
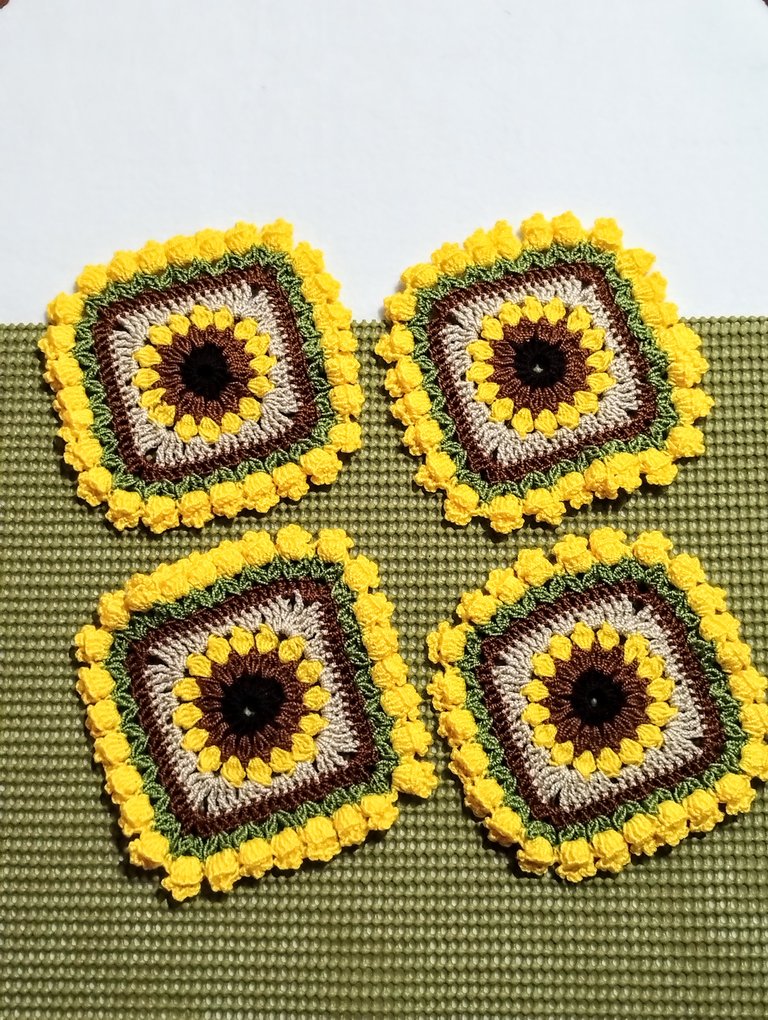
Monday of needles, a day to share and enjoy beautiful creations. I particularly feel that this day in the community is a kind of Gala, where the most beautiful and creative needle projects are shared. On this occasion I bring you this quartet of vase supports. The base is a sunflower granny square, I have made this pattern before for other projects, but in this case, as they were to be cup rests for my table, I wanted to make them look more romantic and embellishing them with a tulip border was wonderful for them. | Lunes de agujas, un día para compartir y disfrutar de hermosas creaciones. Particularmente siento que este día en la comunidad se da una especie de Gala, donde se comparten lo más bellas y creativos proyectos de agujas. En esta ocasión yo les traigo este cuarteto de apoya vasos. La base es un granny square de girasol, este modelo ya lo he realizado antes para otros proyectos, pero en este caso, como serían apoya vasos para mí mesa, quería hacerlos lucir más románticos y engalanarse con un borde de tulipanes les vino de maravilla. |

I'll share the details from the beginning, including the granny square and then we'll move on to the tulips in the border, which in my opinion, needs to be explained in detail, since this border can be used in several projects. | Les comparto los detalles desde el principio, incluyendo el granny square y de inmediato pasaremos a los tulipanes en el borde que en mi opinión, requiere que sea explicado a detalle, ya que este borde se puede utilizar en diversos proyectos. |
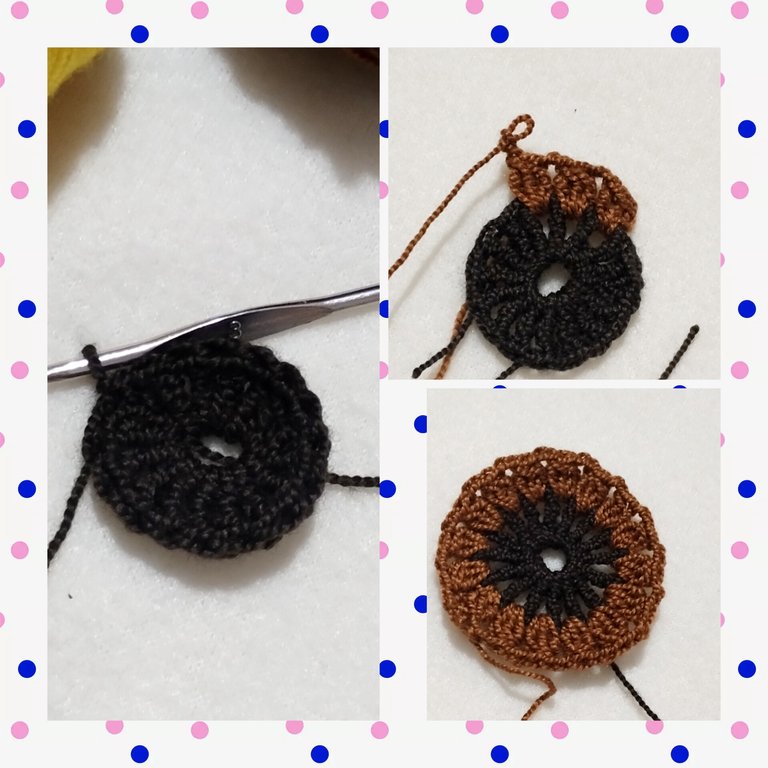
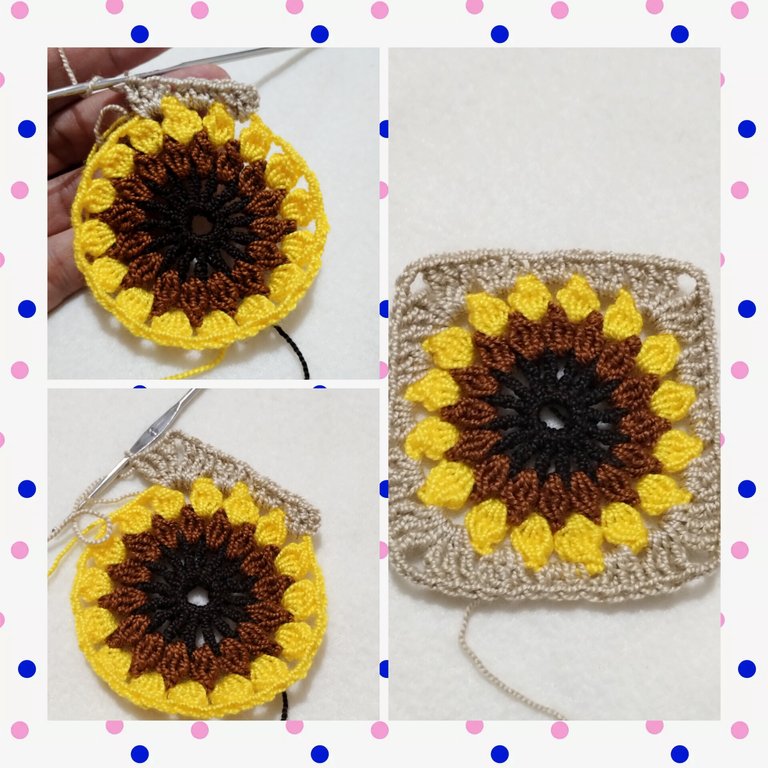
For the granny square, we start with 16 double crochet over a magic ring and close with a slip stitch, which we will do in each round. Then we move on to the next round with a brown yarn a little lighter than the previous one and in between each stitch of the previous round, we knit 3 closed high stitches together followed by 2 chain stitches. In the third row, we knit 4 double crochet stitches, closed together, and followed by 3 chain stitches each; we do this over the two separating chains of the previous row. This completes the sunflower. | Para el granny square, empezamos con 16 puntos altos sobre un anillo mágico y cerramos con punto deslizado, Así lo haremos en cada vuelta. Luego avanzamos en la siguiente vuelta con un hilo café un poco más claro que el anterior y en entre cada punto de la vuelta anterior. realizamos 3 puntos altos cerrados juntos y seguidos de 2 puntos de cadena. En la tercera vuelta, realizamos 4 puntos altos, cerrados juntos, y seguido de tres cada; esto lo hacemos sobre las dos cadenas de separación de la vuelta anterior. Así completamos el girasol |
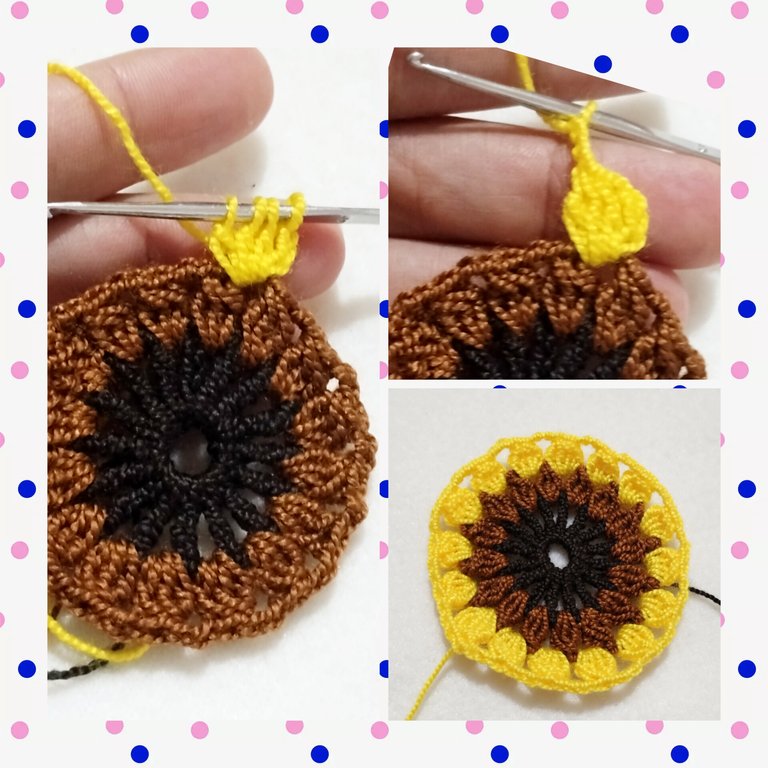
Now we are going to give it the square shape. This is the fourth round. We are going to work between the petals of the sunflower. We start with 3 chains plus two high stitches. In the next space, we knit 3 medium stitches. In the next space 3 double crochet. Now we work the corner which is formed by 3 double high stitches, 3 chains and 3 double high stitches, all in the same space. We repeat the pattern and the square is formed. We make a fifth round which will be of medium stitches and in the corners we make 4 double crochets in the same space, separated by 2 chains. | Para el granny square, Ahora vamos a darle.la forma cuadrada. Ésta es la cuarta vuelta. Vamos a trabajar entre los pétalos del girasol. Empezamos con 3 cadenas más dos puntos altos. En el siguiente espacio, realizamos 3 puntos medios. En el siguiente espacio 3 puntos altos. Ahora trabajamos la esquina que está formada por 3 puntos altos dobles, 3 cadenas y 3 puntos altos dobles, todo en el mismo espacio. Repetimos el patrón y se forma el cuadrado. Realizamos una quinta vuelta que será de puntos medios y en las esquinas realizamos 4 puntos altos en el mismo espacio, separados por 2 cadenas. |
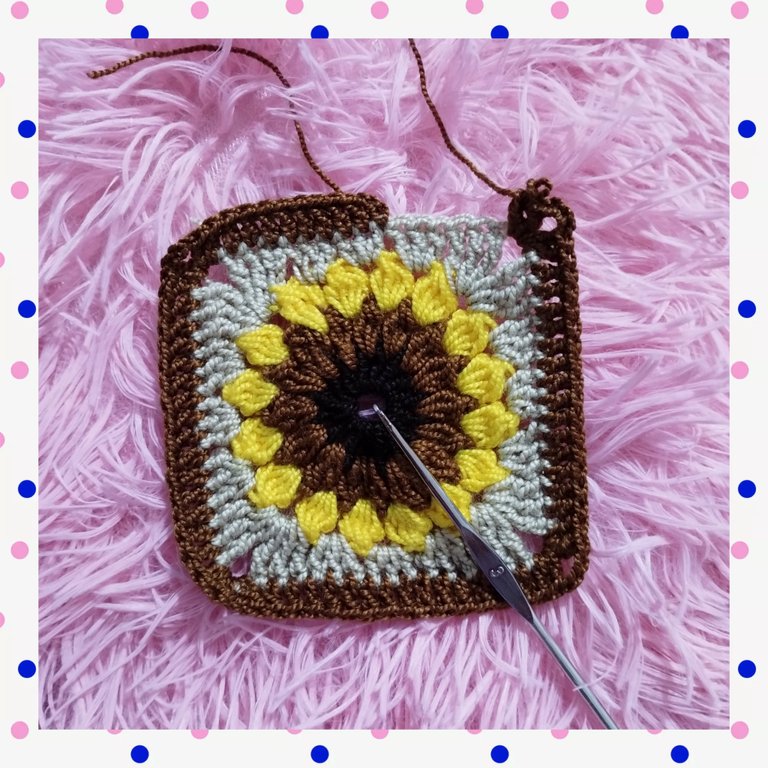
The sixth row is the leaves of the tulips. We begin with 3 chains, and a single crochet. 2 chains and repeat, but from then on we do not close the previous high stitch, but pull out only one loop and knit the second stitch, pull out one loop and we have 3 loops left on the needle, which we close together. We skip two stitches from the previous round and repeat the pattern. We complete the picture. | La sexta vuelta son las hojas de los tulipanes. Empezamos con 3 cadenas, y un punto alto. 2 cadenas y repetimos, pero a partir de entonces no cerramos el punto alto anterior, sino que sacamos solo una lazada y hacemos el segundo punto, sacamos una lazada y nos quedan 3 lazadas en la aguja, las cuales cerramos juntas. Saltamos dos puntos de la vuelta anterior y repetimos el patrón. Completamos el cuadro. |
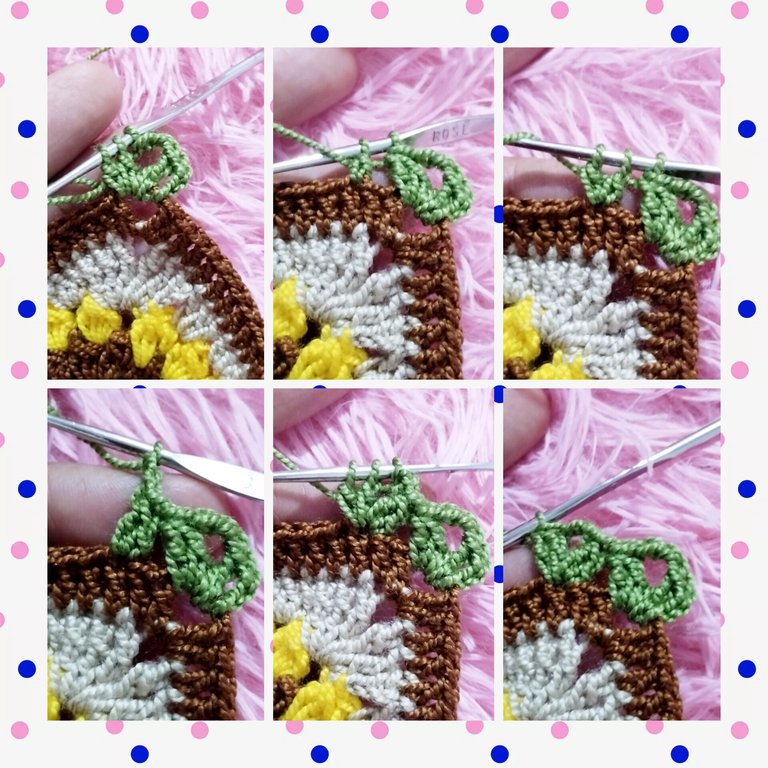
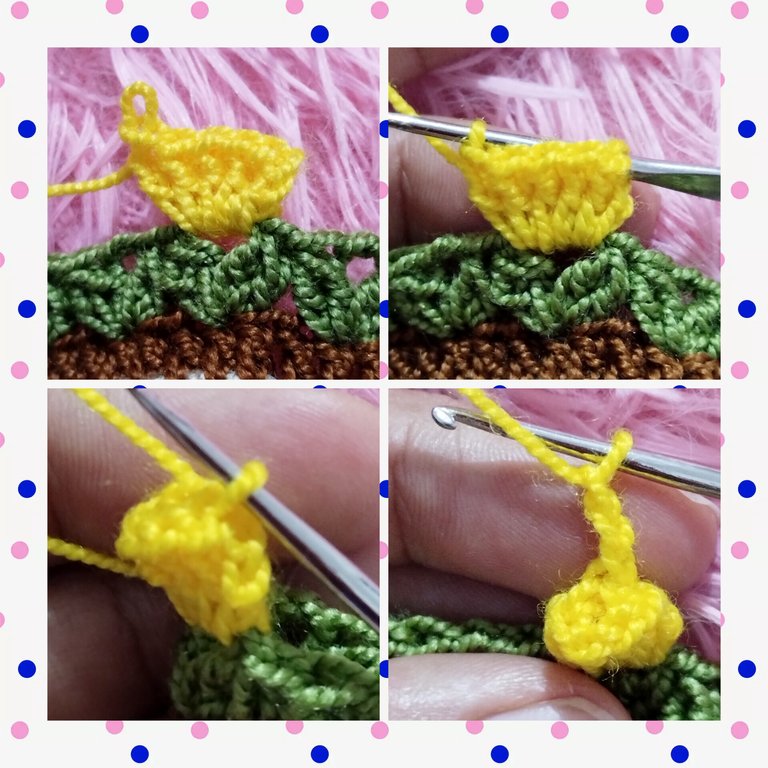
For the tulips, we knit 3 chains to replace the first double crochet. Then we knit 5 double crochet stitches, pull out the needle, place it over the last stitch of the first double crochet and pass it through the last stitch. That is, the needle must pass through the first and last stitch, we bring loop and perform a slipped stitch. | Para los tulipanes, realizamos 3 cadenas que reemplazan el primer punto alto. Luego realizamos 5 puntos altos, sacamos la aguja la colocamos sobre el último punto del primer punto alto y la pasamos por el último punto. Es decir, la aguja debe pasar por el primer y por el último punto, traemos lazada y realizamos un punto deslizado. |
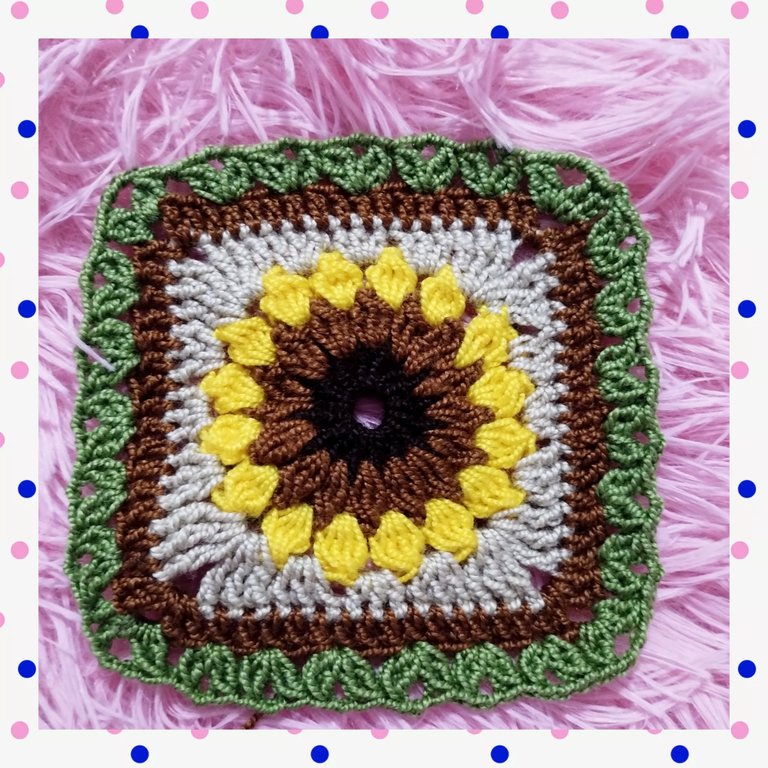
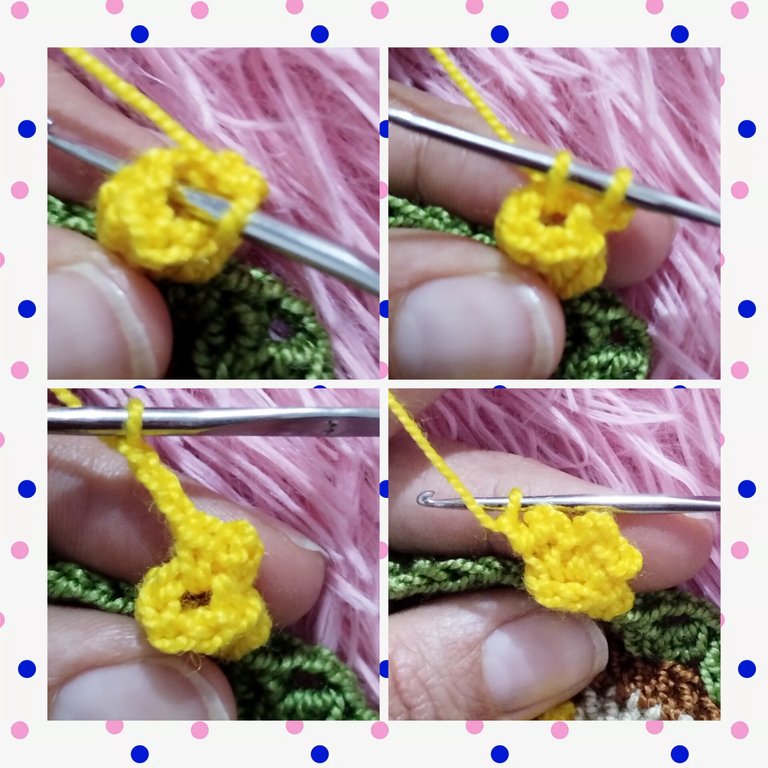
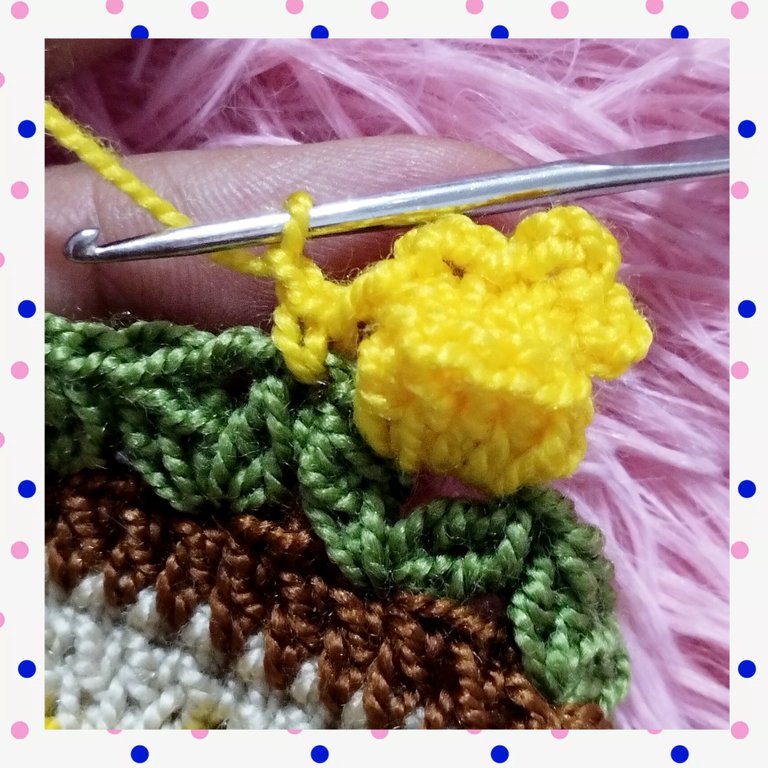
We make the following pattern: 3 chains, 1 single crochet, 3 chains, 1 single crochet, 3 chains and 1 single crochet. All this in the center of the tulip. We move on to the next one, but first we knit a single crochet. Repeat all over the square | Realizamos el siguiente patrón: 3 cadenas, 1 punto bajo, 3 cadenetas 1 punto bajo, 3 cadenetas y 1 punto bajo. Todo esto en el centro del tulipán. Pasamos al siguiente, pero antes realizamos un punto bajo. Repetimos en todo el cuadrado |
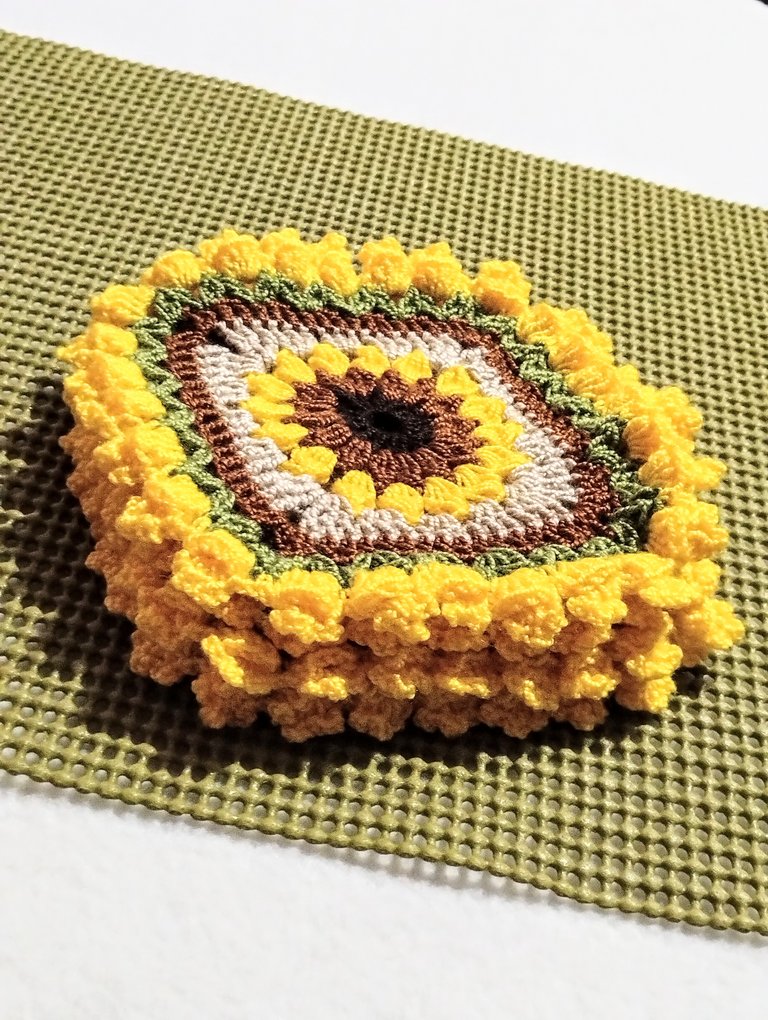
And that's how we finish this project. It seems long...but the process is quite entertaining, so I didn't notice when I finished. Although working in an organized manner helped me move along a little faster. First I did the sunflowers. Then I worked the squares and finally the border flowers. All in series, I hope you like it, Blessed Needlework Monday to all. | Y así es como terminamos este proyecto. Parece largo..pero el proceso es bastante entretenido, así que no me percaté el momento en que terminé. Aunque trabajar de manera organizada me ayudó a avanzar un poco más rápido. Primero hice los girasoles. Luego trabajé los cuadros y finalmente las flores del borde. Todo en serie, Espero que les guste, Bendecido lunes de agujas para todos. |

Imágenes editadas en: inshot
Fotos tomadas con MOTOROLA G 32
Images edited in: inshot
Photos taken with MOTOROLA G 32

Congratulations, you have received support from Ecency through curator @reachdreams
Thank you for your support.
Best regards.
You're welcome.
Saludos te quedó muy hermoso te felicito
Gracias, bella.
Feliz noche
Son una bellezas de posa vaso amiga @karen.art, me encantó el diseño que escogiste, te felicito por tu buen trabajo amiga. Feliz y bendecido día 🙏🏻🤗
Muchas gracias querida Kathe. Me da mucho gusto.
Saludos y amén.
Precioso diseño Karen. Me encantaron estos posavasos con hojitas, quedaron muy prolijos y hermosos. Te felicito ❣️
Que alegría, muchas gracias Laura.
Saludos.
Es lo más lindo que verán mis ojos en este día... Que liiindoooo.... Dios bendiga tus manos
Me gustaron los bordes, están todos perfectos y hermosos😍. Saludos🙏
wow!!!! It is so beautiful!!!! you are a great needlewoman! I have long wanted to learn how to knit such squares. your works inspire me a lot
This cup holder crochet is looking beautiful. The color combination is looking great. It's like a sunflower shape.