Creativity is not wasted. The more you use, the more you have. Maya Angelou (1928-2014)
Greetings my dear Community! it's a pleasure to be able to greet you again, after a few silent weeks... and in this time I've been able to continue learning crafting techniques that I'm sure you'll love.
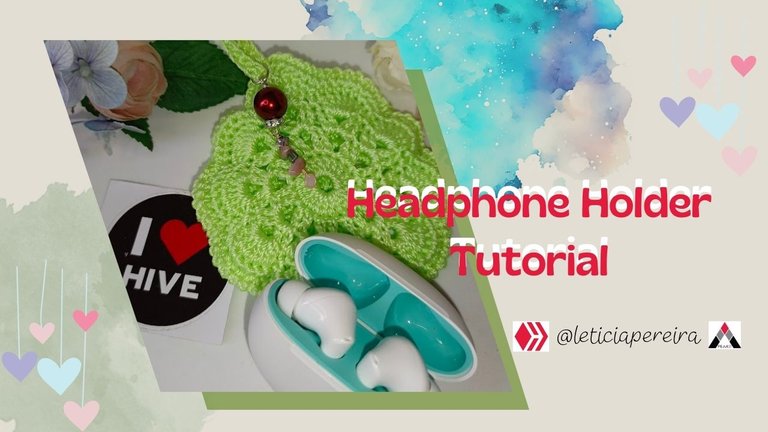
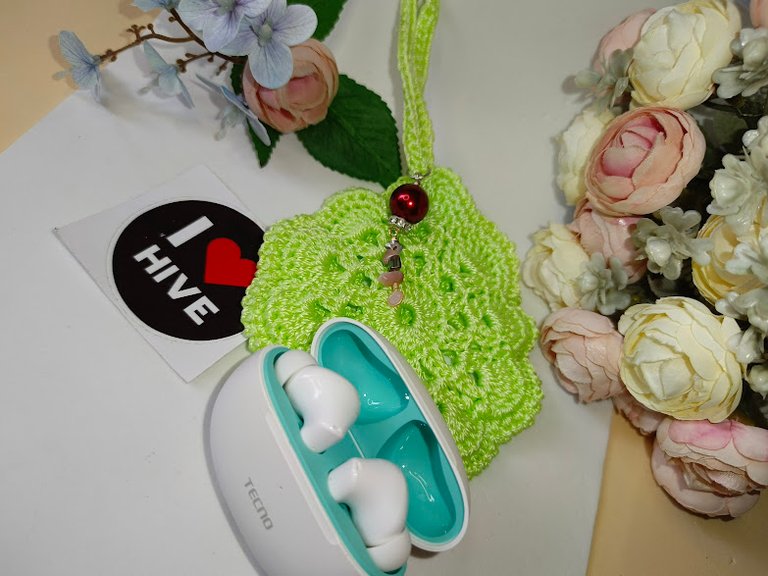
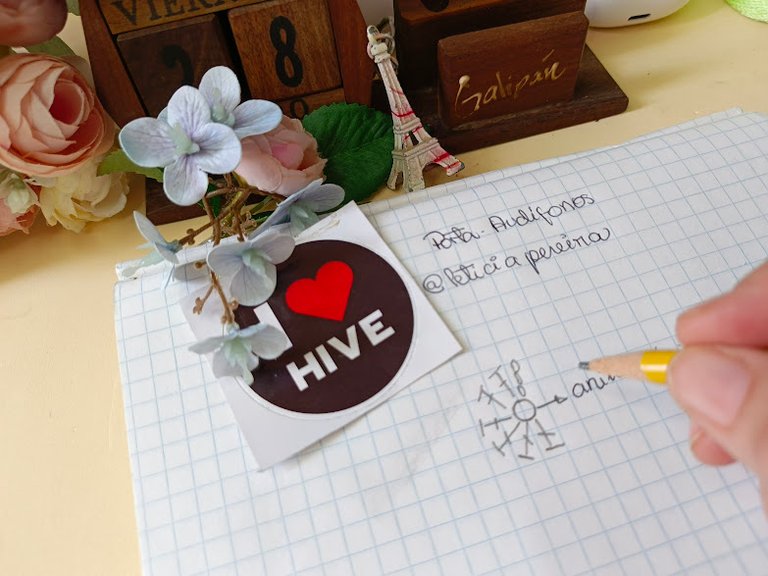
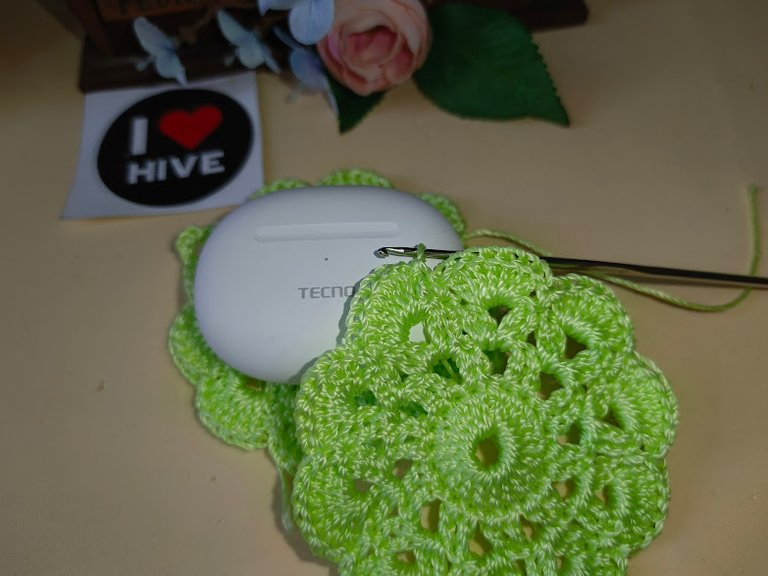
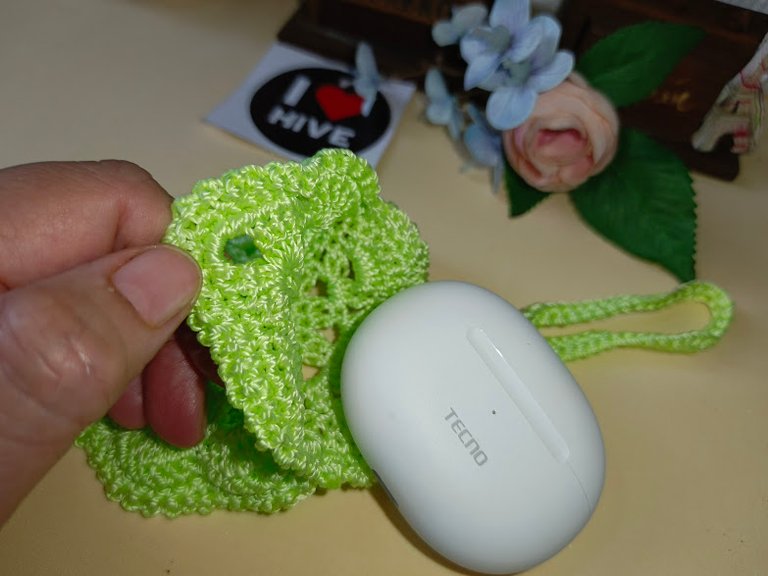
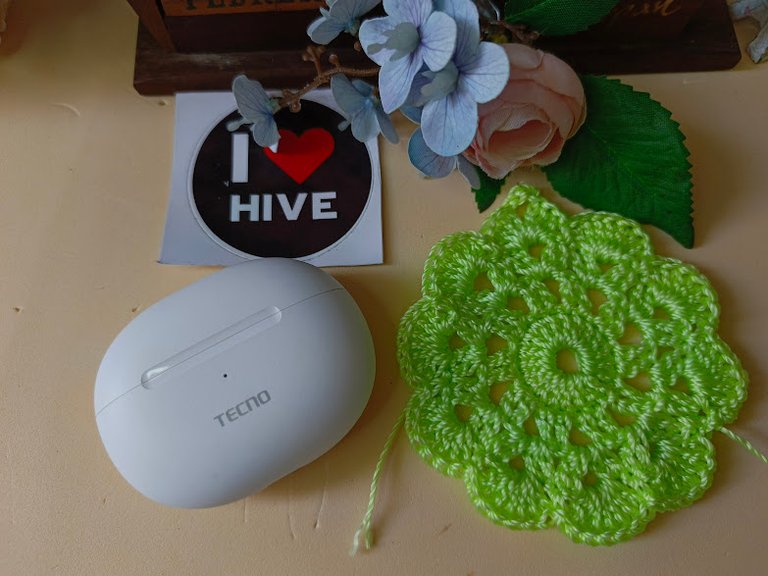
My Christmas 2024 gift has been a mobile phone, which came with a spectacular wireless headset, I don't usually use this kind of electronic device, but its ergonomic fit has been almost perfect, so I have decided to crochet a lining to protect them from falls and losses.
I have prepared a very complete tutorial, with specific photos, so that you can make this accessory easily and quickly; so I invite you to follow the step by step in the elaboration of the project.
La creatividad no se gasta. Cuanto más usas, más tienes. Maya Angelou (1928-2014)
¡Saludos mi querida Comunidad!, es un gusto poder saludarles nuevamente, tras algunas semanas silentes... y es que en éste tiempo que he tomado, he podido seguir aprendiendo técnicas de trabajo artesanal que estoy segura les encantarán.
Mi obsequio de navidad 2024 ha sido un celular, el cual vino en promoción con unos auriculares inalámbricos espectaculares, por lo general no uso éste tipo de artefacto electrónico, pero su ajuste ergonómico ha sido casi perfecto, que he decidido tejer a crochet un forro para protegerlos de caídas y pérdidas.
He preparado un tutorial muy completo, con fotos específicas, para que puedas realizar éste accesorio de manera fácil y rápida; así que te invito a que me acompañes en éste nuevo proyecto!.
Materials:
- Knitting yarn of your choice.
- Crochet needle, according to the yarn selected
- Additional embellishments or accessories (beads, brooches, tassels)
- Scissors
- Lighter
- Notebook to make the pattern to follow
Let's start!
We are going to make the crochet stitch guide pattern, so that our motifs are exactly the same, we can be guided by the different websites to create new designs (Pinterest and YouTube can help you).
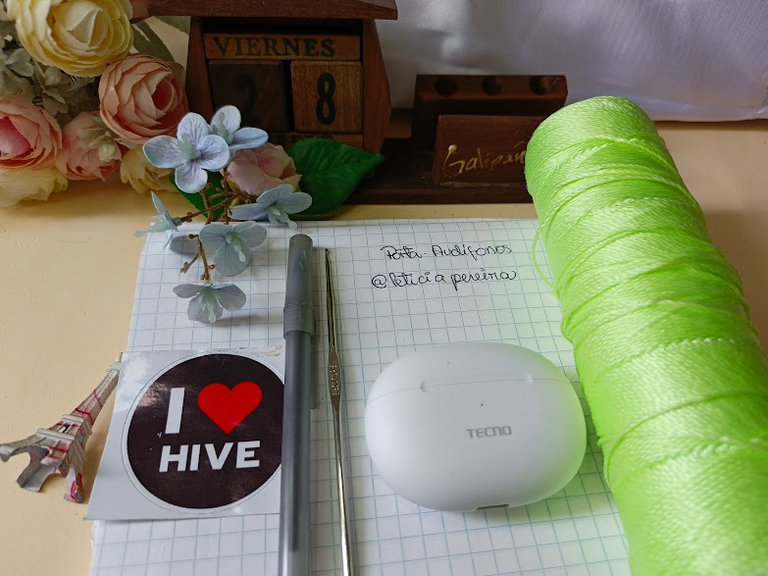
Materiales:
- Hilo de tejer a tu elección
- Aguja de crochet, acorde al hilo seleccionado
- Adornos u accesorios adicionales (perlas, broches, borlas)
- Tijeras
- Encendedor
- Cuaderno para realizar el patrón a seguir
¡Iniciemos!
Vamos a realizar el patrón guía de puntos a crochet, para que nuestros motivos queden exactamente iguales, podemos guiarnos de las diferentes páginas web para crear nuevos diseños (Pinterest y YouTube, te pueden ayudar).
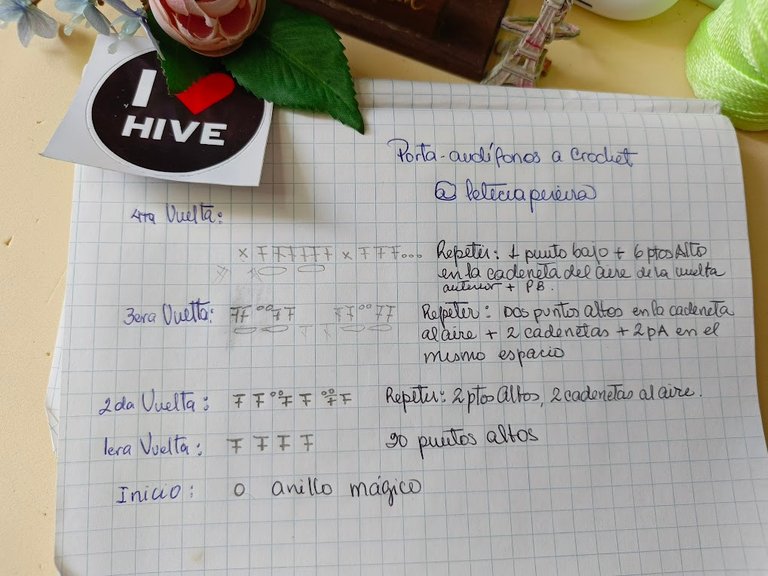
It doesn't matter the way you make the stitch diagram, the important thing is that you can understand it and make others can follow it, in my case, I wanted to do it in a graphic way, but, I ended up making the indications next to the symbols to be more precise.
Round 1: Twenty (20) high stitches.
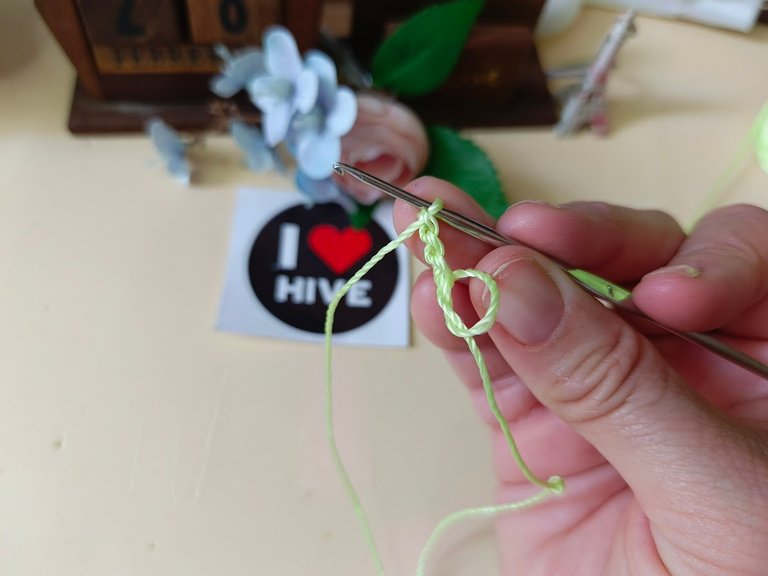
We start our first round, with three chain stitches (which replaces the first double crochet), formed from a ring formed with the yarn (magic ring).
No importa la manera en que realices el diagrama de puntadas, lo importante, es que puedas entenderlo y hacer que otros puedan seguirlo, en mi caso, quise hacerlo de una manera grafica, pero, terminé realizando las indicaciones junto a los símbolos para ser más precisos.
1era. Vuelta: Veinte (20) puntos altos
Iniciamos nuestra primera vuelta, con tres puntos de cadeneta (que sustituye el primer punto alto), formados desde una anilla formada con el hilo (anilla mágica).
We complete our first round with 19 double crochet stitches, for a total of 20 stitches, which we will close with a slip stitch.
2nd row: alternating 20 double crochets and 10 spaces.
Again we start with three chain stitches + a single crochet in the next stitch + an increase; and repeat: two double crochets + two chain stitches, until we complete the 20 stitches on top of the stitches we made in the previous step. Close again with a slip stitch.
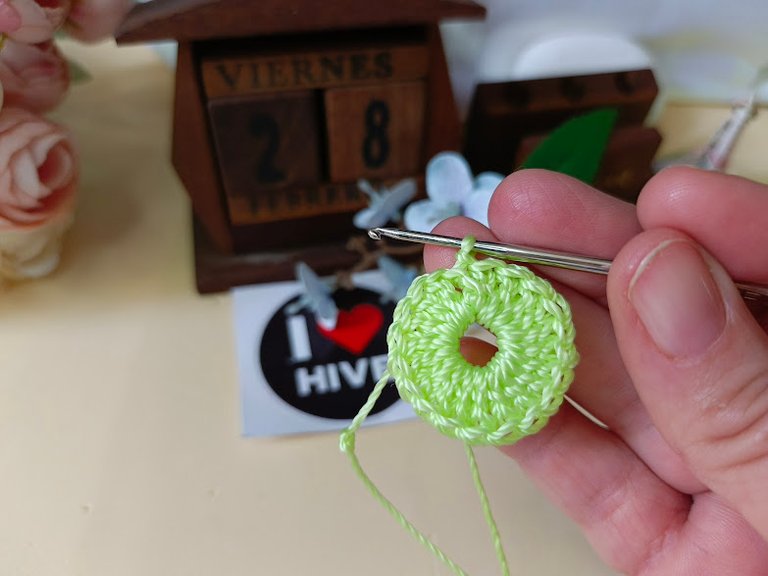
Completamos nuestra primera vuelta con 19 puntos altos, para un total de 20 puntos, los cuales vamos a cerrar con un punto deslizado.
2da. Vuelta: alternando 20 puntos altos y 10 espacios
Nuevamente iniciamos con tres cadenetas + un punto alto en el siguiente punto base + un aumento; y repetimos: dos puntos altos + dos cadenetas, hasta completar los 20 puntos encima de los que realizamos en el paso anterior. Cerramos nuevamente con un punto deslizado.
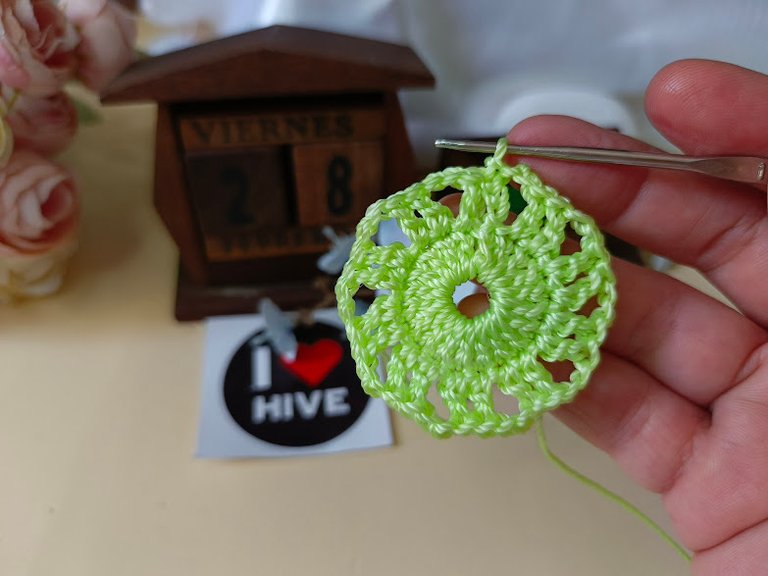
Row 3: Forming the base of the arches
For this round, we will knit a slip stitch until we reach the first empty space (formed from two chain stitches in the previous round): two double crochets + two chain stitches + two double crochets, repeat in the next space, until we reach the end of the round, where we will close with a slip stitch.
Row 4: Knitting the bows
Once again, knit a slip stitch to the first empty space of the previous row and begin:
a. six double crochets in each space + a single crochet in the middle of the 4 base stitches,
b. three double crochets in the next space + 3 chains + 3 double crochets in the same space + a single crochet in the middle of the 4 stitches of the base.
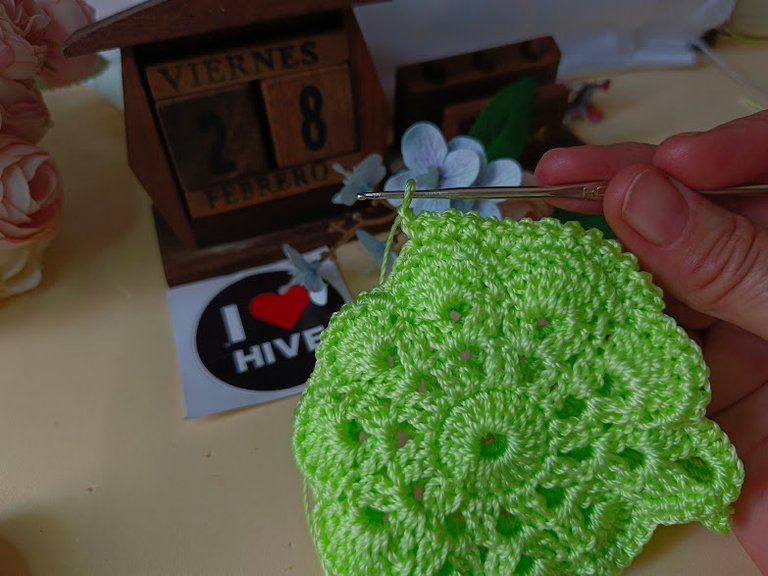
c. repeat step ‘a’ until a total of 10 bows are completed.

3ra. Vuelta: Formando la base de los arcos
Para esta ronda, vamos a realizar punto deslizado hasta llegar al primer espacio libre (formado desde dos cadenetas en la vuelta anterior): dos puntos altos + dos cadenetas + dos puntos altos, repetimos en el siguiente espacio, hasta llegar al final de la vuelta, donde cerraremos con un punto deslizado.
4ta. Vuelta: Tejiendo los arcos
Nuevamente realizamos un punto deslizado hasta el primer espacio libre de la vuelta anterior e iniciamos:
a. seis puntos altos en cada espacio + un punto bajo en medio de los 4 puntos de la base,
b. tres puntos altos en el siguiente espacio + 3 cadenetas + 3 puntos altos en el mismo espacio + punto bajo en en medio de los 4 puntos de la base.
c. repetir el paso "a" hasta completar un total de 10 arcos.

Now it's time to make our second motif, exactly the same, only with a variable in the 4th round.
Second motif variable
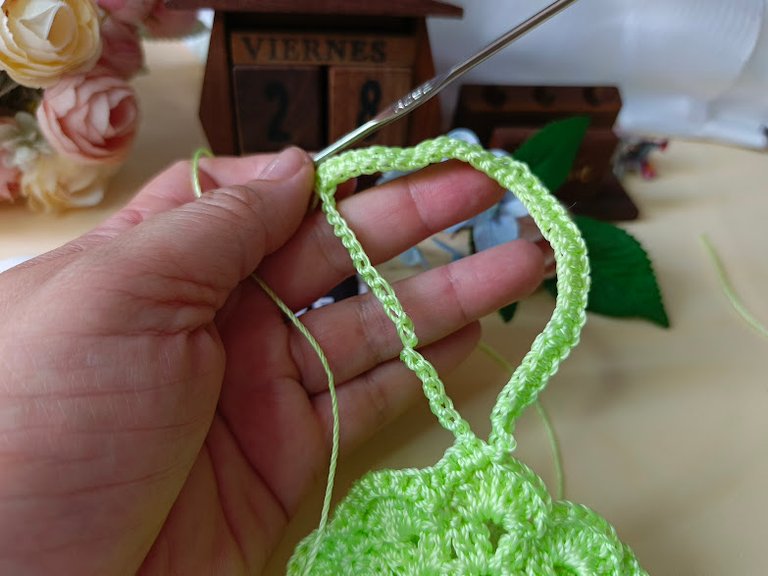
When we get to the moment of increasing chain stitches, in the middle of our second bow, we are going to make 50 chain stitches, which you can reinforce with low or slipped stitches until you reach the base, trying to reinforce the fabric very well, as that big bow we made, will be our fastener, then continue with the successive steps of the round.
Ahora es momento de realizar nuestro segundo motivo, exactamente igual, cólo que con una variable en la 4ta. vuelta.
Variable segundo motivo
Cuando lleguemos al momento de aumentar cadenetas, a mitad de nuestro segundo arco, vamos a realizar 50 cadenetas, las cuales puedes reforzar con puntos bajos o deslizados hasta llegar a la base, tratando de reforzar muy bien el tejido, ya que ese arco grande que realizamos, será nuestro sujetador, luego sigue con los pasos sucesivos de la vuelta.
Bringing motives together.
a. Face both pieces and match the chain stitch increases.
b. From the guide increases, leave an arc and a half.
c. Knit single crochet all over the piece (including the part that is open), trying to match the stitches of both motifs, so that they close.
d. Knit a second round with the following sequence: single crochet and an overcast stitch (without leaving spaces at the base, everything must be knitted again).
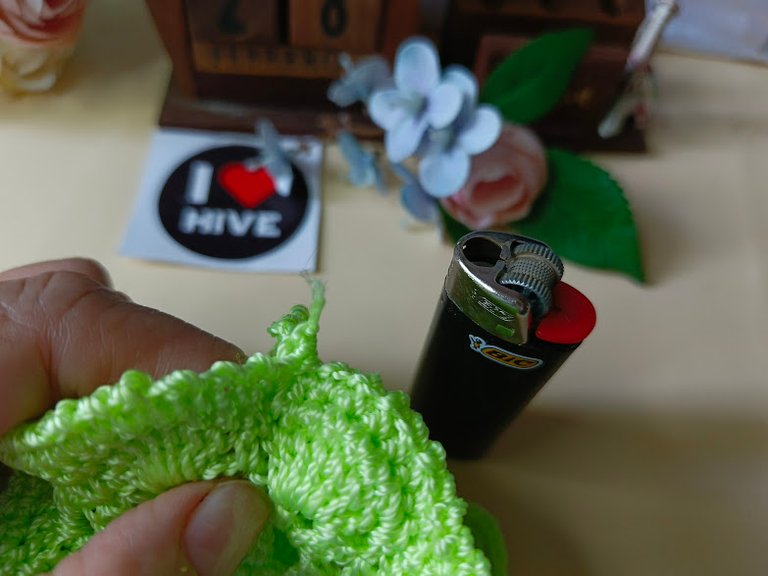
e. With the help of a tinder, burn all the excess stitches of the bag.
Uniendo motivos
a. Enfrentas ambas piezas y haz que coincidan los aumentos de cadenetas.
b. A partir de los aumentos guías, dejas un arco y medio.
c. Teje puntos bajos por toda la pieza (incluyendo la parte que va abierta), procurando coincidir los puntos de ambos motivos, para que cierren.
d. Realiza una segunda ronda con la secuencia: puntos bajos y un punto al aire (sin dejar espacios en la base, todo debe volver a tejer)
e. Con ayuda de un yesquero, quema todas las puntas excedentes del bolsito.
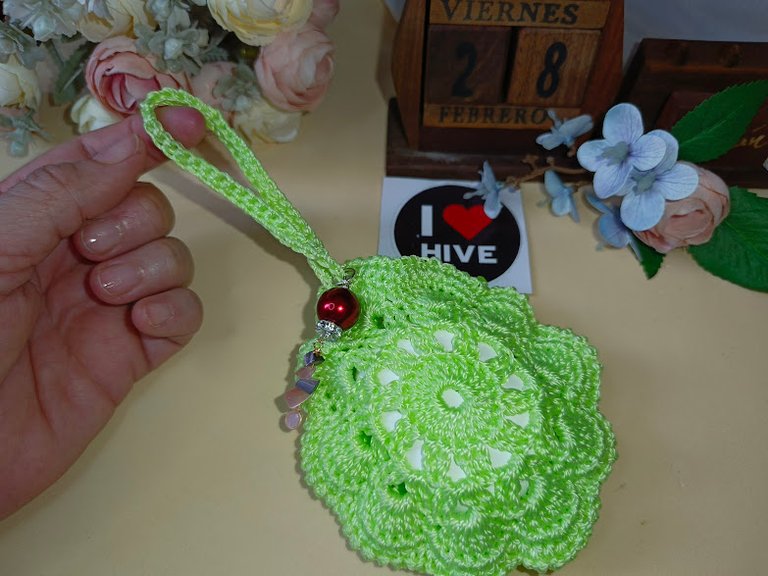
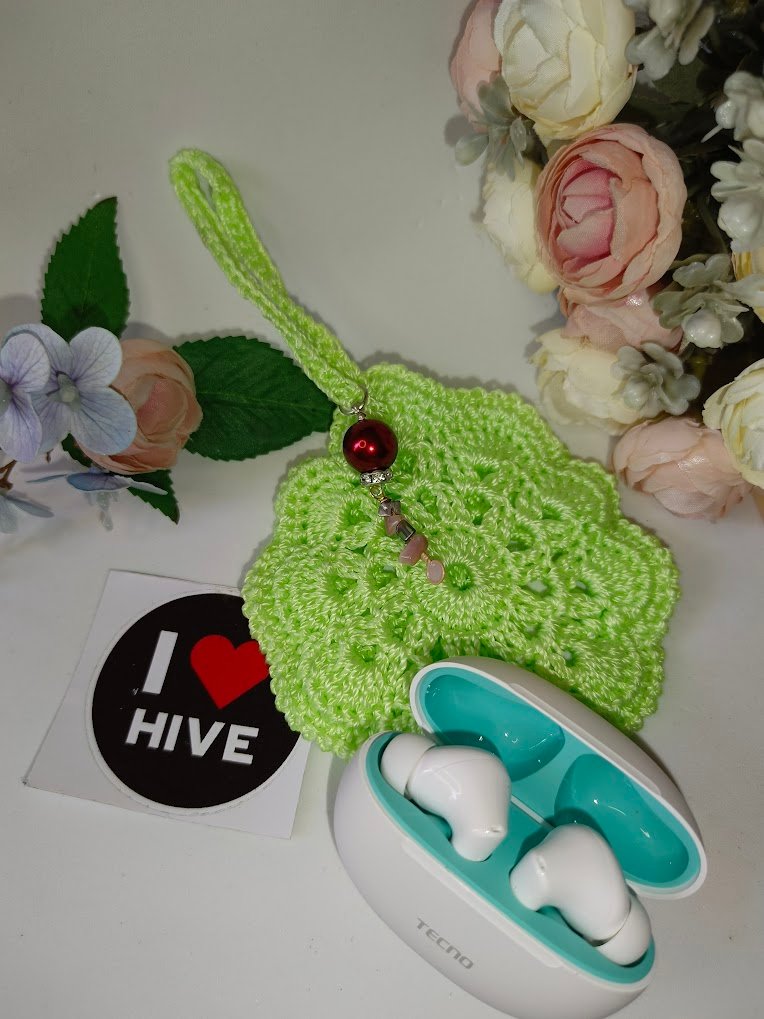
Decorations
It's time to decorate our little bag: place pearls, charms, tassels, any element you like, use earrings, jewellery threads, whatever you have at hand to give an original touch to your piece.
Now your little lining-pouch for your headphones is ready to use!

Adornos
Es momento de adornar nuestro pequeño bolsito: coloca perlas, dijes, borlas, cualquier elemento que te guste, utiliza aros, hilos de bisutería, en fin, lo que tengas a mano para darle un toque original a tu pieza.
Ya tu pequeño forro - bolsito para tus audífonos está listo para utilizar!
Friends, I hope you liked this new tutorial, I hope it can be of great help, especially for those who are just starting to make handmade items.
Remember that handmade work is unique; the elaboration of handmade pieces, apart from being a liberating action, is also an act of love and illusion.
See you soon!
Letty
Amigos, espero que les haya gustado este nuevo tutorial, deseo que pueda de ser de gran ayuda, sobre todo para quienes están iniciando en la elaboración de elementos artesanales.
Recuerda que el trabajo artesanal es único; la elaboración de piezas artesanales, aparte de ser una acción liberadora, es también un acto de amor e ilusión.
¡Nos vemos pronto!
Letty

📸 Huawei Y9 /2019 - Sony H400 - Tecno Camon 30
Acknowledgements: Canva & Deepl Translator
🚨 Please don´t edit or use my images, videos or text on other networks without my approval. 🚨
✒️Autor: @leticiapereira
©️ 2017 - 2025, @leticiapereira - Original Content
@tipu curate 8
Upvoted 👌 (Mana: 0/75) Liquid rewards.
Gracias!
Excelente trabajo como siempre y es muy hermoso. El diseño y el color están lindos. Gracias por compartir esta idea. Saludos 🌹💐🌻🌷
Gracias amiga querida!!! Un abrazo inmenso! por aquí reiniciando en Hive..!
Un hermoso trabajo y todo el proceso de creación también
Hermoso trabajo, me gustó el color y el detalle del adorno con la cuenta roja, se ve muy bien con el color verde del forro.
Saludos!
Hola Leticia. Que buena idea que tuviste para hacer esta funda a tus auriculares, ahora seguramente no se te perderan y además quedan bien decorados. Te felicito!
Wow excelente idea, no usar nuestra creatividad para proteger los accesorios eso es genial. gracias por compartir
It's really beautiful. Hatts off to your innovation as well. You have made it perfectly. Thanks for sharing it with Us.