Saludos queridos amigos de NeedleWorkMonday,! ✂️🪡🧵❤️
Ya estoy en el proceso de hacerle el vestido a mi hija menor para realizar su primera comunión, ya tengo el modelo el cual le voy a hacer, ahora les mostraré cómo ha sido el proceso para confeccionarlo y mostrar la manera de como hice el patrón.
Greetings dear friends of NeedleWorkMonday,! ✂️🪡🧵❤️
I am already in the process of making the dress for my youngest daughter to make her first communion, I already have the model which I am going to make for her, now I will show you how the process of making it was and show how I made the pattern.
La costura la he practicado desde que estaba muy joven pero nunca me había interesado en hacer patrones, siempre que voy a hacer alguna prenda busco una similar y trato de copiarla o copiar el tamaño para adaptarlo a la persona a la cual le voy a hacer las costuras.
Siempre he querido hacer el curso de patronaje pero actualmente no tengo un sitio cerca de mi residencia para lograr estudiar esto, la gran ventaja es que es la actualidad tenemos mucha ayuda con el Internet, así que decidí ver muchos tutoriales para aprender un poco y poder hacer el patrón de este vestido.
En uno de mis post anteriores expliqué la forma como creo que podemos hacer la manga abombada, esta vez les explicaré cómo hacer la camisa para este vestido y la falda que quise hacerle y que mi hija estuvo de acuerdo en el modelo.
I have practiced sewing since I was very young but I had never been interested in making patterns, whenever I am going to make a garment I look for a similar one and try to copy it or copy the size to adapt it to the person for whom I am going to make the seams.
I have always wanted to take the pattern making course but currently I do not have a place near my residence to study this, the great advantage is that nowadays we have a lot of help with the Internet, so I decided to watch many tutorials to learn a little and be able to make the pattern for this dress.
In one of my previous posts I explained how I think we can make the puffed sleeve, this time I will explain how to make the shirt for this dress and the skirt that I wanted to make and that my daughter agreed on the model.
Luego de ver una gran cantidad de fotos de modelos de vestido a mi hija le encantó el modelo de falda circular y alargada en la parte trasera, con manga abombada y con un pequeño escote en la parte del pecho.
En otras ocasiones he hecho faldas acampanadas y es un proceso muy sencillo, se los explicaré de una manera muy práctica:
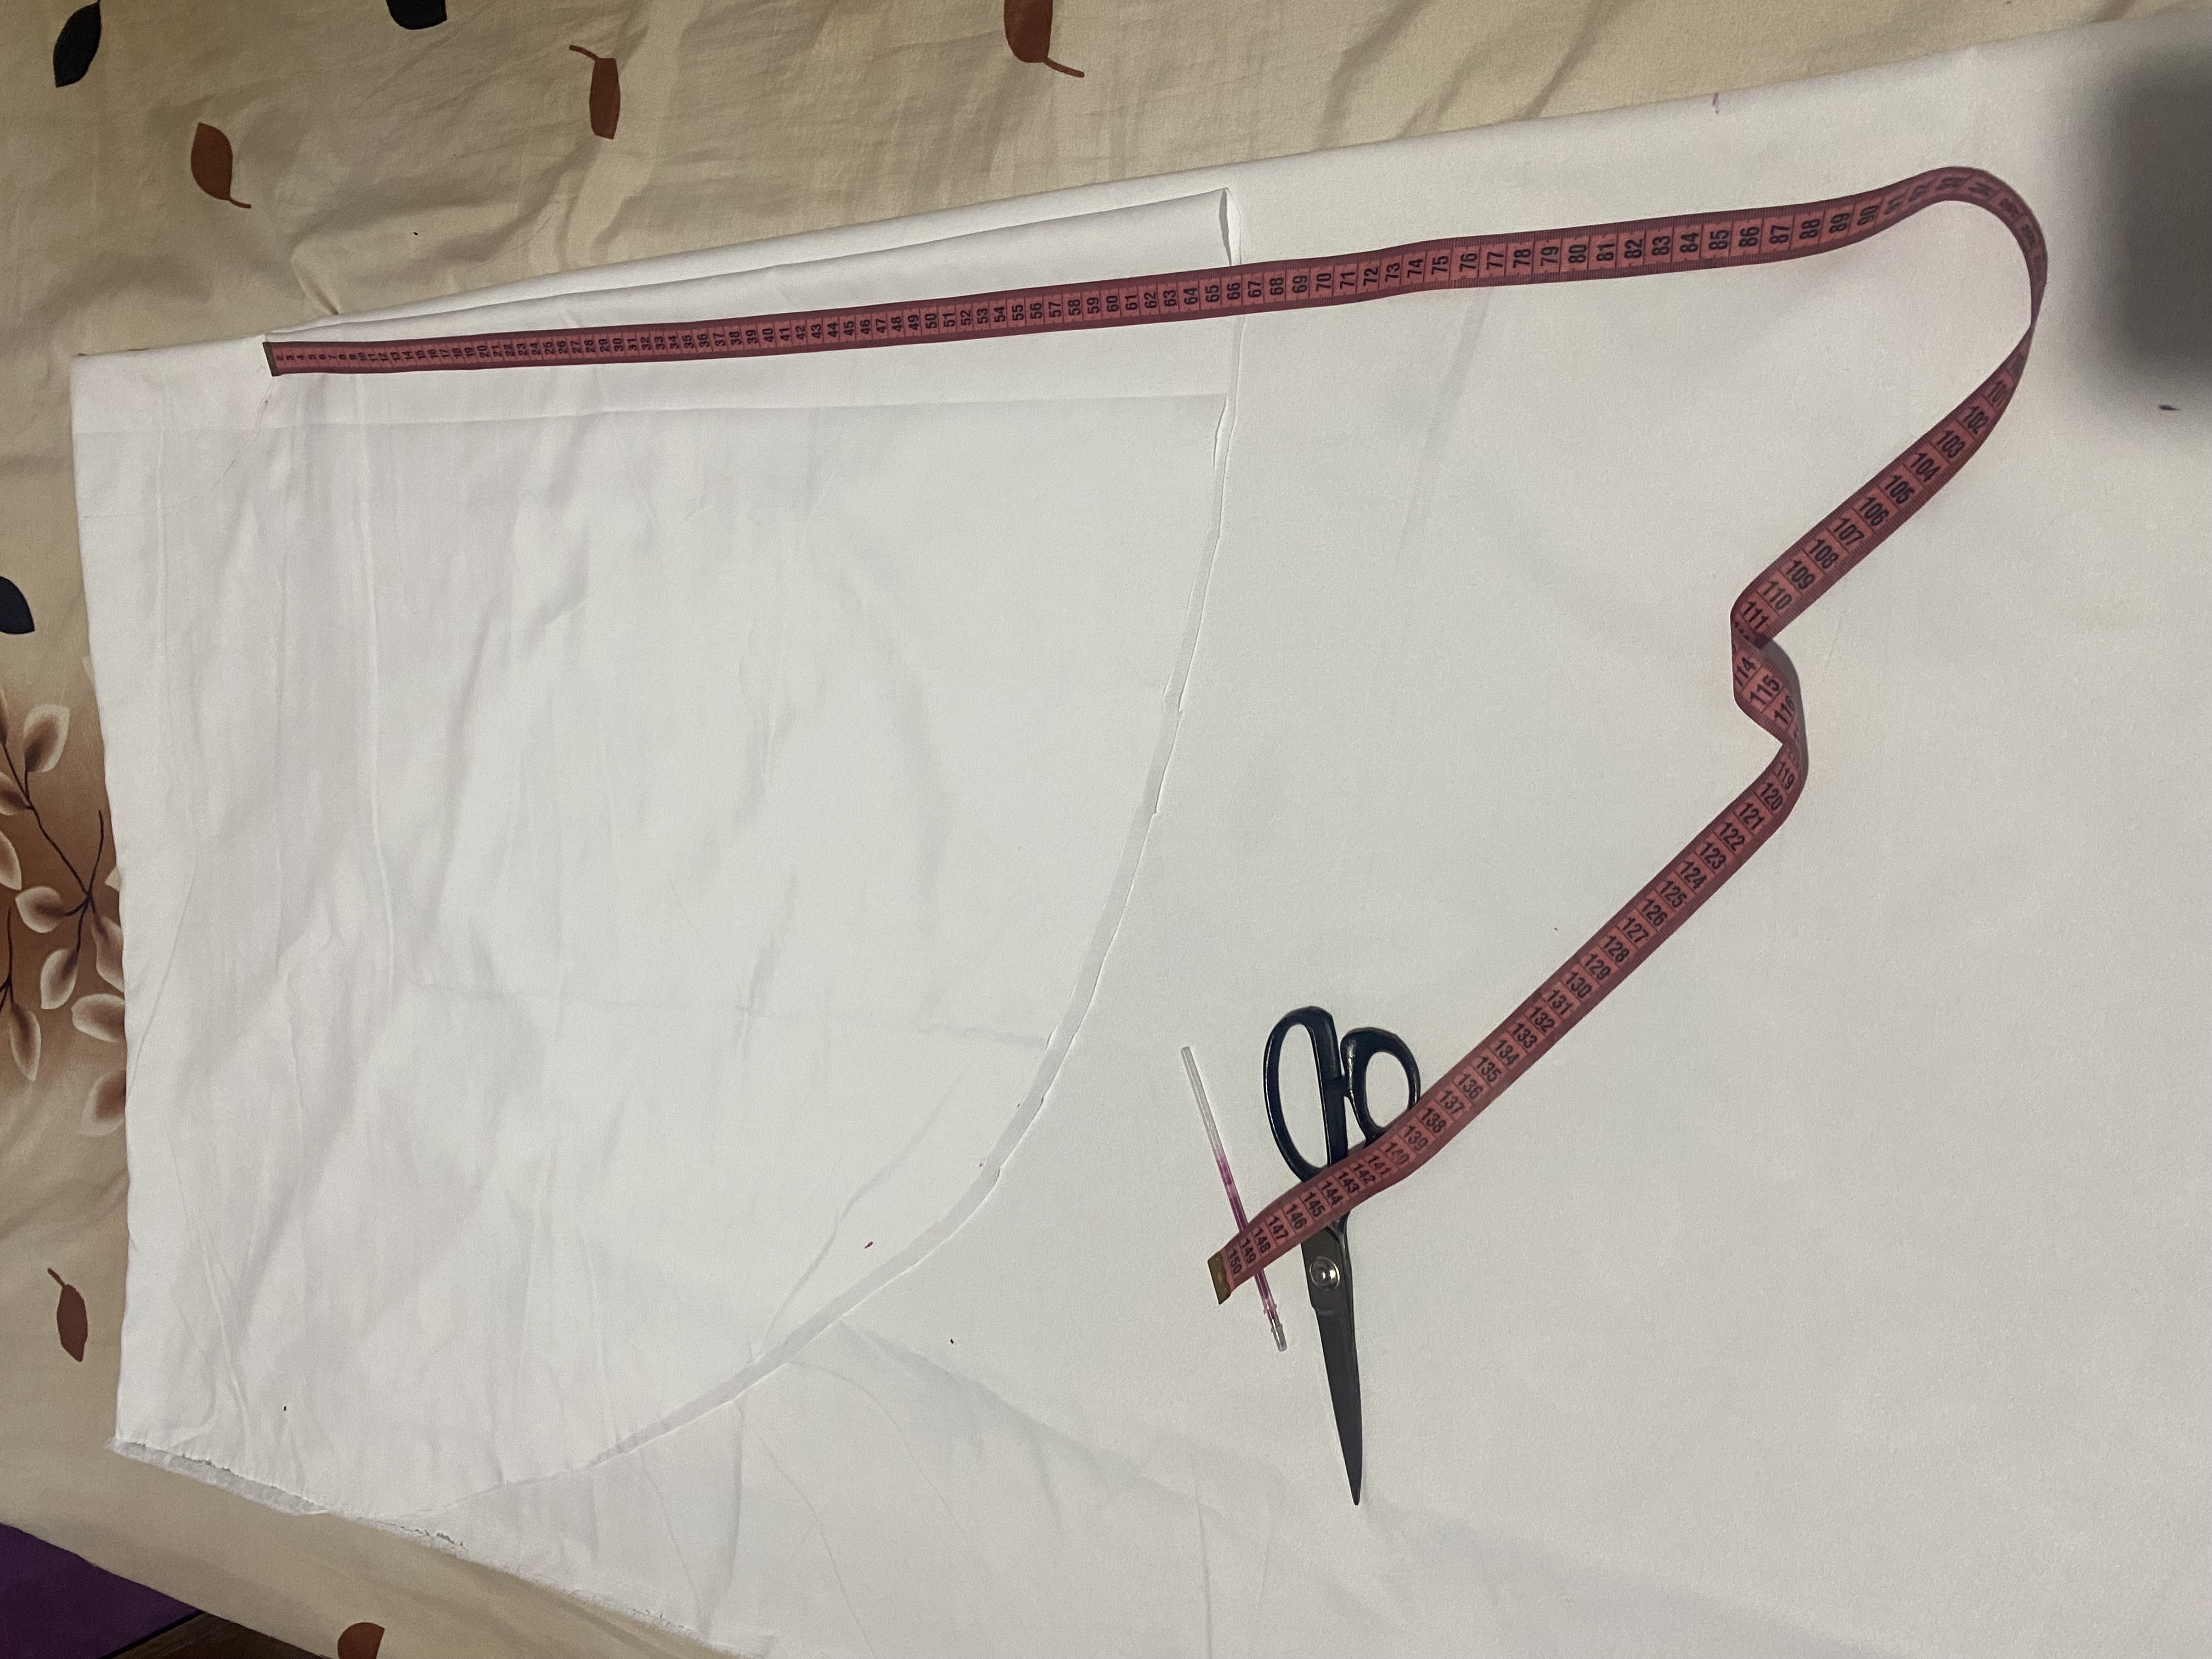
Doblaremos la tela a la mitad tratando de qué la parte más larga quede de forma horizontal, en este caso el largo del vestido en la parte delantera va a ser de 63 cm, vamos a marcar esta medida luego hasta donde marque los 63 cm vamos a hacer un pequeño medio círculo Calculando la cintura del vestido que en este caso son 80 cm, Y el largo trasero serán de 80 cm.
After seeing a large number of photos of dress models, my daughter loved the model with a circular and elongated skirt at the back, with puffed sleeves and a small neckline on the chest.
On other occasions I have made flared skirts and it is a very simple process, I will explain it to you in a very practical way:
We will fold the fabric in half trying to make the longest part horizontal, in this case the length of the dress in the front will be 63 cm, we will mark this measurement then up to where it marks 63 cm we will make a small half circle Calculating the waist of the dress, which in this case is 80 cm, and the back length will be 80 cm.
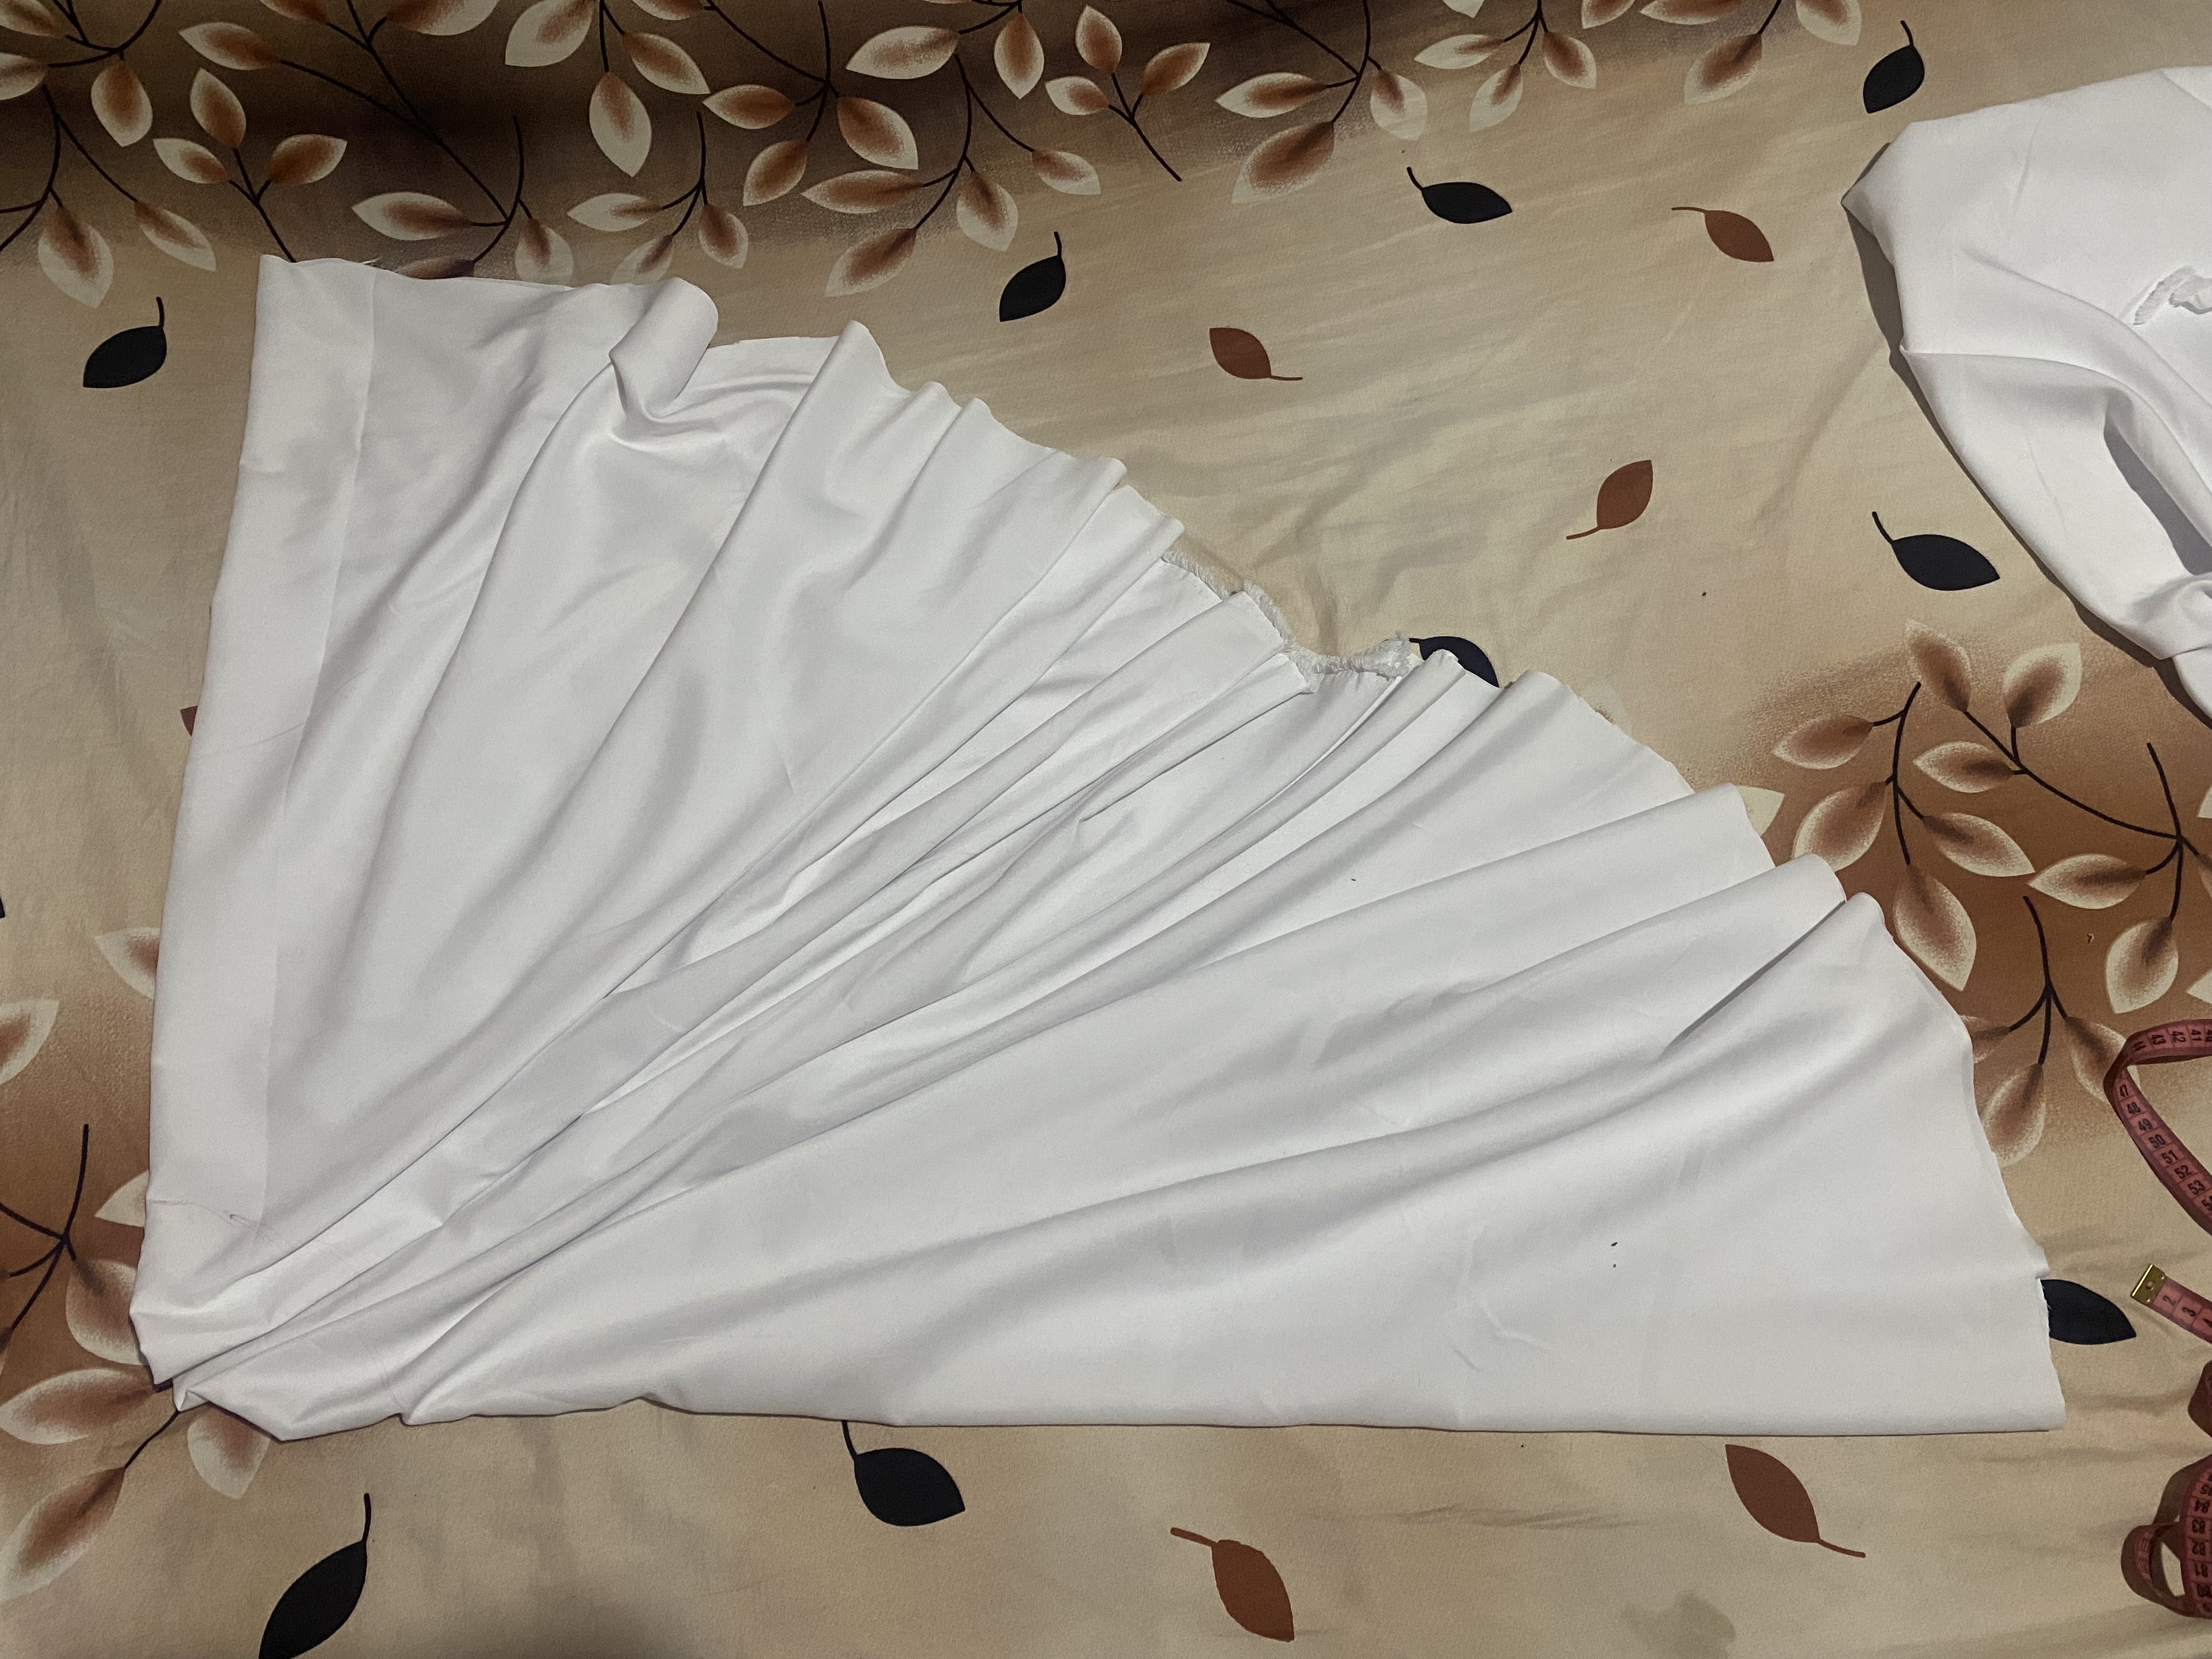
La falda acampanada tiene varias formas la podemos hacer media campana o campana completa, esto va a depender del gusto de la persona, yo quiero que el vestido de mi hija quede bastante frondoso y para esto debe llevar bastante tela, compré 3 m, solo la falda me tomó 2 m de esta tela La cual tiene 1,50 de ancho.
Yo voy a dejar el círculo de la cintura de último ya que en otras ocasiones lo he cortado muy grande y al final tengo que hacerle pliegues y en este caso no quiero hacérselos, quiero que la cintura vaya completamente lisa.
para no equivocarme voy a dibujar el círculo completo con la medida de 63 cm, 40cm y 63cm, para la parte trasera le dibujo el excedente que será el largo que llevará, este modelo largo en la parte de atrás hasta donde recuerdo no lo había hecho y me gusta mucho la idea que mi hija le haya gustado así ya que será algo diferente.
The flared skirt has several shapes, we can make it half a bell or a full bell, this will depend on the person's taste, I want my daughter's dress to be quite lush and for this she must take enough fabric, I bought 3 m, just the skirt took me 2 m of this fabric which is 1.50 wide.
I am going to leave the waist circle last since on other occasions I have cut it very large and in the end I have to make pleats and in this case I don't want to make them, I want the waist to be completely smooth.
In order not to make a mistake I am going to draw the complete circle with the measurement of 63 cm, 40cm and 63cm, for the back part I draw the excess that will be the length it will take, this long model in the back as far as I remember I had not done it and I really like the idea that my daughter liked it like that since it will be something different.
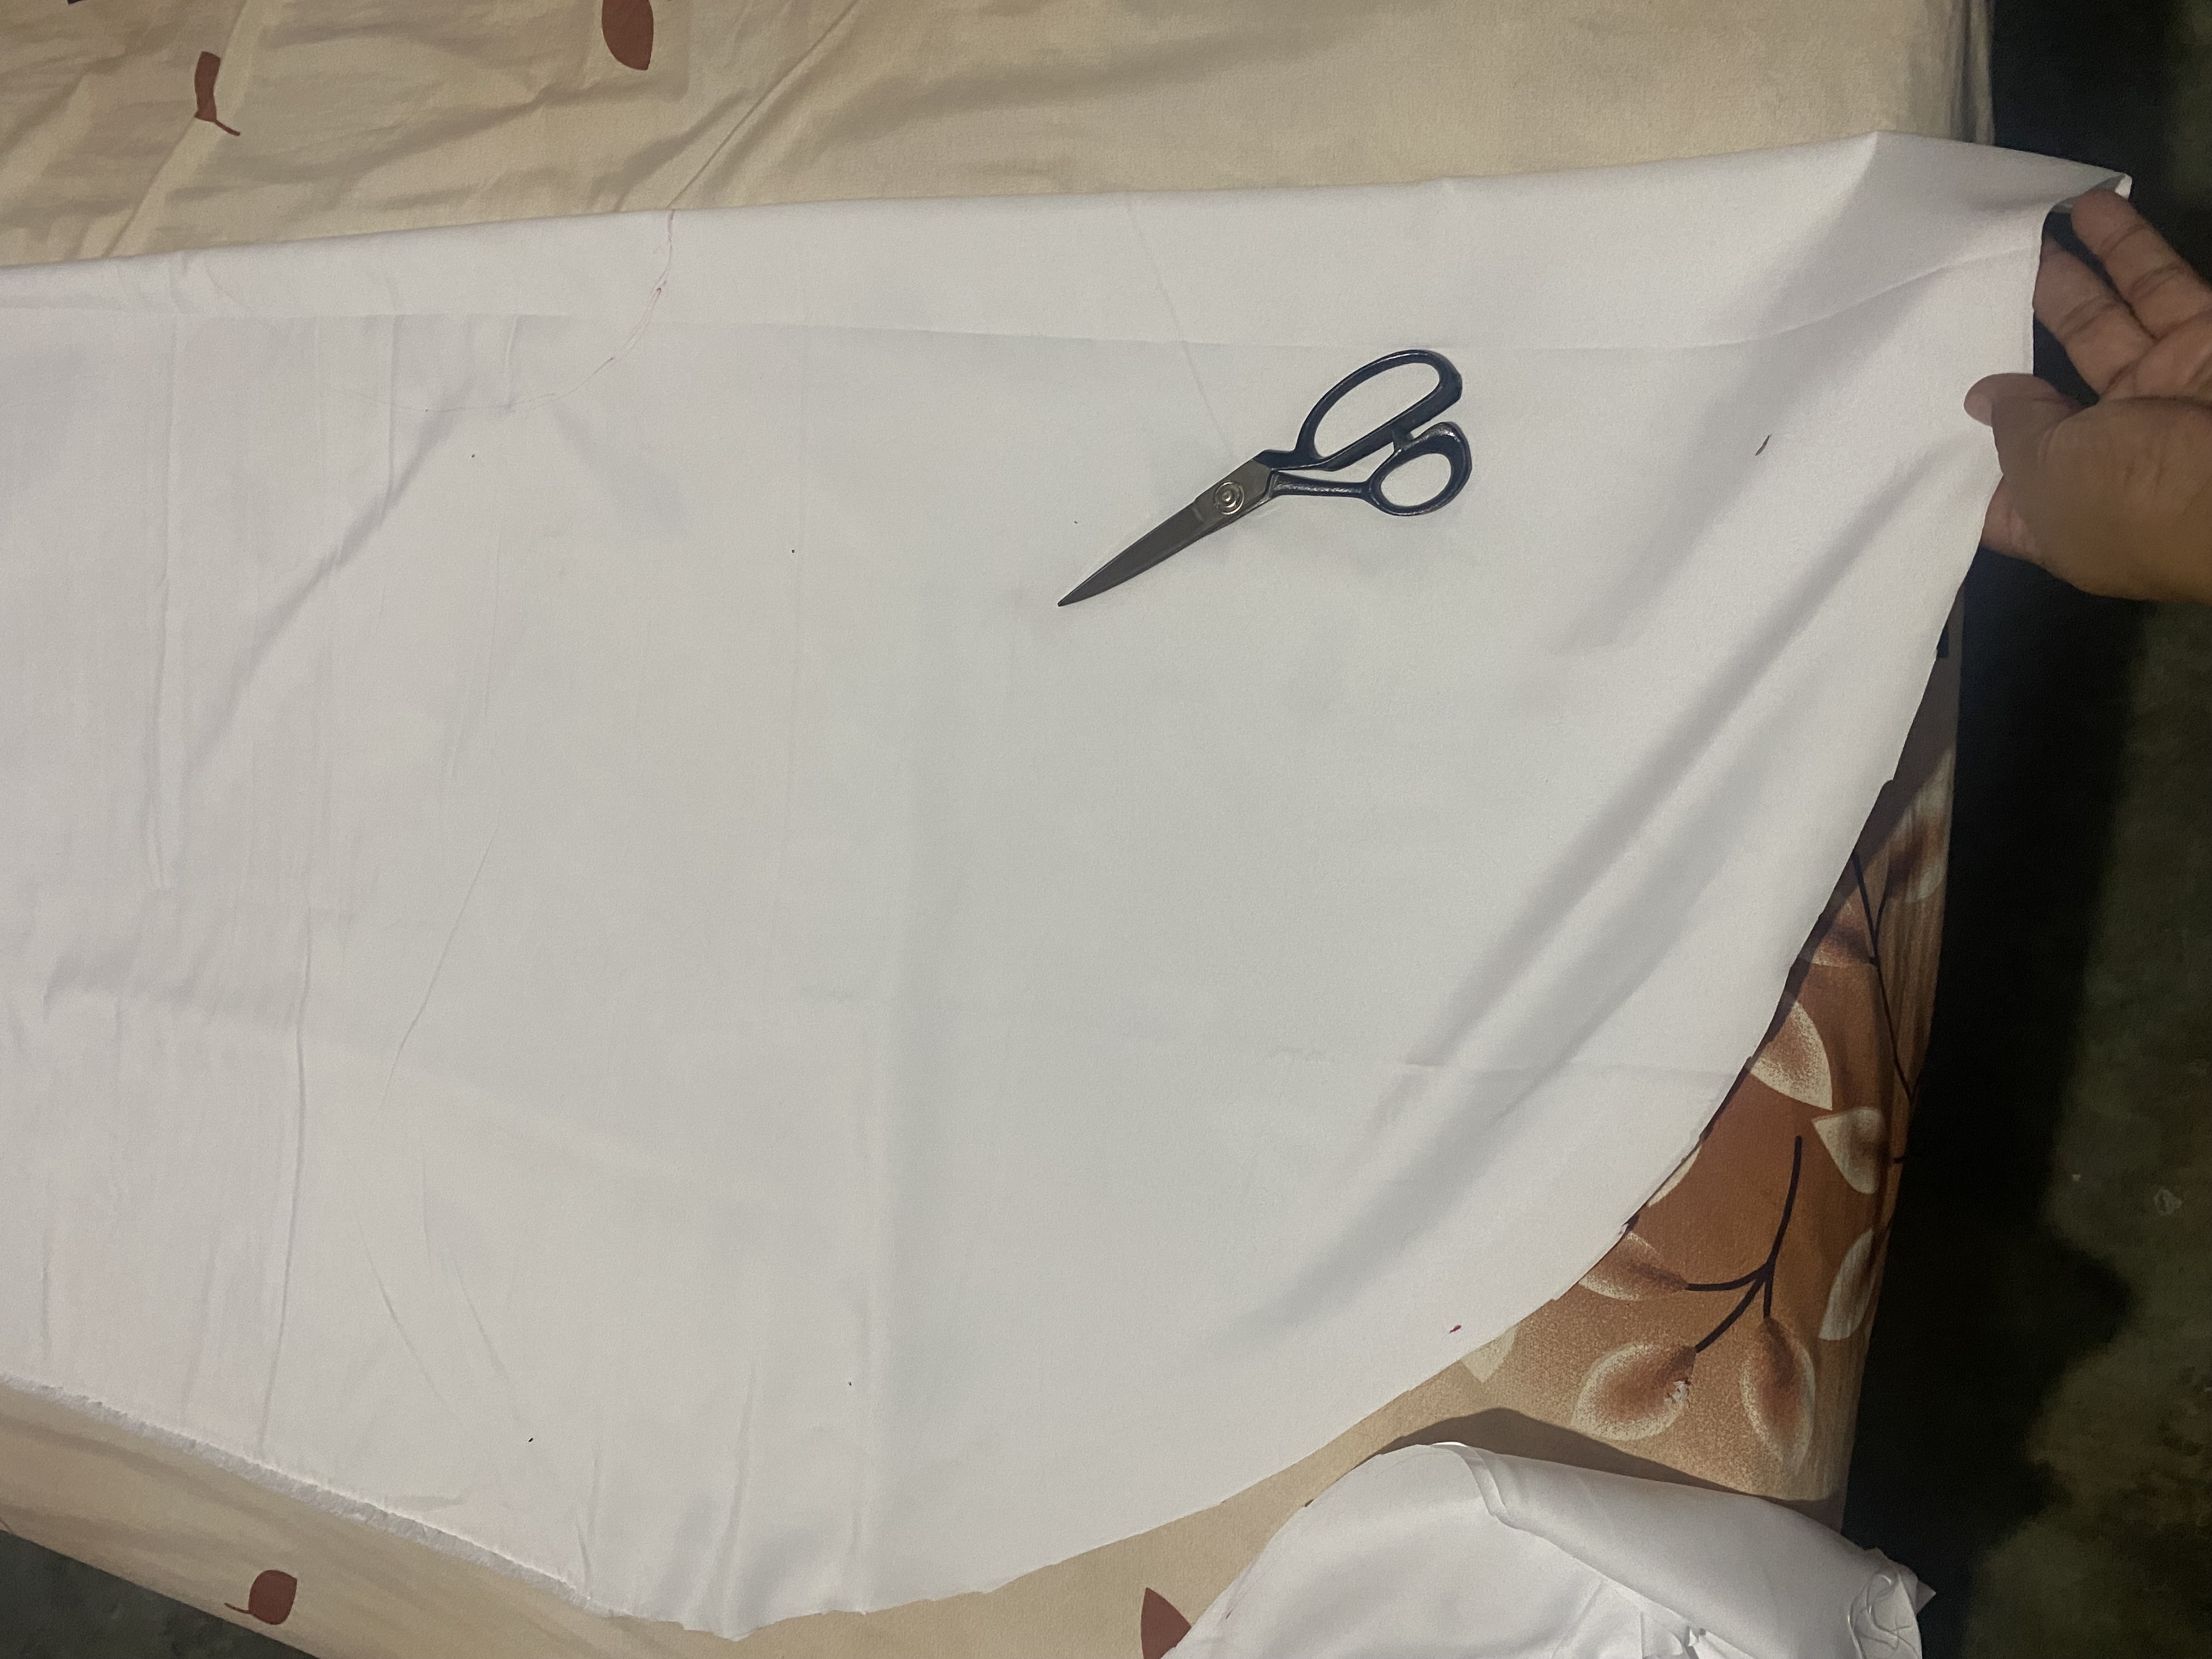
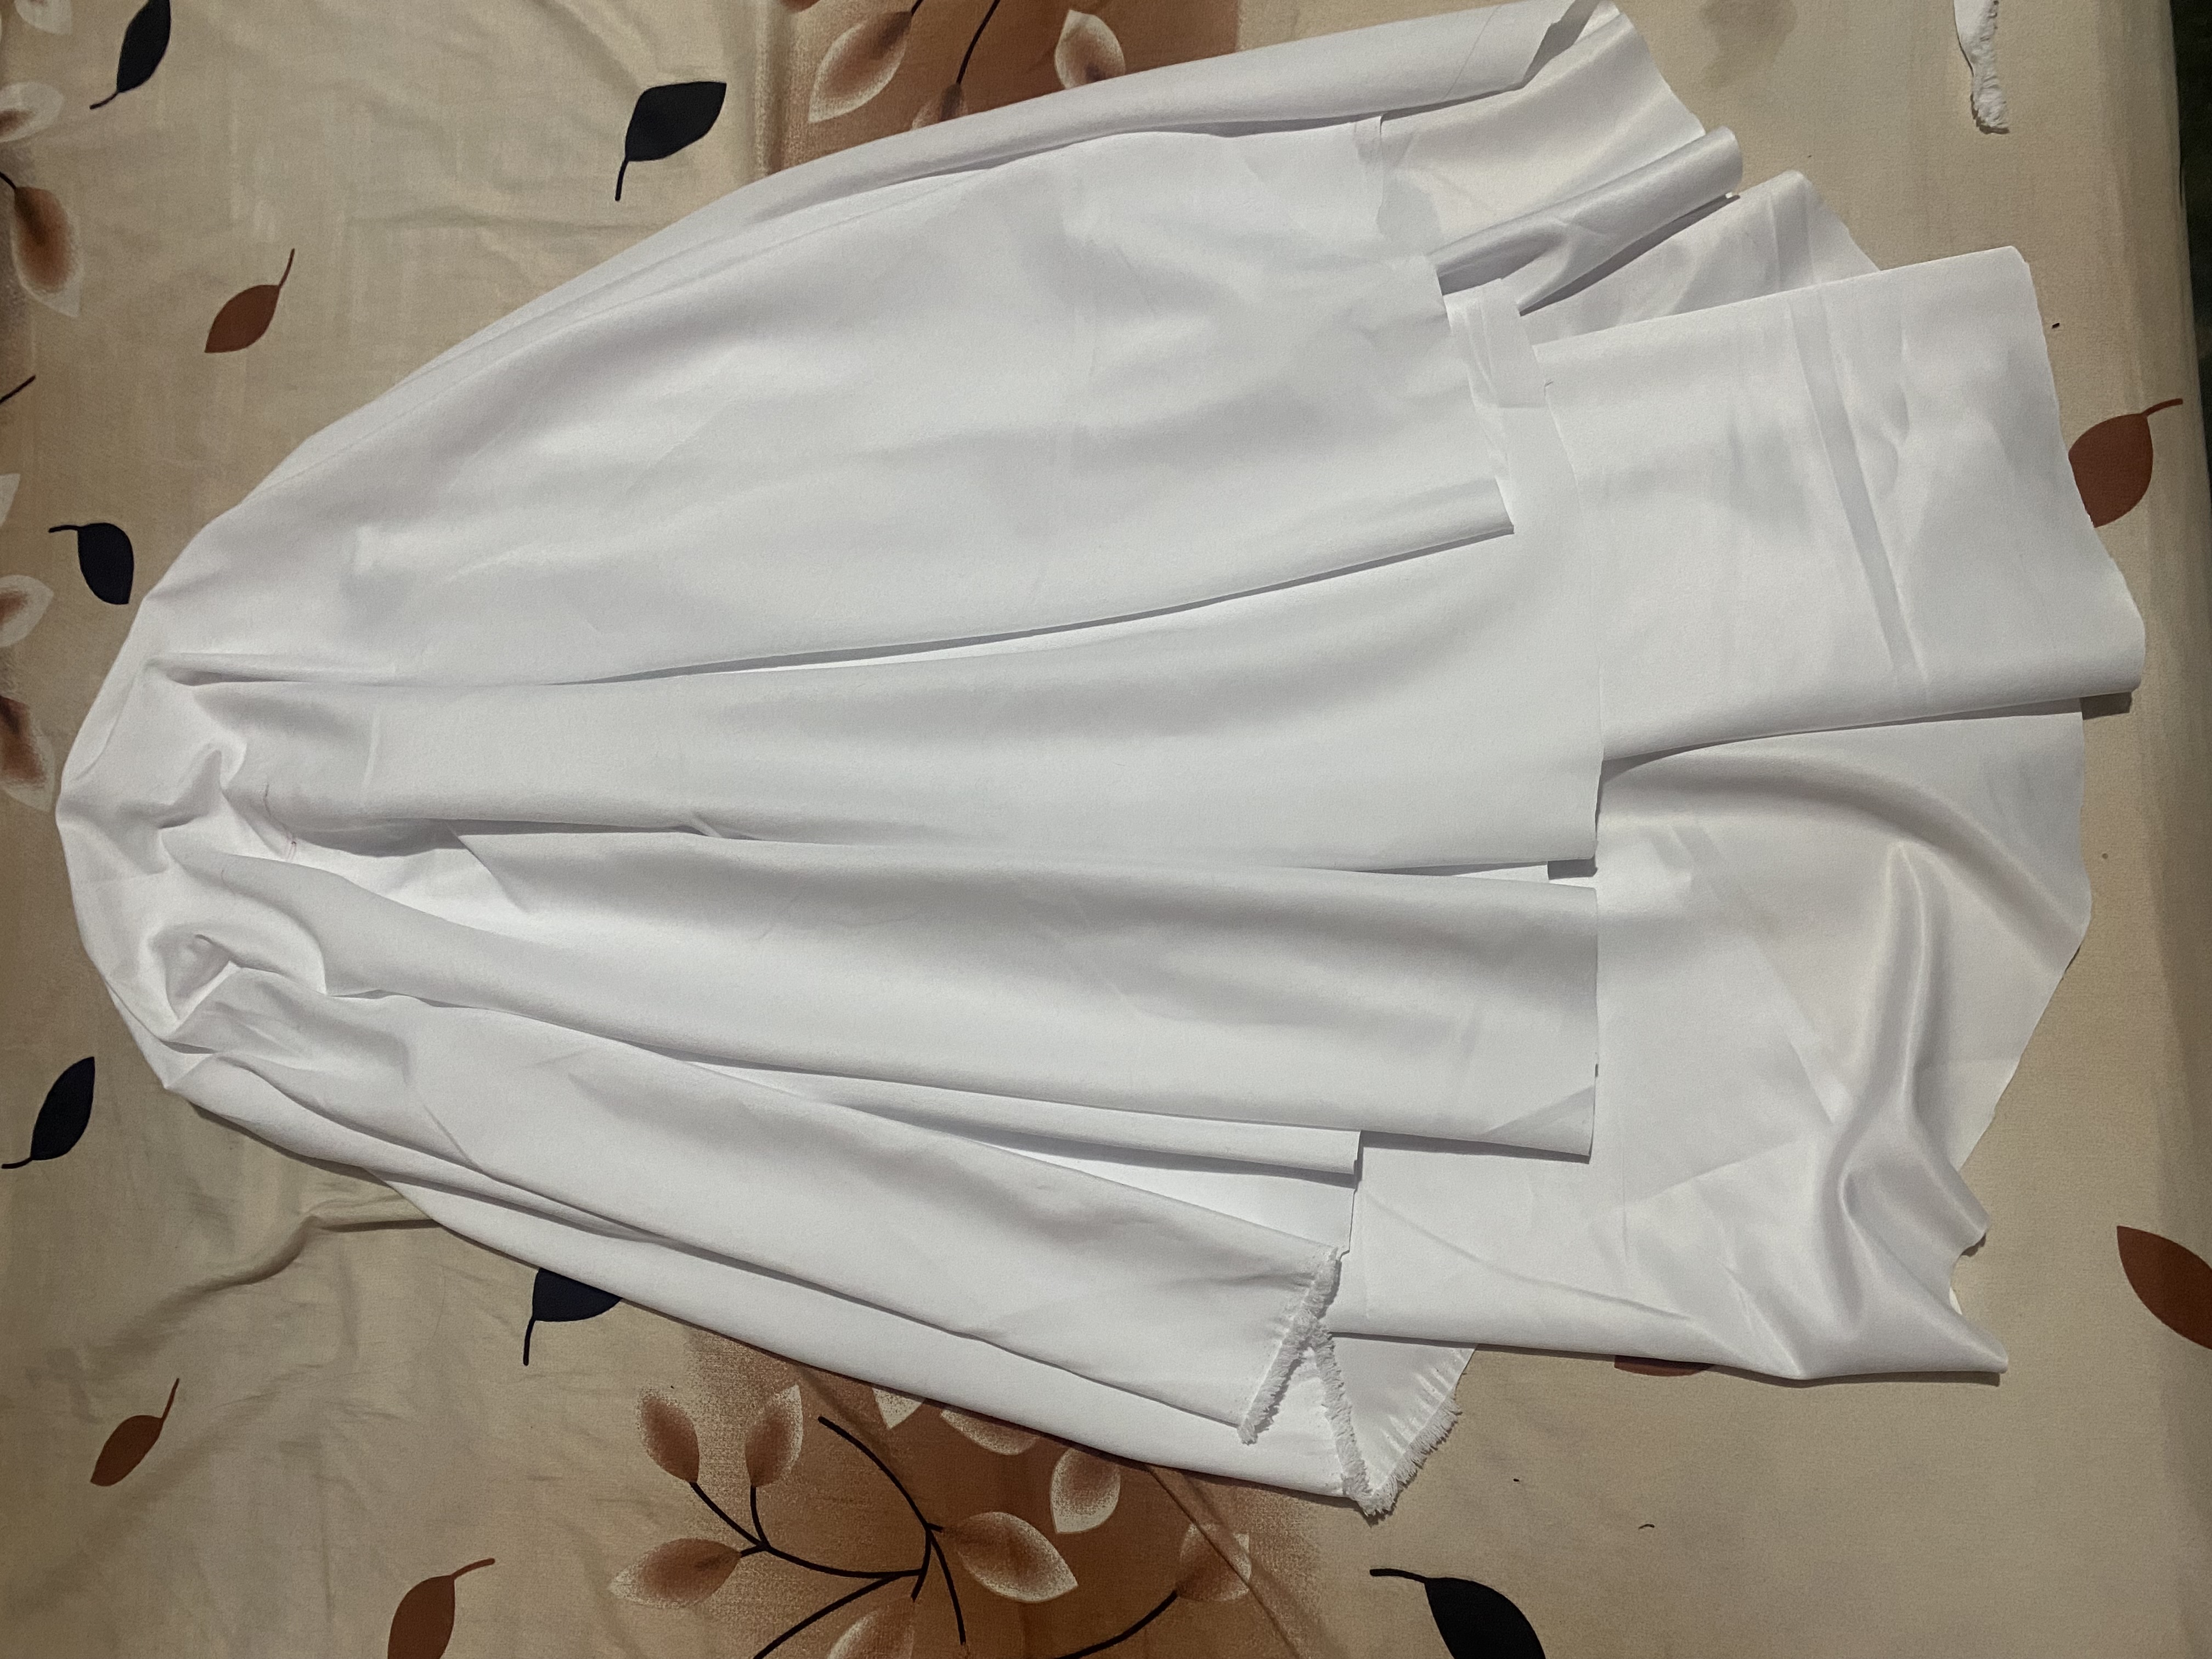
Desocupé mi cama para poder cortar la tela ya que es blanca y me da miedo colocarla en otra superficie y que se me ensucie, usualmente utilizo el piso para cortar mis telas primero limpio bastante bien y luego hago los cortes pero en este caso me da miedo ensuciarlo.
Luego de cortar la tela sentí mucha emoción al ponerla más o menos en la forma como quedará la falda, no sé si le sucede pero cada vez que estoy haciendo algo nuevo me da demasiada emoción
I vacated my bed so I could cut the fabric since it is white and I am afraid of placing it on another surface and getting it dirty. I usually use the floor to cut my fabrics. First, I clean it quite well and then I make the cuts, but in this case I am afraid. dirty it.
After cutting the fabric I felt a lot of emotion when I put it more or less in the shape the skirt will look like, I don't know if it happens but every time I'm making something new it gives me too much emotion.
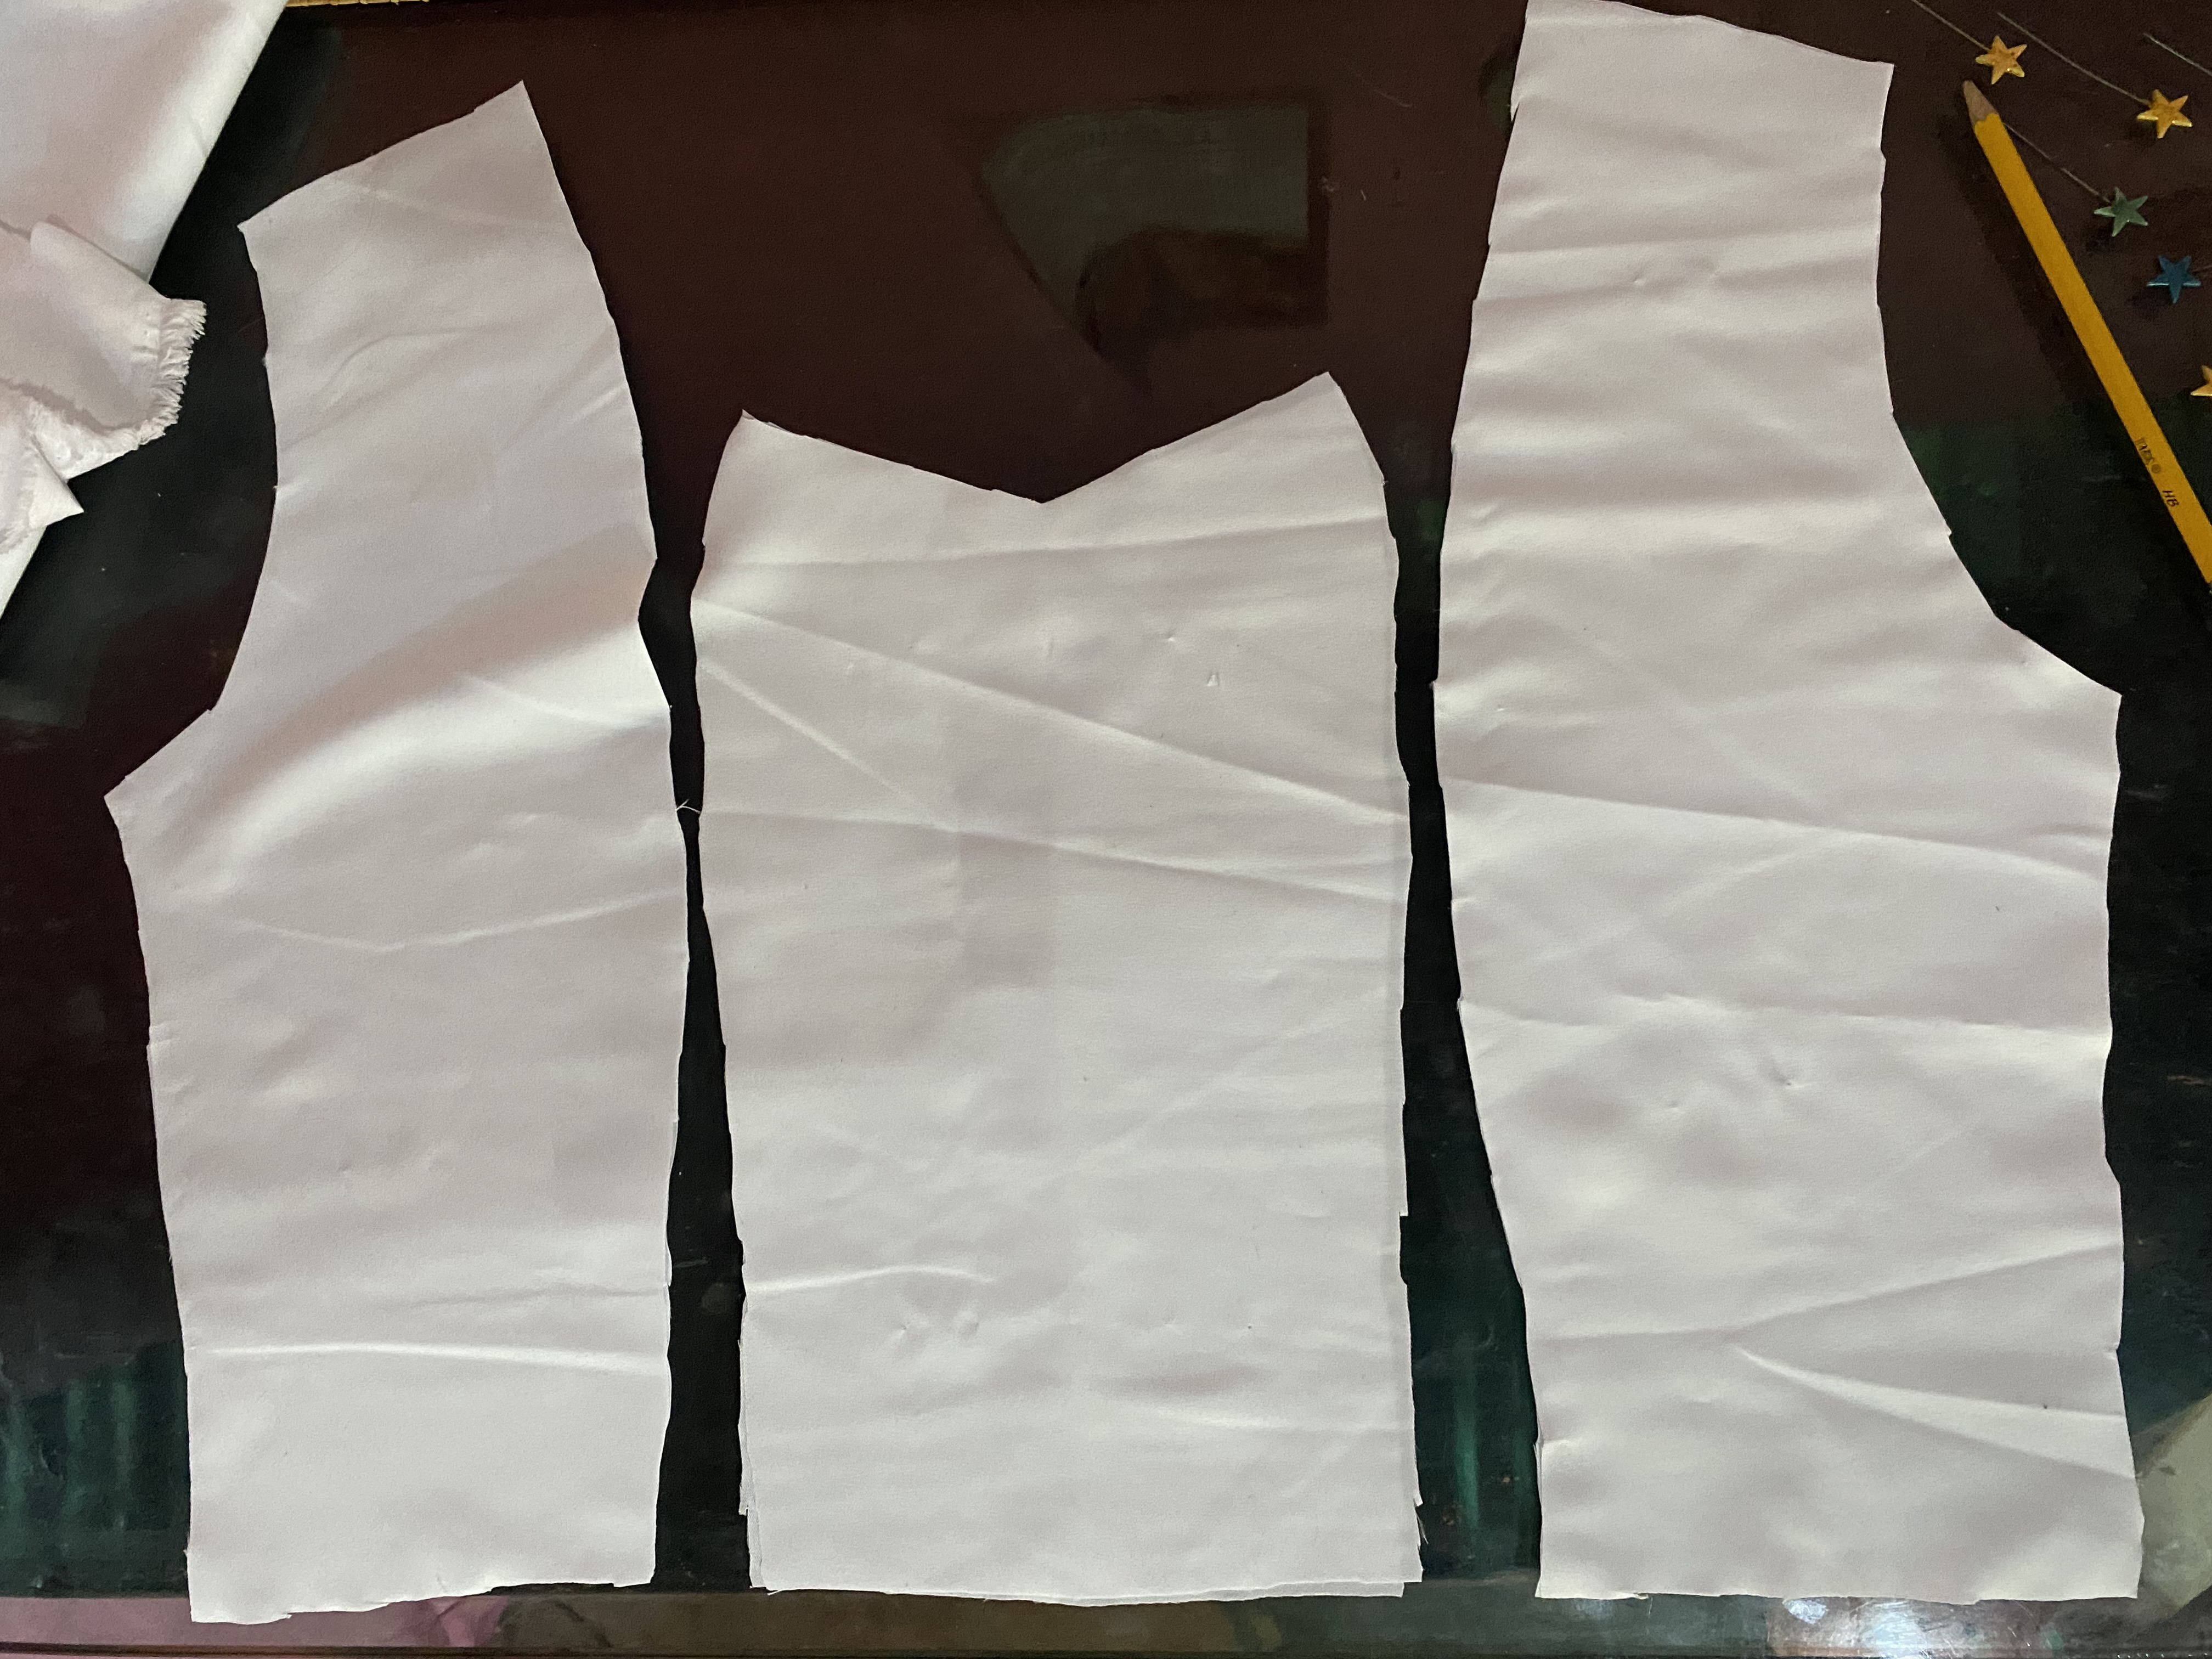
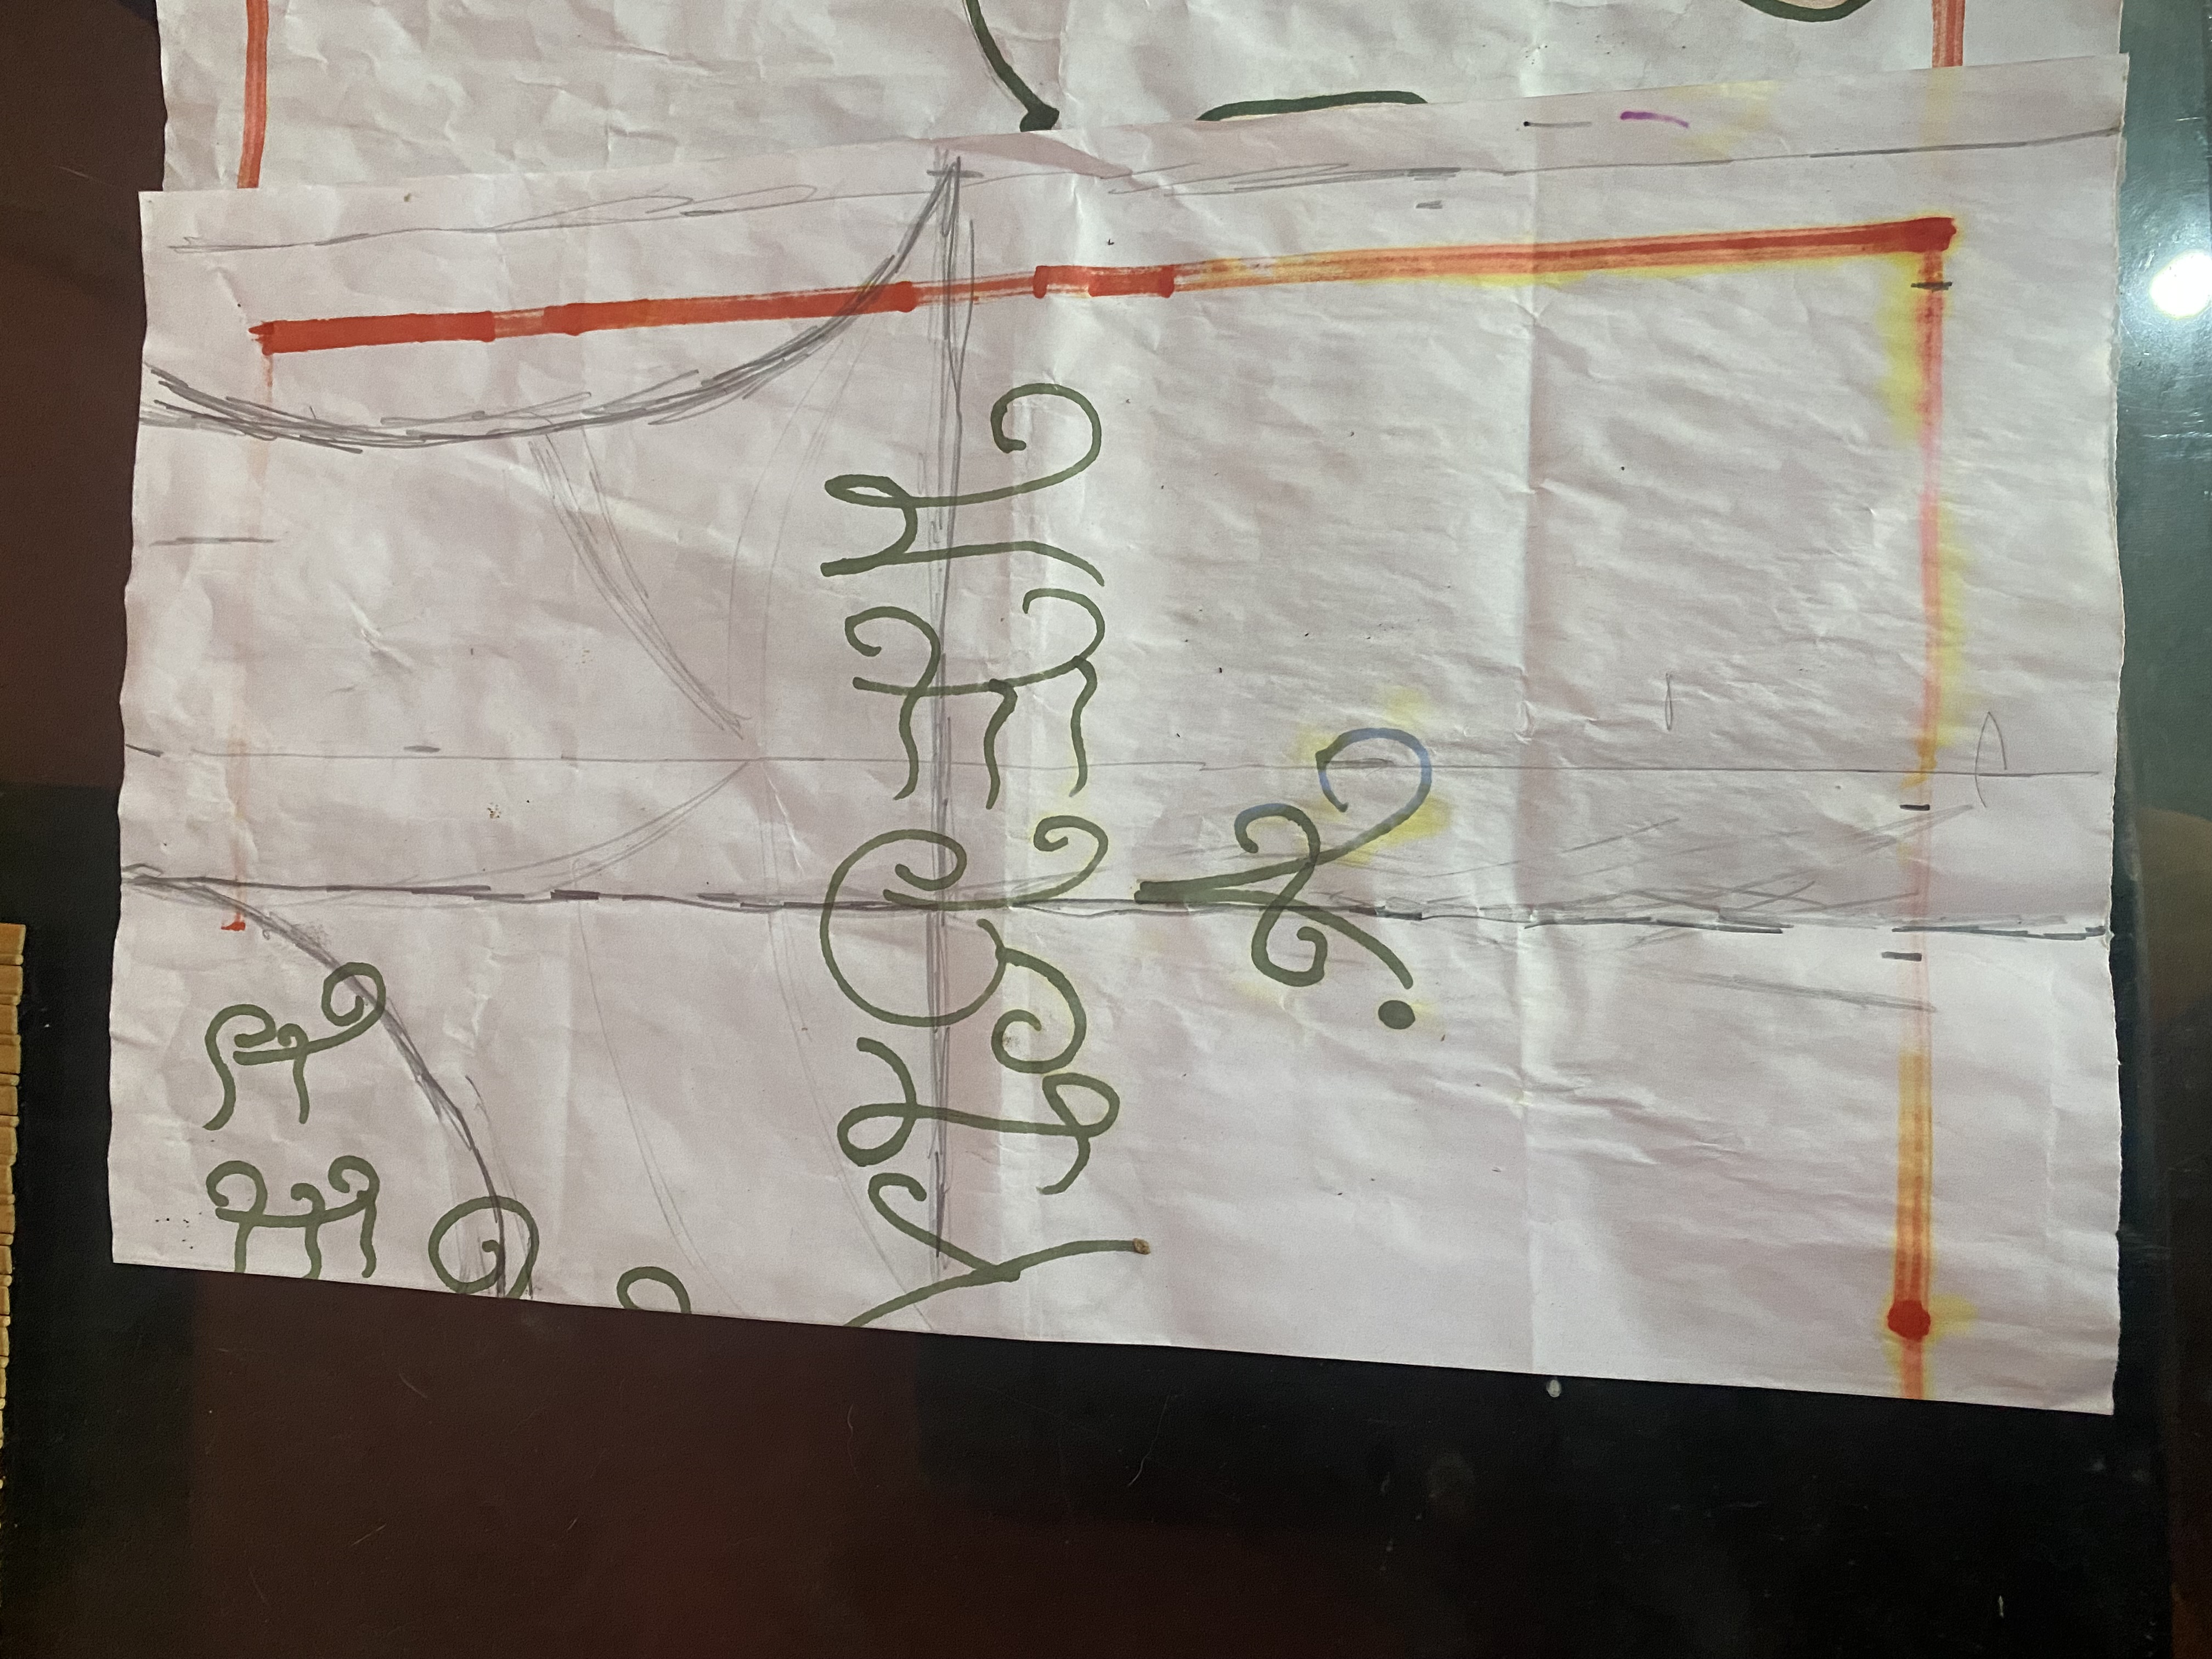
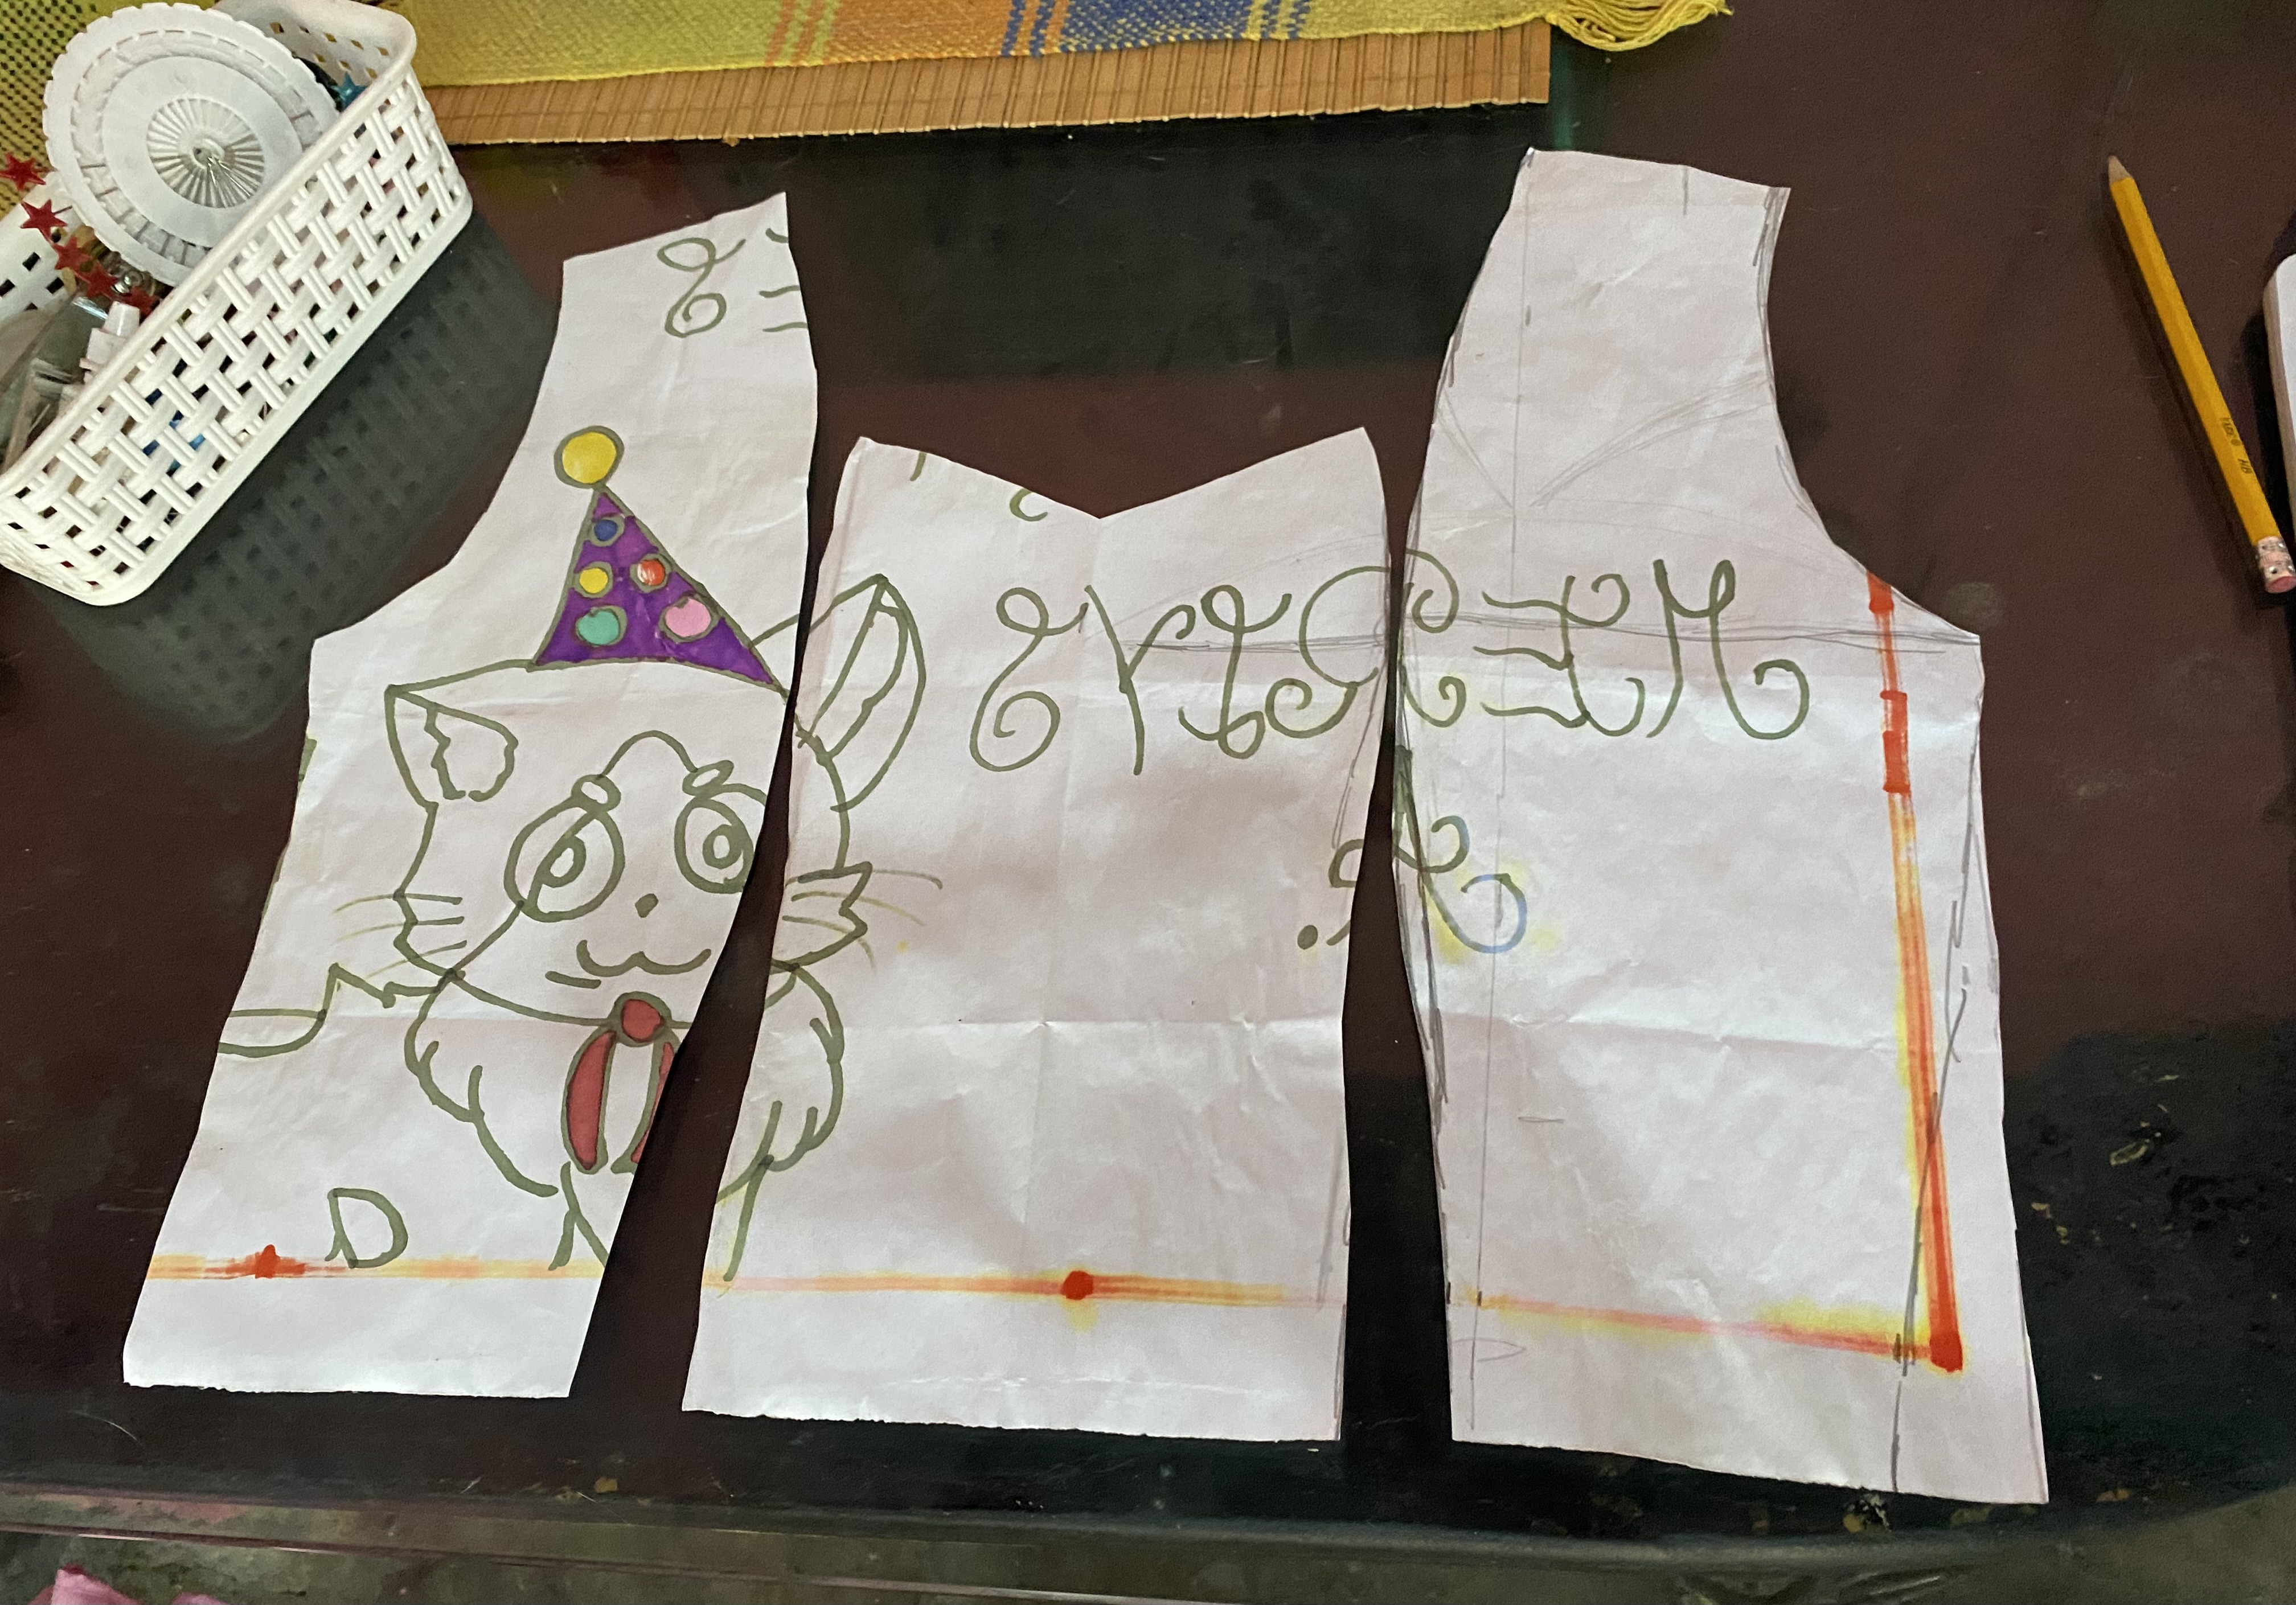
Para la confección de la camisa voy a guiarme con medidas, la medida desde el hombro hasta la cintura será de 45 cm, así que esta será nuestra primera medida la cual marcaré en el papel de reciclaje que estoy utilizando, Desde la orilla hasta el centro vamos a marcar 9 cm y trazamos una línea en forma vertical, esta es una medida estándar la cual vi en la gran mayoría de videos de patronaje.
Para la parte del hombro vamos a marcar 9 cm Desde la orilla de adentro, luego desde la orilla de afuera vamos a marcar 3 cm a lo cual bajamos 3 cm más y trazamos una línea en diagonal esta va a ser la caída del hombro.
Para el escote del pecho vamos a bajar 9 cm, en el caso de este vestido voy a hacerle una forma redondeada en el pecho está la área pulso ya que no cuento con la regla apropiada para esto, igual le podemos dar la forma bonita con nuestro pulso.
Para la pinza inferior nos vamos a guiar por la línea que trazamos de 9 cm desde el centro hacia dentro, vamos a marcar la caída del busto desde arriba hasta donde di lo cual en mi caso son 34 cm, desde esa marca vamos a marcar 3 cm dividiéndolos 1,5cm de la línea hacia el centro y 1,5 cm de la línea hacia la orilla, Le damos la forma redondeada en la parte del busto luego la atrasamos recta hasta la cintura.
To make the shirt I am going to be guided by measurements, the measurement from the shoulder to the waist will be 45 cm, so this will be our first measurement which I will mark on the recycling paper that I am using, From the edge to the center We are going to mark 9 cm and draw a line vertically, this is a standard measurement which I saw in the vast majority of pattern making videos.
For the shoulder part we are going to mark 9 cm From the inside edge, then from the outside edge we are going to mark 3 cm to which we go down 3 cm more and draw a diagonal line, this will be the fall of the shoulder.
For the neckline of the chest we are going to lower it 9 cm, in the case of this dress I am going to make a rounded shape in the chest is the pulse area since I do not have the appropriate ruler for this, we can still give it a nice shape with our pulse.
For the lower dart we are going to be guided by the line that we drew 9 cm from the center inwards, we are going to mark the fall of the bust from above to where I said which in my case is 34 cm, from that mark we are going to mark 3 cm dividing them 1.5cm from the line towards the center and 1.5cm from the line towards the edge. We give it a rounded shape in the bust part then we move it back straight to the waist.
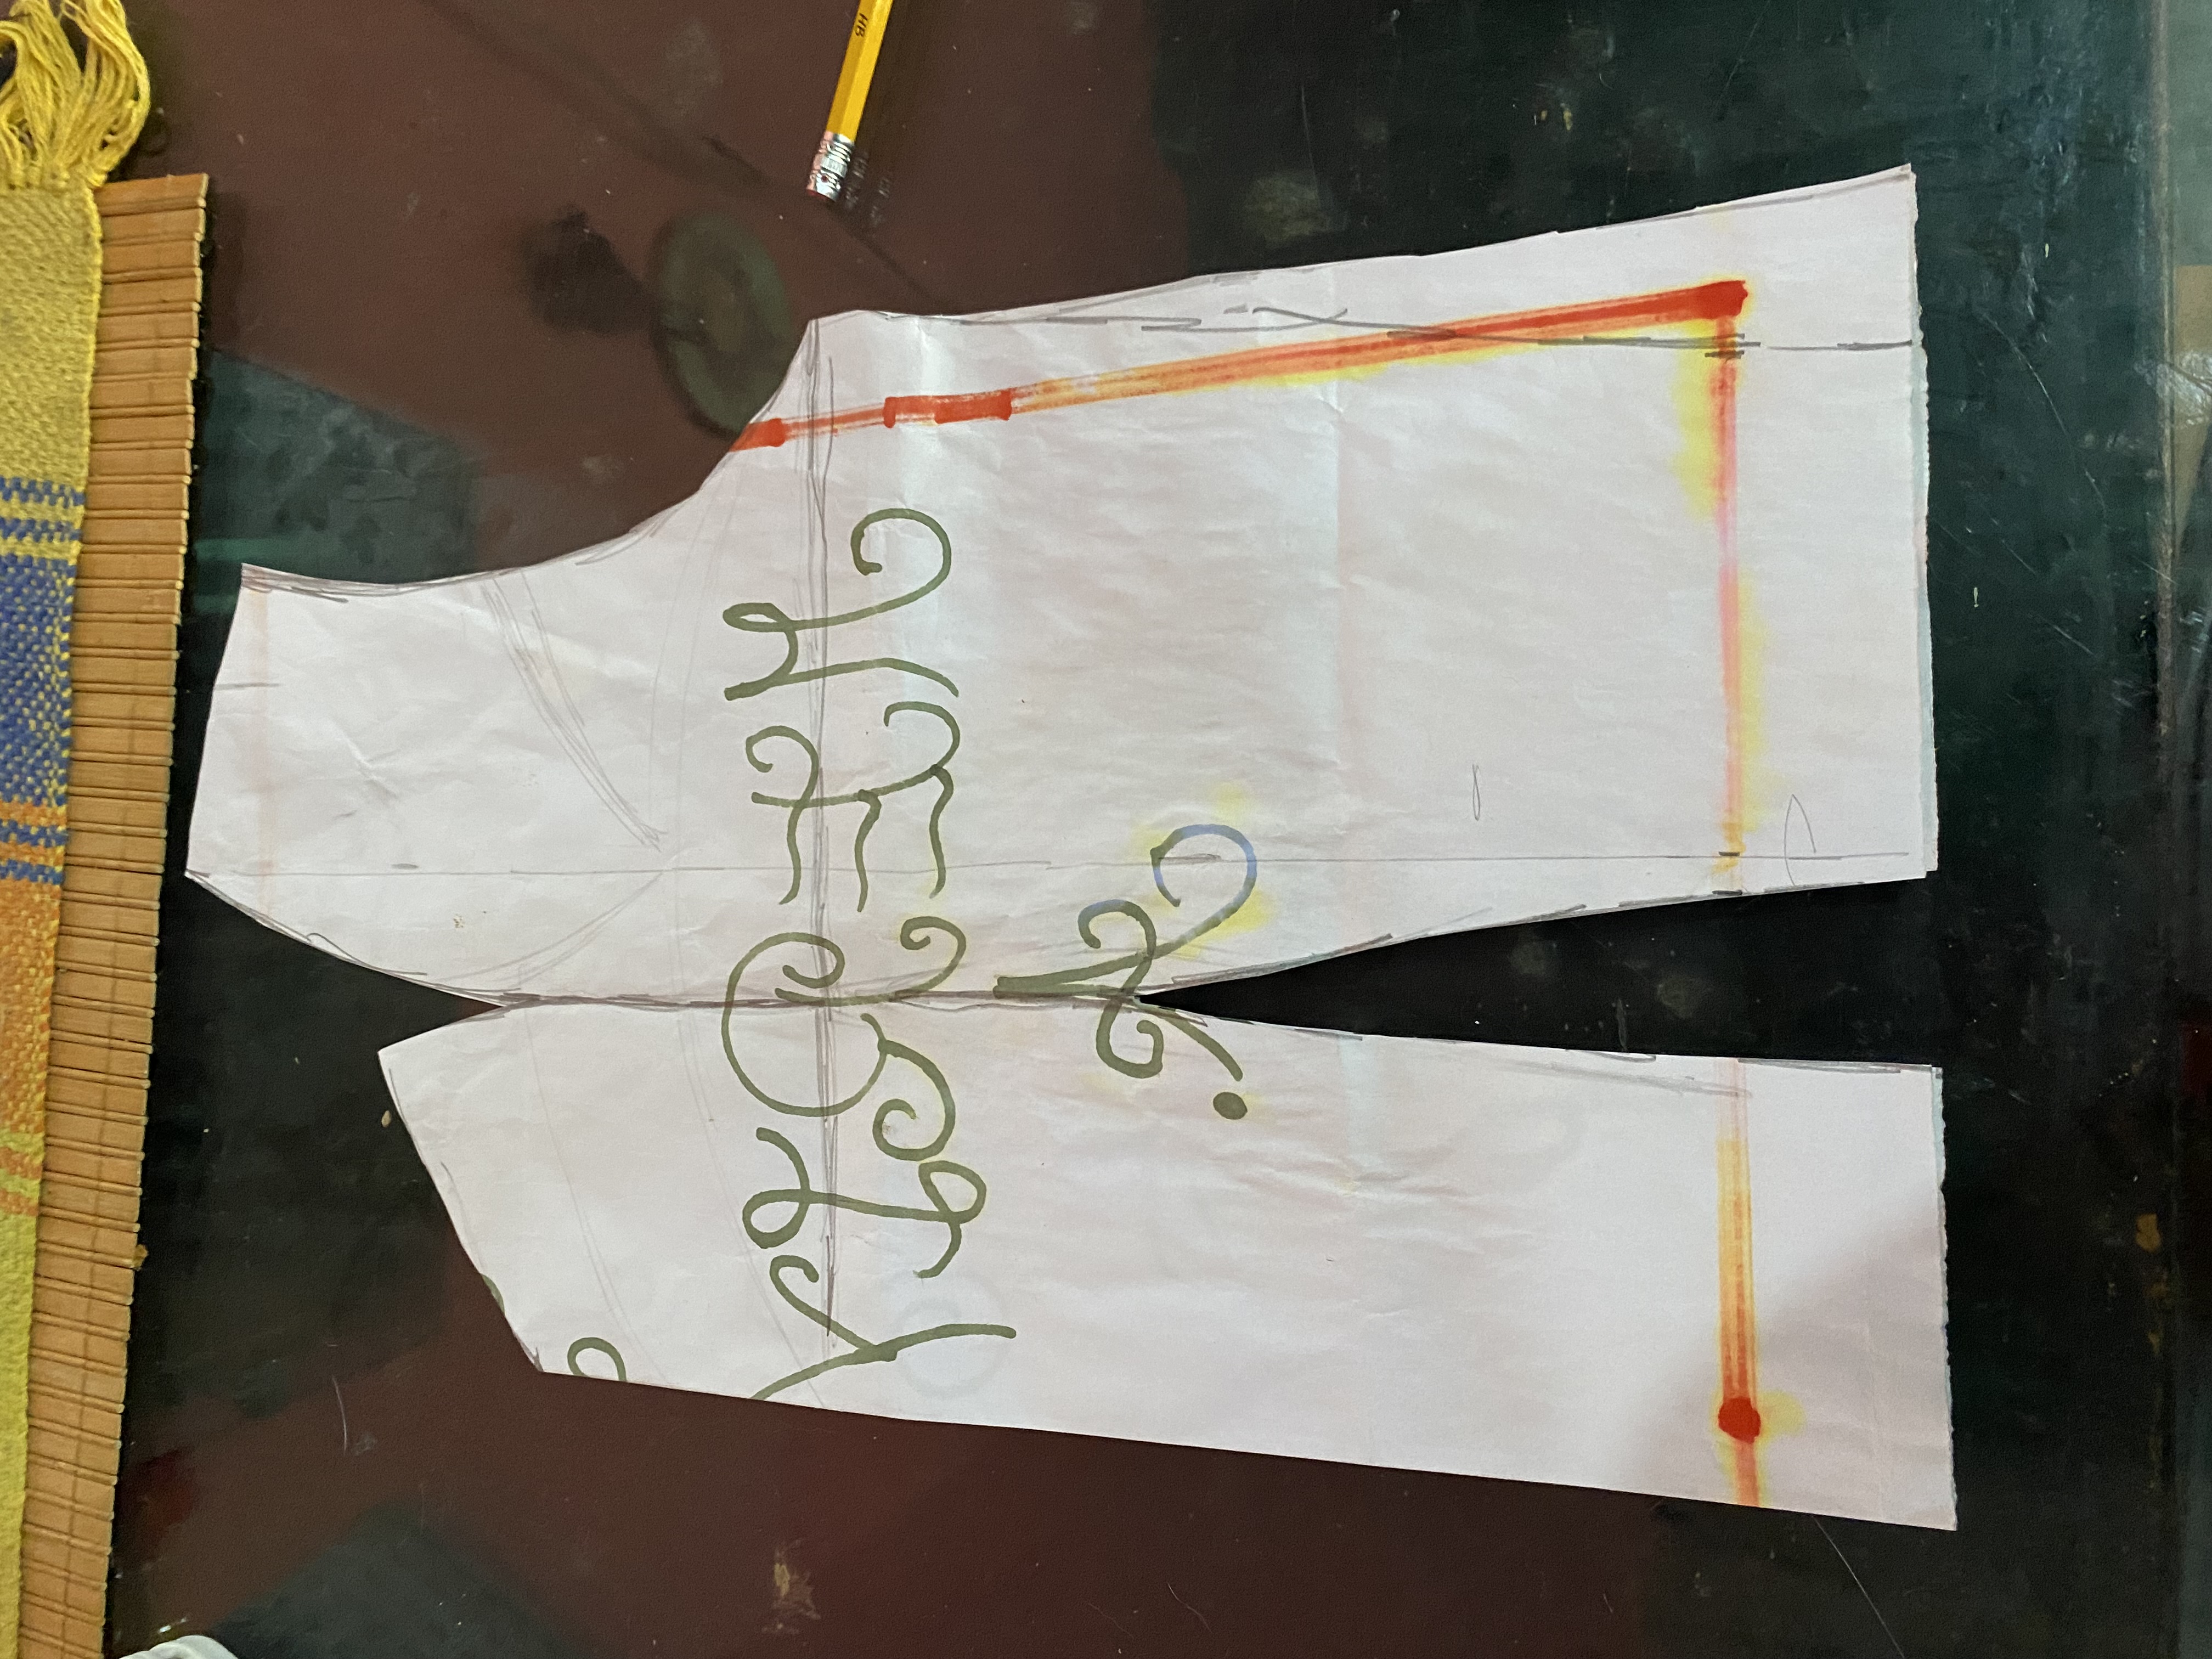
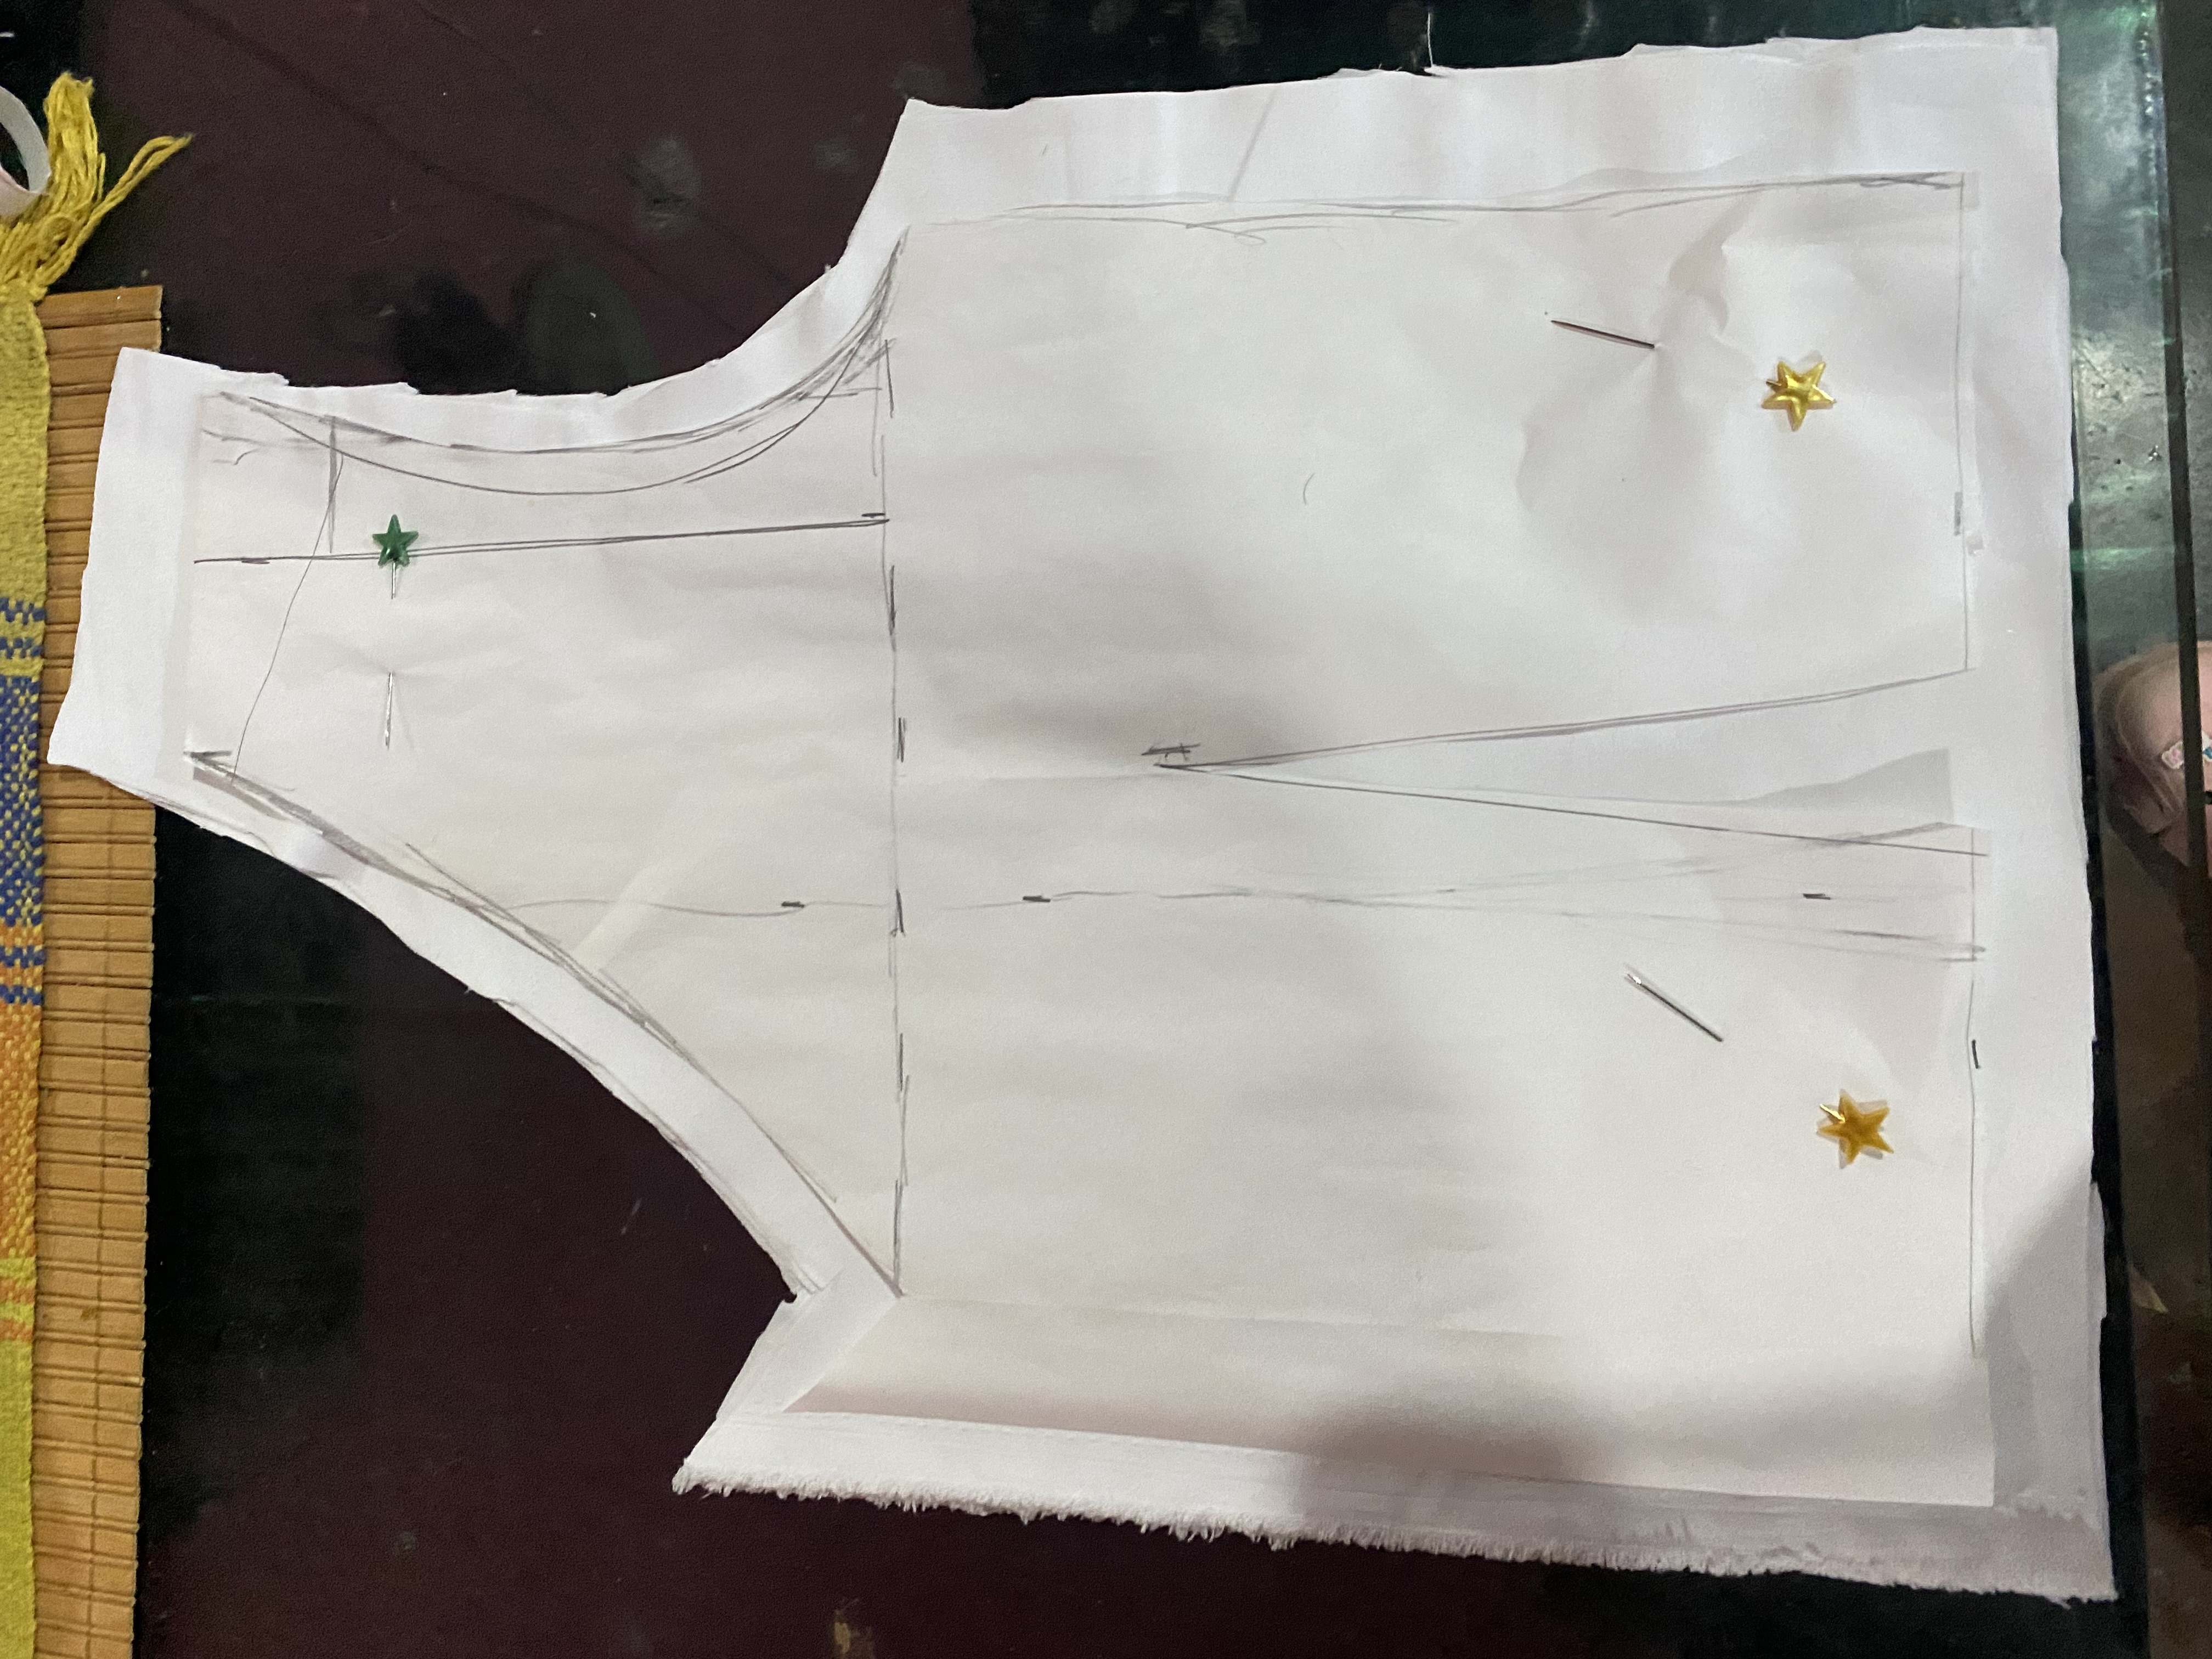
Para la parte trasera vamos a utilizar Las medidas principales y luego vamos a modificar diferente sólo en la caída del cuello y en la pinza, para la caída del cuello vamos a bajar aproximadamente 20 cm ya que la parte trasera del vestido será trazando una línea diagonal, aún no he decidido si le colocaré cremallera o un lindo trenzado .
Para la pinza vamos a doblar a la mitad y de allí dibujaremos una línea guiándonos de la línea de la axila 4 cm hacia abajo, marcamos uno, 5 cm a cada lado de la línea para luego cortar, al tener listo el patrón y colocarlo sobre la tela Decidí cortar 2 cm más largo en la parte del hombro y no cortar la parte de la pinza ya que no quiero que el vestido le quede muy ceñido al cuerpo .
For the back part we are going to use the main measurements and then we are going to modify differently only in the fall of the neck and in the dart, for the fall of the neck we are going to go down approximately 20 cm since the back of the dress will be drawing a diagonal line I haven't decided yet if I'll add a zipper or a nice braid.
For the dart we are going to fold it in half and from there we will draw a line guiding ourselves from the armpit line 4 cm down, we mark one, 5 cm on each side of the line and then cut, once we have the pattern ready and place it on the fabric I decided to cut 2 cm longer in the shoulder part and not cut the dart part since I don't want the dress to be too tight on the body.

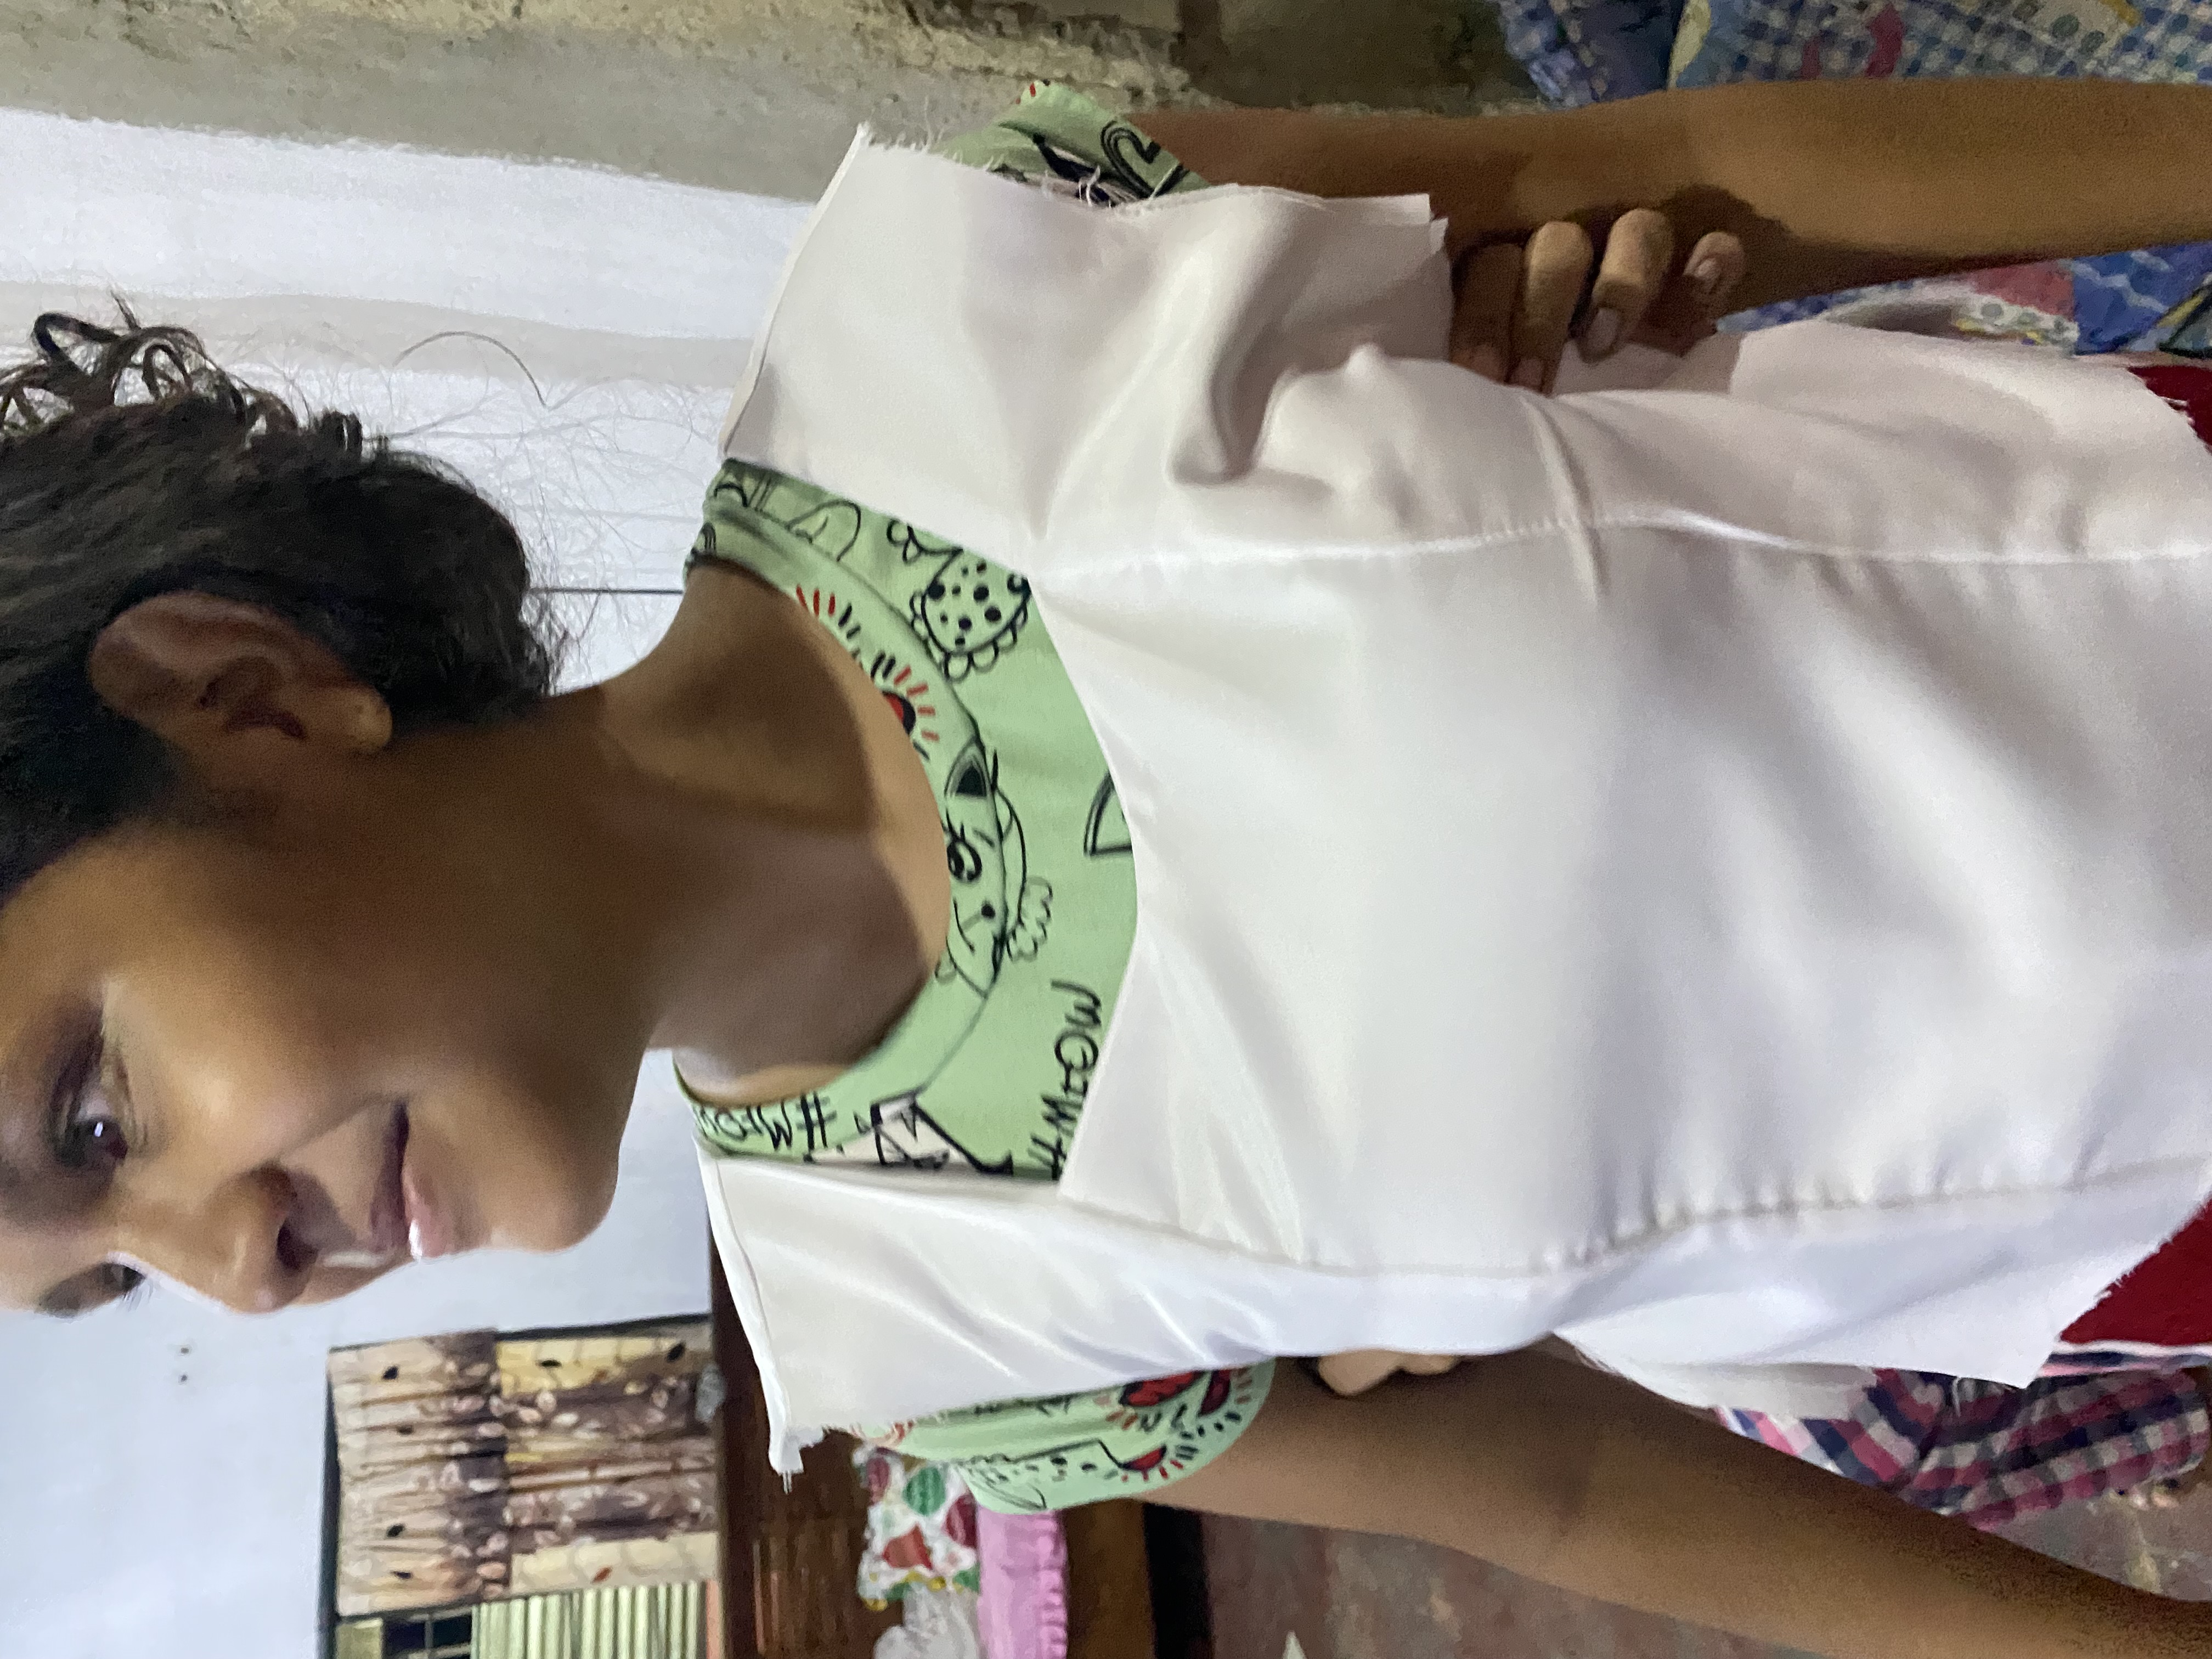
Luego de cortar y trazar las primeras costuras estoy muy emocionada por cómo va quedando el vestido, la tela no me alcanzó para las mangas y para el lazo que va a llevar en la cintura, espero pronto compartirles el resultado final.
El proceso para hacer este vestido me ha parecido muy interesante ya que nunca había utilizado patrones y mucho menos hacerlos yo misma, Cada día enfrentamos nuevos retos y cumplimos esas metas que tanto deseamos, sólo espero seguir aprendiendo cada día más en mis costuras ya que es algo que me apasiona demasiado, es todo por hoy me despido deseándoles muchos éxitos y bendiciones a todos, hasta otra oportunidad
After cutting and tracing the first seams, I am very excited about how the dress is turning out. I didn't have enough fabric for the sleeves and the bow that will be worn at the waist. I hope to share the final result with you soon.
I found the process to make this dress very interesting since I had never used patterns, much less made them myself. Every day we face new challenges and achieve those goals that we desire so much. I only hope to continue learning more every day in my sewing since it is something that I am very passionate about, that's all for today, I say goodbye, wishing you all much success and blessings, until another opportunity
Me hiciste recordar mis inicios en la costura, me decía mejor dañar papel que tela
Jaja es cierto, yo he dañado muchas telas por no saber hacer patrones, pero ahora poco a poco voy aprendiendo con patrones, gracias por comentar amiga saludos 🥰
a mi me pasó
I used to think pattern drafting was a hectic process in the past but ever since I gave it a trial, it has been my go-to process for dress making because you end up with less error and sure of what measurement you used because you can always refer to the pattern. And this right here is an excellent job, keep the good work on!
My friend, I thought it was something very complicated and as I watch videos and understand the explanations I see that it is something practical and not so difficult, everything is in the measurements, thanks for commenting, greetings 🥰
👏 Keep Up the good work on Hive ♦️ 👏
sagarkothari88 to upvote your post ❤️
🙏 Don't forget to Support Back 🙏❤️ @palomap3 suggested
La importancia de realizar un patrón: las prendas de vestir quedan más lindas!, Me gustaría aprender hacer patronaje, creo que será mi próxima meta!, Gracias por compartir!
Así es amiga, quedan muchísimo mejor y más precisas, gracias por comentar, saludos 🥰
Hola Marlyn. Va a quedar hermoso el vestido, ya se ve lindo ahora y la tela está muy buena también. Me gusta el diseño de lo que va a ser la falda también. Esperemos verlo completo pronto. Te mando un saludo 💕
A medida que lo voy armando siento mucha emoción, este es un trabajo que requiere muchos detalles, pronto espero compartir el resultado, gracias por comentar amiga, saludos 🥰
Interesante tu explicación. Yo aprendí costura con la muñeca Barbie, pero cuando voy a trabajar en grande me preocupa que no quede bien. Saludos.
Guao trabajar es miniatura es un poco difícil, yo tenía un problema antes, al hacer alguna prenda la cortaba mas grande para evitar errores y luego perdía mucha tela, ahora que recién me guió con patrones veo que es más fácil, gracias por comentar amiga, saludos 🥰
😍