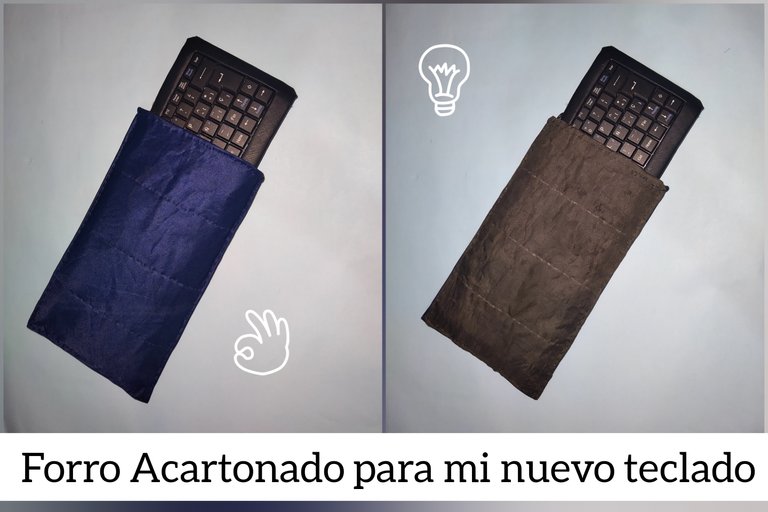
Hola, hoy vengo a enseñarte como realizo un pequeño estuche acartonado para mi nuevo teclado. En realidad no es nuevo, es uno que yo mismo hice utilizando como base un teclado de Tablet Canaima, puedes verlo mejor en Mi post de ayer ☺️
La novedad de éste estuche es que en su interior tiene cartulina, lo que hace que sea mas duro y resistente, es un pequeño truco que recién aprendí y quise colocarlo en práctica, se que no es nuevo y realmente no soy un experto, aunque igualmente haré mi mejor intento..
Hello, today I am here to show you how I make a small cardboard case for my new keyboard. Actually it's not new, it's one that I made using a Canaima Tablet keyboard as a base, you can see it better in My post from yesterday ☺️
The novelty of this case is that it has cardboard inside, which makes it harder and more resistant, it's a little trick that I just learned and I wanted to put it into practice, I know it's not new and I'm not really an expert, although anyway I'll do my best..
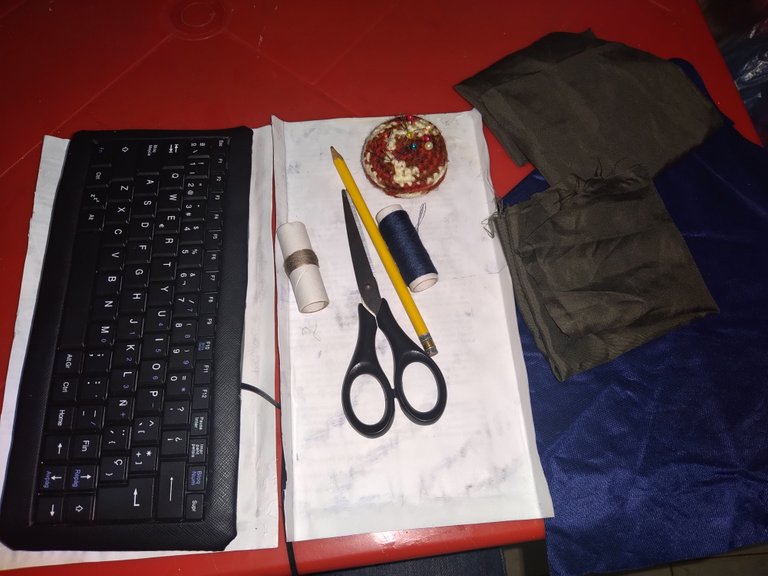
Lo primero sería mostrarles los materiales y herramientas a utilizar, aunque la verdad es que no lo tenía muy claro en ese momento. Ahora mientras escribo el post y una vez terminado el proyecto, puedo nombrarte algunas cosas:
- Retazos de telas (4 trozos de tamaño similar)
- Aguja, hilos del color de la tela a utilizar y dedal
- Tijeras
- Grapadora (nunca falla)
- Pega blanca
- Regla
- Un trozo de Tiza
- Cartulina
The first thing would be to show them the materials and tools to use, although the truth is that it was not very clear to me at that time. Now while I write the post and once the project is finished, I can name a few things for you:
- Scraps of fabric (4 pieces of similar size)
- Needle, threads of the color of the fabric to be used and thimble
- Scissors
- Stapler (never fails)
- White glue
- Rule
- A piece of chalk
- Cardboard
No voy a mentir, seguramente me olvidé de alguna herramienta o material, así que mejor vayamos iniciando y vamos viendo que utilizo. Teniendo en cuenta que las medidas me servirán solo a mi y que estoy utilizando retazos de tela que honestamente ni se como se llaman, no creo que importe tanto si olvido algun material.
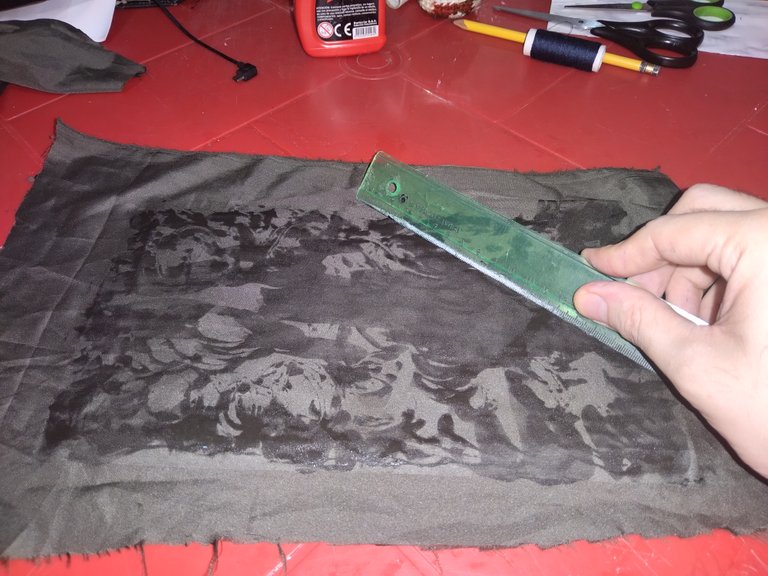
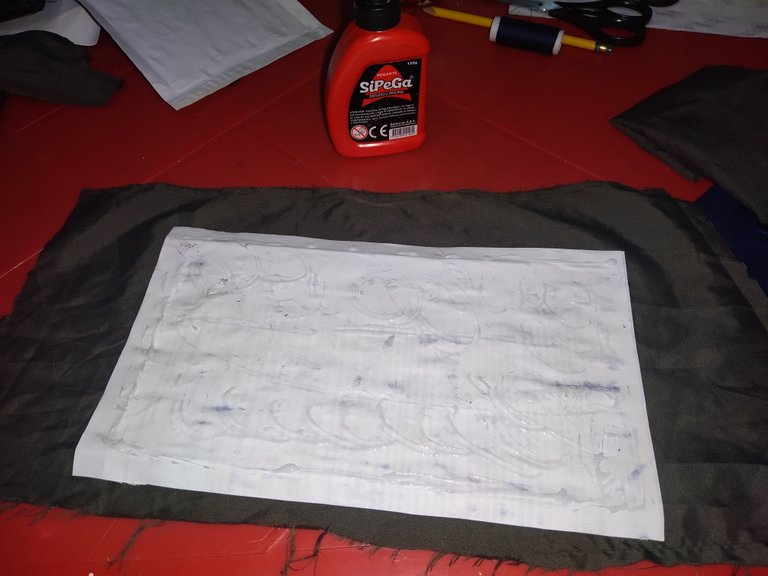
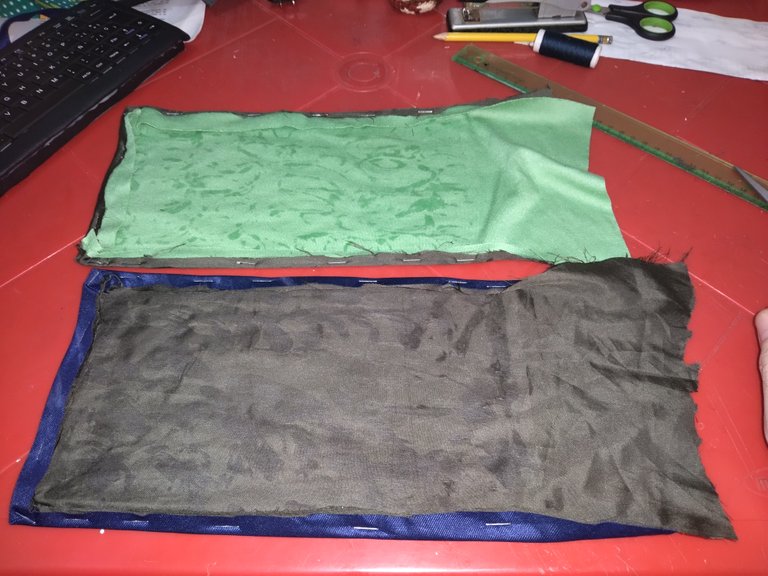
Lo primero que hice fue añadir pega blanca a la cartulina y forrarla con trozos de tela, en mi caso son trozos de diferente tela, ya que al ser retazos no cuento con trozos iguales del suficiente tamaño. Un paso importante es raspar con la regla luego de haber colocado la tela sobre la pega, esto quitará cualquier arruga ☺️
I'm not going to lie, surely I forgot some tool or material, so let's start and see what I use. Taking into account that the measurements will only work for me and that I am using scraps of fabric that I honestly don't even know what they are called, I don't think it matters so much if I forget some material.
The first thing I did was add white glue to the cardboard and cover it with pieces of fabric, in my case they are pieces of different fabric, since being scraps I don't have equal pieces of sufficient size. An important step is to scrape with the ruler after placing the fabric on the glue, this will remove any wrinkles ☺️


Si te preocupa la humedad de la pega, no te preocupes, es pega blanca a medida que se va secando va desapareciendo. Y realmente no la uso para pegar definitivamente la tela a la cartulina, porque honestamente se que no aguantará, es mas como un sujetador para poder hacer las costuras que ves en las imágenes de arriba.
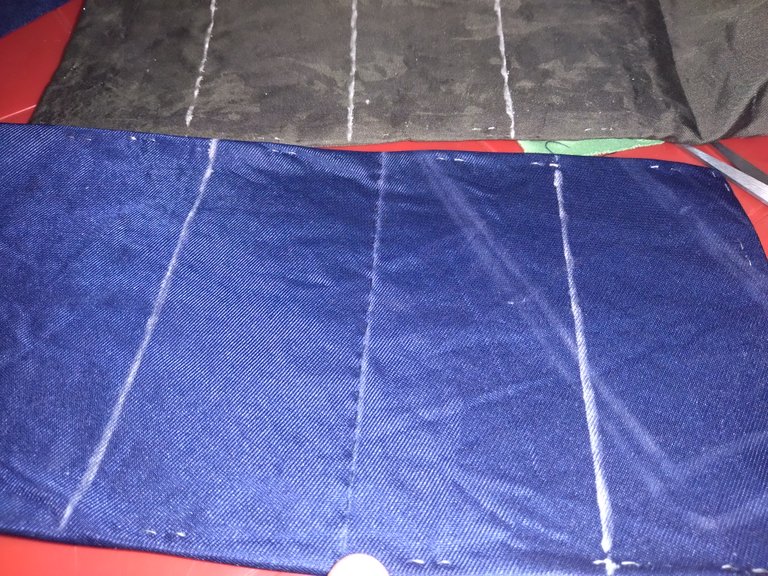
Para ello debo primero hacer unas líneas con tiza, que me servirán de guia para que la costura quede relativamente derecha y tampoco debo preocuparme por dejar manchas, porque se quita muy fácilmente ☺️
If you are worried about the humidity of the glue, don't worry, it is white glue as it dries it disappears. And I don't really use it to definitively glue the fabric to the cardstock, because honestly I know it won't hold, it's more like a bra to be able to do the seams you see in the pictures above.
To do this, I must first make some lines with chalk, which will serve as a guide so that the seam is relatively straight and I do not have to worry about leaving stains, because it is very easy to remove ☺️
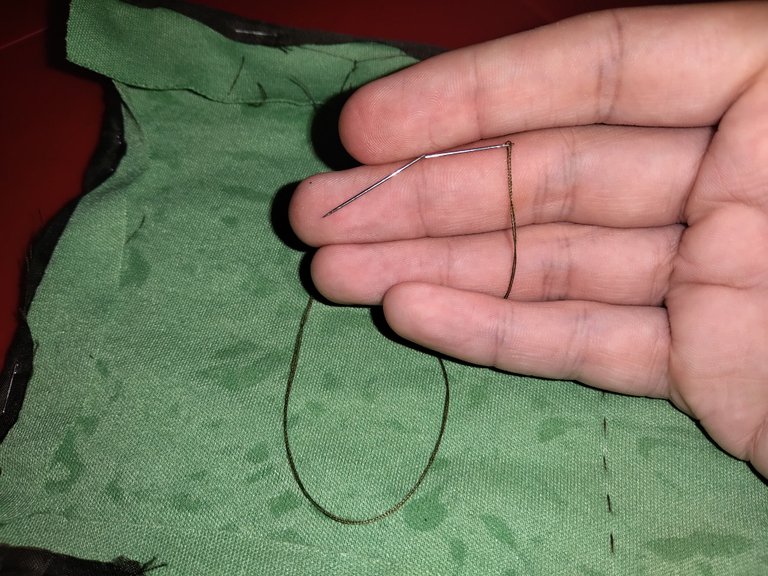
Luego de partir una aguja, llegó la hora de unir las dos mitades. Y no tiene mayor misterio, la verdad es que cuando coses a mano no hay muchas opciones, lo mas sencillo es realizar una costura recta, intentando que quede lo mas firme posible e intentando no romper el hilo en el proceso.
¿Tu conoces otro tipo de costura a mano? 🤔 La verdad se que hay personas con una habilidad tremenda, que pueden coser a mano muy rápido y conseguir un resultado como el de una máquina, supongo que la memoria muscular tiene mucho que ver y que no es algo que se logra de un momento a otro, aunque igual seguiré practicando hasta lograr desarrollar esa habilidad ☺️
After breaking a needle, it was time to join the two halves. And there is no greater mystery, the truth is that when you sew by hand there are not many options, the simplest thing is to make a straight seam, trying to make it as firm as possible and trying not to break the thread in the process.
Do you know another type of hand sewing? 🤔 The truth is that there are people with tremendous skill, who can sew by hand very quickly and achieve a result like that of a machine, I suppose that muscle memory has a lot to do with it and that it is not something that is achieved from one moment to the next. another, although I'll still keep practicing until I manage to develop that skill ☺️
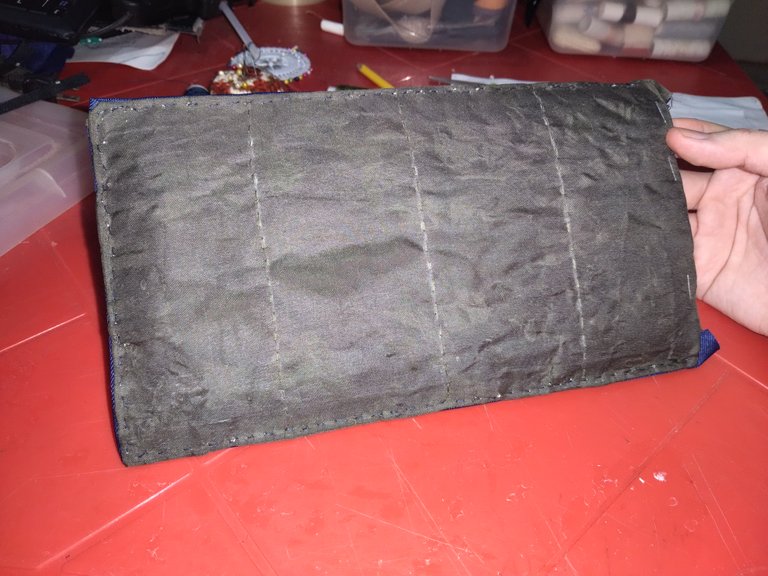
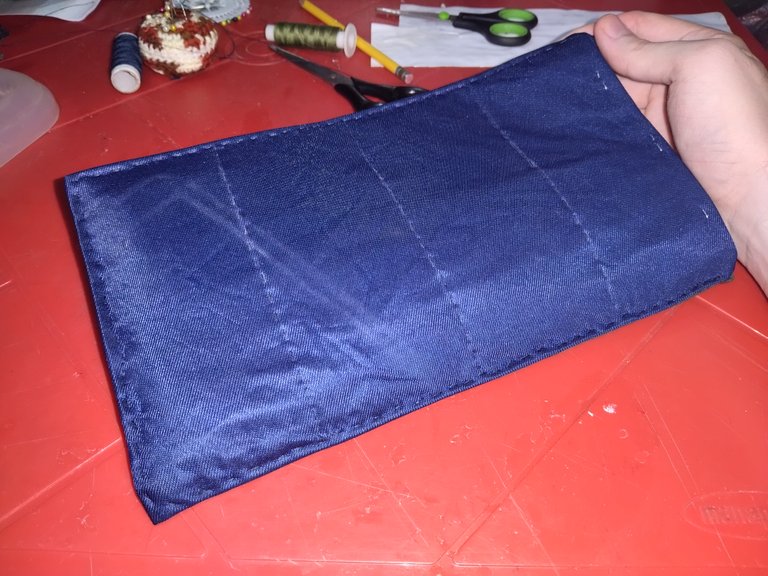
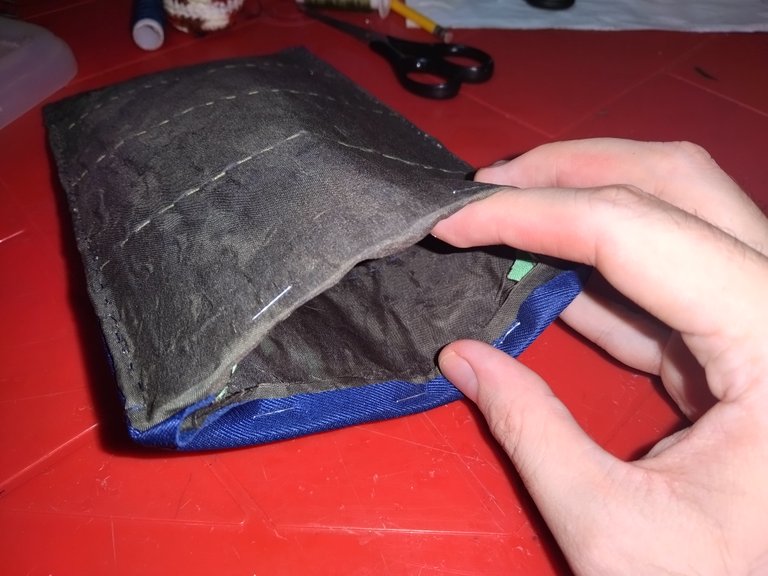
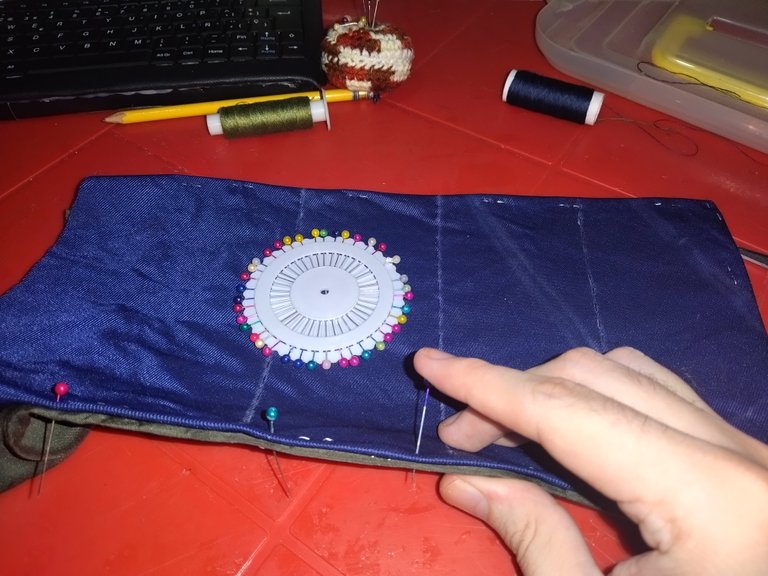
Luego de mucho luchar con la aguja y de pinchar mis dedos muchas veces, logré realizar la costura de los bordes laterales y del borde inferior, solo me falta coser el borde superior. Inicialmente pensé en colocar un cierre o una tapa de algún tipo, aunque luego que hice pruebas me di cuenta que la cartulina es un truco excelente, todo queda bastante compacto y solido, así que no hizo falta colocar mas nada, al menos de momento solo me ocuparé de coser el borde superior.
After much struggle with the needle and pricking my fingers many times, I was able to sew the side edges and the bottom edge, I just need to sew the top edge. Initially I thought of placing a closure or a lid of some kind, although after I did tests I realized that cardboard is an excellent trick, everything is quite compact and solid, so it was not necessary to place anything else, at least for now only I'll take care of sewing the top edge.
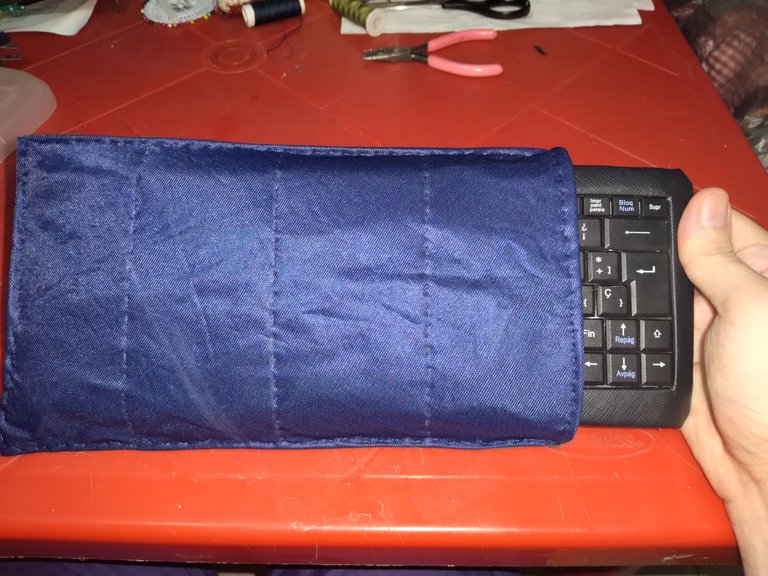
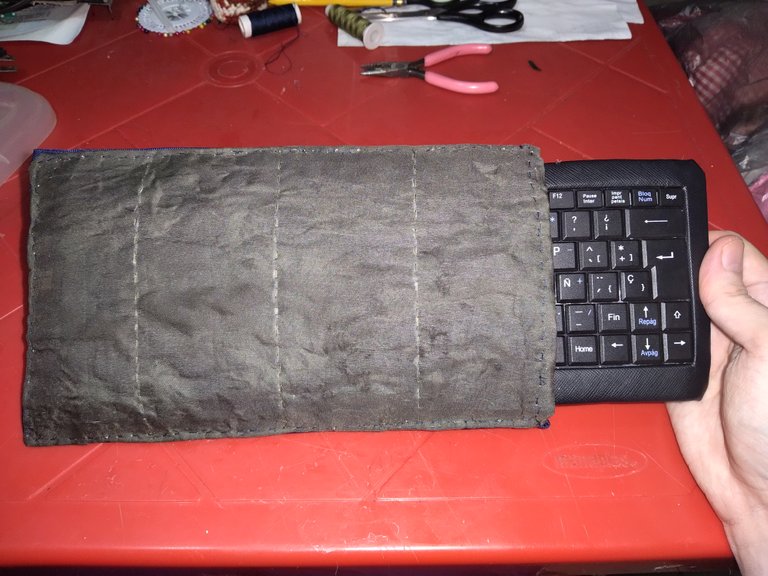
Y así de fácil terminé el proyecto de hoy. Sé que no es la gran cosa, aunque me emociona mucho compartirselos porque forma parte de mis pequeños avances en mejorar mis herramientas de creación de contenido. Próximamente espero poder mejorar la iluminación y dedicarme de lleno a crear contenido para Hive, lo que incluye lógicamente traer nuevos y buenos proyectos de costura para ustedes.
Muchas gracias por leer, espero te hayas divertido y aprendido algo nuevo hoy ☺️
And that's how easy I finished today's project. I know it's not a big deal, but I'm really excited to share it with you because it's part of my small progress in improving my content creation tools. Soon I hope to be able to improve the lighting and dedicate myself fully to creating content for Hive, which logically includes bringing new and good sewing projects for you.
Thank you very much for reading, I hope you had fun and learned something new today ☺️
The rewards earned on this comment will go directly to the people( @evelin71 ) sharing the post on Twitter as long as they are registered with @poshtoken. Sign up at https://hiveposh.com.
Hola Oscar. La costura a mano puede ser tediosa pero vale la pena si queres hacer un proyecto que necesitas como en este caso. Y a veces es inevitable romper agujas pero es parte del oficio jaja. Este estuche te quedó genial, te felicito por el y por la prolijidad de tus puntadas. Segui así ❣️.
Disculpa la tardanza, vengo llegando de diligencias. Si, la costura a mano es tediosa, aunque es lo que hay mientras junto para mi máquina, por cierto, ¿Hay alguna que me recomiendes? 🤔
Casualmente pasé hoy por una tienda y vi unas muy raras que tenian varios rollos de hilo, no entendí que era exactamente, tecnología muy avanzada para mi, yo me quedé en la que debias pisar un pedal 😂
Es inevitable pincharse sobre todo cuando tiene varias capaz , pero siempre el resultado vale la pena. Saludos
Great idea thanks for sharing
Congratulations @oscargonzalez123! You have completed the following achievement on the Hive blockchain and have been rewarded with new badge(s):
Your next target is to reach 1250 replies.
You can view your badges on your board and compare yourself to others in the Ranking
If you no longer want to receive notifications, reply to this comment with the word
STOPCheck out the last post from @hivebuzz:
Support the HiveBuzz project. Vote for our proposal!
¡Felicitaciones!
Estás participando para optar a la mención especial que se efectuará el domingo 6 de noviembre del 2022 a las 8:00 pm (hora de Venezuela), gracias a la cual el autor del artículo seleccionado recibirá la cantidad de 1 HIVE transferida a su cuenta.
¡También has recibido 1 ENTROKEN! El token del PROYECTO ENTROPÍA impulsado por la plataforma Steem-Engine.
1. Invierte en el PROYECTO ENTROPÍA y recibe ganancias semanalmente. Entra aquí para más información.
2. Contáctanos en Discord: https://discord.gg/hkCjFeb
3. Suscríbete a nuestra COMUNIDADEntra aquí para más información sobre nuestro trail. y apoya al trail de @Entropia y así podrás ganar recompensas de curación de forma automática.
4. Visita nuestro canal de Youtube.
Atentamente
El equipo de curación del PROYECTO ENTROPÍA
Thank you for sharing this post on HIVE!
Your content got selected by our fellow curator rezoanulvibes & you received a little thank you upvote from our non-profit curation initiative. Your post will be featured in one of our recurring curation compilations which is aiming to offer you a stage to widen your audience within the DIY scene of Hive.
Next time make sure to post / cross-post your creation within the DIYHub community on HIVE and you will receive a higher upvote!
Stay creative & hive on!