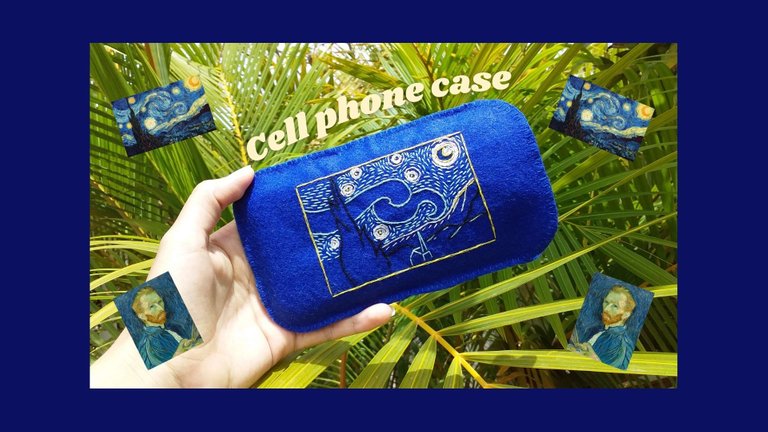
Bienvenidos | Welcome
Saludos a toda la hermosa comunidad de needleworkmonday:3 espero que estén muy bien y que estén teniendo una linda semana ❤ Hoy les comparto este post para mostrarles el proceso de cómo hice una linda funda para mi celular. Como muchos sabrán, me gusta darle algún toque especial a las cositas que hago para conseguir algo único, así que para esta ocasión, decidí hacer un diseño bordado, que en este caso fue del famoso cuadro de Vincent Van Gogh: "La noche estrellada"✨🌌 al principio me costó un par de veces conseguir lo que quería, pero al final todo quedó bastante bien. Si están interesados en hacer este bordado en lo que sea que quieran, como en camisetas, bolsos o pantalones, espero este post les ayude ❤.
Sin más preámbulos, comencemos.
Greetings to all the beautiful needleworkmonday community:3 I hope you are very well and that you are having a nice week ❤ Today I share with you this post to show you the process of how I made a cute case for my cell phone. As many of you may know, I like to give some a special touch to the little things I do to get something unique, so for this occasion, I decided to make an embroidered design, which in this case was from the famous painting of Vincent Van Gogh: "The starry night"✨🌌 at first it took me a couple of times to get what I wanted, but in the end everything turned out pretty well. If they are interested in doing this embroidery on whatever you want, like on t-shirts, bags or pants, I hope this post helps you ❤.
Without further ado, let's get started.
Materiales | Materials:
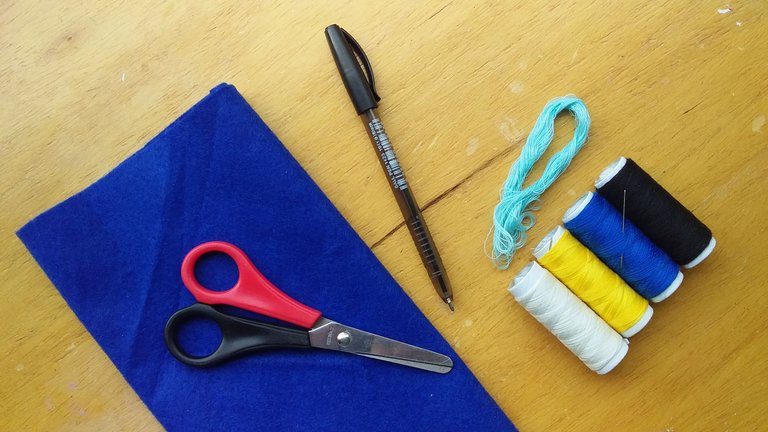
| Fieltro azul | Hilos y aguja | Tijeras |
|---|---|---|
| Lápiz |
| Blue felt | Threads and needle | Scissors |
|---|---|---|
| Pencil |
🌌Proceso | Process🌌
Paso 1 | Step 1
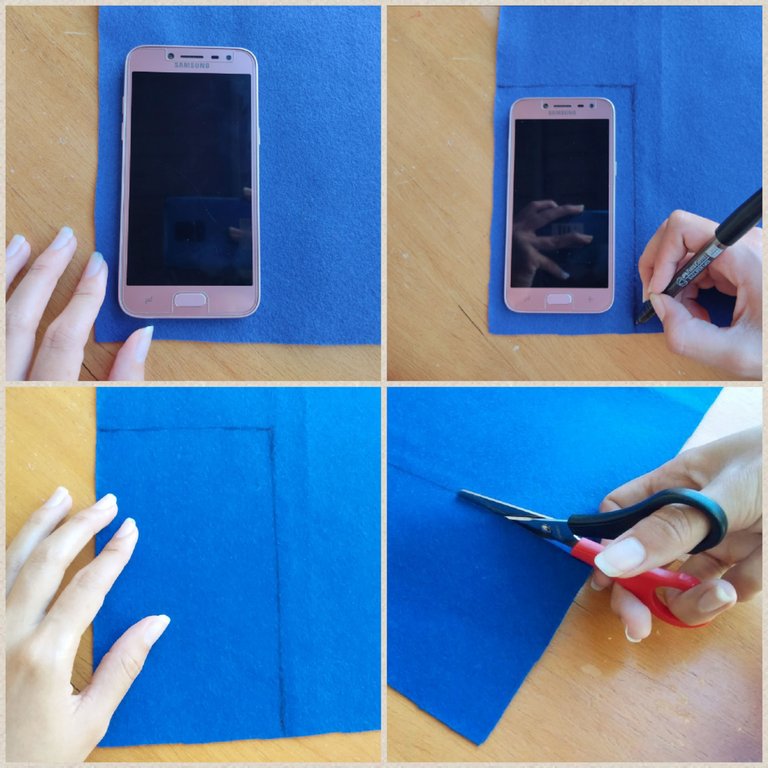
Lo primero que hice fue ubicar mi celular sobre el fieltro y luego dibujé un rectángulo alrededor.
The first thing I did was to place my cell phone on the felt and then I drew a rectangle around it.
Paso 2 | Step 2
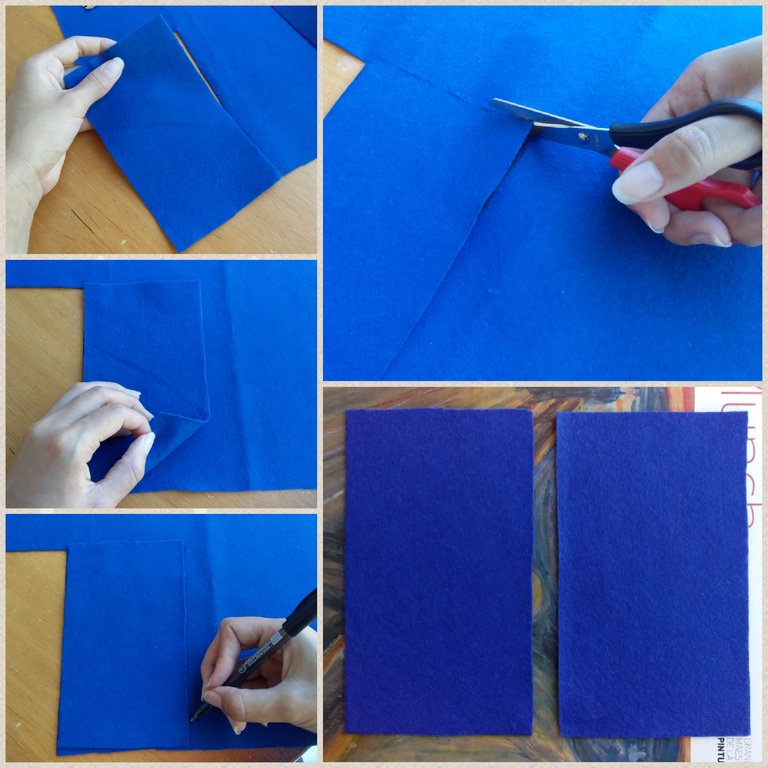
Corté el primer rectángulo y lo ubiqué nuevamente sobre la tela para marcarlo, cortarlo y así tener 2 piezas iguales.
I cut the first rectangle and placed it again on the fabric to mark it, cut it and thus have 2 equal pieces.
Paso 3 | Step 3
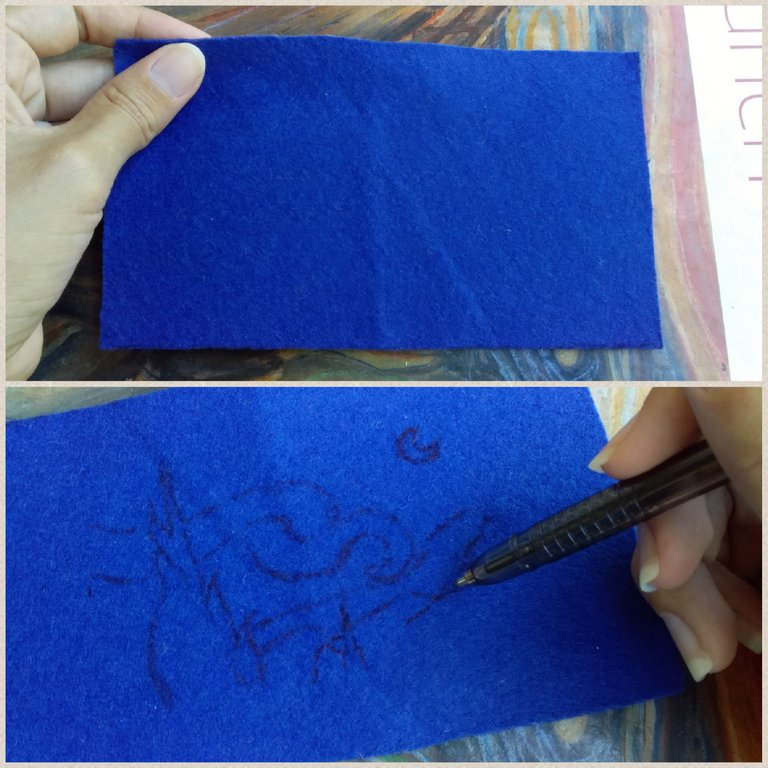
Tomé una de ellas y empecé a bocetear el cuadro. Una de las dificultades que les contaba al principio era que hacía el boceto muy grande, casi abarcando toda la pieza y me preocupaba por detalles. Al final me decidí por hacerlo mucho más pequeño, lo más centrado posible y tomando solo los elementos más importantes como la luna, las estrellas y el pino que está a un lado; y una que otra casita (no todas).
I took one of them and started to sketch the painting. One of the difficulties I was telling you at the beginning was that I made the sketch very big, almost covering the whole piece and I was worried about details. In the end I decided to make it much smaller, as centered as possible and taking only the most important elements such as the moon, the stars and the pine tree on one side; and one or two little houses (not all of them).
Paso 4 | Step 4
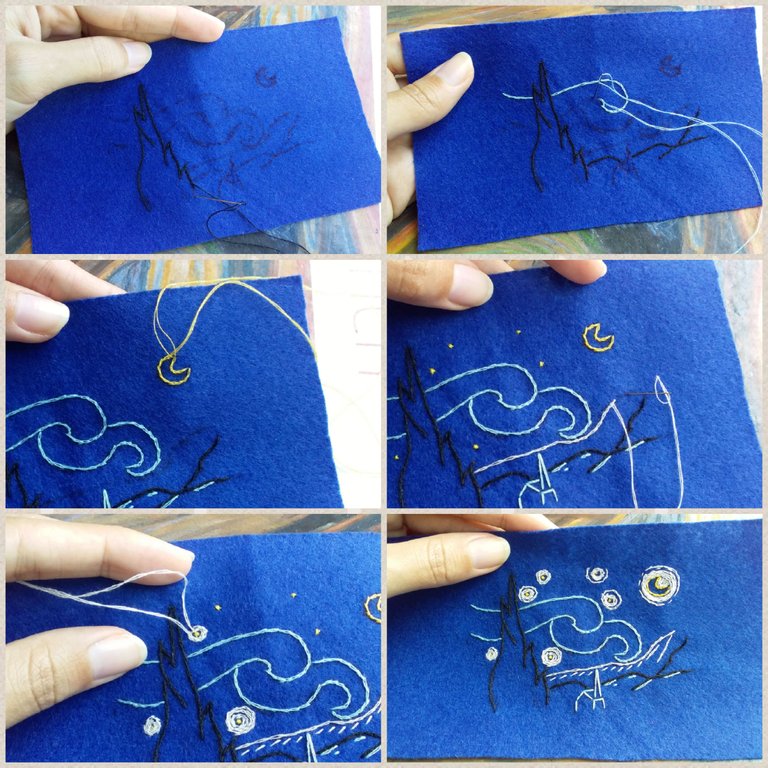
Con una puntada split bordé todo el boceto, sin rellenar, solo un poco en las estrellas y en la luna (por fuera) para dar un toque de luz.
With a split stitch I embroidered the whole sketch, without filling, just a little on the stars and the moon (on the outside) to give a touch of light.
Paso 5 | Step 5
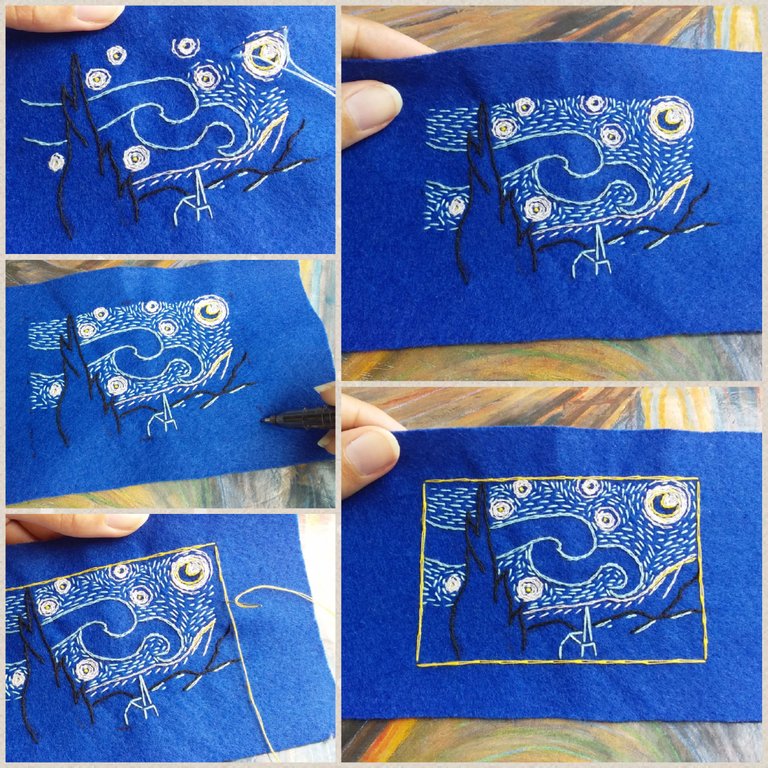
Continué haciendo unas puntadas en el fondo siguiendo la forma las estrellas, la luna y los remolinos de viento, para dar ese efecto de movimiento tan característico que tiene la noche estrellada. Luego, finalmente, cerré todo en un rectángulo amarillo.
I continued by making some stitches in the background following the shape of the stars, the moon and the wind swirls, to give that effect of movement so characteristic of the starry night. Then, finally, I closed everything in a yellow rectangle.
Paso 6 | Step 6
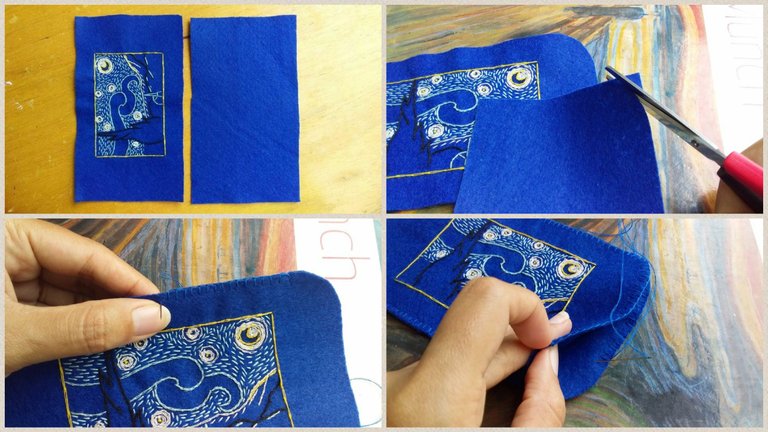
Una vez terminé de bordar, tomé ambas piezas de fieltro y les redondeé las esquinas, luego las junté y cosí por fuera, dejando la abertura para que entrara el celular y listo.
Once I finished embroidering, I took both pieces of felt and rounded the corners, then put them together and sewed them on the outside, leaving the opening for the cell phone to enter and that was it.
🌌Resultado | Result🌌
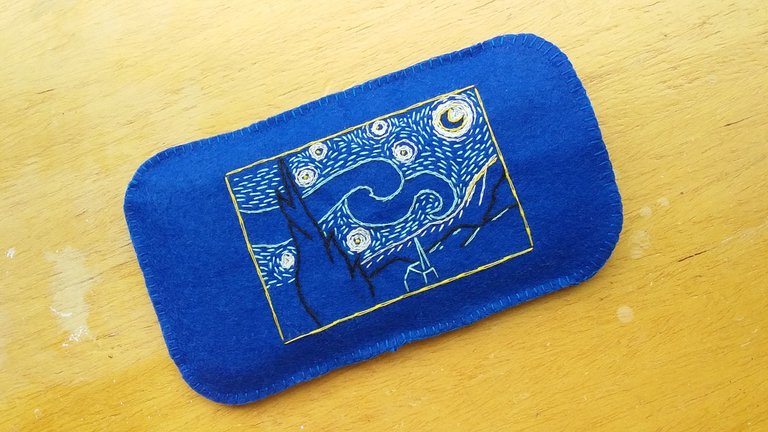
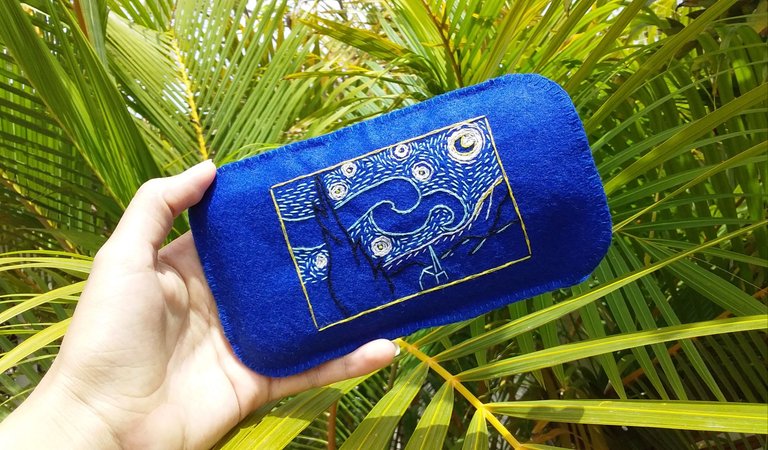
Y este es el resultado.
En lo personal me gustó mucho este estilo lineal, se ve sencillo pero elegante(? En los primeros intentos quise hacerlo todos rellenos, pero no terminaron viéndose así de bien como este.
Espero que les haya gustado, muchas gracias por leerme.❤
And this is the result.
Personally I really liked this linear style, it looks simple but elegant(? In the first attempts I wanted to make them all filled, but they didn't end up looking as good as this one.
I hope you liked it, thank you very much for reading me.

Congratulations @paugomez! You have completed the following achievement on the Hive blockchain and have been rewarded with new badge(s):
Your next target is to reach 60 posts.
You can view your badges on your board and compare yourself to others in the Ranking
If you no longer want to receive notifications, reply to this comment with the word
STOPTo support your work, I also upvoted your post!
Check out the last post from @hivebuzz:
Support the HiveBuzz project. Vote for our proposal!
Wow beautiful thank for sharing
Thank uu :3
Oh por Dios te quedo demasiado bello, es que esa "Noche estrellada" tiene su toque magico, gracias por compartir
Aaaa gracias por leer y por tu lindo comentario c:💖
OMG ❣️ que lindo 🤩❤️❤️. Te quedó genial, el bordado tiene todos los detalles necesarios para reconocer la obra. Que genial que lo hayas incluído en esta funda, lo podrás apreciar seguido ❣️.
Exactoo 💖 creeme que me encantó, cada vez que la veo me emociono jajajjs gracias c: ✨
Que bonito y artístico es esta funda para celular amiga!
Realmente admirable tu trabajo me gusto mucho!
Saludos!