Good afternoon friends, I hope you are enjoying the week 🥰🙋🏻♀️
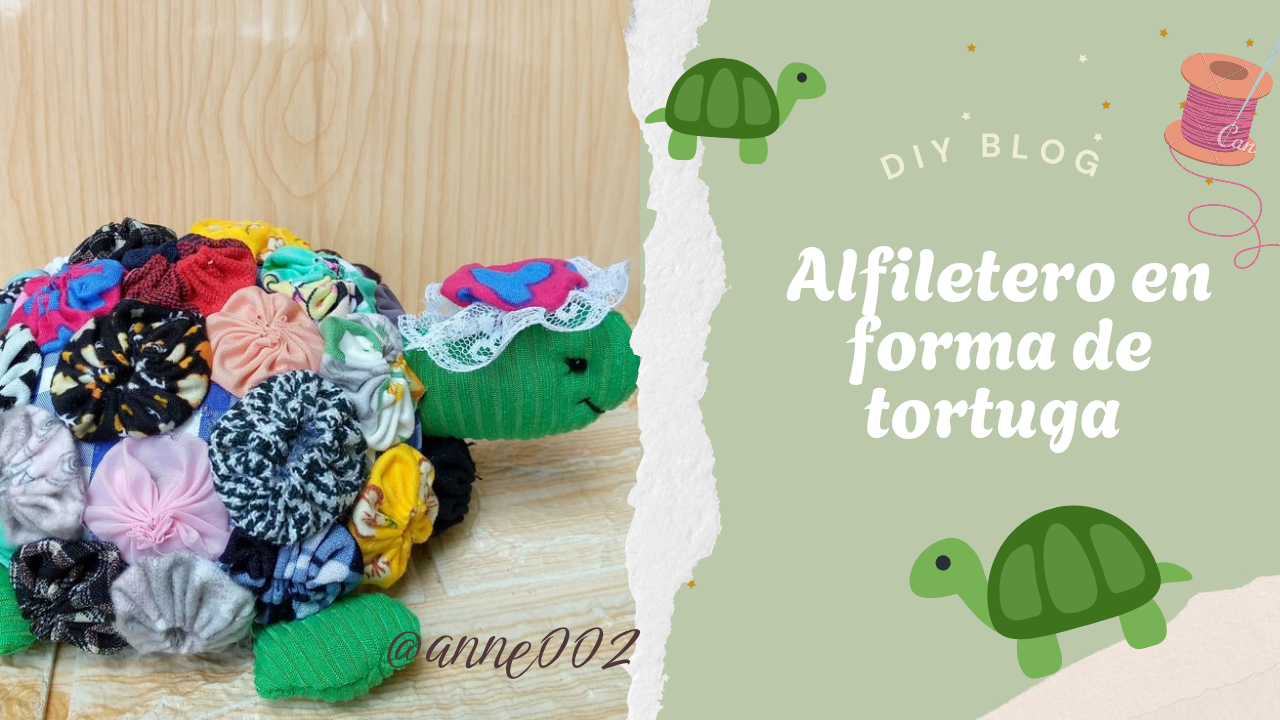
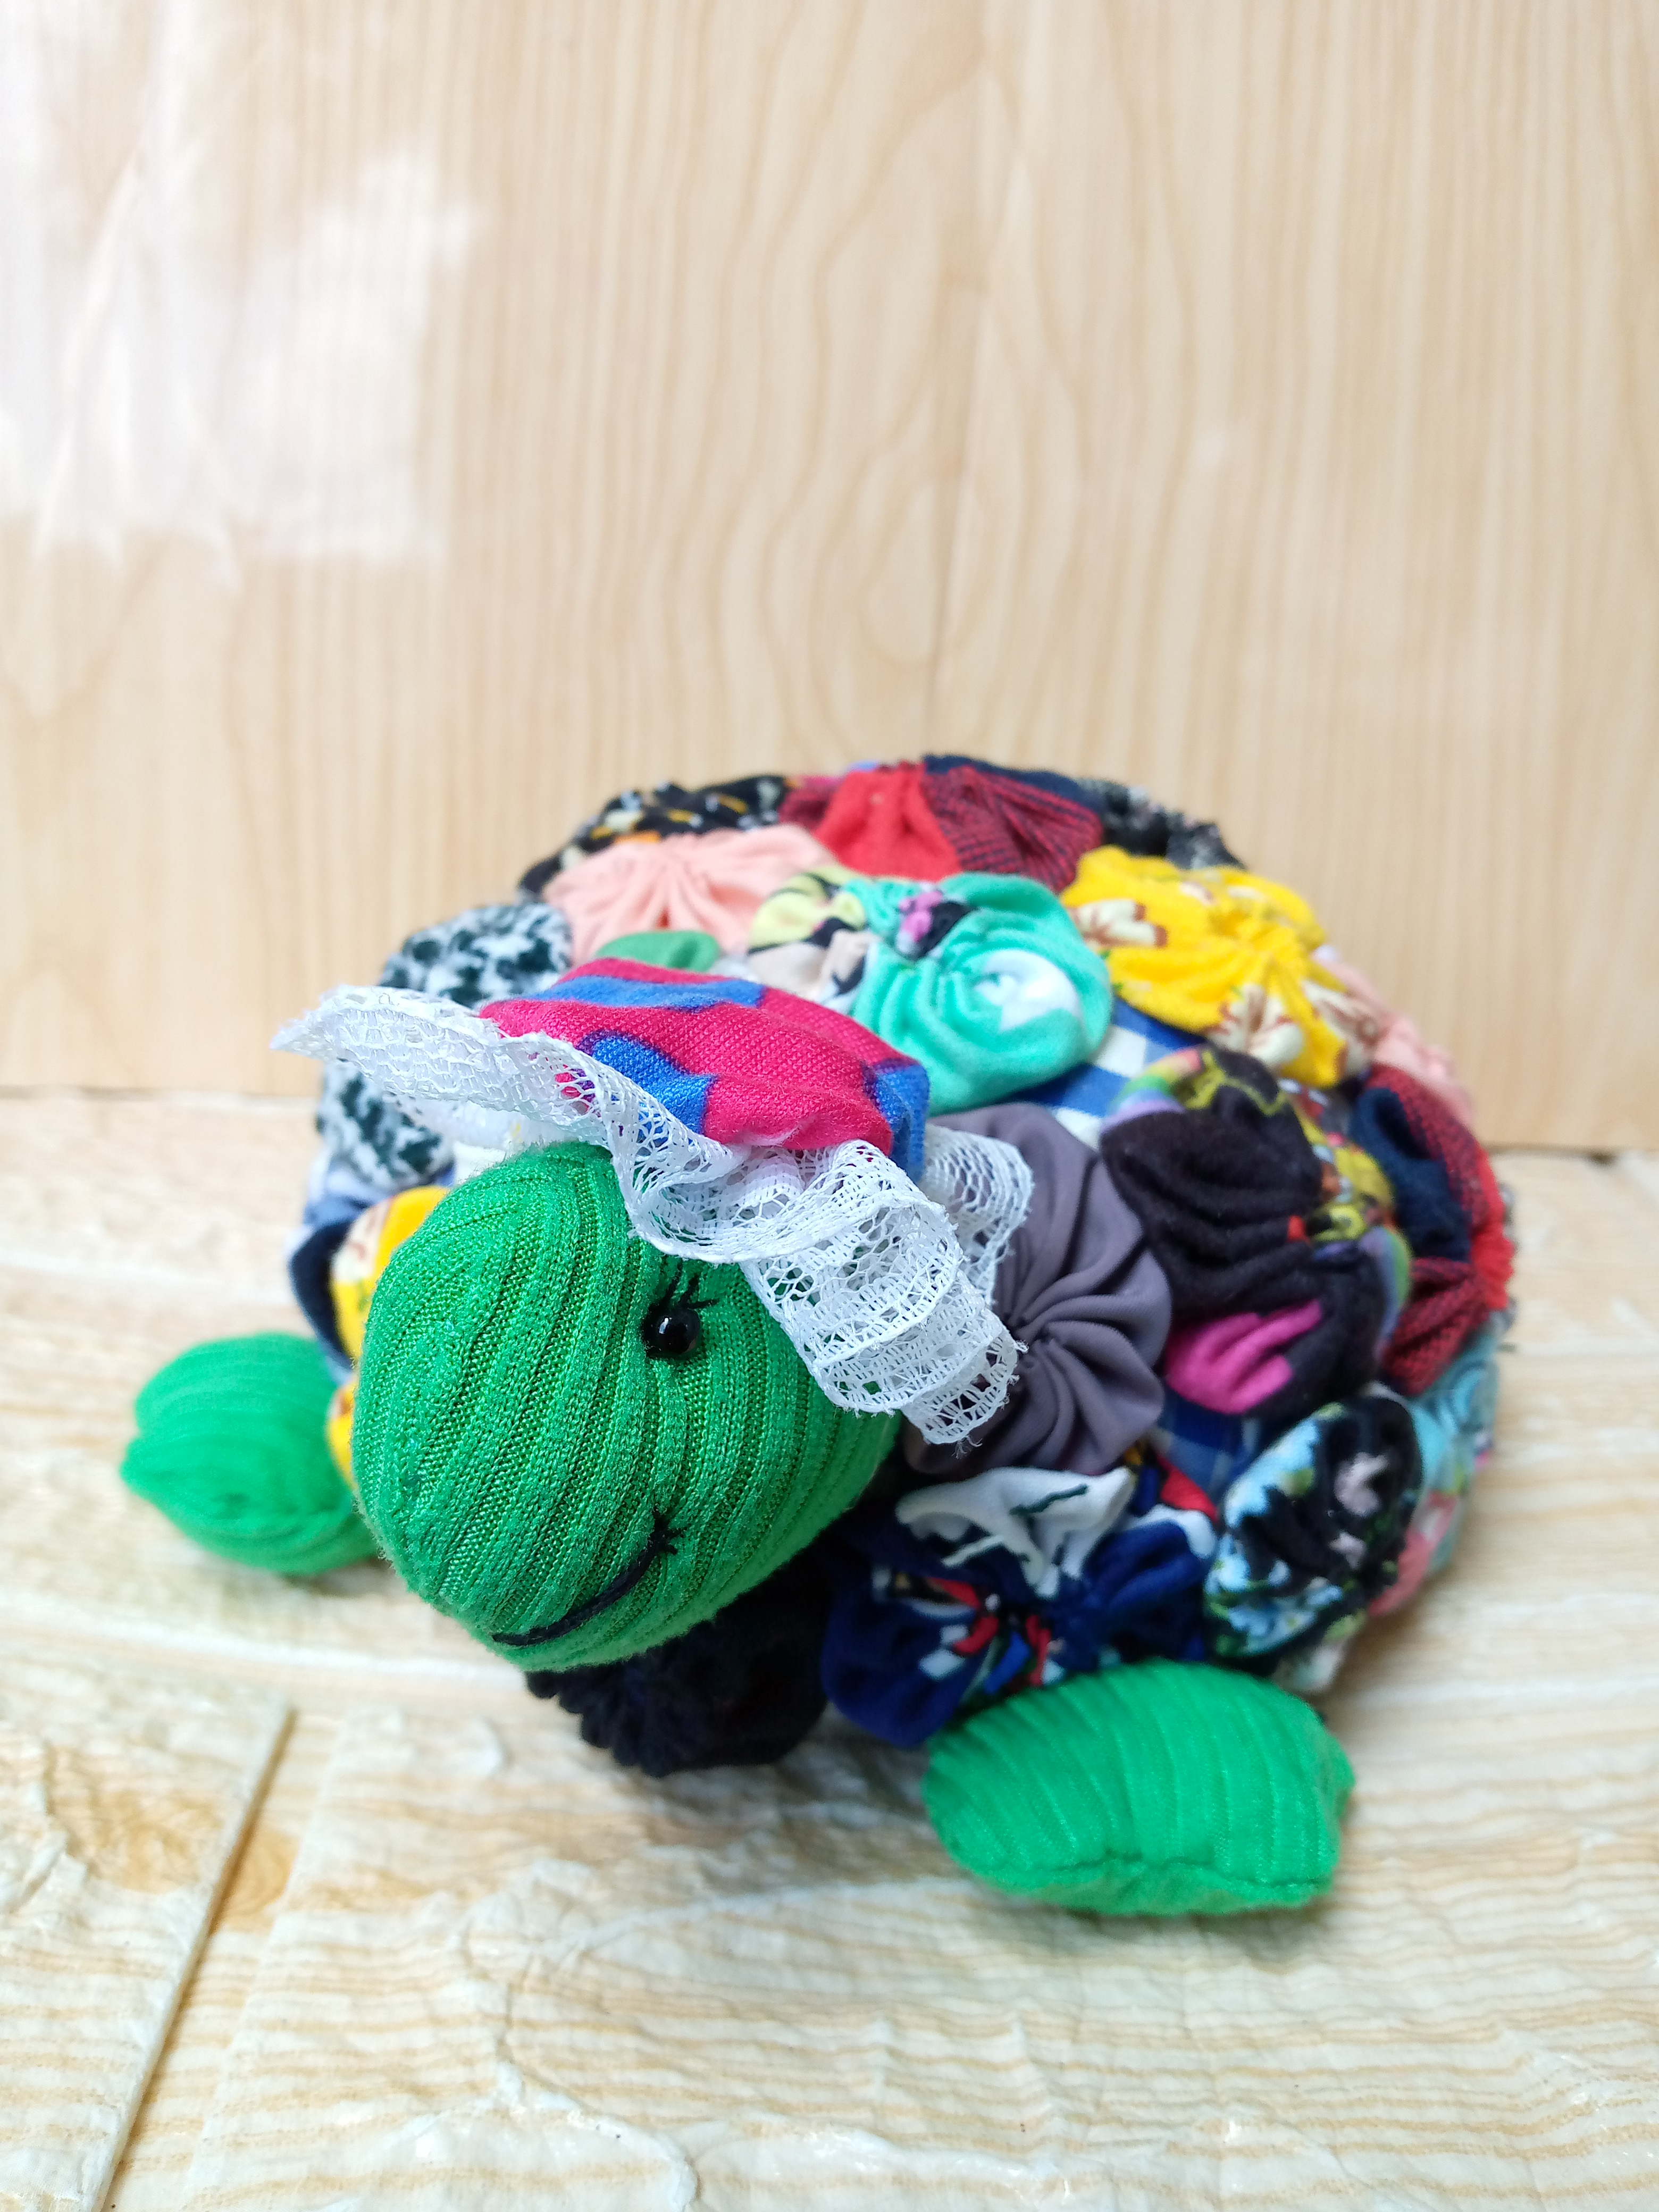
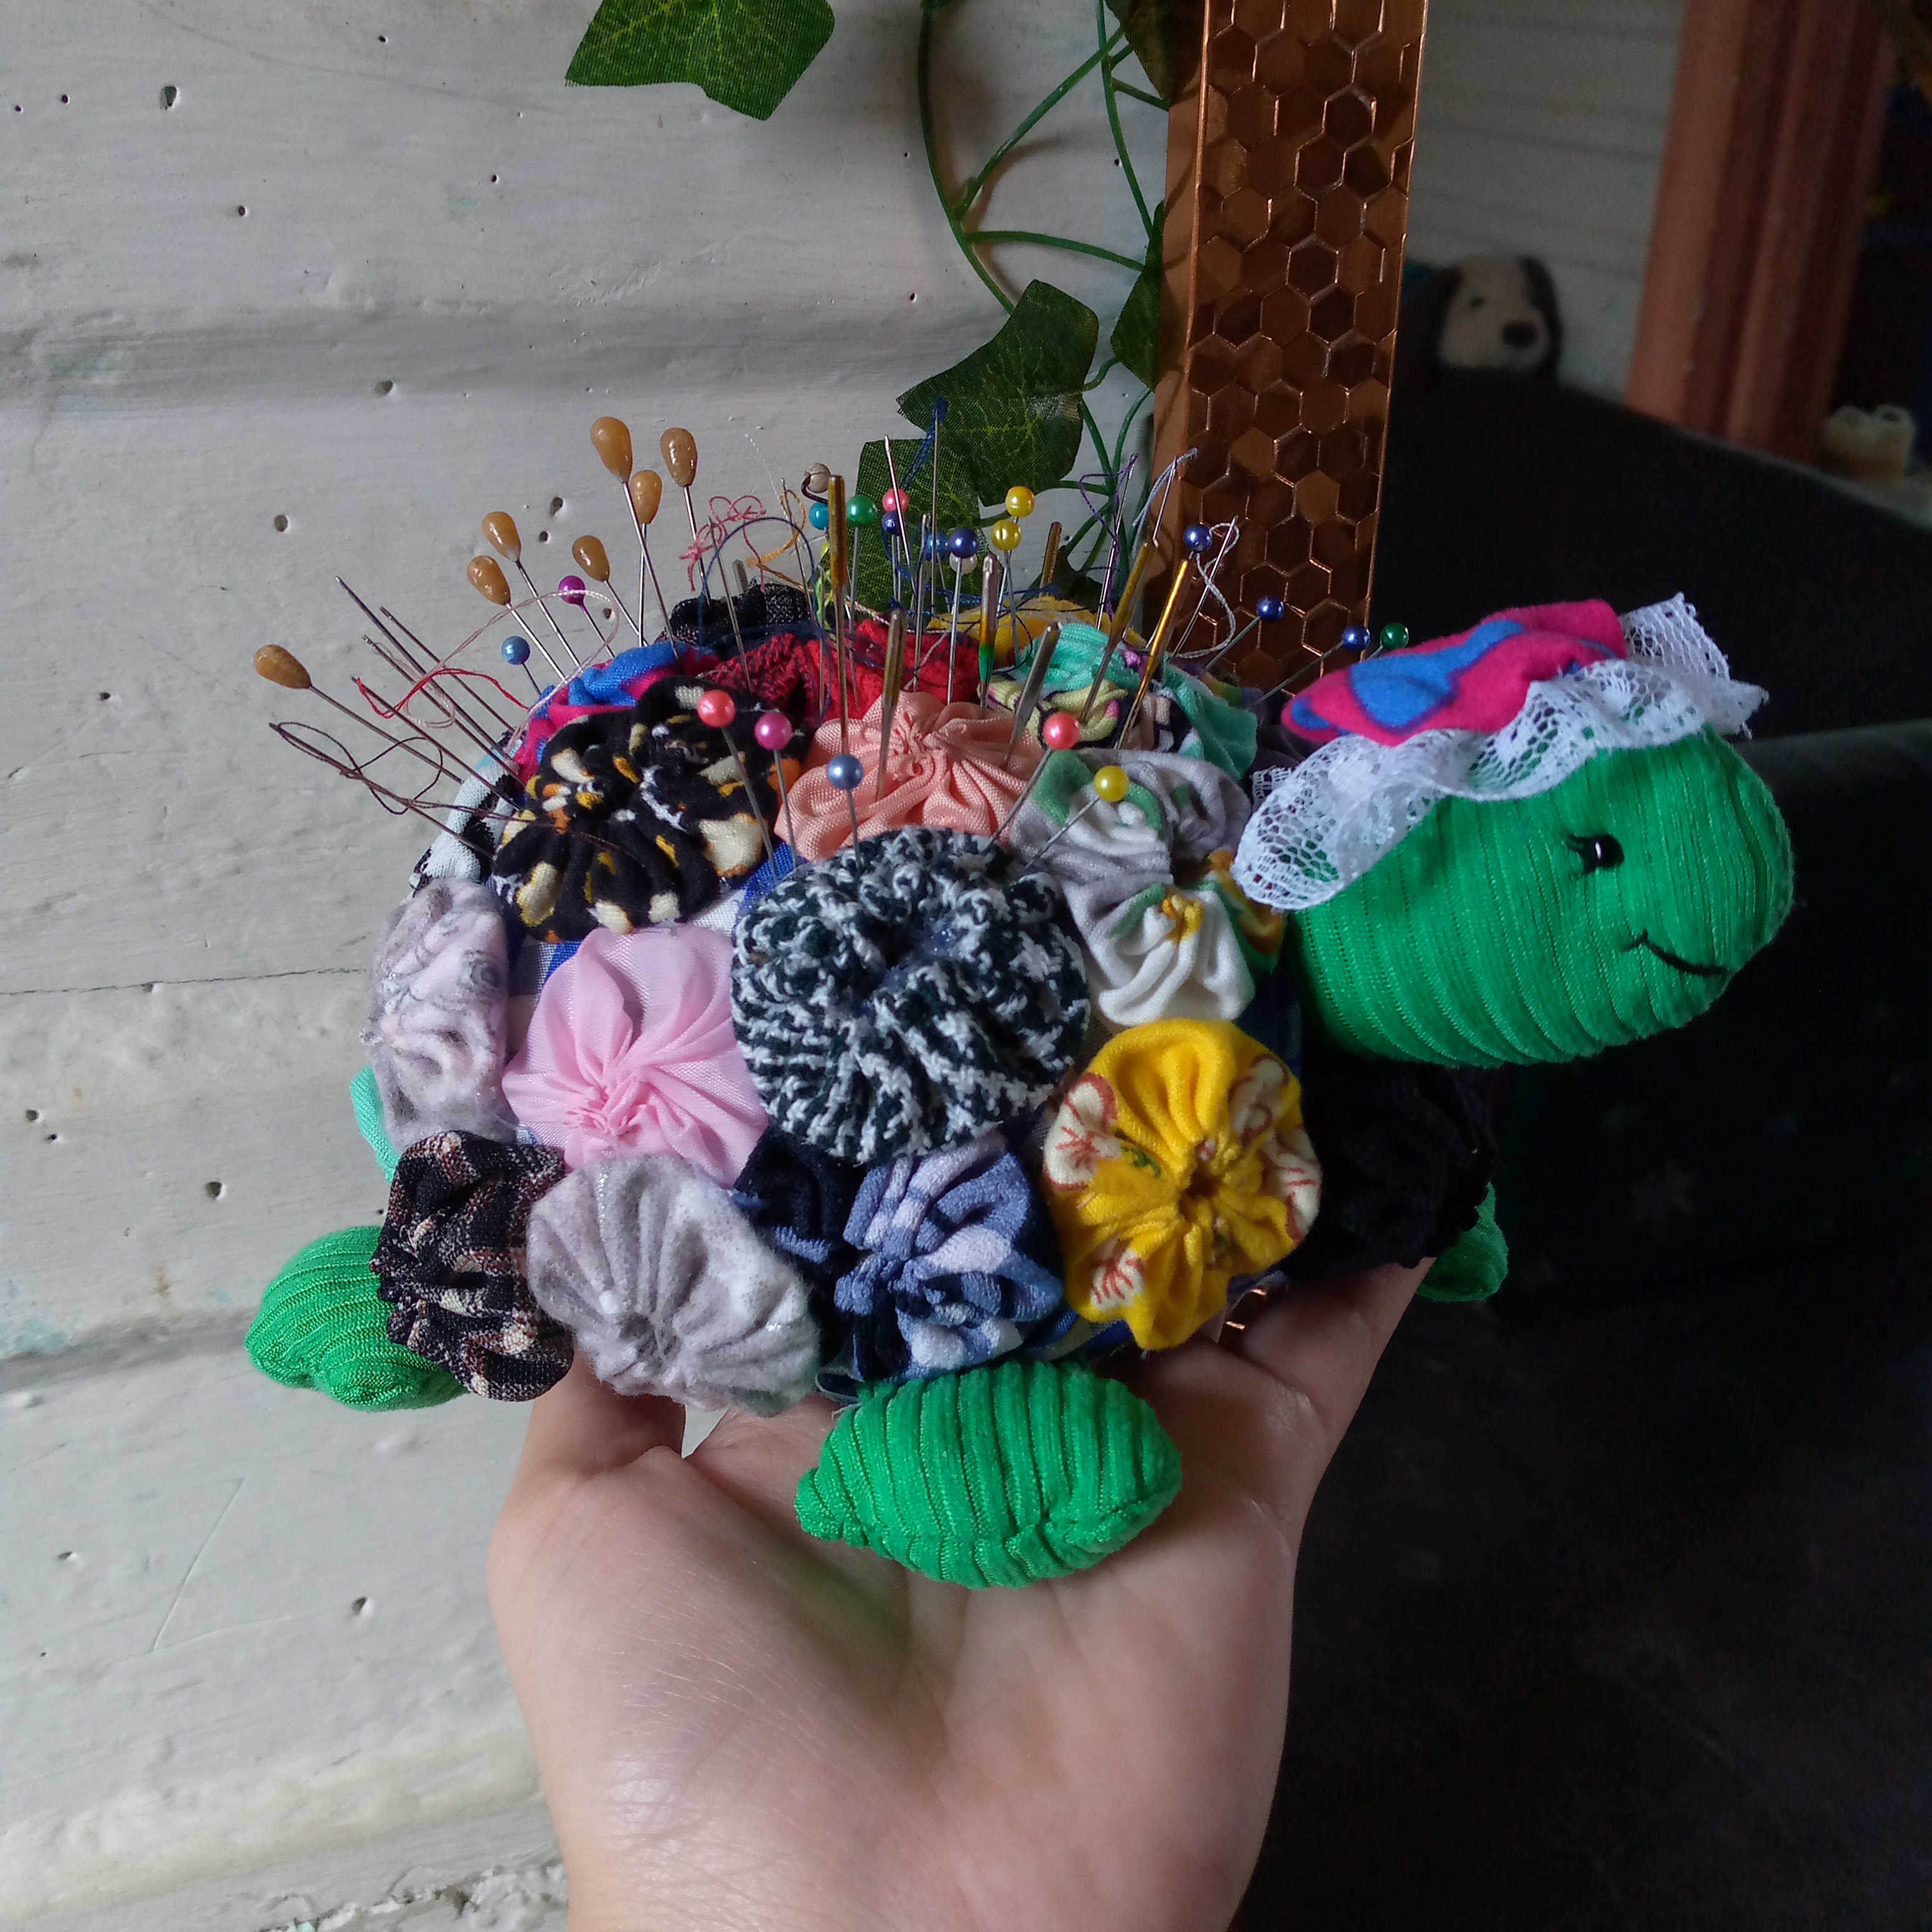
I want to show you how to make this beautiful little turtle with scraps of fabric that I know you have at home. I know you like these types of materials and so do I. That's why I brought you this simple tutorial so that you can also make it and thus have your pins in a more organized way. Although I know that most pincushions made with sponge have needles that tend to go inside and we always end up losing them there and that it's a little dangerous when those needles go to the bottom because we could prick our fingers trying to get them out.

Let's go with the materials, dear friends, and appreciate the process. I would be happy to know later what you think of these ideas for your pins and how you could do it in the comfort of your home.
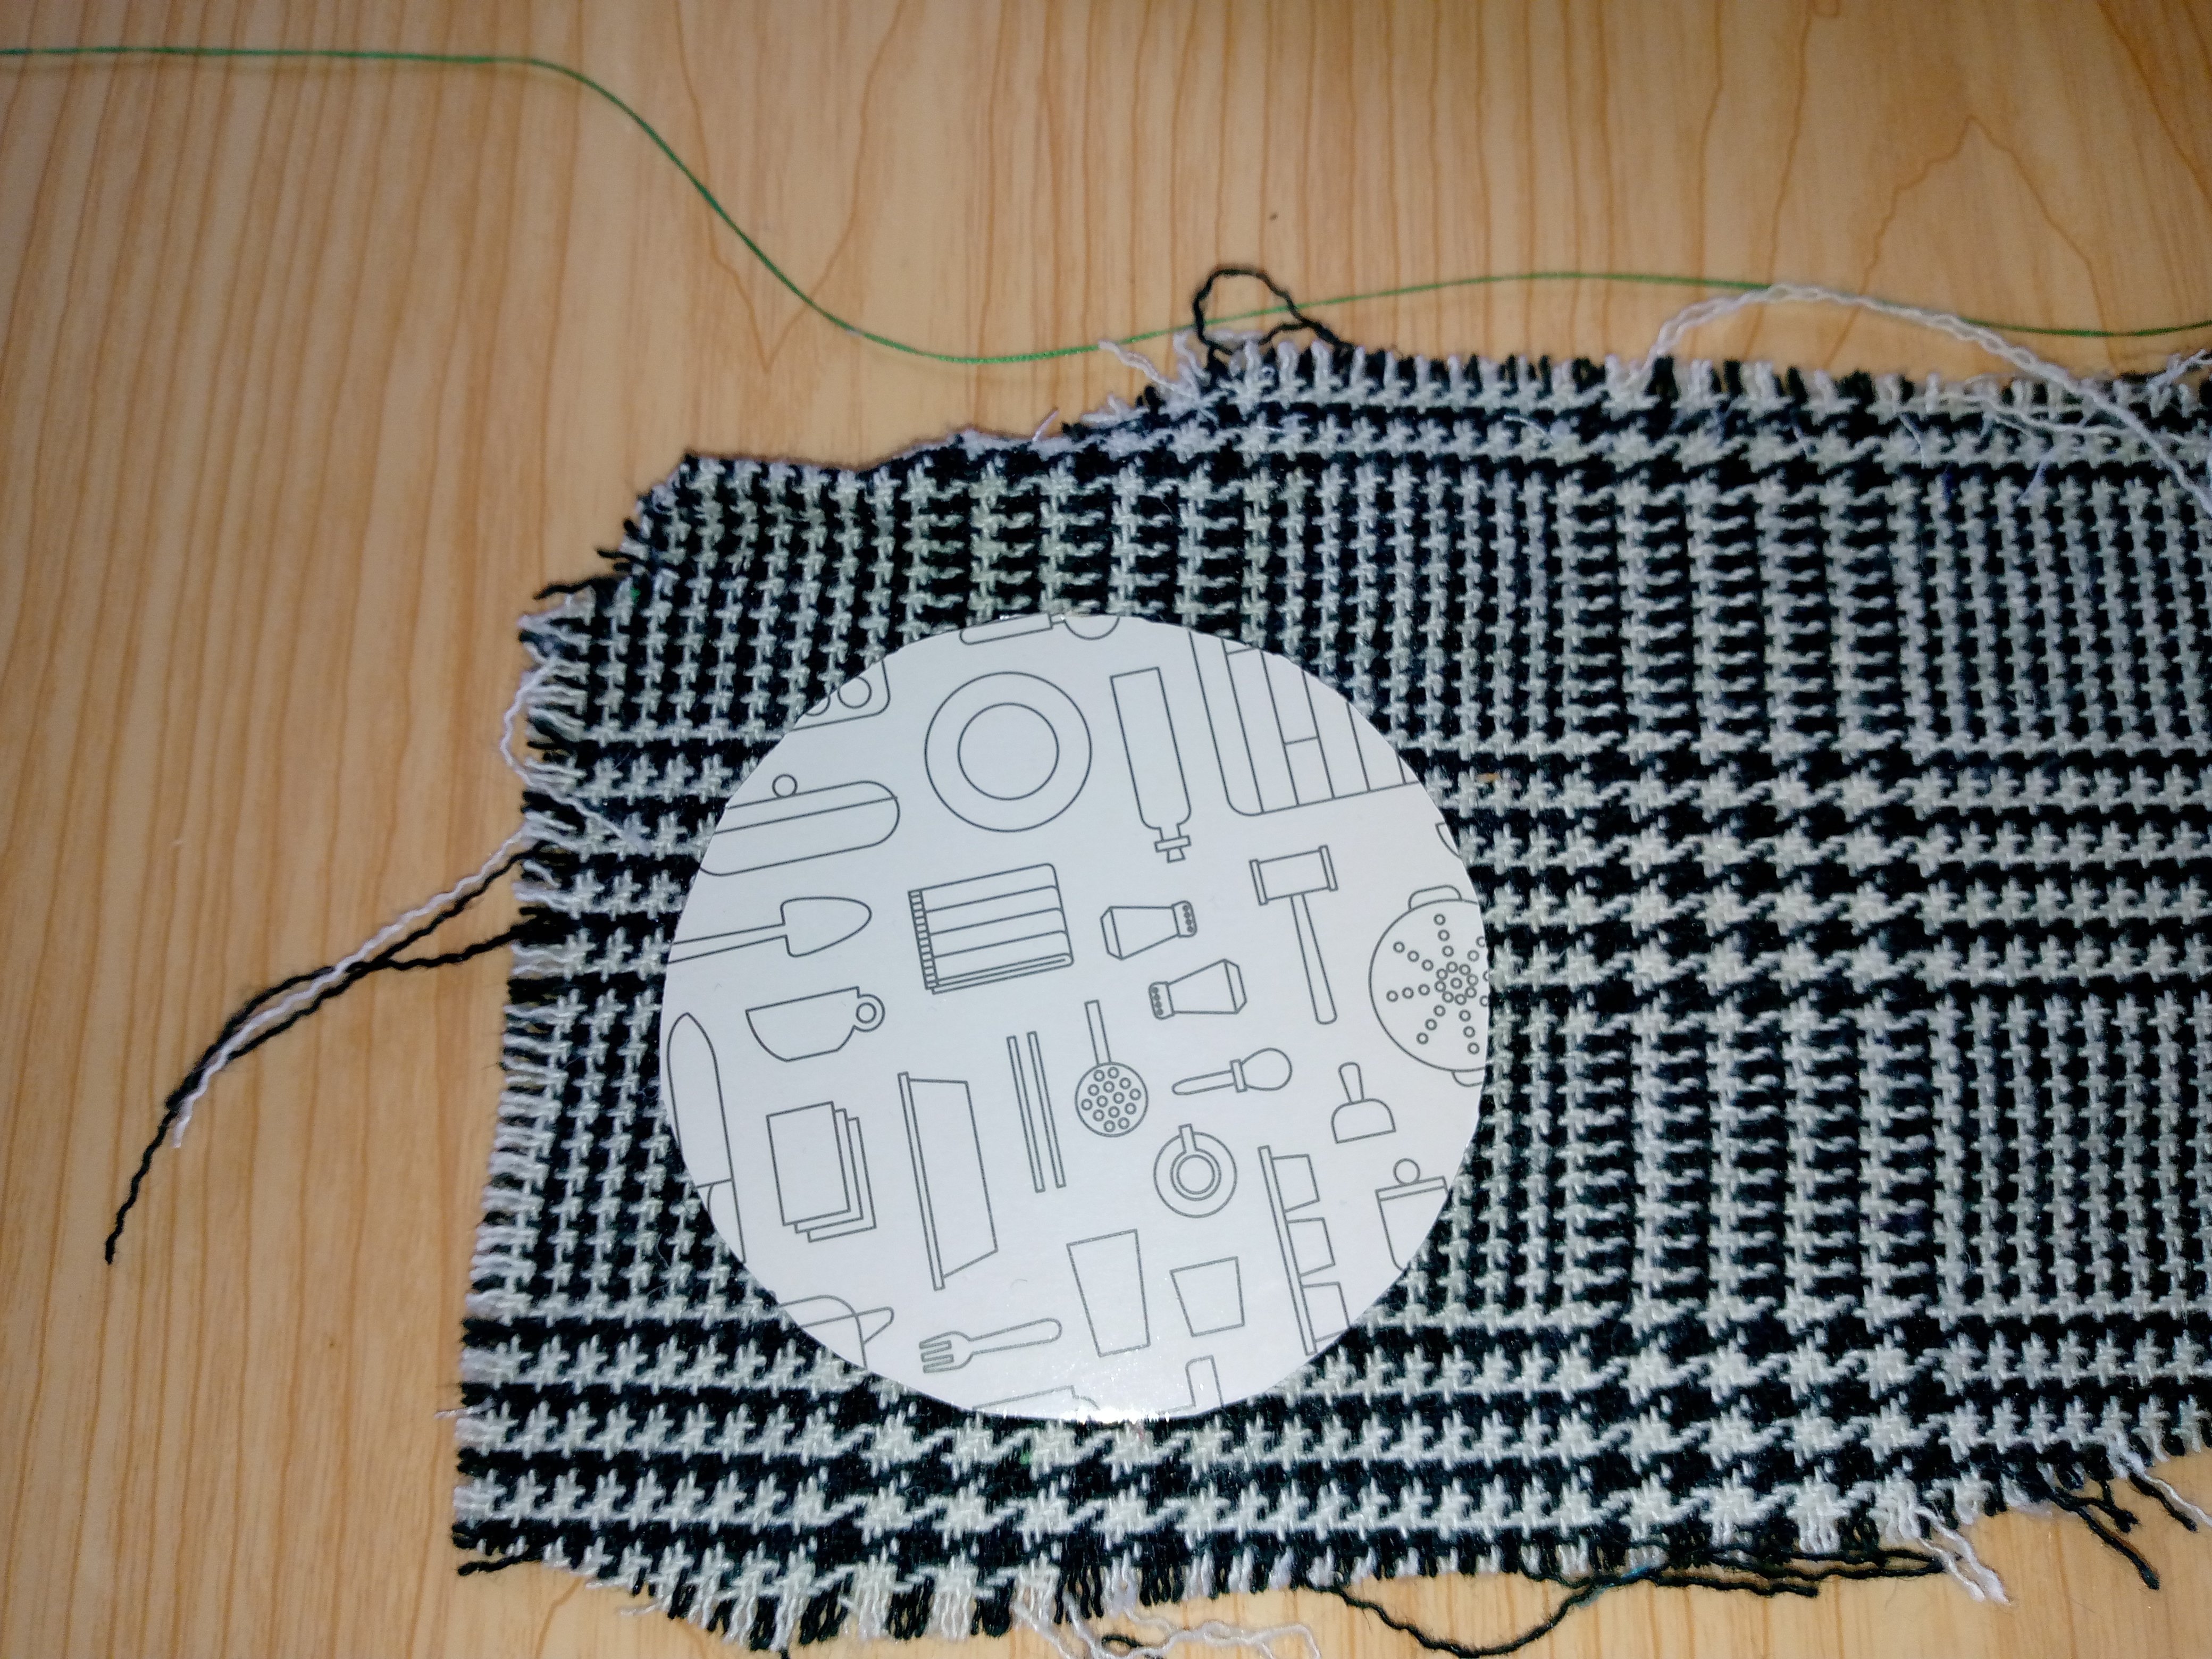
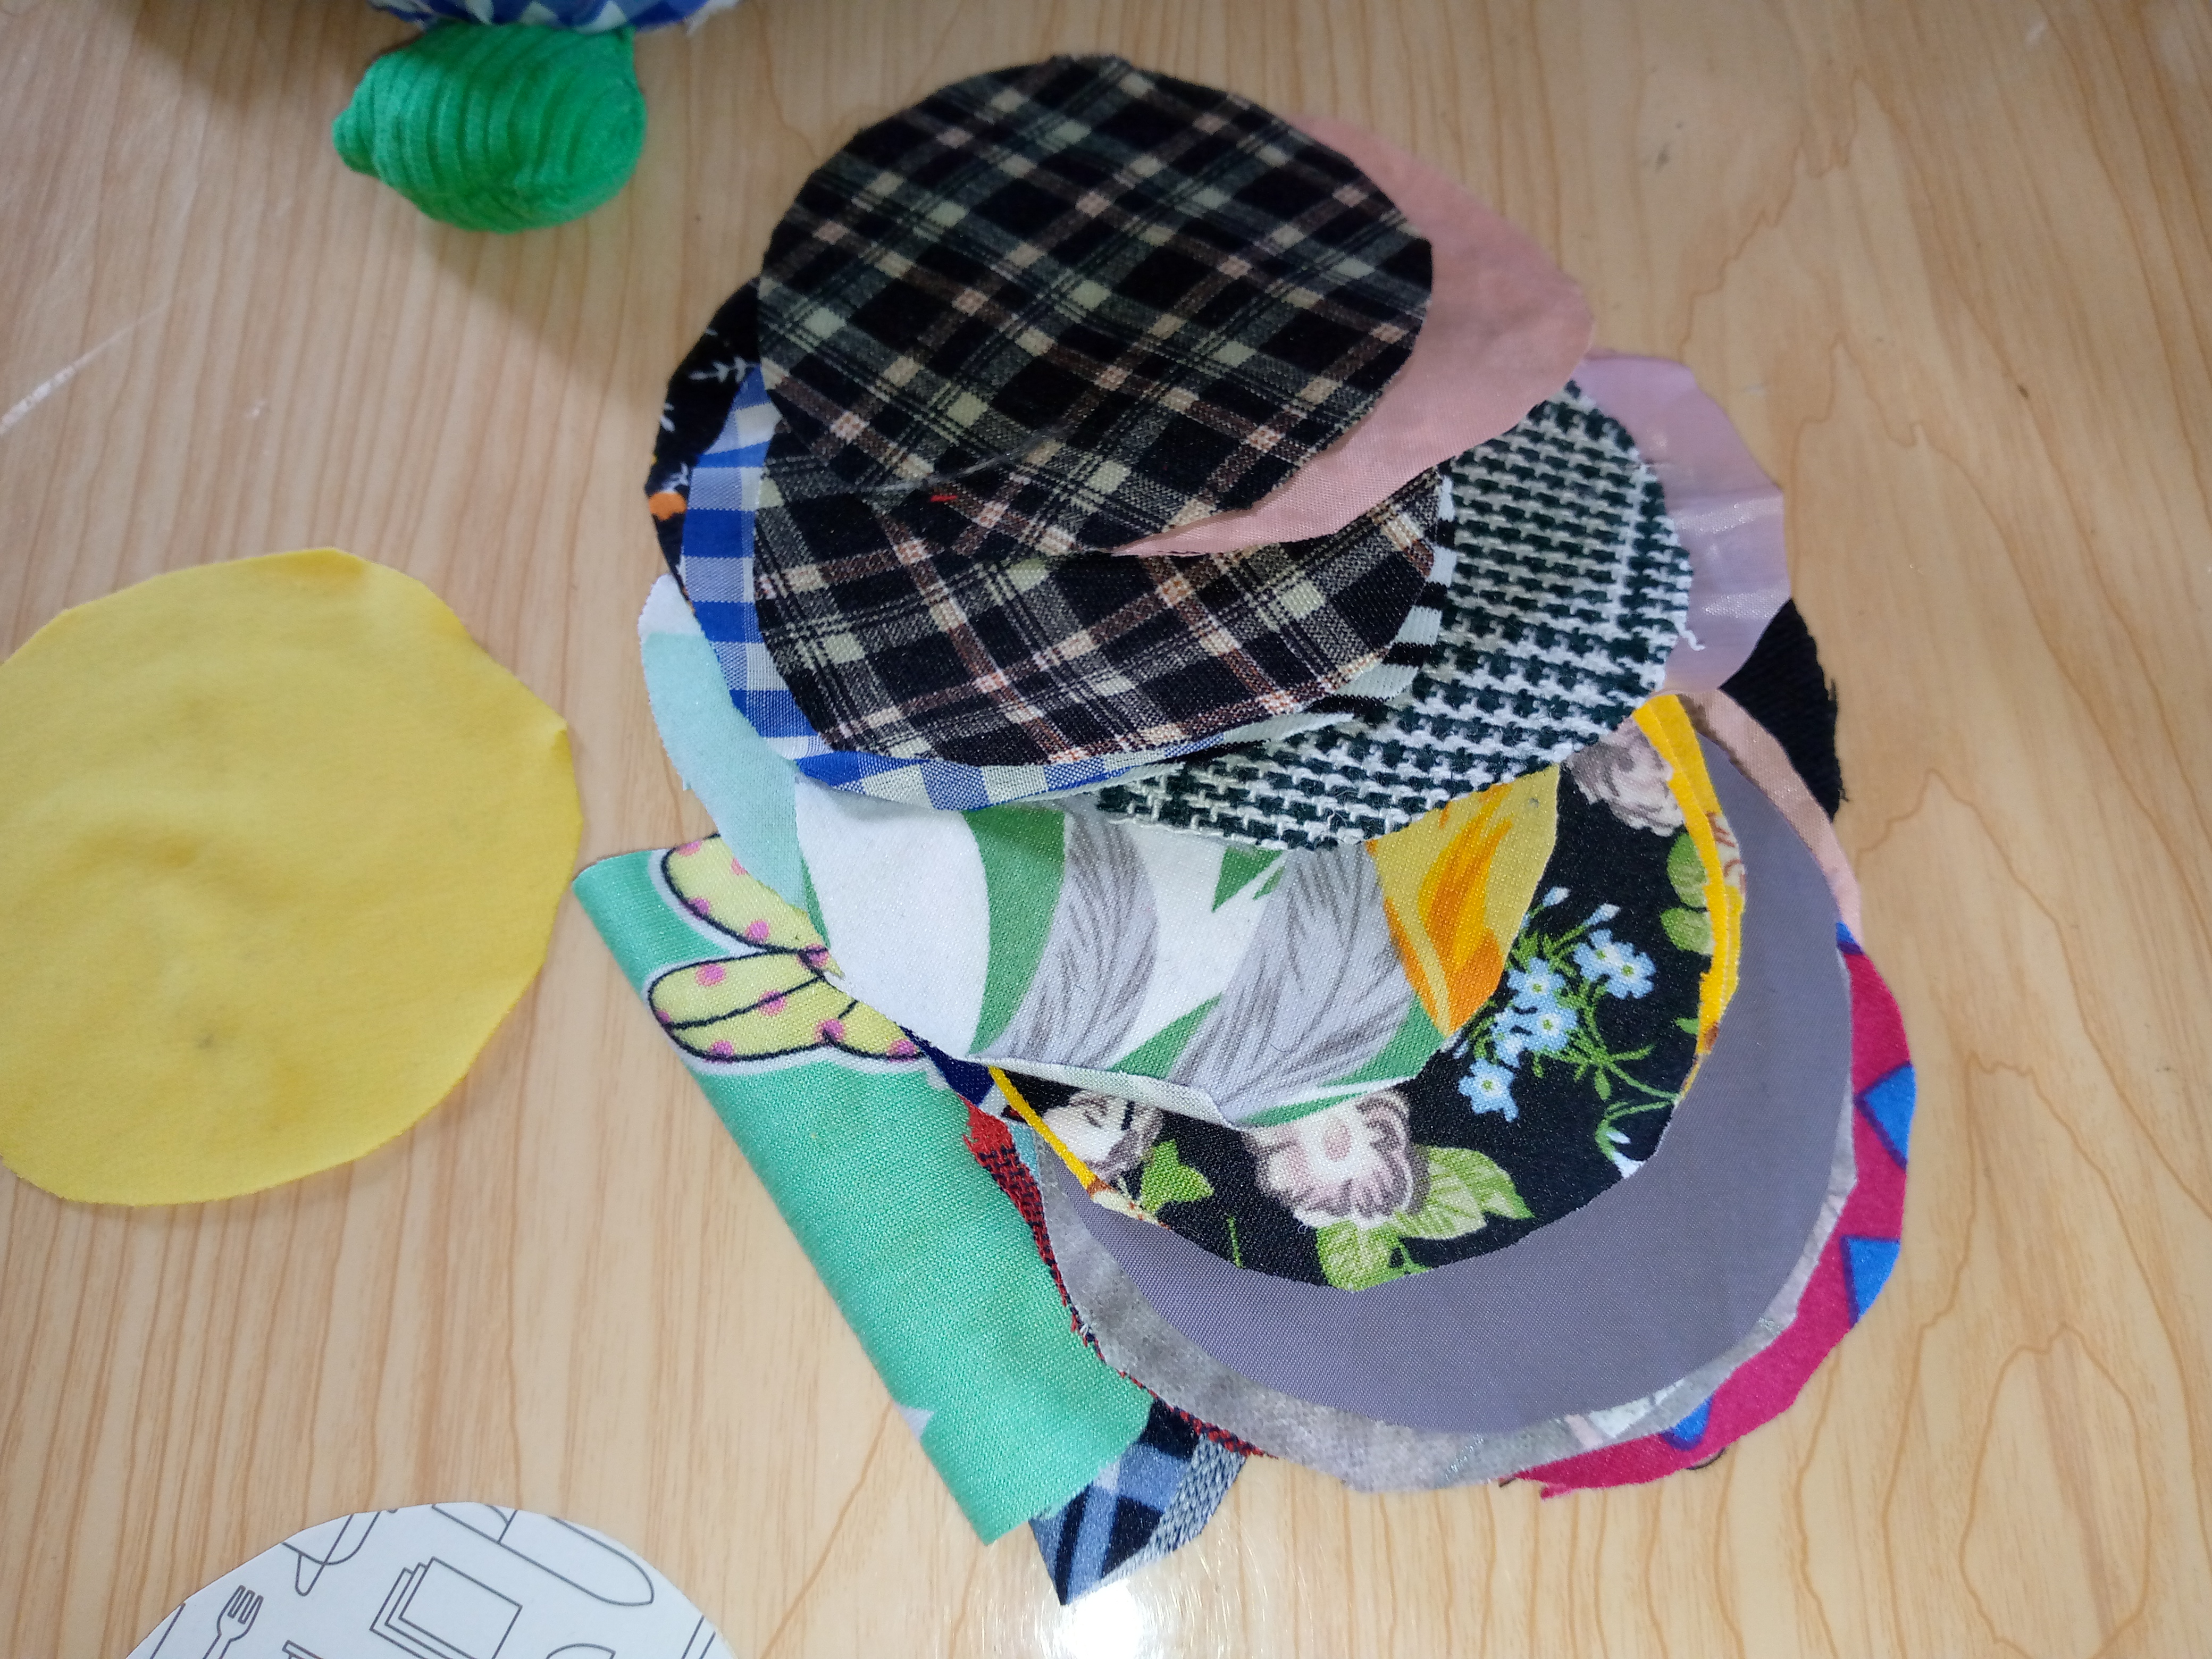
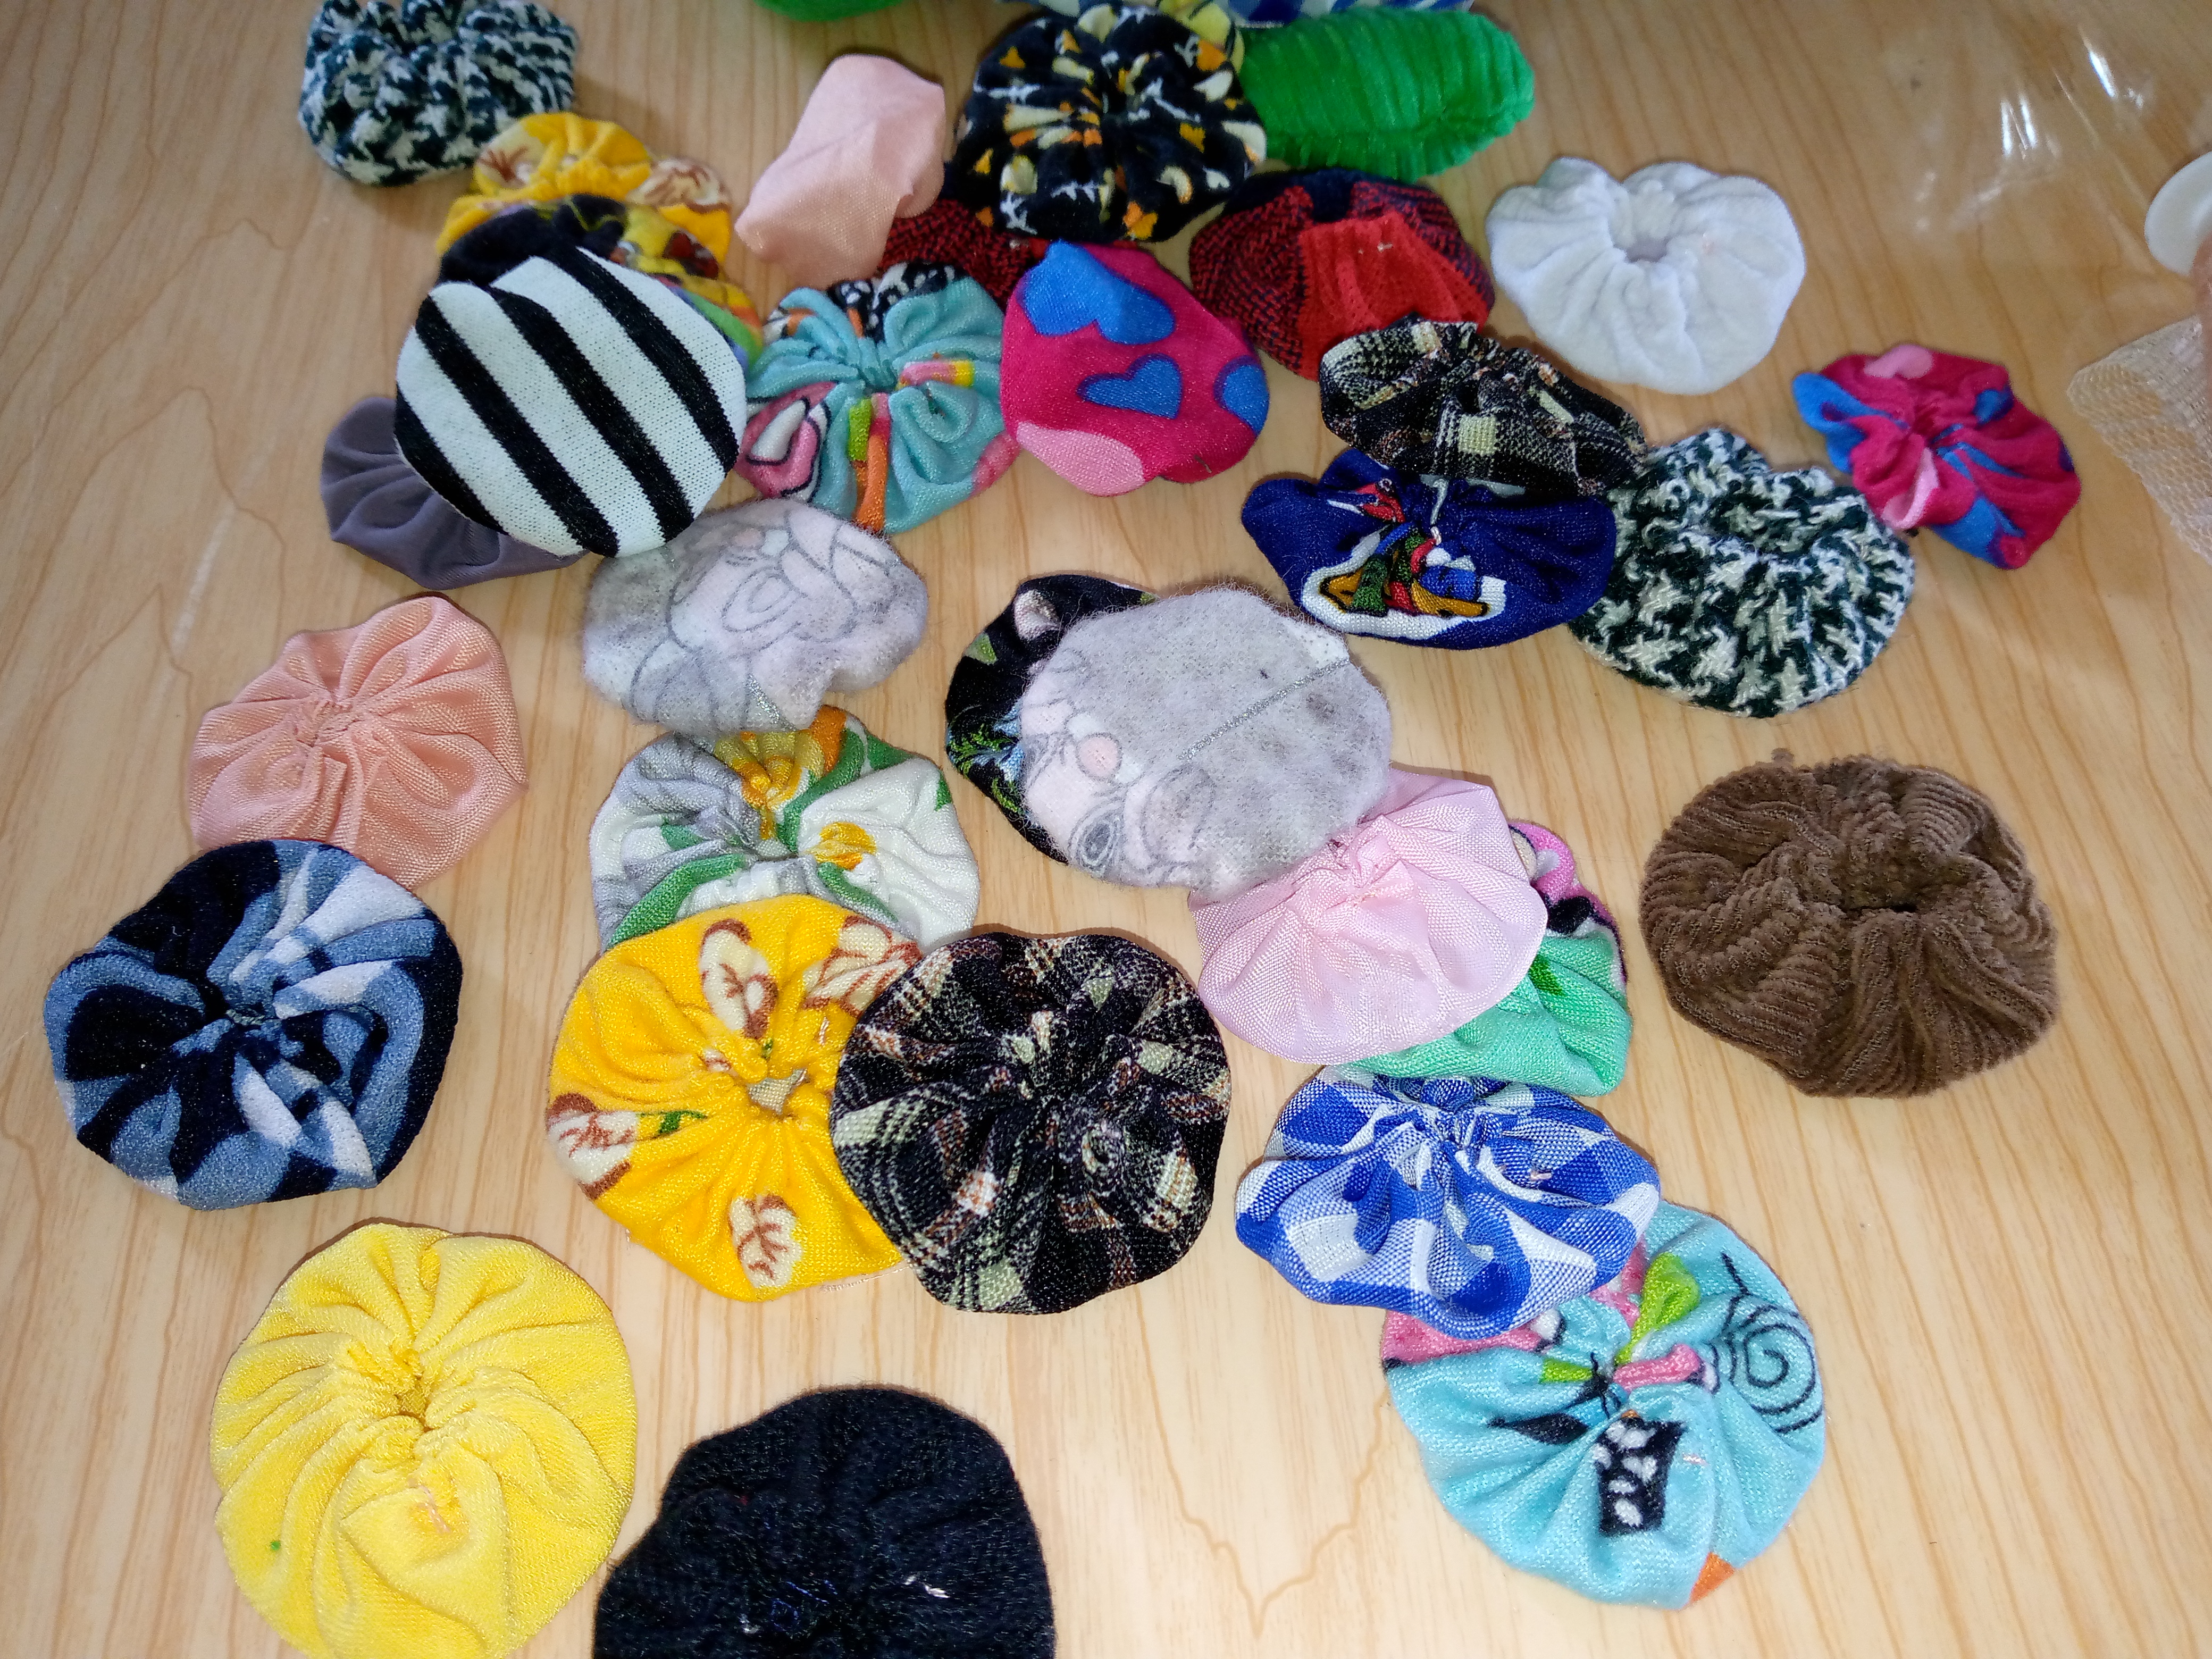
We will be recycling those scraps of fabric that we have at home even if they are very small because we will make circles of fabric to cover and make the shell of our little turtle with those small scraps of fabric. If you have enough of these, then the time has come to use them🥰🧵🪡
Materiales:// Materials:
- Retazos de tela de diferentes colores
- Silicón caliente
- Tijeras
- Relleno para muñecos
- Aguja e hilo
- 2 Piedritas negras
- Mitad de esfera de telgopor
- Patrones
- Scraps of fabric in different colors
- Hot glue
- Scissors
- Stuffing for dolls
- Needle and thread
- 2 black stones
- Half a styrofoam sphere
- Patterns
Pasos a seguir://Steps to follow:


Paso 01
Step 01
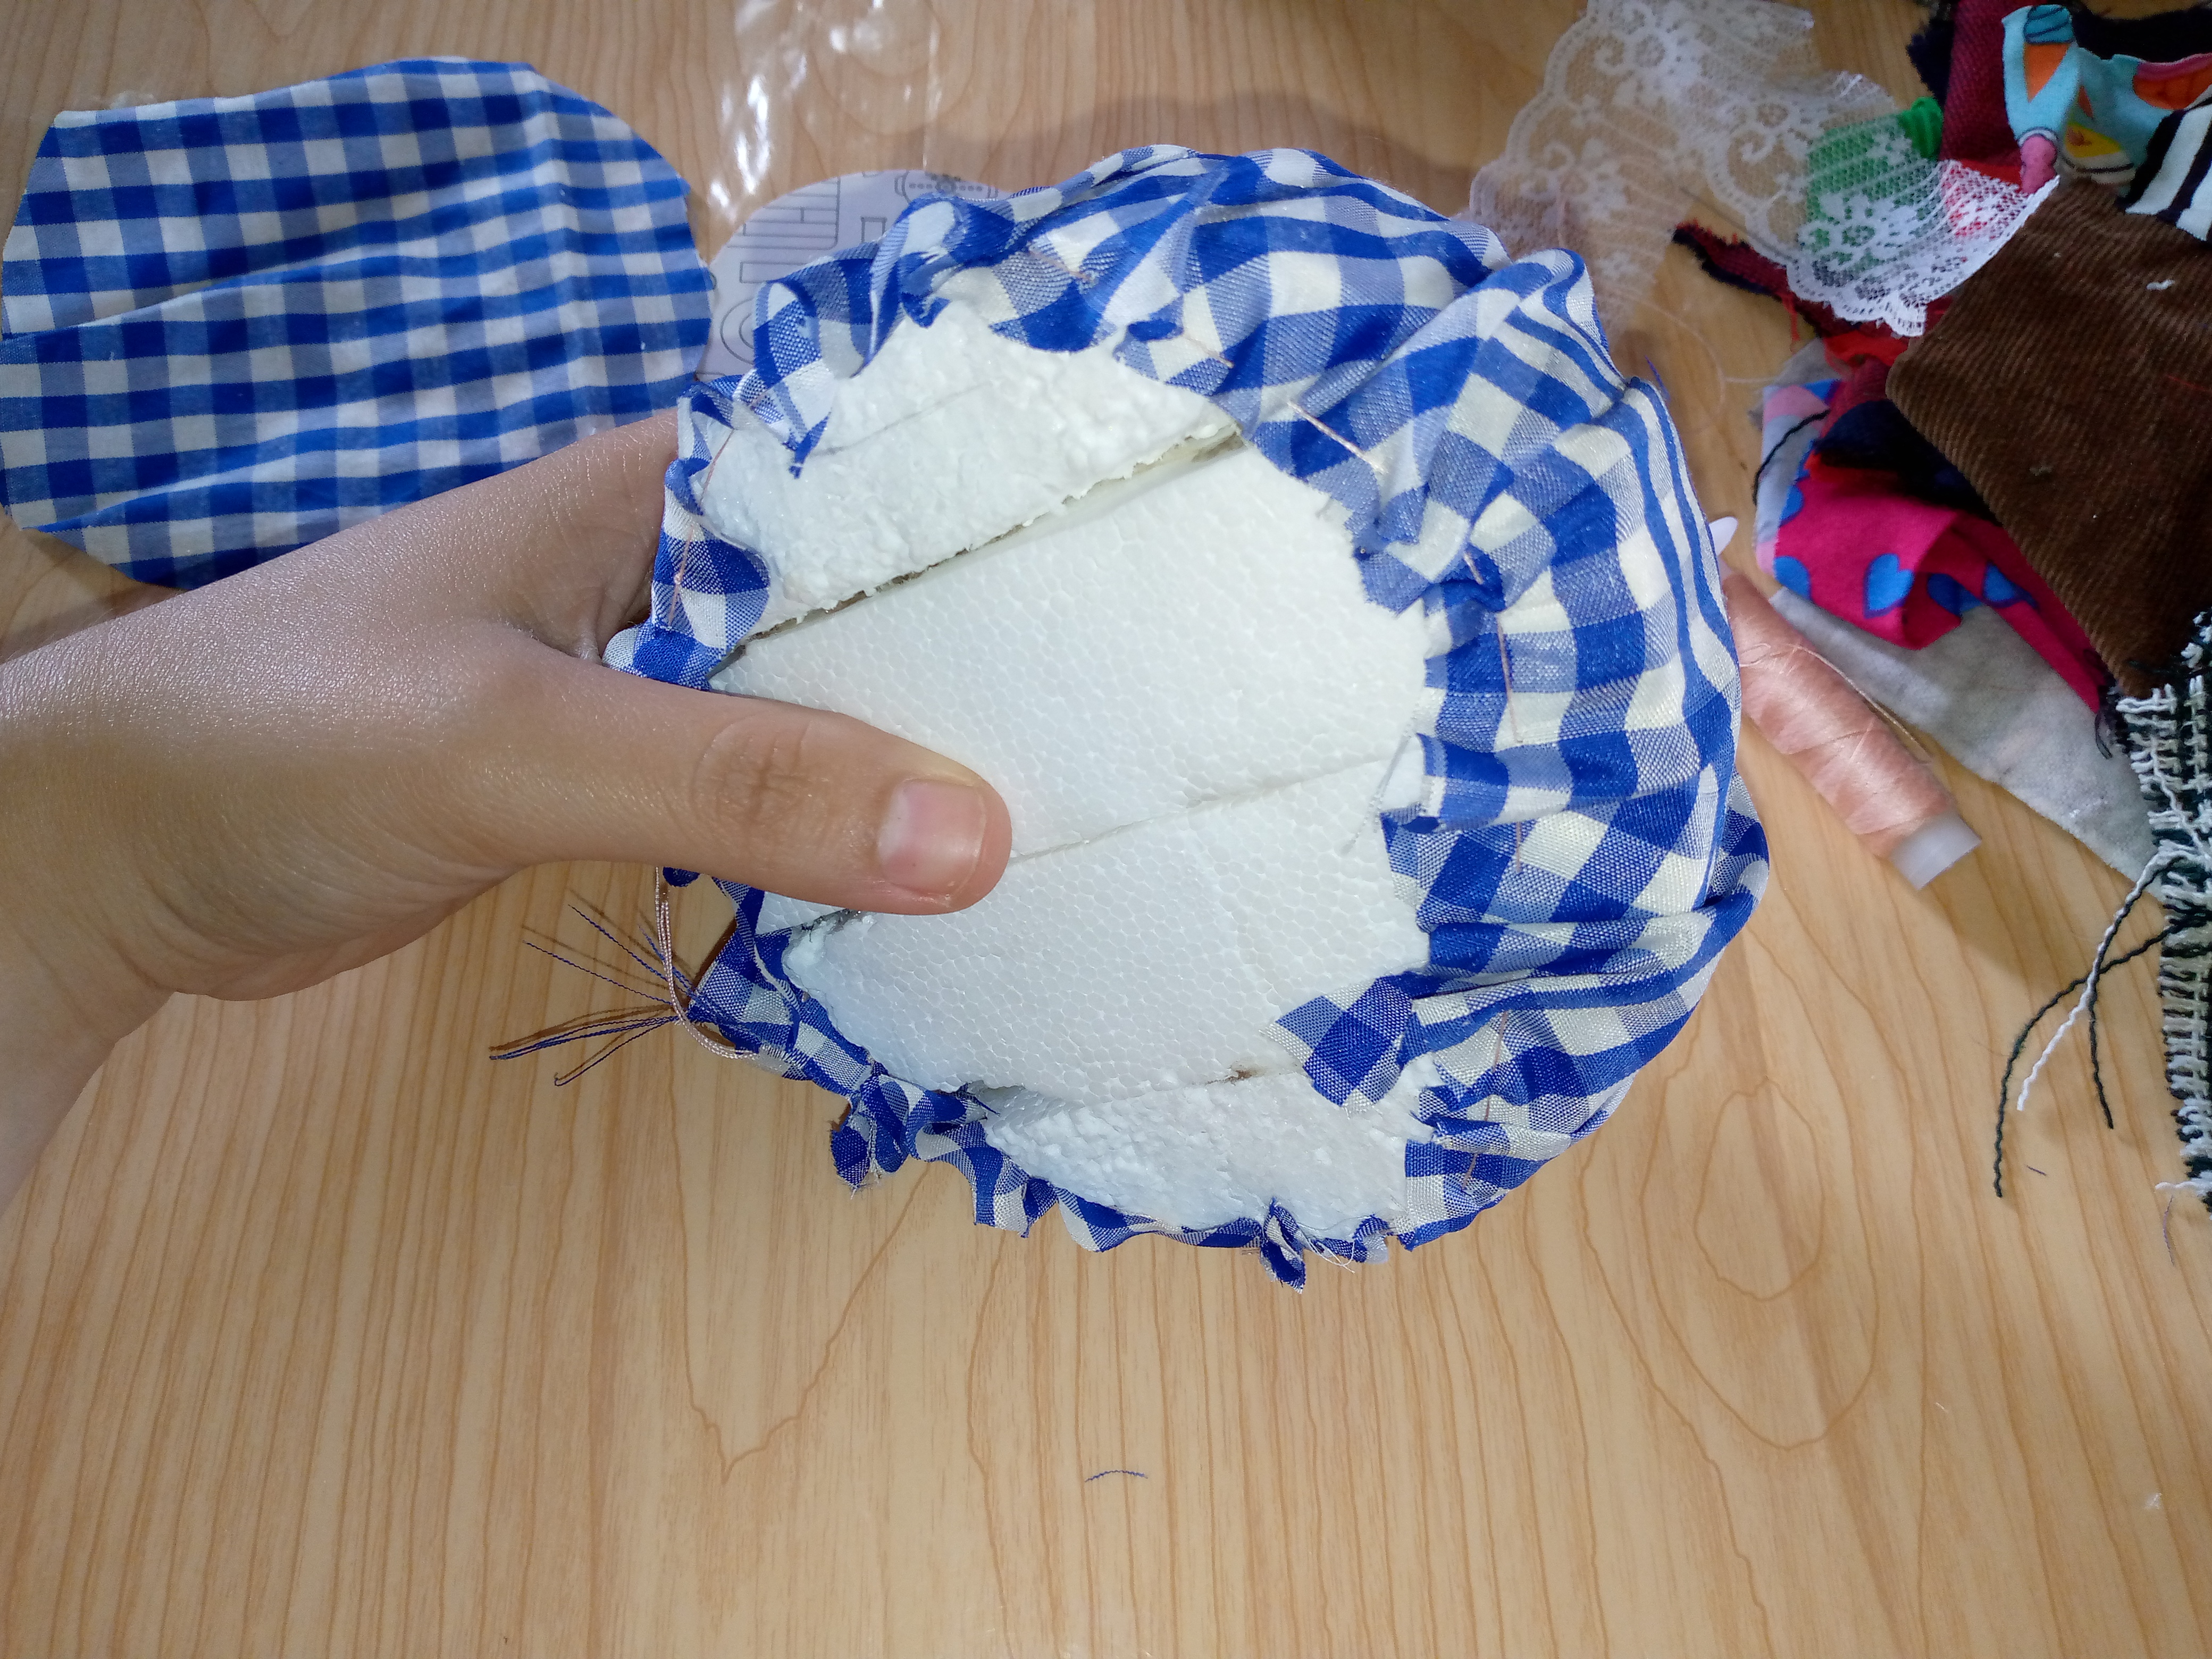
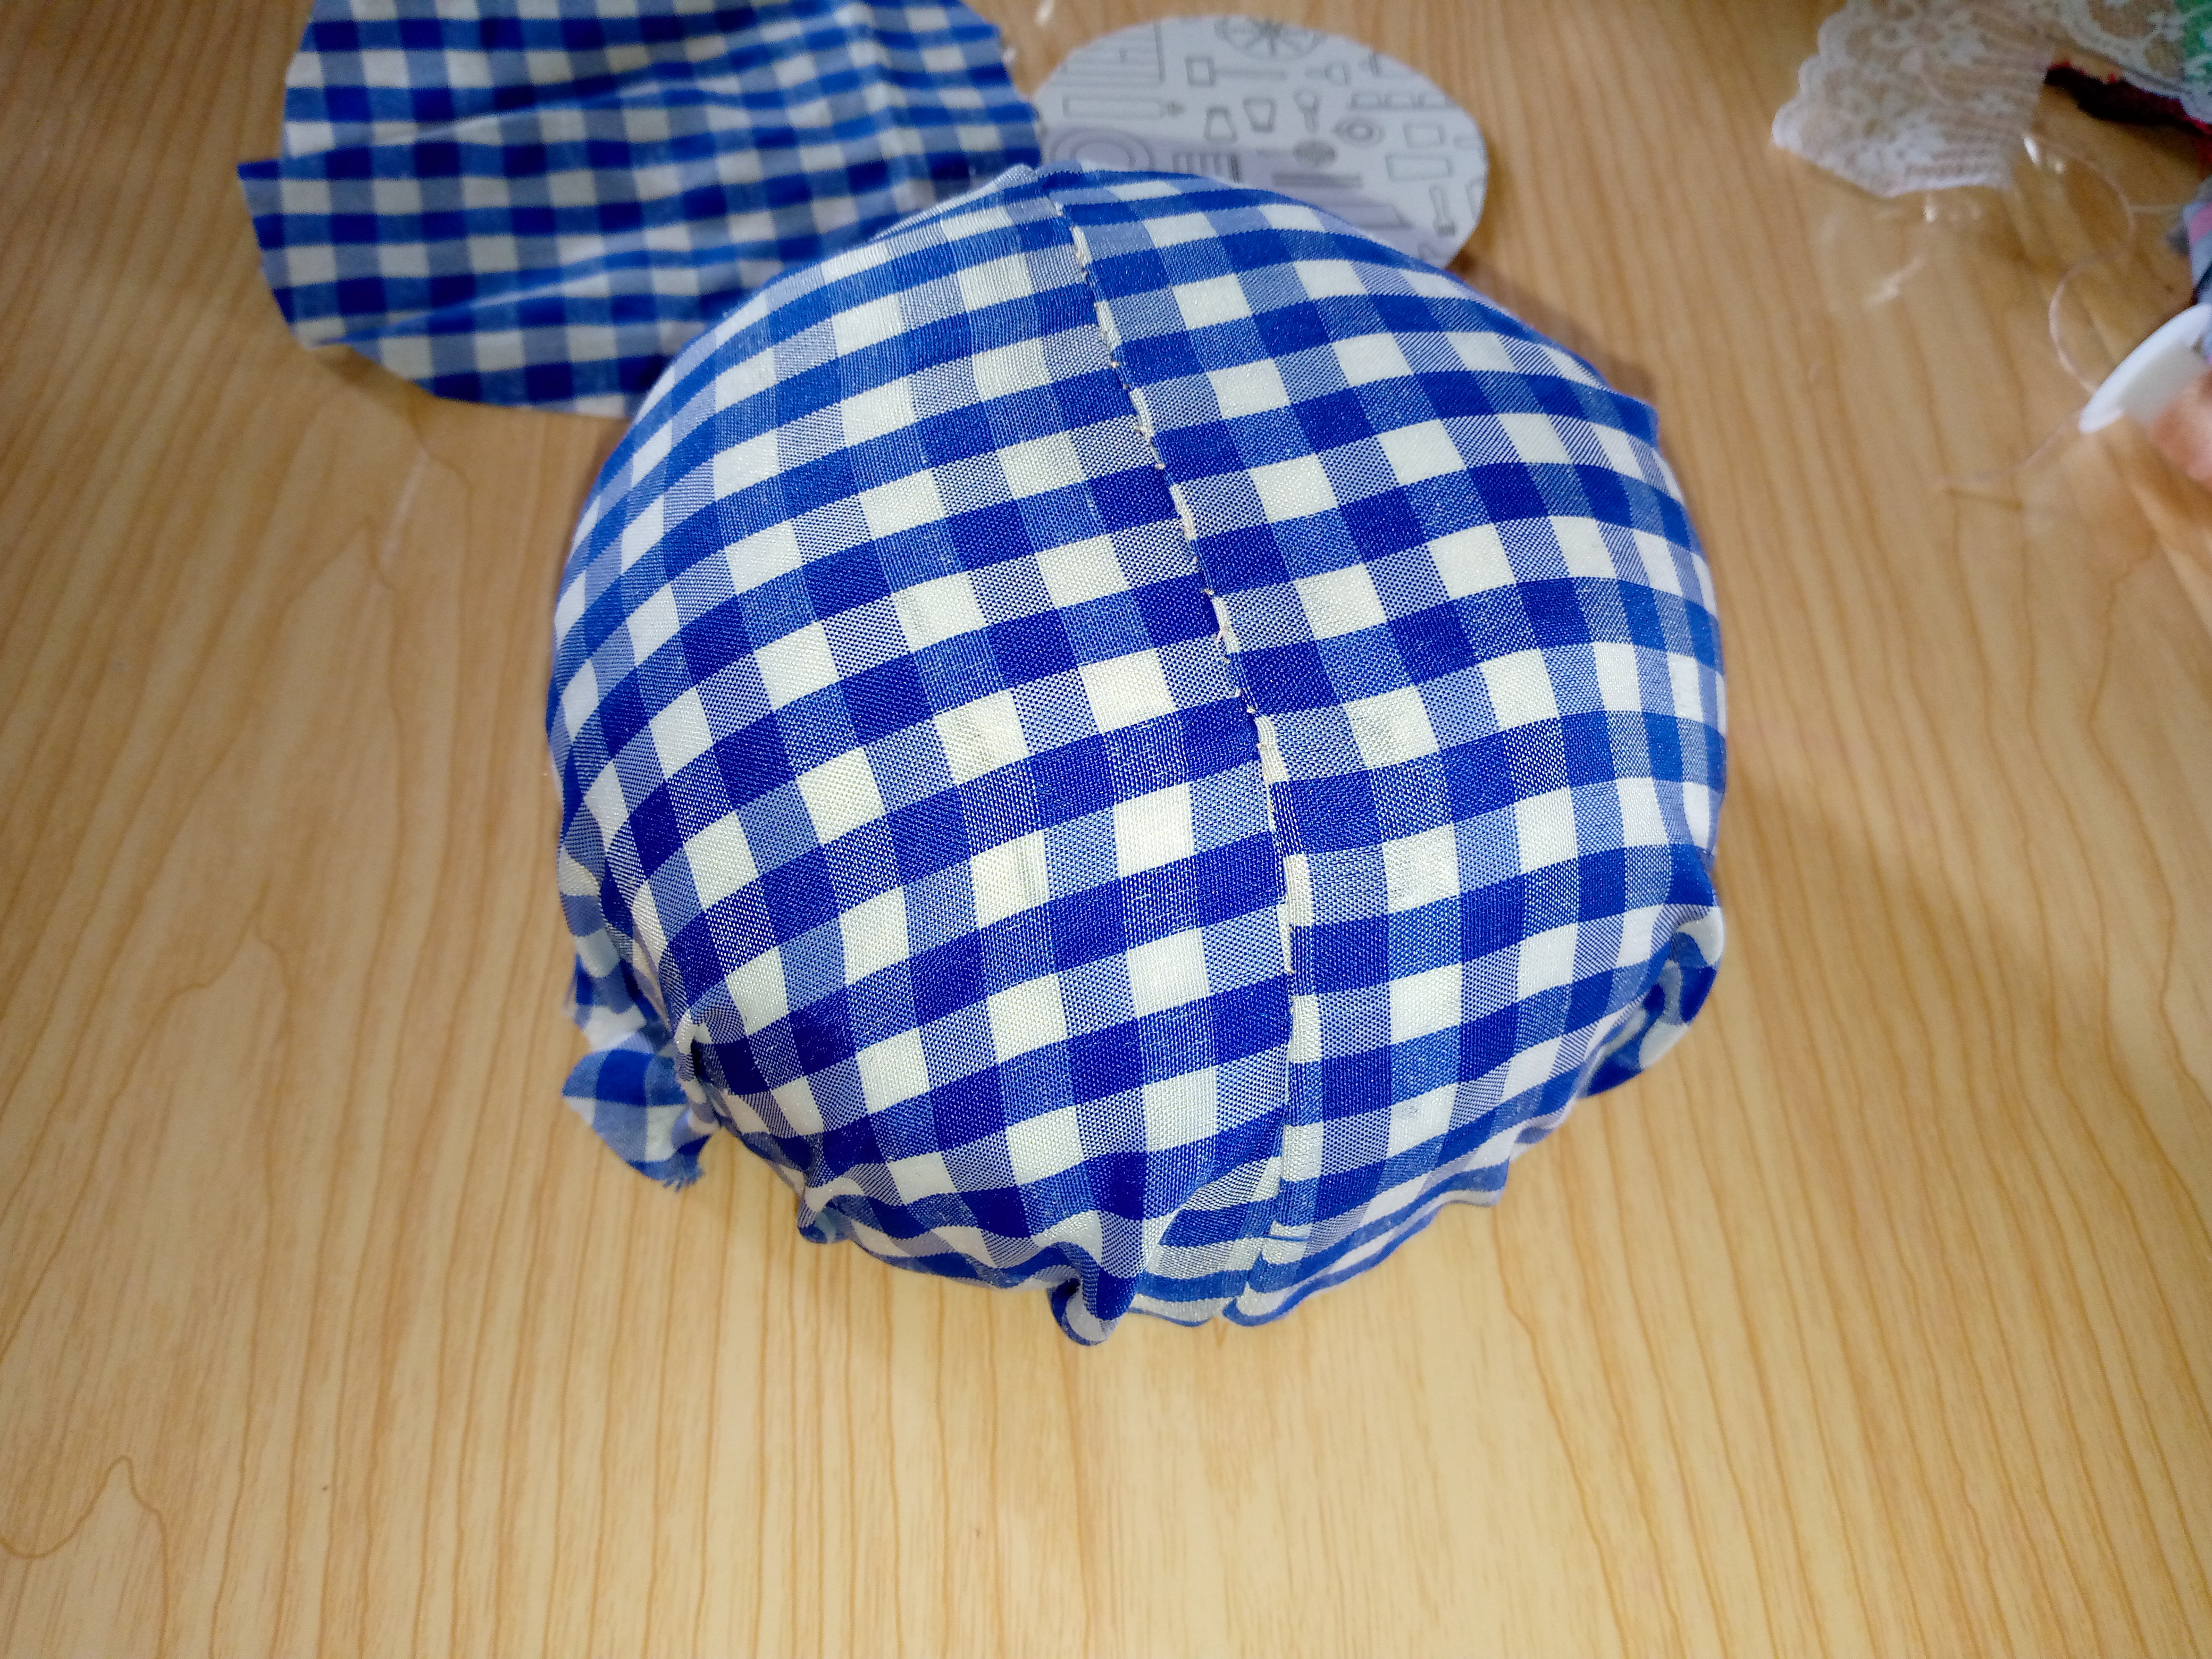
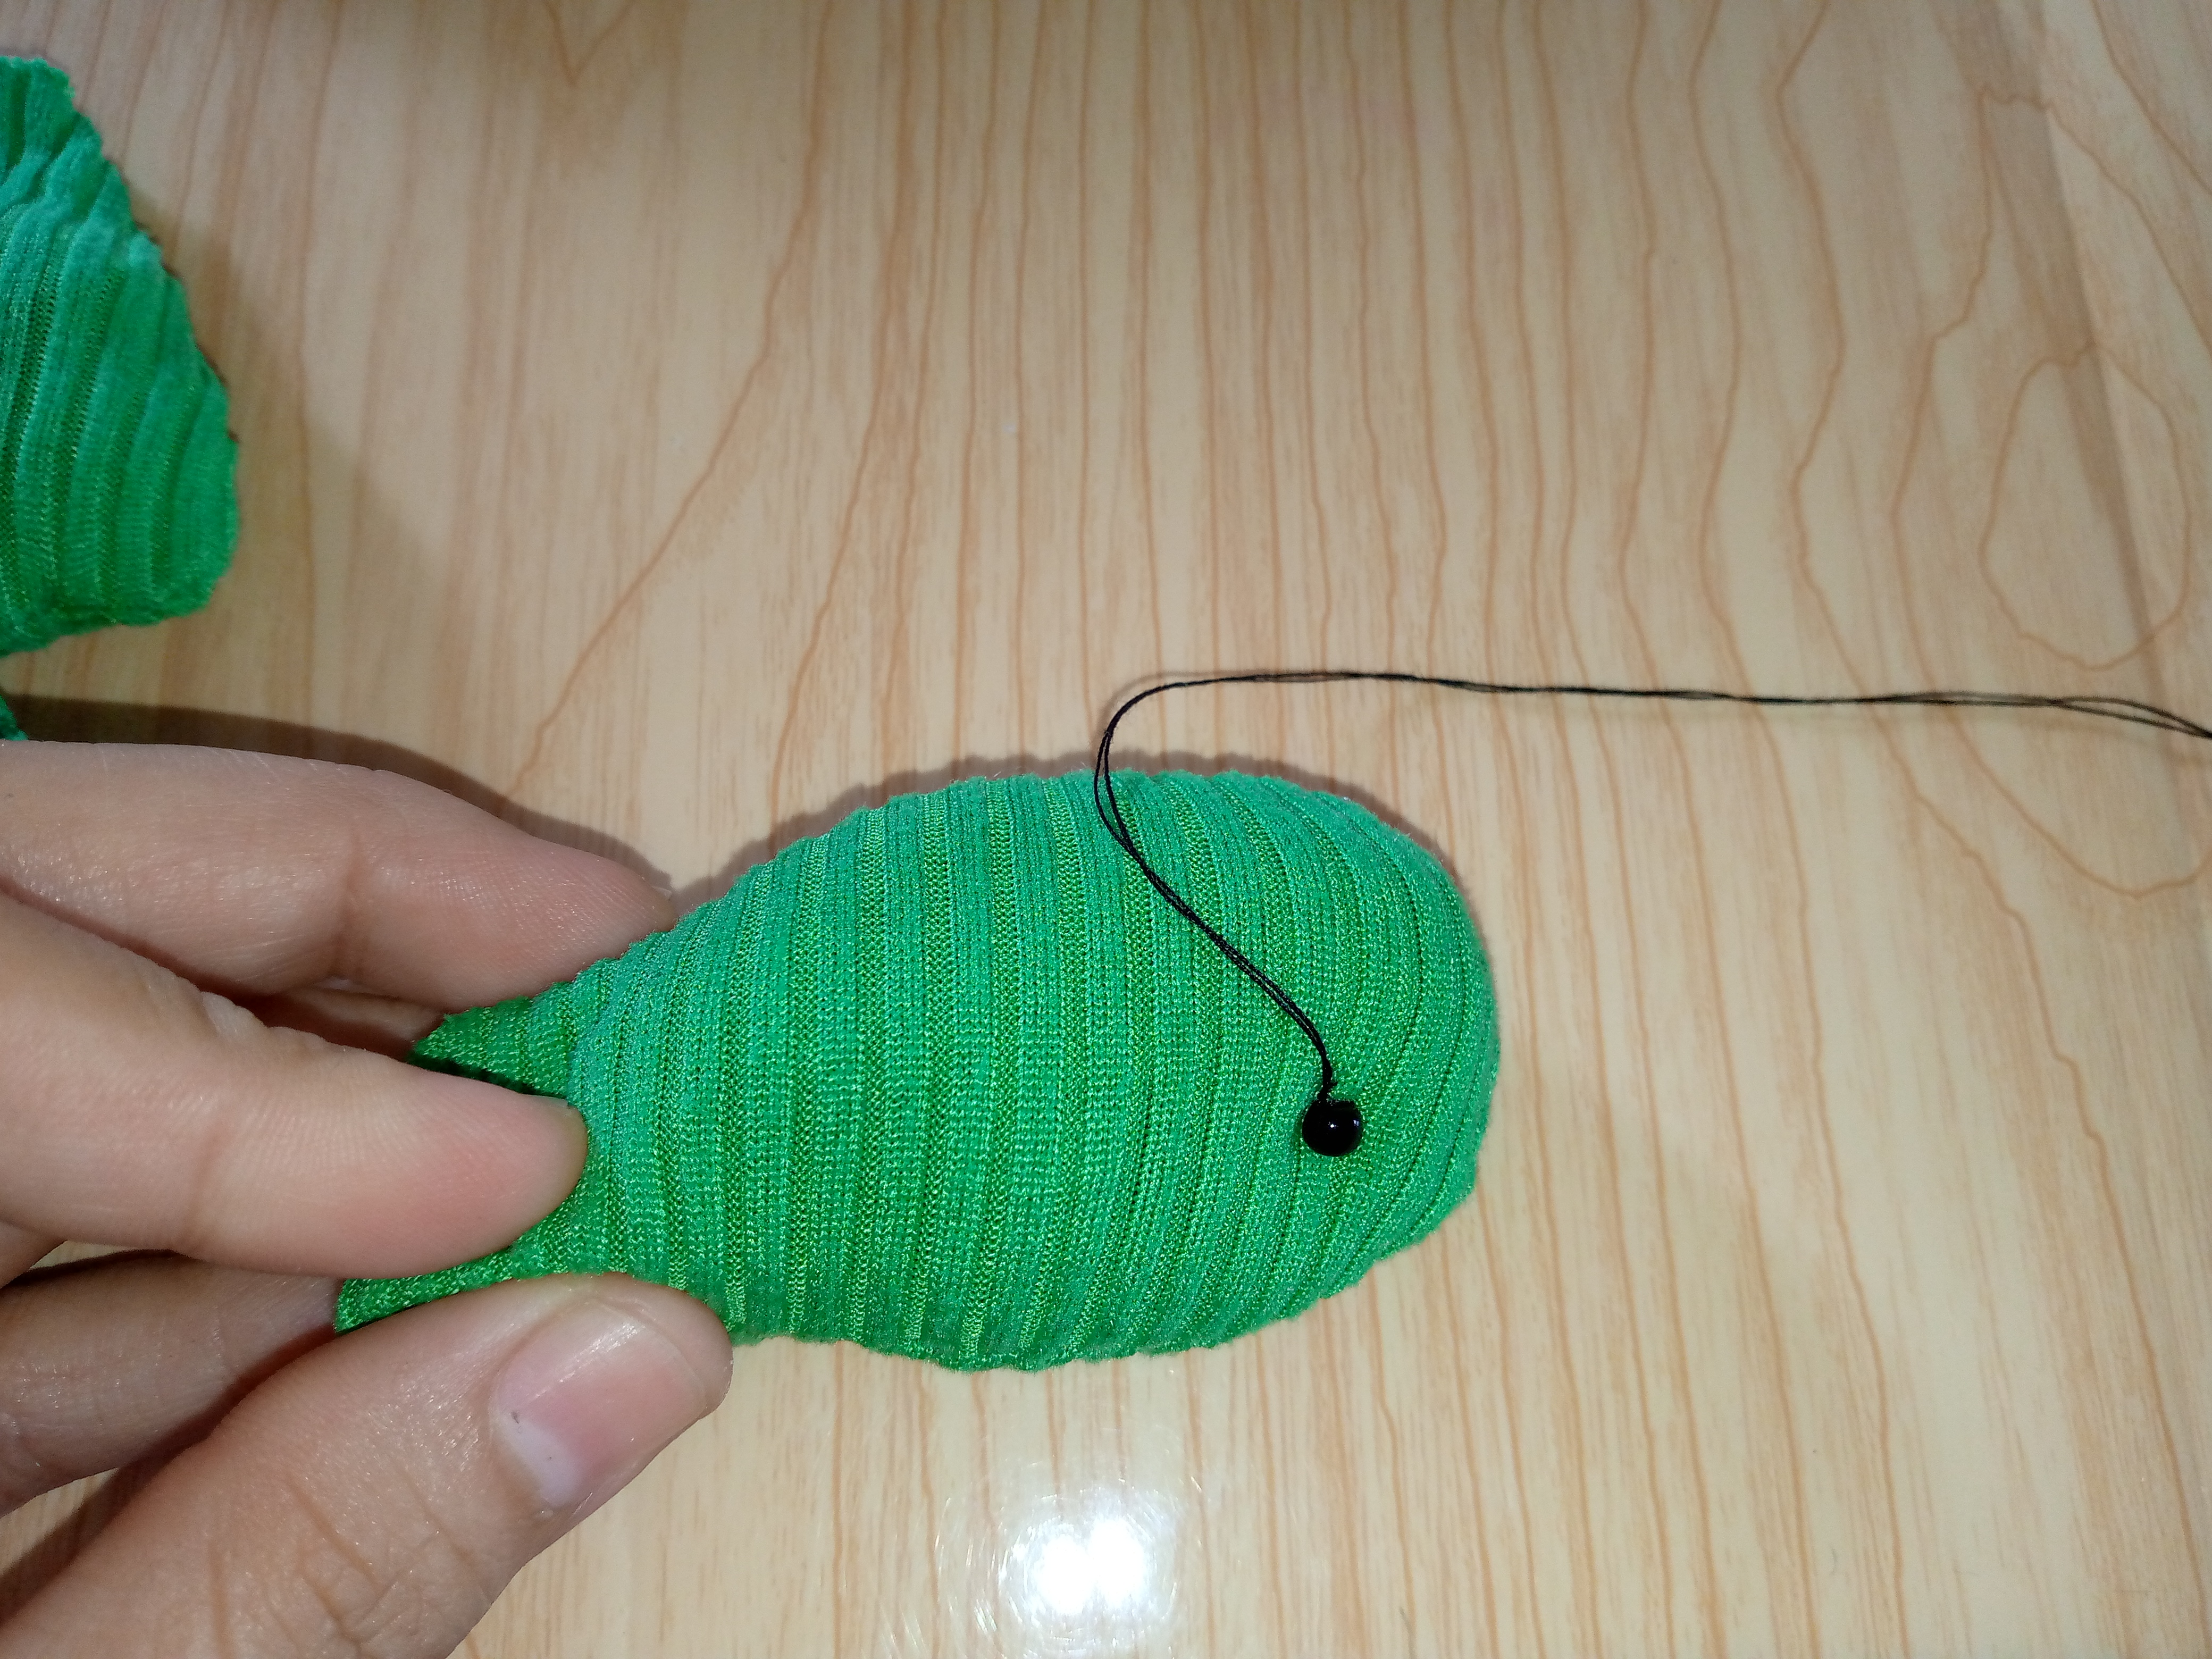
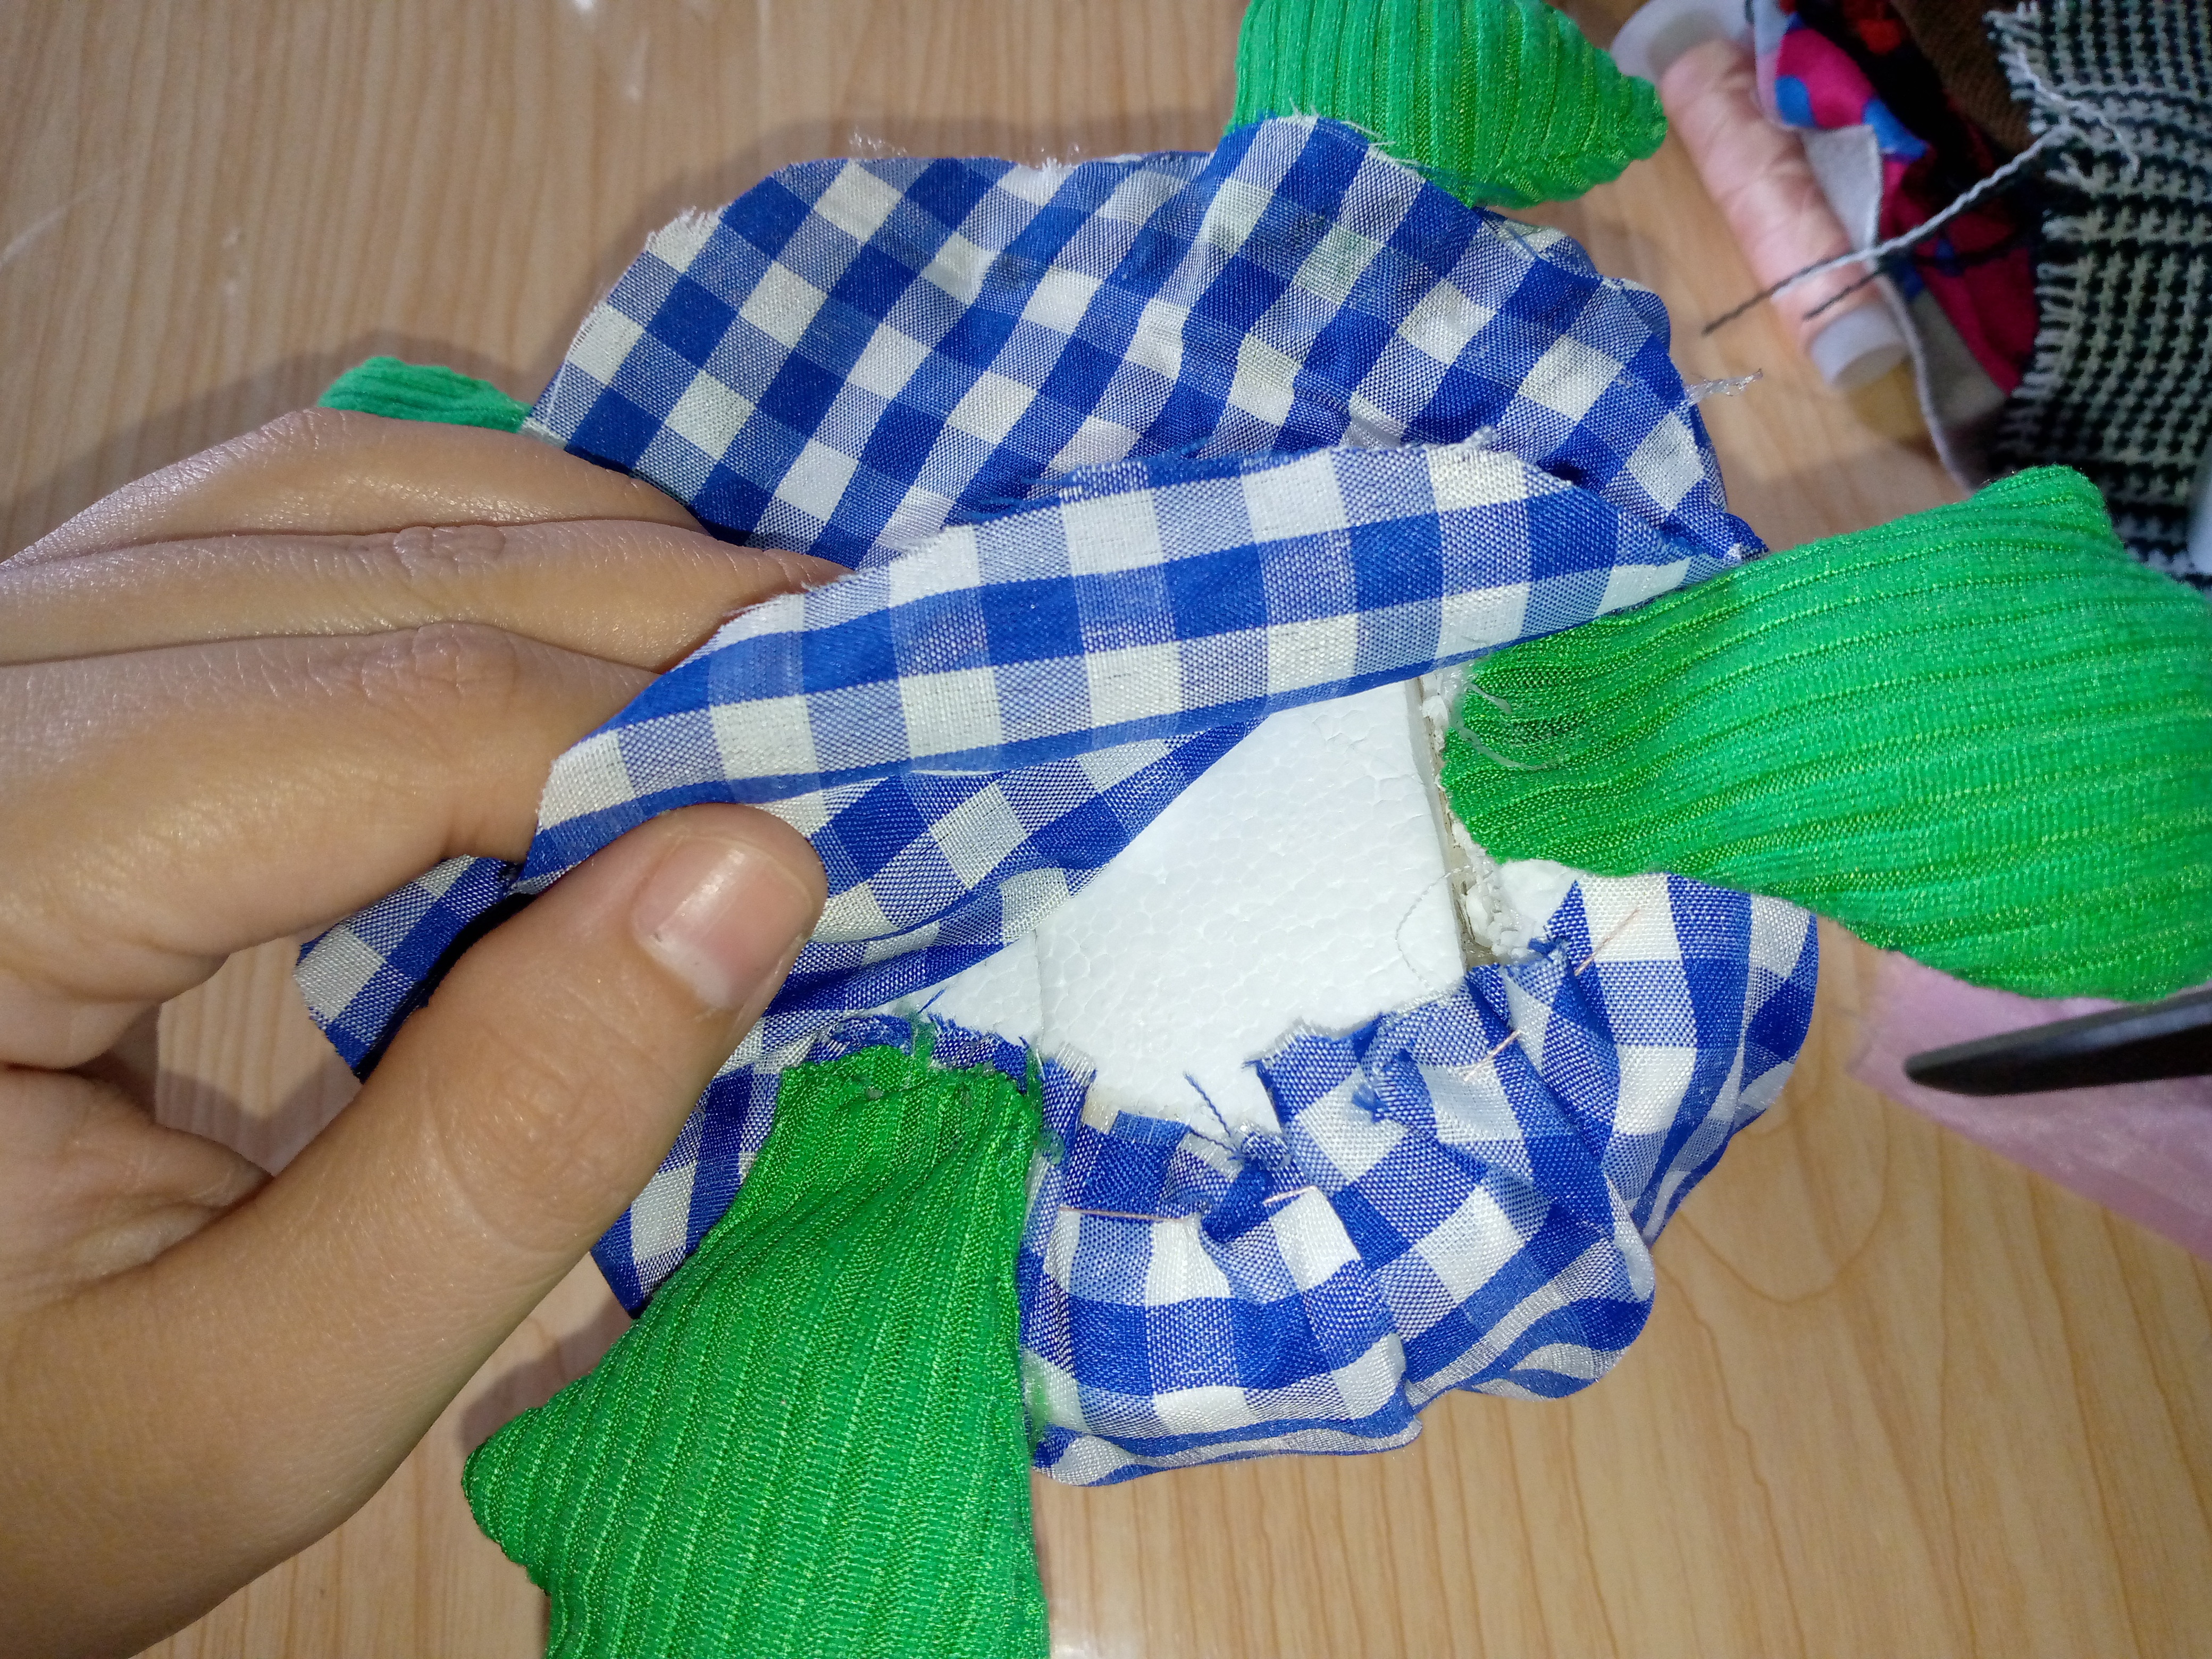
We start by covering our half of the Styrofoam sphere with a piece of fabric and we are going to sew around the outline with thread and needle and gather the fabric a little bit so that we can adjust it well to the sphere and it does not come loose, then we are going to cut the pieces of the turtle with the patterns on a piece of green fabric, such as the legs and the head, we will cut four double legs and a double head.
Paso 02
Step 02
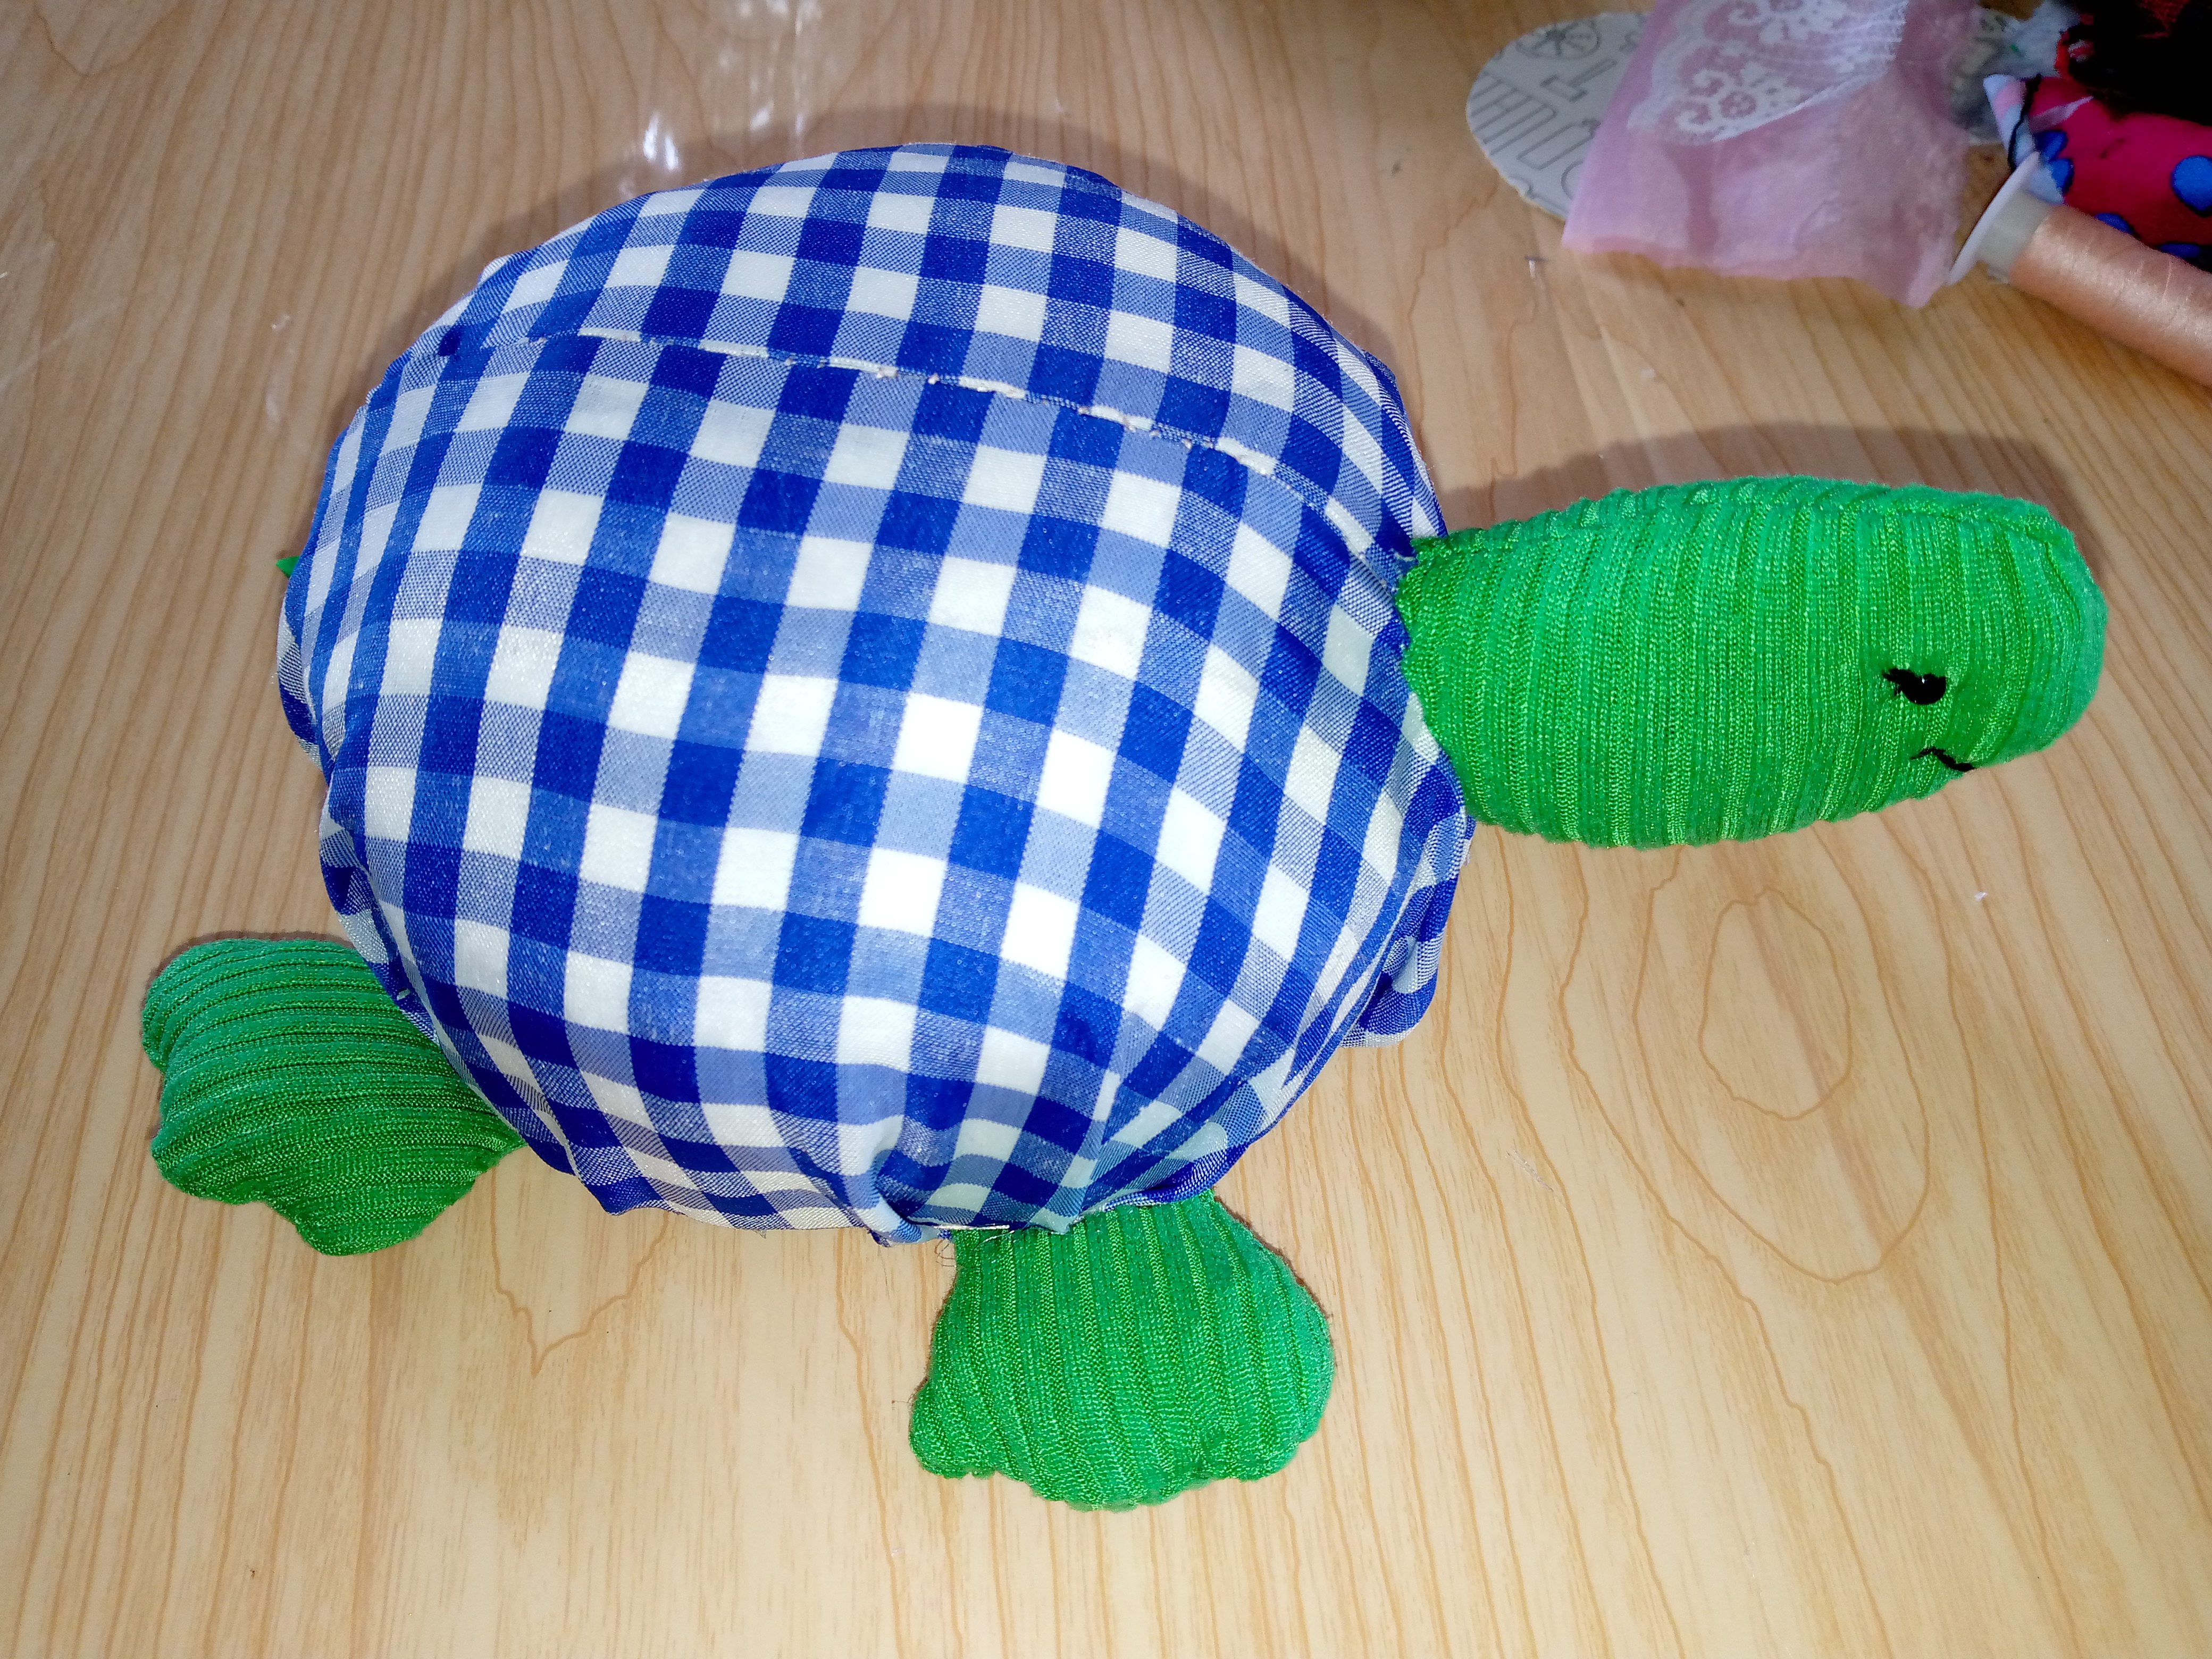
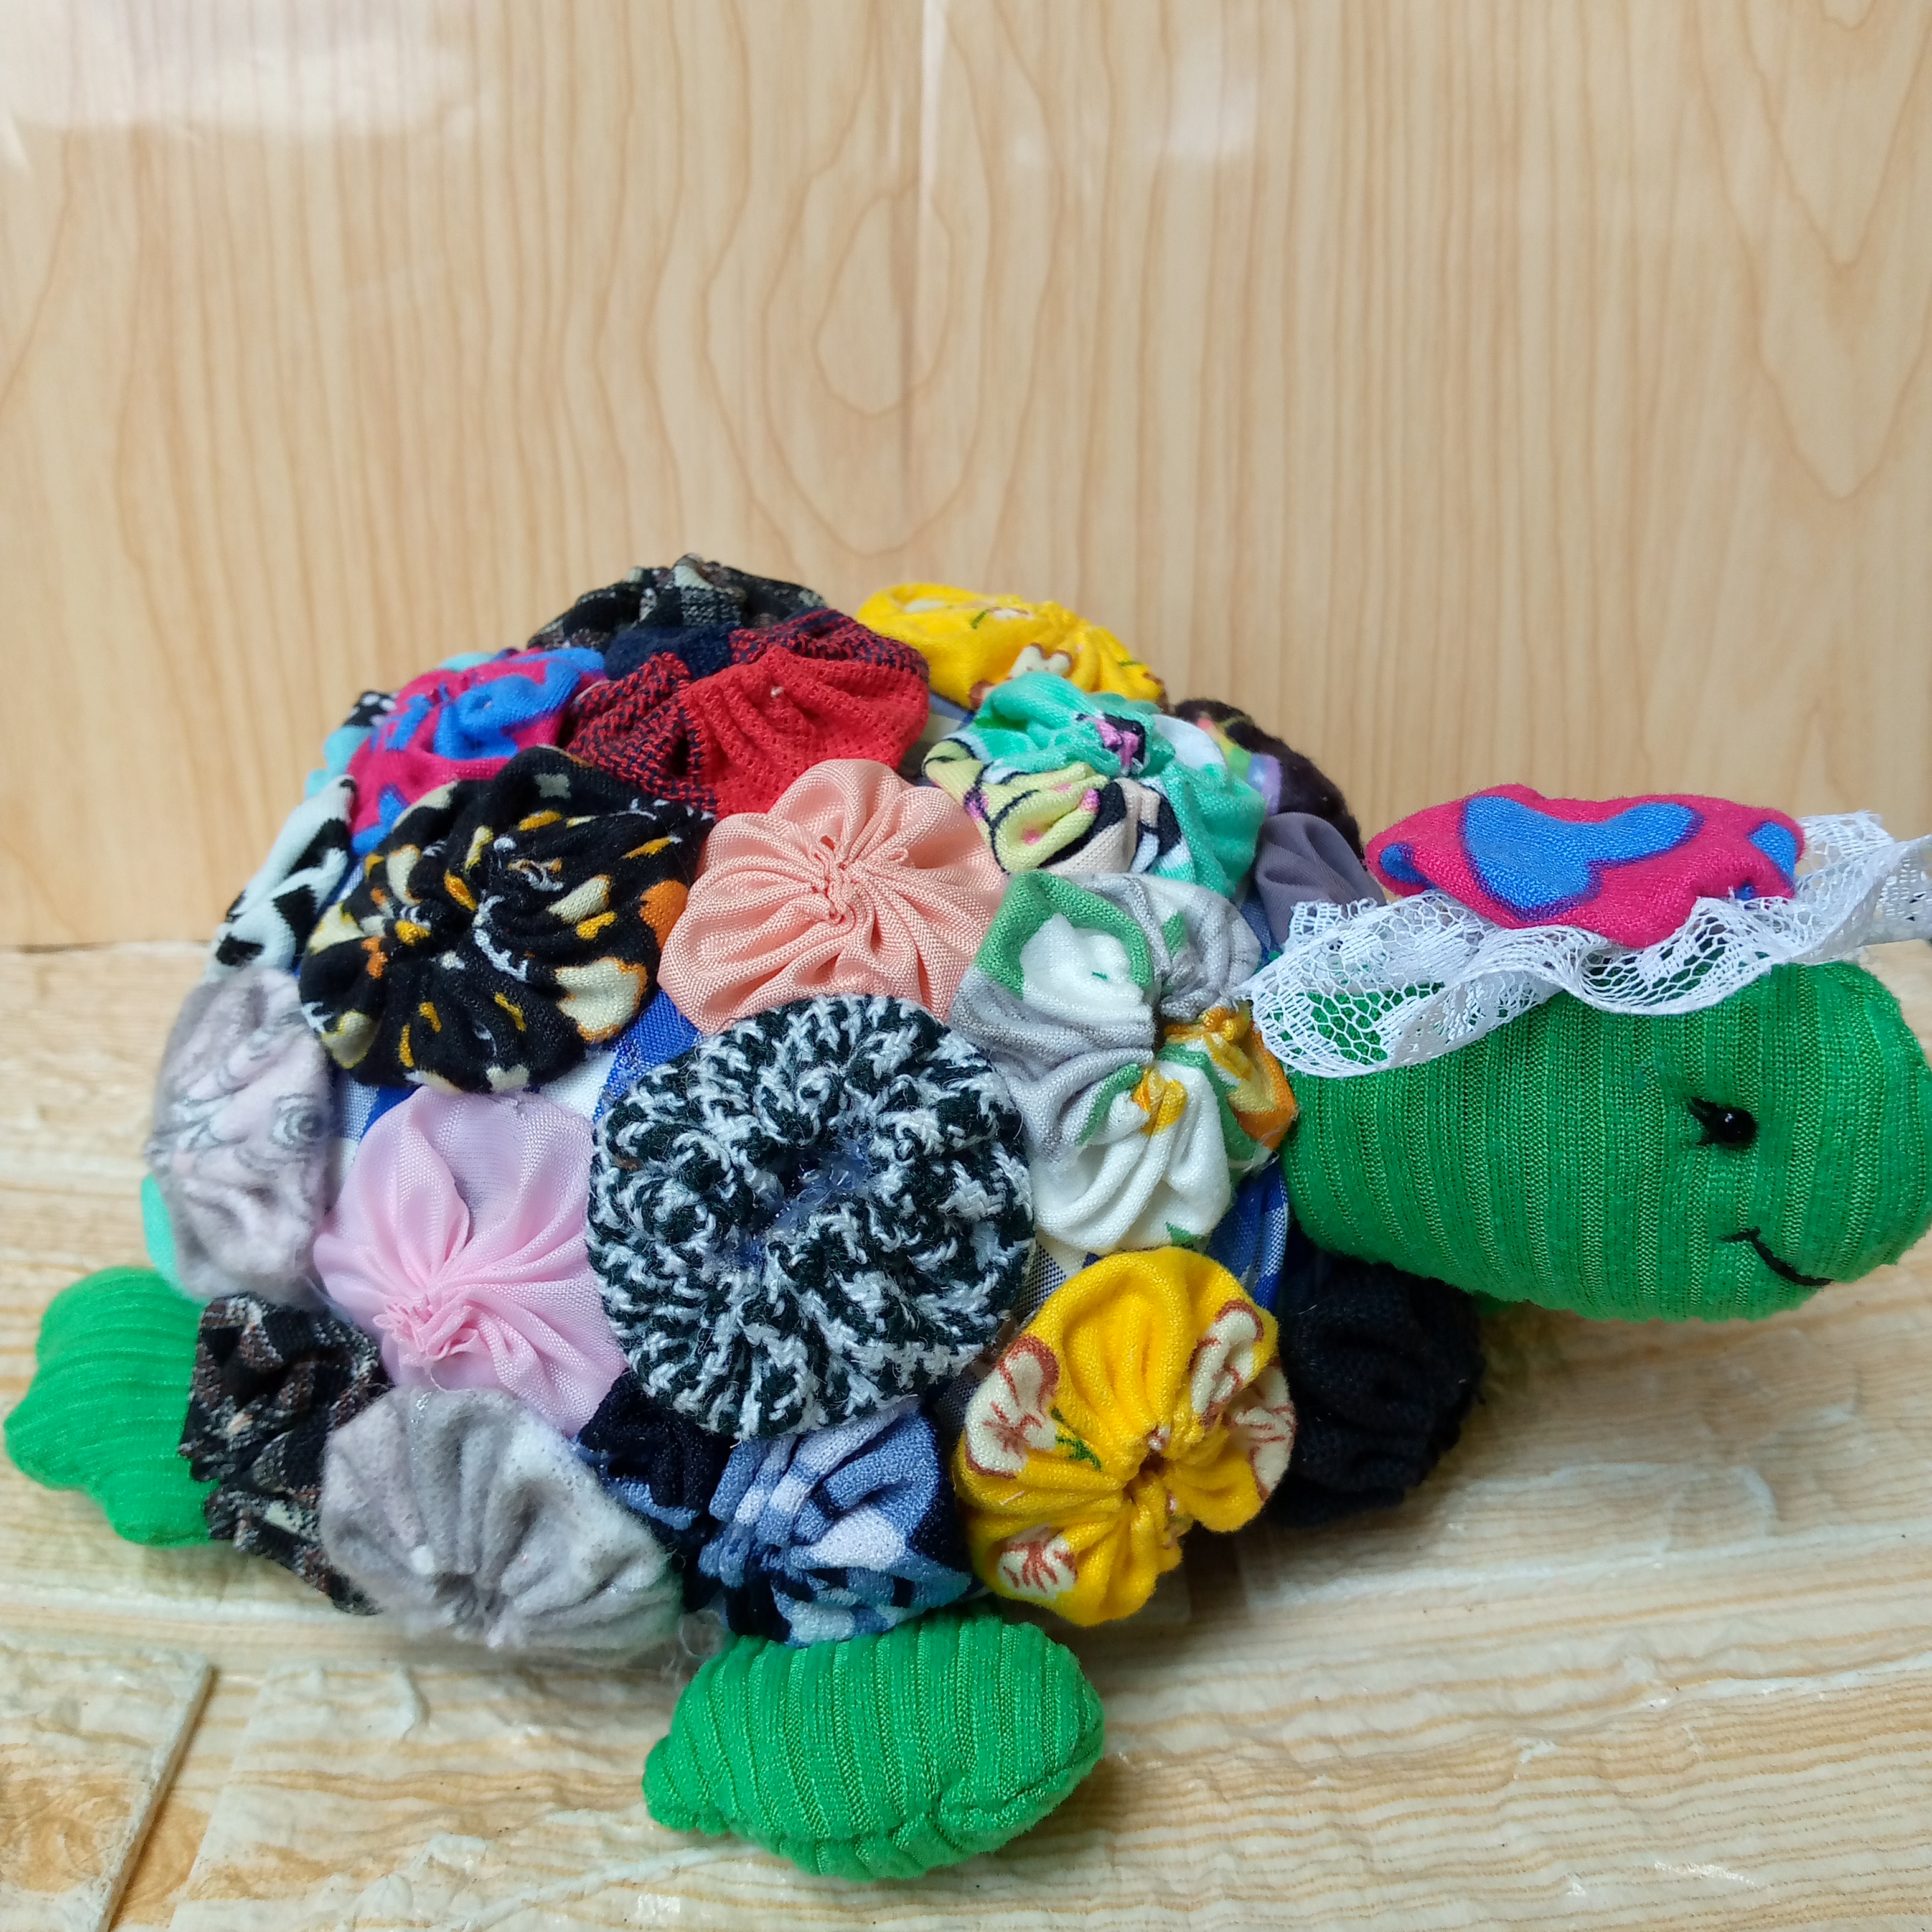
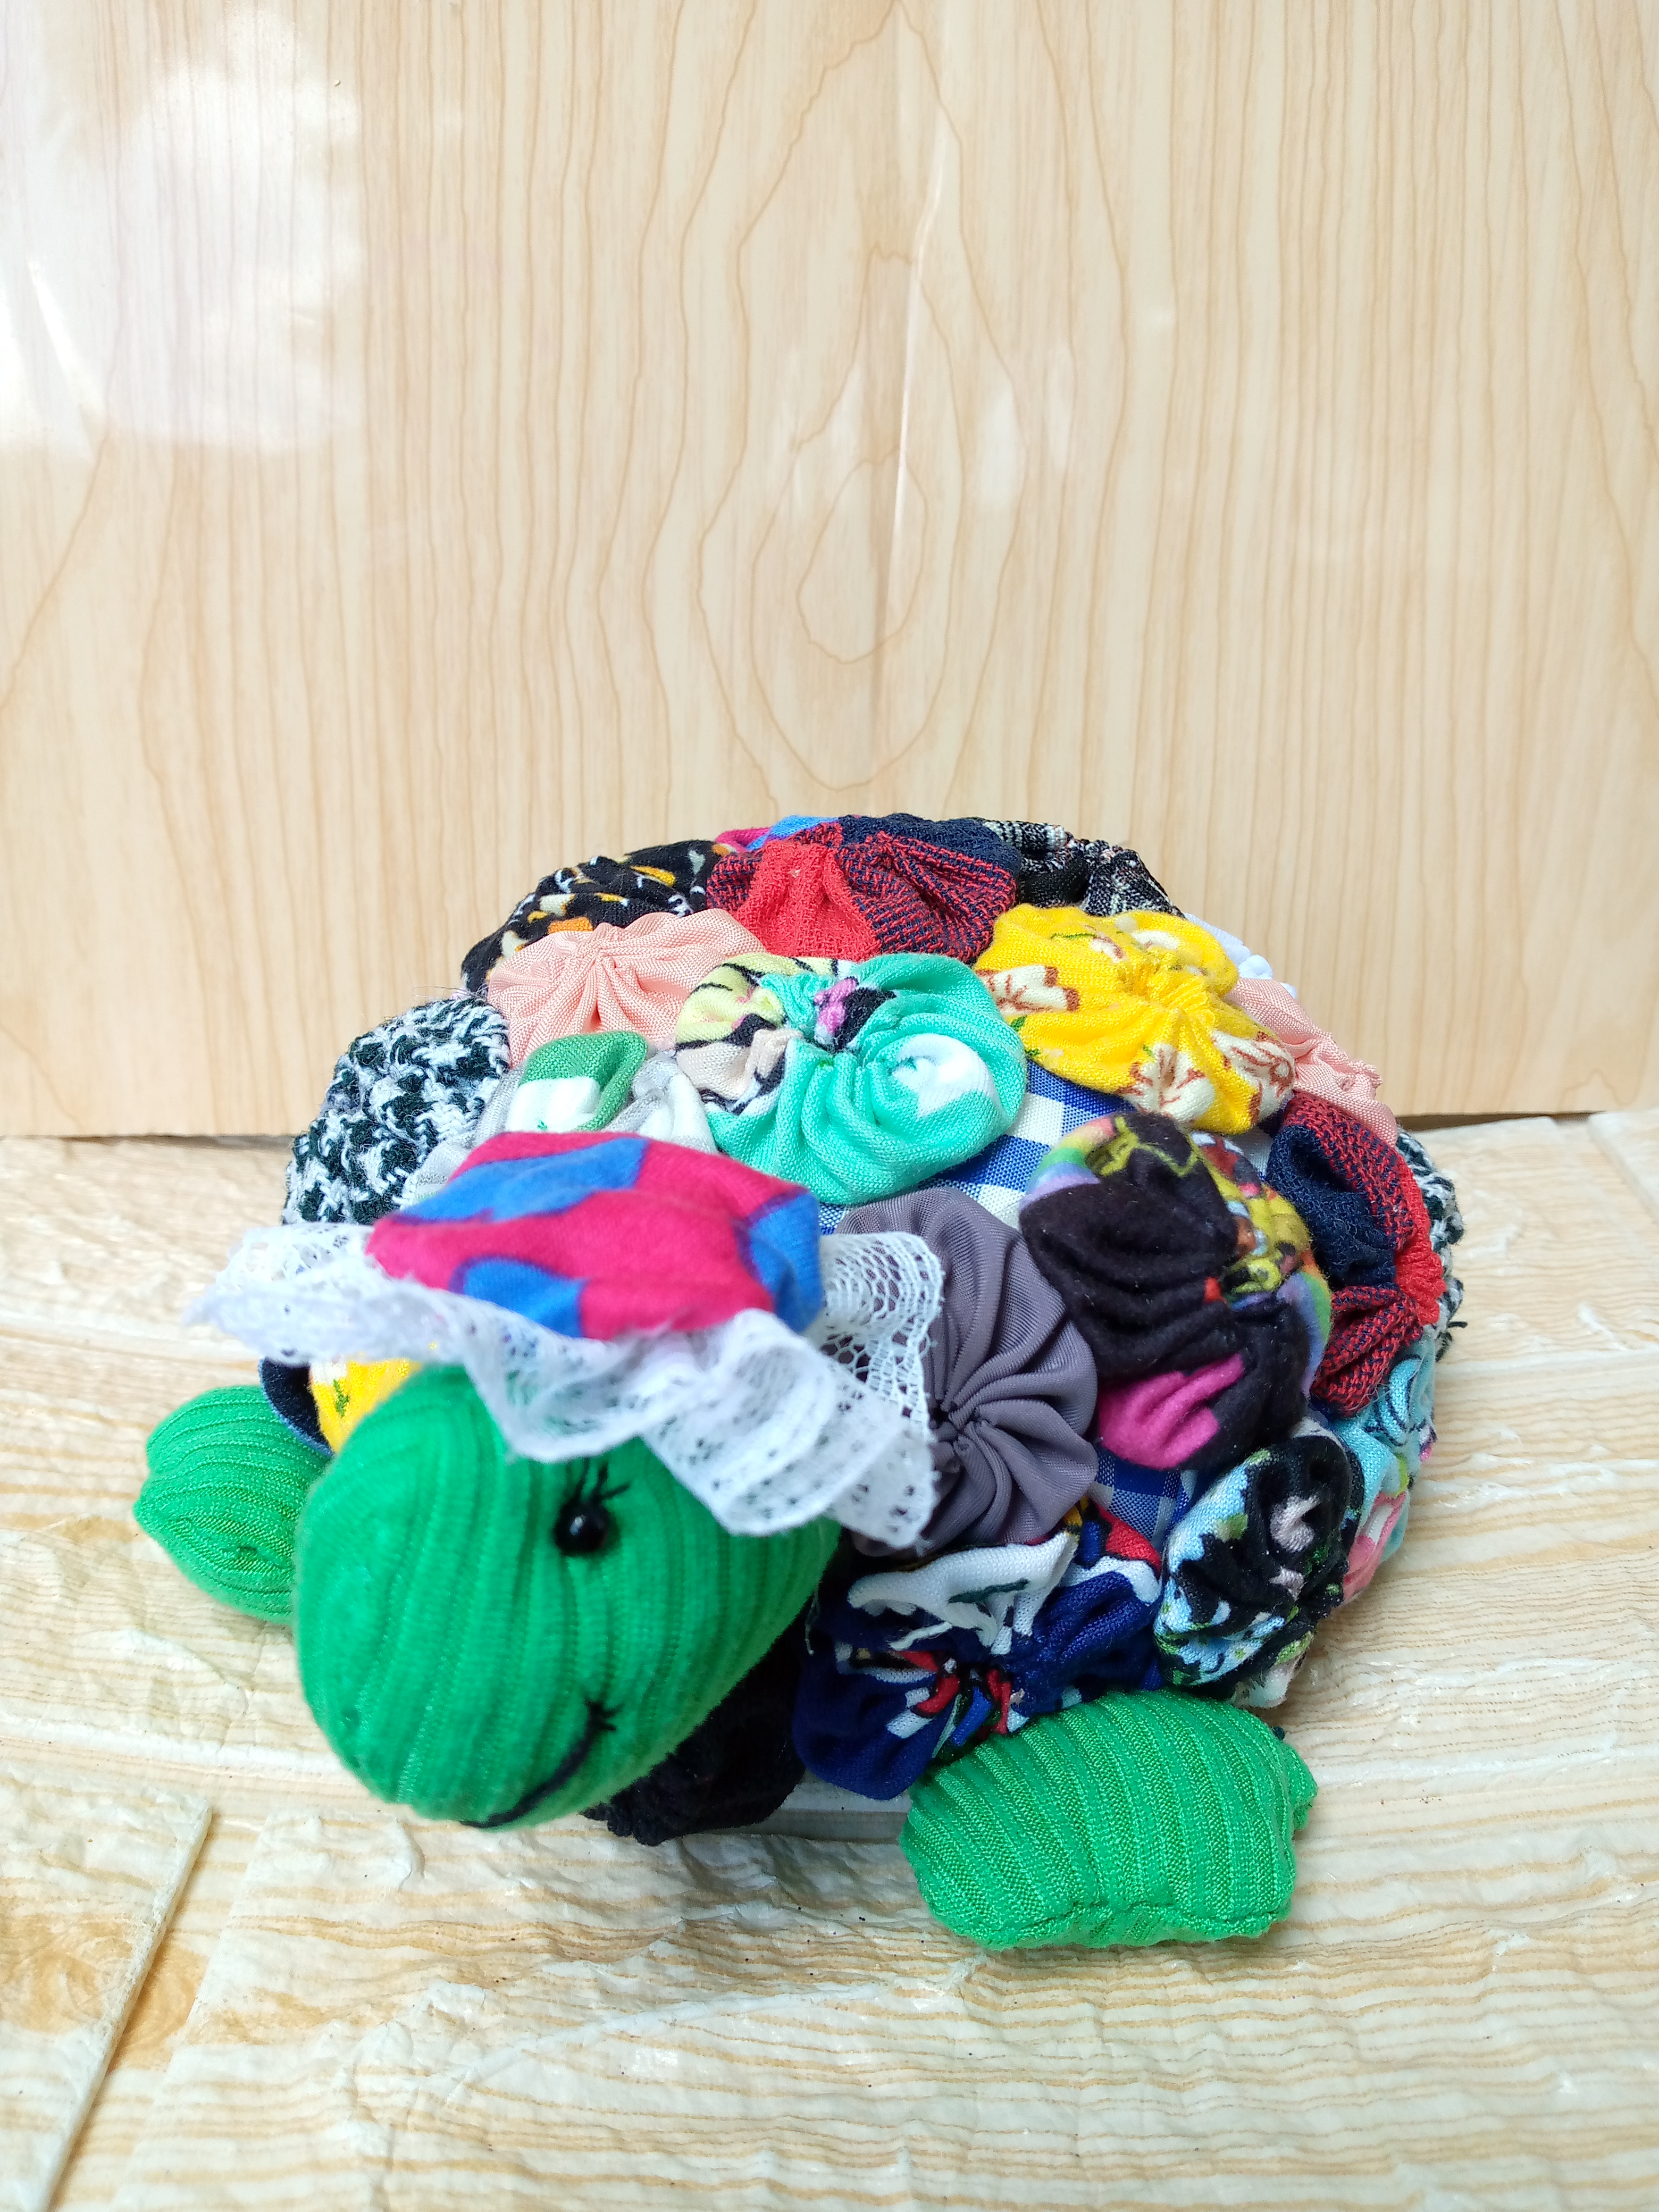
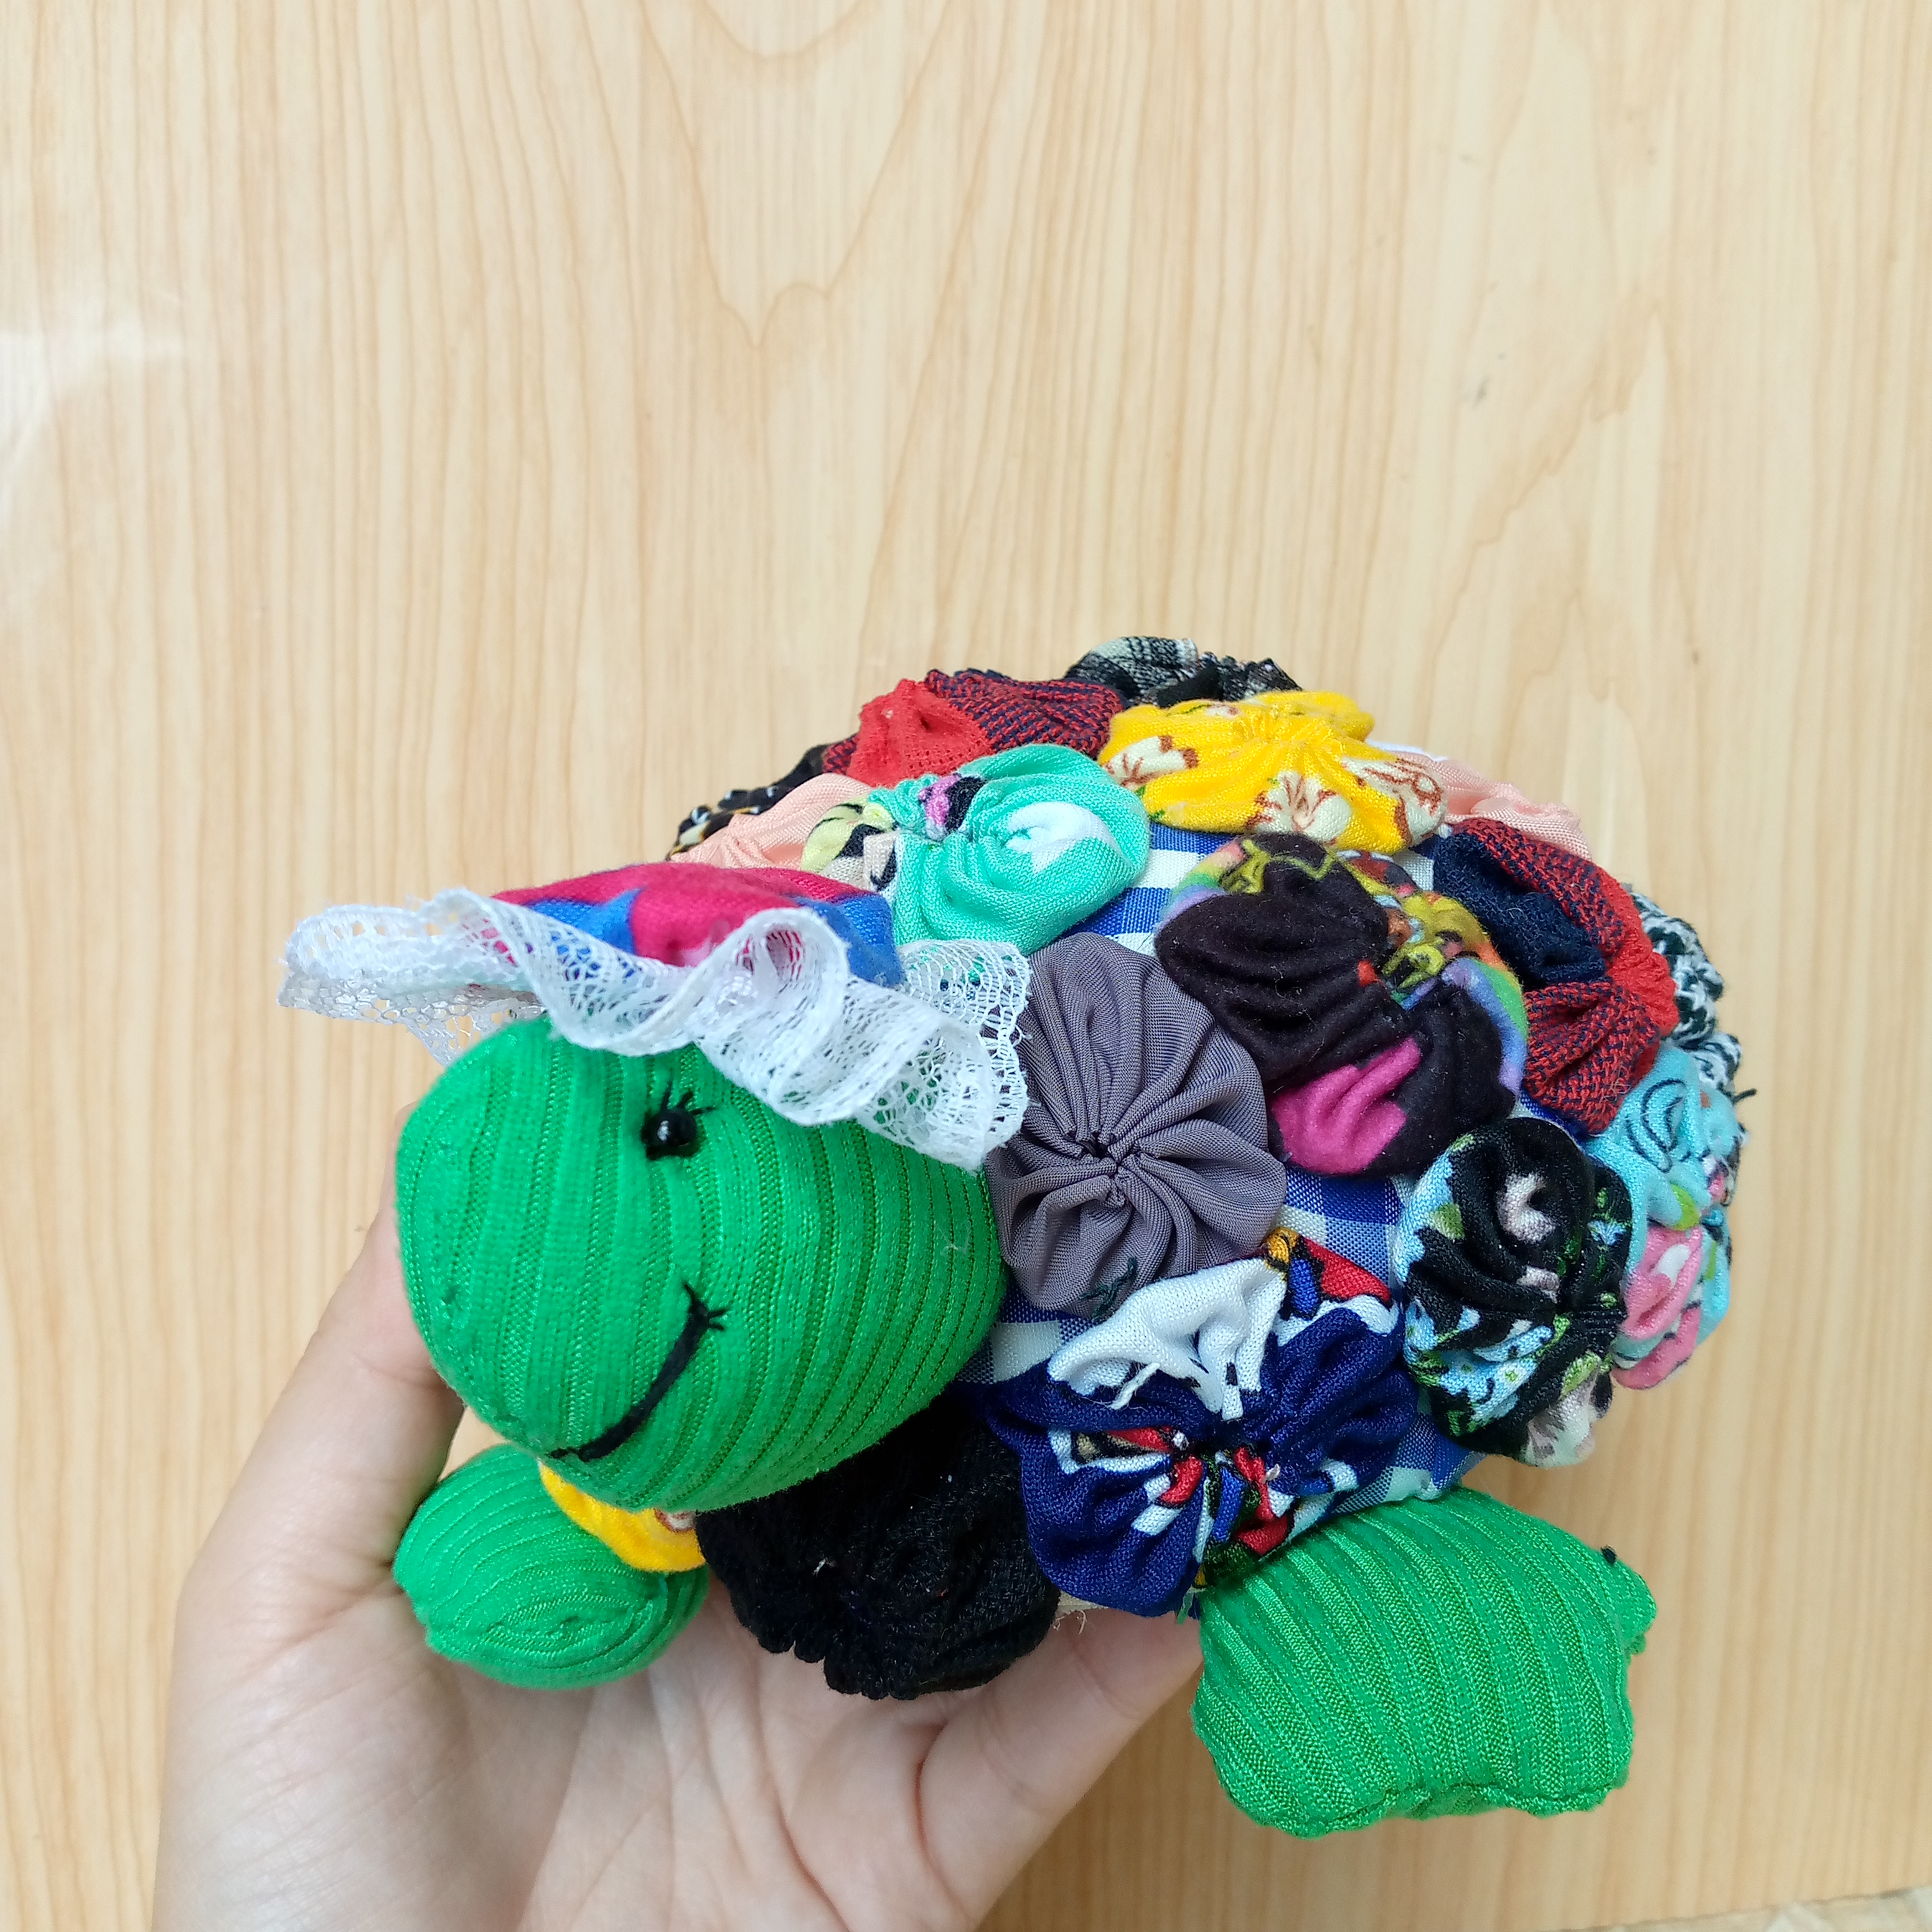
The second step we will do is sew the pieces of the turtle, the legs and the head and then we turn them over, fill them, make the face of the turtle with the black stones, I will make the eyes, eyelashes and the mouth of course, and then the legs will be placed on the bottom of my lined styrofoam sphere and I will place it in four parts since the sphere will be the body of the turtle, then I will glue with silicone on the top of the sphere above and then I will sew it with green thread to hold it more to the base and with a piece of green foam we will make the tail and we will also glue it behind.
Paso 03
Step 03
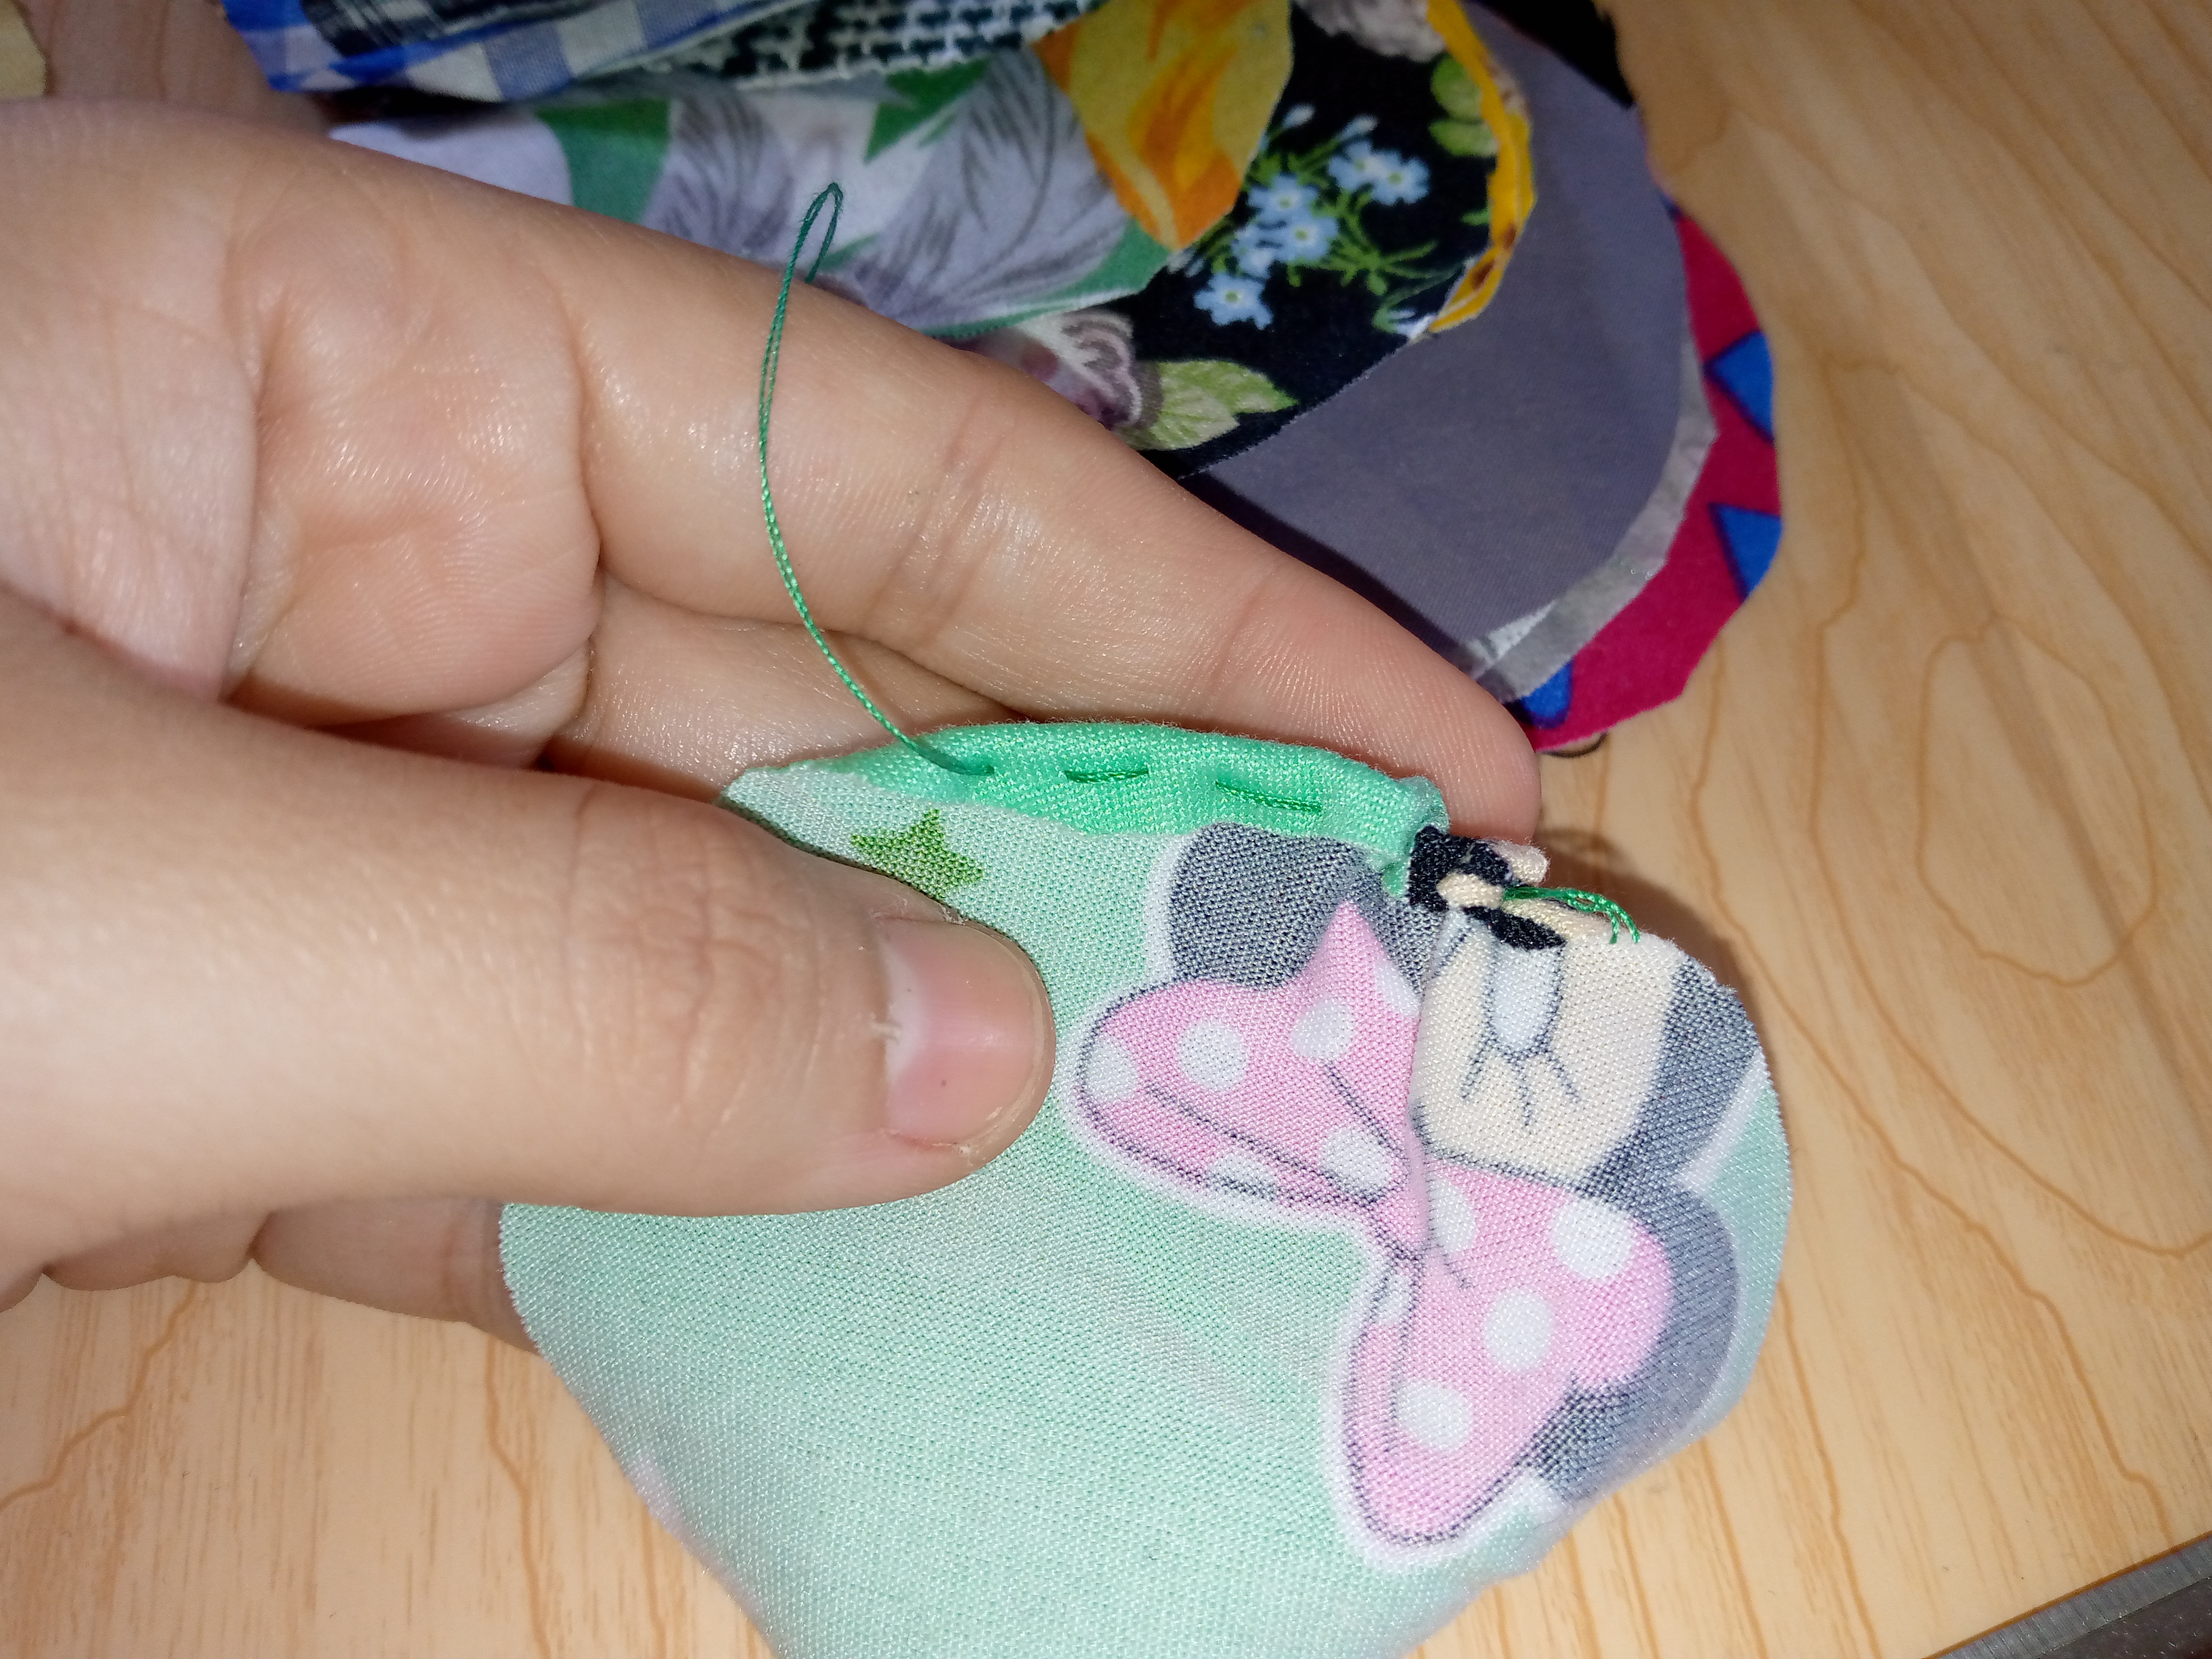
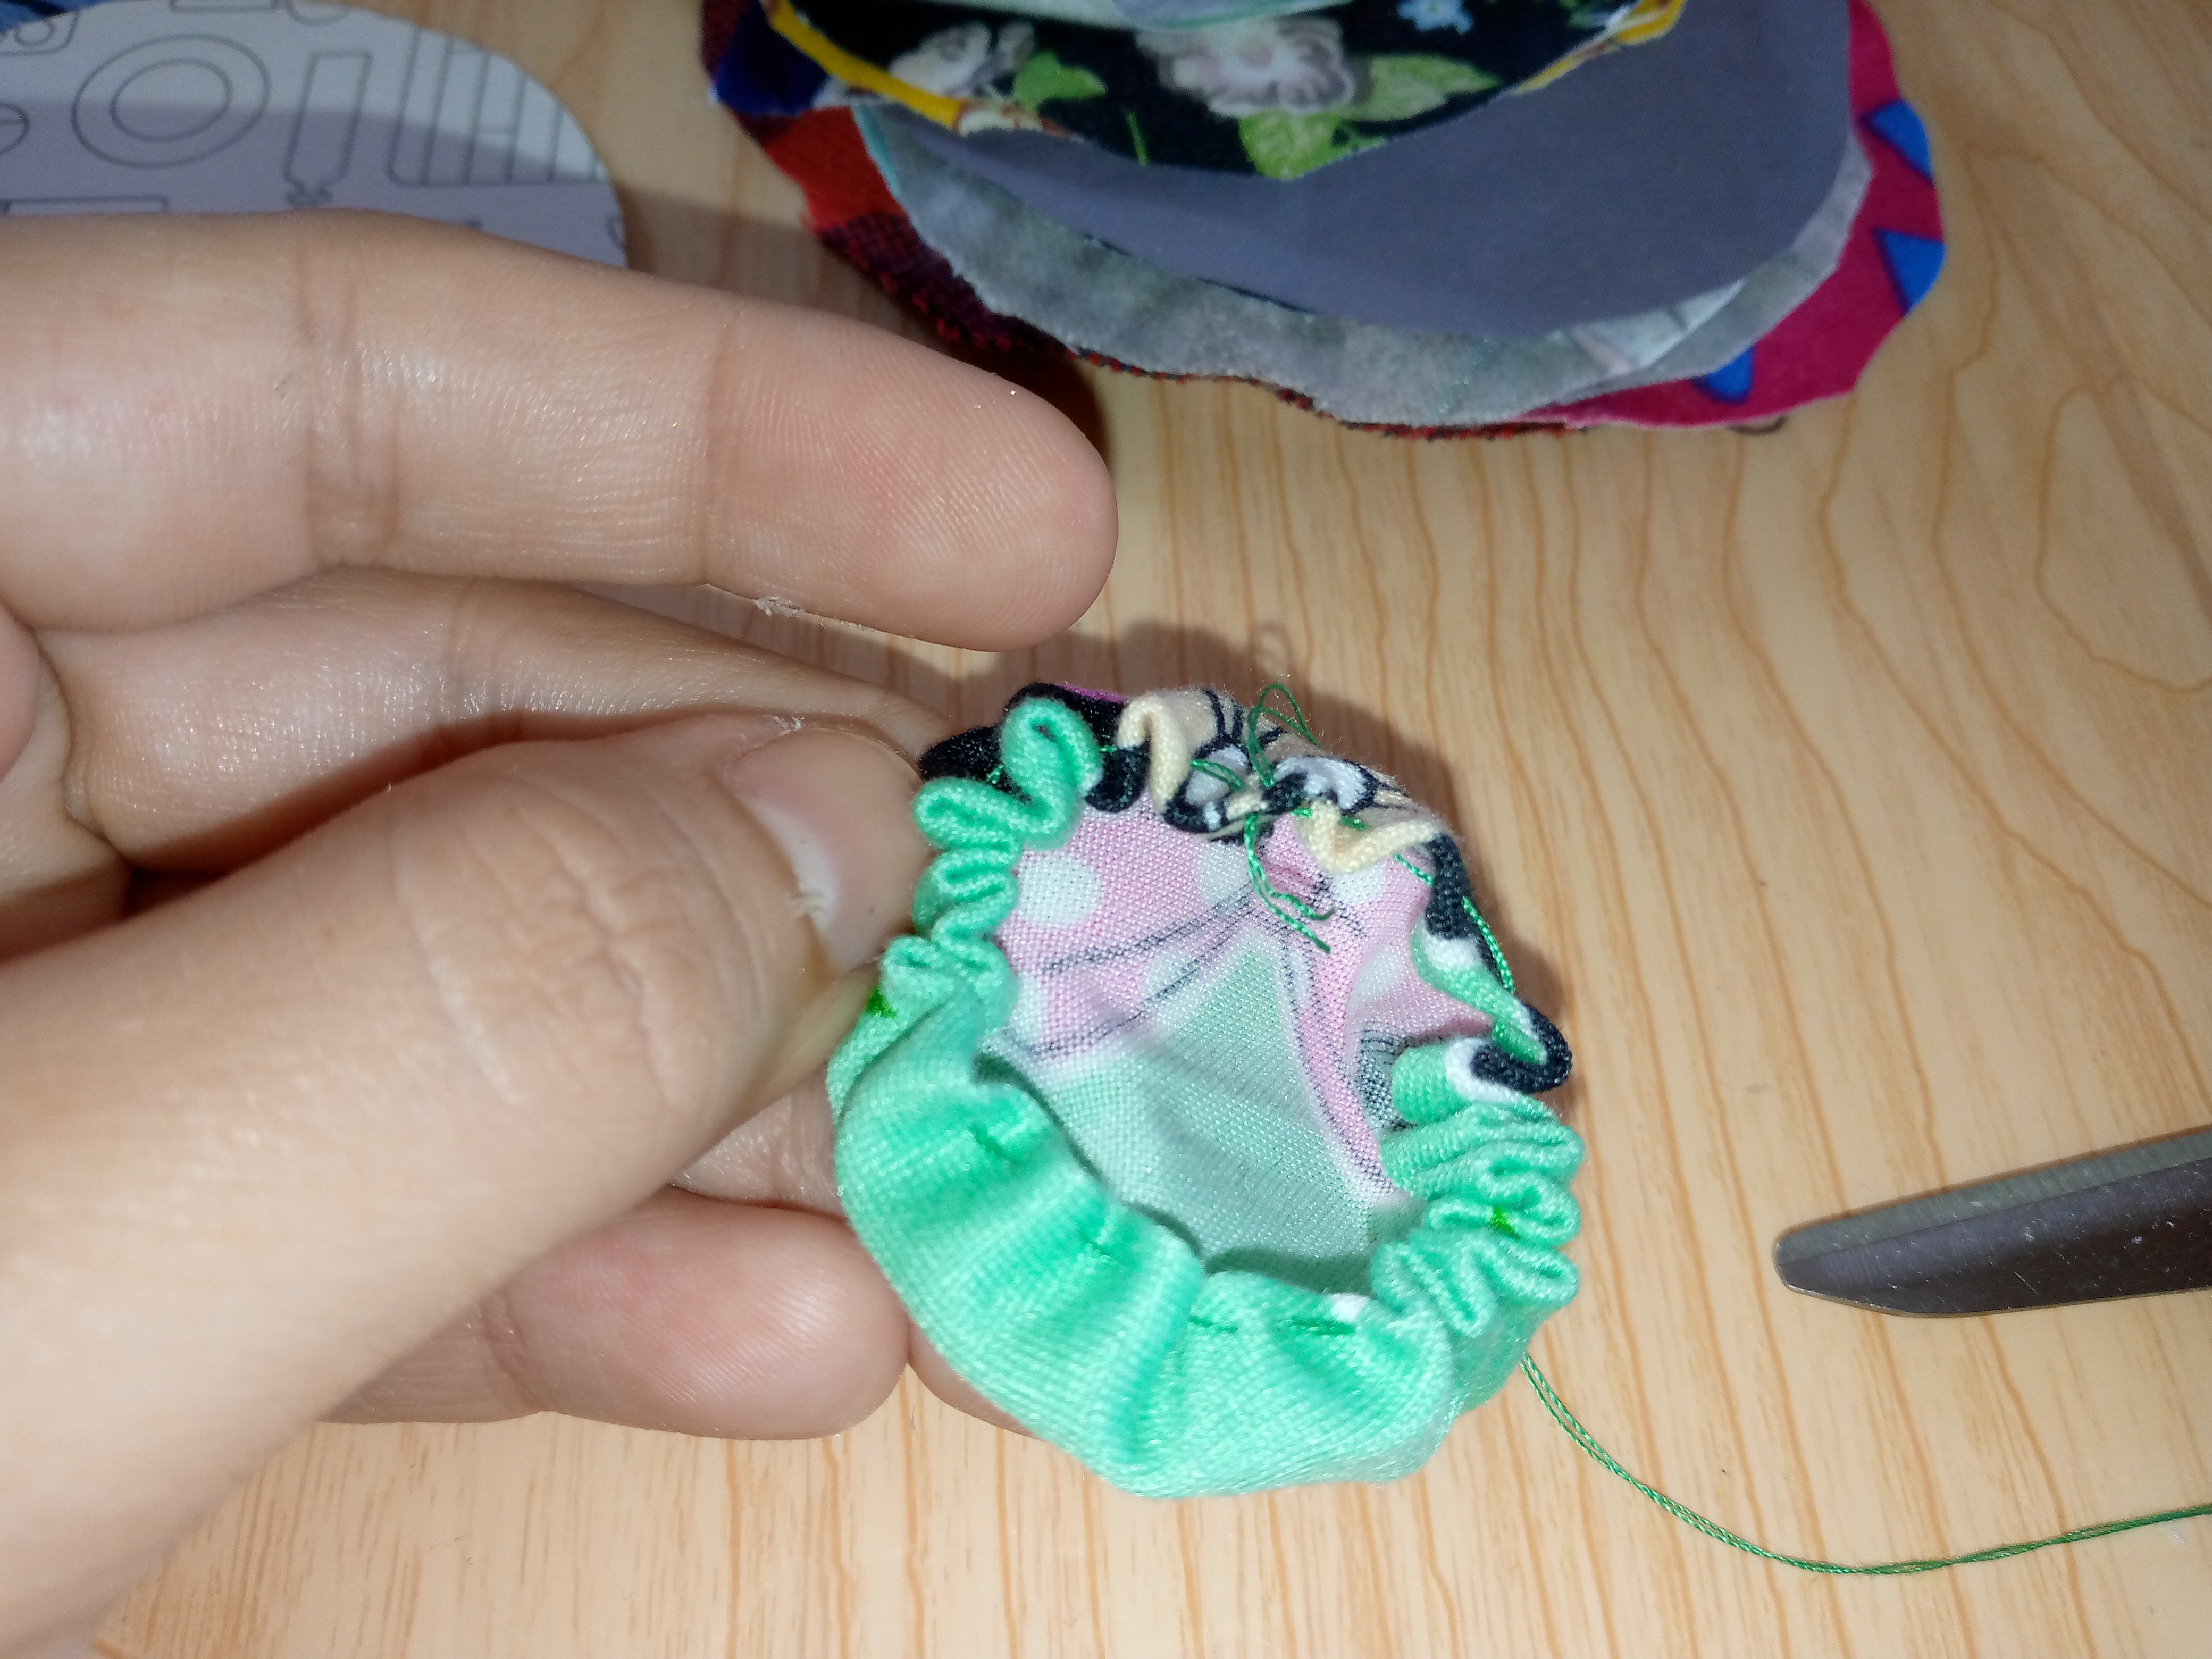
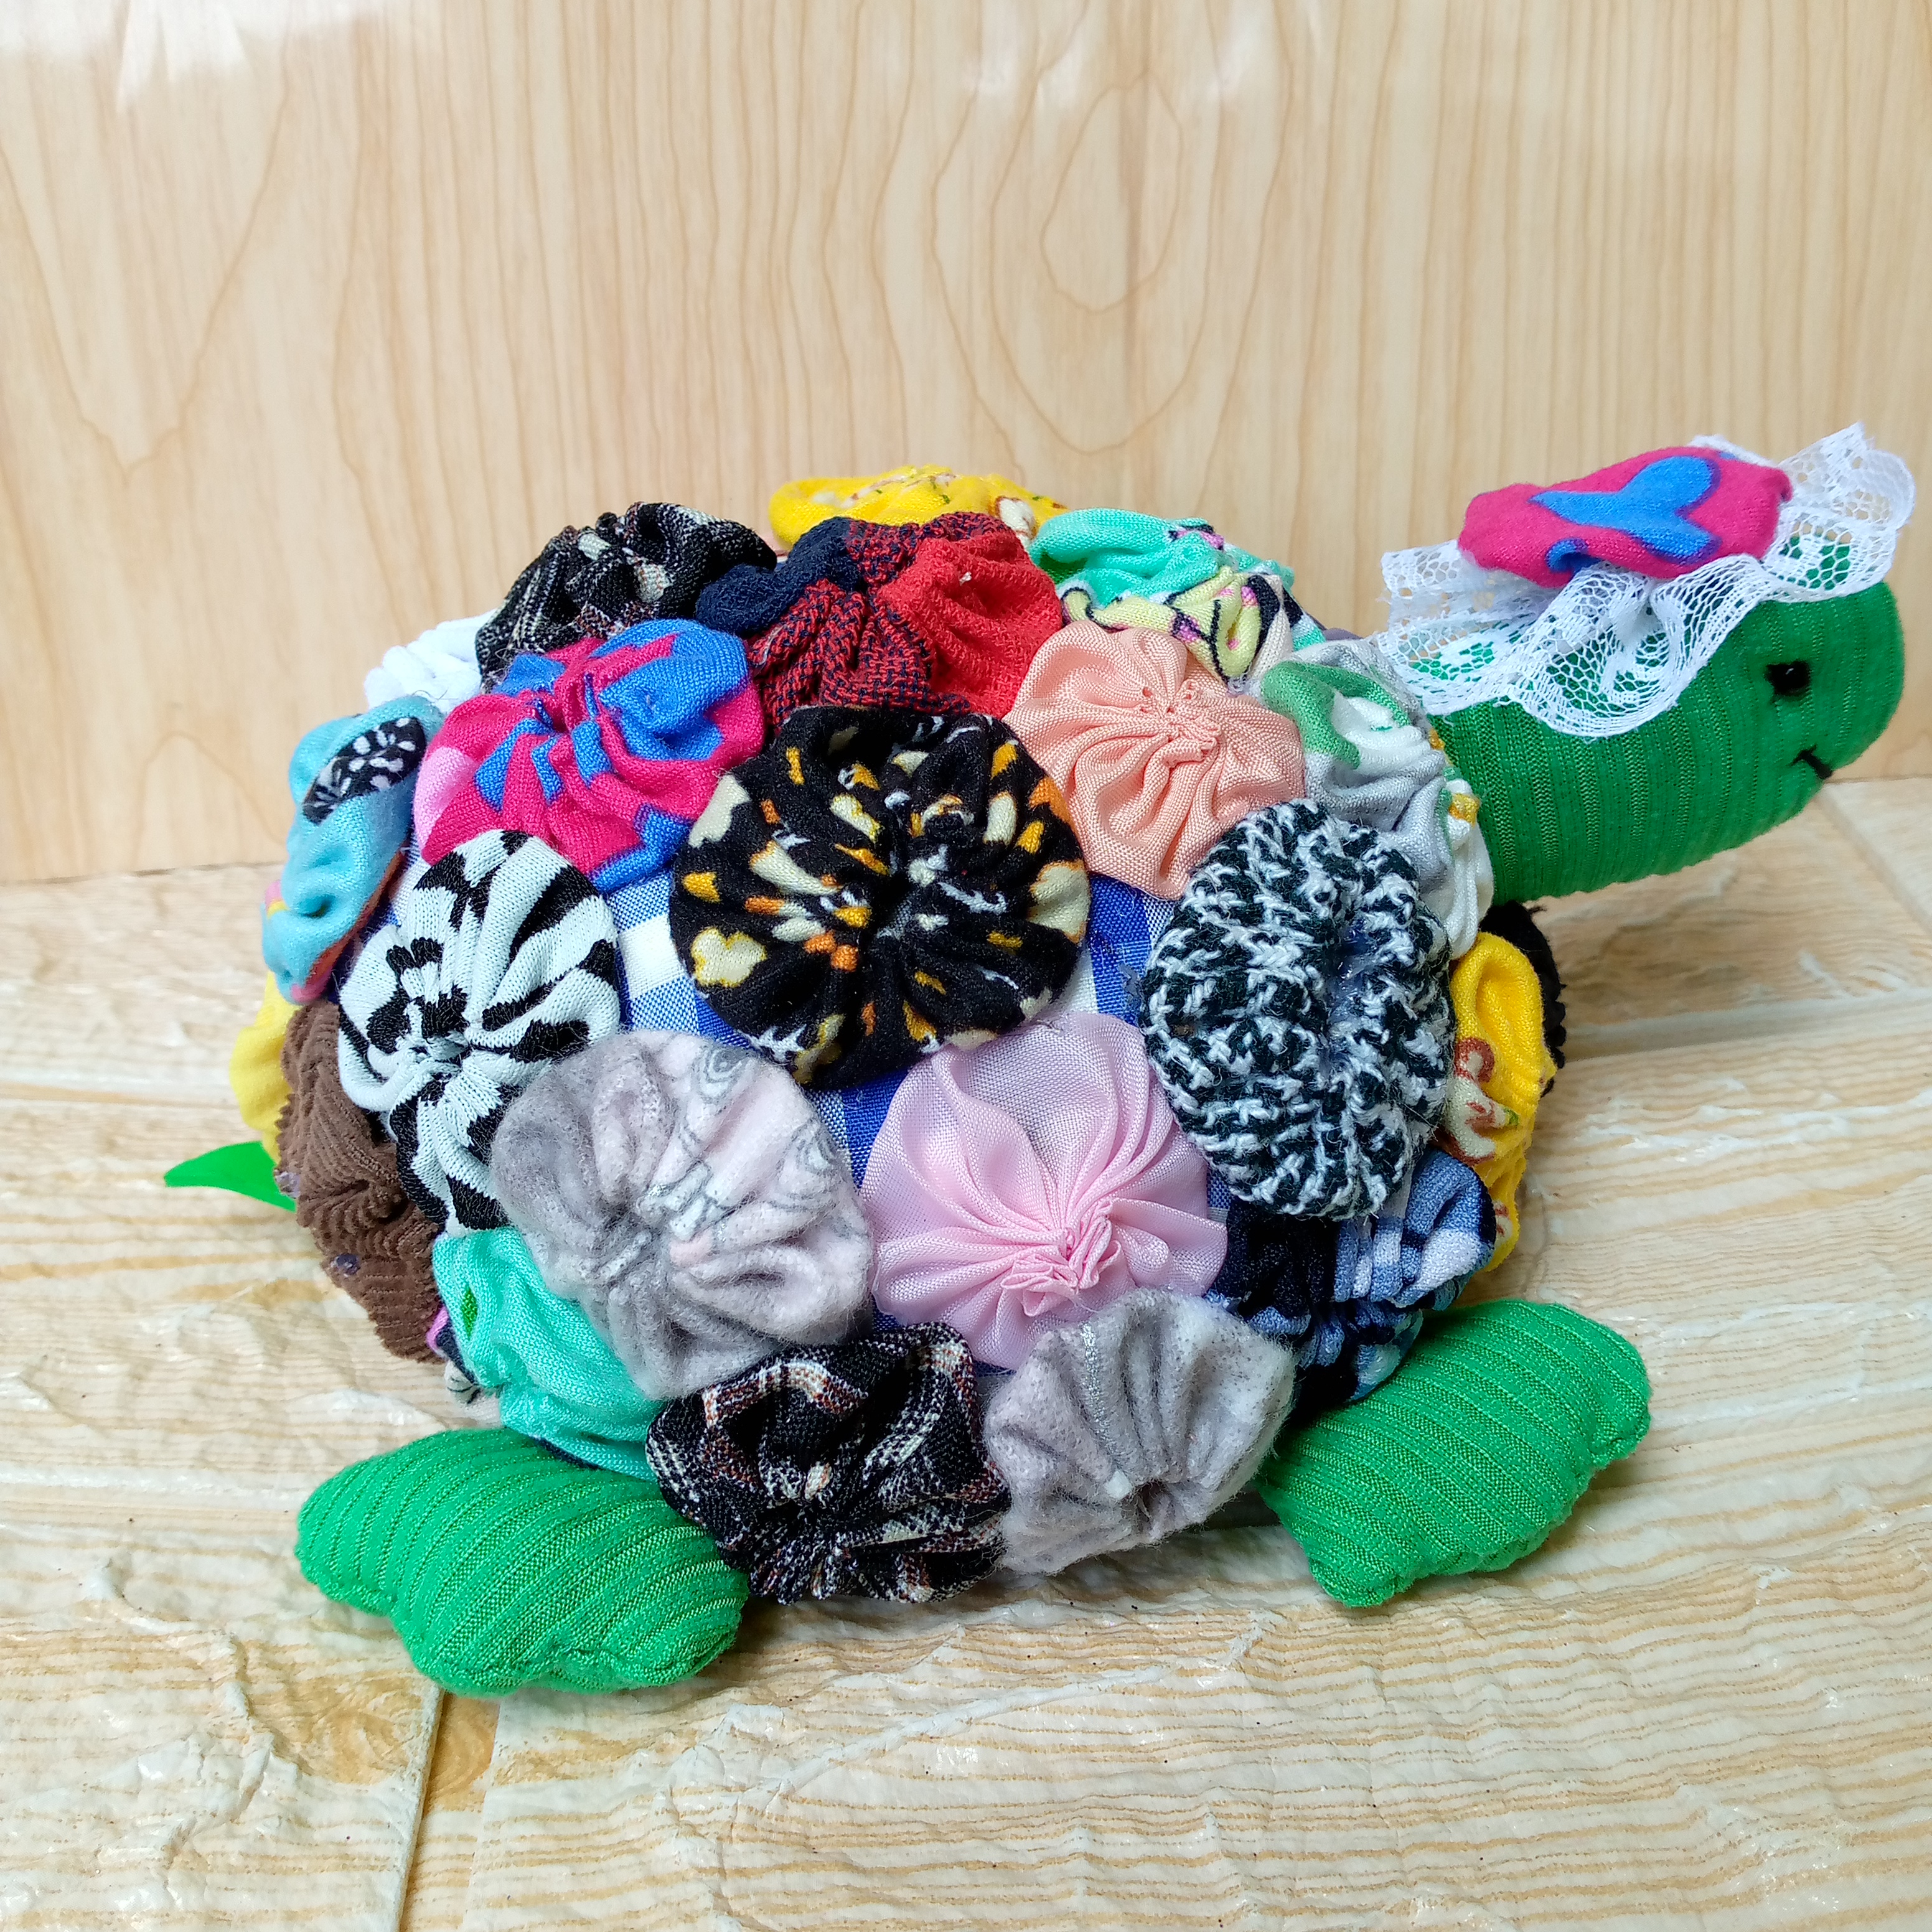
With our circular pattern that I made out of cardboard measuring 8 cm wide x 8 cm long, I will cut out several circles with the scraps of fabric. I will cut enough so that I can reach them. Then, to assemble the circles, I will fold them inwards into the circle and sew with needle and thread all around the perimeter. Of course, at the end, I will gather them well and thus form the pieces for the turtle's shell.

Paso 04
Step 04
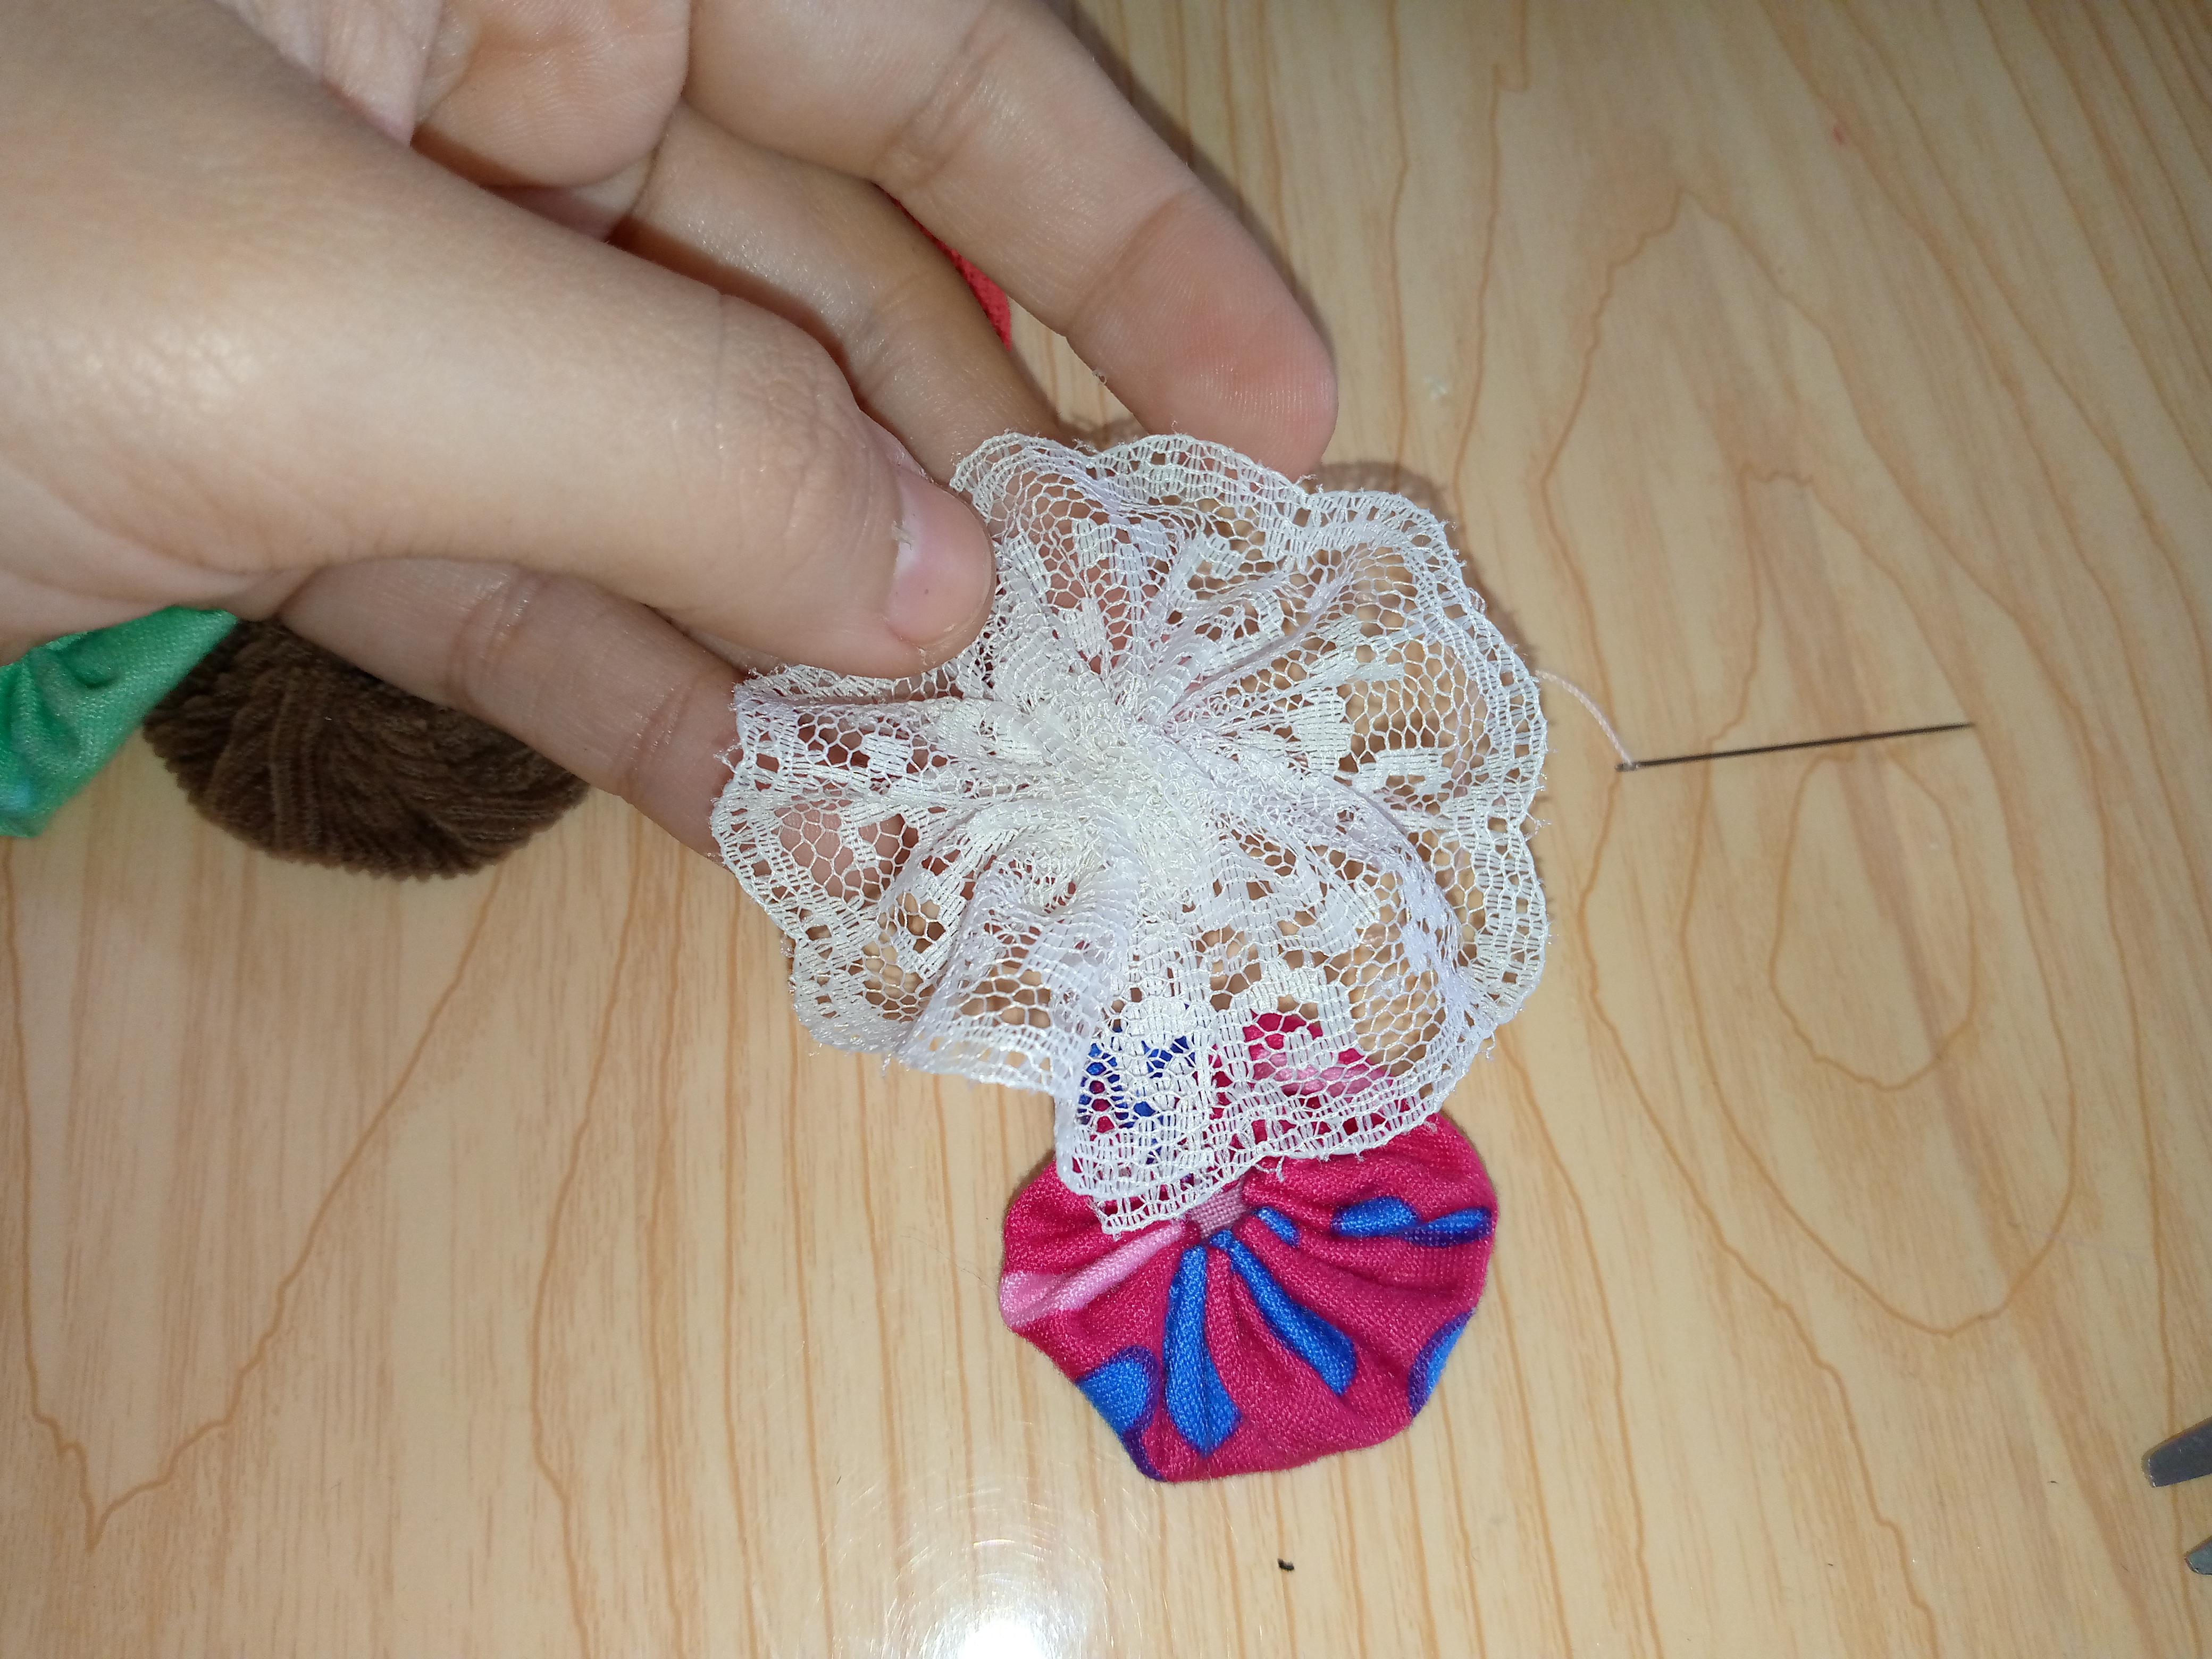
Now to finish I will begin to assemble the circles starting with the top of my turtle and I will glue each one with silicone from top to bottom, gluing them well so that they do not come loose or peel off when we insert the pins. Once I assembled the circles and covered the shell with them, I wanted to make a little hat for my turtle with a bit of white lace that I sewed around it and gathered it in the middle, I placed one of the little fabric circle badges and glued it on top of its head and that is how I finished it.
Resultado:// Result:
This is how it turned out, my artisan friends, I am glad to know that you liked the idea of making this pincushion with recycled materials, it can be used to decorate in those spaces where we want this little turtle to look pretty and another thing is that we can use the smaller spheres to make little turtles and make a good gift to someone you know will like it or to that seamstress friend who we know will appreciate it very much🪡🧵, I wish you a beautiful afternoon and until another next blog😉.


Creating things with love 🌷❤️
🦋✨ All the images in this publication are my author ,📱taken with my TecnoSpark8C cell phone |📸Photos edited in PicsArt and Canva. Text translated in Google Translate.
Te quedó super hermosa 😍 aunque acá no tengo muchos retazos de tela tengo una vecina costurera que se la voy a enseñar se que la va a amar. Gracias por compartir ❤️ saludos
Oh amiga gracias por tu comentario,le va a gustar mucho cuando sepa que se pueden hacer cositas con retazos de tela muy bonitos 🧵🫂
Es muy linda 😍 que maravillosa creatividad para hacer esta tierna tortuguita y me encanto los materiales con los cuales esta hecha, toda una coqueta esta tortuga jeje 😘
Oh que lindo muchas gracias @elbuhito me alegra hasta sudo de tu agrado...saluditos 😘🦉