
English
Hi there, friends of the HiveDiy community, it's been a while, how are you doing today? I hope you are doing great!
Well, you know I'm a Girly Girl and I also love handmade things, so to speak. And what more handmade than a handmade denim bag?
I already have a few bags, but they are nothing like this, so I wanted to give a different touch to my little trunk of accessories. This time you will join me to make a little bag with the fabric of a pair of jeans… But the best part! Is that we will use only the boots, so you don't need to sacrifice jeans, just take one that you already want to cut (because with these hot weather, you just want to wear shorts).
So this time we'll take thread and needle, the boots of a pair of jeans, and here we go!
Materials
Two boots from a pair of jeans, measuring approx. 30 cm each. One will be used for the bag and the other for the straps.
Thread and needle.
Tape measure.
Pencil to mark where we will cut the fabric.
Scissors.
Embellishments of your choice.
 |  |
|---|
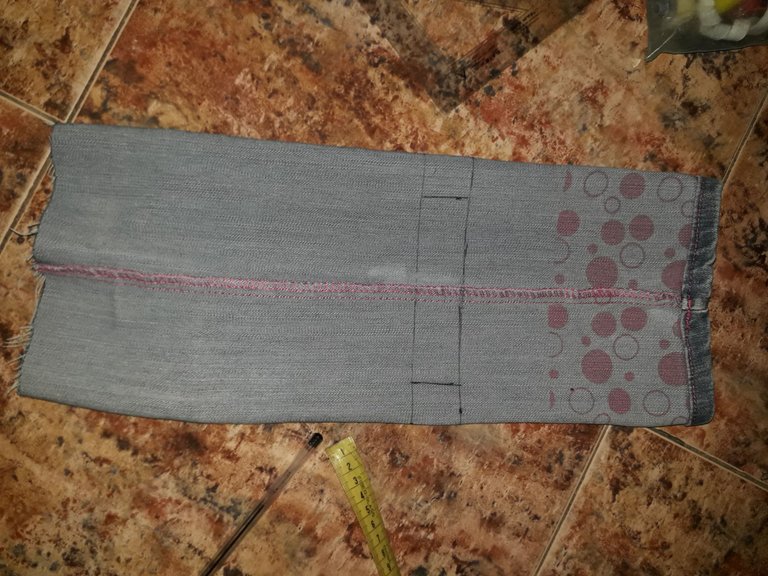
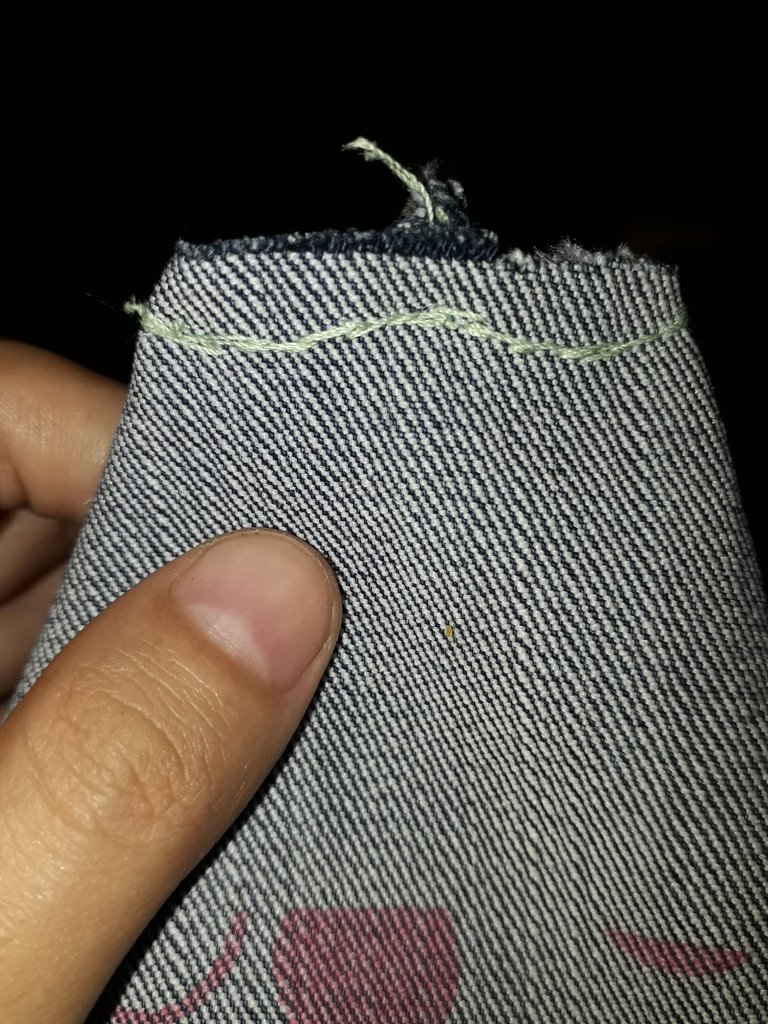
I started by arranging the first boot of the pants, so that the side seam of the boot is almost in the middle, as shown in the photo on the left. It's not ideal to do it this way, and in fact these seams are usually left on the sides, but I wanted them to look like ornaments on the bag.
I measured approximately 16 cm from the hem of the pants to the top of the boot, and marked a horizontal line. Then, I measured about 1 cm higher, and marked another line, this would be a guide to mark a couple of squares on each side, 3 cm wide each.
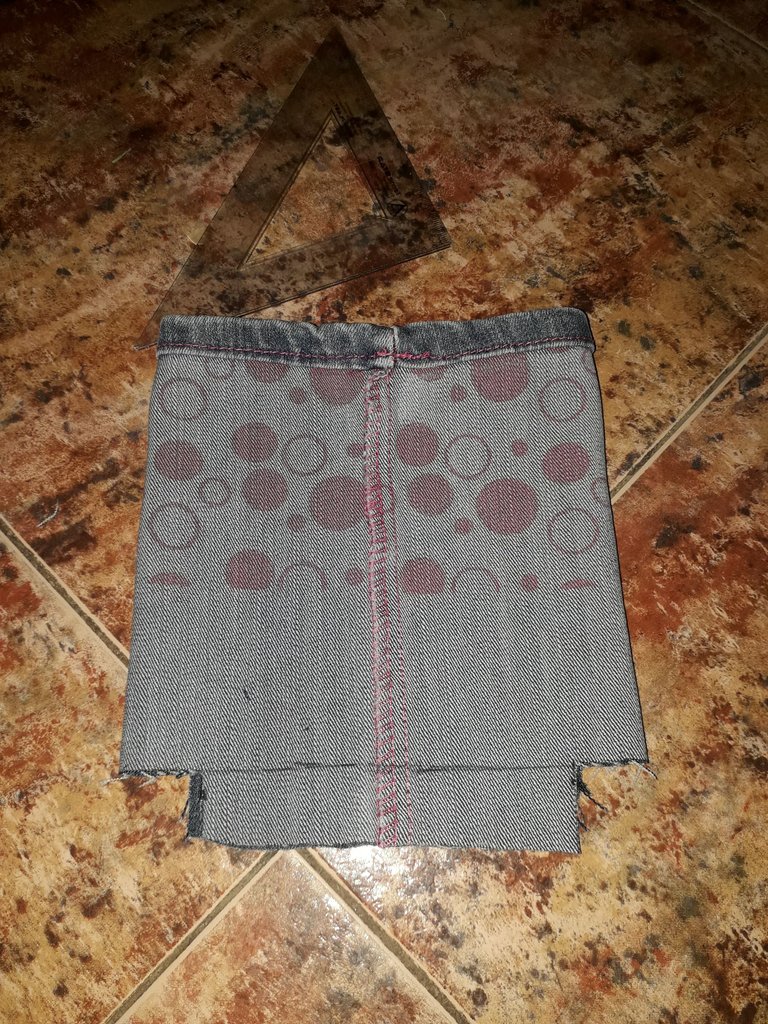
After so many guide lines and so on, we cut right on the second line we marked, and also cut out the 3 cm squares we made earlier, as seen in the second picture.
Now we are going to sew to start closing what is going to be the bottom of the bag. We make a seam only in this area.
I really liked doing this seam, which consists of putting the needle through the fabric and passing the thread over it, then pulling it and repeating the process along the whole area that we need to sew; I feel that this seam is quite similar to the one that is usually done professionally on the inside of the garments, but I emphasize “similar”, hahaha.
 |  |
|---|
This step I don't know how to explain it exactly....
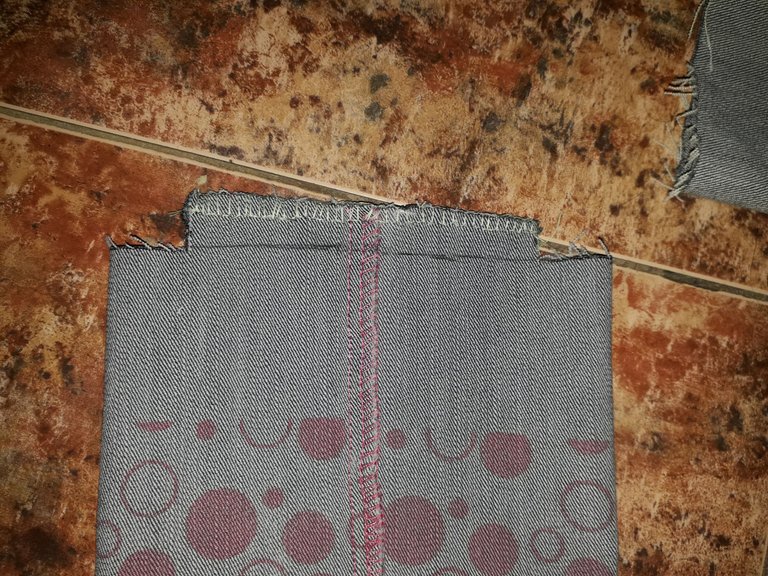
We are going to take our bag and now we are going to put it on its side. The little square holes that we didn't sew before, we are going to flatten them as you can see in the second picture, and that's where we are going to sew a seam. I hope you understand, good thing I have pictures to illustrate, hahaha.
I made the seam in that wave shape, I really don't know why, it was like just at that moment that I was making the seam, my hand took free will and made those curves. When I turned the fabric over afterwards, I realized that it didn't look too bad, and in fact the seam was well secured. The one thing I would always recommend is: if you know how to use a sewing machine, unlike me, you should use one. Machine sewing is 10 times faster and a more professional finish.
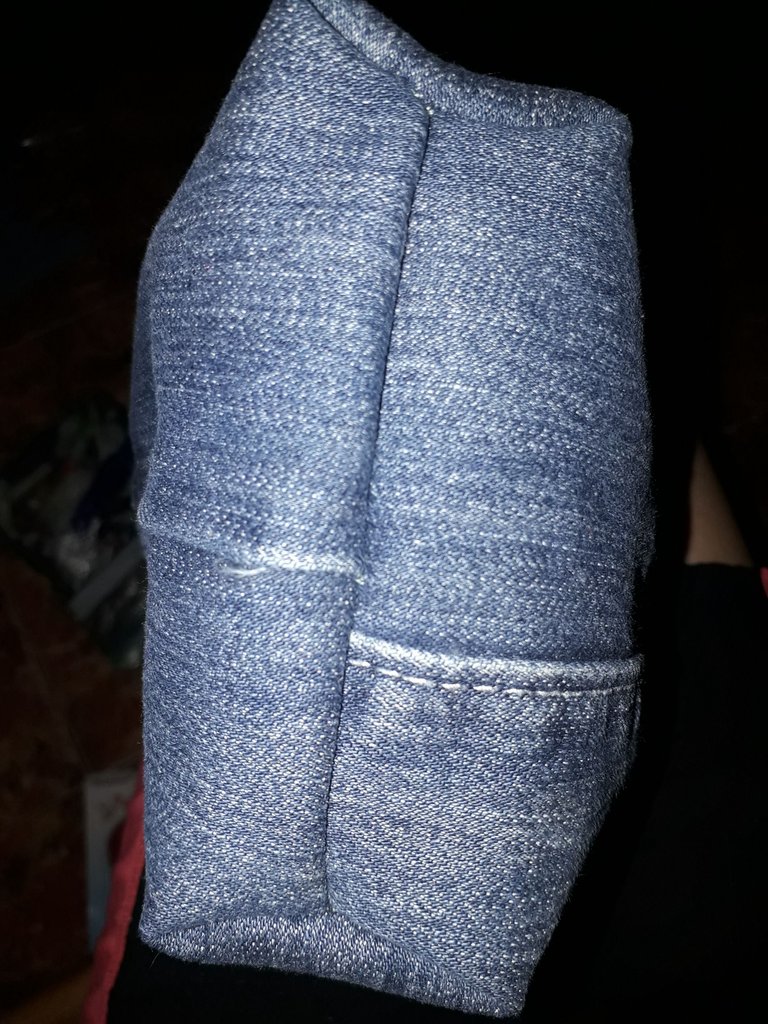
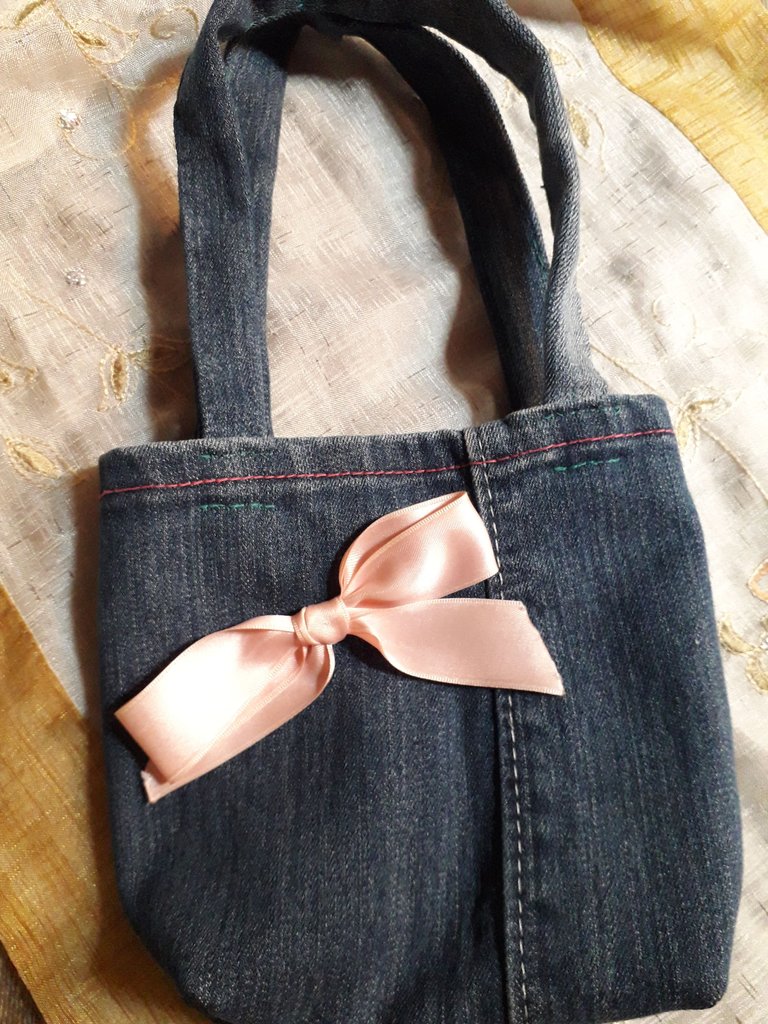
With these simple steps, we would already have the bottom of our bag. Did you notice how those seams I made on the sides ended up looking like a pair of bows? I really liked it. It's my first time making a bag, but I think this is a very good idea for those of us who are beginners, because it helps us to understand the basic structure of a bag, and then we can replicate it many more times, with different sizes and fabrics, if we want.

And with this we would have the base of our bag, we only need the straps and that would be it, but first let's go with that.
 |  |
|---|
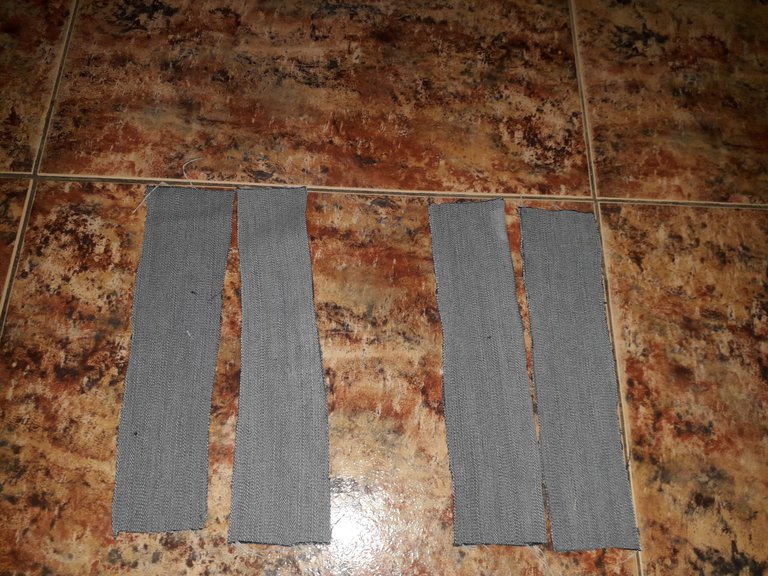
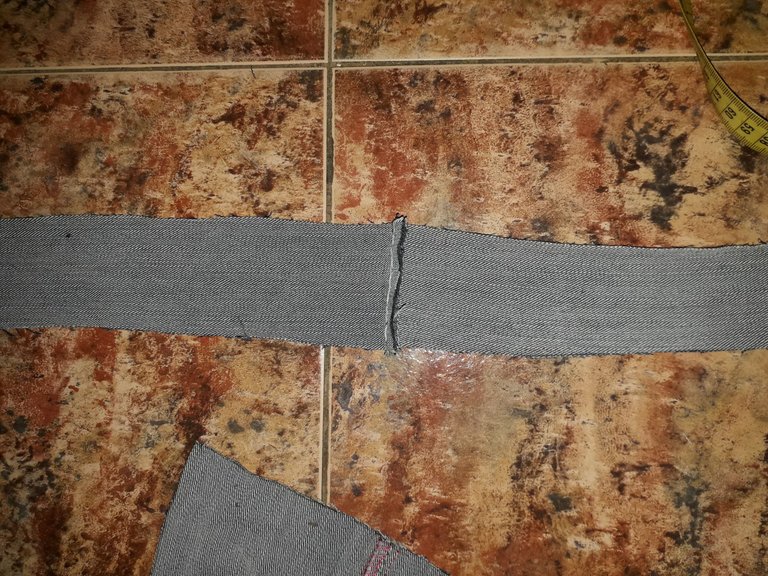
We take the second trouser boot and cut out 4 ribbons, 22 cm long and 5 cm wide, each one.
We will divide them in two pairs, and we will have to sew them together, as shown in the second picture, resulting in a ribbon of approx. 44 cm long and 5 cm wide.
Remember that the length of these ribbons will depend on your personal taste. I, by the way, had to cut them in four parts because the trouser boot I used was not so long and a 40 cm long fabric was not enough, hahaha, as you can see.
 |  |
|---|
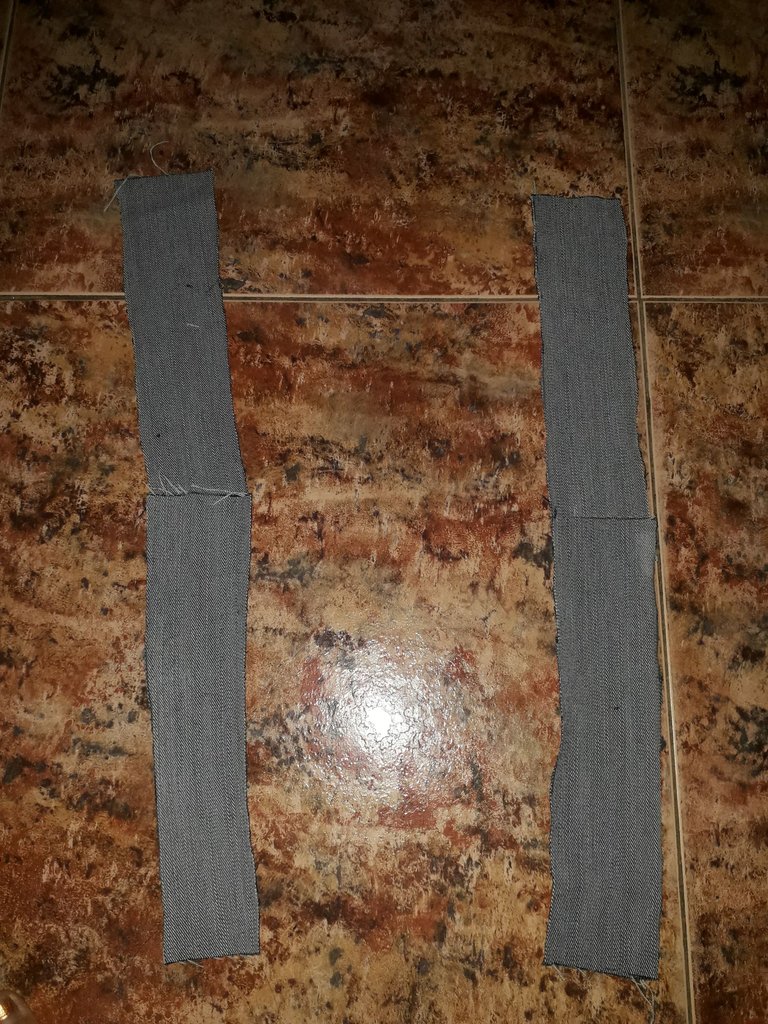
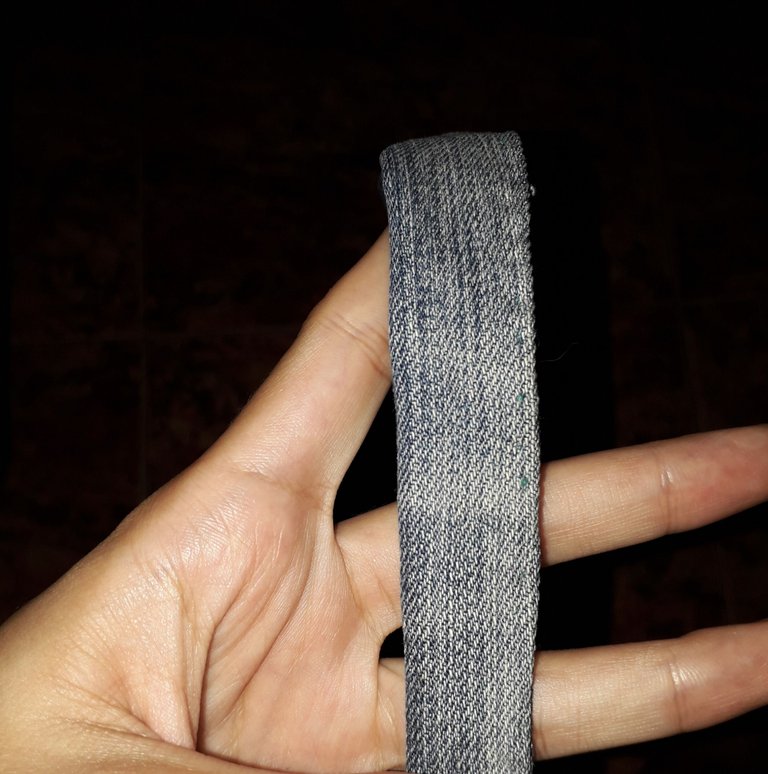
We are going to fold the fabric in such a way that we are left with two strips of 44 cm long and approx. 2.5 cm wide. These rough edges that we have left, we are going to tuck them in a little bit, and we are going to start sewing a seam on top, like a hem, practically. I made a seam that I call “stitch seam”, because it looks like small, almost imperceptible stitches on top. The important thing is to make a nice seam, you know that it will be visible because it is the strap of our bag.
 |  |
|---|
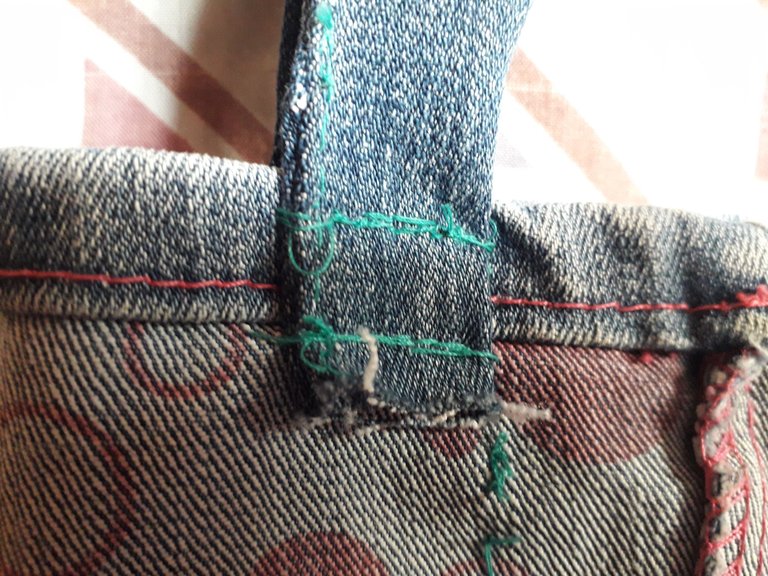
Then we will take the ribbons, once the edges of both are sewn, and we will glue them to our bag. I glued them to the bag with a little bit of fabric leftover, and made two seams to secure it well. See the couple of pictures above, if I'm not making myself clear. This is a process I repeated four times, on each edge of the straps, respectively.
I think this is one of the elements of our bag that must be sewn in the best way, because it is what holds the weight of the things that will be inside the bag, although, because of its size, we will not put so much weight in it.
With this we would have the bag ready; however, I want to add a couple of decorations, which is up to each person's taste. I will add a small pocket and a bow. Let's go with the pocket process, although I'm not sure how I'll explain it.
 |  |
|---|
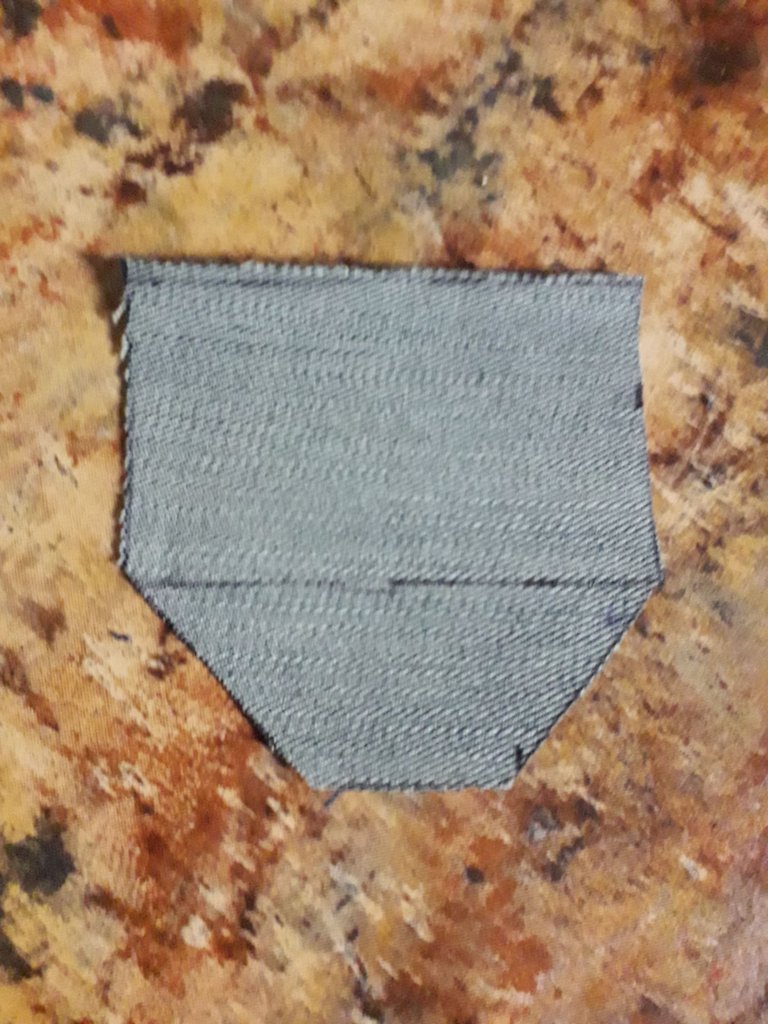
With the leftover fabric, I started to make the pocket. I took as a reference, more or less, the shape of the pocket of a skirt I had on hand, hahaha. First, I took a pencil to mark a rectangle 5 cm high and 8 cm wide on the fabric. Then, at each bottom edge of that rectangle, a diagonal line comes out. These two diagonal lines come close together to leave a 3 cm space between them. In conclusion, look at the image on the left to guide you, I hope my explanation was good enough anyway, hehe.
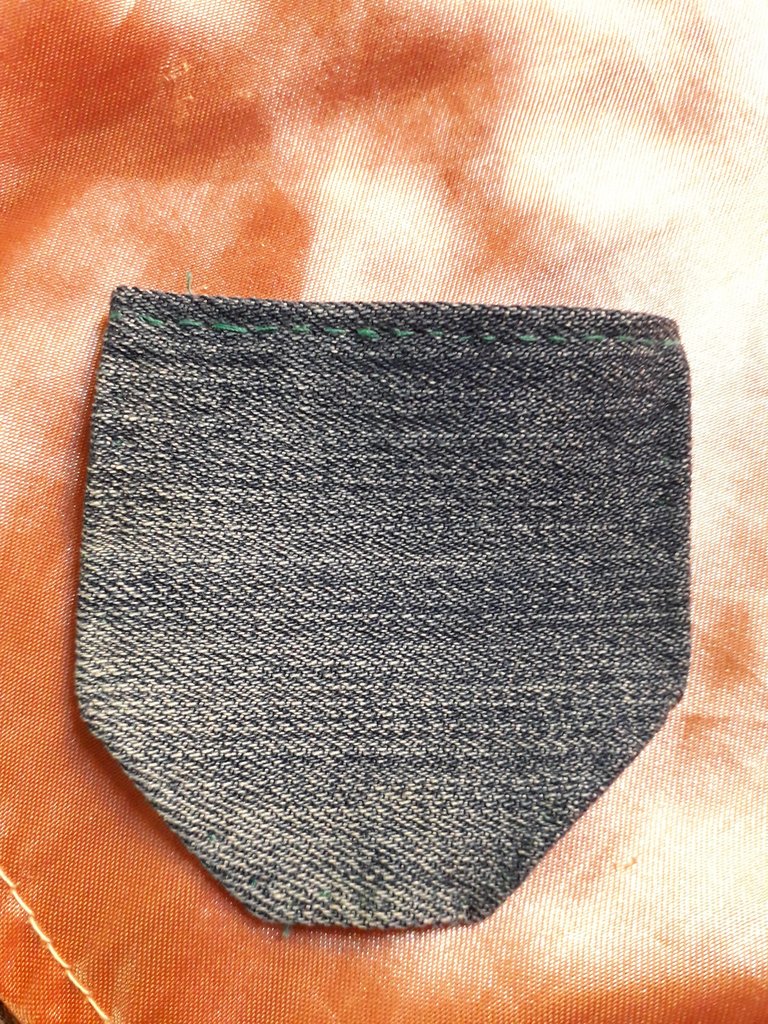
After we have marked this sketch on fabric, we cut it out. Once it is cut out, we are going to hem this pocket, so that the edges are not rough. As you can see, only in the upper part I made a “neat” seam of lines, to decorate. In the rest of the pocket, I did what I call “dot stitching”; I didn't take special care in securing it well, since these areas are the ones that I will later sew on top to attach them to the bag. The important thing is that we make the hem.
 |  |
|---|
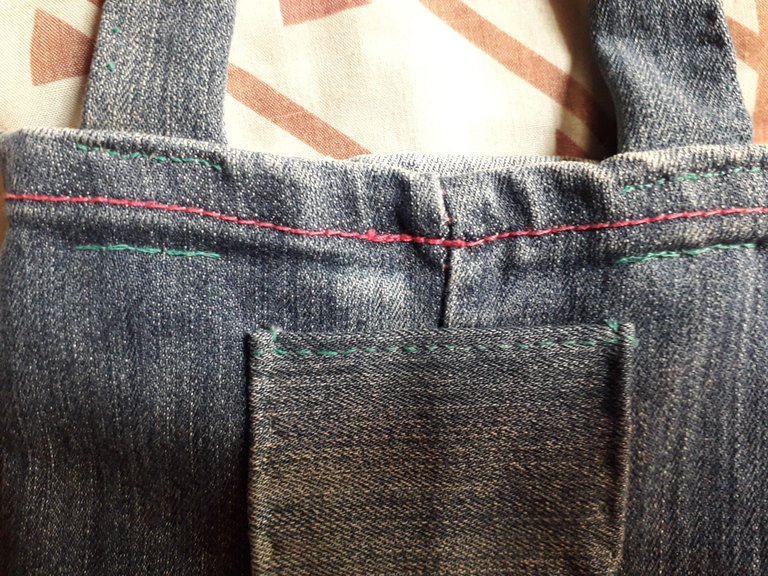
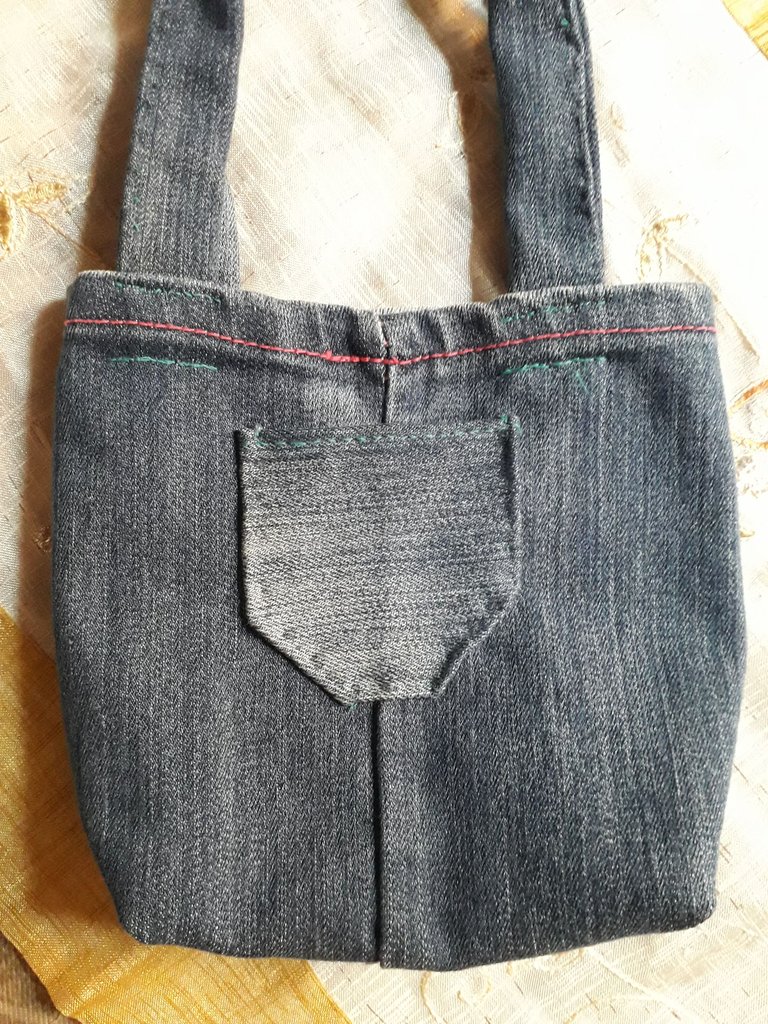
Once the hem of the pocket was ready, I took care of attaching it by sewing it to the back of the bag. Gluing a pocket like this is not easy, and in fact it was the first time I sewed a pocket on a garment.
Finally, I sewed a little bow that I had forgotten among my things. I don't have a tutorial on how I made the bow because I already had it made a long time ago, but it's really just a classic bow, one of those you make to tie the ribbon on your shoes, just like that.

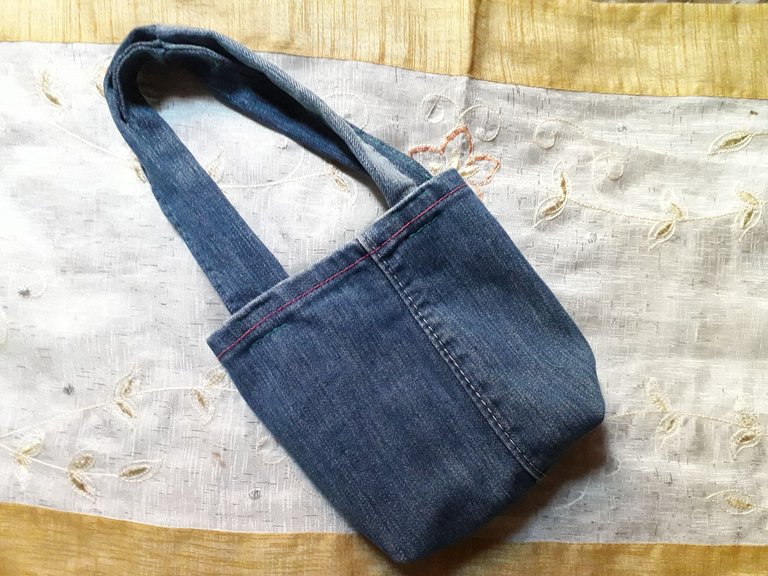
And that would be it! I loved it because it goes with everything, and I can put my makeup and girlie stuff in there, hehe. I also made it to fit my cell phone inside.
The only cons I saw is that it doesn't have a zipper and because it's so small, you have to carry it in your hand at all times. Although I don't know if anyone would know how to put a zipper on it somehow, it would be really cool.
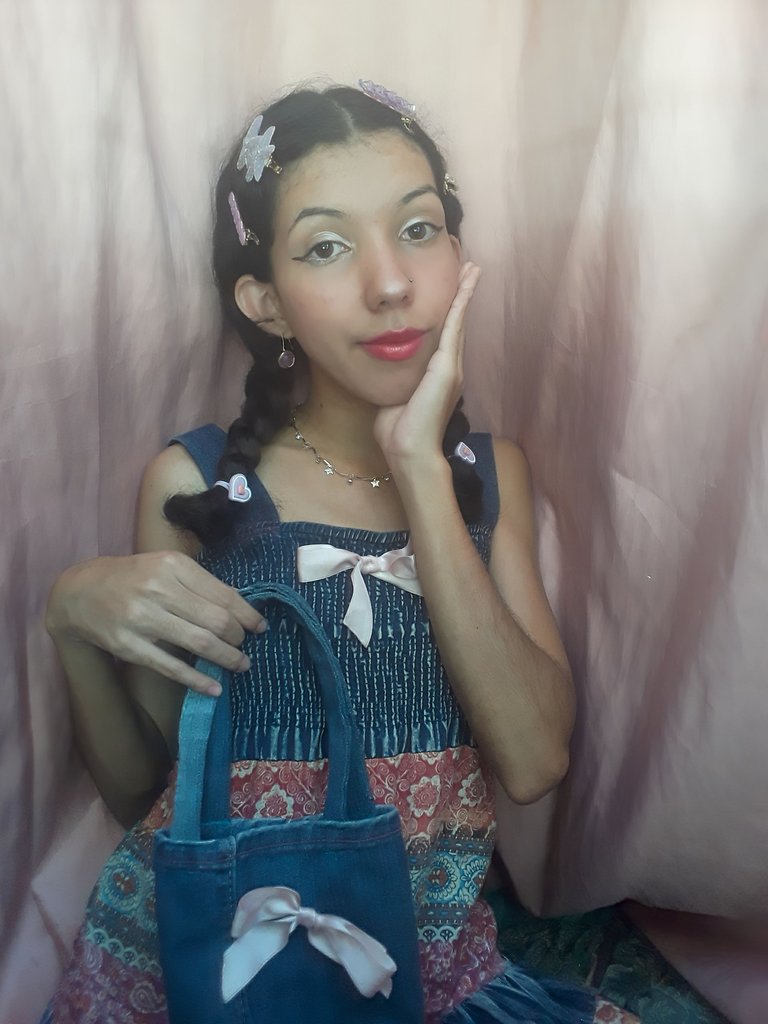
However, I liked this bag because it's easy to make, and it's a very useful way to recycle fabric, plus the jean fabric goes with everything. If you are a girl who likes simple, but pretty things, you should try this; the best thing is that you can put any embellishments you want on it.
Without anything else to add… Take care, drink water, and don't forget to smile. Love you! See you in the next post, bye!

Español
Holiii, amigos de la comunidad de HiveDiy, ha pasado un tiempo, ¿cómo se encuentran el día de hoy?, ¡espero que muy bien!
Pues saben que yo soy una Girly Girl y también me encantan las cosas artesanales, por así decirlo. ¿Y qué más artesanal que un bolso de mezclilla hecho a mano?
Ya tengo algunos bolsos, pero no son nada parecidos a esto, así que quise darle un toque diferente a mi pequeño baúl de accesorios. En esta ocasión me acompañarán a hacer un pequeño bolsito con la tela de unos jeans… ¡Pero lo mejor! Es que usaremos únicamente las botas, por lo cual no necesitan sacrificar unos jeans, simplemente toman uno que ya quieran recortar (porque con estos calores, solo dan ganas de usar shorts).
Así que en esta ocasión tomaremos hilo y aguja, y las botas de unos jeans, ¡y vamos allá!
Materiales
Dos botas de un pantalón de mezclilla, que midan aprox. 30 cm cada una. Una la usaremos para el bolso y la otra para los tirantes.
Hilo y aguja.
Cinta métrica.
Lapicero para marcar donde cortaremos la tela.
Tijera.
Adornos de tu elección.
| |
|---|
Comencé por acomodar la primera bota del pantalón, de manera que la costura lateral de la misma quede casi a la mitad, tal como se ve en la foto izquierda. No es lo ideal hacerlo de esta manera, y de hecho estas costuras se suelen dejar a los laterales, pero yo quise que lucieran como unos adornos en el bolso.
Medí aproximadamente 16 cm desde el dobladillo del pantalón hacia arriba de la bota, y marqué una línea horizontal. Luego, medí aproximadamente 1 cm más arriba, y marqué otra línea, esto sería una guía para marcar un par de cuadrados a cada lado, de 3 cm de ancho cada uno.
Después de tantas líneas guía y demás, recortamos justo en la segunda línea que marcamos, y también recortamos los cuadritos de 3 cm que hicimos anteriormente, tal como se ve en la segunda imagen.
Ahora vamos a coser para empezar a cerrar lo que va a ser el fondo del bolso. Hacemos una costura solo en esta zona.
Me gustó mucho hacer esta costura, que consiste en meter la aguja por la tela y pasar el hilo por encima, luego jalarla y repetir el proceso a lo largo de toda el área que necesitamos coser; siento que esta costura se parece bastante a la que suelen hacer profesionalmente por dentro de las prendas, pero hago énfasis en “se parece”, jajaja.
| |
|---|
Este paso no sé cómo explicarlo exactamente…
Vamos a tomar nuestro bolso y lo vamos a poner ahora de lado. Los huequitos cuadrados que no cosimos antes, los vamos a aplastar tal como se ve en la segunda foto, y ahí encima es donde pasaremos una costura. Espero que se entienda, que bueno que tengo fotos para ilustrar, jajaja.
La costura la hice en esa forma de onda, realmente no sé por qué, fue como que justo en ese momento que estaba haciendo la costura, mi mano tomó libre albedrío e hizo esas curvas. Al voltear la tela luego, me di cuenta de que no quedó tan mal, y de hecho quedó bien asegurada la costura. La única cosa que recomendaría siempre es: si sabes usar máquina de coser, a diferencia de mí, deberías usarla. Coser con máquina es 10 veces más rápido y con un acabado más profesional.
Con estos simples pasos, ya tendríamos el fondo de nuestro bolso. ¿Se dieron cuenta como esas costuras que hice a los laterales terminaron luciendo como un par de arcos? Me gustó mucho. Es mi primera vez haciendo un bolso, pero creo que esta es una muy buena idea para los que somos principiantes, porque nos ayuda a entender la estructura básica de un bolso, y luego podemos replicarlo muchas veces más, con diferentes tamaños y telas, si queremos.
Y ya con esto tendríamos la base de nuestro bolso, solo nos faltan las cintas y ya estaría, pero primero vamos con eso.
| |
|---|
Tomamos la segunda bota del pantalón y recortaremos 4 cintas, de 22 cm de largo y 5 cm de ancho, cada una.
Las vamos a dividir en dos parejas y las tendríamos que empatar, cosiendo, como se ve en la segunda imagen, resultando en una cinta de aprox. 44 cm de largo y 5 cm de ancho.
Recuerden que el largo de estas cintas va a depender del gusto personal de ustedes. Yo, por cierto, tuve que recortarlas en cuatro partes porque la bota del pantalón que usé no era tan larga y no me alcanzaba una tela de 40 cm de largo, jajaja, ustedes entenderán.
| |
|---|
Vamos a doblar la tela de tal manera que nos queden dos cintas de 44 cm de largo y aprox. 2,5 de ancho. Estos bordes toscos que nos quedan, los vamos a meter hacia dentro un poco, y vamos a comenzar a hacer una costura por encima, como un dobladillo, prácticamente. Yo le hice una costura que es a la que yo le llamo "costura de punto", porque por encima luce como pequeños puntos casi imperceptibles. Lo importante es hacer una costura bonita, ya saben que será visible porque es la correa de nuestro bolso.
| |
|---|
Luego tomaremos las cintas, una vez ya cosidos los bordes de ambas, y las vamos a pegar a nuestro bolso. Yo las pegué al bolso con un pequeño sobrante de tela que quedara hacia dentro, y le hice dos costuras para asegurarlo bien. Vean el par de fotos arriba, si no me estoy explicando bien. Este es un proceso que repetí cuatro veces, en cada borde de las correas, respectivamente.
Creo que este es uno de los elementos de nuestro bolso que debe estar cosido de la mejor manera, porque es lo que sostiene el peso de las cosas que estarán dentro del bolso, aunque, por su tamaño, no meteremos tanto peso en él.
Con esto ya tendríamos listo el bolso; sin embargo, yo quiero añadirle un par de adornos, que ya queda al gusto de cada persona. Yo le añadiré un pequeño bolsillo y un lacito. Vamos con el proceso del bolsillo, aunque no estoy segura de como lo explicaré.
| |
|---|
Con la tela sobrante, me dispongo a hacer el bolsillo. Tomé como referencia, más o menos, la forma del bolsillo de una falda que tenía a la mano, jajaja. Primero tomé un lapicero para marcar un rectángulo de 5 de alto y 8 cm de ancho en la tela. Luego, en cada borde inferior de ese rectángulo, sale una línea diagonal. Estas dos líneas diagonales se acercan hasta dejar un espacio de 3 cm entre ellas. En conclusión, miren la imagen de la izquierda para guiarse, espero que mi explicación haya sido lo suficientemente buena de igual manera, jiji.
Después de que hayamos marcado este boceto en tela, lo recortamos. Una vez recortado, vamos a hacer un dobladillo a este bolsillo, para que no queden toscos los bordes. Como ven, solo en la parte superior hice una costura "cuidada" de líneas, para adornar. En el resto del bolsillo, hice lo que yo llamo “costura de puntos”; no me tomé especial cuidado en asegurarla bien, ya que de igual manera estas zonas son las que luego coseré por encima para pegarlas al bolso. Lo importante es que hagamos el dobladillo.
| |
|---|
Una vez listo el dobladillo del bolsillo, me encargué de pegarlo cosiéndolo a la parte trasera del bolso. Pegar un bolsillo así no es fácil, y de hecho es la primera vez que cosía un bolsillo en alguna prenda.
Por último, le cosí un lacito que tenía olvidado entre mis cosas. No tengo tutorial de como hice el lazo porque ya lo tenía hecho desde hace tiempo, pero en realidad solo es un lazo clásico, de esos que haces para amarrar la cinta de tus zapatos, tal cual.
¡Y ya estaría! A mí me encantó porque combina con todo, y puedo meter mi maquillaje y mis cosas de chicas ahí, jiji. También lo hice a la medida para que cupiera mi celular dentro.
Los únicos contras que yo le vi, es que no tiene cierre y que, como es tan pequeño, se debe llevar siempre en la mano. Aunque no sé si alguien sabría ponerle un cierre de alguna manera, estaría muy genial.
Sin embargo, a mí me gustó este bolso porque es fácil de hacer y es una manera muy útil de reciclar tela, además de que la tela de jean combina con todo. Si eres una chica a la que le gustan las cosas simples, pero bonitas, deberías intentar esto; lo mejor es que puedes ponerle los adornos que quieras.
Sin nada más que añadir… Cuídense, tomen agua, y no se olviden de sonreír. ¡Se les quiere! Nos vemos en el próximo post, ¡chau!

Credits | Créditos
- English translation DeepL (sorry for any mistakes, English is my second language)
- Traducción al inglés DeepL (lo siento por cualquier error, el inglés es mi segundo idioma.)
- Cover, dividers, and banners made in Canva
- Portada, separadores y banners hechos en Canva
- Photos used in the post were taken by me, using a Samsung Galaxy J6
- Las fotos usadas en el post fueron tomadas por mí, usando un Samsung Galaxy J6n by me, using a Samsung Galaxy J6
Posted Using INLEO
AYNSSS CELELEEE tú haces unas cosas vale, me ganaste, yo ni sé coser. Me da como mucha ternura cuando veo que haces cositas así. Veinte diez para ti.
Jajaja, gracias chama. 🩷✨
Pero tu también puedes aprender a coser, yo por ejemplo solo se cositas básicas, no es realmente difícil.
Ayñ, me alegra saber que te guste lo que yo hago, porque s veces siento mucha inseguridad para subirlo. Mwah. 💋
I love this kind of bags with this material.🤗❤️
I'm so glad you liked it. ✨ Yep, it's a versatile material, I'd say. 🩷
Exactly my dear, is the word, a super versatile material.
the bag is very beautiful
Thank you 🩷✨
You're welcome. Happy Monday.
That's a lovely way to recycle old jeans, and the size of this bag is pretty decent:)
That's right, I think it's a useful way to give new life to those pieces of clothing. Regarding the size, I think as long as it fits the necessary items for our daily outings, it's fine. 🤭
And thanks for commenting, I'm glad you liked it. ✨
That is so cute😍maybe I'll try to make this one hihi
Awww, thank you so much 🩷. I'm glad you think it's cute. I bet it’s going to turn out gorgeous, and I can’t wait to see what decorations you'd add to it. ✨
Toda una artesana eres, me encanta cuando haces este tipo de proyectos. Yo hace años comencé una cartera parecida, pero la termine, no recuerdo porqué 😆 creo que coser no es lo mío jajaja. Pero la tuya quedó hermosa y sí combina con tu vestido, buen trabajo nena. 🥰🫰🏻
Gracias, Sarangcita! Que bueno que te guste jijiji, esa es mi motivación para seguir subiendo estás cositas. Te entiendo, también me pasa de que dejó algunas cosas abandonadas, y muchas otras han terminado en la basura. Pero después de todo, si a ti no te gusta la costura, al menos tienes una gran habilidad como artista. Y si, combina muy lindo, para un día tranquilo. 🩷✨
~~~ embed:1897803632625549801?t=JQ3yJXj1g-XlPzb4tTSZcQ&s=19 twitter metadata:Tm90X0NlbGVseXx8aHR0cHM6Ly90d2l0dGVyLmNvbS9Ob3RfQ2VsZWx5L3N0YXR1cy8xODk3ODAzNjMyNjI1NTQ5ODAxfA== ~~~
Congratulations @celely! You have completed the following achievement on the Hive blockchain And have been rewarded with New badge(s)
Your next target is to reach 150 posts.
You can view your badges on your board and compare yourself to others in the Ranking
If you no longer want to receive notifications, reply to this comment with the word
STOPCheck out our last posts:
Your denim bag is so simple, classy and cost effective. Great job and thanks for sharing.
Thank you very much! Glad to hear you liked it, I really appreciate the support ✨.