Español.
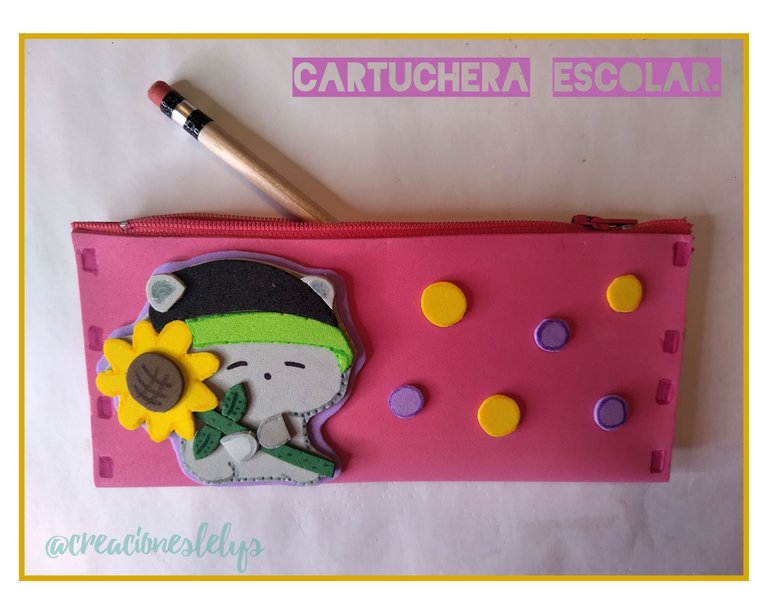
CARTUCHERA ESCOLAR. ELABORADA CON FOAMI.
Hola, hola. Espero que estén muy bien. Gracias a HONEY MANUALIDADES hoy puedo mostrarles la linda decoración que realicé sobre una cartuchera elaborada con foami. Estoy súper contenta con el resultado. Pónganse cómodos para que lean y disfruten de este tutorial.

Les cuento que he tenido que ocupar las horas de la madrugada para hacer mis creaciones ya que ahora duermo en el día y hago guardia en las noches. Esto porque debemos estar alertas ya que los delicuentes andan rondando por nuestro sector, al parecer entre la 1 y 3:30 de la madrugada ellos caminan por estas calles buscando robar en alguna casa. Nada mejor que mantenerme despierta haciendo mis manualidades.
Aproveché de realizar una linda CARTUCHERA ESCOLAR PARA NIÑOS. Entran en ella cómodamente los lápices de grafito, lapiceros y lápices de colores. Además podemos guardar el sacapuntas y la borra.

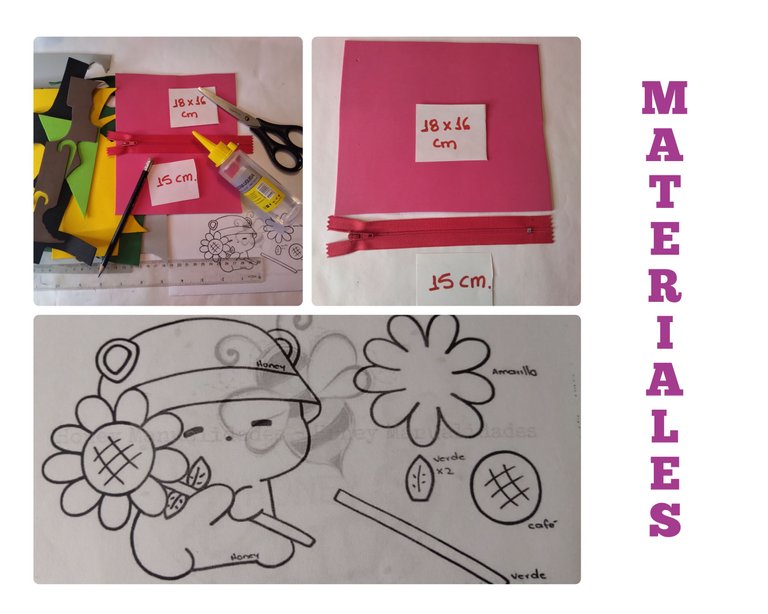
🍄 Los materiales que usé para realizar esta cartuchera son:
- Foami liso.
- Cierre plástico de 15cm.
- Tijeras.
- Pegamento: silicón frío.
- Regla.
- Dibujo y moldes.
- Aguja lanera.

🍄 Elaborar la cartuchera fue una labor muy entretenida. Estuve pendiente de cualquier ruido o ladrido del perro y a la vez me distraje haciendo algo que me encanta: crear.
🍄 Empecé midiendo y cortando un trozo de foami de 18×16cm. También seleccioné un cierre que combine en color y se ajuste a la medida del foami. Este es un cierre plástico de 15cm.
🍄 Doblé el foami a la mitad en la medida de 18cm. Presioné un poco para que quedara doblado.
🍄 Coloqué una línea de silicón frío en uno de los extremos del foami. Tomé el cierre con el abridor hacia afuera y pegué en la línea de pegamento la mitad del cierre.
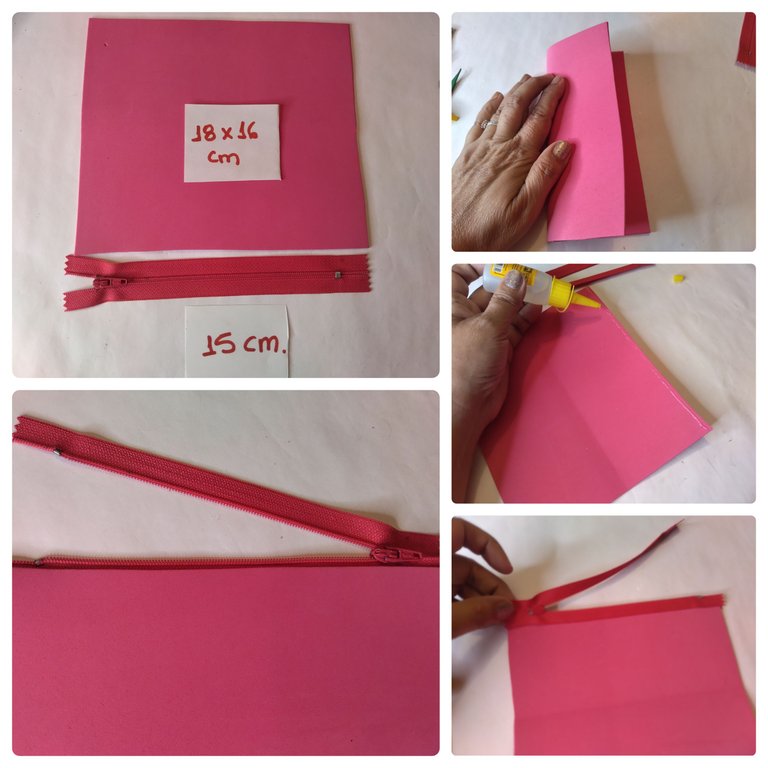
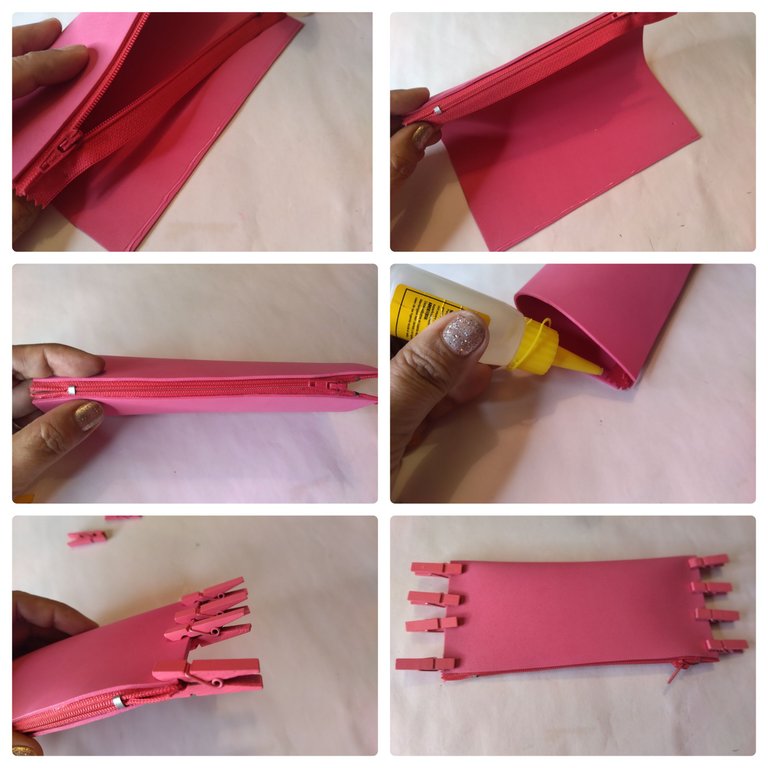
🍄 Cuando ya estaba pegado este lado coloqué una línea de silicón frío en el otro extremo del foami. Cerré el cierre y pegué el otro lado al foami. Sosteniéndolo hasta quedar fijo.
🍄 Para dejar secando coloqué algunos ganchos de madera. Posicioné los ganchos de manera ordenada porque esta presión deja marcas en el foami.
🍄 Mientras se pega el cierre a la cartuchera empecé a realizar el adorno. Este es un gatito popular, la imagen la obtuve en la página del Facebook de Honey manualidades 👏 le pedí a mi hermana que imprima el dibujo. Lo usé como molde para sacar la figura decorativa de mi labor.
🍄 Lo que hice fue puyar con la aguja lanera todas las líneas que forman el dibujo, de este modo va quedando marcado en el foami.
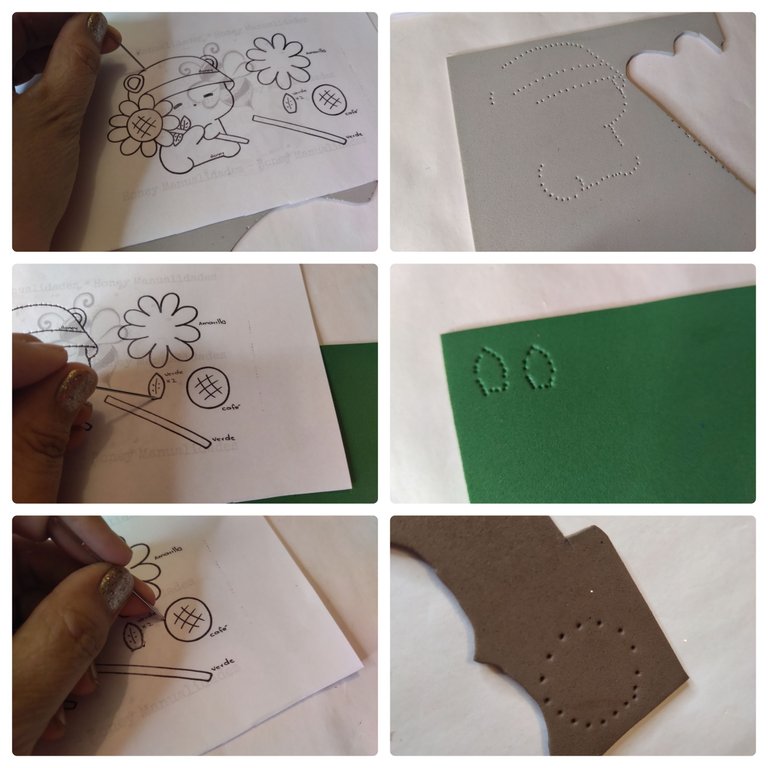
🍄 Repetí este proceso en cada una de las partes del diseño; primero todo el contorno del gato y después por separado cada una de sus partes: la flor, las hojas, el tallo, sus brazos, el sombrero.
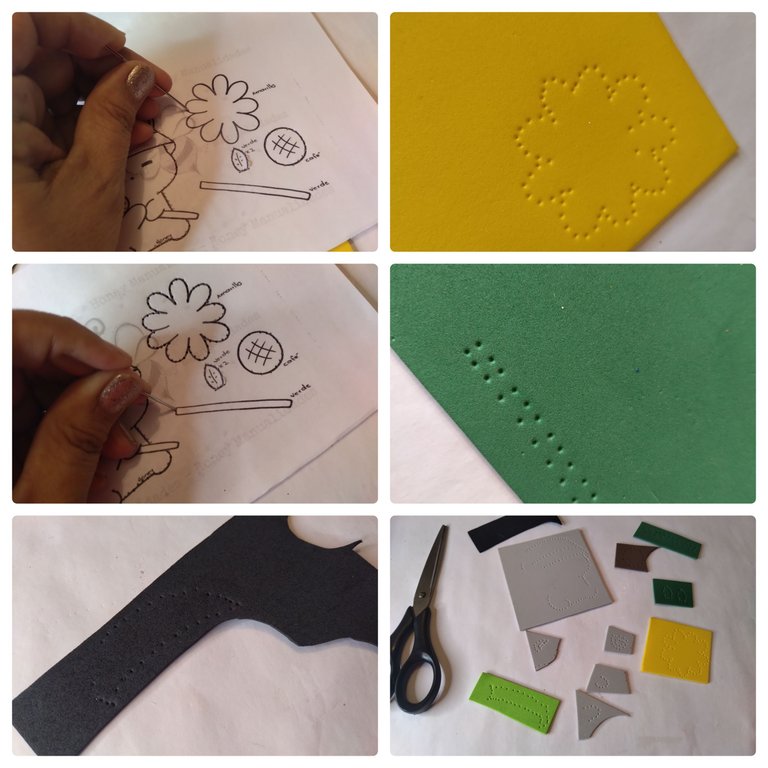
🍄 Al tener todas las piezas cortadas empecé a pegarlas para obtener primero la flor. Después pegué las dos partes del sombrero, luego las orejas.
🍄 La flor es un girasol muy lindo. Lo pegué al cuerpo y sobre el tallo pegué los bracitos.
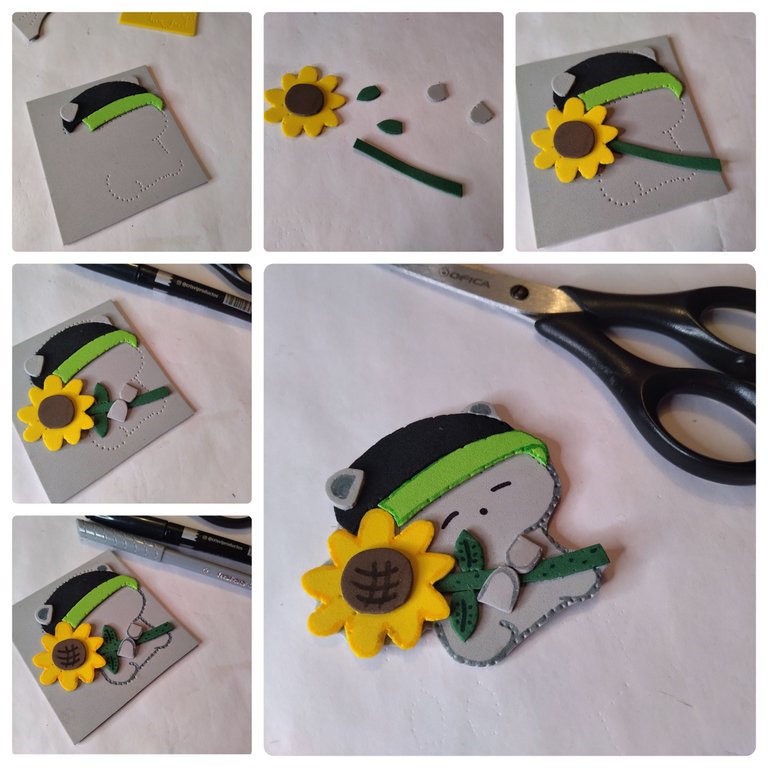
🍄 Con los marcadores realicé bordes y tracé algunas líneas sobre el diseño. También dibujé con marcador negro los ojos y su nariz.
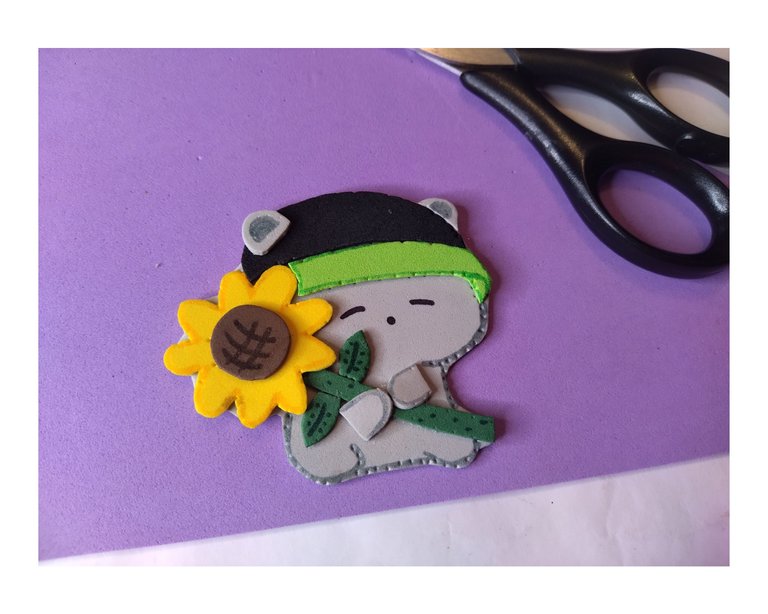
🍄 Una vez seco todo el pegamento en el diseño y los trazos de marcador procedí a pegarlo en la cartuchera. Además recorté algunos círculos en foami y los pegué al lado del gato, repartidos en el espacio lateral.
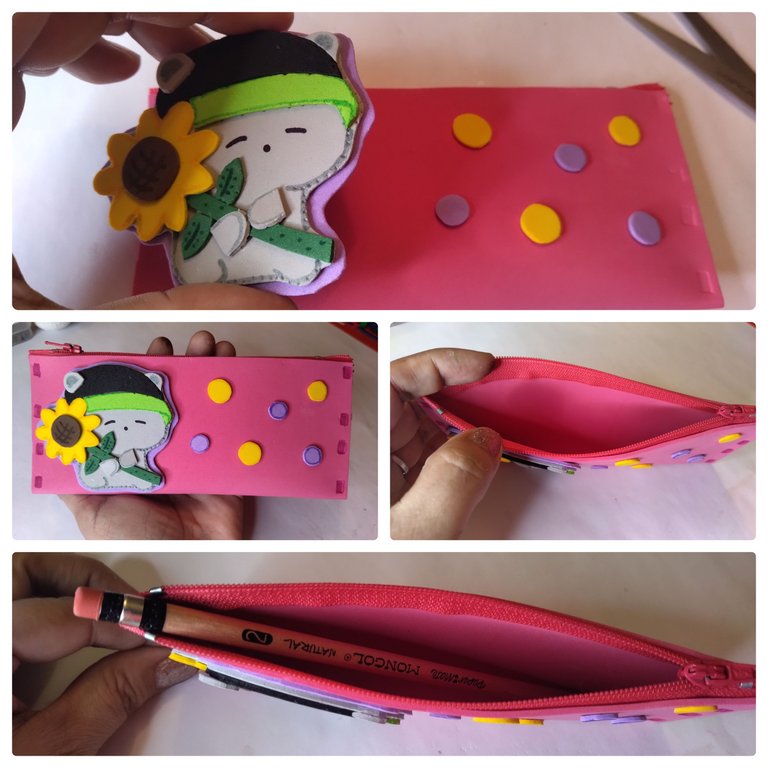
🍄 Al estar seco todo el pegamento ya habremos terminado y podemos usar esta linda CARTUCHERA ESCOLAR PARA NIÑOS. Para guardar los lápices de colores y grafitos. Muy práctico y fácil de hacer. ¡Me encanta como se ve! ¿Y a ti?
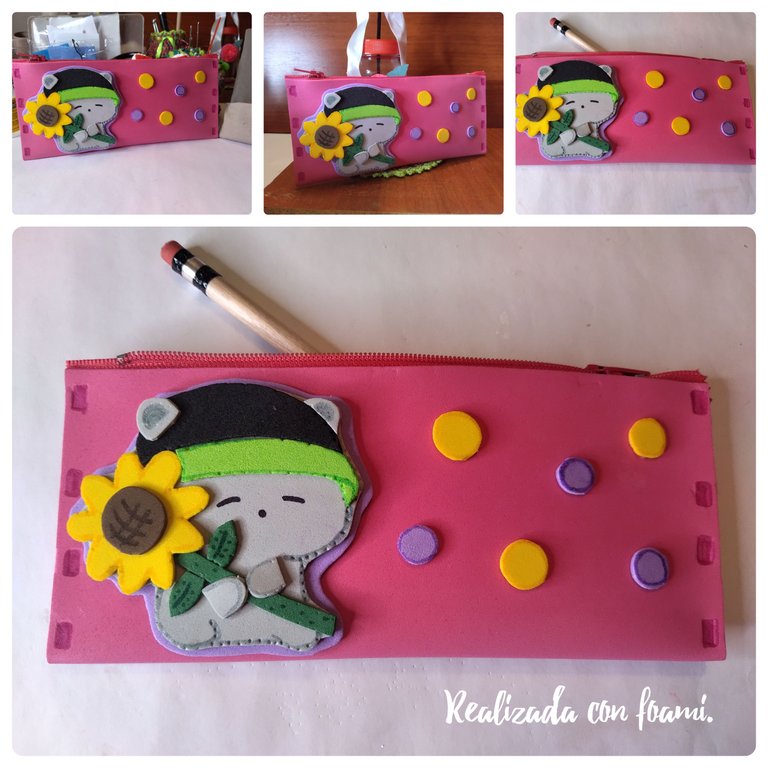
Muchas gracias por tu visita. Todas las fotos son de mi propiedad. Edité con Polish. Usé el traductor de Deepl. Será hasta una próxima oportunidad 😃 se les quiere. Bendiciones 🙏
English.

SCHOOL PENCIL CASE. MADE WITH FOAMI.
Hello, hello. I hope you are doing very well. Thanks to HONEY HANDICRAFTS today I can show you the nice decoration I made on a school pencil case made with foami. I am very happy with the result. Make yourselves comfortable to read and enjoy this tutorial.

I tell you that I have had to occupy the early morning hours to make my creations as I now sleep during the day and stand guard at night. This is because we must be alert as criminals are roaming around our area, apparently between 1 and 3:30 in the morning they walk these streets looking to rob a house. Nothing better than to stay awake doing my crafts.
I took the opportunity to make a nice SCHOOL BOX FOR CHILDREN. It fits graphite pencils, pencils and colored pencils comfortably. We can also keep the pencil sharpener and the eraser.

🍄 The materials I used to make this pencil case are:
- Smooth Foami.
- Plastic zipper of 15cm.
- Scissors.
- Glue: cold silicone.
- Ruler.
- Drawing and molds.
- Wool needle.


🍄 Making the pencil case was a very enjoyable task. I kept an eye out for any noise or barking from the dog and at the same time distracted myself by doing something I love: creating.
🍄 I started by measuring and cutting an 18×16cm piece of foami. I also selected a zipper that matches in color and fits the size of the foami. This is a 15cm plastic zipper.
🍄 I folded the foami in half at the 18cm measurement. I pressed a little bit to make it stay folded.
🍄 I placed a line of cold silicone on one end of the foami. I took the zipper with the opener facing out and glued on the glue line half of the zipper.

🍄 When this side was already glued I glued a line of cold silicone on the other end of the foami. I closed the zipper and glued the other side to the foami. Holding it until it was fixed.
🍄 To let it dry I placed some wooden hooks. I positioned the hooks neatly because this pressure leaves marks on the foami.

🍄 While gluing the clasp to the pencil case I started making the embellishment. This is a popular kitty, I got the image from the Honey crafts Facebook page 👏 I asked my sister to print the drawing. I used it as a mold to draw the decorative figure for my craft.
🍄 What I did was to punch with the wool needle all the lines that form the drawing, in this way it will be marked on the foami.

🍄 I repeated this process on each of the parts of the design; first the whole outline of the cat and then separately each of its parts: the flower, the leaves, the stem, its arms, the hat.

🍄 Having all the pieces cut I started gluing them together to get the flower first. Then I glued the two parts of the hat, then the ears.
🍄 The flower is a very cute sunflower. I glued it to the body and on the stem I glued the little arms.

🍄 With the markers I made borders and drew some lines on the design. I also drew with black marker the eyes and his nose.

🍄 Once all the glue was dry on the design and the marker strokes I proceeded to glue it onto the pencil case. I also cut out some circles in foami and glued them to the side of the cat, spread out in the side space.

🍄 When all the glue is dry we are done and we can use this cute CHILDREN'S SCHOOL BOX. To store crayons and graphite pencils. Very practical and easy to make, I love the way it looks, don't you?

Thank you very much for your visit. All photos are my property. I edited with Polish. I used Deepl translator. will be until next time 😃 you are loved. Blessings 🙏
~~~ embed:1621481634678685697 twitter metadata:MTI2MDIxMTM3NTg4MTgxNDAxNnx8aHR0cHM6Ly90d2l0dGVyLmNvbS8xMjYwMjExMzc1ODgxODE0MDE2L3N0YXR1cy8xNjIxNDgxNjM0Njc4Njg1Njk3fA== ~~~
The rewards earned on this comment will go directly to the people( @creacioneslelys, @madushanka ) sharing the post on Twitter as long as they are registered with @poshtoken. Sign up at https://hiveposh.com.
Te quedó preciosa, la verdad, super dulce, me encanta!! genial trabajo @creacioneslelys!😀
Hola. Muchas gracias amiga. A mí también me encantó el resultado 😌 saludos.
🤗❤️
Wao, this is so lovely, you did a great job
Thanks you 🤗
You are welcome
Excelente idea amiga y su diseño esta muy lindo, me encanta en foami ya que es mas duradera, gracias por compartirnos tu idea, feliz día 🤗
Muchas gracias 😁 me alegra que te haya gustado.
Saludos amiga,ye quedó muy linda la cartuchera, me gustó la técnica de usar la aguja para transferir los patrones al foamy, yo utilizo un palillo de altura o un bolígrafo sin tinta para marcarlos, tu idea está buenísima, la usaré pronto.
Bendiciones!
Hola. Está técnica la aprendí por aquí. Muchas gracias 😁 que bien que te haya gustado.
Que lindo 😍🥰👏
Hola @ceciliajess 👋 muchas gracias.
Hermoso trabajo, amiga, la felicito por esa obra de arte de crear una cartuchera con foami. Admiro esa destreza que tiene para crear.
Que Dios bendiga, esas manos.
¡Saludos!😊
Iniciaron las clases amiga y se siente en tu post ajajja, un proceso explicado grandiosamente como siempre, es muy fácil seguir tus tutoriales, mantén el buen contenido.