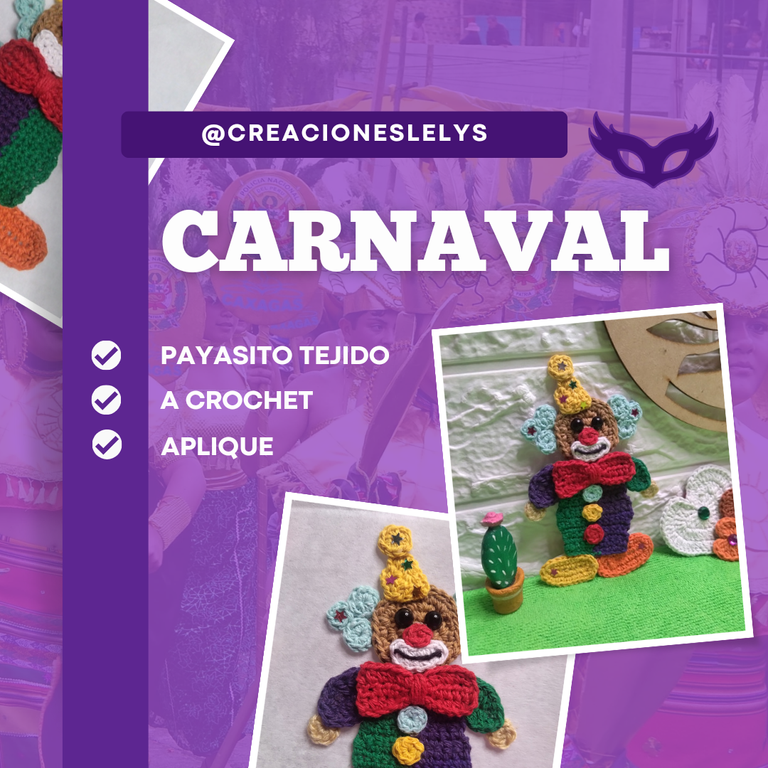
Hola a todos los participantes de esta linda comunidad. Espero que estén pasando un gran día. Por mi país continuamos con la celebración de las fiestas de carnaval 🎭 por tal motivo hoy quiero presentarles unas de las figuras más representativas de estos días ¿Quién será?
Hello to all the participants of this nice community. I hope you are having a great day. In my country we continue with the celebration of the carnival festivities 🎭 for that reason today I want to introduce you to one of the most representative figures of these days.
Así es 🎭 la figura del payaso 🤡 es predominante en la mayoría de las decoraciones del carnaval. Por su aspecto tan colorido y gracioso. Te pido que me acompañes a realizar una muestra tejida para usar como aplique. Estoy segura que te va a encantar ver todo el proceso de su elaboración.
That's right 🎭 the figure of the clown 🤡 is predominant in most carnival decorations. Because of its colorful and funny appearance. I ask you to join me in making a woven sample to use as applique. I'm sure you'll love to see the whole process of making it.
Payaso tejido a crochet.
Crochet clown.
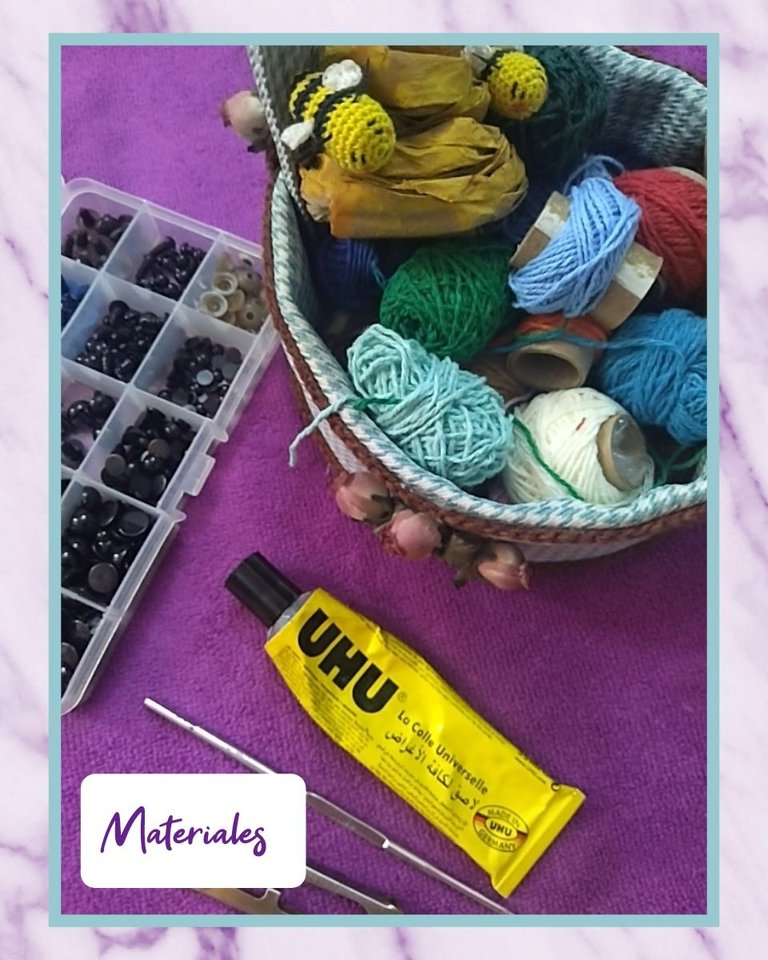
Para realizar esta muestra de payaso tejido a crochet necesité de los siguientes materiales:
🤡 Hilos pabilos de variados colores.
🤡 Aguja de crochet de 2,25mm.
🤡 Tijeras.
🤡 Tela pelon.
🤡 Pegamento.
🤡 Aguja lanera.
🤡 Ojos plásticos color negro.
🤡 Confeti en forma de estrella.
🤡 Pinzas.
To make this crochet knitted clown sample you will need the following materials:
🤡 Wick yarns of assorted colors.
🤡 2,25mm crochet needle.
🤡 Scissors.
🤡 Pellon fabric.
🤡 Glue.
🤡 Wool needle.
🤡 Black plastic eyes.
🤡 Confetti in the shape of a star.
🤡 Tweezers.
Realizarlo me ocupó un poco de tiempo ya que la muestra está compuesta por muchas piezas, la mayoría de ellas muy pequeñas. Elegí hacer un payaso 🤡 pequeño porque tal vez lo use como aplique en una franela para niña.
It took me a bit of time to make it since the sample is made up of many pieces, most of them very small. I chose to make a clown 🤡 small because I might use it as an applique on a girl's flannel.
Primero tejí todas las piezas.
First I knitted all the pieces.
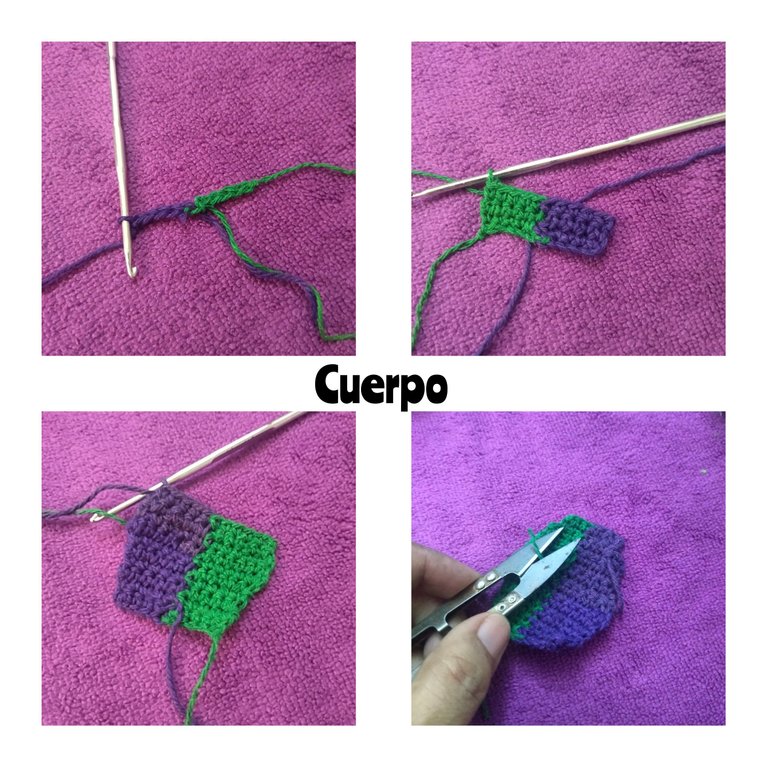
🤡 El cuerpo: empecé tejiendo una cadena bicolor de 11 puntos. Sobre esa cadena tejí tres vueltas de 10 puntos cada una. Para lograr el efecto bicolor lo que hice fue tejer cinco cadenas del primero color y enseguida en el punto seis agregar el segundo color. Para hacerlo crecer continué tejiendo tomando cada color de hilo solo al momento en que corresponda usarlo. Luego de las primeras cuatro vueltas inicié dos vueltas de aumentos solo en el punto de inicio y al final de la vuelta. Luego las siguientes vueltas se tejen tipo espejo hasta obtener nuevamente los 10 puntos con los que empecé a tejer. Para finalizar tejí tres vueltas de solo disminuciones en los extremos. Cerré la vuelta y oculté las hebras.
🤡 The body: I started by knitting a bicolor chain of 11 stitches. On that chain I knitted three rounds of 10 stitches each. To achieve the bicolor effect what I did was to knit five chains of the first color and then in stitch six add the second color. To make it grow I continued knitting taking each color of yarn only at the moment when it should be used. After the first four rows I started two rows of increases only in the starting stitch and at the end of the row. Then the following rows are knit mirrored until the 10 stitches with which I started knitting are obtained again. To finish I knit three rows of decreases only at the ends. I closed the row and hid the yarns.
🤡 Cabeza, cabello y gorro: para tejer la cabeza o cara del payaso inicié con un anillo mágico de 6pb. Luego tejí una vuelta de solo aumentos. Enseguida una de 1pb-1aum. Después otra de 2pb-1aum. Cerré la vuelta y escondí la hebra sobrante.
Para el cabello tejí dos círculos de 8pb en un anillo mágico y uno de 5pb en anillo mágico. Se deben tejer dos grupos de estos.
Para el gorro tejí un pequeño rectángulo comenzando con 7 puntos cadena. Subí una vuelta de 7pb. Luego tejí disminuciones al inicio de la vuelta hasta obtener 1pb. Cerré la vuelta y escondí el hilo. Este gorro se completa tejiendo un círculo de 6pb en un anillo mágico.
🤡 Head, hair and hat: to knit the head or face of the clown I started with a 6pb magic ring. Then I knit one round of increases only. Then a round of 1pb-1aum. Then another round of 2pb-1aum. I closed the loop and hid the excess yarn.
For the hair I knit two 8pb circles in a magic ring and one 5pb circle in a magic ring. Two groups of these should be knitted.
For the cap I knit a small rectangle starting with 7 chain stitches. I went up one row of 7 sts. Then I knit decreases at the beginning of the row until I had 1 stitch. I closed the loop and hid the yarn. This hat is completed by knitting a 6pb circle in a magic ring.

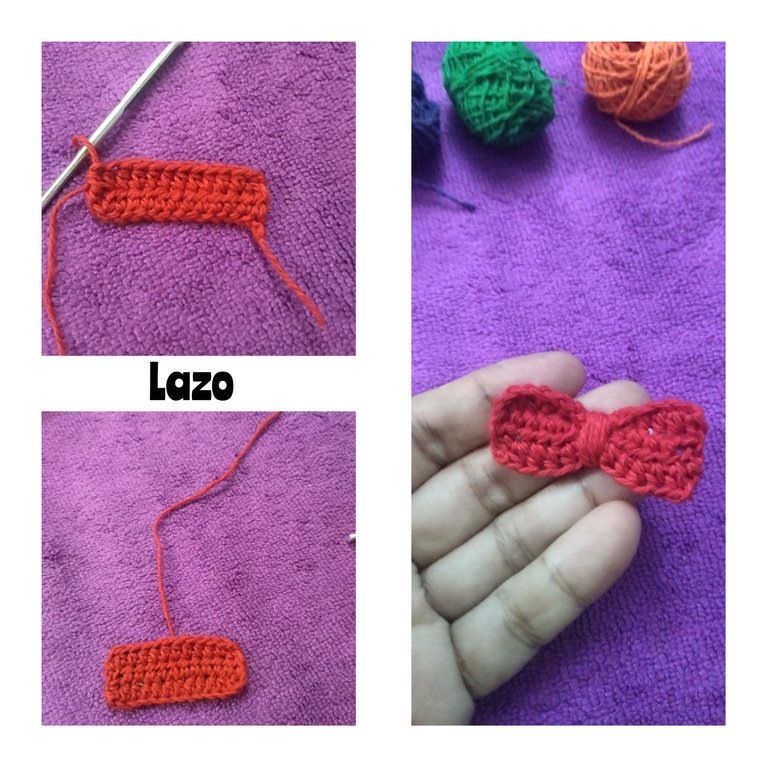
🤡 Hacer el lazo fue muy sencillo: empecé tejiendo 14 puntos cadenas, luego tejí cuatro vueltas de 12 puntos medios altos. Finalice la vuelta dejando la hebra de hilo larga. Llevé la hebra hasta el medio del rectángulo por la parte de atrás del tejido. Realicé varias vueltas por el medio del tejido haciendo un poco de presión. Finalmente escondí la hebra por el hilo enrollado.
🤡 Making the loop was very simple: I started by knitting 14 chain stitches, then knit four rounds of 12 medium-high stitches. I ended the round by leaving the yarn strand long. I brought the yarn to the middle of the rectangle through the back of the knitting. I made several loops through the middle of the fabric with a little pressure. Finally I hid the strand of yarn through the rolled yarn.
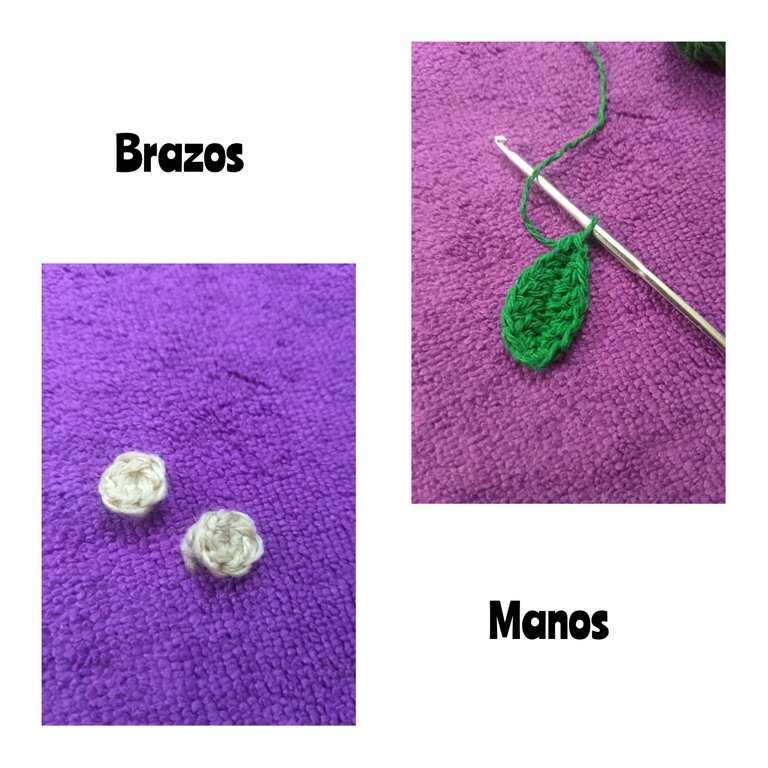
🤡 Brazos y manos: empecé tejiendo las manos, realicé una anillo mágico de 6pb. Para los bracitos tejí 9 cadenas, luego tejí sobre las cadenas 1pd-1pb-1pma-3pa-1pma-1pb-1pd. Cerré y escondí la hebra.
🤡 Arms and hands: I started by knitting the hands, I made a magic ring of 6pb. For the little arms I knit 9 chains, then knit over the chains 1pd-1pb-1pma-3pa-1pma-1pb-1pd. I closed and hid the strand.
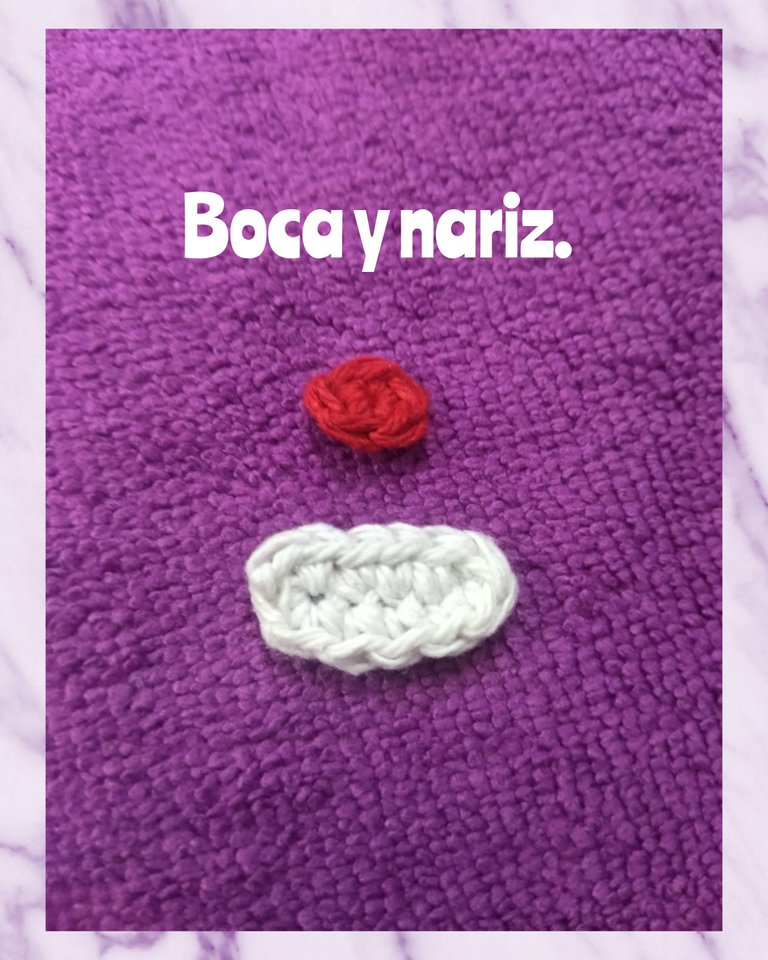
🤡 Boca y nariz: empecé tejiendo la nariz en color rojo. Solo tejí un anillo mágico de 6pb. Para la boca tejí una cadena de 8puntos. Sobre esa cadena tejí 1aum de pb-6pb-1aum de pb-6pb-1aum de pb-1pd. Cerré y oculté hebra. Con hilo color negro bordé la boca.
🤡 Mouth and nose: I started by knitting the nose in red. I only knitted a 6pb magic ring. For the mouth I knitted a chain of 8pb. Over that chain I knit 1aum of pb-6pb-1aum of pb-6pb-1aum of pb-1pd. I closed and hid the strand. With black thread I embroidered the mouth.
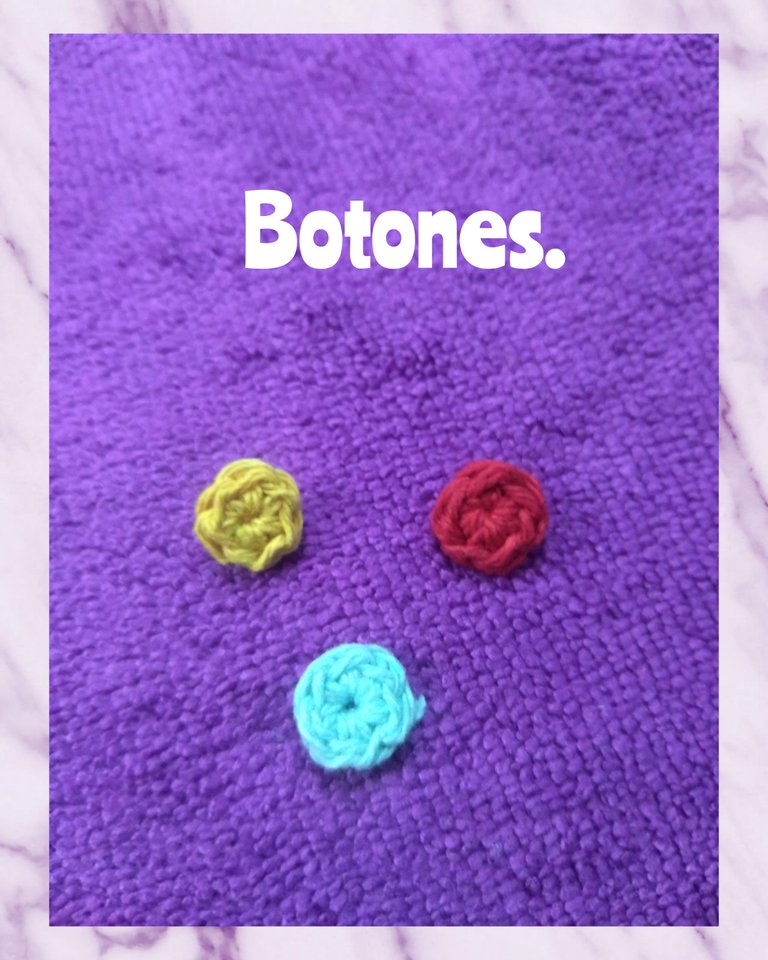
🤡 Botones: elegí tres colores de hilos, con cada uno realicé un anillo mágico de 6pb.
🤡 Buttons: I chose three colors of yarn, with each one I made a magic ring of 6pb.
🤡 Las botas o zapatos: empecé tejiendo 9 puntos cadenas. Sobre esas cadenas tejí una vuelta aumentando solamente en las esquinas. Luego tejí otra vuelta tejiendo de nuevo un solo aumento en el punto del medio de cada extremo. Cerré y oculté la hebra.
🤡 The boots or shoes: I started by knitting 9 chain stitches. Over those chains I knitted one round increasing only in the corners. Then I knit another round knitting again a single increase in the middle stitch of each end. I closed and hid the yarn.
Armado del aplique:
Assembly of the wall light:
Para comenzar a armar coloqué a modo de presentación todas las piezas sobre esta tela de pelon, es la tela que usamos para colocar en los cuellos y mangas de las camisas. Una vez convencida empecé a pegar cada una de las piezas respetando la posición donde van y dejando un borde por las orillas sin pegar, esto para que luego al coser el aplique a la franela no se me dificulte.
To start assembling I placed all the pieces on this pelon fabric as a presentation, it is the fabric we use to place on the collars and sleeves of the shirts. Once I was convinced I began to glue each of the pieces respecting the position where they go and leaving a border on the edges without gluing, this so that later when sewing the appliqué to the flannel it would not be difficult.
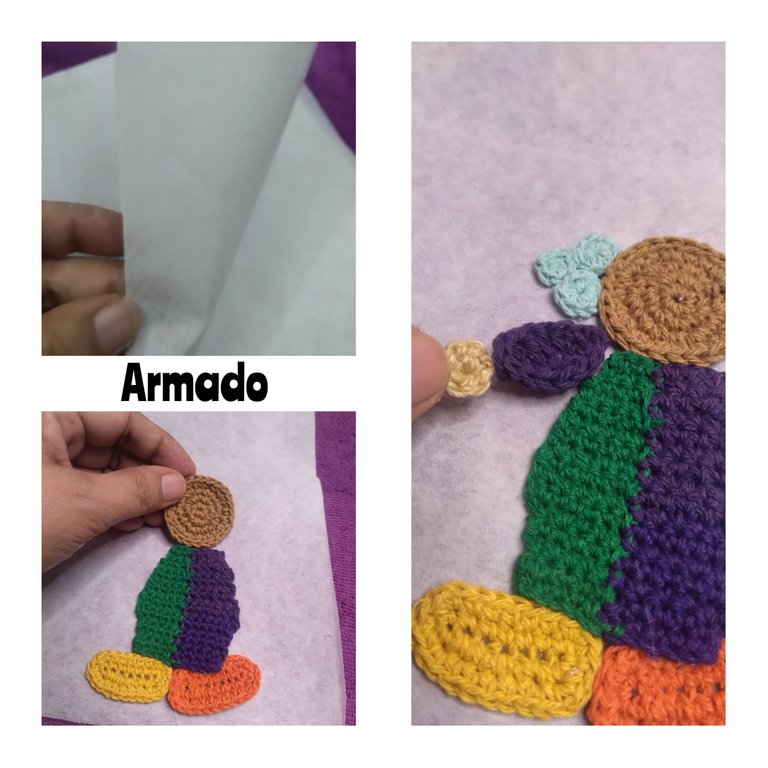
🤡 Me encantó hacer esta parte porque fue como dar forma a un rompecabezas y a medida que las iba pegando se veía más lindo el payaso.
🤡 I loved doing this part because it was like shaping a puzzle and as I glued them together it made the clown look cuter.
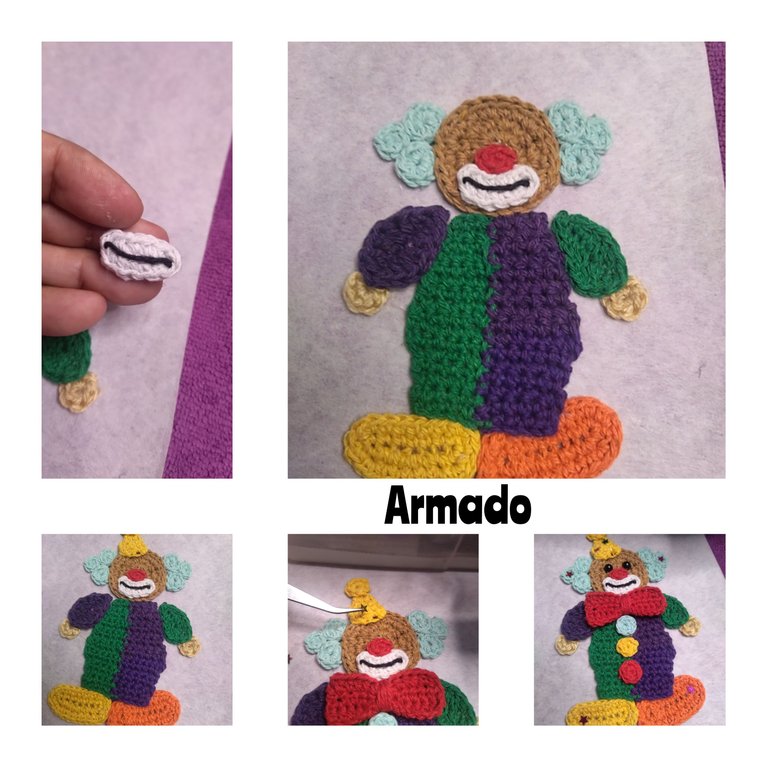
🤡 El último paso fue pegar los ojitos y los confites. ¿¡Se súper lindo no creen!?
🤡 The last step was to glue the eyes and sprinkles. It's super cute, don't you think?!
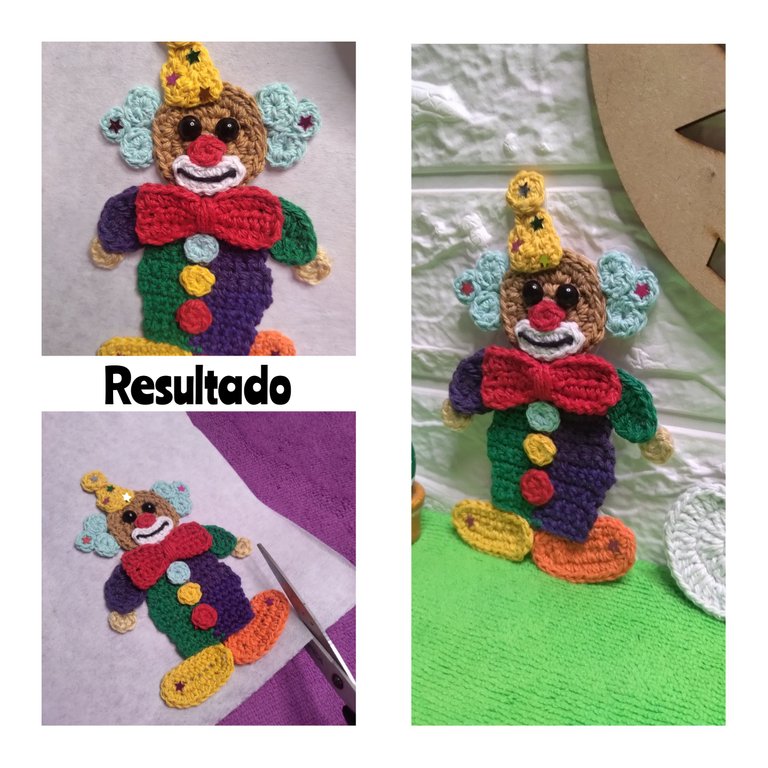
Espero que les haya gustado esta muestra. Pronto compraré la franela en la que voy a usar el aplique. Muchísimas gracias por el apoyo. Todas las fotos son de mi propiedad. Edité con Polish y Canva. Los gifs fueron extraídos de la aplicación giphy que trae mi teléfono. Usé el traductor de Deelp. Hasta pronto.
I hope you liked this sample. I will soon buy the flannel on which I will use the applique. Thank you very much for your support. All photos are my property. I edited with Polish and Canva. The gifs were extracted from the giphy app my phone comes with. I used Deelp translator. See you soon.
Te quedó espectacular, me imagino la declaración con muchos globos, debe quedar preciosa esa franela.
Hola 👋🏾 me alegra saber que te guste 😃 seguro que con globos se vería genial. Gracias por el aporte 👍
Una payado super simpático , con tanos colores que rápidamente me dibujo una sonrisa, es precioso Lelys!!😍
Hola amiga. Me da mucho gusto saber que te guste este payasito saltador 🤡 que pases linda noche. 🫂
A los niños les va a encantar!🤡
Si. Este lo usaré para decorar una franela para niña.
Te va a quedar hermosa!
Esa técnica es muy bonita, el payaso me encantó, sobre todo porque es muy colorido. Saludos 👋🏻
Hola amiga. Muchas gracias ☺️
Me encantó tu payaso tejido a crochet. Es una obra de arte muy hermosa y original. Me gusta mucho el detalle de los colores, los botones y el sombrero. Se ve que le pusiste mucho cariño y dedicación. Te felicito por tu talento y creatividad.
Hola. Me da gusto saber que te gustó este payasito. A mí me encantó hacerlo!!! 😃
haha, this is pin point perfection 🤡 👏🏿
Thanks You 🫂
Congratulations, your post has been upvoted by @dsc-r2cornell, which is the curating account for @R2cornell's Discord Community. Enhorabuena, su "post" ha sido "up-voted" por @dsc-r2cornell, que es la "cuenta curating" de la Comunidad de la Discordia de @R2cornell.
Muchísimas gracias por el apoyo 😊
Aaah!! Me encantan todos esos colores, no soy tremendamente fan de los payasos, pero definitivamente éste se llevo mi corazón con todos esos colores 💕. Excelente trabajo ✨
Hola. Me da gusto saludarte. Que bueno que te gustó 😃 es un placer compartir mis creaciones con ustedes amiga. Feliz descanso.
Que espectacular el trabajo, con muchos detalles y hechos con mucha minucion, precioso y adorable payasito 😍 y bien decorativo con esos colores tan alegres, buhito quiere uno jiji (que pedigueño jajaja)
Me encanto ❤️
Hola. Muchas gracias por detallarlo. Me alegra que a Buhito 🦉 le guste.
🤡 Serían buenos compañeros.
Muchas gracias por el apoyo 💖🫂😊✅☺️🤍👋🏾🙋🏾♀️🎊😁
¡¡¡Buen trabajo!!! Gracias por publicar tu excelente contenido en Hive Diy.
Tu comunidad artesana ahora es testigo

Gracias a ustedes por el apoyo.
Amiga @creacioneslelys, me gustó el payaso, la selección de colores esta fabulosa.
Hola, me alegra saberlo. Muchas gracias.