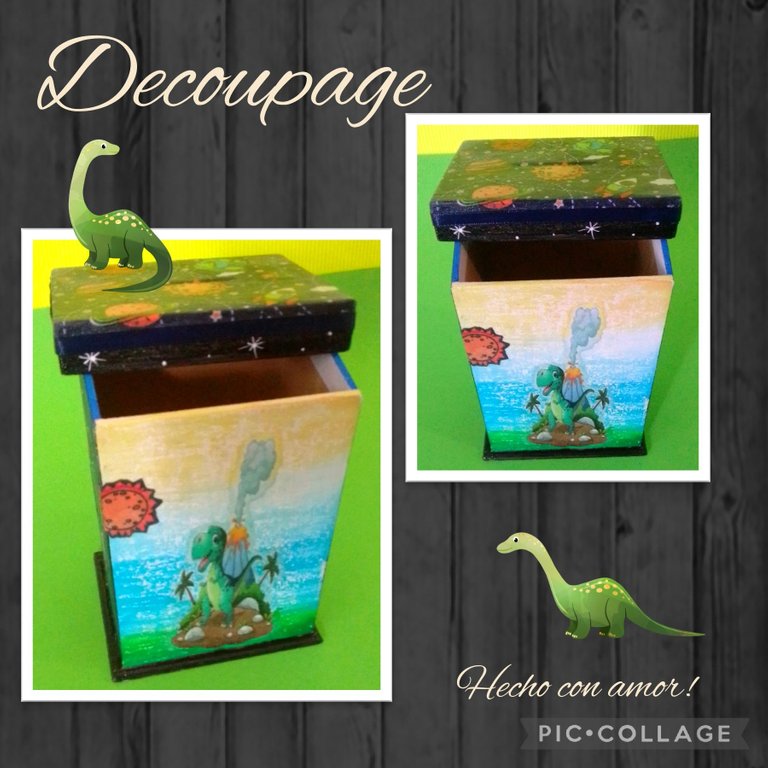
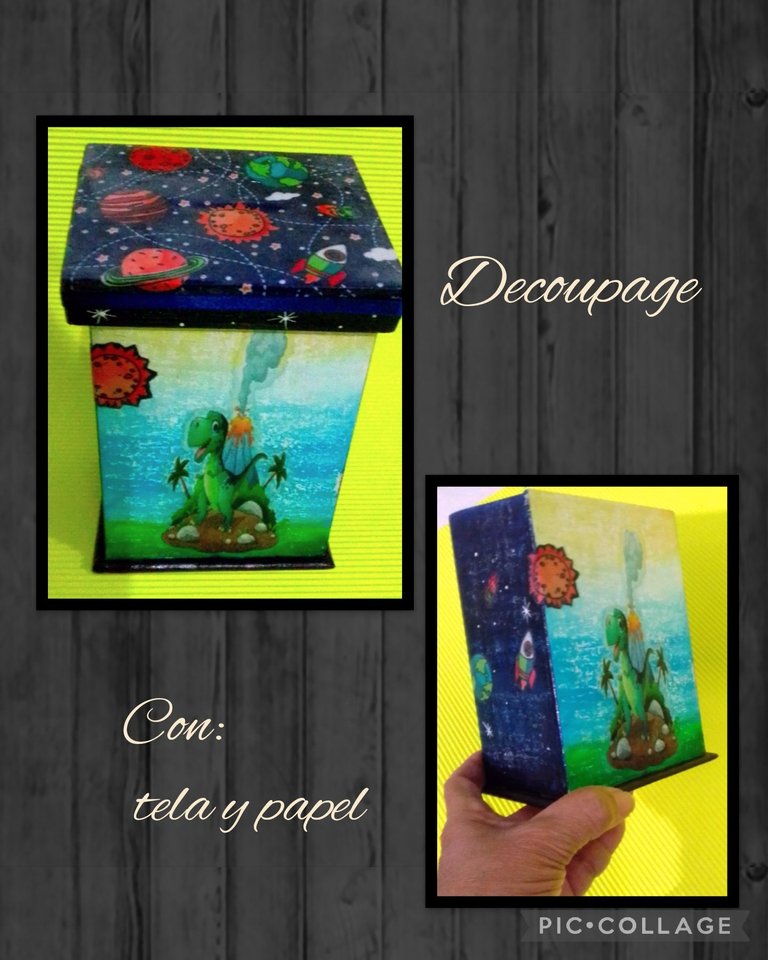
Hola queridos amigos que visitan mi Blog, espero hayan pasado un feliz fin de semana.
Algunos de ustedes no saben de que se trata la técnica del Decoupage y este término viene de una palabra francesa que significa recortar y consiste en recortar papeles o telas y pegar sobre materiales como madera, plástico, jabones, velas, cartón, cerámicas, etc.
Entonces ahora les mostraré como lo hice y como lo puedes hacer tú!
Para ello vas a necesitar:
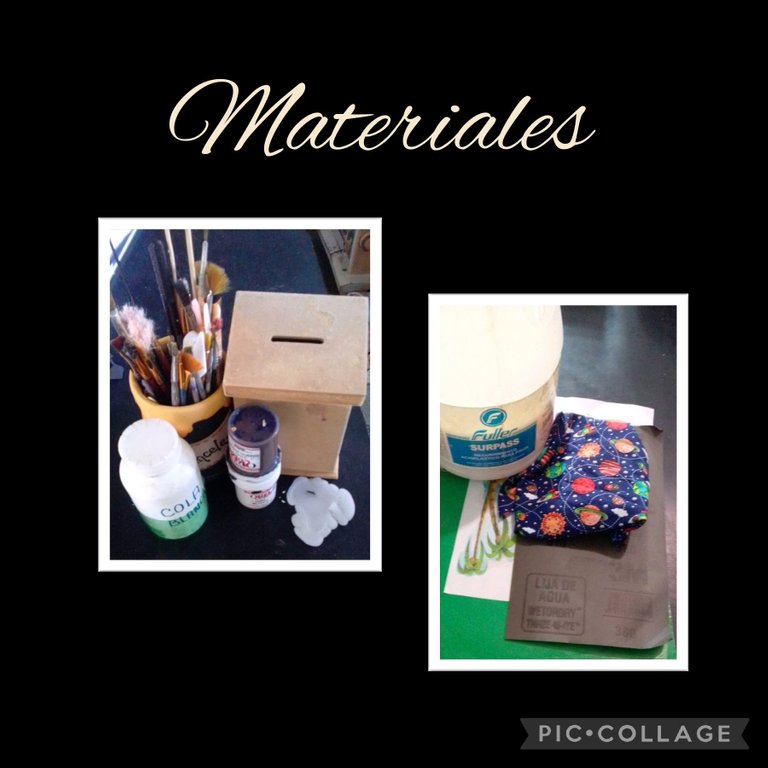
| Caja de mdf | Pinturas y pinceles |
|---|---|
| Cola blanca | Resto de vela |
| Tela | Impresión de papel |
| Lija | Tijera |
| Lápiz | Pañito |
| Bolsa plástica | Cera Surpass para madera (brillo) |
Comencemos:
Paso 1:
Lijar y pintar con base blanca.
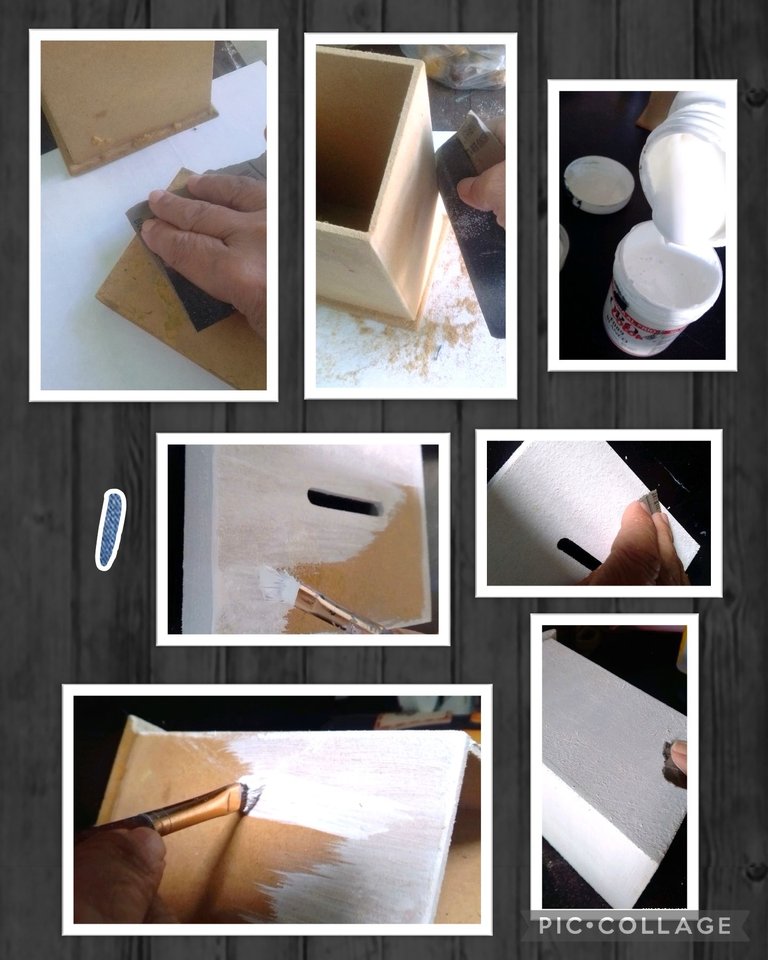
- Lija la caja para quitar restos e imperfecciones, luego comienza aplicando una mano de pintura blanca acrílica.
Nota: como no tengo, agregué cola blanca a la pintura blanca para darle esa textura como plástica semejando a la pintura acrílica. - Ahora pasa una lija para suavizar la pieza.
- Luego aplica la segunda mano de pintura y lija nuevamente la tapa y la base.
Paso 2:
Pasar vela y pintar.
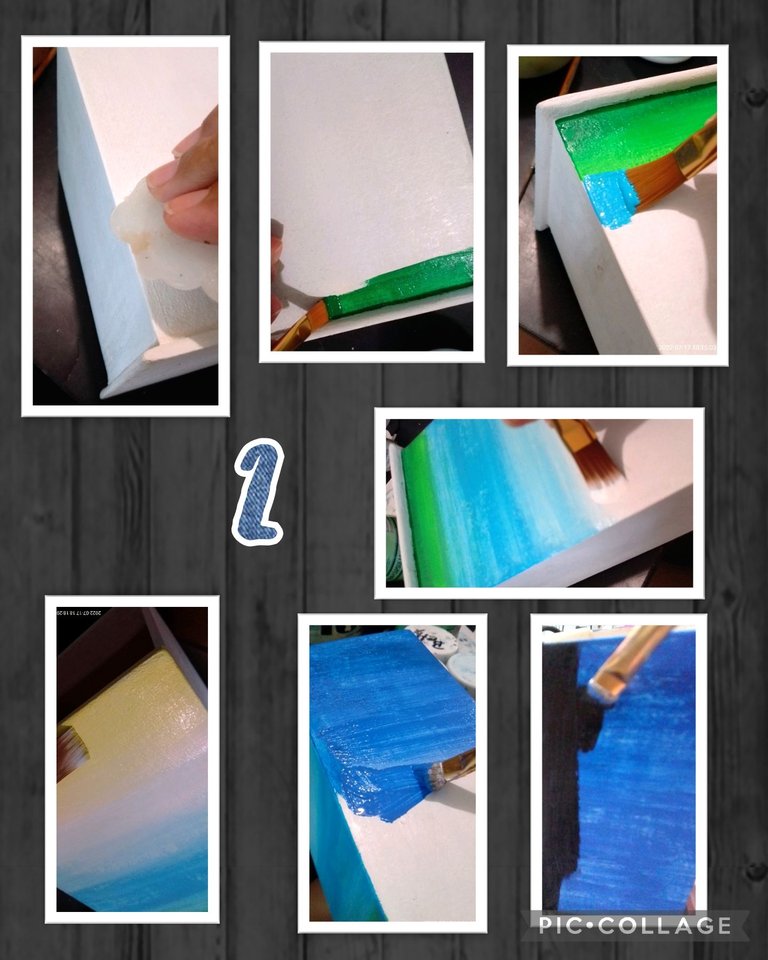
- Ahora pasa una vela o restos de la vela por algunos lugares de la pieza, yo la pase por casi toda la pieza porque después de pintar salieron muchos grumos, por eso es bueno lijar después de pintar.
- Si quieres hacer un paisaje como base para la impresión, comienza pintando de abajo hacia arriba, aplica verde oscuro, verde manzana, azul celeste, azul cielo, blanco siempre tratando de unir un color con otro y por último aplica amarillo y deja secar.
- Los otros lados pinta del color de tu preferencia, en este caso apliqué pintura azul rey, dejé secar y luego cubrí con pintura negra.
Paso 3:
Lijar y recortar impresión.
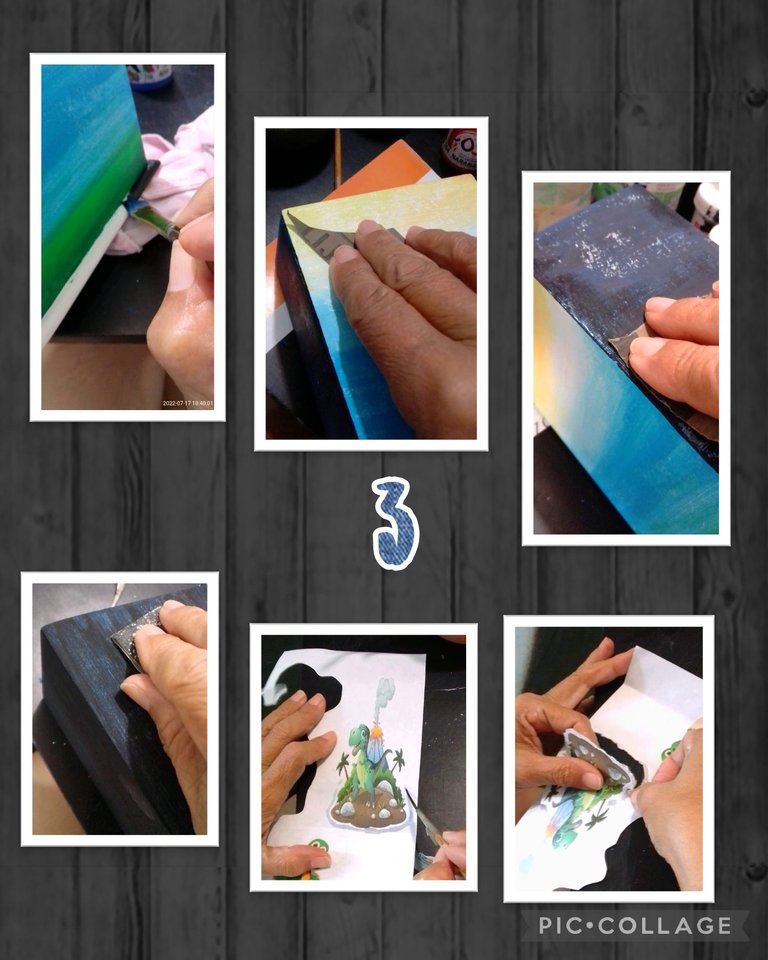
- Aplica color negro en la base y deja secar.
- Ahora pasa una lija 360 suavemente por algunas partes de la pieza, eso hará que despegue la pintura donde se pasó la vela, puedes pasar varias veces si lo quieres como envejecido o deteriorado por el tiempo, y eso me viene perfecto para esta pieza jajaja..
- A la impresión pásale un pincel mojado con agua dejando un borde de 3 ó 4 milímetros y comienza a recortar con las manos hasta sacar toda la figura.
Paso 4:
Lijar, pegar y rematar impresión.
Decoupage con papel.
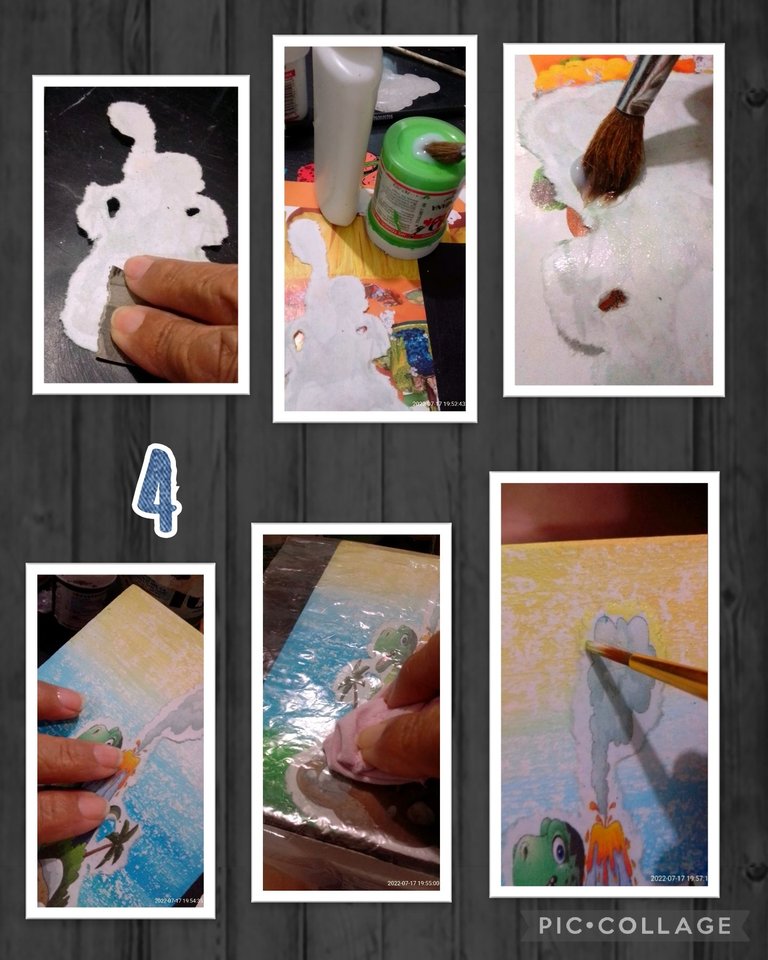
- Lija por la parte trasera los bordes de la impresión para rebajar el grueso del papel y quede como servilleta muy delgado para que a la hora de pegar no se vea mucho el borde.
- Luego con un pincel suave aplica pega blanca en la parte trasera de la impresión y pega a la caja, coloca una bolsa transparente y pasa un pañito para sacar burbujas de aire y deja secar.
- Ahora toca pintar la orilla blanca de la impresión con los mismos colores de la base, dando toques con el pincel sin humedecer mucho.
Paso 5:
Rematar borde de la impresión y recortar tela.
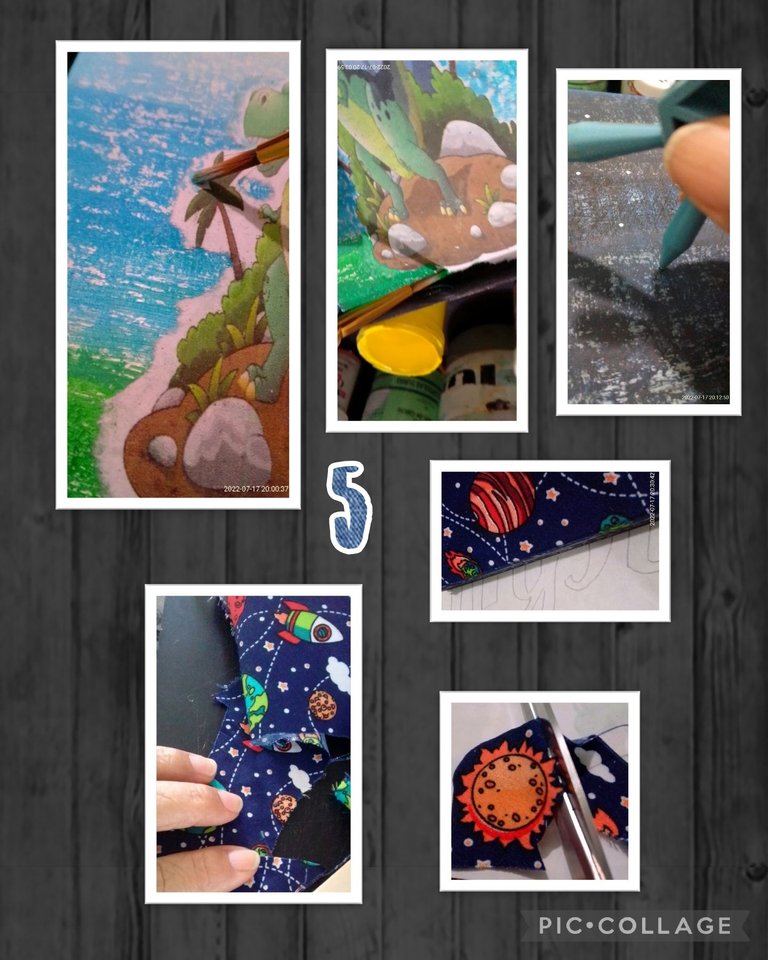
- Termina de aplicar pintura en el borde de la impresión, luego pinta a los lados puntos y haz unas mini estrellitas, semejando el espacio.
Luego recorta en la tela un rectángulo del tamaño de la tapa y los apliques que pegarás.
Paso 6:
Decoupage con tela.
Pegar tela a la tapa y apliques.
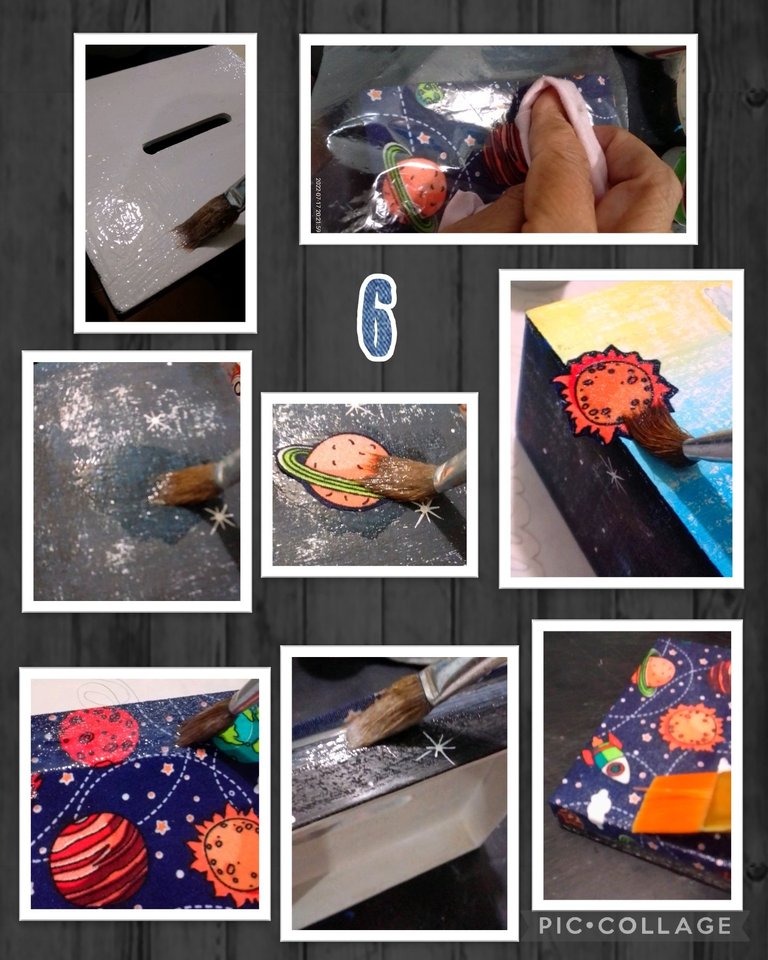
- Aplica pegamento a la tapa, colaca sobre la tela y arriba pon la bolsa plástica y frota con el paño para sacar el aire y deja secar.
-Luego aplica pegamento a los lados, pega los apliques y después aplica una capa de pegamento encima del recorte y repite este procedimiento con la tapa y deja secar bien.
Paso 7:
Aplicar barniz o cola y rematar.
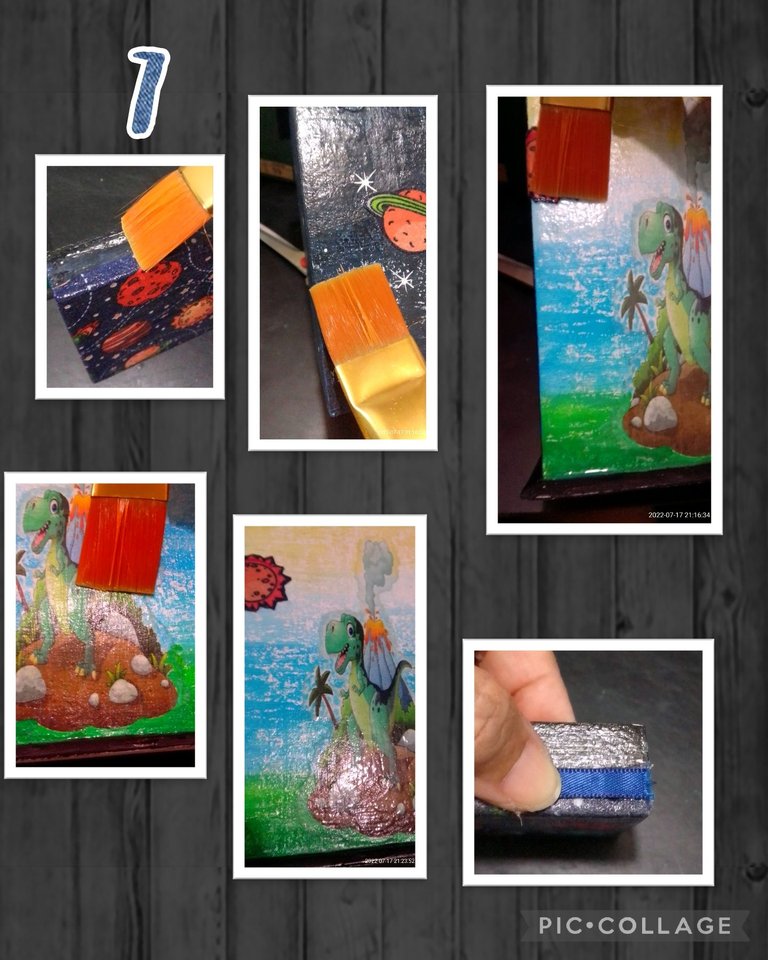
- Llegó el paso final, aplica en un mismo sentido, una mano de barníz, yo apliqué cera para pisos de madera (Surpass), puedes aplicar el que tengas y deja secar, luego aplica una segunda capa y deja secar y para rematar el doblez de la tela sobre la tapa, recorta una cinta de raso y pega por todo el contorno.
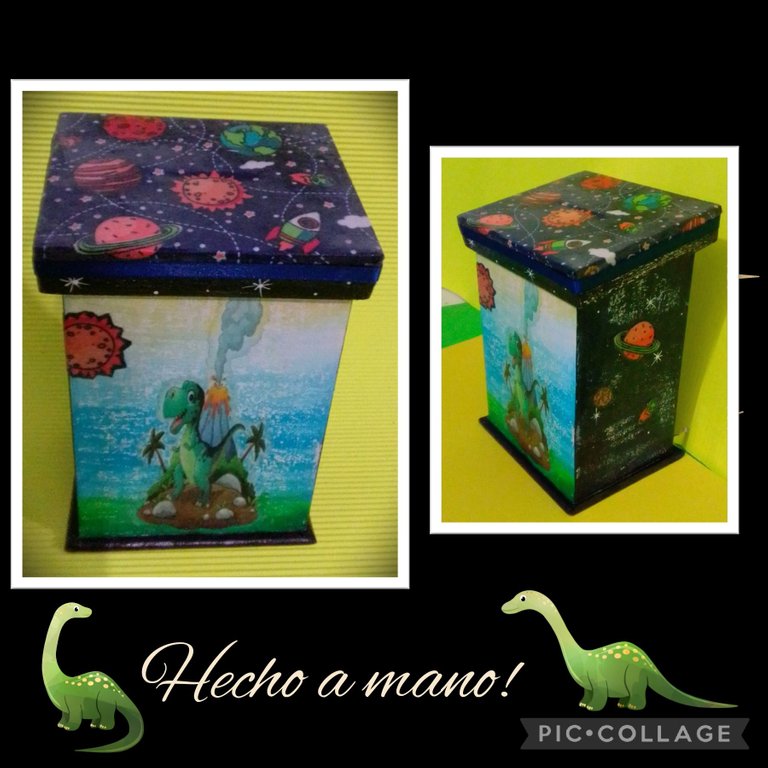
Y ahora si quedó terminada esta cajita, creo valió la pena recuperarla.
Ustedes que dicen?

Fuentes:
https://es.wikipedia.org/wiki/Decoupage
Ahora me despido mencionando el traductor de mi publicación es DeepL, utilicé las etiquetas HTML, las fotos capturadas con mi teléfono Blu G5 y editadas con Pic Collage.
Deseo mucha suerte a todos los participantes del concurso y a la vez agradecer a la comunidad @HiveDiy por siempre poner nuevos retos y con cada concurso la tarea de investigar y aprender como se hace.
Muchas gracias por tu visita y apoyo.
Saludos.
English:


Hello dear friends who visit my Blog, I hope you have had a happy weekend.
I am sad for not being able to participate in the contest because my tv which I use as a monitor, was also damaged thanks to the efficiency of the good electricity services that exist here in Venezuela, there are already 2 monitors and 2 tv damaged and to complete the internet signal goes every day from 8 am to 6 pm and well today thank God a good friend lent me this monitor while I look for someone to repair one, if it has repair. And well, taking advantage of the fact that it was 9 am and I had internet I decided to write my participation in the contest and just when I was going to start translating at 11 am the internet signal went out again and arrived at 6 pm, it is really a chaos.
Well, at this time of the night I decided to finish my publication even though I know I am not participating in the contest.
Today I am going to share with you what was going to be my participation in the beautiful contest that our Great Community @HiveDiy invited us, as always making every day we are learning and sharing as it is only done in family and I say this because it is what I feel with all of you.
Today I will make recycling or giving utility to this old and deteriorated mdf piggy bank box that I made a long time ago and that rolling here and there has fallen water and as you know this material deteriorates with water and well has damaged parts but I think by applying these Decoupage techniques I will do my best to cover these imperfections and the best thing is to give it utility.
Here I am going to show you how to do these two Decoupage techniques: with fabric and printed paper.
Some of you don't know what Decoupage technique is all about and this term comes from a French word that means to cut out and consists of cutting out papers or fabrics and gluing them on materials such as wood, plastic, soaps, candles, cardboard, ceramics, etc.
**So now I will show you how I did it and how you can do it yourself.
For this you will need:

| MDF box | Paints and paintbrushes |
|---|---|
| White glue | Rest of candle |
| Cloth | Paper print |
| Scissors | Scissors |
| Pencil | Wipes |
| Plastic bag | Surpass wood wax (glitter) |
Let's get started:
Step 1:
Sand and paint with white primer.

- Sand the box to remove debris and imperfections, then start by applying a coat of white acrylic paint.
Note: since I don't have any, I added white glue to the white paint to give it that plastic-like texture resembling acrylic paint. - Now sand the piece to smooth it out.
- Then apply the second coat of paint and sand the top and base again.
Step 2:
Pass candle and paint.

- Now pass a candle or remains of the candle through some places of the piece, I passed it through almost the entire piece because after painting many lumps came out, so it is good to sand after painting.
- If you want to make a landscape as a base for printing, start painting from bottom to top, apply dark green, apple green, sky blue, sky blue, white always trying to unite one color with another and finally apply yellow and let it dry.
- The other sides paint the color of your preference, in this case I applied royal blue paint, let it dry and then covered with black paint.
Step 3:
Sand and cut out print.

- Apply black color on the base and let it dry.
- Now pass a 360 sandpaper gently through some parts of the piece, this will remove the paint where the candle was passed, you can pass several times if you want it as aged or deteriorated by time, and that's perfect for this piece hahaha ....
- To the impression pass a brush wet with water leaving an edge of 3 or 4 millimeters and begin to cut with your hands until the whole figure is removed.
Step 4:
Sand, glue and finish off the print.
Decoupage with paper.

- Sand the edges of the print on the back to reduce the thickness of the paper and make it look like a very thin napkin so that when it is time to glue the edge does not show too much.
- Then with a soft brush apply white glue on the back of the print and glue to the box, place a transparent bag and pass a tissue to remove air bubbles and let dry.
- Now it's time to paint the white border of the print with the same colors of the base, dabbing with the brush without wetting too much.
Step 5:
Finish off the edge of the print and cut out the fabric.

- Finish applying paint to the edge of the print, then paint dots on the sides and make some mini stars, resembling the space.
Then cut a rectangle out of the fabric the size of the cover and the appliqués you will glue on.
Step 6:
Decoupage with fabric.
Glue fabric to the lid and appliqués.

- Apply glue to the lid, place on the fabric and on top put the plastic bag and rub with the cloth to remove the air and let it dry.
-Then apply glue to the sides, glue the appliqués and then apply a layer of glue on top of the cutout and repeat this procedure with the lid and let it dry well.
Step 7:
Apply varnish or glue and finish off.

- The final step came, apply in the same direction, a coat of varnish, I applied wax for wood floors (Surpass), you can apply the one you have and let dry, then apply a second coat and let dry and to finish the fold of the fabric on the lid, cut a satin ribbon and glue around the contour.
And now this little box is finished, I think it was worth recovering it.
What do you say?


Sources:
https://es.wikipedia.org/wiki/Decoupage
Now I say goodbye mentioning the translator of my publication is DeepL, I used HTML tags, the photos captured with my Blu G5 phone and edited with Pic Collage.
I wish good luck to all the participants of the contest and at the same time thank the community @HiveDiy for always putting new challenges and with each contest the task of researching and learning how to do it.
Thank you very much for your visit and support.
Regards.
Congratulations @elmundodebetty! You have completed the following achievement on the Hive blockchain and have been rewarded with new badge(s):
Your next payout target is 3000 HP.
The unit is Hive Power equivalent because post and comment rewards can be split into HP and HBD
You can view your badges on your board and compare yourself to others in the Ranking
If you no longer want to receive notifications, reply to this comment with the word
STOPTo support your work, I also upvoted your post!
Oh amiga que mal que no pudiste montar tu participación a tiempo. Es complicado trabajar así, te entiendo demasiado. La cuestión es tener la mente en positivo, fijada en el objetivo que quieres lograr y mantener la fe de que pronto todo mejorará y será perfecto para que trabajes cómodamente.
Mis mejores deseos para ti y espero que aunque no estén dentro de los participantes, tu post obtenga muchos votos ♥
Hola amiga si es complicado pero, eso sí, nunca pierdo la fé y muchas gracias por tus palabras y buenos deseos.
Hola Betty ♥️ Valoro tu actitud de presentarnos igual tu proyecto aún fuera de los plazos del concurso porque es muy lindo y trabajaste el él, aunque siento mucho lo que pasó con tu TV. Las técnicas de deocupage dan resultados tan buenos, sin dudas valió la pena recuperar esta cajita. La combinación de tela, papel y también pintura fue genial.
Gracias por compartir tu proyecto ❣️. Saludos!
Buen día amiga Laura, muchas gracias por tu comentario.
Y si, me siento feliz de haber podido compartir con todos ustedes mi trabajo.
Gracias a ti!
Saludos y bendiciones.
Excelente trabajo @elmundodebetty, me encanto tu técnica gracias por compartir ¡Felicidades fue un trabajo precioso! 😍 te deseo éxito en futuros proyectos ¡saludos! 💕
Gracias amiga, igualmente tu trabajo sobre vidrio quedó muy lindo!
Igualmente.
Saludos.
Qué preciosidad Beatriz, es un trabajo muy pero muy pulcro. Gracias por participar en el concurso.
Buen día @equipodelta que bueno que le haya gustado mi trabajo.
Muchas gracias por el apoyo.
Me encanto mucho tu trabajo @elmundodebetty, esta impecable felicitaciones.
Hola! Muchas gracias, encantada de que te haya gustado.
Gracias a ti!
Saludos.
Te quedo súper hermosa tu cajita amiga @elmundodebetty todo el trabajo, detalles, está genial.
Felicidades, y gracias por compartir trabajos tan maravillosos.
Saludos y bendiciones 🤗🌹❤️
Buen día amiga Dayadam, muchas gracias por tu comentario, igual tu trabajo de Decoupage quedó precioso.
Un placer para mi compartirlo con ustedes.
Bendiciones y gracias.
Thank you for sharing this amazing post on HIVE!
Your content got selected by our fellow curator @rezoanulvibes & you just received a little thank you via an upvote from our non-profit curation initiative!
You will be featured in one of our recurring curation compilations and on our pinterest boards! Both are aiming to offer you a stage to widen your audience within and outside of the DIY scene of hive.
Join the official DIYHub community on HIVE and show us more of your amazing work and feel free to connect with us and other DIYers via our discord server: https://discord.gg/mY5uCfQ !
If you want to support our goal to motivate other DIY/art/music/homesteading/... creators just delegate to us and earn 100% of your curation rewards!
Stay creative & hive on!
Muchas gracia DIYHub por el apoyo a mi publicación.
@elmundodebetty amiga es una lastima que no pudiste participar este vendito problema con la luz que nos afecta a todos, tu trabajo es muy hermoso me encanto tu tecnica felicitaciones
@elmundodebetty wonderful 👌 I like it so much. This photos show how it make step by step. I think it more helpful for us. Your painting so attractive 😍! Stay safe❤️