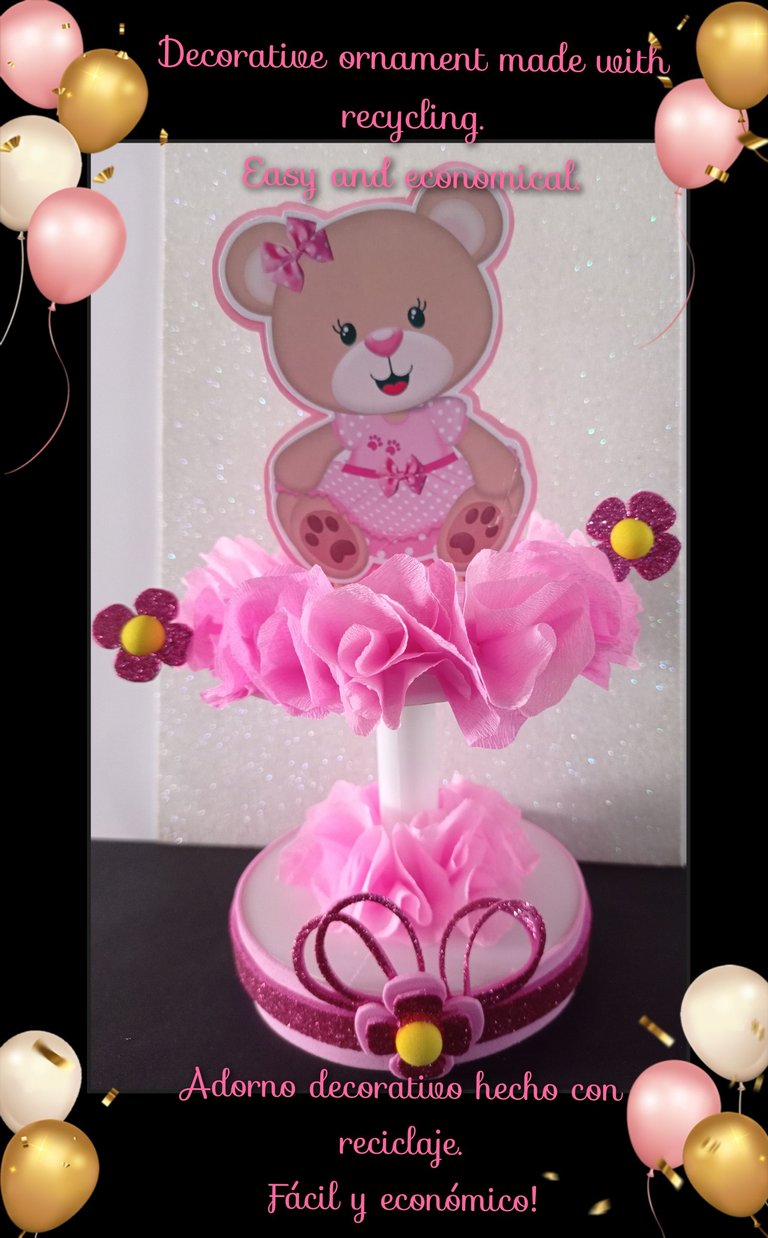
Hola y bienvenidos sean todos los que hoy me visitan.
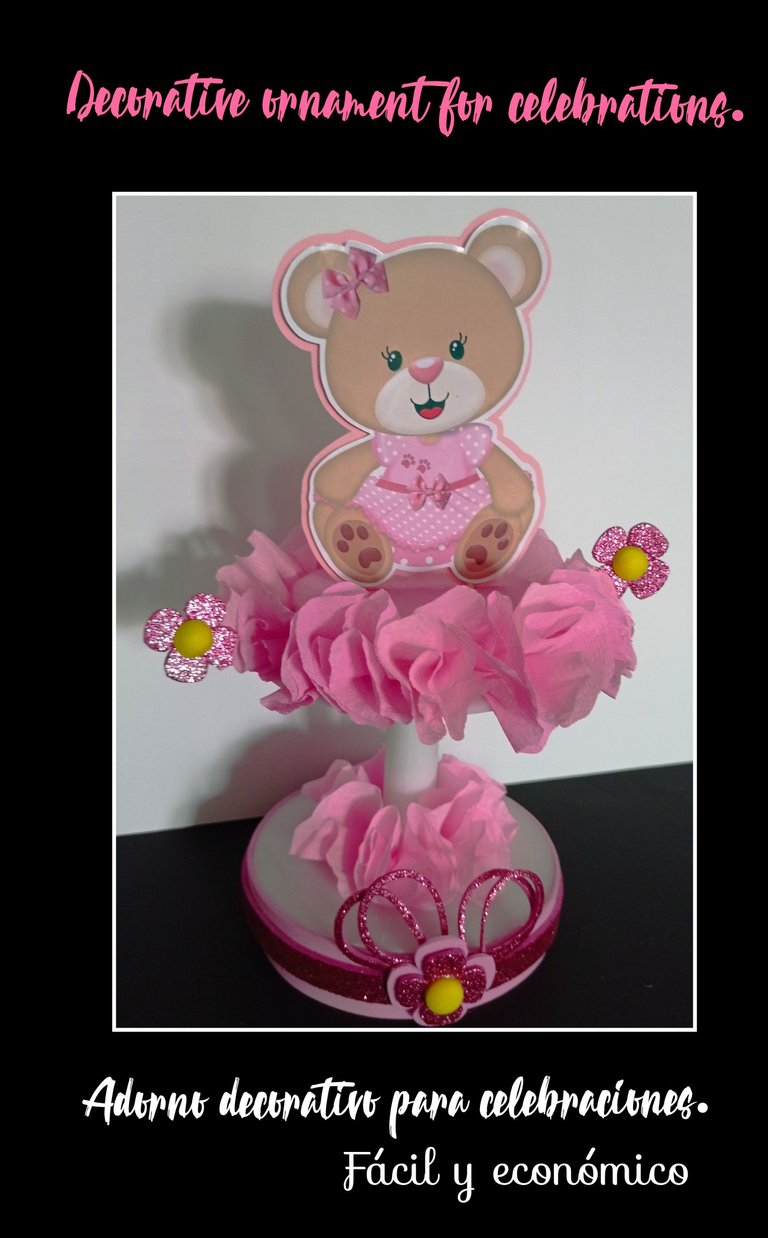
Por aquí muy feliz de compartir con ustedes, les traigo un tutorial muy fácil de elaborar, está hecho con un carrete de plástico (donde vienen las cintas) también se puede hacer con 2 CD y un tubo de cartón o plástico en el centro. el carrete lo tomé como base principal para crear un bonito adorno que bien lo puedes usar como decoración, centro de mesa o recuerdo para obsequiar en tus celebraciones.
Entonces te invito a que me acompañes y veas el proceso.
Vas a necesitar:
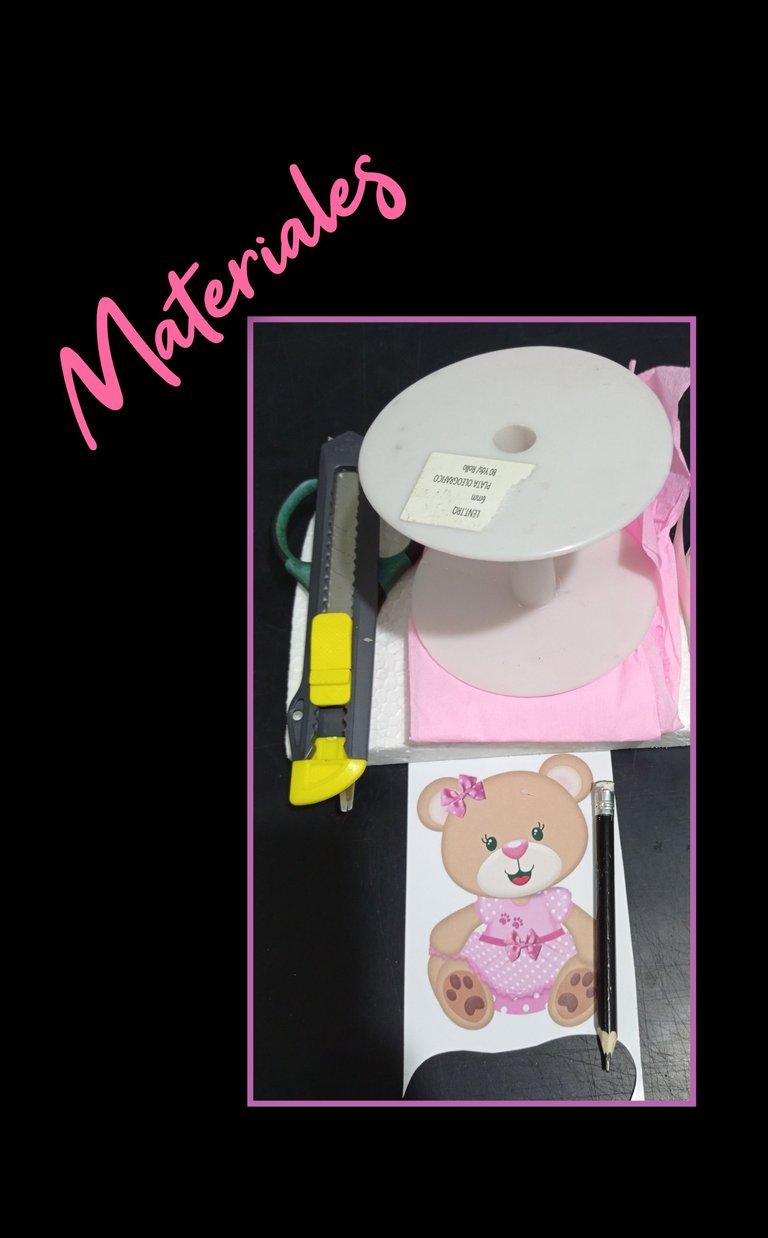
| Carrete de plástico (reciclaje) | Papel crepé |
|---|---|
| Anime | Foami |
| Impresión | Lápiz |
| Tijera y cuchilla | Regla |
| Silicón | Palito de madera |
| Plancha eléctrica |
Paso 1:
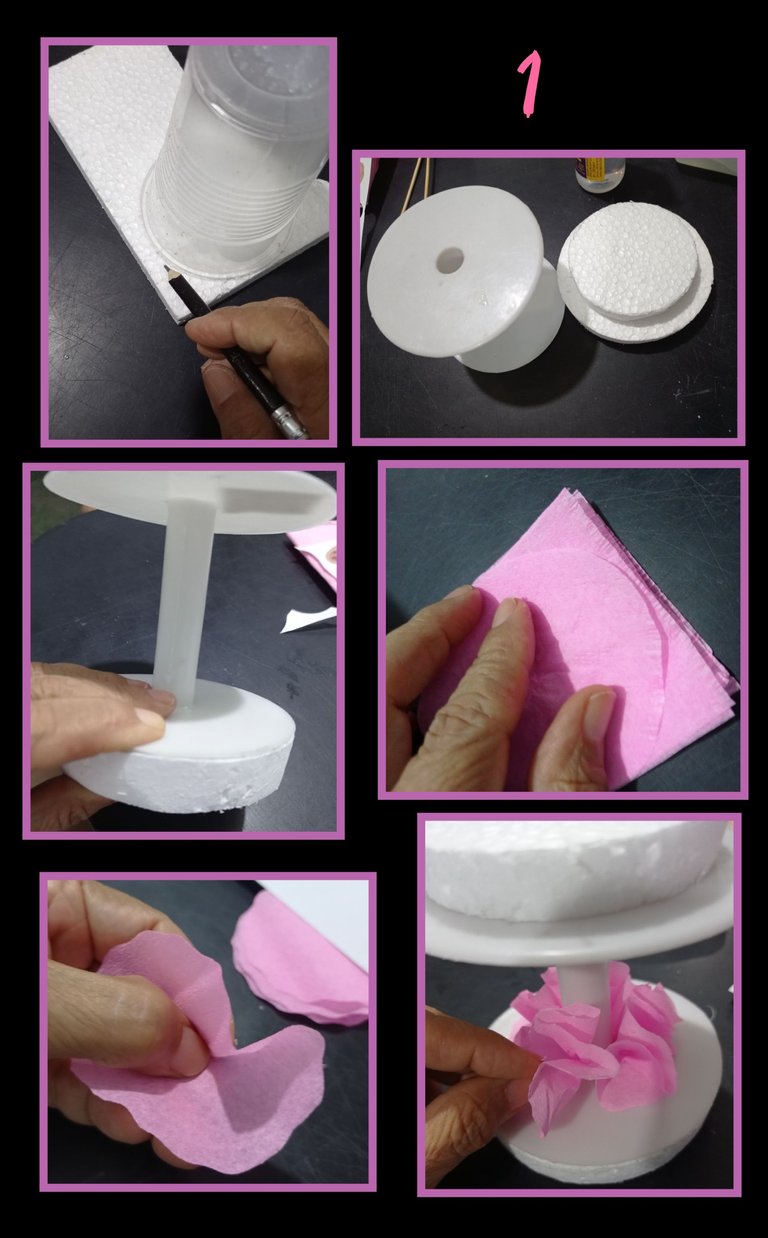
- Coloca el carrete sobre el anime y marca la circunferencia por todo el contorno y recorta con la cuchilla, después recorta otro más pequeño para la parte superior como se ve en la foto.
- Luego aplica silicón y pega ambos círculos al carrete.
- Aparte recorta unos cuadrados de 6x6cm y recorta en forma circular.
- Luego marca el centro y aplica silicón en la parte baja del carrete y pega los papeles en todo el contorno.
Parte 2:
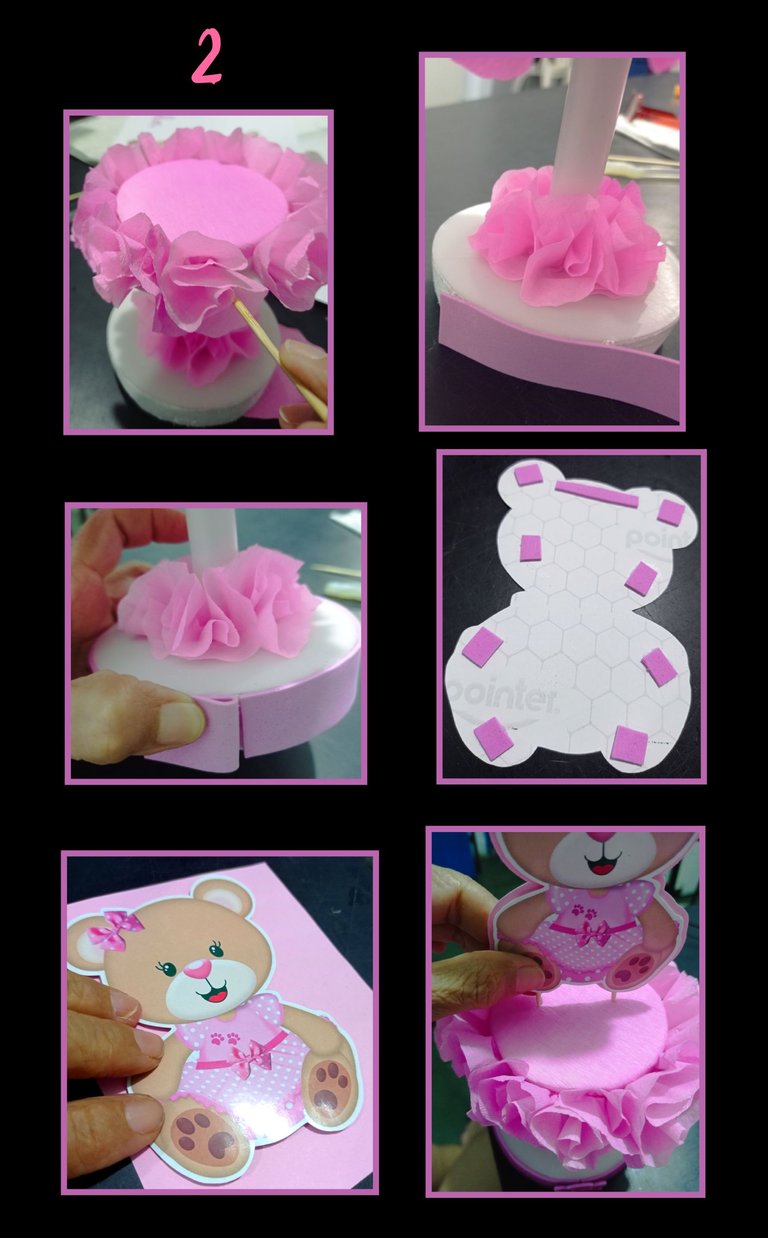
- Ahora recorta un círculo del tamaño del anime superior y pega para forrar.
- Luego aplica un poco de silicona en el borde del anime y comienza a insertar con un palito hasta completar todo el contorno.
- Ahora recorta una tira de foami y pega en el contorno de la parte baja y recorta el sobrante.
- Recorta la impresión y pega pequeños cuadritos de foami en la parte trasera y pega a una cartulina o pedazo de foami y recorta dejando un pequeño borde e inserta dos palillos de madera para introducir en el centro del anime.
Paso 3:
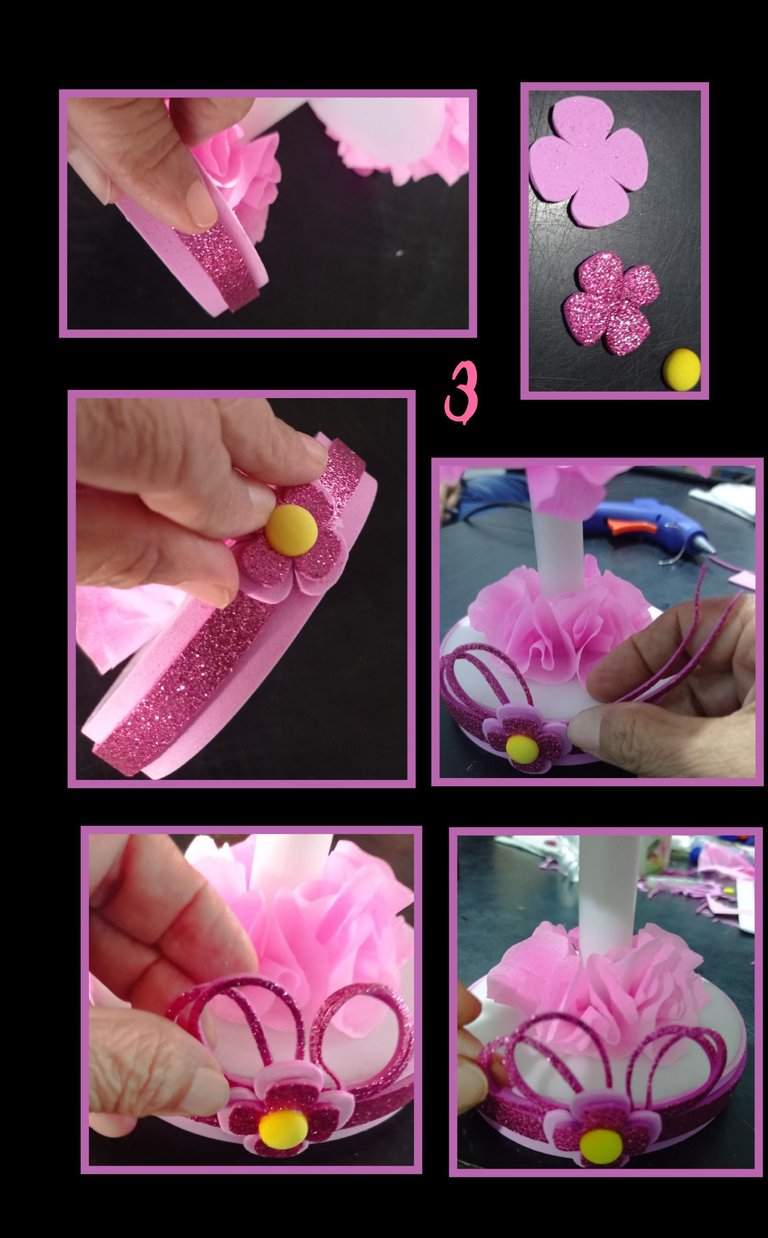
- Recorta una tira de 1cm de foami escarchado y pega en todo el contorno del círculo, aparte recorta flores y pega una en la unión de las tiras para tapar, después recorta cuatro tiras delgadas y arma un lazo detrás de la flor para decorar.
Paso 4:
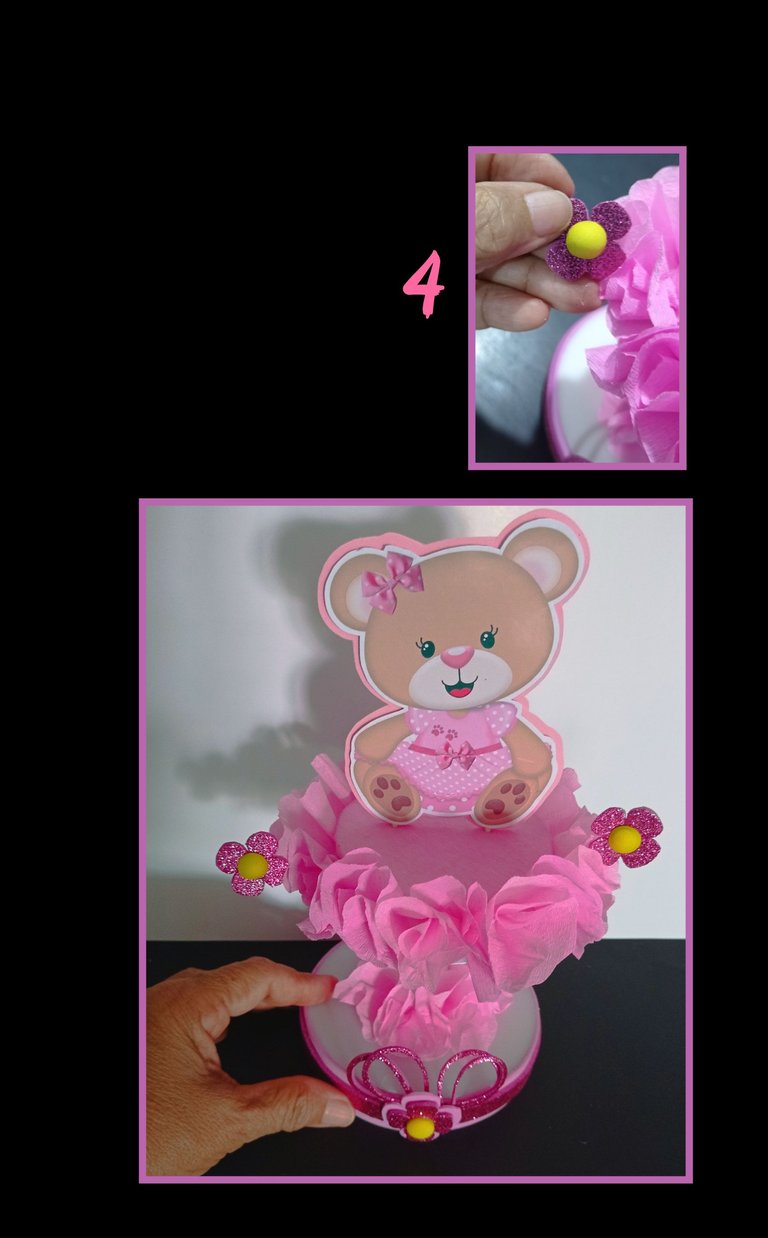
- Ahora pega florecitas a los lados.
Traducido con DeepL
Las fotos capturadas con mi Redmi Note 9 y editadas con GridArt.
Fuente:
https://www.pinterest.es/pin/4996249580531292/
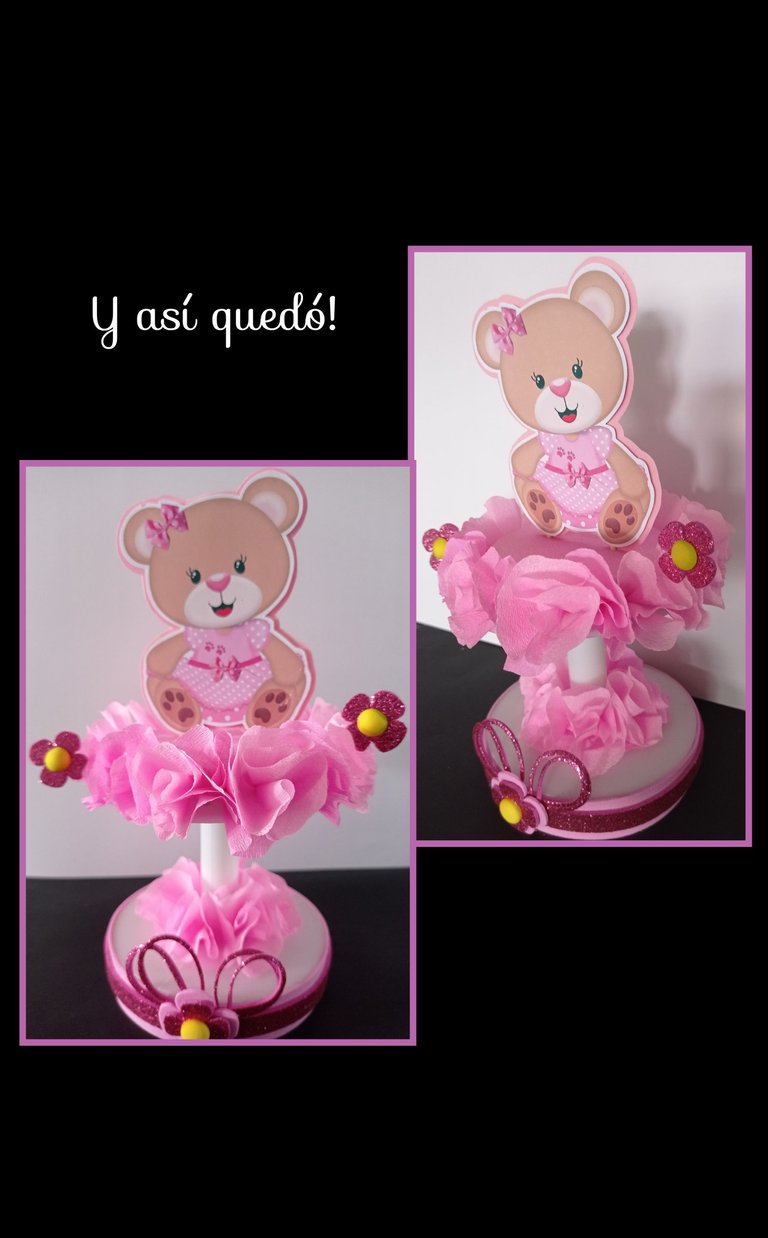
Ahora mira otras fotos de este bonito y fácil adorno, al que también puedes personalizar y decorar con las imágenes y colores que prefieras, este quedaría muy bonito para decorar en un baby shower o cumpleaños.

- Ahora me despido deseando que mi tutorial te guste y sirva de guía para realizar este lindo y fácil adorno, muchas gracias por tu visita y apoyo.
Saludos a todos.
Ah y no te olvides que reciclando ayudamos a nuestro planeta!
English:


Hello and welcome to all who visit me today.
I am very happy to share with you, I bring you a very easy to make tutorial, it is made with a plastic spool (where the ribbons come) can also be made with 2 CDs and a cardboard or plastic tube in the center. I took the spool as the main base to create a nice ornament that you can use as a decoration, centerpiece or souvenir to give away at your celebrations.
Then I invite you to join me and see the process.
You will need:

| Plastic spool (recycled) | Crepe paper |
|---|---|
| Anime | Foami |
| Printing | Pencil |
| Scissors and razor | Ruler |
| Silicone | Wooden stick |
| Electric iron |
Step 1:

- Place the spool on the anime and mark the circumference all around and cut out with the cutter, then cut out a smaller one for the top as shown in the photo.
- Then apply silicone and glue both circles to the spool.
- Then cut out some 6x6cm squares and cut them in a circular shape.
- Then mark the center and apply silicone to the bottom of the spool and glue the papers all around.
Part 2:

- Now cut out a circle the size of the top anime and glue to line.
- Then apply some silicone to the edge of the anime and start inserting with a stick until the entire outline is complete.
- Now cut out a strip of foami and glue on the outline of the bottom and trim the excess.
- Cut out the print and glue small squares of foami on the back and glue to a cardboard or piece of foami and trim leaving a small border and insert two wooden sticks to insert in the center of the anime.
Step 3:

- Cut out a 1cm strip of frosted foami and glue around the circle, then cut out flowers and glue one at the junction of the strips to cover, then cut out four thin strips and tie a bow behind the flower to decorate.
Step 4:
- Now glue little flowers on the sides.


Translated with DeepL
Photos captured with my Redmi Note 9 and edited with GridArt.
Source:
https://www.pinterest.es/pin/4996249580531292/
Now look at other photos of this nice and easy ornament, which you can also customize and decorate with the images and colors you prefer, this would look very nice to decorate for a baby shower or birthday.

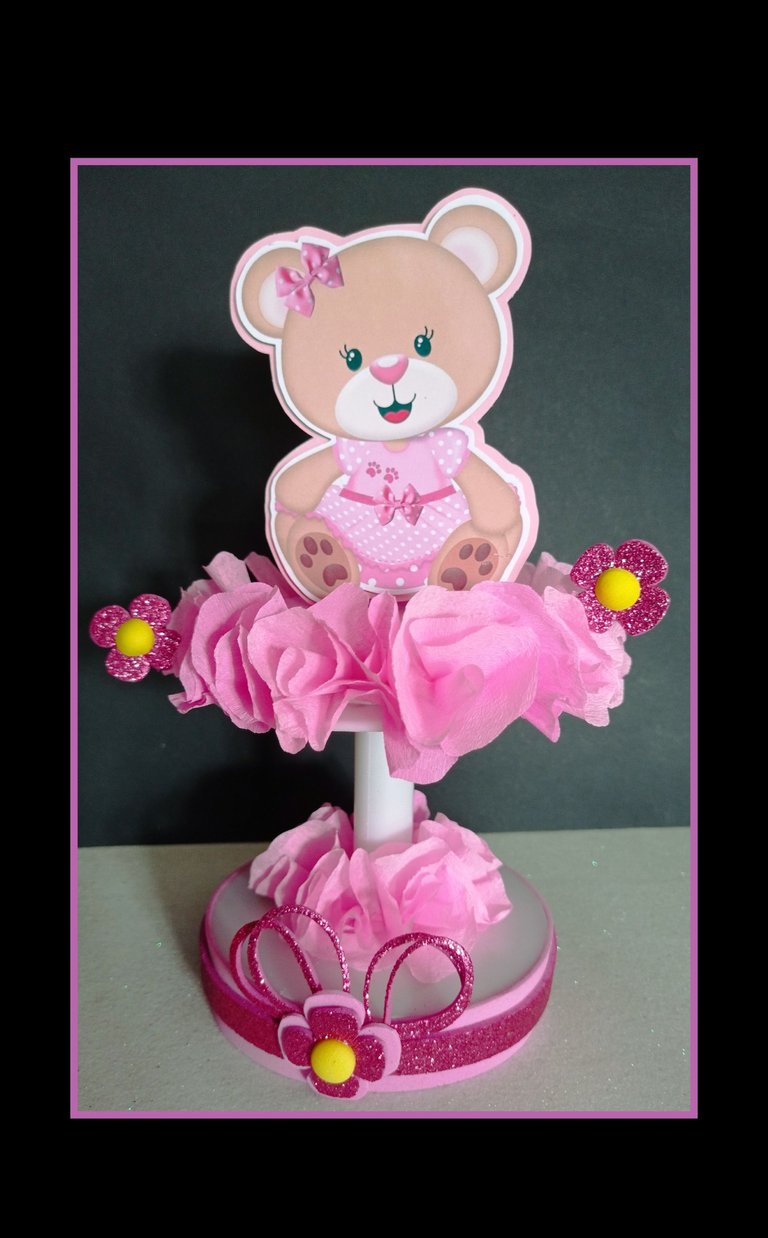
- Now I say goodbye wishing that you like my tutorial and serve as a guide to make this nice and easy ornament, thank you very much for your visit and support.
And don't forget that recycling helps our planet!
Greetings to all.
Gracias por el apoyo!
Feliz día.
Hermosa decoración!!! Gracias por compartir!
Gracias a ti por apoyar y comentar.
Hola Betty. Que buena idea la de aprovechar este carrete para hacer un lindo adorno, eso si que es sacarle provecho hasta el final. Me gustó como quedó, muy lindo como centro de mesa también. ¡Felicitaciones ❣️!
Hola Laura, me alegro que te haya gustado... jajajaja y hasta a el, le saqué provecho! y si amiga, todo lo que uso y veo que después me puede servir para reciclar le saco provecho y a la vez contribuyo con el medio ambiente.
Saludos y nuevamente gracias.
Hermoso y muy tierno!! Con material de reciclaje podemos hacer un sinfín de cosas. Una vez hice una mesita con un carrete de cable y tubos de papel y con otra hice un pequeño taburete. Te felicito por esa gran idea. Saludos 🌺🌹💐🌺🌹
Que hermosa chupetera amiga me gustó y explicaste muy bien todo el proceso
Hermoso!! Muy tierno!
Gracias amiga por tu comentario...y que bueno que te gustó.