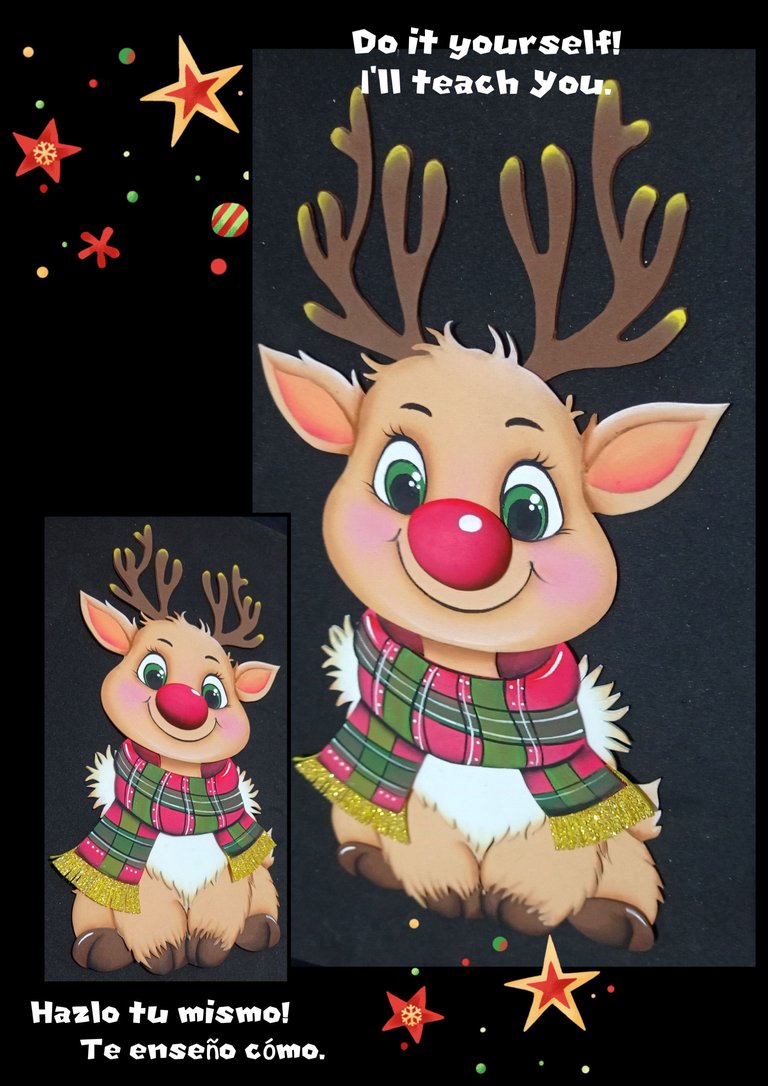
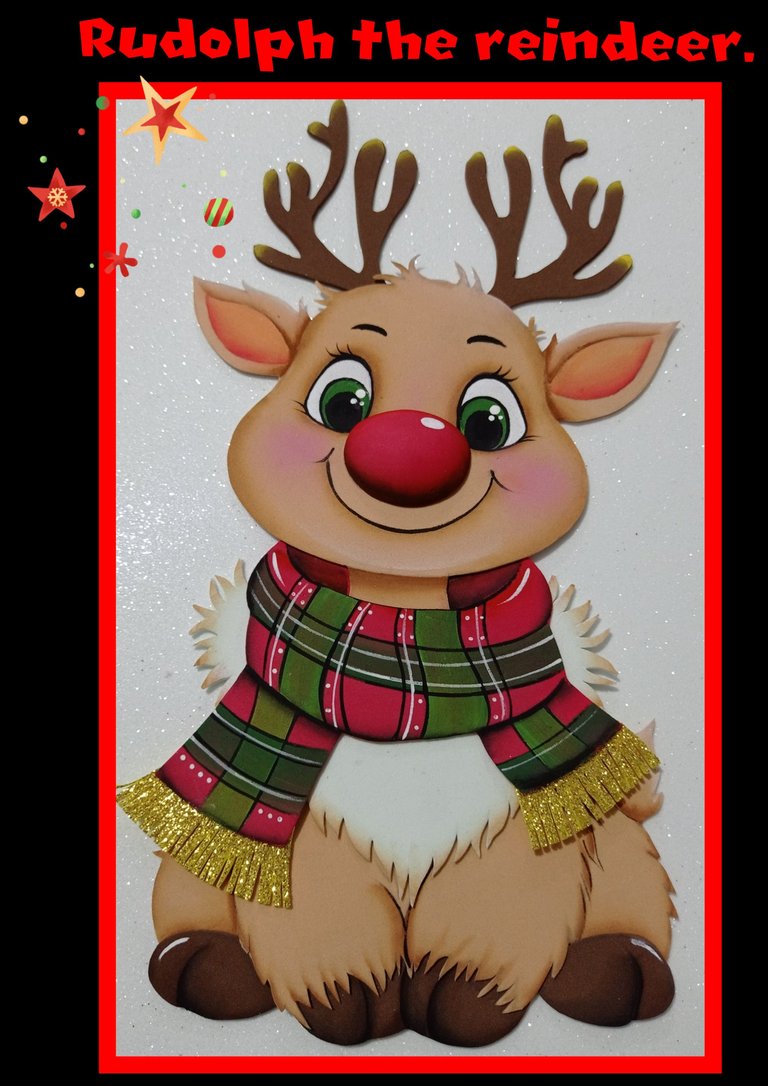
Conoces a Rodolfo, el Reno de la nariz roja?
Lo pueden usar para decorar cualquier espacio.
Reseña:
Cuenta la historia navideña que papá Noel saldría a repartir los regalos de navidad junto a sus 8 renos y debido a una fuerte tormenta le era imposible, es ahí cuando papá Noel conoce a Rodolfo quien tenía una nariz roja, cuya potente luz le serviría para guiar a los demás renos y llevar los juguetes a su destino.
Desde entonces es Rodolfo el héroe que acompañó a Papá Noel en todas las navidades.
Comencemos:
Materiales a usar:
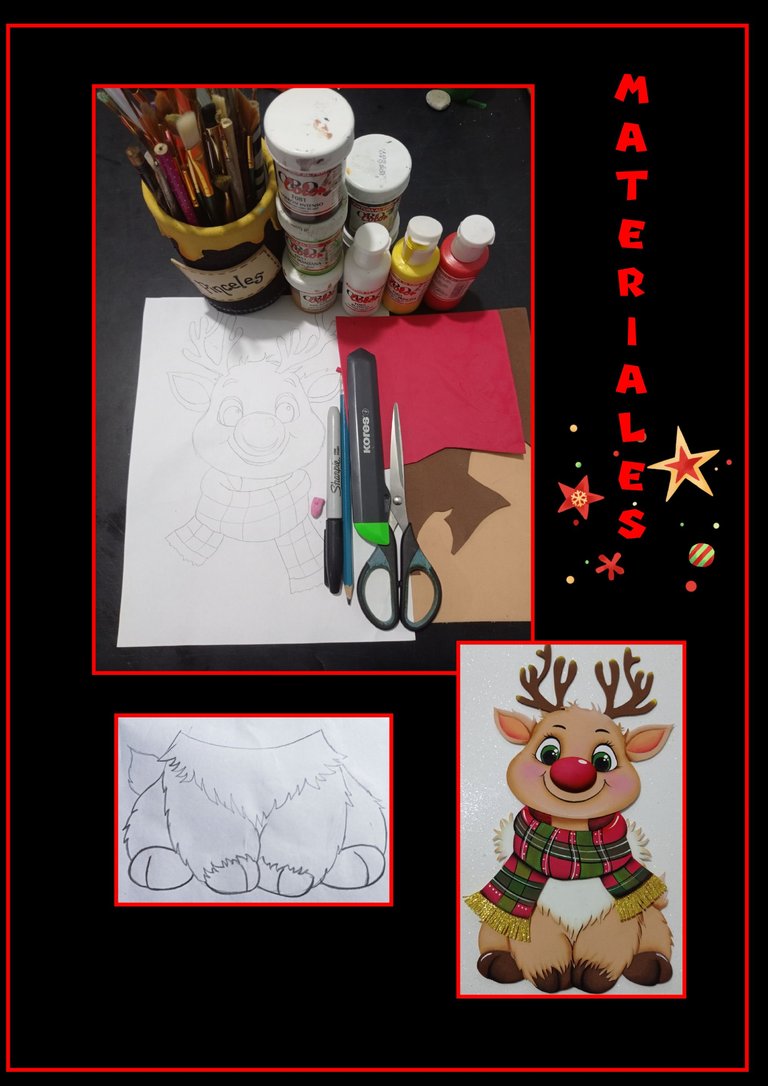
| Foami de colores | Pinturas y pinceles |
|---|---|
| Tijera, cuchilla | Lápiz 4B ó 6B |
| Molde | Plancha eléctrica |
Paso 1:
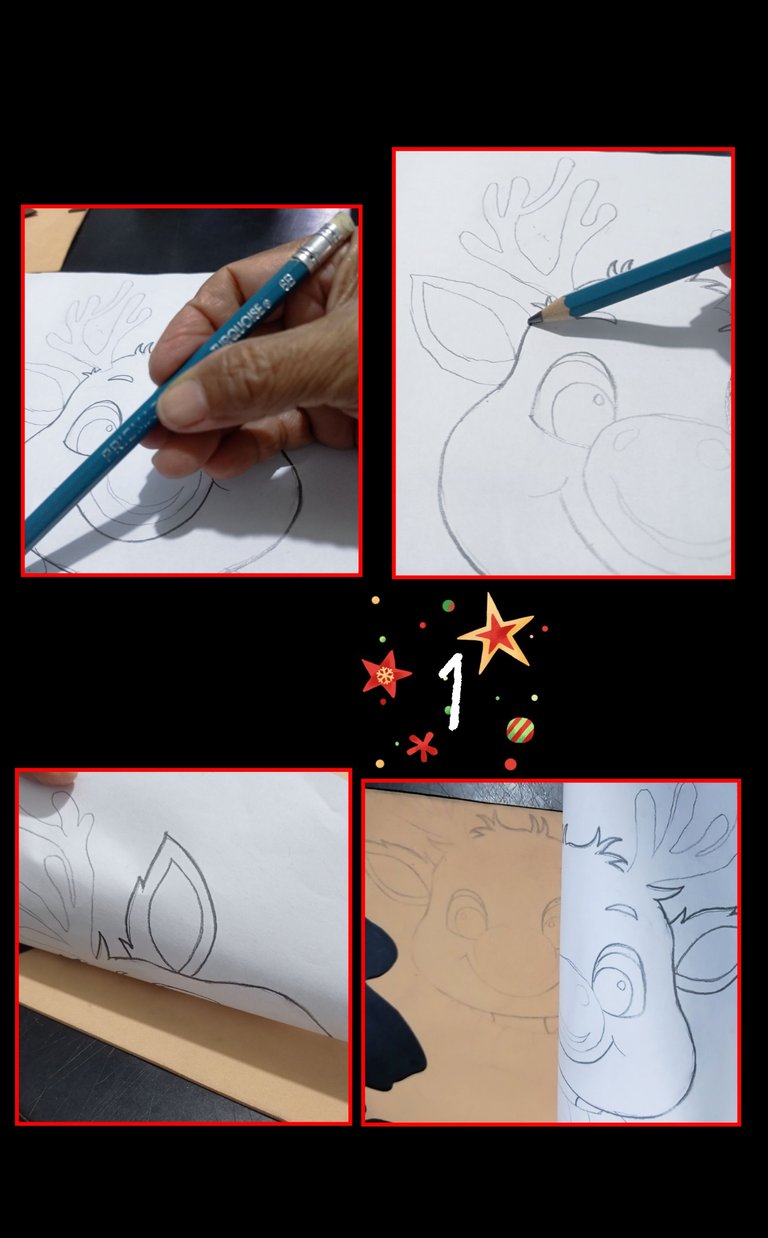
- Utiliza un lápiz 6B y remarca el dibujo.
- Coloca el dibujo sobre el foami y con los anillos de la tijera, frota el papel hasta transferir cada una de las piezas.
Paso 2:
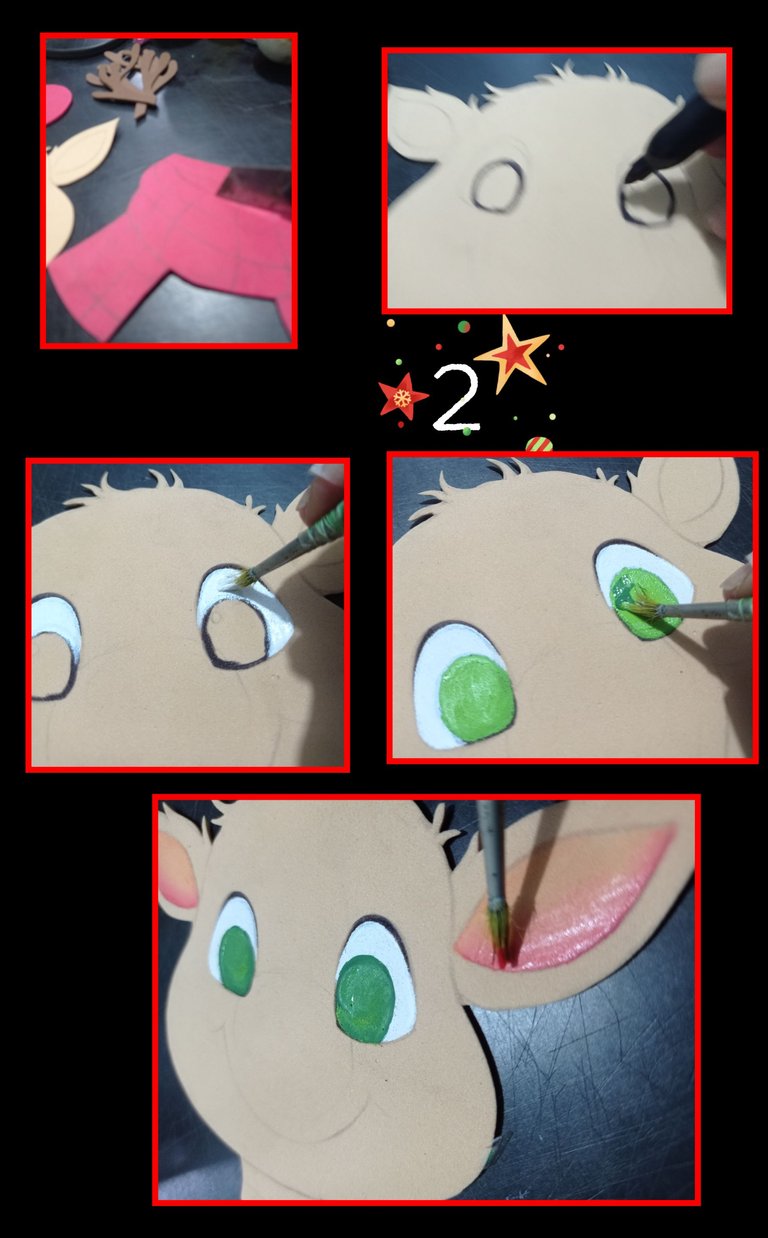
- Recorta todas las piezas marcadas, luego con un marcador dibuja el contorno de los ojos y rellena primero con pintura blanca, luego rellena con verde y deja secar, después pinta el centro de las orejas con pintura rosada y luego con pintura roja, pasa por el borde inferior pintado.
Paso 3:
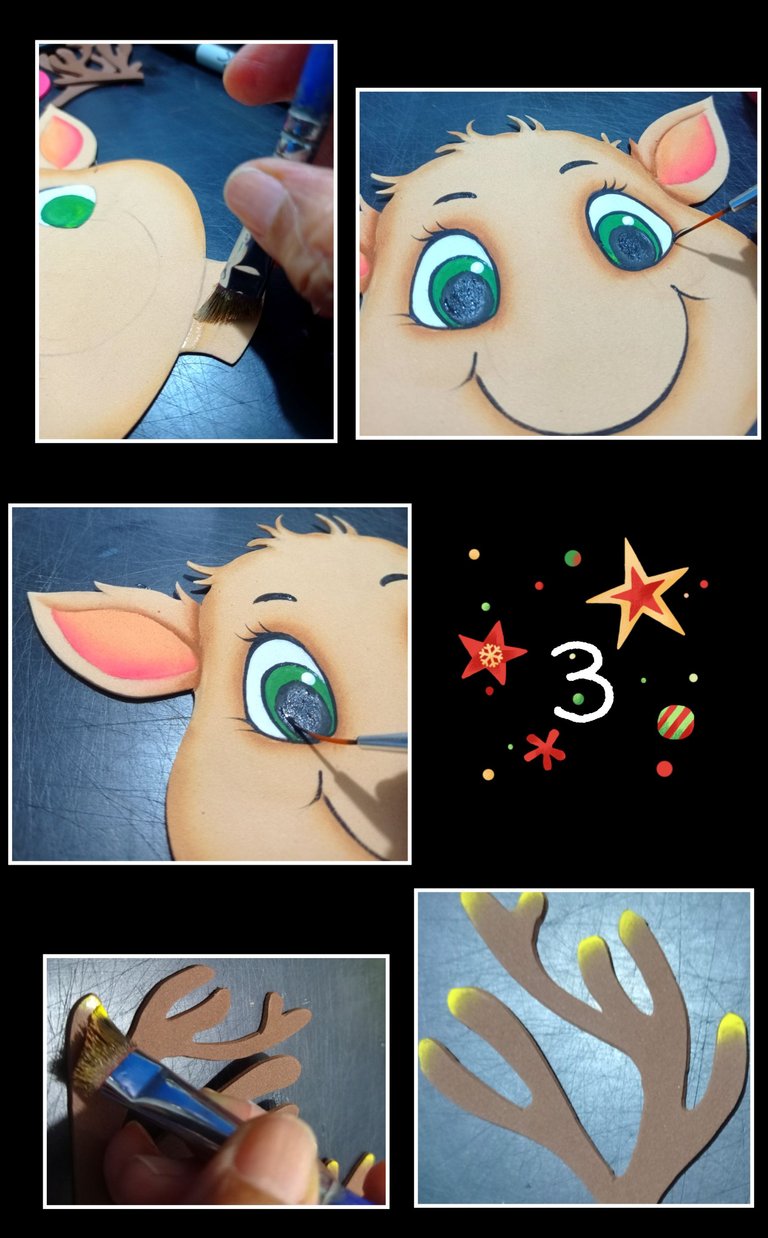
- Moja el pincel en agua y retira el exceso pasando un paño seco, luego moja la punta en pintura piel moreno o marrón claro y pasa por el borde de la cara, ojos y boca.
- Después rellena el iris y con un pincel fino o marcador punta fina, delinea los ojos, boca, pestañas y cejas.
- Después pinta la punta de los cuernos con pintura amarilla.
Paso 4:
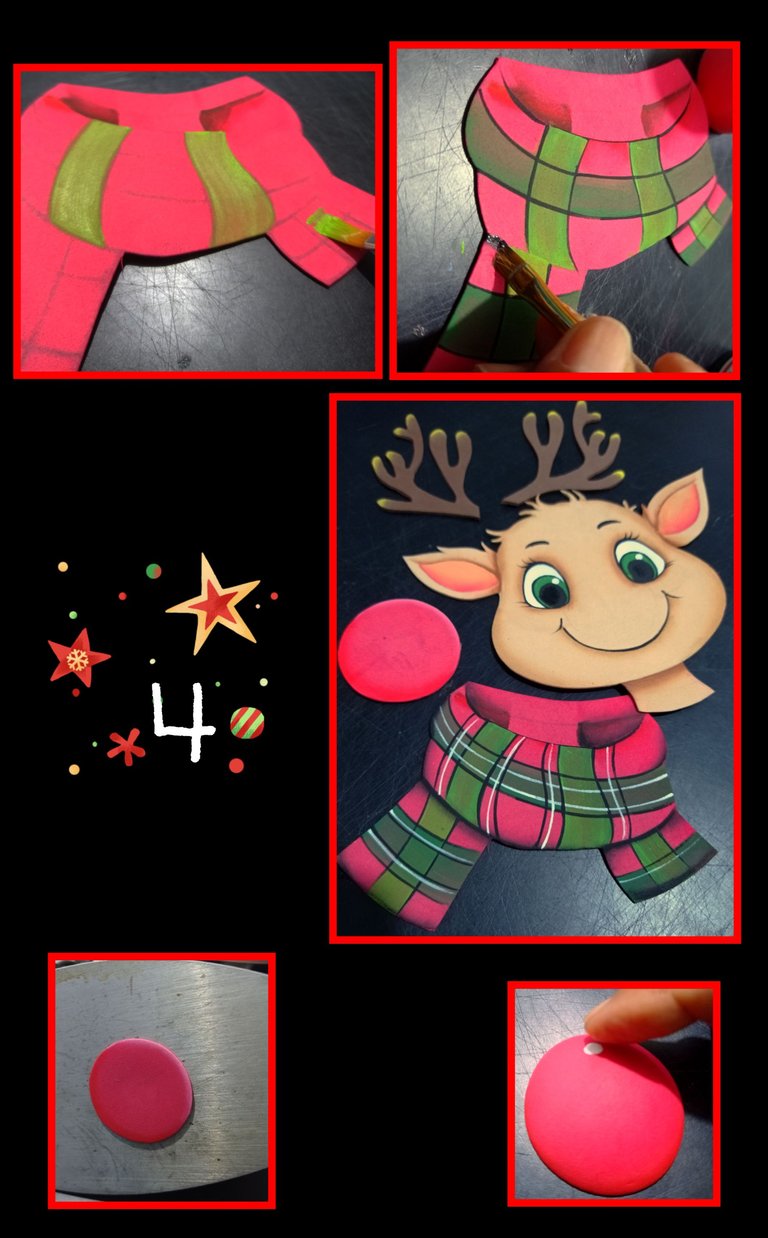
Para pintar la bufanda y semejar a una tela, pinta con marrón o negro la parte donde irá pegada la cabeza, luego con pintura verde pinta líneas gruesas verticales y con verde oscuro las horizontales.
- Hecho esto deja secar y luego con un marcador o pincel liner o 00 para pintar ojos, haz líneas en negro y otras en blanco como se muestra en la foto y deja secar, luego calienta la plancha y coloca la nariz a termoformar.
Paso 5:
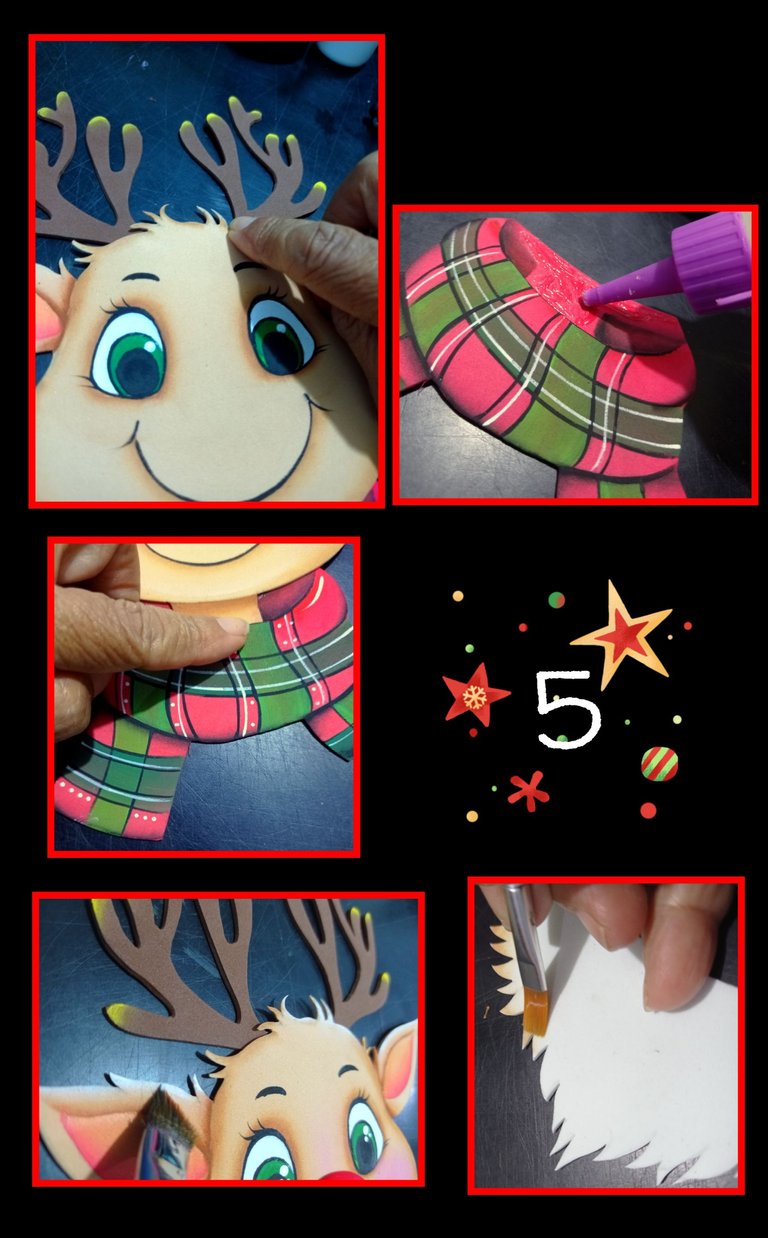
- Ahora, aplica silicón a los cuernos y comienza a armar a Rodolfo, siempre guiándote con el molde.

- Si quieres puedes armar solo el busto de Rodolfo quedaría así!
y si lo quieres completo, recorta las piezas restantes y pinta por todo el contorno de la parte de arriba de las orejas y luego la barba con pintura marrón claro.
Paso 6:
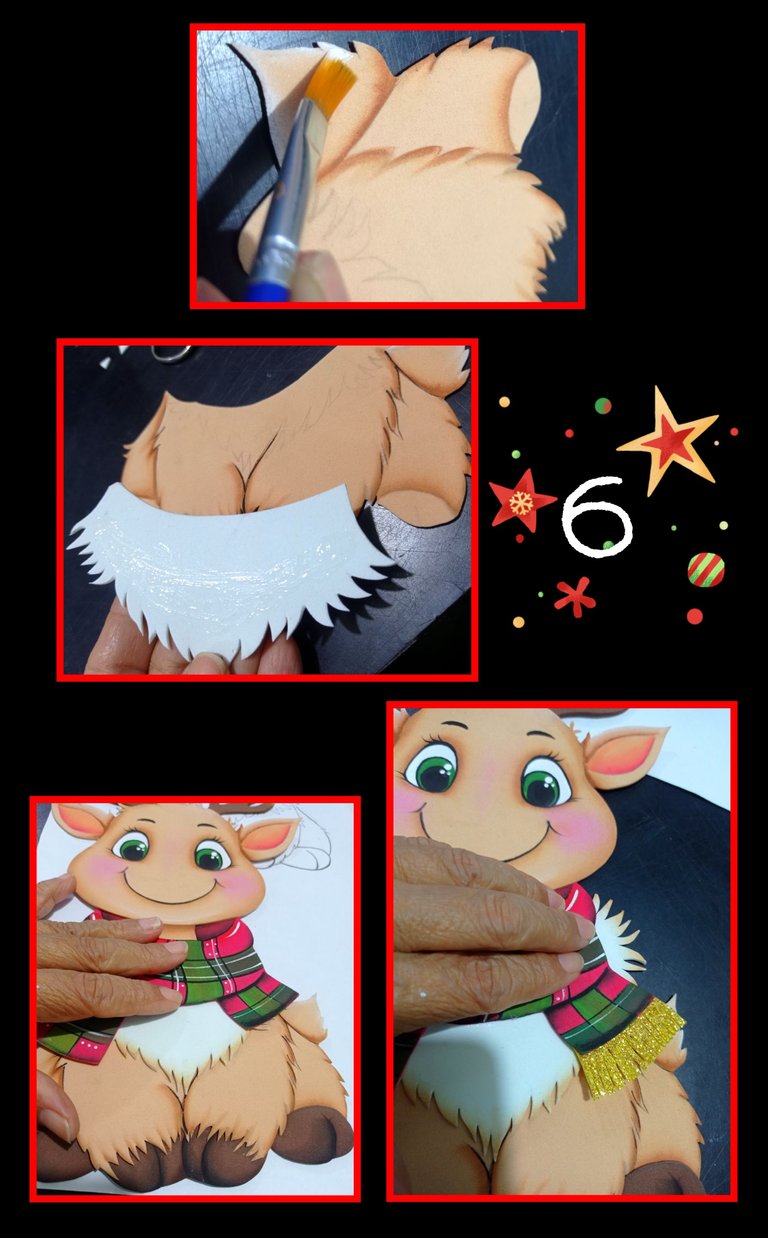
- Pinta la parte de arriba de la cola y deja secar.
- Después aplica silicón en la barba y pega sobre el cuerpo, también los cascos, decora la bufanda y pega al cuerpo.
Paso 7:
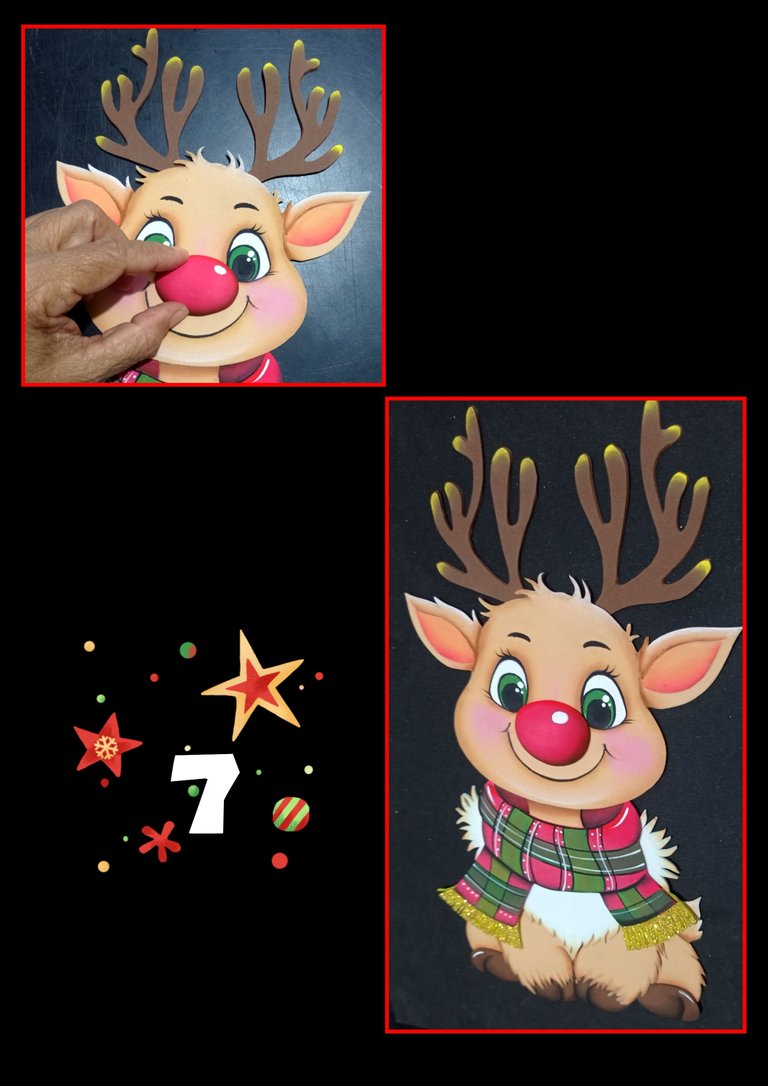
- Por último aplica silicón y pega la nariz.
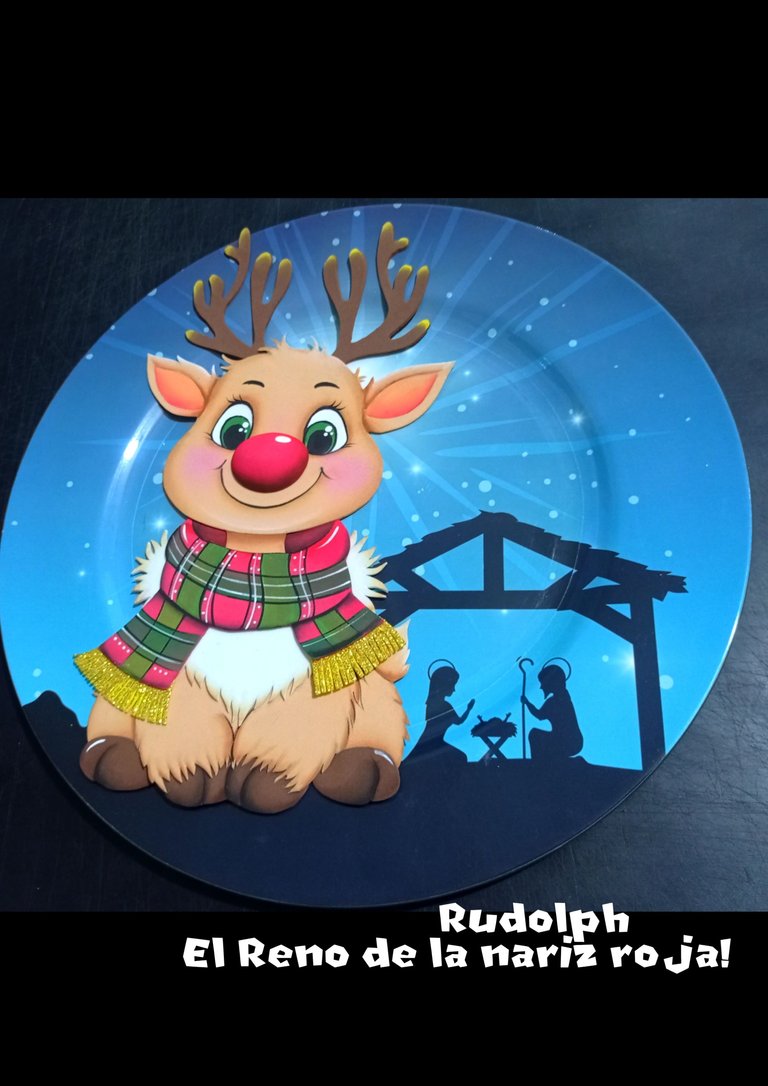
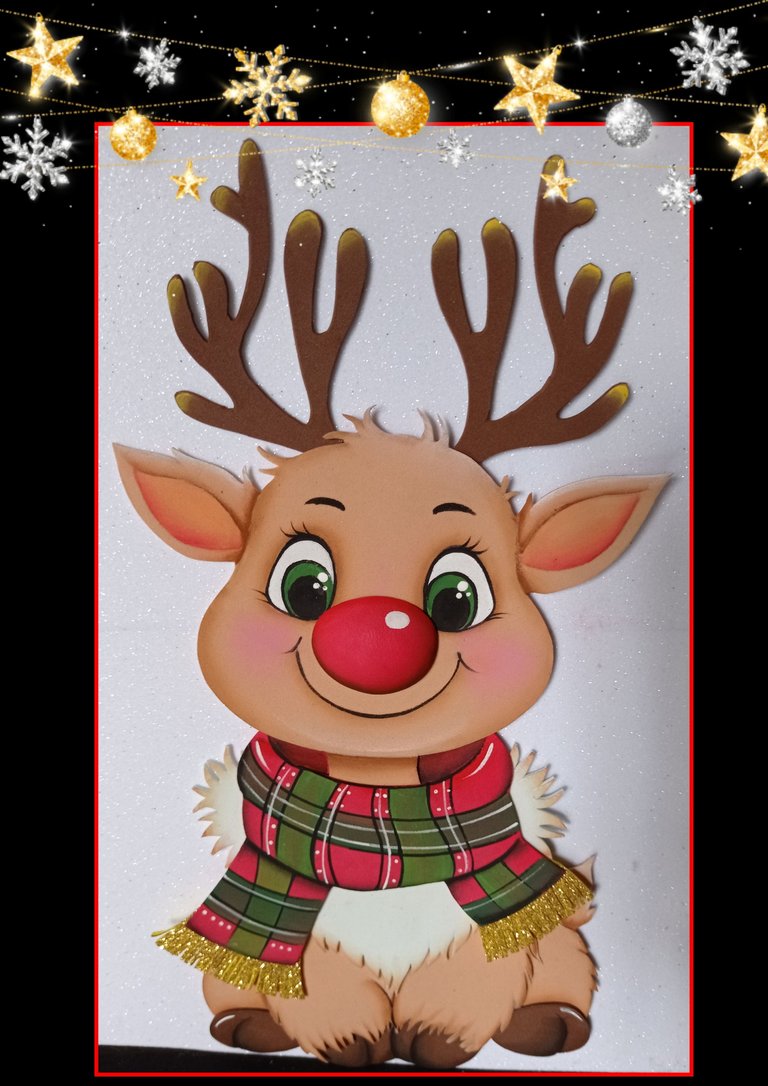
Y aquí el resultado final!

Fuente:https://es.pinterest.com/pin/476255729363018945/
Wikipedia:https://es.wikipedia.org/wiki/Rodolfo_el_reno
Aplicación para collage: GridArt
Teléfono: Redmi Note 9.
Redes sociales: X elmundodebetty
Facebook: elmundodebetty
Ahora llegó la hora de despedirme no sin antes invitarte a ver mi próximo tutorial.
Gracias por el apoyo brindado y si es de tu agrado comentar,con gusto responderé tu mensaje.
Saludos.
English:


Do you know Rudolph, the Red-nosed Reindeer?
You can use it to decorate any space.
Description
The Christmas story tells that Santa Claus would go out to deliver Christmas presents with his 8 reindeer and due to a strong storm it was impossible, that's when Santa Claus meets Rudolph who had a red nose, whose powerful light would serve to guide the other reindeer and bring the toys to their destination.
Since then, Rudolph has been the hero who has accompanied Santa Claus every Christmas.
Let's get started:
Materials to use:

| Colored Foami | Paints and brushes |
|---|---|
| Scissors, blade | 4B or 6B pencil |
| Mold | Electric iron |
Step 1:

- Use a 6B pencil and outline the drawing.
- Place the drawing on the foami and with the rings of the scissors, rub the paper until each piece is transferred.
Step 2

- Cut out all the marked pieces, then with a marker draw the outline of the eyes and fill first with white paint, then fill with green and let dry, then paint the center of the ears with pink paint and then with red paint, go through the bottom painted edge.
Step 3.

- Dip the brush in water and remove the excess by wiping it with a dry cloth, then dip the tip in tan or light brown paint and go around the edge of the face, eyes and mouth.
- Then fill in the iris and with a fine brush or fine tip marker, outline the eyes, mouth, eyelashes and eyebrows.
- Then paint the tip of the horns with yellow paint.
Step 4

To paint the scarf and resemble a cloth, paint with brown or black the part where the head will be glued, then with green paint, paint thick vertical lines and with dark green the horizontal ones.
- Then with a marker or liner brush or 00 for painting eyes, make lines in black and others in white as shown in the photo and let dry, then heat the iron and place the nose to thermoform.
Step 5

- Now, apply silicone to the horns and begin to assemble Rodolfo, always guided by the mold.

- If you want you can assemble only the bust of Rodolfo, it would look like this!
and if you want it complete, cut out the remaining pieces and paint all around the top of the ears and then the beard with light brown paint.
Step 6.

- Paint the top of the tail and let dry.
- Then apply silicone on the beard and glue on the body, also the hooves, decorate the scarf and glue to the body.
Step 7

- Finally apply silicone and glue the nose.
And here is the final result!


Fuente:https://es.pinterest.com/pin/476255729363018945/
Wikipedia:https://es.wikipedia.org/wiki/Rodolfo_el_reno

Collage application: GridArt
Phone: Redmi Note 9.
Social networks: X elmundodebetty
Facebook: elmundodebetty
Now it's time to say goodbye but not before inviting you to see my next tutorial.
Thank you for your support and if you like to comment, I will gladly answer your message.
Greetings.
Admiro a las personas con buen manejo del lápiz, sobre todo por su prosa y obviamente también por su pulso, como es este caso. Me encanto el paso a paso y si compartimos con los más pequeños de la casa, mucho mejor.
Felicitaciones
Feliz día
Muchas gracias por tu comentario, me alegra mucho que te haya gustado mi publicación.
Ah y muchas gracias por la corrección, lo tomaré muy en cuenta.
Saludos.
Este post ha sido votado y curado por el equipo Hive Argentina | Participa en nuestro Trail de curación.
Estoy feliz de contar con su voto @hiveargentina, muchas gracias por el apoyo.
Hermoso 🤩 como todo lo que nos compartes. ¡Me encantó!
Hola amiga Lelys, me alegra mucho saber que nuevamente pasaste por aquí y que te gustó mi publicación. Muchas gracias.
Demasiada belleza amiga, me encanta la expresión que lograste darle a su carita. Gracias por compartir
Uy, que lindo saber que te haya gustado mi Rodolfo.
Muchas gracias por tu apoyo y comentario.
Congratulations @elmundodebetty! You have completed the following achievement on the Hive blockchain And have been rewarded with New badge(s)
Your next target is to reach 60000 upvotes.
You can view your badges on your board and compare yourself to others in the Ranking
If you no longer want to receive notifications, reply to this comment with the word
STOPCheck out our last posts:
Muchas gracias @hivebuzz por mi nueva insignia y por el apoyo que siempre me brindan.
De nada @elmundodebetty 🌹
Apóyenos también y vote por nuestro testigo.
Recibirá una insignia adicional y un voto más fuerte de nuestra parte cuando le notifiquemos.
This is so beautiful, your creation of Rudolph is amazing, and the back story? Superb. Great work friend and cheers to more creative ideas.
Buenas noches y muchas gracias @diyhub por el apoyo a mi publicación y me alegra mucho el que le haya gustado.
Hola amiga, que lindo reno, me encanta la bufanda y su carita tierna, se ve adorable.
Saludos!
Hola amiga Belky, gusto en saludarte.
Me alegra mucho te haya gustado mi reno.
Muchas gracias por comentar.