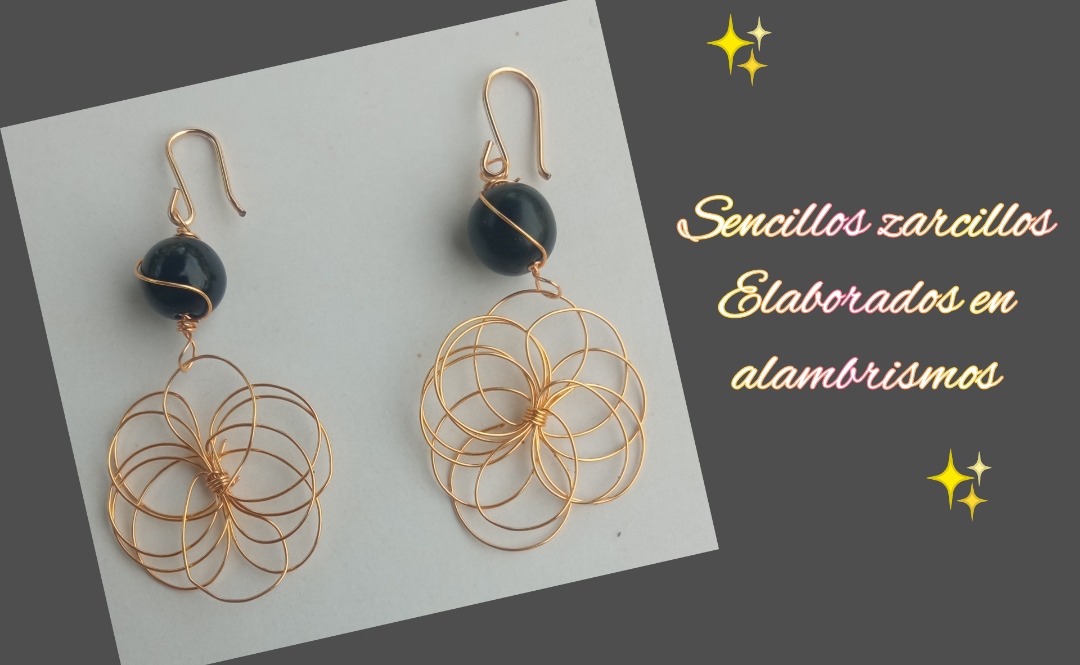
Feliz y bendecido día tengan todos, sean todos bienvenidos a mi blog, les cuento que gracias a esta plataforma he comenzado a elaborar un pequeño emprendimiento en bisutería, todas esas cosas sencillas que pueden conseguir en mi blog. En esta oportunidad les quiero compartir un nuevo diseño que elabore esta semana, se trata de unos muy sencillos aretes con forma de flor, elaborados el alambrismos y pedrería.
Happy and blessed day everyone, welcome to my blog, I want to tell you that thanks to this platform I have started to develop a small jewelry business, all those simple things that you can get on my blog.
This time I want to share a new design that I made this week, it is about very simple earrings in the shape of a flower, made with wire mesh and rhinestones.
This is a very elegant and comfortable design to take anywhere, and it is also very easy for everyone to make, even if they do not have experience. For all of you, I made this tutorial so that you can guide yourself and make it at home.
The technique is super easy, I invite you to do it with me.
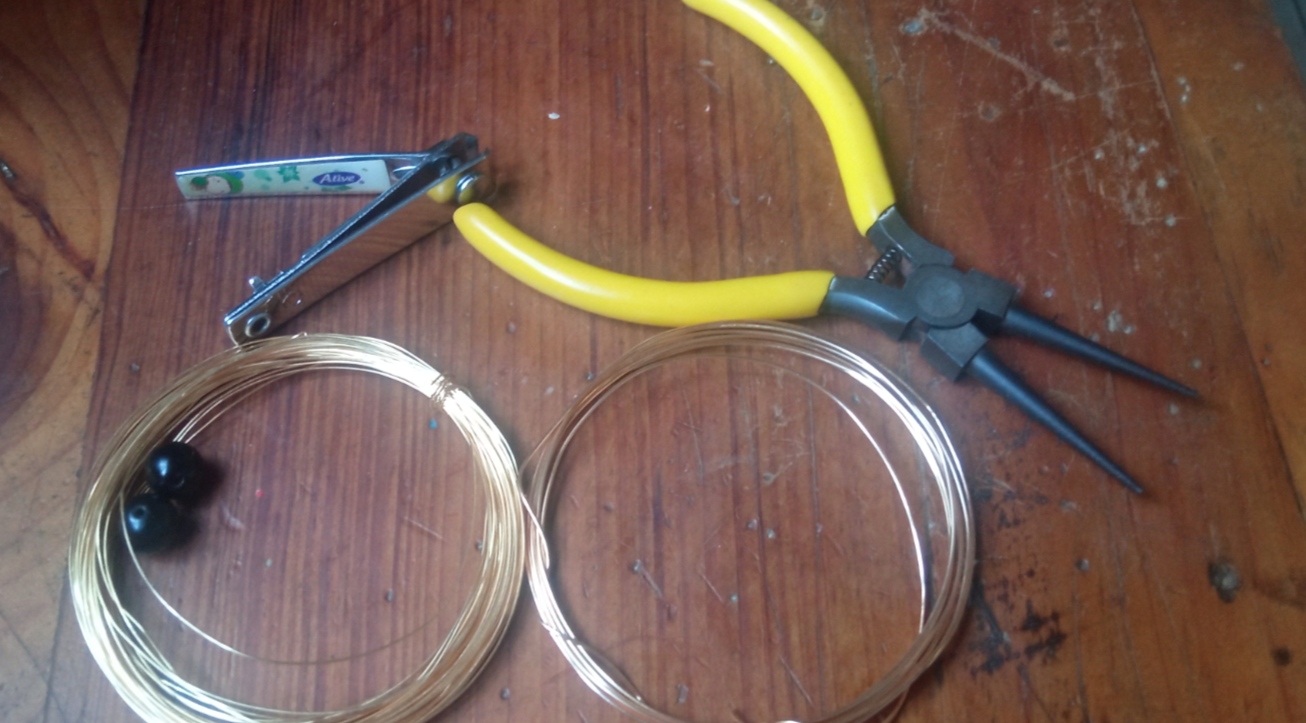
- Alambre de bisutería calibre 20.
- alambre de bisutería calibre 26.
- Piedra negra mediana.
- pinza de bisutería
- 20 gauge jewelry wire.
- 26 gauge jewelry wire.
- Medium black stone.
- jewelry clip
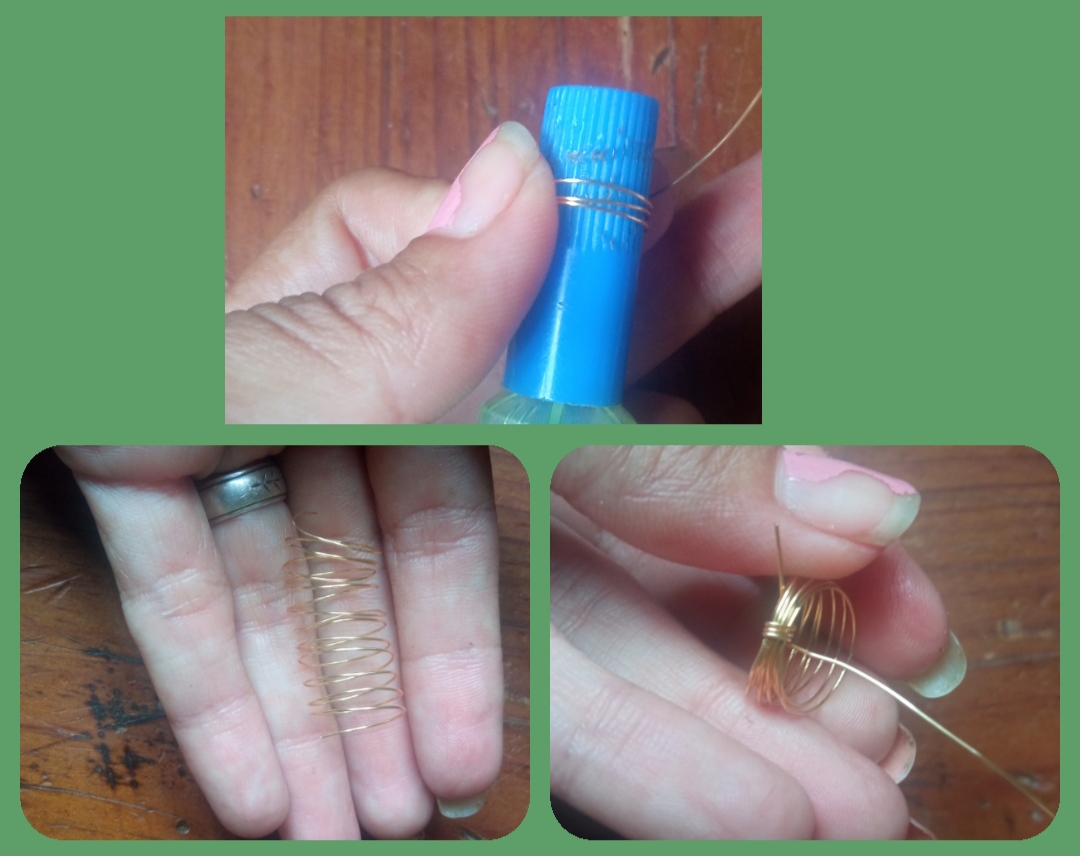
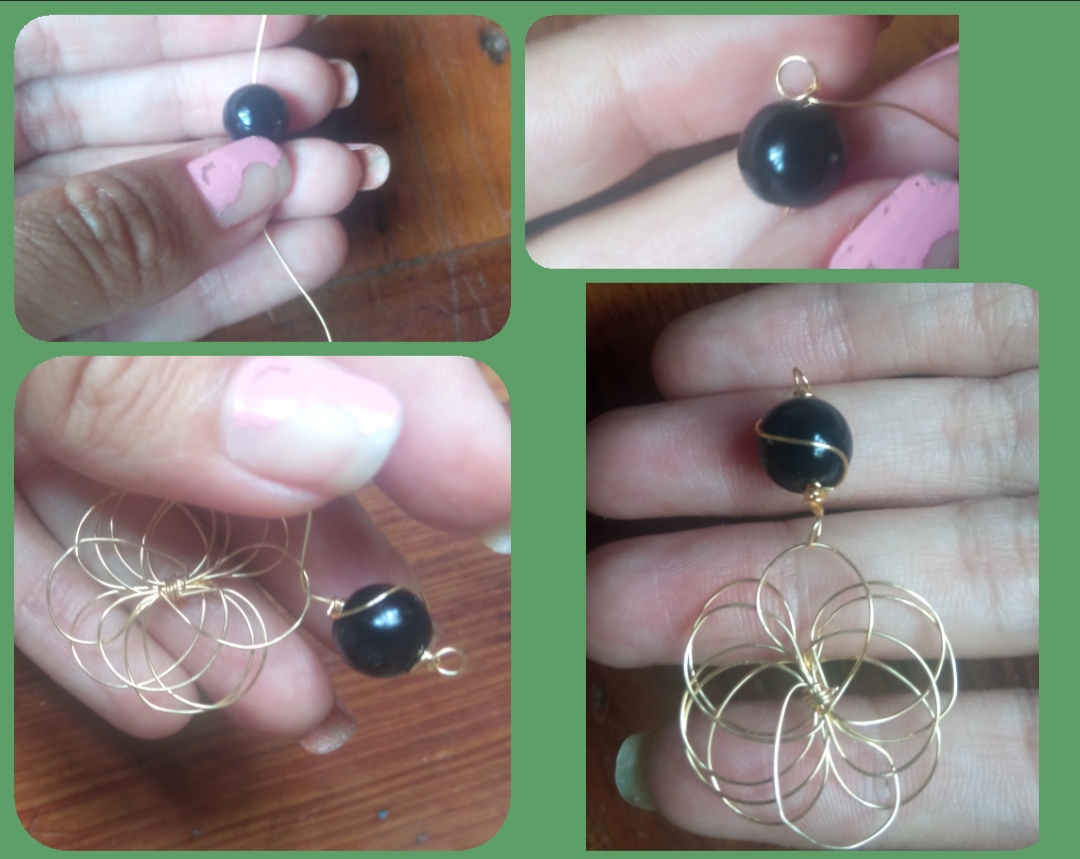
✴️ Paso 1: para iniciar la elaboración de nuestro hermoso diseño pueden observar que lo primer que debemos hacer es buscar un objeto que nos sirva como molde para elaborar formas circulares, en mi caso use una tapa de marcador escolar, Seguidamente tomamos el alambre de bisutería calibre 26 y realizamos varias vueltas sobre está base, las vueltas que desee, yo elabore 12 vueltas o círculos. Luego sacamos está forma del molde y tomando 5 cm más de este mismo alambre vamos a unir los círculos tal cual pueden observar, lo ideal es tomar en cuenta las puntas de cada extremo, de se posible que estén bien sujeta en ese amarre para que no se note las puntas.
✴️ Step 1: to start making our beautiful design, you can see that the first thing we have to do is look for an object that will serve as a mold to make circular shapes, in my case I used a school marker cover, then we took the 26 gauge jewelry wire and make several turns on this base, the turns you want, I make 12 turns or circles.
Then we take this shape out of the mold and taking 5 cm more of this same wire we are going to join the circles as you can see, the ideal is to take into account the tips of each end, if possible they are well attached to that mooring so that they do not notice the tips.
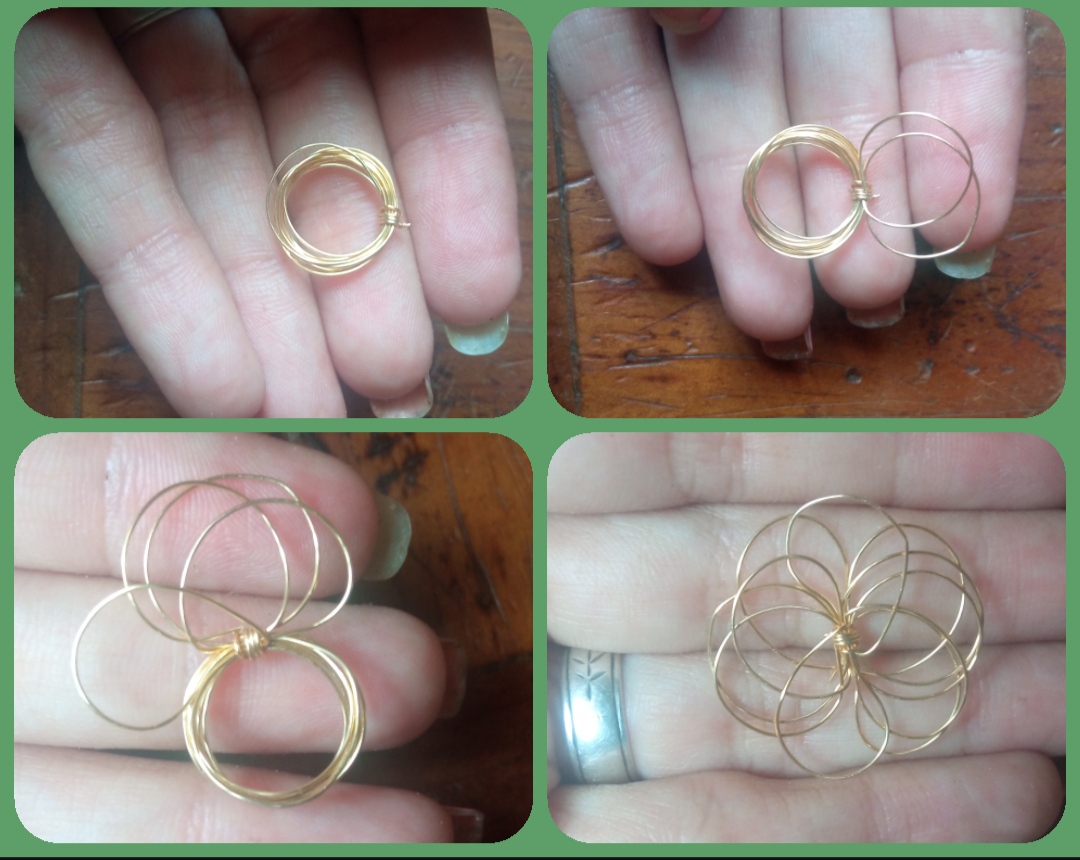
✴️ Step 2: to continue very carefully because this is a very fine wire, ideal for molding but also very easy for it to lose its shape, we are going to separate the circles, giving shape to our flower.
We will go folding and organizing the circular shapes all around so that we have a more or less uniform shape, so that the number of petals is noticeable.
✴️ Paso 3: Seguidamente tomamos 8cm de alambre de bisutería calibre 26 Introducimos la piedra negra o del color que usted seleccione, en uno de los extremos del alambre con ayuda de la pinza elaboraremos una pequeña argolla para evitar la piedra pueda salirse y el otro extremo lo llevamos hasta nuestra flor, lo Introducimos por uno de los pétalos y realizamos la misma forma circular sosteniendo el pétalo, el exceso de alambre lo moldeamos por encima de la piedra en forma de decoración y lo enrrollamos en el otro extremo.
✴️ Step 3: Next we take 8cm of 26 gauge jewelry wire. We introduce the black stone or the color that you select, in one of the ends of the wire with the help of the pliers we will make a small ring to prevent the stone from coming out and We take the other end to our flower, we introduce it through one of the petals and we make the same circular shape holding the petal, we mold the excess wire on top of the stone in the form of a decoration and we roll it up at the other end.
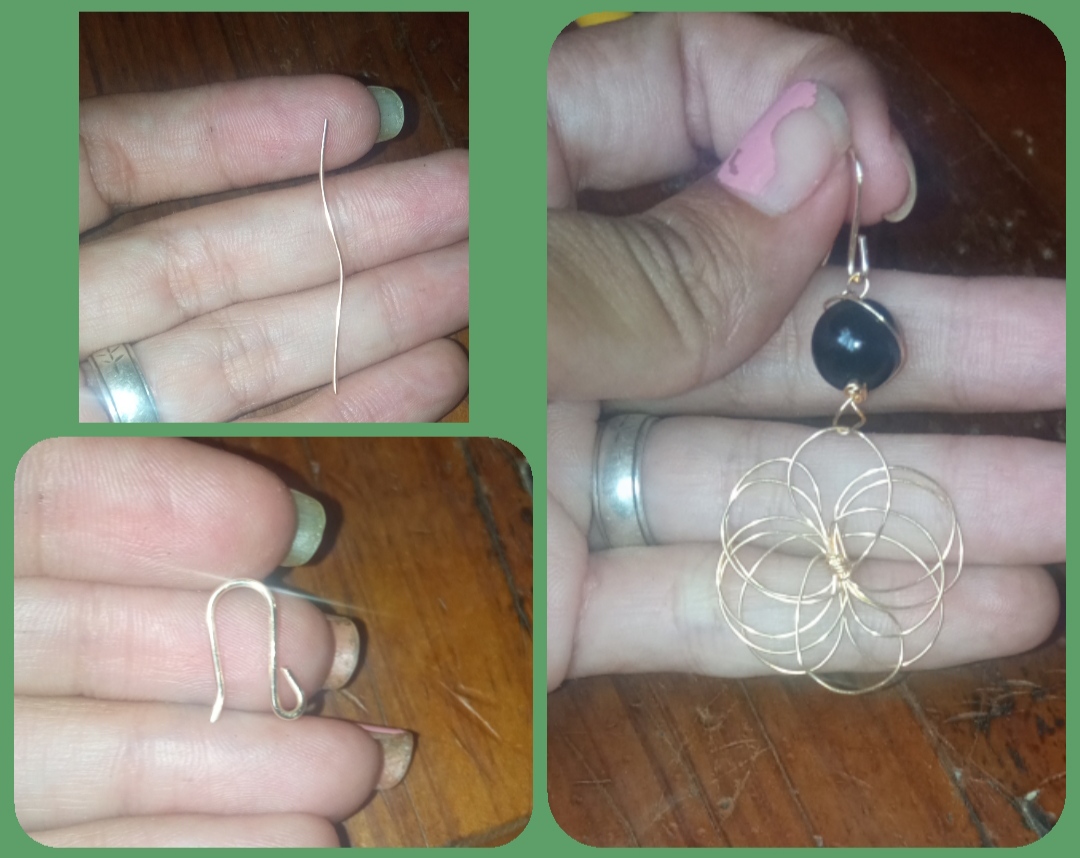
✴️ Paso 4: por último con 4cm de Alambre de bisutería calibre 20 elaboraremos el anzuelo para zarcillos y lo uniremos a nuestra creación por el círculo que elaboramos en la parte superior de la piedra negra y listo
✴️ Step 4: finally, with 4cm of 20 gauge jewelry wire we will make the hook for tendrils and we will join it to our creation through the circle that we made on top of the black stone and that's it

Todas las Fotos son de mi autoría y fueron tomadas con mi Celular Redmi 9What did you think? Super easy and simple to make right, and they are very pretty, you can modify them and make them smaller or larger according to your taste, just like the rhinestones, you can use the color of your choice, they will still be super beautiful, I can assure you, I hope this tutorial has been to your liking and may also be useful to you.
I say goodbye for this opportunity my dear friends, grateful for your visit.
Greetings and blessings.
All Photos are my authorship and were taken with my Redmi 9 Cellphone
Están muy bonitos me encanta la flor en alambrismo 👍
Me alegra que te haya gustado.
I've always admired wire jewellery but have never done it. I only worked with beads. Nice earrings, congratulations. Original idea.
I love working with the wire rope technique, it seems ideal for creating and imagining new designs, but I think that placing rhinestones and beads make them look more beautiful.
I'm glad you liked it.
Today I made a mistake posting on liketu I did not realize that I had marked adult content, well I realized after publishing it because it did not show me the content, I deleted it because I could not edit that part, I do not know if I did right or wrong, I did not want to republish it because I do not know what would be right.
Excuse my boldness to ask you, but a long time ago I made a mistake and you guided me.Hello @erika how are you? Sorry for the inconvenience.
You can't delete anything from the blockchain. Even if you remove the content, it can be retrieved. If you republish it, it can be seen as abuse. Unfortunately many are deleting their post and posting the content again hoping for more votes, so now it is considered abuse.
So if you did such a mistake, leave it as it is and better luck next time.
That's what I wanted to know, if I could post it again, good of me to ask first.
Thank you.
You're welcome @emmaris and please always ask, if something is not clear. Better ask, the get into trouble :)
thank you very much for your help and guidance :)
Están hermosos y muy modernos, con tu explicación se me hizo fácil de realizar ✨💮✨💮
Gracias por compartir 💮✨💮 Saludos 🤗
Me alegra mucho saber que te gustó y te fue de utilidad, gracias por su comentario 😊.
~~~ embed:1664350223500562434?t=EUDKv4UN8RmwCsXgo1qKfQ&s=19 twitter metadata:bWFyaWFybzU3MTU3Mzc1fHxodHRwczovL3R3aXR0ZXIuY29tL21hcmlhcm81NzE1NzM3NS9zdGF0dXMvMTY2NDM1MDIyMzUwMDU2MjQzNHw= ~~~
Están muy lindos yo también hago bisutería
Que bonito diseño✨ luce muy elegante🖤
I'm amazed seeing how awesome this tendrils looks like. Great work.
Gracias 😊
Es un trabajo bastante bueno, lucen muy elegantes. Le deseo mucha suerte en su emprendimiento.
Muchas gracias 😊.