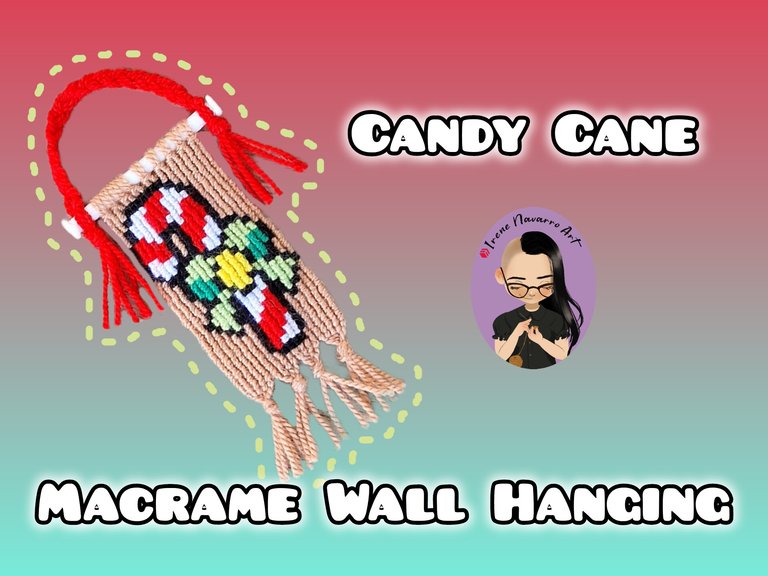
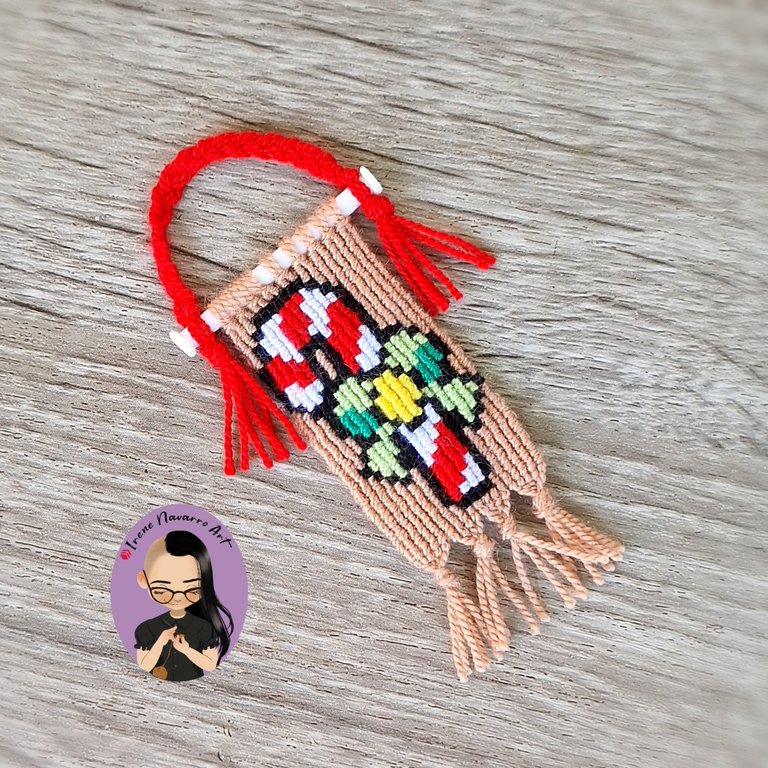
Saludos querida comunidad, cada día más cerca de la navidad he venido a compartir con ustedes un nuevo tutorial para realizar un colgante hecho en macramé con temática navideña, en esta ocasión he decidido hacer el diseño de un bastón de caramelo también conocido por como bastón de navidad, el cual es un dulce que se consume en estas fechas y que se ha popularizado como motivo de decoración, espero le sea de utilidad mi publicación.
Greetings dear community, every day closer to Christmas I have come to share with you a new tutorial to make a macramé pendant with a Christmas theme. This time I have decided to make the design of a candy cane also known as a Christmas cane, which is a sweet that is consumed at this time and that has become popular as a decoration motif. I hope my publication is useful to you.
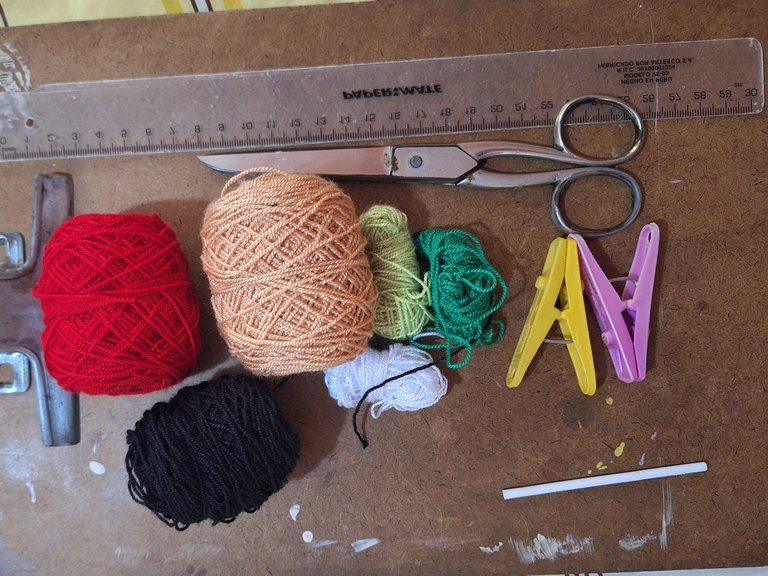
Materiales / Materials

- Hilo acrílico para crochet: beige, negro, blanco, rojo, amarillo, verde claro y verde oscuro.
- Tabla
- Palito de plástico
- Tijera
- 2 pinzas para ropa
- Regla
- Patrón
- Acrylic crochet yarn: beige, black, white, red, yellow, light green and dark green.
- Board
- Plastic stick
- Scissors
- 2 clothespins
- Ruler
- Pattern
Proceso / Process

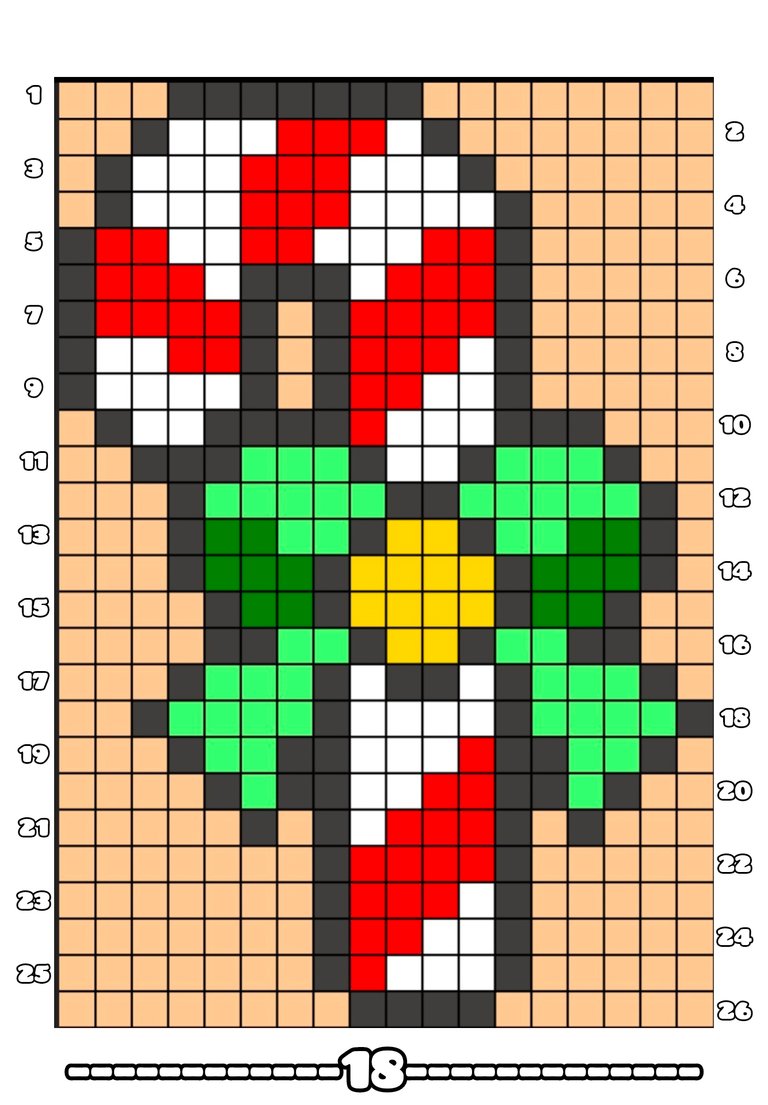
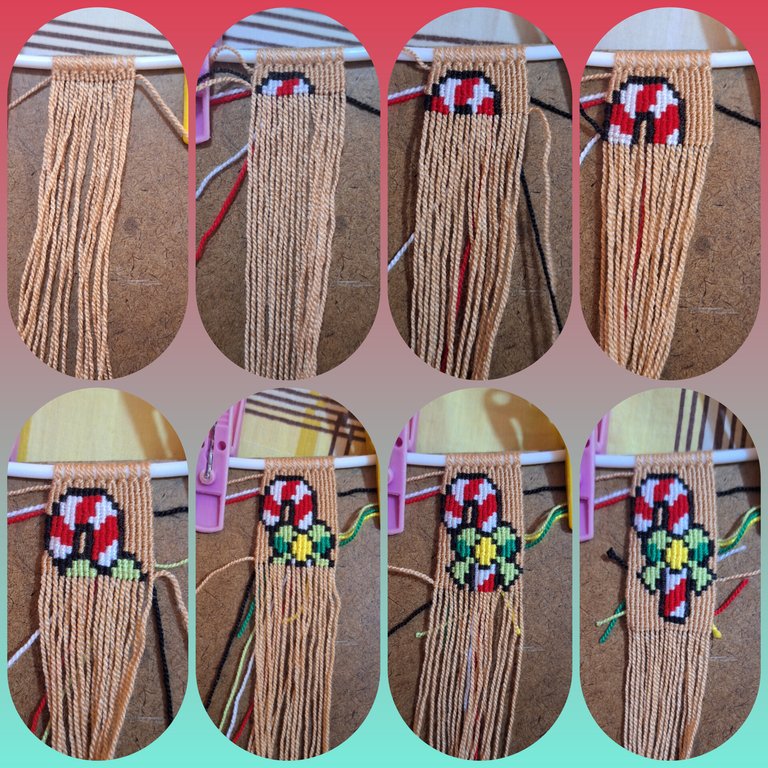
Para este patrón usé una imagen de referencia que encontré en Pinterest, posteriormente en la aplicación Pixel Station redibujé la imagen, en una cuadricula de 18 x 26 cuadros, el número de columnas de cuadros indica el número de hilos guía que se necesitan, es decir 8, mientras que el número de filas indica la cantidad hileras de nudos que se deben realizar, en la aplicación Inshot agregué los números, sin embargo, al momento de realizar el trabajo decidí agregar una hilera de solo el color de fondo al principio y al final.
For this pattern I used a reference image that I found on Pinterest, later in the Pixel Station application I redrew the image, in a grid of 18 x 26 squares, the number of columns of squares indicates the number of guide threads needed, that is, 8, while the number of rows indicates the number of rows of knots to be made, in the Inshot application I added the numbers, however, when making the work I decided to add a row of only the background color at the beginning and at the end.

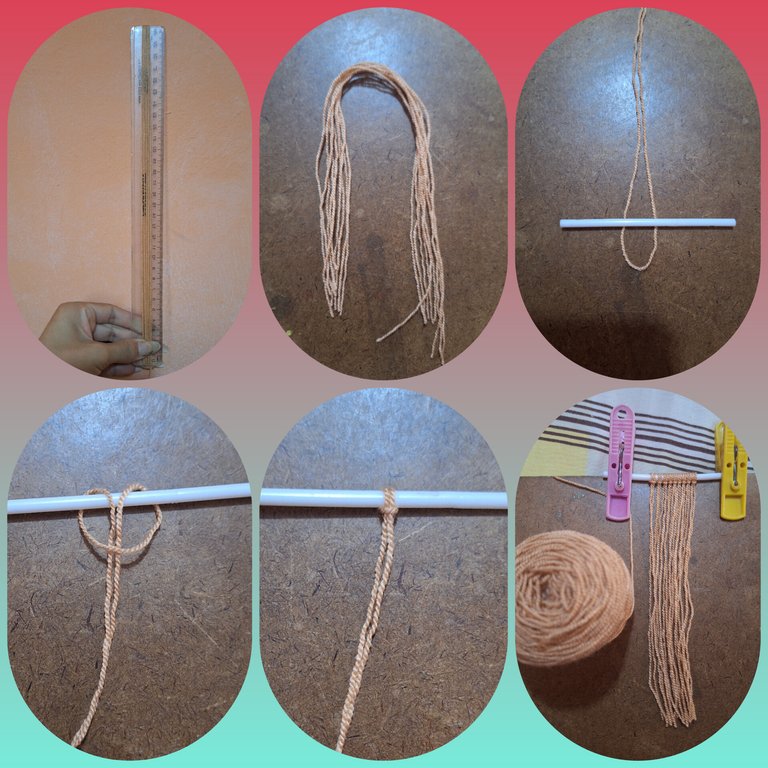
Con el hilo beige corté 9 hebras de 30 cm, tomando las hebras por la mitad las anudé al palito del plástico, de este modo se obtienen los 18 hilos guía, con las pinzas para ropa aseguré los extremos del palito a la tabla, luego agregé el hilo anudador de color beige de primer lugar a la izquierda para hacer la primera hilera de nudos de color de fondo, en las hileras impares el hilo anudador envuelve dos veces cada uno de los hilos guía de izquierda a derecha, mientras que en las hileras pares se anuda de derecha a izquierda, se debe agregar los otros hilos anudadores según corresponda en el patrón, cada cuadro representa un nudo, para cambiar de color del nudos los hilos anudadores se cruzan por la parte de atrás dado que no es un diseño reversible, no obstante mantener el orden el cruce de los hilos por detrás ayudará a facilitar el trabajo y evitar que los hilos se enreden. La última hilera es igualmente de color beige.
With the beige thread I cut 9 strands of 30 cm, taking the strands in half I tied them to the plastic stick, in this way the 18 guide threads are obtained, with the clothespins I secured the ends of the stick to the board, then I added the beige knotting thread first on the left to make the first row of background colored knots, in the odd rows the knotting thread wraps twice each of the guide threads from left to right, while in the even rows it is knotted from right to left, the other knotting threads must be added as appropriate in the pattern, each square represents a knot, to change the color of the knot the knotting threads are crossed at the back since it is not a reversible design, however keeping the order the crossing of the threads from behind will help to facilitate the work and prevent the threads from getting tangled. The last row is also beige.

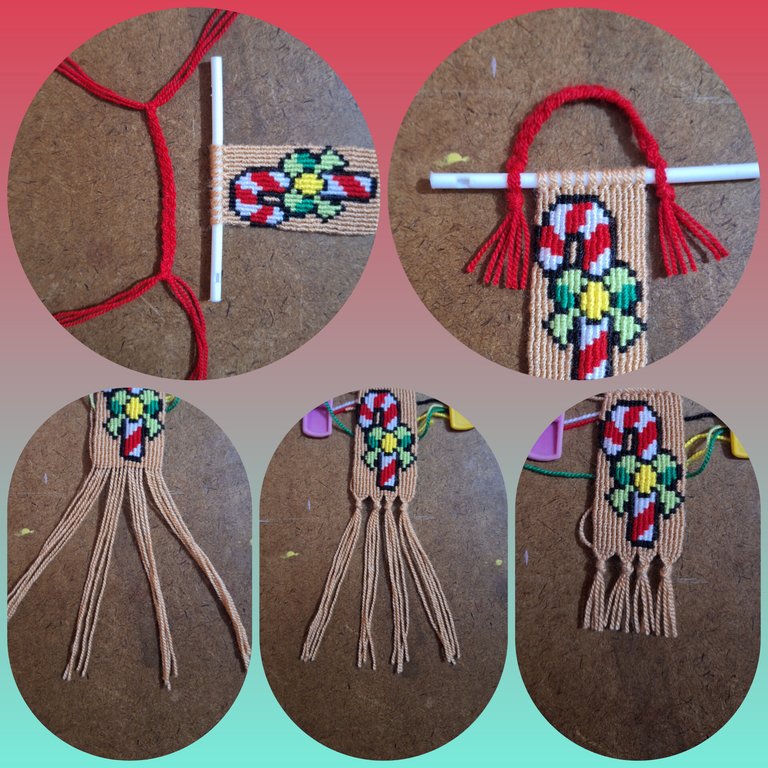
Para finalizar dividí las hebras en 4 partes para hacer los nudos que formarán lo flecos y corté las puntas para emparejar, posteriormente con 6 hebras de hilo rojo hice la trenza que sirve de asa al colgante, quemar las puntas del palito de plástico da un mejor acabado pero es opcional.
To finish, I divided the strands into 4 parts to make the knots that will form the fringes and cut the ends to match, then with 6 strands of red thread I made the braid that serves as a handle for the pendant, burning the ends of the plastic stick gives a better finish but it is optional.
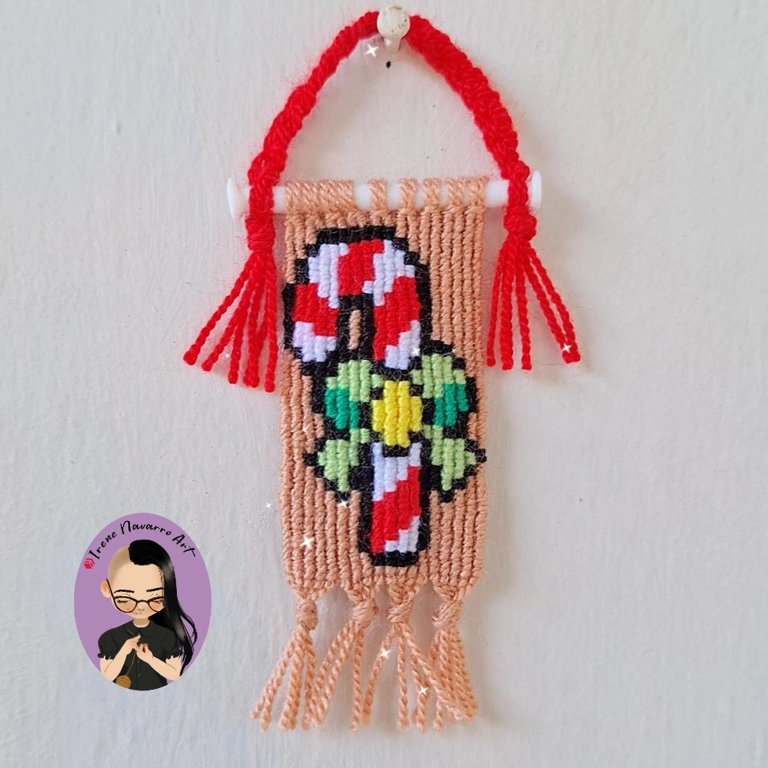
Resultado / Result

Imágenes tomadas con dispositivo Samsung A54. Portada editada en Inshot
Pictures taken with Samsung A54 device. Cover edited in Inshot
Espero les haya gustado. Les invito a leer mis próximas publicaciones y siempre estaré dispuesta a responder sus preguntas y comentarios, también pueden seguirme y contactarme en cualquiera de mis redes sociales. ¡Muchas gracias!
I hope you liked it. I invite you to read my next publications and I will always be willing to answer your questions and comments, you can also follow me and contact me on any of my social networks. Thank you!
Facebook
Twitter
Instagram
Ko-Fi
Discord: irenenavarroart#0361
Posted Using InLeo Alpha

Hay que coqueto adorno, me encanto este diseño.
Muchas gracias ☺️
😊
In making creative handicrafts like this, it is certainly a pretty good and beautiful thing.
Es muy tierno este diseño navideño, me encantó como a pesar de ser tan pequeño sintiendo y perfectamente el diseño, los colores son adorables.
Muchas gracias ☺️
Hello irenenavarroart!
It's nice to let you know that your article will take 4th place.
Your post is among 15 Bestkeithtaylor articles voted 7 days ago by the @hive-lu | King Lucoin Curator by
You receive 🎖 2.1 unique LUBEST tokens as a reward. You can support Lu world and your curator, then he and you will receive 10x more of the winning token. There is a buyout offer waiting for him on the stock exchange. All you need to do is reblog Daily Report 514 with your winnings.
Buy Lu on the Hive-Engine exchange | World of Lu created by szejq (Lucoin) and get paid. With 50 Lu in your wallet, you also become the curator of the @hive-lu which follows your upvote.
STOPor to resume write a wordSTARTThat came out so cute.
Macram is something I have been thinking about for a long time to practice and learn but never had the time and opportunity. Your work is giving me hope.
Thank you very much 😊