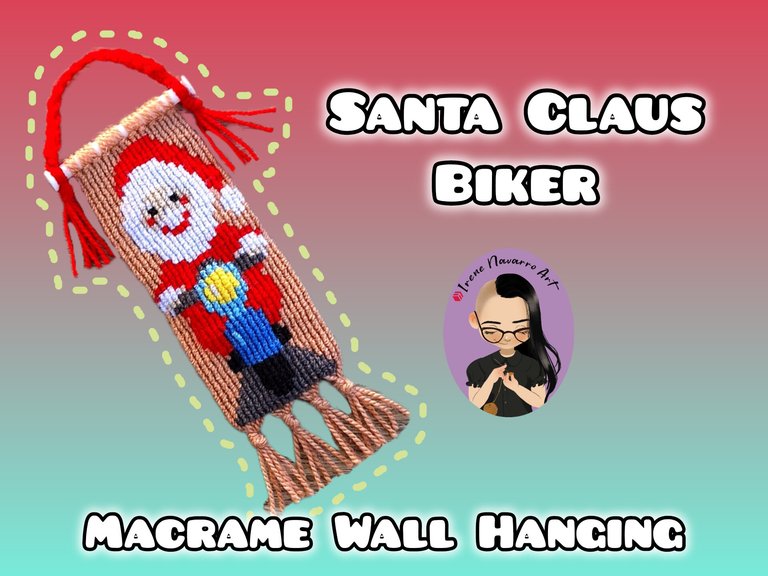
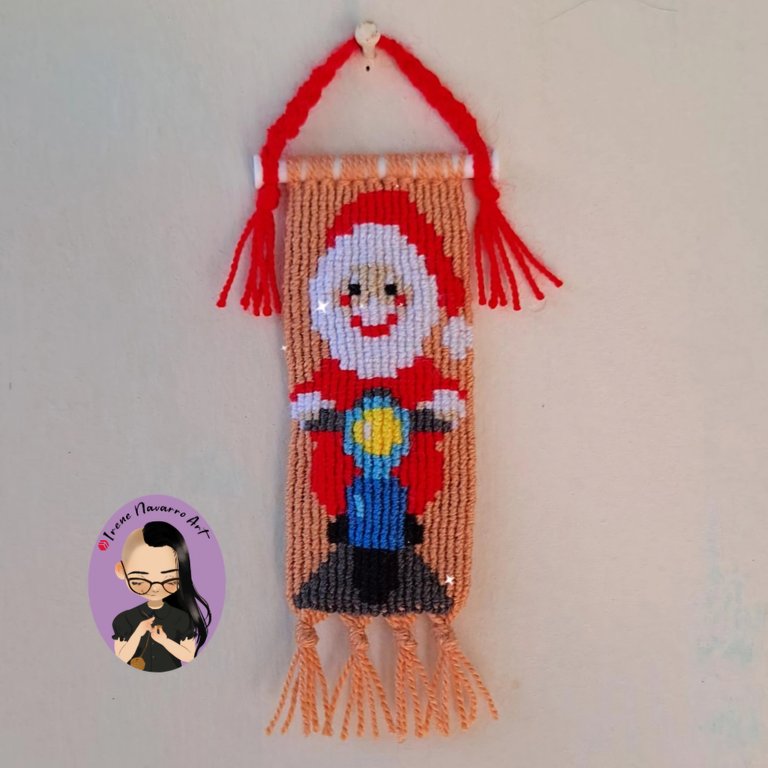
Saludos querida comunidad de los artesanos, el día de hoy comparto con ustedes un tutorial para realizar un colgante macramé con la figura de un Santa Claus en motocicleta, el diseño lo conseguí online como un patrón para punto cruz, le hice unas pequeñas modificaciones y lo adapté al tamaño que quería, este es para ser usado como adorno del árbol navideño pero ustedes pueden colgarlo en cualquier parte que deseen decorar, espero les sea de utilidad mi publicación.
Greetings dear community of artisans, today I share with you a tutorial to make a macramé pendant with the figure of Santa Claus on a motorcycle, I found the design online as a cross-stitch pattern, I made some small modifications and adapted it to the size I wanted, this is to be used as a Christmas tree ornament but you can hang it anywhere you want to decorate, I hope my post is useful to you.
Materiales / Materials

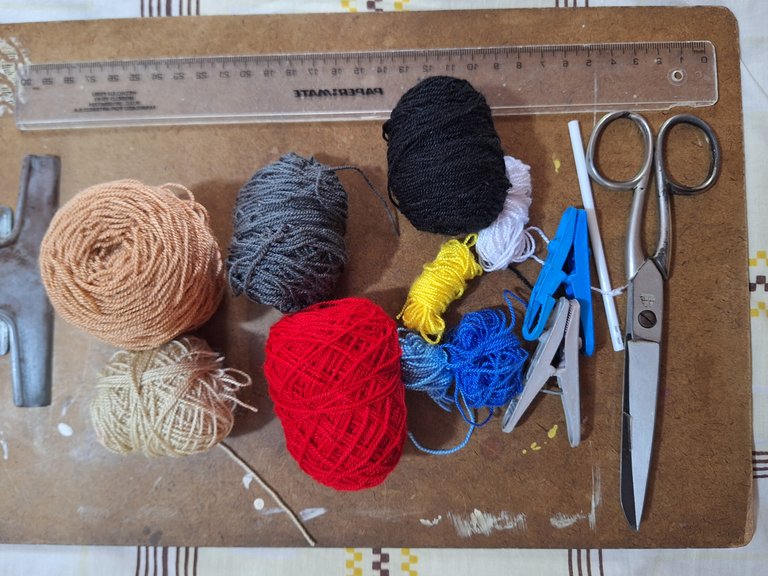
- Hilo acrílico para crochet: beige, negro, blanco, gris, azul oscuro, azul claro, amarillo, rojo.
- Tabla
- Tijera
- Palito de plástico
- 2 pinzas para ropa
- Patrón
- Acrylic yarn for crochet: beige, black, white, grey, dark blue, light blue, yellow, red.
- Board
- Scissors
- Plastic stick
- 2 clothespins
- Pattern
Proceso / Process

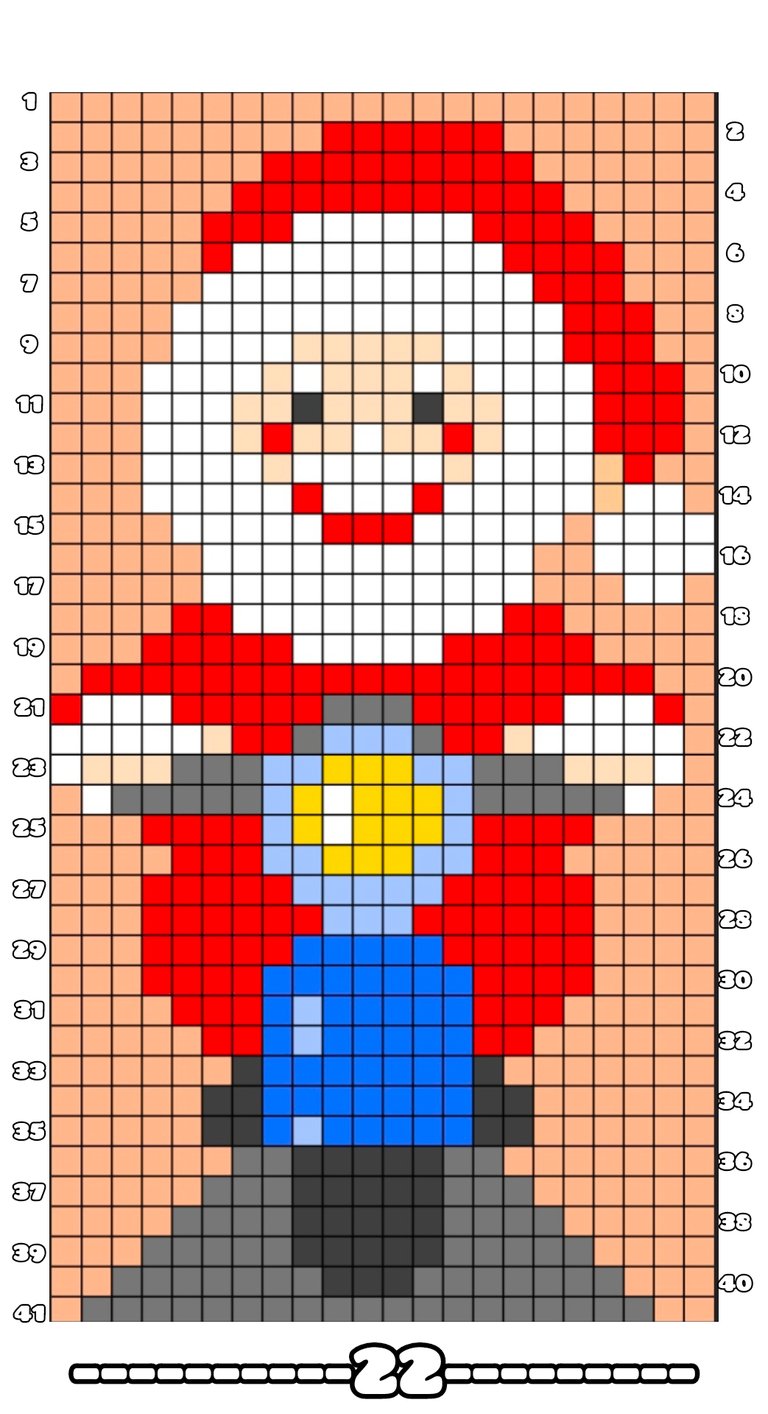
Usé una imagen de referencia para hacer el patrón, redibujé la imagen en la aplicación Pixel Station, con un lienzo de 22 x 41 cuadros, con la herramienta de pincel y bote de pintura pinté cada uno de los cuadros, las 22 columnas de cuadro indican el numero de hilos guía necesarios para hacer el trabajo, mientras que el numero de 41 filas indica el número de hileras de nudos, la cantidad de colores es igual a la cantidad de hilos anudadores, es decir un hilo anudador por cada color.
I used a reference image to make the pattern, I redrew the image in the Pixel Station app, with a 22 x 41 square canvas, with the brush tool and paint bucket I painted each of the squares, the 22 columns of the square indicate the number of guide threads needed to do the job, while the number of 41 rows indicates the number of rows of knots, the number of colors is equal to the number of knotting threads, that is, one knotting thread for each color.

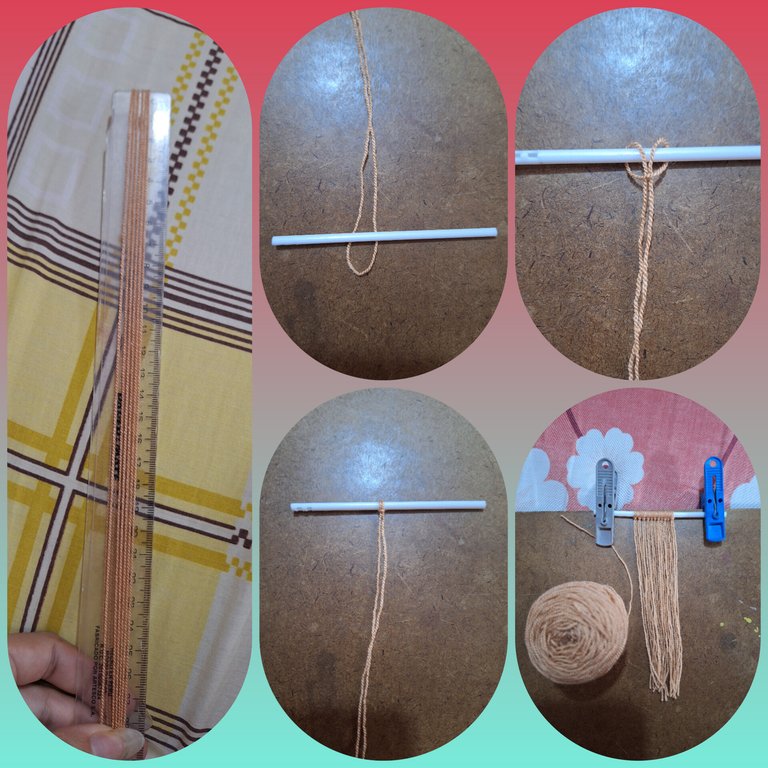
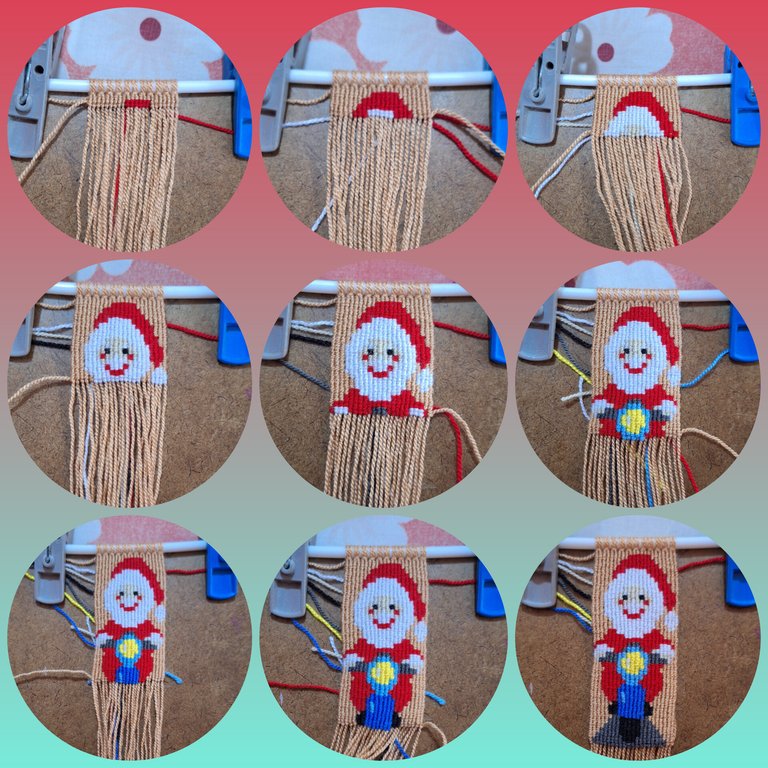
Con el hilo beige cortar 11 hebras de 30 cm, tomar las hebras por la mitad y anudar al palito de plástico, para de ese modo obtener 22 hilos guía, tan como se muestra en las siguientes imágenes.
Using the beige thread, cut 11 strands of 30 cm, take the strands in half and tie them to the plastic stick, thus obtaining 22 guide threads, as shown in the following images.

Sujetar el palito de plástico a la tabla colocando una pinza para ropa en cada extremo del palito, sujetar de primer lugar a la izquierda el primer hilo anudador, es decir el hilo beige del color de fondo para hacer la primera hileras de nudos, en la primera hilera y en todas la hileras impares, el hilo anudador envuelve dos veces cada uno de los hilos guía de izquierda a derecha, en las hileras de numero par se hace los mismo pero de derecha a izquierda, los hilos añudadora de otros colores se van agregando conforme de necesiten según el patrón, cada cuadro representa un nudo por lo tanto los cambios de color de hilo anudador se realizan cruzando las hebras por la parte de atrás ya que el diseño no es reversible.
Attach the plastic stick to the board by placing a clothespin on each end of the stick, first hold on the left the first knotting thread, that is, the beige thread of the background color to make the first rows of knots, in the first row and in all the odd rows, the knotting thread wraps twice each of the guide threads from left to right, in the even numbered rows the same is done but from right to left, the knotting threads of other colors are added as needed according to the pattern, each square represents a knot therefore the knotting thread color changes are made by crossing the strands on the back since the design is not reversible.

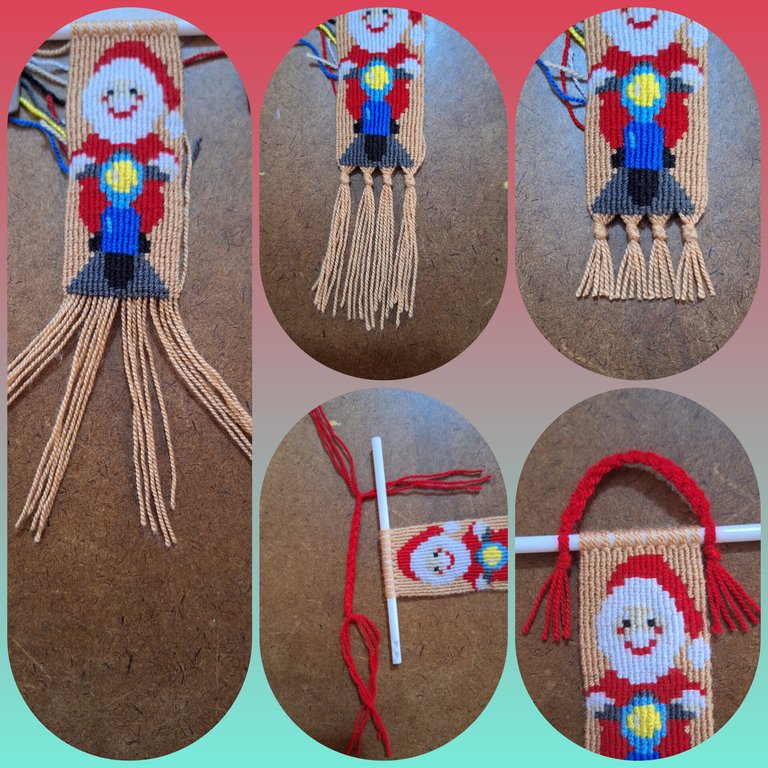
Al finalizar la hilera 41, se deben dividir en cuatro partes los hilos guía y hacer cuatro nudos, cortar las puntas para emparejar y crear flecos, con 6 hebras de 20 cm de hilo rojo se hace una trenza que se anuda al palito en cada extremo, para formar el asa del colgante.
At the end of row 41, divide the guide threads into four parts and make four knots, cut the ends to match and create fringes. With 6 strands of 20 cm of red thread, make a braid that is tied to the stick at each end, to form the handle of the pendant.
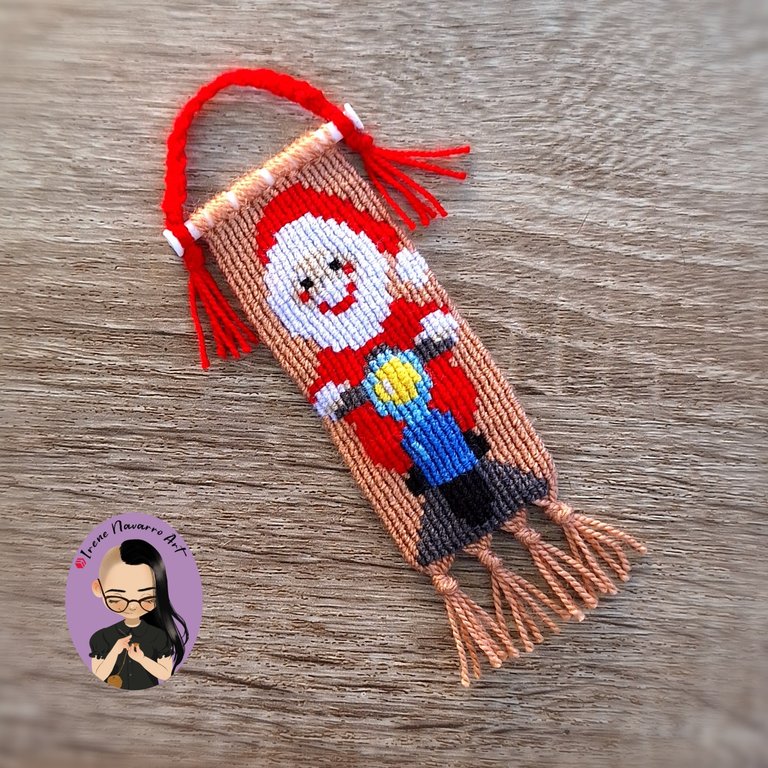
Resultado / Result

Imágenes tomadas con dispositivo Samsung A54. Portada editada en Inshot
Pictures taken with Samsung A54 device. Cover edited in Inshot
Espero les haya gustado. Les invito a leer mis próximas publicaciones y siempre estaré dispuesta a responder sus preguntas y comentarios, también pueden seguirme y contactarme en cualquiera de mis redes sociales. ¡Muchas gracias!
I hope you liked it. I invite you to read my next publications and I will always be willing to answer your questions and comments, you can also follow me and contact me on any of my social networks. Thank you!
Facebook
Twitter
Instagram
Ko-Fi
Discord: irenenavarroart#0361
Posted Using InLeo Alpha

Qué ingenioso o Santa motociclista, se ve muy divertido y tierno.
Muchas gracias 😁
A creation of a pretty good handicraft and I like the results of handicrafts that have extraordinary art.
Thank you
You are welcome, my brother
Santa Claus se modernizo y ahora va en motocicleta a repartir regalos jajaja esta excelente, me encanto este diseño 😘
Claro todo se adapta con el tiempo 😄 Gracias
Pero piensa en los pobres renos, les has quitado el trabajo 😄. En verdad quedó hermoso y se puede colgar en cualquier lado, tal y como mencionas.
El diseño original tenia un reno de parrillero pero yo no incluí debido al tamaño 😁
Santa Claus on a Motorcycle? Bravo!! This came out so well and your tutorial was enlightening dear friend. We appreciate your work, great job, and thanks for sharing.
Thank you very much
Hola @irenenavarroart te quedó hermoso... Te felicito
Gracias vale. Saludos ☺️