El caso es que de esos tengo muchos en mi casa, tengo una gran selección musical, de programas de ordenadores, películas y series favoritas, algunos los tengo en el formato de los CD grandes y otros en los CD pequeños. En vista de que muchas de sus estuches se encuentran un poco deteriorado, decidí darles un toque bien chic e ir seccionándolos, por géneros: terror, rosa, acción, comedia, etc. Para ello, me decidí por unos lindos emojis.
Estas imágenes son muy conocidas y utilizadas por todos nosotros en nuestros mensajes, las vemos en las redes sociales para expresar nuestras emociones o sentimientos en vez de utilizar palabras.
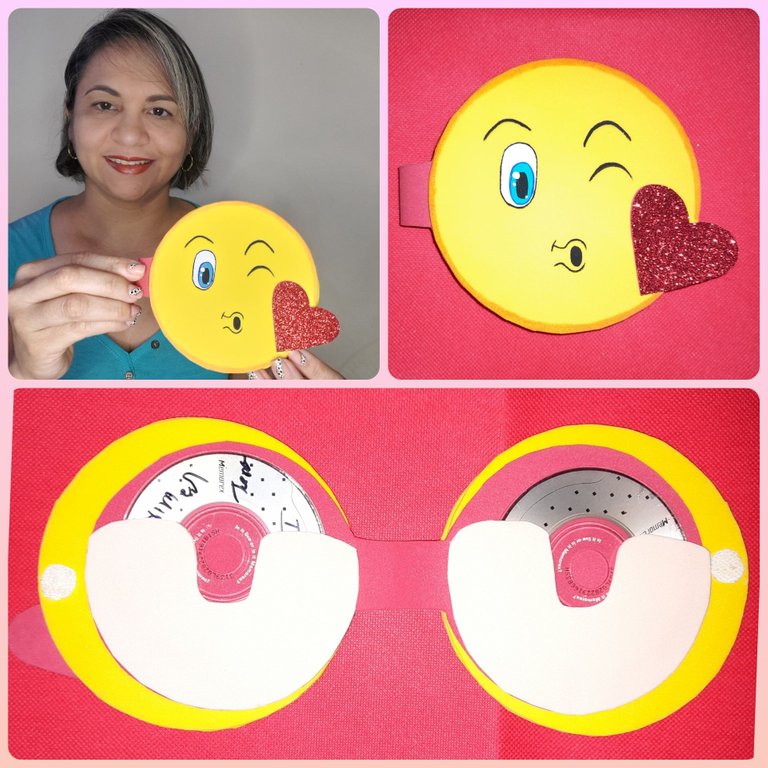
Existen más de 1.700 emojis o emoticones y siguen actualizándose cada vez. Me gustaría hacer varios (unos 100 jajjaja), pero solo les mostraré el paso a paso del emoji de carita feliz y el que lanza un beso, porque he comenzado a seccionar mis miniCD de series y películas de amor y comedia romántica. Debo decirles, que pueden utilizar este emoji para cualquier otro proyecto que decidan hacer, la portada de una libreta o de una carpeta, o como cotillón para una fiesta, pues el paso básico es muy sencillo. Aquí les dejo, las instrucciones para Elaborar un porta miniCD con diseño de emoji.
Greetings friends from #hive, I hope you are enjoying a nice Saturday. Today I bring you a very fun project and as I always tell you: easy, fast and simple to make, it consists of a miniCD holder. Yes, even if you don't believe them or don't see them much, there are some tiny CDs. Perhaps many wonder that there are other devices for storing information, but years ago, before pen drives or flash memory appeared, CDs were used to store not only information, but also movies and music used this element. to sell and promote their productions.
The fact is that I have a lot of those in my house, I have a great selection of music, computer programs, movies and favorite series, some I have in the format of large CDs like chamo and others in small CDs. Given that many of their cases are a bit damaged, I decided to give them a very chic touch and divide them by genre: horror, pink, action, comedy, etc. For this, I decided on some cute emojis. These images are well known and used by all of us in our messages, we see them on social networks to express our emotions or feelings instead of using words.
There are more than 1,700 emojis or emoticons and they keep updating every time. I would like to do several (about 100 hahaha), but I will only show you the step by step of the happy face emoji and the one that blows a kiss, because I have started to section my miniCDs of series and movies of love and romantic comedy. I must tell you that you can use this emoji for any other project you decide to do, the cover of a notebook or a folder, or as a party favor for a party, because the basic step is very simple. Here I leave you the instructions to make a miniCD holder with an emoji design.
Materiales:
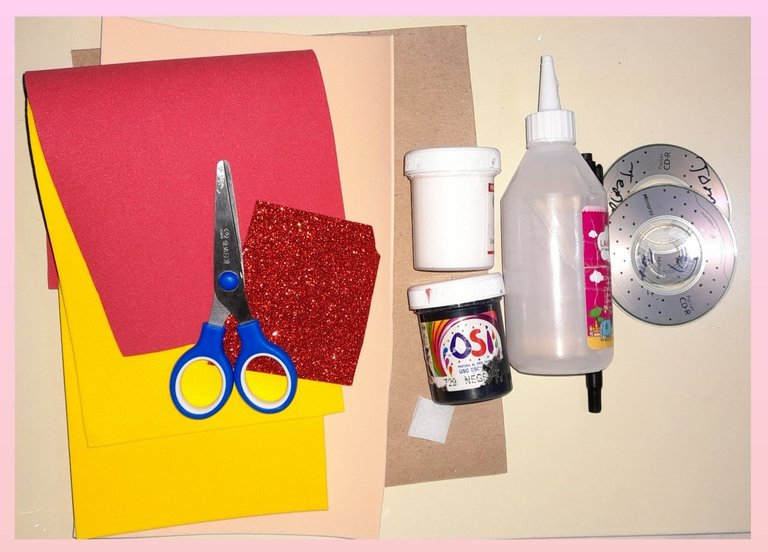
- Foami amarillo, piel y rojo.
- Pintura blanca, negra y turquesa.
- Mini CD.
- Cartón.
- Silicón frío.
- Pincel.
- Lápiz.
- Tijeras.
Materials:
- Yellow, leather and red foami.
- White, black and turquoise paint.
- Mini-CDs.
- Paperboard.
- Cold sylicon.
- Brush.
- Pencil.
- Pair of scissors.
Paso a paso:
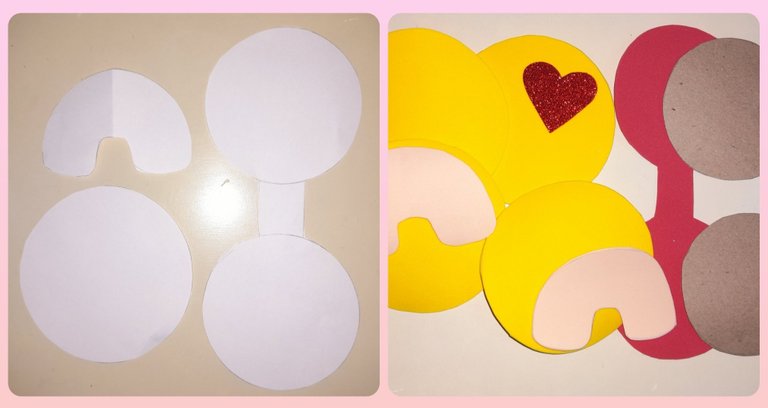
Recortamos los patrones y los trasladamos al foami. Para esto cortamos dos círculos de cartón, cuatro círculos de foami amarillo, dos círculos rojos unidos por el medio, dos semicirculos y un corazón.
Step by Step:
We cut out the patterns and transferred them to the foami. For this we cut two circles of cardboard, four circles of yellow foami, two red circles joined by the middle, two semicircles and a heart.
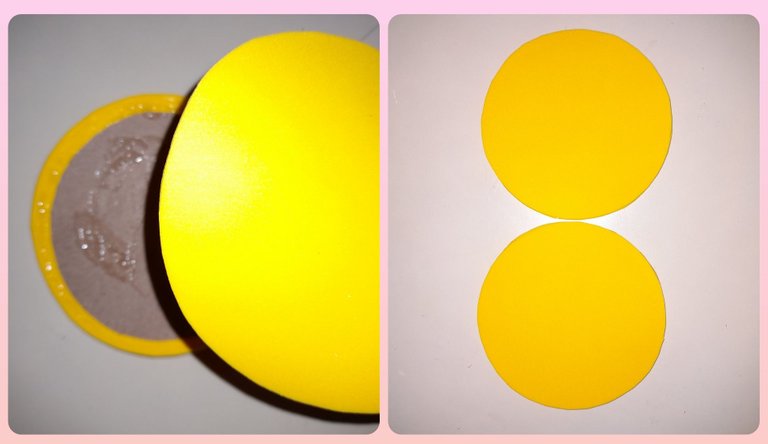
Luego forramos los círculos de cartón con los círculos de foami amarillo.
Then we line the cardboard circles with the yellow foami circles.
Luego pegamos los círculos de foami rojo
sobre el amarillo tal como lo indica la figura.
Then we glue the circles of red foami on the yellow as indicated in the figure.
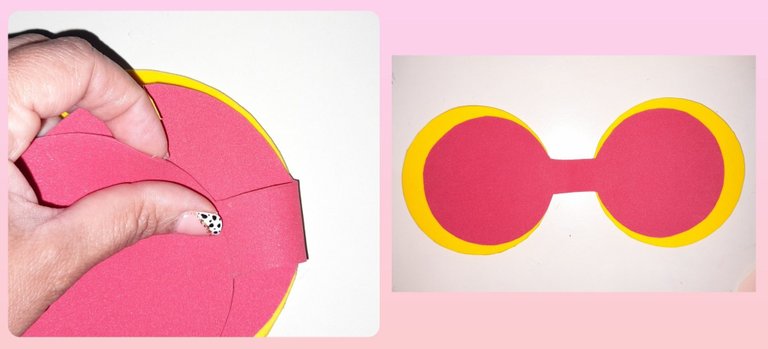
Luego pegamos los semicírculo de foami color melón por toda la orilla del foami rojo, de tal manera que quede como bolsillo para colocar los mini CD. Para cerrar el porta mini CD colocamos un pequeño círculo de cierre mágico.
Then we glue the semicircles of melon-colored foami along the entire edge of the red foami, so that it remains as a pocket to place the mini CDs. To close the mini CD holder we place a small magic closing circle.

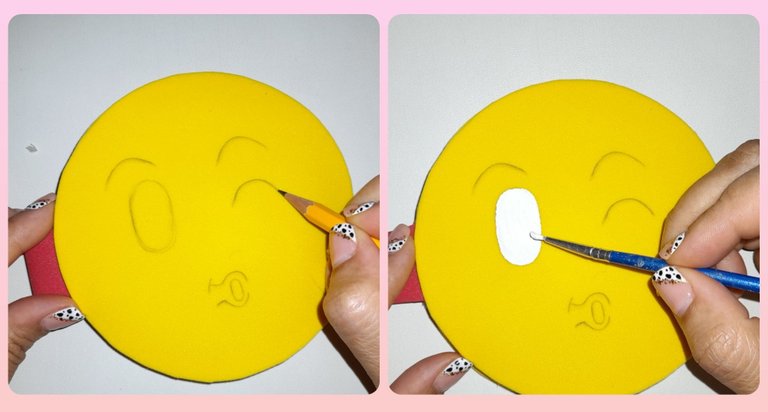
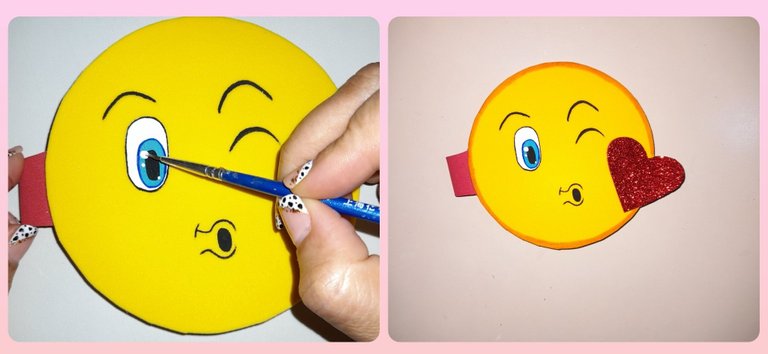
Ahora procedemos a dibujar la carita feliz,la cual dibujamos con el lápiz de grafito sobre el foami amarillo. Empezamos a pintar el ojo, colocando una capa blanca.
Now we proceed to draw the happy face, which we draw with the graphite pencil on the yellow foami. We begin to paint the eye, placing a white layer.
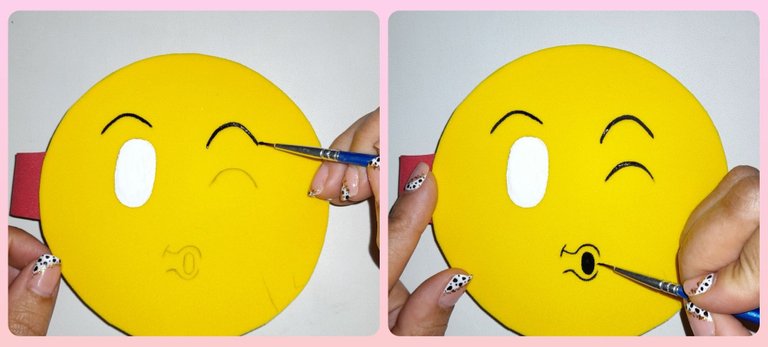
Con el pincel delgado y la pintura negra delineamos las cejas, la boca y el ojo que está cerrado.
With the thin brush and the black paint we outline the eyebrows, the mouth and the eye that is closed.
Luego sobre la pintura blanca del ojo, pintamos un ovalo azul, esperamos que sequen bien y pintamos el ovalo negro.
Then on the white paint of the eye, we paint a blue oval, we wait for them to dry well and we paint the black oval.
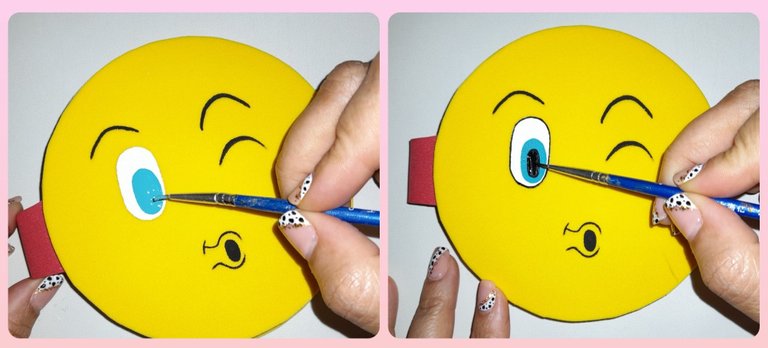
Por último pintamos dos puntos blanco sobre el ovalo negro del ojo para darle luz, con el marcador naranja delineamos toda la orilla de la carita feliz y pegamos el corazón en una esquina. Y de esta manera fácil, rápida y sencilla tenemos listo un lindo porta mini CD.
Finally we paint two white dots on the black oval of the eye to give it light, with the orange marker we outline the entire edge of the happy face and paste the heart in one corner. And in this easy, fast and simple way we have a nice mini CD holder ready.
-Las fotos son de mi propiedad, tomadas un Samsung A21S,cámara de 48MP.
-Para la traduccion Google Traductor.
-The photos are my property, taken with a Samsung A21S, 48MP camera.
-For Google Translate translation.
[Imagen de referencia] (https://pin.it/5p7zfL4)


Thank you for sharing this amazing post on HIVE!
non-profit curation initiative!Your content got selected by our fellow curator @rezoanulvibes & you just received a little thank you via an upvote from our
You will be featured in one of our recurring curation compilations and on our pinterest boards! Both are aiming to offer you a stage to widen your audience within and outside of the DIY scene of hive.
Join the official DIYHub community on HIVE and show us more of your amazing work and feel free to connect with us and other DIYers via our discord server: https://discord.gg/mY5uCfQ !
If you want to support our goal to motivate other DIY/art/music/homesteading/... creators just delegate to us and earn 100% of your curation rewards!
Stay creative & hive on!