
Feliz noche mi gente bonita de esta comunidad, hoy paso por aquí para unirme al concurso que una vez más hace el @equipodelta y agradecer de ante mano por dicha oportunidad para mostrar nuestros talentos, también quisiera invitar a @milanck para que se una a este concurso y pueda ser parte de todos los talentos aquí mostrado, bueno sin más que agregar les invito a mirar hasta el final como decore mi esfera con tela, perfecta para decorar en esta navidad.
Happy evening my beautiful people of this community, today I come here to join the contest that once again makes the @equipodelta and thank you in advance for this opportunity to show our talents, I would also like to invite @milanck to join this contest and can be part of all the talents shown here, well without further ado I invite you to look until the end as I decorate my sphere with fabric, perfect for decorating this Christmas.
Materiales:
Diferentes trozos de telas.
Esfera de anime.
Cinta de Raso color rojo número 2 y 9.
Pistola de silicón.
Tijeras, lápiz, cuchillo y molde de hoja.
Materials:.
Different pieces of fabrics.
Anime sphere.
Red satin ribbon number 2 and 9.
Silicone gun.
Scissors, pencil, knife and leaf mold.

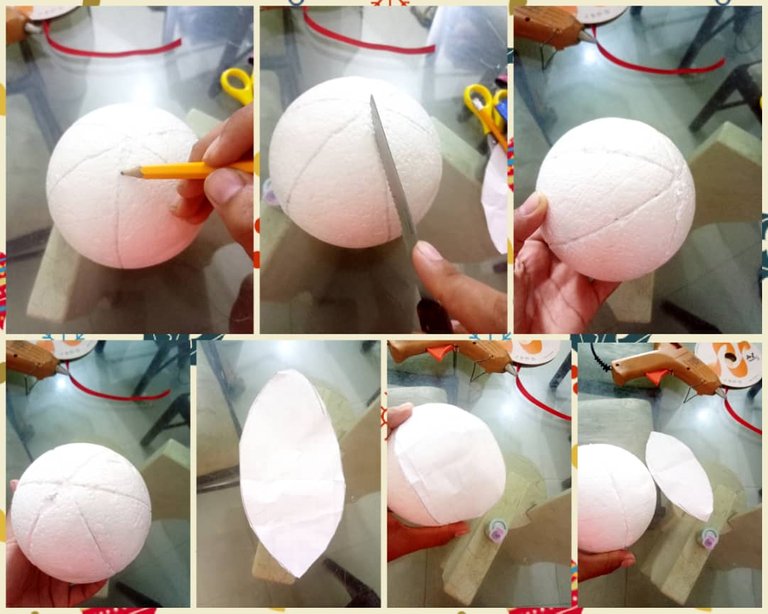
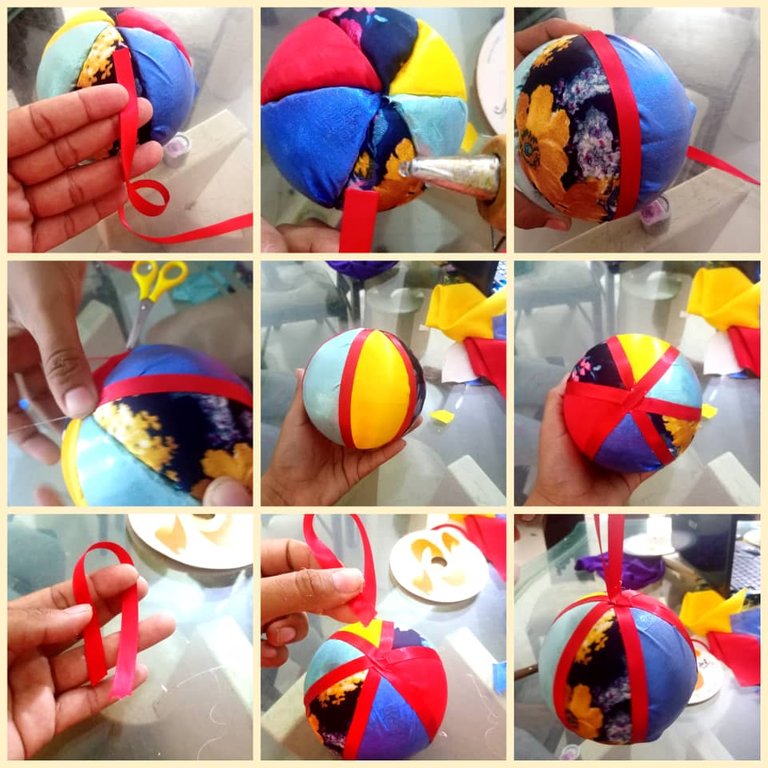
Marcamos con el lápiz la división de la esfera en este caso lo dividimos en 6 partes y luego con el cuchillo pasamos por donde están las líneas abriendo una apertura un tanto profunda.
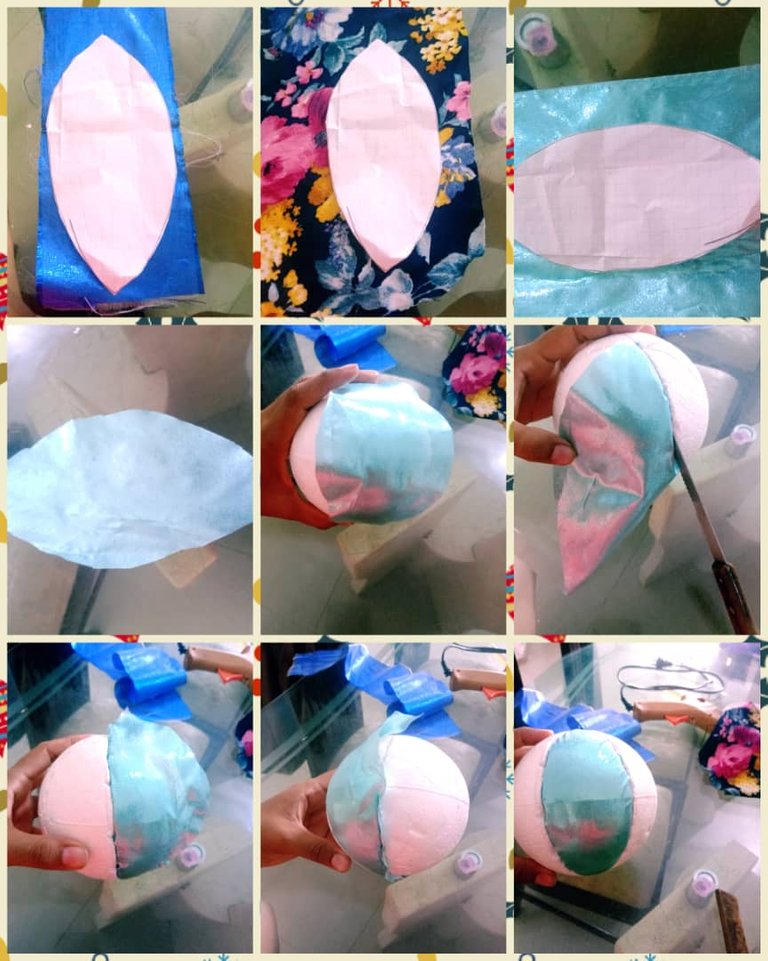
Luego con el molde de papel lo colocamos encima de cada trozo de tela y cortamos ya que ese es el guía par forrar las partes dividida de la esfera, cortamos y tomamos el trozo de tela y lo colocamos encima de la esfera y con la ayuda del cuchillo vamos metiendo la orilla de la tela por la apertura de la esfera forrando así una parte de ese color como muestra la imagen.
We mark with the pencil the division of the sphere in this case we divide it into 6 parts and then with the knife we go through where the lines are opening a somewhat deep opening.
Then with the paper mold we place it on top of each piece of fabric and cut since that is the guide to line the divided parts of the sphere, cut and take the piece of fabric and place it on top of the sphere and with the help of the knife we put the edge of the fabric through the opening of the sphere thus lining a part of that color as shown in the image.
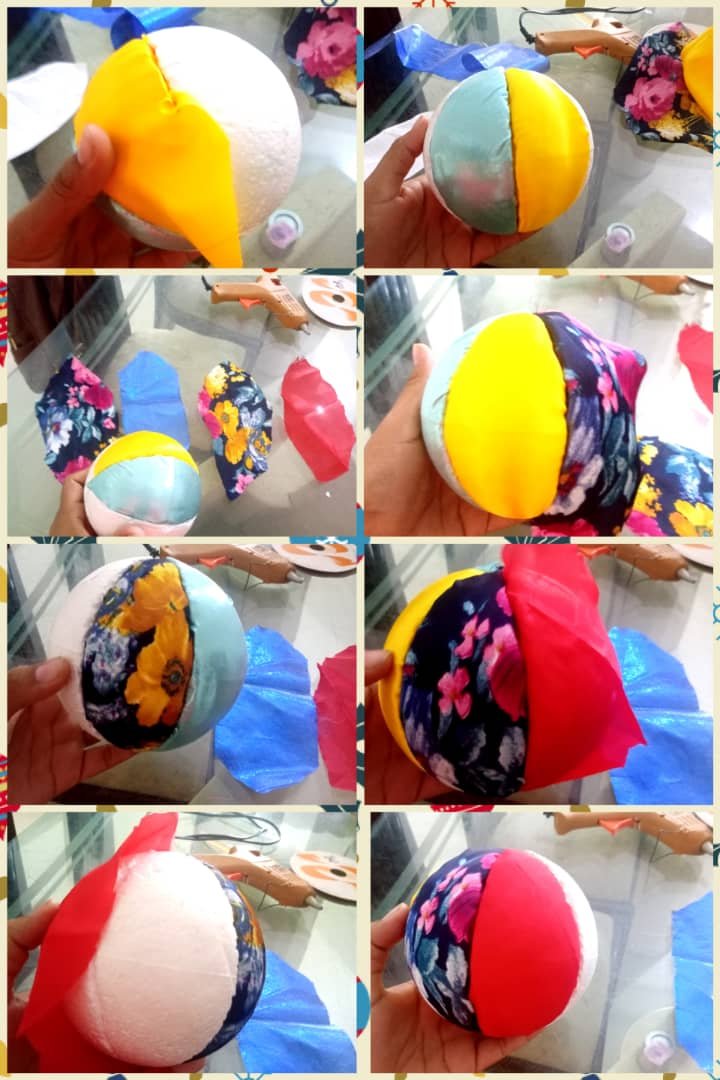
Así vamos incorporando cada trozo de tela en las divisiones de la esfera, seguimos con la amarilla, luego la floreada de ambos lados, seguimos con la roja y por último con la tela azul, así terminamos de forrar cada parte de la esfera con 6 colores, como lo es la navidad muy colorida y alegre.
So we are incorporating each piece of fabric in the divisions of the sphere, we continue with the yellow, then the flowered on both sides, followed by the red and finally with the blue fabric, so we finish lining each part of the sphere with 6 colors, as it is very colorful and cheerful Christmas.
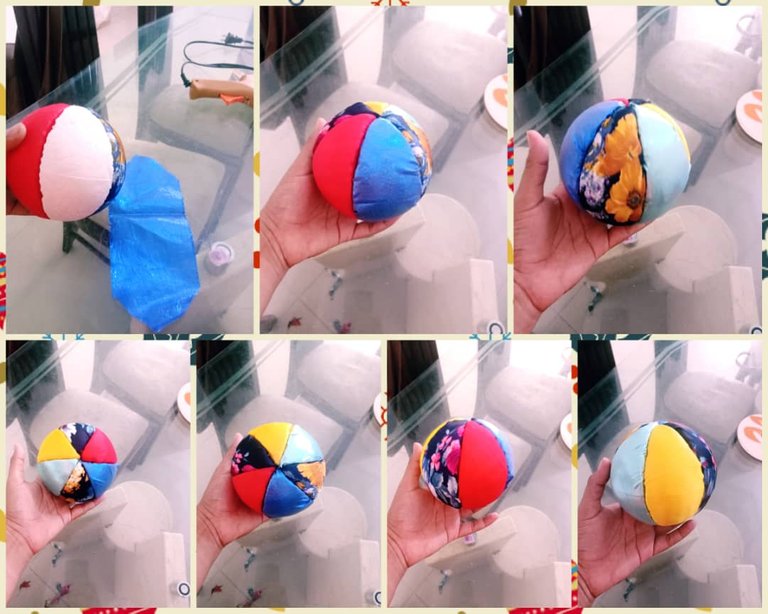
Ya con nuestra esfera totalmente forrada nos disponemos a colocarle cinta roja por cada parte de las ranuras o separación de cada color y con la misma cinta cortamos un pedacito y pegamos en el centro de la esfera donde se unen todas los pase de cinta, pegamos allí para poder colgar nuestra esfera.
Once our sphere is fully lined, we are ready to place red ribbon in each part of the grooves or separation of each color and with the same ribbon we cut a small piece and stick it in the center of the sphere where all the ribbon passes meet, we stick it there to be able to hang our sphere.
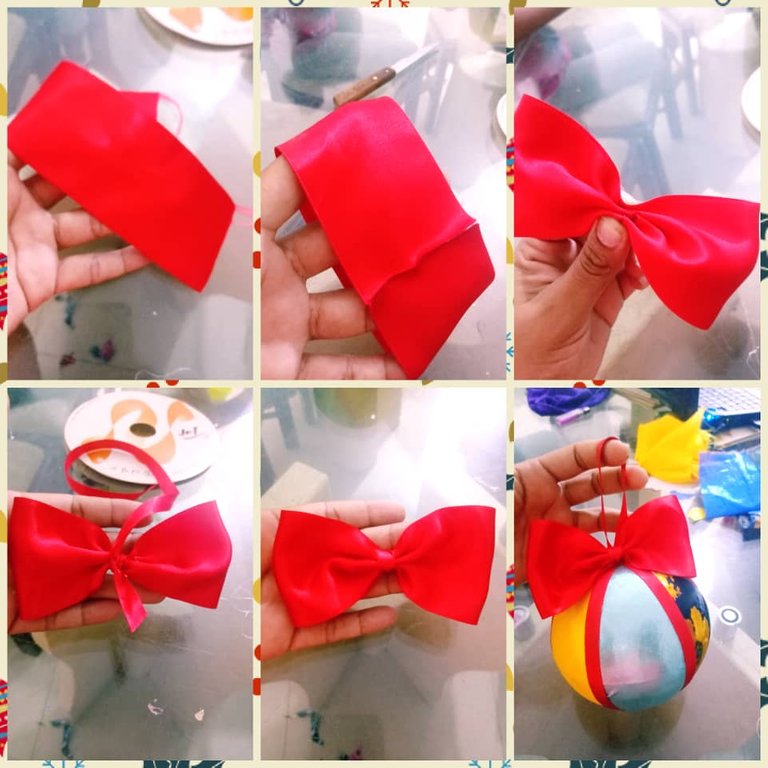
Ya para darle el toque final con una cinta roja mas ancha la unimos en las puntas y luego la tomamos por el medio, vamos doblando y amarramos en el centro con la cinta mas delgada y por último pegamos en el centro de la esfera donde pegamos la cinta colgante, quedando así lista la esfera decorada con tela especial para nuestro arbolito de navidad o cualquier otra decoración en casa.
Now to give the final touch with a wider red ribbon we join it at the ends and then we take it in the middle, we fold it and tie it in the center with the thinner ribbon and finally we glue it in the center of the sphere where we glued the hanging ribbon, thus being ready the sphere decorated with special fabric for our Christmas tree or any other decoration at home.
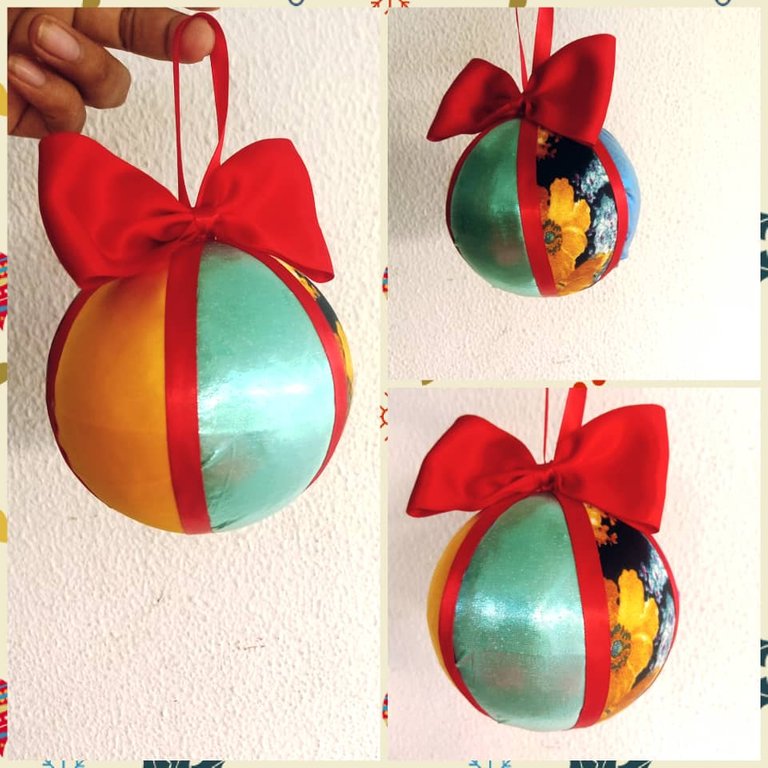
Así quedo lista mi esfera navideña, espero les haya gustado. Bendiciones.
This is how my Christmas sphere is ready, I hope you liked it. Blessings.


Te ha quedado muy coqueta. Muchas gracias por compartir con nosotros tu proyecto y participar en el concurso, mucha suerte.
Muchas gracias a ustedes también @equipodelta por la oportunidad.
Congratulations @maryoris.marcano! You have completed the following achievement on the Hive blockchain and have been rewarded with new badge(s):
Your next target is to reach 10000 upvotes.
You can view your badges on your board and compare yourself to others in the Ranking
If you no longer want to receive notifications, reply to this comment with the word
STOPCheck out the last post from @hivebuzz:
Muchas gracias.