Good evening and happy start to the week, creative friends from #HiveDiy !!! I hope you are all very well. This time I am going to show you the step by step of a beautiful Santa Claus with traditional colors but designed in a different way.
Buenas noches y feliz inicio de semana amigos creativos de #HiveDiy!!! Espero que estén todos muy bien. En esta oportunidad voy a mostrarles el paso a paso de un hermoso Papá Noel con los colores tradicionales pero diseñado de diferente manera.
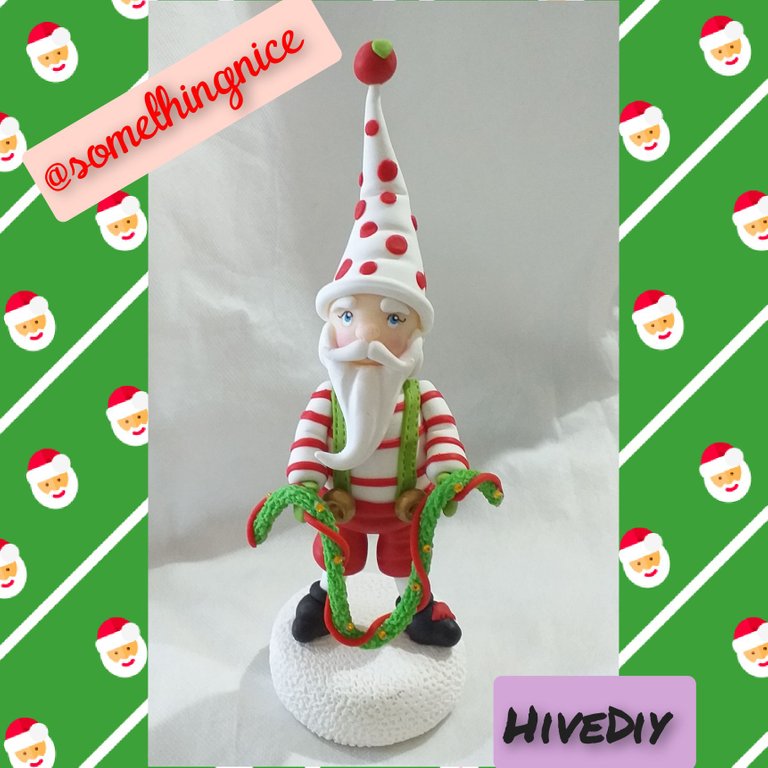
I made this beautiful Santa Claus following the step by step of a magazine by Leticia Suárez del Cerro from 2011. Every year I make different models but I love this one !!
Este hermoso Papa Noel lo hice siguiendo el paso a paso de una revista de Leticia Suárez del Cerro del año 2011. Todos los años hago diferentes modelos pero este me encanta!!
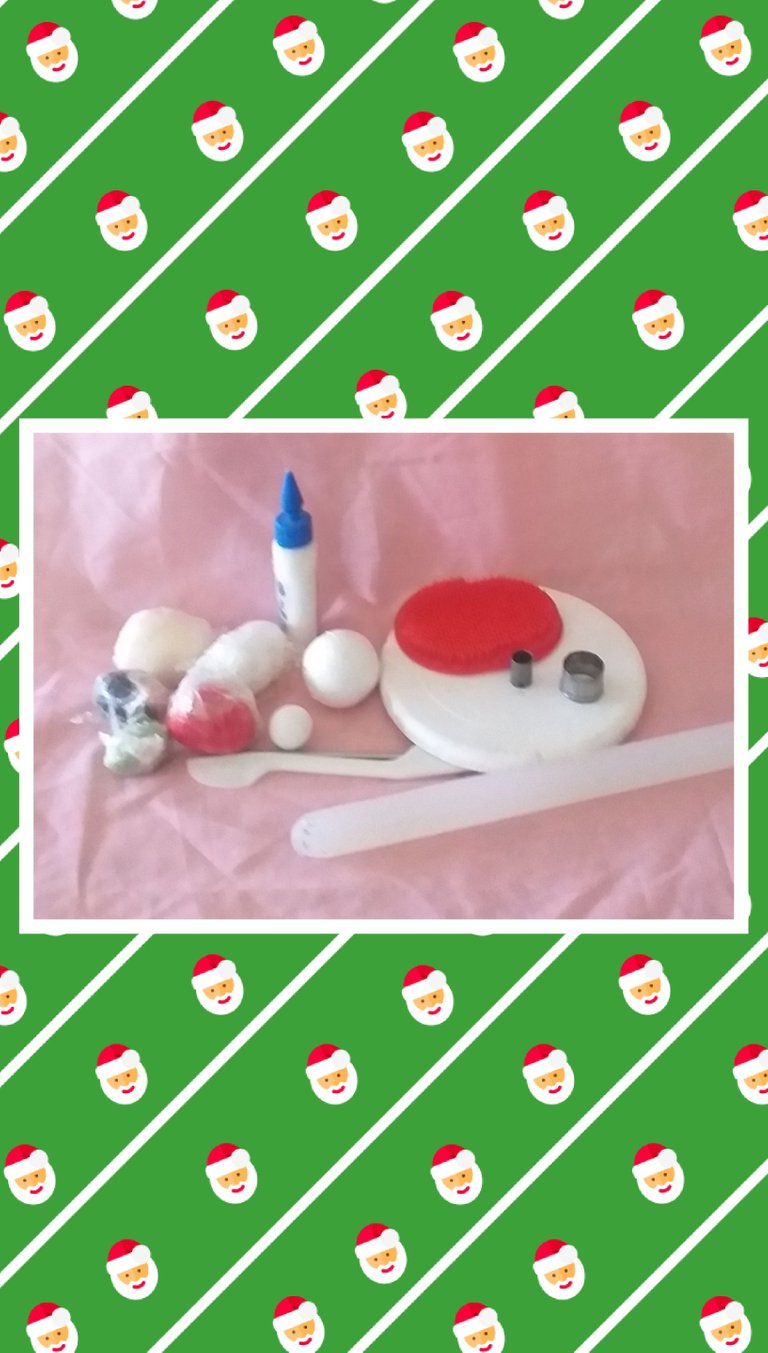
Materials
🎅 cold porcelain
🎅 vinyl glue
🎅 cuttings
🎅 rolling pin
🎅 sharp
🎅 brush
🎅 two polystyrene spheres of different sizes
🎅 gold acrylic
🎅 strass
🎅 Styrofoam cover
🎅 chopsticks
Materiales
🎅 porcelana fría
🎅 cola vinilica
🎅 estecas
🎅 palo de amasar
🎅 cortantes
🎅 cepillo
🎅 dos esferas de telgopor de diferentes
tamaños
🎅 acrílico dorado
🎅 strass
🎅 tapa de telgopor
🎅 palillos
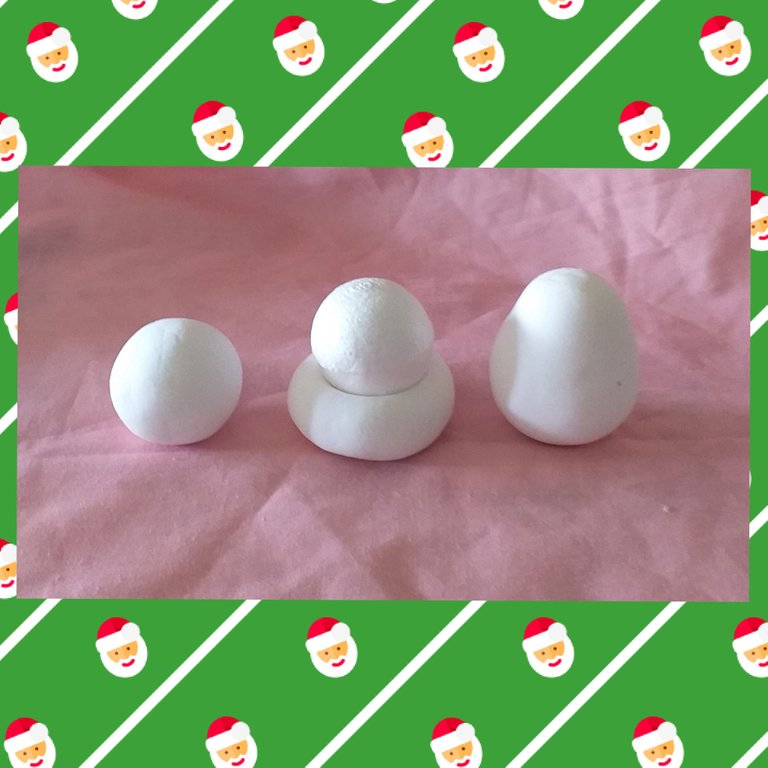
For the body, make a white ball, insert the largest sphere, close and shape it into a pear.
Para el cuerpo hacer una bolita de color blanco, introducir la esfera más grande, cerrar y darle forma de pera.
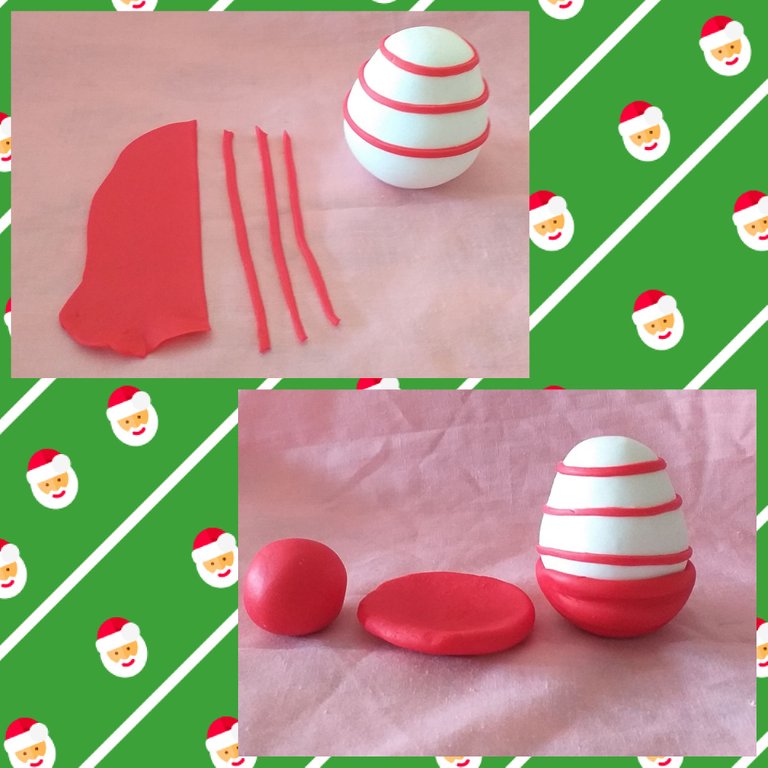
Roll out red dough, cut thin strips, glue on the body.
For the pants, make a ball, flatten and hollow out. Paste at the bottom and make marks to simulate wrinkles.
Estirar masa roja, cortar tiras finas, pegar en el cuerpo.
Para el pantalón hacer una bolita, aplanar y ahuecar. Pegar en la parte inferior y hacer marcas para simular arrugas.
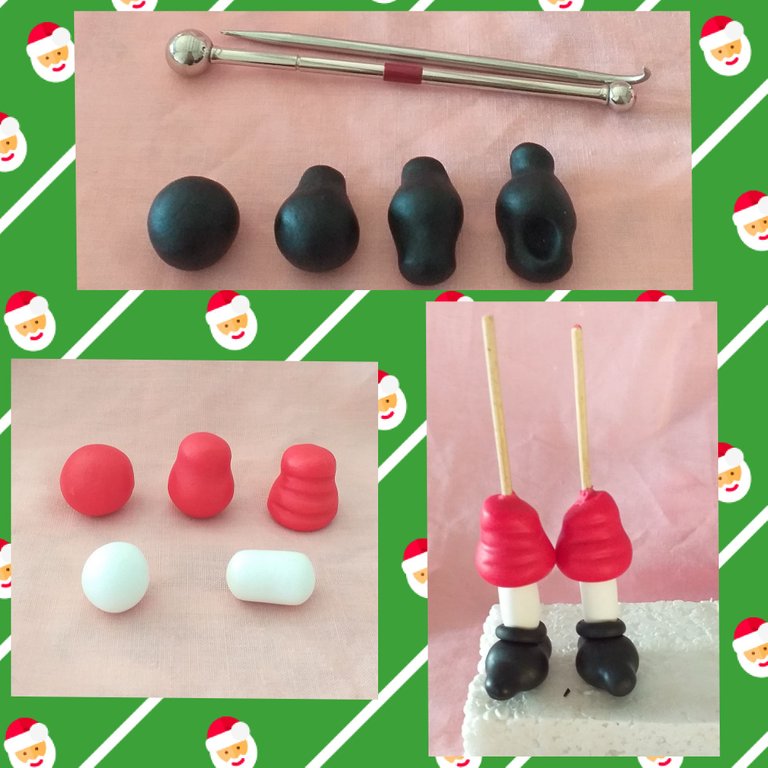
For the shoes, make two equal balls, put a little point at the top, repeat the step at the bottom, hollow out.
For the legs, make two equal balls, form a pear, flatten a little at the top and bottom and mark wrinkles. Make two white rolls for the stockings.
Join the parts and insert a toothpick to make it firm.
Para los zapatos hacer dos bolitas iguales, sacar un poco de punta en la parte superior, repetir el paso en la parte inferior, ahuecar.
Para las piernas hacer dos bolitas iguales, formar una pera, aplanar un poco en la parte superior e inferior y marcar arrugas. Hacer dos rollos blancos para las medias.
Unir las partes e introducir un palillo para darle firmeza.

For the head, make a ball, insert the polystyrene sphere, close and mark the separation of the face and forehead.
From the same portion of the face, we divide in half and little by little we form the neck.
Mark the eye socket, form the nose and for the mouth we use a ball-shaped stake which we introduce so that it forms.
Para la cabeza hacer una bolita, introducir la esfera de telgopor, cerrar y marcar la separación de la cara y la frente.
De la misma porción de la cara, dividimos a la mitad y de a poco formamos el cuello.
Marcar la cuenca de los ojos, formar la nariz y para la boca usamos una esteca con forma de bolita la cual introducimos para que se forme.
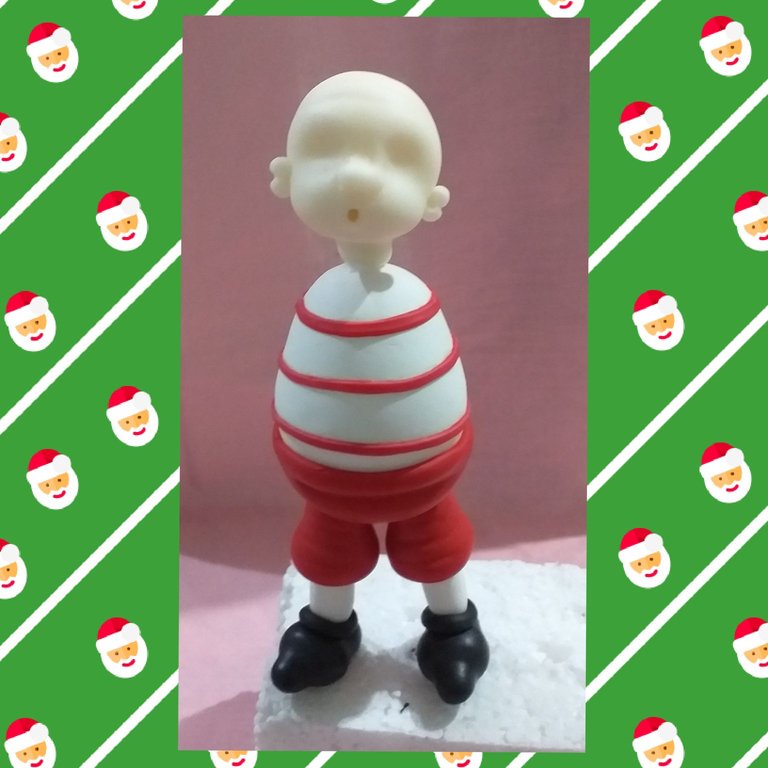
Attach the body to the legs and the head to the body.
Unir el cuerpo a las piernas y la cabeza al cuerpo.
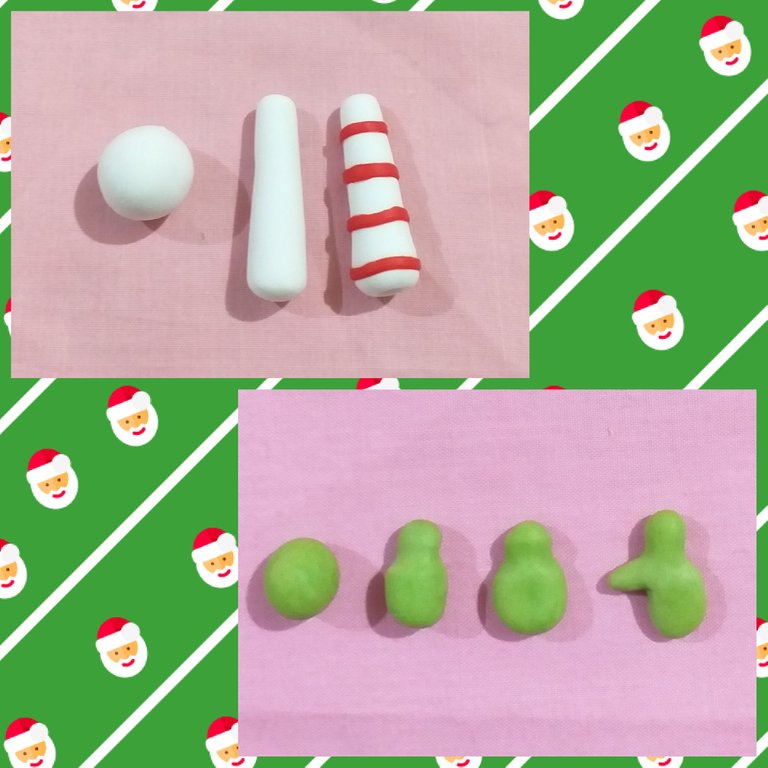
For the arms, make two equal balls, stretch leaving a larger end. Glue red strips.
For the mittens, make two equal balls, shape into a cylinder, mark the wrist, flatten and cut in the shape of a "1" to form the finger.
Para los brazos, hacer dos bolitas iguales, estirar dejando un extremo más grande. Pegar tiras rojas.
Para las manoplas hacer dos bolitas iguales, dar forma de cilindro, marcar la muñeca, aplanar y cortar en forma de "1" para formar el dedo.
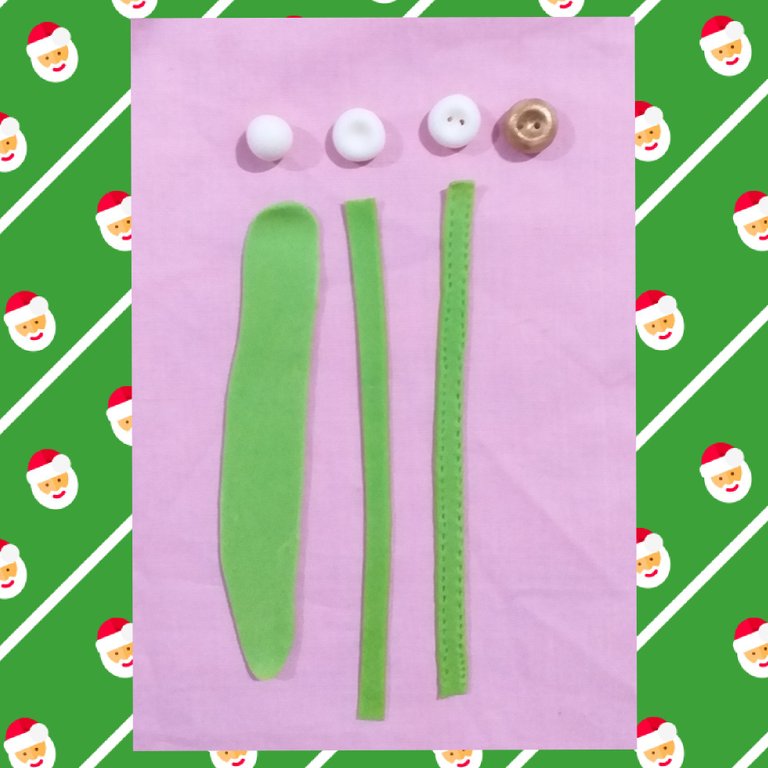
For the button detail, make two equal balls, flatten, hollow out, mark two holes and paint with golden acrylic.
For the handles, make two strips and mark short lines on the edges to simulate sewing.
Para el detalle de los botones hacer dos bolitas iguales, aplanar, ahuecar, marcar dos agujeros y pintar con acrílico dorado.
Para los tiradores, hacer dos tiras y marcar en los bordes líneas cortas para simular la costura.
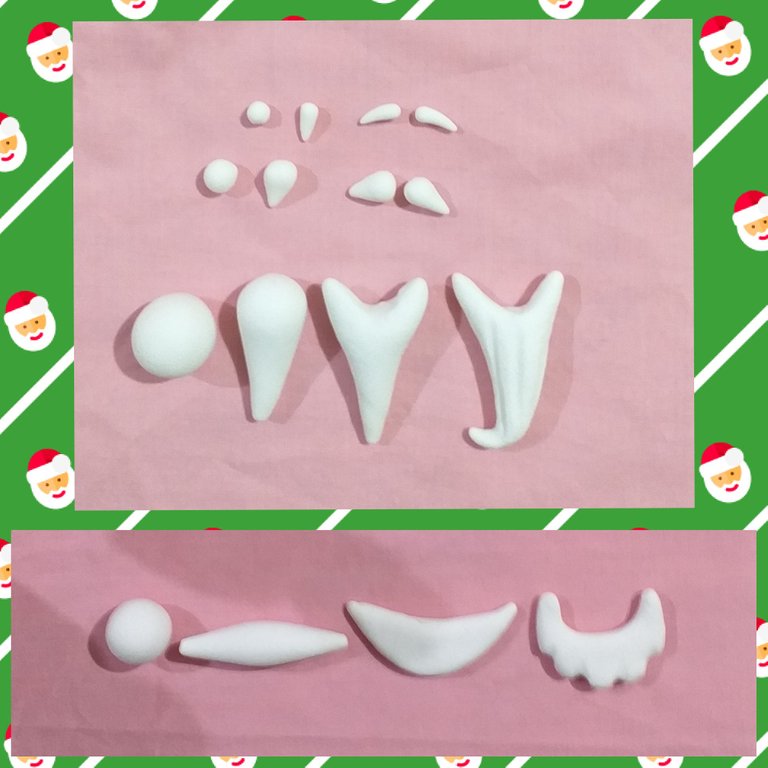
For the eyebrows and whiskers, make two equal balls and give them a teardrop shape, of course the eyebrows have to be smaller.
For the beard, make a ball, give the shape of a tear of the length we want, in the thickest part make a separation, mark to simulate the hairs.
For the hair, make a ball, refine the ends, shape a "U", flatten and mark gently.
Para las cejas y los bigotes hacer dos bolitas iguales y darle forma de lágrima, por supuesto que las cejas tienen que ser más pequeñas.
Para la barba hacer una bolita, dar forma de lágrima del largo que deseamos, en la parte más gruesa hacer una separación, marcar para simular los pelos.
Para el pelo hacer una bolita, afinar en los extremos, dar forma de "U",aplanar y marcar suavemente.
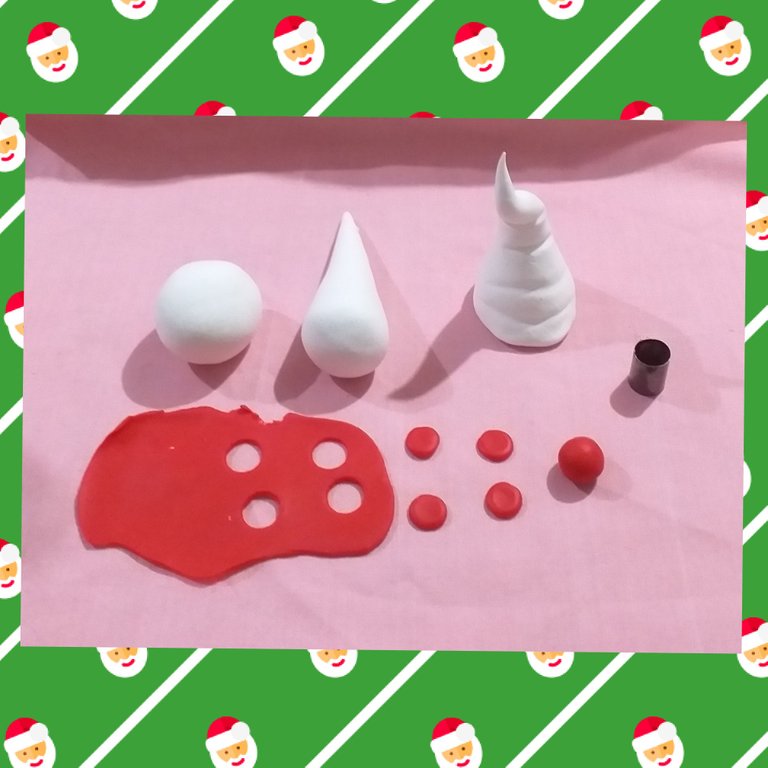
For the hat, make a ball, shape an elongated teardrop, mark the wrinkles.
Decorate with red circles and a ball on the tip.
Para el gorro hacer una bolita, dar forma de lágrima alargada, marcar las arrugas.
Decorar con círculos rojos y una bolita en la punta.
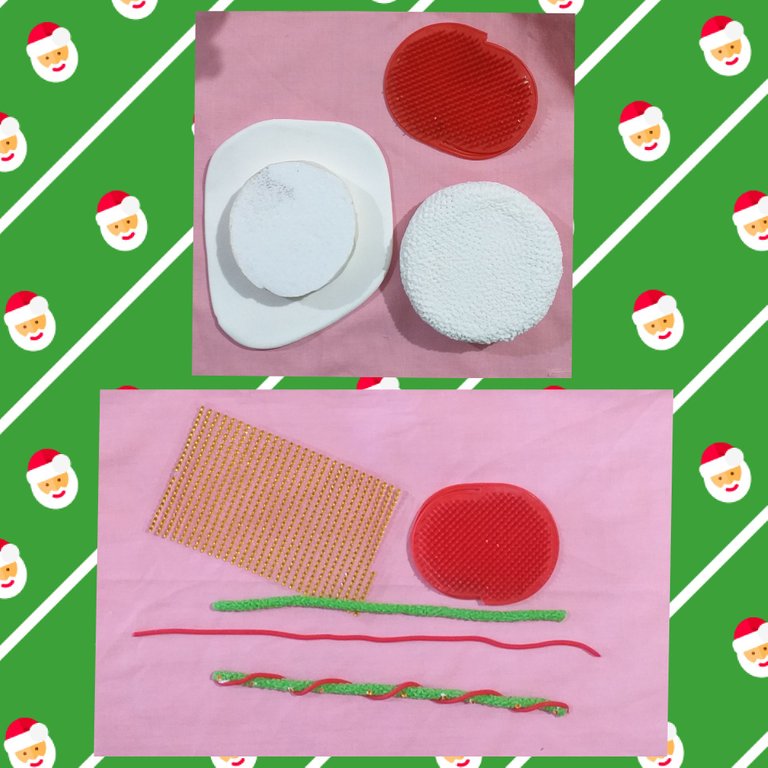
For the base, roll out the dough, glue on the lid, remove the excess and repeat the step on the other side. Texture with the brush.
For the garland make a roll, texture and weave with a thinner roll. Decorate with rhinestones.
Para la base estirar masa, pegar la tapa, quitar el excedente y repetir el paso del otro lado. Texturar con el cepillo.
Para la guirnalda hacer un rollo, texturar y entrelazar con un rollo más fino. Decorar con strass.
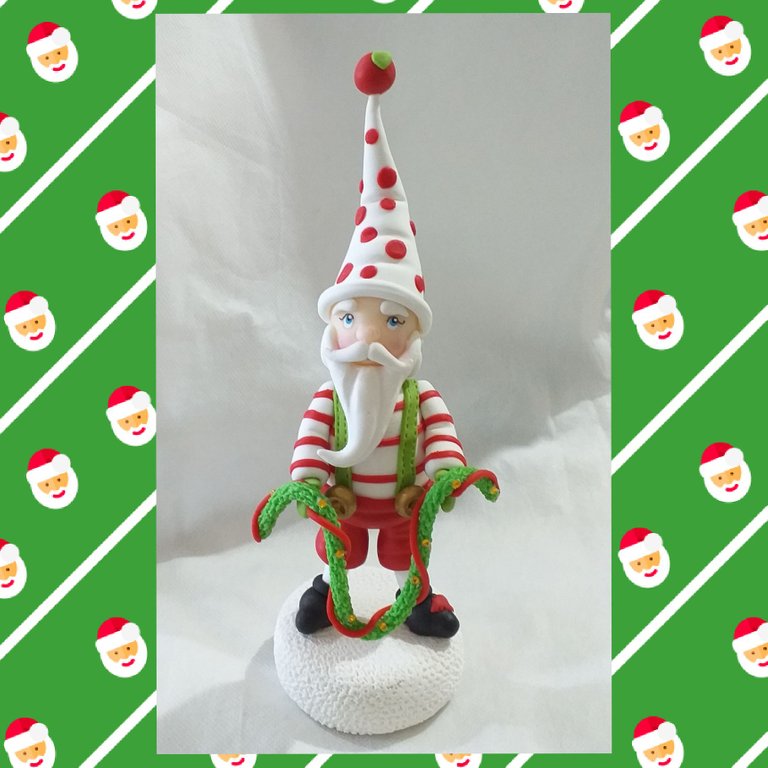
Glue all the pieces together, paint the eyes with acrylics or markers and put on makeup.
For this post I took photos with my Samsung Galaxy j4 cell phone and used the Collage Marker application and the Google translator.
As always, I hope you liked it and are encouraged to do it because it is beautiful to decorate our house and more with something made with our hands. Greetings. Andrea ❤❤❤
Pegar todas las piezas, pintar los ojos con acrílicos o marcadores y maquillar.
Para este post tomé fotos con mi teléfono celular Samsung Galaxy j4 y utilicé la aplicación Collage Marker y el traductor de Google.
Como siempre espero que les haya gustado y se animen a hacerlo porque es hermoso decorar nuestra casa y más con algo hecho con nuestras manos. Saludos. Andrea ❤❤❤
