✨🌟🦛¡Hola amigos amantes de la creatividad! Espero que hayan pasado un muy buen comienzo de semana.✨
🔸Sin más que añadir, a continuación los dejo con el paso a paso:
✨🌟🦛¡Hello friends who love creativity! I hope you had a very good start to the week.✨
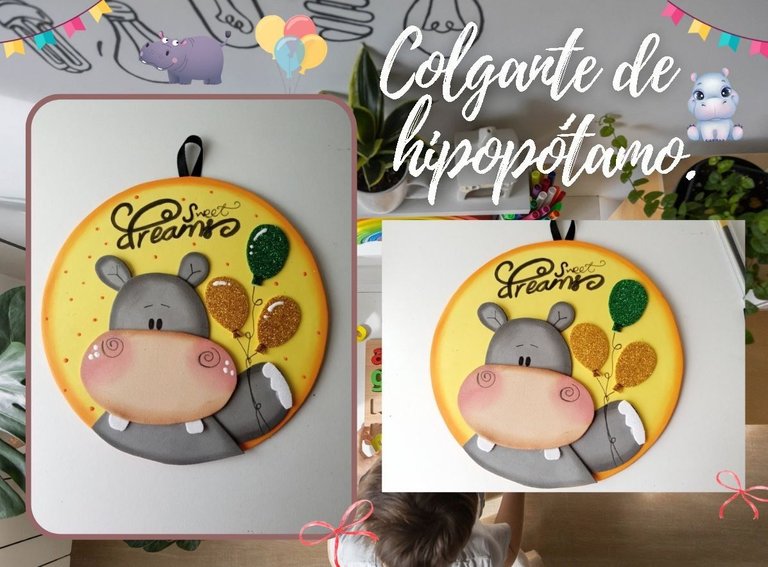
¡Good afternoon friends! I hope you are having a great week. For my part, I am quite happy. On this occasion I share with you the step by step to make a hippo-themed pendant. This idea was designed for the little ones' room in the house, it seems like a pretty cute idea to me and I wanted to take advantage of the fact that I had the materials to make a cute hippopotamus for the first time.
On the other hand, I want to mention that I am quite happy with the result of this decoration, I am quite proud of my progress and I hope you are enjoying my creations.
🔸Without more to add, then I leave you with the step by step:
♥️ESPERO QUE TE GUSTE,
¡Empecemos!
♥️I HOPE YOU LIKE IT,
Let's start!

✂️ MATERIALES | ✂️ MATERIALS

- Foami escarchado dorado y verde.
- Foami amarillo, blanco,
crema y gris. - Marcadores.
- Pegamento.
- Hoja blanca.
- Pinturas.
- Cartón.
- Cinta.
- Tijeras.
- Regla.
- Lápiz.
- Gold and green frosted foam.
- Foami yellow, white,
cream and grey. - Markers.
- Glue.
- White sheet.
- Paintings.
- Cardboard.
- Tape.
- Scissors.
- Ruler.
- Pencil.

🌟 PROCEDIMIENTO | 🌟 PROCESS

- PASO 1:
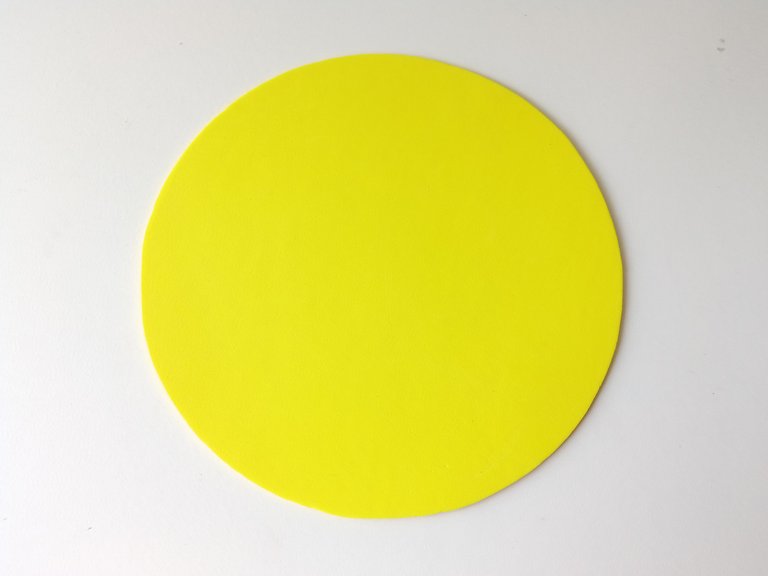
Comencé dibujando un círculo de 15 cm de circunferencia en foami amarillo y recorté. Para darle más color a la pieza, tomé un poco de pintura naranja y difuminé por todo el borde del círculo con ayuda de un pañito. Seguidamente, escribí una frase con lápiz en la parte superior, bastante centrada y remarqué con marcador negro.
- STEP 1:
I started by drawing a circle 15 cm in circumference in yellow foam and cut out. To give more color to the piece, I took a little orange paint and blended it all over the edge of the circle with the help of a cloth. Next, I wrote a phrase with pencil at the top, quite centered and highlighted with a black marker.



- PASO 2:
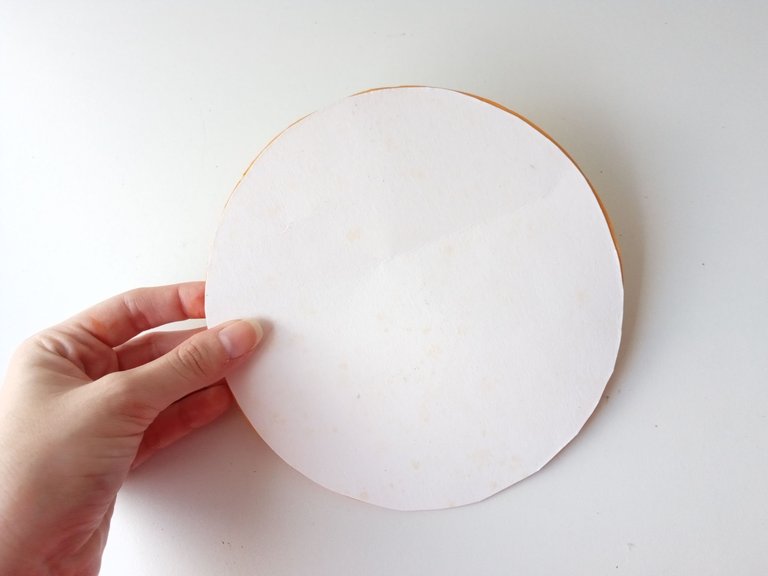
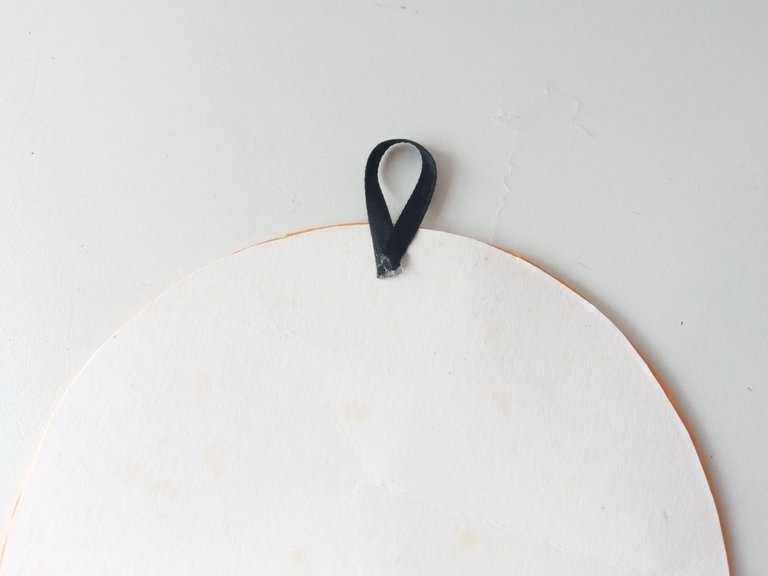
Pegué la parte trasera del círculo en cartón delgado y recorté los excedentes. Para poder colgar, recorté un trozo de cinta delgada, la doblé a la mitad y pegué en la parte superior, bien centrado.
- STEP 2:
I glued the back of the circle onto thin cardboard and trimmed off the excess. To be able to hang, I cut out a piece of thin ribbon, folded it in half, and glued it to the top, centered.


- PASO 3:
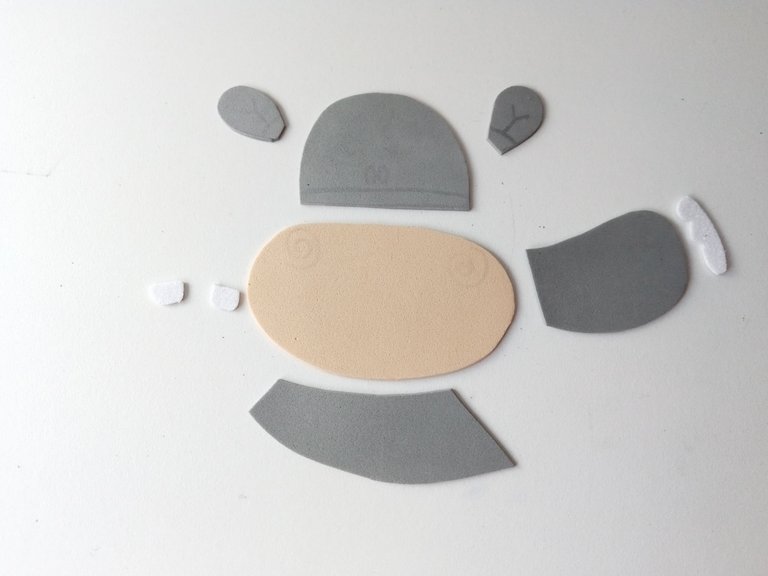
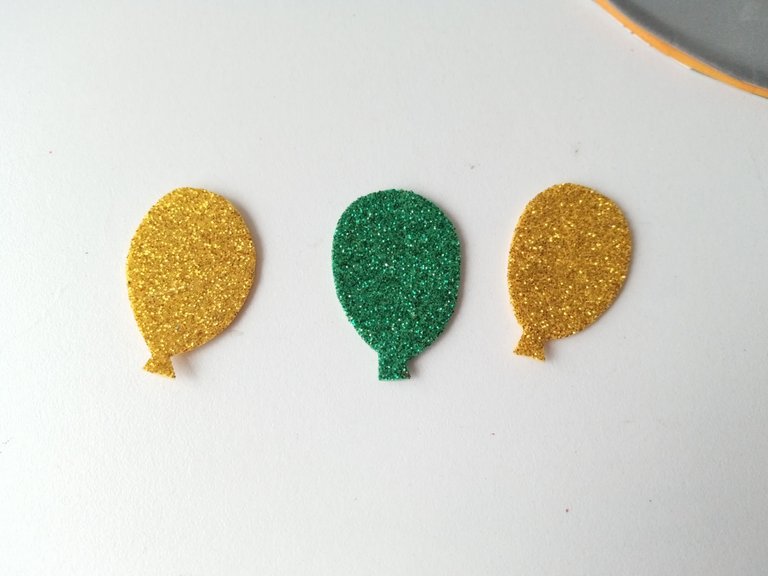
Ahora sí, comencé dibujando los patrones de toda la decoración en una hoja blanca, al tener todo listo, transferí cada una de las piezas al color correspondiente de foami de la siguiente manera: la cabeza, orejas, cuerpo y patas en foami gris, el hocico en foami crema, las pesuñas y dientes en foami blanco, los globos en dorado y verde escarchados.
- STEP 3:
Now yes, I started drawing the patterns of all the decoration on a white sheet, having everything ready, I transferred each of the pieces to the corresponding color of foam as follows: the head, ears, body and legs in gray foam, the Snout in cream foam, paws and teeth in white foam, balloons in frosted gold and green.


- PASO 4:
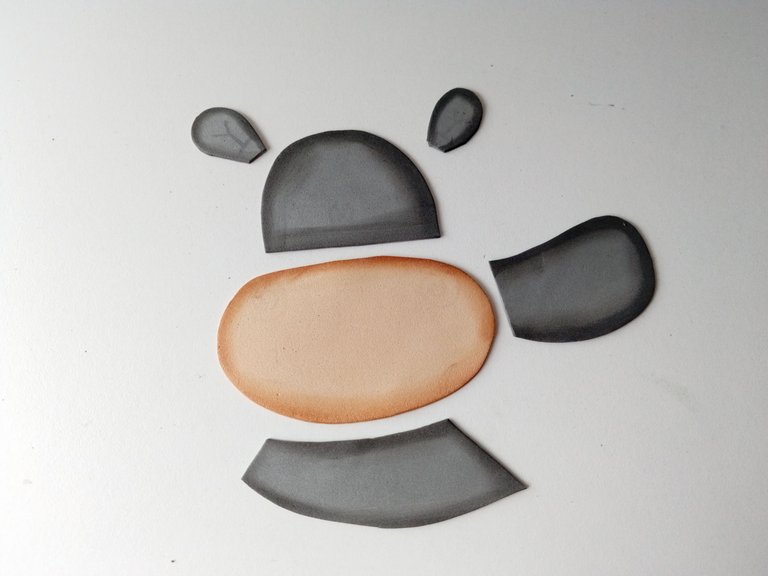
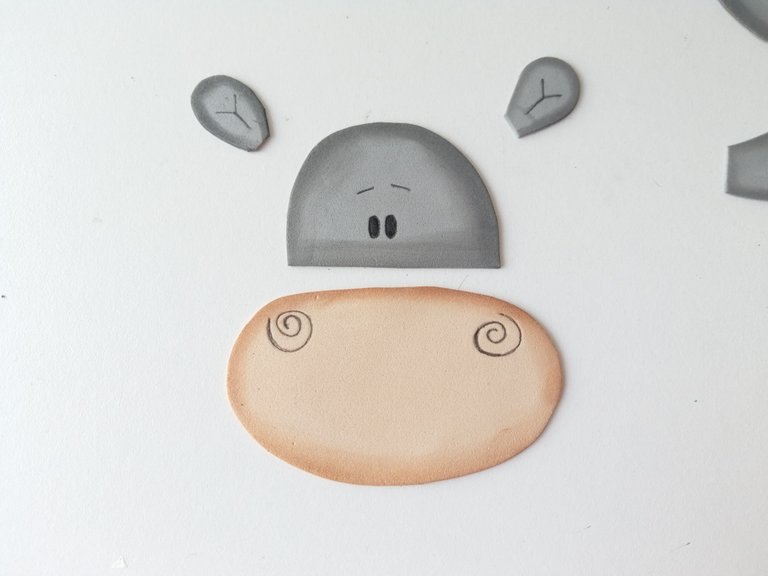
Una vez recortadas todas las piezas del hipopótamo, tomé un color de pintura más oscuro o que contrastara con cada uno de los colores de foami e hice lo mismo que con el círculo, difuminé por todo el borde de cada una de las piezas para dar más detalle y sombras. Por otra parte, dibujé ojos, cejas, fosas y orejas.
- STEP 4:
Once all the hippopotamus pieces were cut out, I took a darker paint color or one that contrasted with each of the foam colors and did the same as with the circle, I blended it along the entire edge of each of the pieces to give more detail and shadows. On the other hand, I drew eyes, eyebrows, nostrils and ears.


- PASO 5:
Seguidamente, pegué todas las piezas del hipopótamo y con un poco de pintura rosa, di color a las mejillas. Después, pegué la pieza al colgante, al igual que los globos. Por último, dibujé las cuerdas de los globos agarradas del hipopótamo, di puntos de luz con pintura blanca a mejillas y los globos . Finalmente, para darle un poco de color al fondo, con pintura naranja y un palito, hice puntos desordenados.
- STEP 5:
Next, I glued all the hippo pieces and with a little pink paint, I gave color to the cheeks. Next, I glued the piece to the pendant, as well as the balloons. Finally, I drew the strings of the balloons holding on to the hippopotamus, I gave highlights with white paint to the cheeks and the balloons. Finally, to give a little color to the background, with orange paint and a stick, I made messy dots.

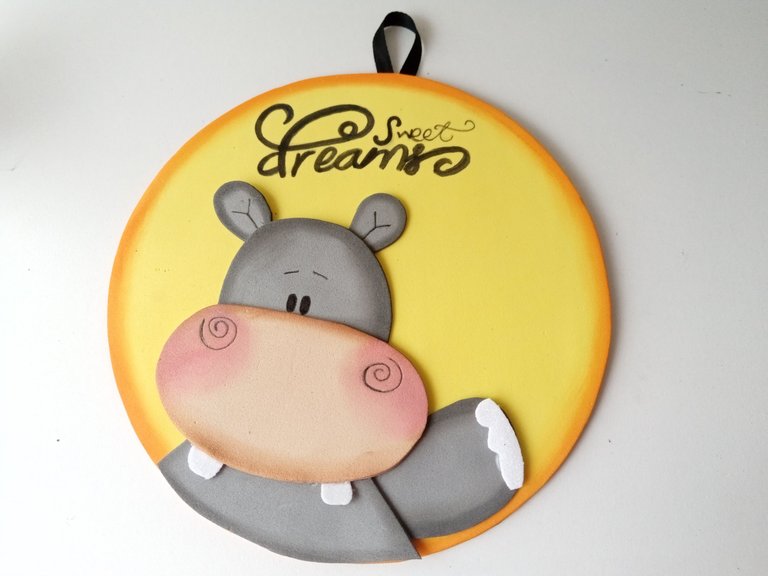
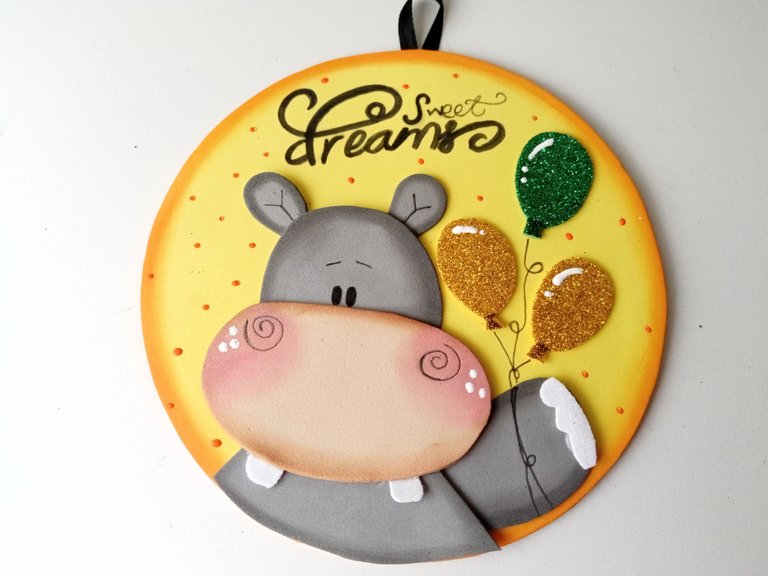

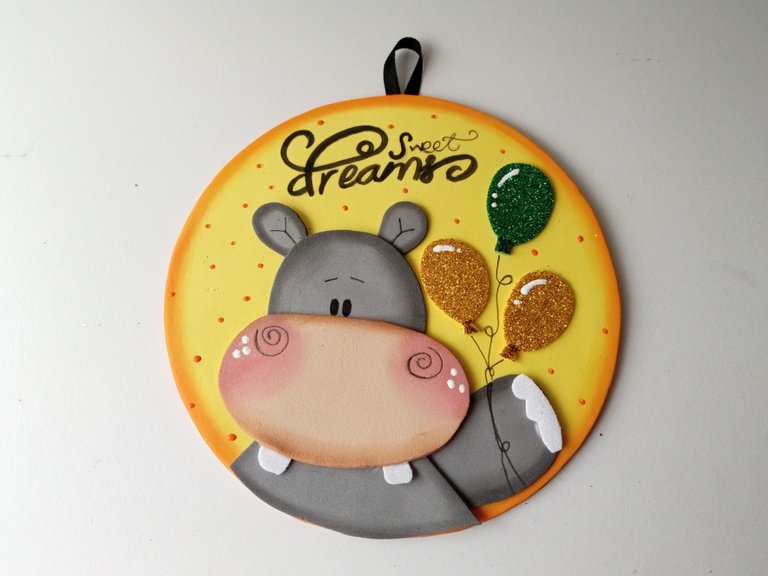
✨¡And ready!✨This is how you can make a nice decoration for the little one's room or make something much larger and decorate a hippo-themed party. I am very happy with the final result and the process was very fun. I hope you liked it and are encouraged to make this beautiful decoration.
❤️Until the next post.

✨RESULTADO: | ✨RESULT:



Todas las fotografías son de mi propiedad.
Separador y Fotos editadas en Canva
All photographs are my property.
Photos edited in Canva
!hiqvote
@caspermoeller89, the HiQ Smart Bot has recognized your request (2/3) and will start the voting trail.
In addition, @valenpba gets !HUG from @hiq.redaktion.
Discord. And don't forget to vote HiQs fucking Witness! 😻For further questions, check out https://hiq-hive.com or join our
@hiq.smartbot, sorry!
You are out of hugs for today.
You can call the HUG bot a maximum of 2 per day.
The current call limits are:
Thank you so much!!! Thanks for the support 💕
Te quedó demasiado hermoso😍😍 me encanta el color de fondo que elegiste amii 😍
Pero cuchitura🤗🥰🥰, quede enamorada valen la combinación de colores fue perfecta 🥰
Muchas gracias mi Yage! Me alegra mucho que te haya gustado, tu también hacer bellezas.💕
Muchas gracias por el apoyo amiga 💕
Está precioso y puede utilizarse para muchas cosas, para decorar cotillones escolares,para las cabeceras de los lápices de los niños, para cajitas decoradas, es decir de muchos tamaños, está bien lindo. Me gustó mucho, y como siempre cuidaste los detalles y lo prolijo.
Cute hippo.😊😊 I like how you used the hippo an an inspiration for your pendant. It's very unique. 😊
Quedó super lindo amiga, me encanta el destello de los globitos escarchados... Felicidades por esta linda creación. <3
Muchas gracias Kris. Así es, eso es lo divertido del foami, se puede trabajar con distintas texturas o crear distintos diseños para dar contraste.
Muchas gracias por tus palabras! ✨✨
Quedó hermoso, me gustó mucho. Felicitaciones 👏.
Muchas gracias , amiga! Me alegra mucho que te haya gustado mi creación. Saludos 💕
Hola Valen. Hermoso colgante, me parece una muy buena idea para decorar la habitación de los pequeños. Se ve bastante tierno el resultado, te felicito ❤️
Hola bella! Me alegra mucho que te haya gustado esta decoración , le puse mucho amor 💕.
Muchas gracias por el apoyo ✨
Te quedó demasiado lindo mi Valen 😍😍🥺 Todo curiosito y precioso!!!
Muchas gracias mi Vane! 🤭 Quedó tiernito jaja
Es tan tierno y adorable, me imagino que quedará perfecto decorando la habitación de los pequeños de la casa. Me alegra mucho que hayas compartido este paso a paso, es una idea tan linda y asequible que seguro inspirará a muchos a darle vida a estos animalitos! Saludos! 👋
Muchas gracias, amigo! Así es, yo también creó que quedaría muy lindo para decorar la puerta o habitación de los pequeños. Me alegra que te haya gustado. Saludos ! ✨
Quedó precioso 😍
Discord Felicitaciones, su publicación ha sido votada por @ dsc-r2cornell. Puedes usar el tag #R2cornell. También, nos puedes encontrar en
Muchas gracias por el apoyo amigos 💕
Demasiado bello querida amiga, tienes excelentes técnicas para hacer los difuminados y efectos de color.
Muchísimas gracias bella! Agradezco tu lindo comentario, me alegra saber que se notan los pequeños detalles.💕
Muchas gracias amigos 💕💕✨
Valentinaaaaa pero que es esta belleza? AMOOOOO🩷🥰
Ayyyy!!! Gracias amiga hermosa 🥺💕🌼
Que cuchitura de hipopótamo, está perfecto para decorar la habitación de los niños, teqquedó hermoso y curiosito. ❤️🤗😍
Saludos!
Ayyy pero que ternura Valen 😍 Este colgante está demasiado bello ami, quedaría lindo para decorar la puerta o habitación de los niños ❤️
Me gusto mucho como te quedo el colgante, es muy adorable y hermoso, gracias por compartirnos esta asombrosa idea
Escrito por lionsaturbix / Written by lionsaturbix
¡¡¡Buen trabajo!!! Gracias por publicar tu excelente contenido en Hive Diy.