✨¡Hola amigos amantes de la creatividad! Espero que estén todos bien.✨
🔸Sin más que añadir, a continuación los dejo con el paso a paso:
✨¡Hello friends who love creativity! I hope you are all well.✨
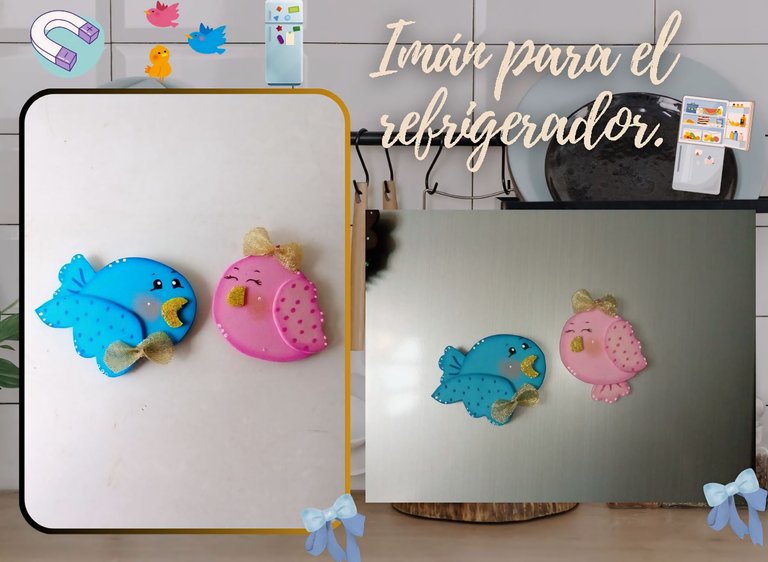
Good afternoon, friends! I hope you are having a great week. For my part, I am happy to stop by here to share a new creation with you. On this occasion I am sharing with you the step by step to make some cute bird magnets for the refrigerator. You know that I love to share two ideas to make a set of magnets, since sharing just one is almost never an option, and I say almost never because I have shared magnets that are a bit bigger and more elaborate that would give me two posts if I were a partner haha. So that is not the idea, the idea is to be able to share with you two fairly simple ideas that match to decorate the refrigerator.
🔸Without more to add, then I leave you with the step by step:
♥️ESPERO QUE TE GUSTE,
¡Empecemos!
♥️I HOPE YOU LIKE IT,
Let's start!

✂️ MATERIALES | ✂️ MATERIALS
- Foami rosa.
- Foami azul.
- Cinta dorada.
- Foami escarchado dorado.
- Pinturas y marcadores.
- Imanes.
- Pegamento.
- Hoja blanca.
- Tijeras.
- Lápiz.
- Pink foam.
- Blue foam.
- Gold ribbon.
- Gold frosted foam.
- Paints and markers.
- Magnets.
- Glue.
- White paper.
- Scissors.
- Pencil.
🌟 PROCEDIMIENTO | 🌟 PROCESS
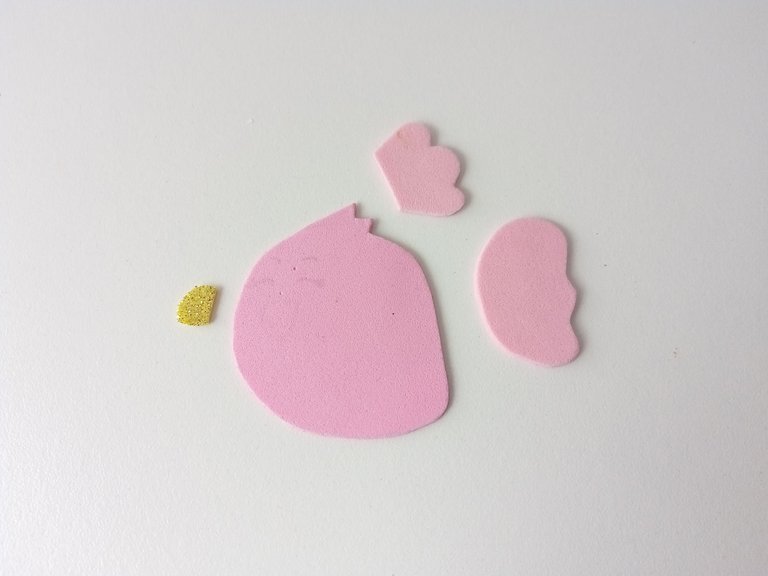
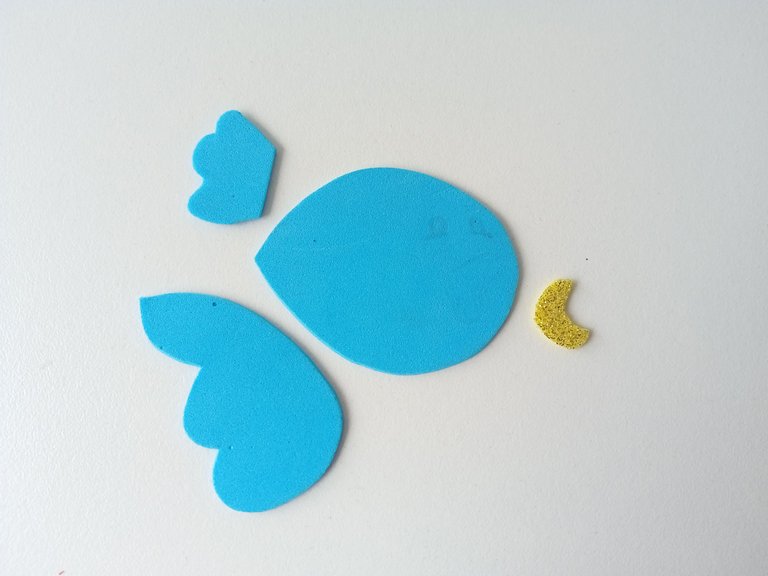
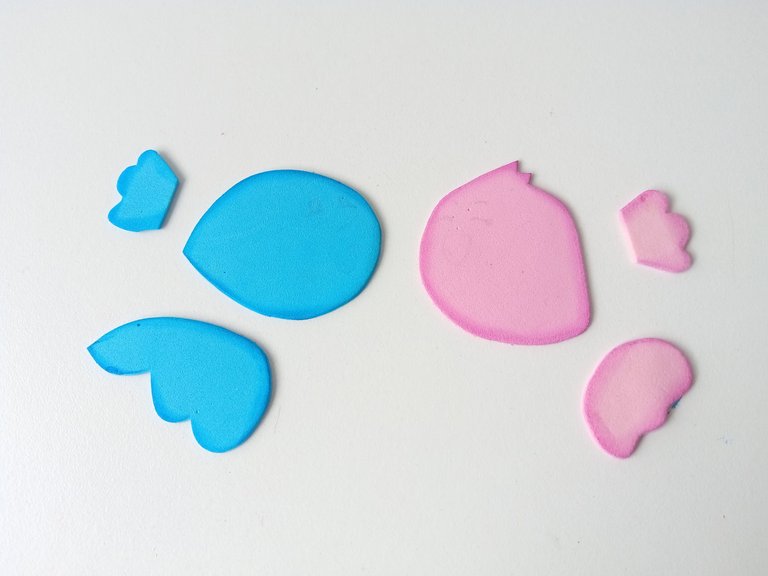
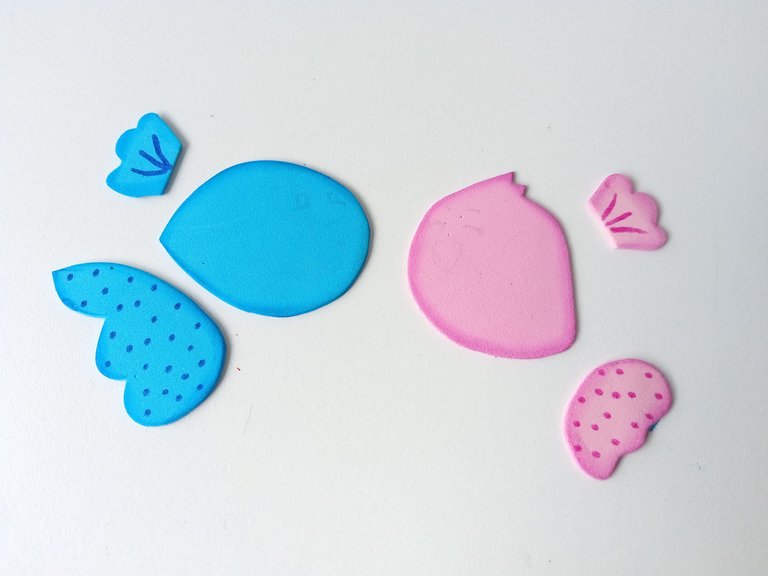
✨PASO 1:
Lo primero que hice fue dibujar el diseño de ambos pajaritos en una hoja blanca y luego dibujé cada una de las partes por separado para tener el patrón y transferirlo a los colores correspondientes de foami, como explico a continuación: cuerpo y alas de la hembra en foami rosa, cuerpo y alas del macho en foami azul y picos en foami escarchado dorado.
✨STEP 1:
The first thing I did was draw the design of both birds on a white sheet and then I drew each of the parts separately to have the pattern and transfer it to the corresponding colors of foam, as I explain below: body and wings of the female in pink foam, body and wings of the male in blue foam and beaks in golden frosted foam.
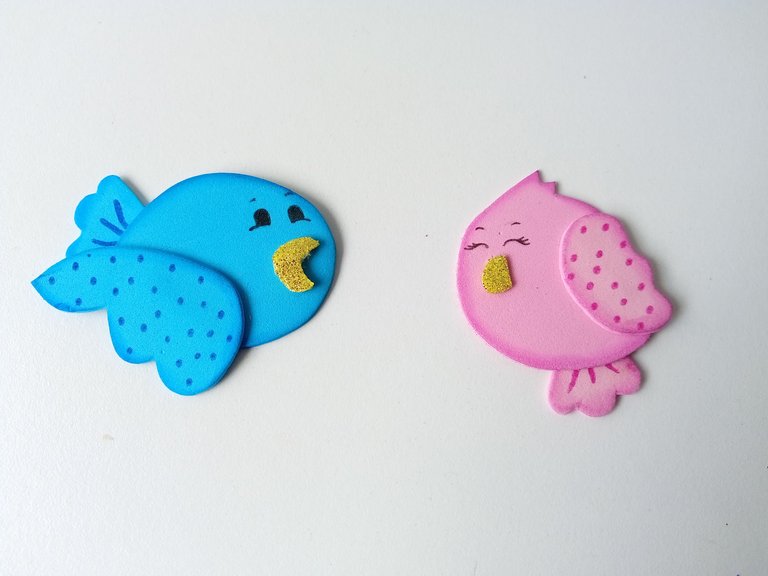
✨PASO 2:
Seguidamente, comencé a dar color a los bordes con pinturas y difuminando con ayuda de un pañito. Además, di detalles con marcadores del mismo color a las alas con puntos y a la cola. También dibujé el rostro con marcador negro.
✨STEP 2:
Next, I began to color the edges with paints and blending with the help of a cloth. In addition, I gave details with markers of the same color to the wings with dots and to the tail. I also drew the face with a black marker.
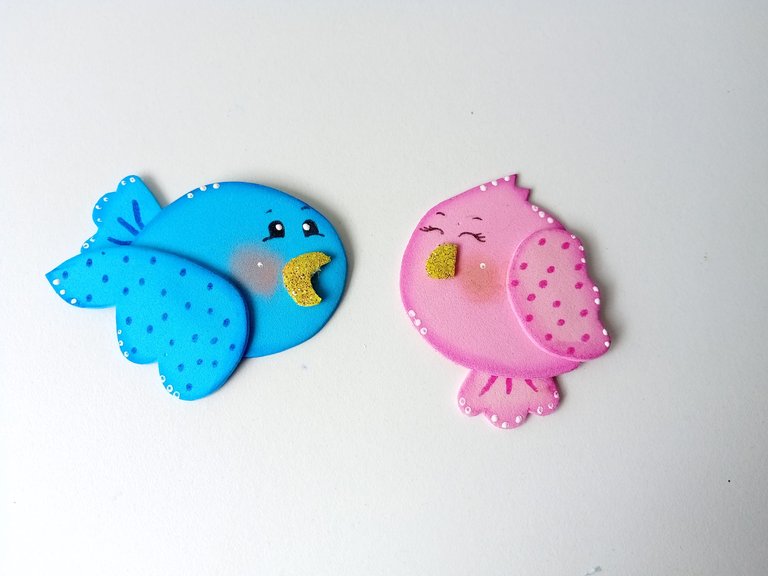
✨PASO 3:
Pegué todas las piezas hasta formar ambos pajaritos, pinté las mejillas con rubor, di puntos de luz a los ojos del macho, y a ambos puntos de luz a algunas partes del cuerpo.
✨STEP 3:
I glued all the pieces together to form both birds, painted the cheeks with blush, gave points of light to the eyes of the male, and to both points of light to some parts of the body.
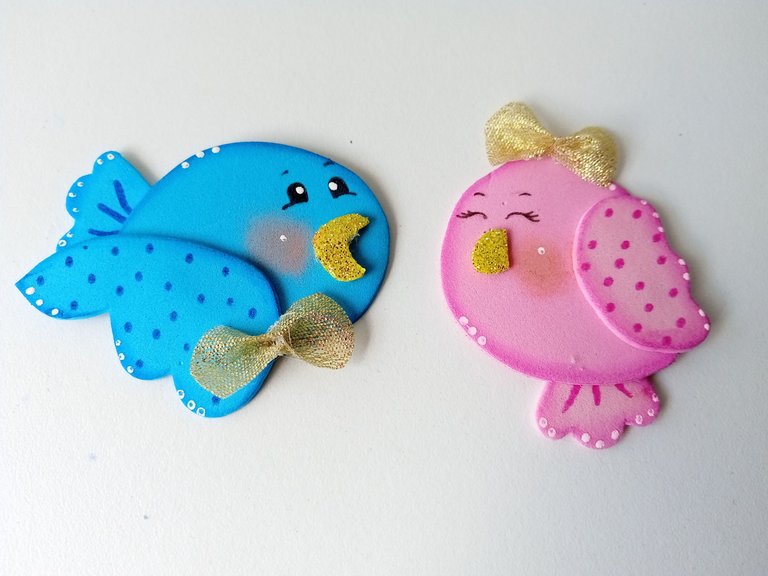
✨PASO 4:
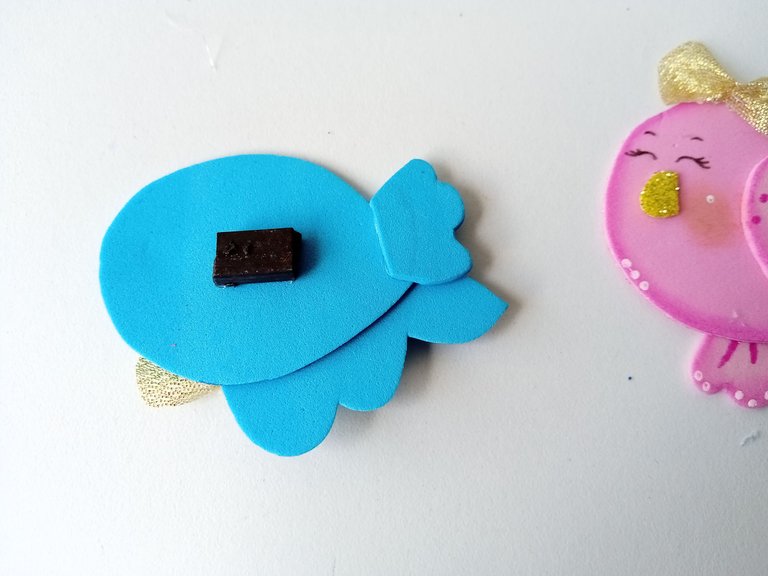
Para finalizar, tomé un trozo de la cinta dorada, pero puede ser un trozo de tela, recorté dos piezas, le amarré hilo en medio para darle la formita del lazo y los pegué a los pajaritos. En mi caso, pegué los lacitos en lugares diferentes; a él en el pecho y a ella en la cabeza. Finalmente, pegué los imanes en la parte trasera de cada pájaro.
✨STEP 4:
To finish, I took a piece of the gold ribbon, but it could be a piece of fabric, cut out two pieces, tied thread in the middle to give it the shape of a bow and glued them to the birds. In my case, I glued the bows in different places; on his chest and on her head. Finally, I glued the magnets on the back of each bird.
✨This is how you can make some nice magnets to decorate your refrigerators or renew old decorations and put new ones. The good thing is that you can create the design you want without having to use so many materials. In addition, it is a nice detail to give to a family member or friend. I hope you liked it and are encouraged to make the step by step.
❤️Until the next post.
✨RESULTADO: | ✨RESULT:


Todas las fotografías son de mi propiedad.
Separador y Fotos editadas en Canva
All photographs are my property.
Photos edited in Canva
Posted Using InLeo Alpha
Amiiiigaaaaaa🩷
Que tiernos y hermosos te han quedado estos imanes, me encantan y no logro decidir cuál es mi favorito!
Amii súper lindos, me encantan, se ven muy tiernos y cuchis, el lacito les quedó precioso
Quedaron muy lindos. Para la nevera son especiales.
Muchas gracias! Me alegra mucho que te haya gustado ✨💕
Demasiado cuchi 😍
Ay! Muchas gracias bella 💕. Me alegra que te haya gustado esta idea de imanes 🤭
Saludos.
Ayyy pero que cosita más linda y tierna 🥹 felicidades por hacer siempre un hermoso trabajo. 🌼
Tan linda Ami! Tu siempre que pasas dejas un lindo comentario y lo agradezco mucho.💕✨
Looks wonderful.
Thank you very much! I'm glad you liked this idea of magnets. Greetings ✨
Te quedaron hermosos 🥹❤️ Olivia quiere unos pajaritos para la nevera
Gracias amiga linda! Ay 🥹 tan hermosa la princesa de la casa 🥰
Hola Valen, que hermosos que te quedaron estos adornos. Se ven muy adorables, me gusta el efecto del rubor en ellos. Gracias por compartir, que tengas buen día ❤️
Hola Laura! Me alegra que te hayan gustado estas decoraciones.💕
Así es, el toque de rubor le da un aspecto tierno y delicado.
Muchas gracias, que tengas una linda noche.✨💕
Hola amiga linda, se ven tan lindas tus creaciones. Las neveras lucen bellas con estos imanes.
Hola Ami bella! Totalmente,los imanes le dan un poco de vida y color a las neveras 🤭.
Gracias por comentar Ami 💕
Awww que bonito valen 🥰🥰🥰
Muchas gracias Yage 🤭💕
Que cositas tan preciosas, te quedaron hermosos Ami 💕
Gracias mi Vane! Después te mando unos 🤭💕