Hello dear creative friends!!! I hope everyone is well and have a great start to the weekend. Today I am going to show you how to make a beautiful and delicate ballet dancer.
Hola queridos amigos creativos!!! Espero estén todos muy bien y tengan un excelente comienzo del fin de semana. Hoy les voy a mostrar como hacer una hermosa y delicada bailarina de ballet.
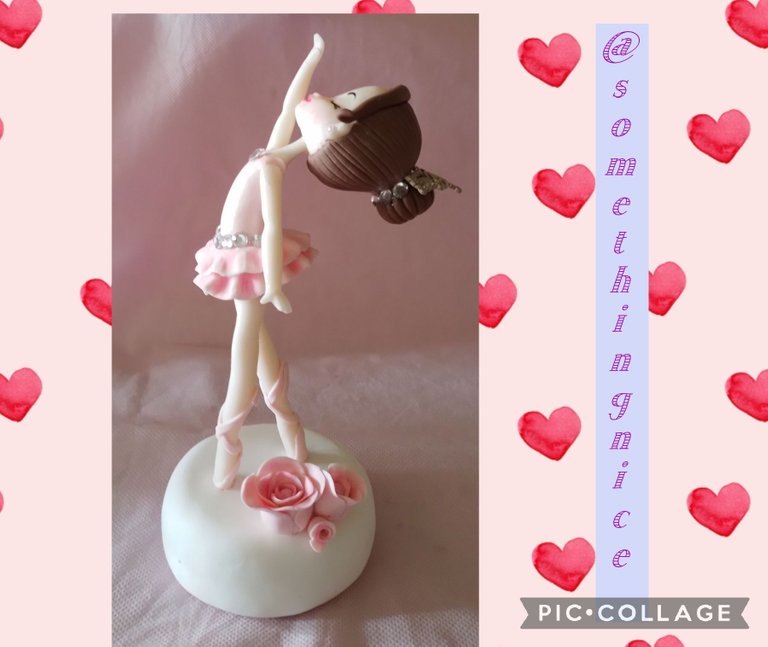
I made this beauty of work with an image from Pinterest. Here I leave the link https://pin.it/1u3l31m
Esta belleza de trabajo lo hice con una imagen de Pinterest. Aquí les dejo el link https://pin.it/1u3l31m
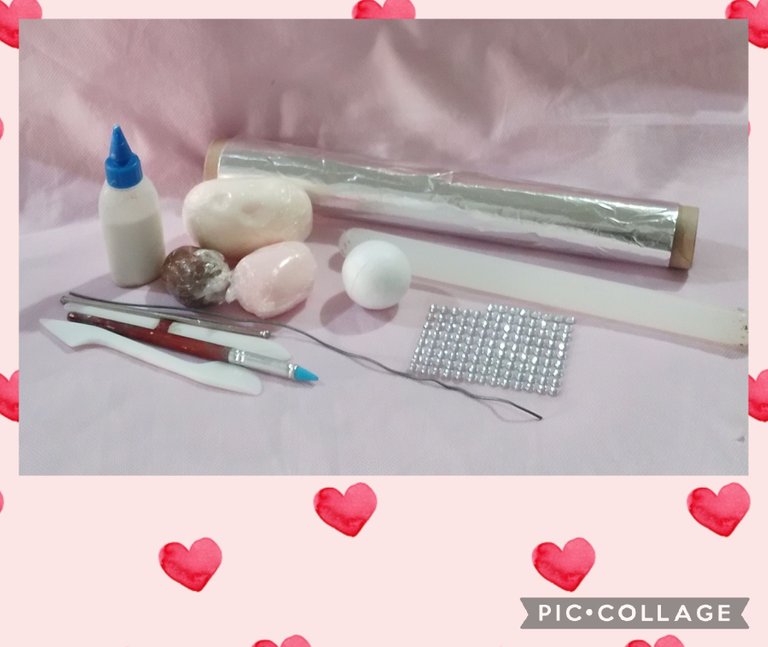
Materials
🩰 cold porcelain
🩰 vinyl glue
🩰 steks
🩰 rolling pin
🩰 Styrofoam sphere
🩰 round cutters
🩰 piece of wire
🩰 aluminum foil
🩰 paper tape
🩰 rhinestones (optional)
Materiales
🩰 porcelana fria
🩰 cola vinilica
🩰 estecas
🩰 palo de amasar
🩰 esfera de telgopor
🩰 cortantes redondos
🩰 trozo de alambre
🩰 papel de aluminio
🩰 cinta de papel
🩰 strass (opcional)
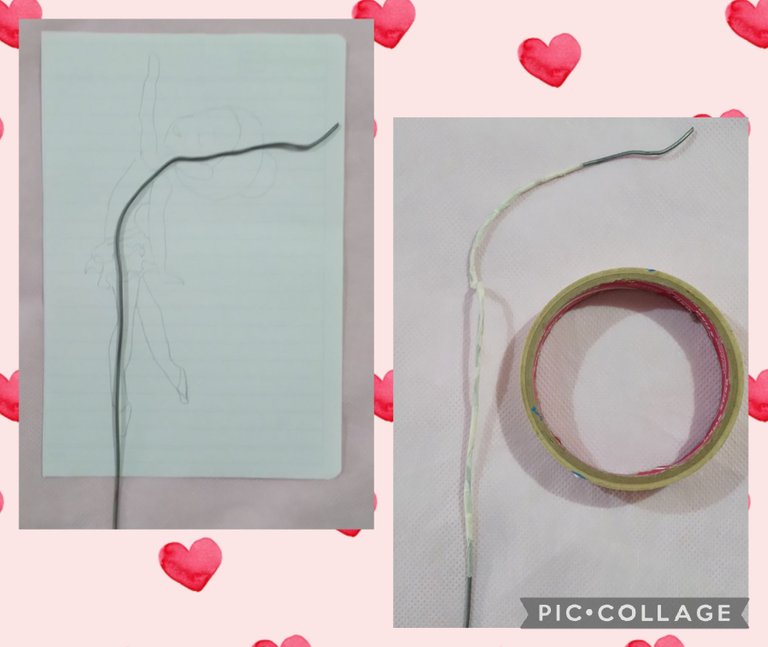
Print or draw the image, use a piece of wire that goes from the head to the tip of the feet and above to be able to embed it in the base. Copy the position of the body. Cover the wire with paper tape.
Imprimir o dibujar la imagen, usar un trozo de alambre que vaya desde la cabeza hasta la punta de los pies y sobre para poder incrustarla en la base. Copiar la posición del cuerpo. Cubrir el alambre con cinta de papel.
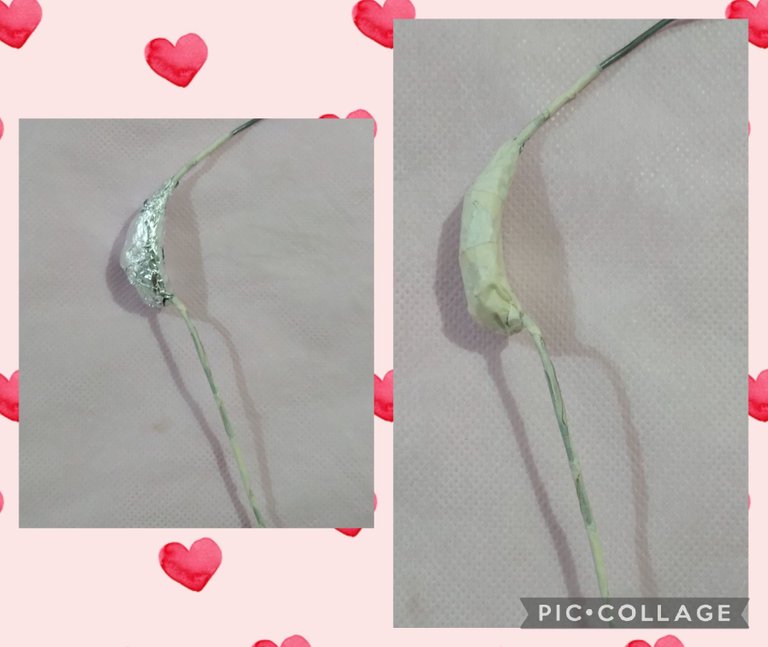
Form the body on the wire with the aluminum foil. Cover everything with the paper tape.
Formar el cuerpo sobre el alambre con el papel de aluminio. Cubrir todo con la cinta de papel.
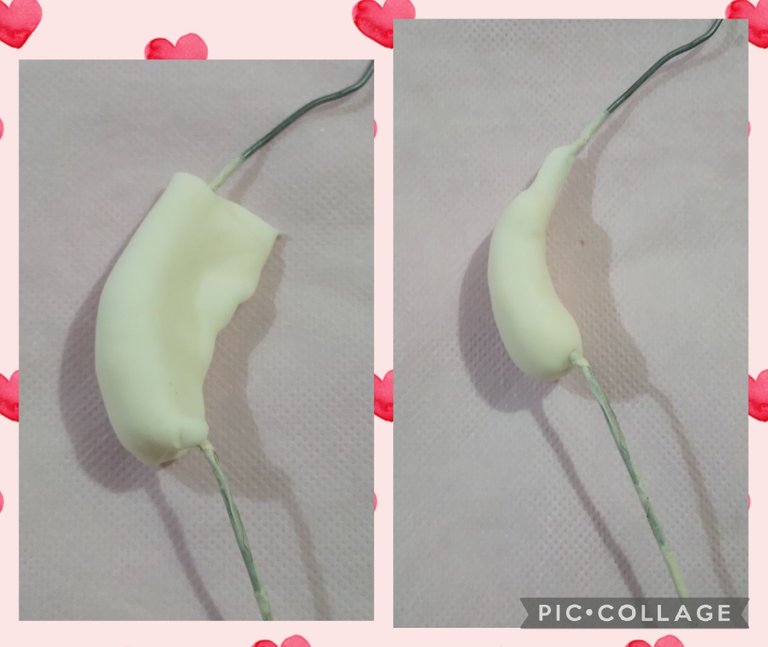
Stretch skin-colored cold porcelain, cover the body and remove the excess.
Estirar porcelana fria color piel, cubrir el cuerpo y quitar el excedente.
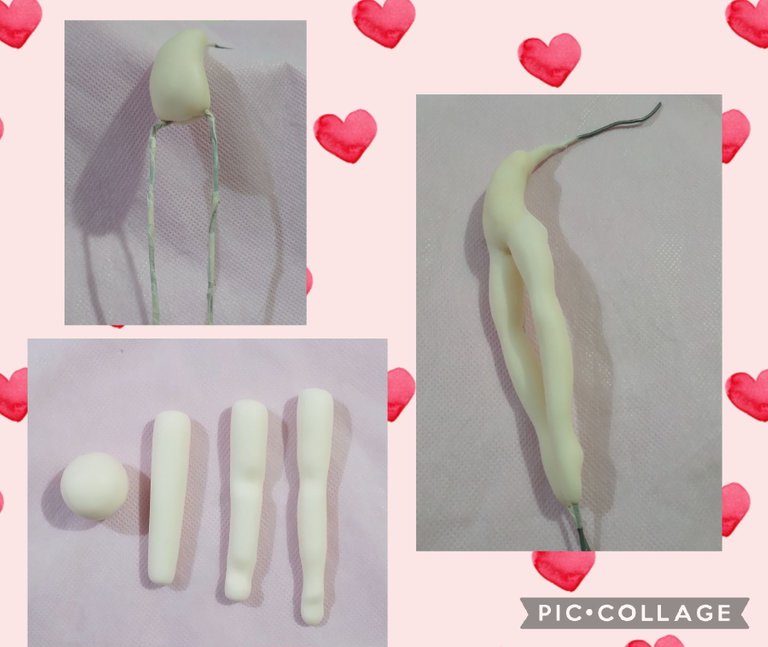
Add another piece of wire for the other leg.
For the legs, make two equal balls, stretch leaving a thinner end, mark in the middle for the knee and in a quarter for the foot, give the final touches so that everything is well formed. Glue the legs embedding one in each wire, melt the joint with water.
Agregar otro trozo de alambre para la otra pierna.
Para las piernas hacer dos bolitas iguales, estirar dejando un extremo más fino, marcar en el medio para la rodilla y en un cuarto para el pie, dar los toques finales para que quede bien formado todo. Pegar las piernas incrustado una en cada alambre, fundir la unión con agua.
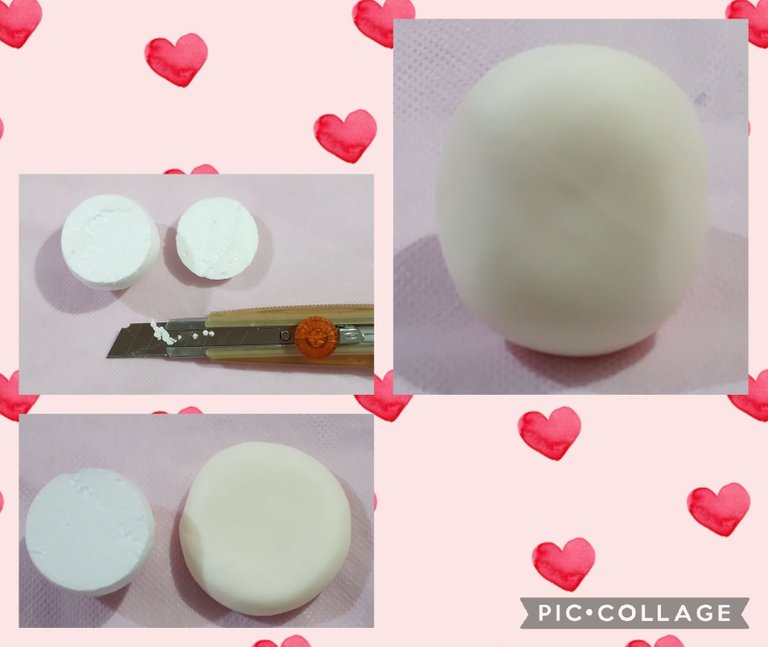
For the head, remove a portion of the styrofoam sphere, make a skin-colored ball, flatten and place on the flat part of the sphere and close.
Para la cabeza quitar una porción a la esfera de telgopor, hacer una bolita color piel, aplanar y colocar sobre la parte plana de la esfera y cerrar.
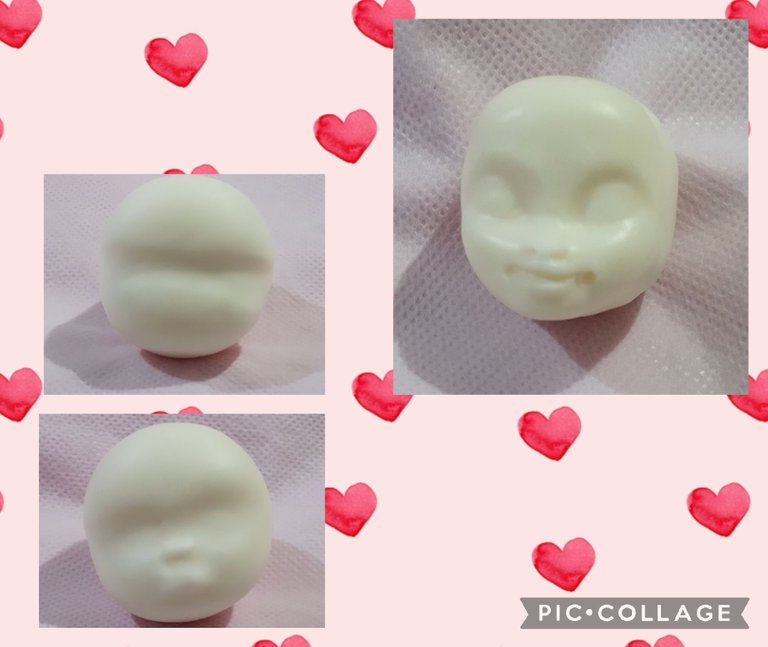
Mark the separation of the face and the forehead, join a little dough to form the nose, mark the nostrils, mark the eye sockets and form the mouth.
Marcar la separación de la cara y la frente, juntar un poquito de masa para formar la nariz, marcar los orificios nasales, marcar la cuenca de los ojos y formar la boca.
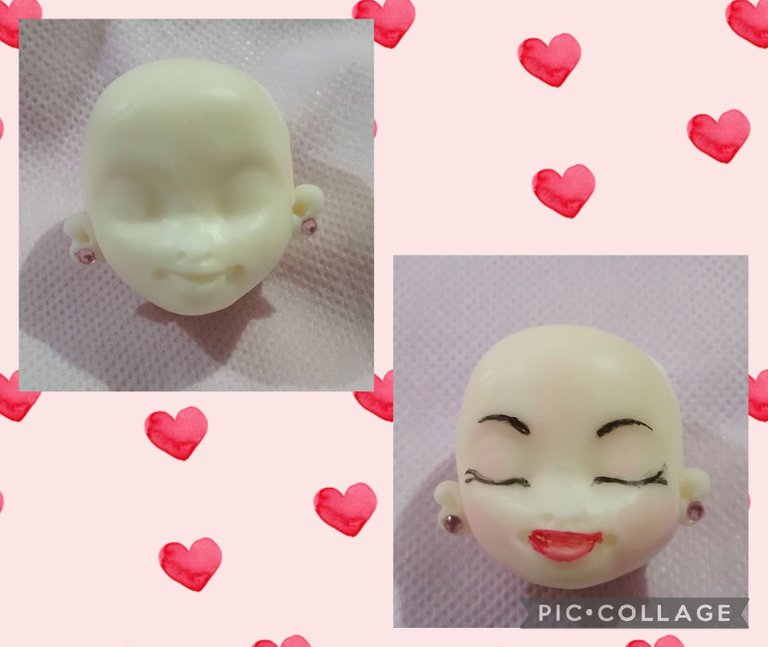
For the ears, make two equal balls, stretch them in the shape of a cylinder, glue and hollow out the center, add a small strass to simulate the rings.
With a black marker draw the eyes and eyebrows, with a pink marker paint the lips.
Para las orejas hacer dos bolitas iguales, estirar en forma de cilindro, pegar y ahuecar en el centro, agregar un pequeño strass para simular los aros.
Con marcador negro dibujar los ojos y las cejas, con marcador rosado pintar los labios.
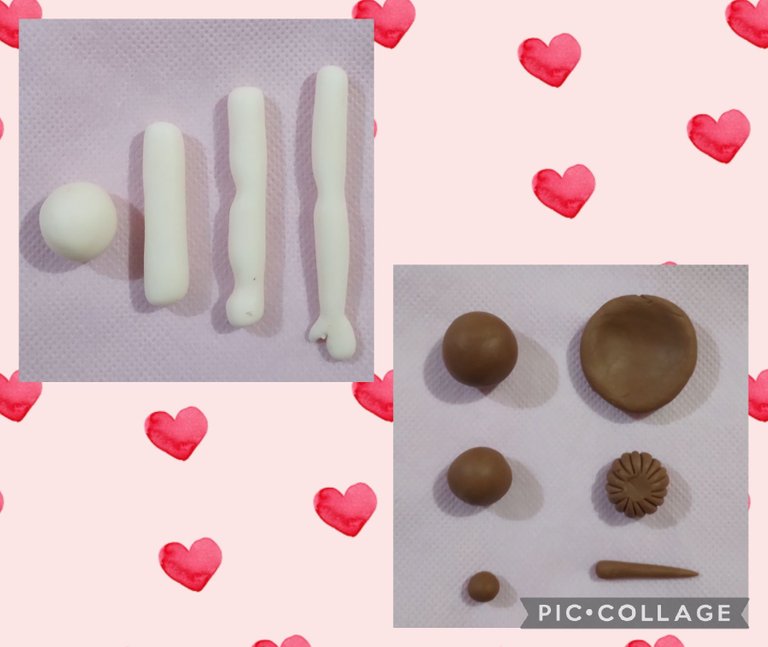
For the arms, make two equal balls, stretch leaving a thinner end, mark in the middle for the elbow and in a quarter for the hand, flatten and remove a portion in the shape of a "1" to form the thumb.
For the hair, make a ball of the desired color, form a helmet. For the bun, make a smaller ball, flatten it a bit and mark lines to simulate the hairs. For the bangs, make two little balls and stretch them in the shape of an elongated teardrop.
Para los brazos hacer dos bolitas iguales, estirar dejando un extremo más fino, marcar al medio para el codo y en un cuarto para la mano, aplanar y quitar una porción en forma de "1" para formar el dedo pulgar.
Para el pelo hacer una bolita del color deseado, formar un casco. Para el rodete hacer una bolita más pequeña, aplanar un poco y marcar líneas para simular los pelos. Para el flequillo hacer dos bolitas y estirar en forma de lágrima alargada.
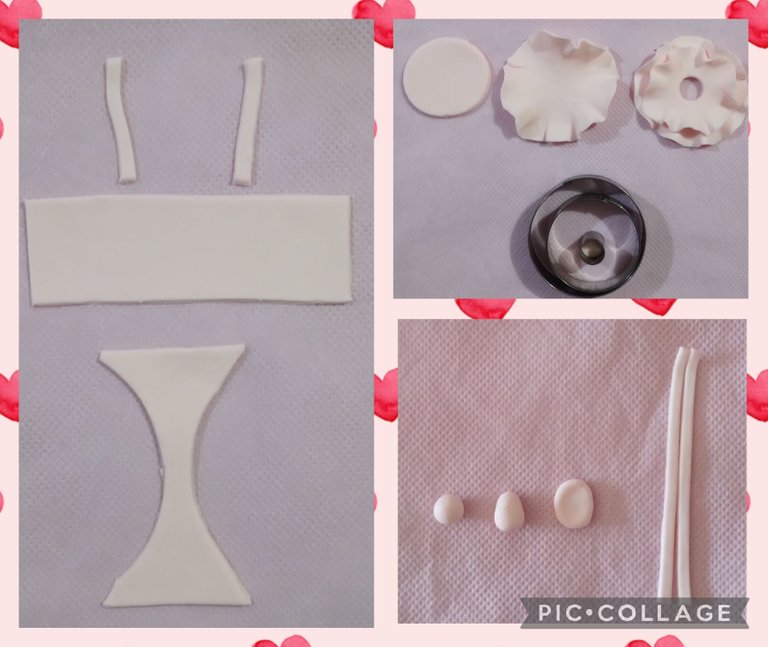
For the mesh, cut two straps for the straps, a rectangle for the torso and make the panties in one piece. Paste everything and erase the union with water so that there is a whole mesh.
For the skirt, cut two circles of different sizes, refine the edges so that it is wavy, overlap and remove a circle in the center to be able to place it.
For the slippers, make two equal balls, shape them into a drop and flatten them, cut two strips.
Para la malla, cortar dos tiras para los breteles, un rectángulo para el torso y de una sola pieza hacemos la bombacha. Pegar todo y borrar la unión con agua para que quede una malla entera.
Para la falda cortar dos círculos de diferentes tamaños, afinar los bordes para que quede ondulado, superponer y quitar un circulo en el centro para poder colocarla.
Para las zapatillas hacer dos bolitas iguales, dar forma de gota y aplanar, cortar dos tiras.
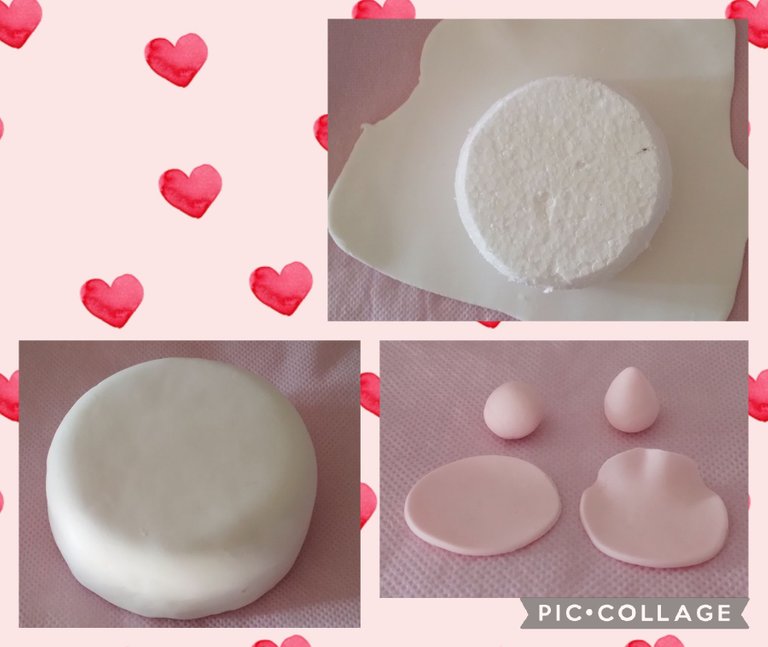
For the base, roll out the dough, glue the styrofoam circle, remove the excess. Repeat the process on the other side.
For the roses, make a small ball, shape a drop for the center and for the petals cut circles of different sizes that we narrow at the edges and glue by overlapping around the drop.
Para la base, estirar masa, pegar el círculo de telgopor, quitar el excedente. Repetir el proceso del otro lado.
Para las rosas hacer una bolita, dar forma de gota para el centro y para los pétalos cortar círculos de diferentes tamaños que afinamos en los bordes y pegamos superponiendo alrededor de la gota.
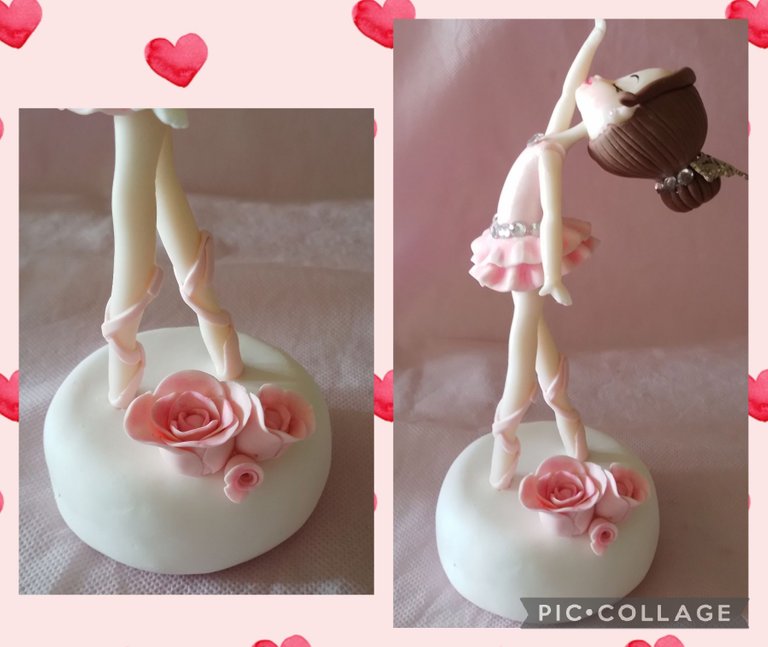
Join the pieces with vinyl glue, decorate the waist and the bun with strass. Finally makeup.
For this post I took photos with my Samsung Galaxy A03 cell phone and used the PicCollage app and Google translate.
I hope this work is to your liking, the truth is that I loved it. Greetings. Andrea💜💜💜
Unir las piezas con cola vinilica, decorar la cintura y el rodete con strass. Por último maquillar.
Para este post tomé fotos con mi teléfono celular Samsung Galaxy A03 y utilicé la aplicación PicCollage y el traductor de Google.
Espero que este trabajo sea de su agrado, la verdad que a mi me encantó. Saludos. Andrea💜💜💜
Mas que un buentrabajo es ungranregalo para la comunidad: Gracias por compartir!
Que lindas palabras @divergente1 muchas gracias 😊💜
Thank you for sharing this post in the DIYHUB Community!
Your content got selected by our fellow curator semarekha & you just received a little thank you upvote from us for your great work! Your post will be featured in one of our recurring compilations which are aiming to offer you a stage to widen your audience within the DIY scene of Hive. Stay creative & HIVE ON!
Please vote for our hive witness <3
Beautiful creation :) @tipu curate 3
Upvoted 👌 (Mana: 0/42) Liquid rewards.
Hi @sharminmim 👋 thank you very much 😊
You're welcome :)