Repository
Project Repository
https://github.com/pckurdu
https://github.com/pckurdu/standart-dialog-in-electron
What Will I Learn?
You will learn what the dialog module in electron
You will learn how to use open dialog and save dialog and message box and error box methods in electron
You will learn what are the ipcRenderer and ipcMain modules and what does it do in electron
You will learn how to read and write files with file system in electron
You will leran how to filters in dialog modules
You will learn how icon is added to dialog windows in electron
Requirements
Atom Editor:https://atom.io/
Electron: https://electronjs.org/
Difficulty
Intermediate
Tutorial Contents
In this tutorial I will teach standard dialog modules and examples of use in electron. In addition to being the main location dialog module, I will also show the ipcRenderer module and the ipcMain module and the file system issues. Thus, you will be able to understand the file read and write operations in the electrons and the communication between the main and renderer processes.
You may need to open a file in your desktop application, or you may need to save a typed text. You may need to receive a message about an error or an error while performing these operations.
Electron offers us an API to create native communication boxes. Using this API, we can easily do the above. All we need to do is use the methods contained in this API. This API is named dialog.
There are a few things you need to know about the dialog module before you start. Dialog module works only in main process. It also runs after the dialog module app module is loaded. If you want to run in the renderer process, we have to define the remote module.
In this dialog module, I'll show you the 4 methods it contains. Let's first explain these methods and then go through the detailed examples.
Methods
1-dialog.showOpenDialog()
With this method we can view files.
2-dialog.showSaveDialog()
With this method we can save it as a file.
3-dialog.showMessageBox()
With this method, we can forward our messages to the end user.
4-dialog.showErrorBox()
With this method, we can inform the end user in case of an error.
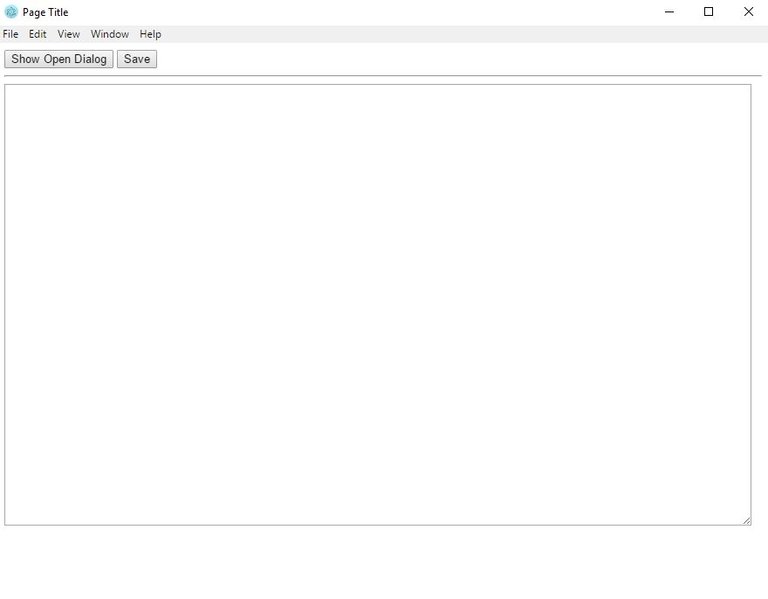
Now that I have shown how the methods work ,let’s go sample. Place one textarea and place two buttons. Perform the process of opening a file from the buttons and the selected file should only have a .txt extension. After the file is selected, the text in it will be placed in the textarea . Once you have made the necessary changes to this text, click on the second button to save it. If an error is encountered during the save operation, a warning message pops up. If no error occurs, create a message that says the operation succeeded.
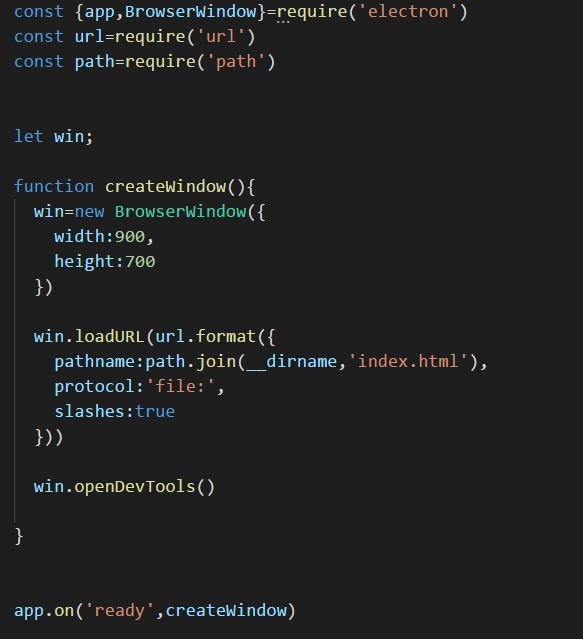
First, let's write our electron codes for the electron application to the main.js file.
Now I can start typing my codes.
showOpenDialog()
first we start with the showOpenDialog method.
Let's open the index.html file and place two buttons and one textarea
I said that the Dialog module only works in the main process. So I need to communicate my renderer process and main process. I will use the ipcRenderer and ipcMain modules to do the communication. I need to define it first to use the ipcRenderer module.
We need to send the clicked information of the button to the main process so that we can work with dialog methods. We will perform this sending by the send method of ipcRenderer module. The method of sending is to send a piece of information to the other side. When the button is clicked, run a function and send the information of this function to the main process
Now we can capture the information that the button is clicked with the open-dialog name.
Let's open the Main.js file.
Here we must define the ipcMain module to communicate with the process. We also need to define a dialog module to perform dialog operations. Finally, we need to define a file system to access the data in the selected file.
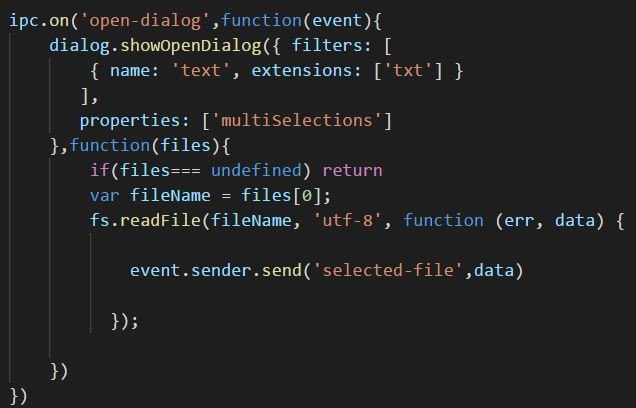
Let's write the showOpenDialog method when the button is clicked. So you choose the file by ipcMain on method.
We can restrict the files that we want to be selected with showOpenDialog method. With the filters feature, we can set the name and extension of the file that we want to be selected as an option.
We can also decide which properties to use with properties. The following features are available:
openFile- Allow files to be selected.
openDirectory- Allow directories to be selected.
multiSelections- Allow multiple paths to be selected.
It is possible to use these features together.
The callback function of the showOpenDialog method can access the selected file. The contents of the file can be read using the file system. The event in the ipcMain on method can be used to send the renderer process after reading the contents of the file.
The following code snippet appears when we collect the above. This code snippet chooses a file and restricts it to a .txt extension. It also allows you to select more than one file. After the file is selected, the renderer processes the data in the process.
Open the index.html page. In this page, we will catch the data coming from the main process and write it to the textarea
We can run the application
When you click Show Open Dialog button, the window to select the file opens.
As you can see, we can only make files with .txt extension.
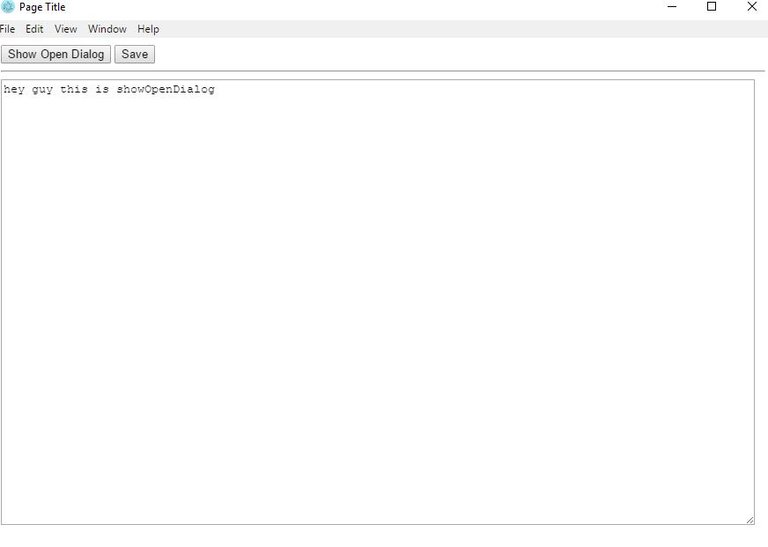
After I selected the file, the data in it was written to the textarea.
showSaveDialog()
Now that I have exported the data in the file to the textarea, I can do the save operation by making the necessary edits.
Open the index.html page.
Add the onclick event to the Save button
I want to save the textarea value to the save button and send it to the main process.
Let's open the Main.js file.
The ipcMain method needs to import data into the textarea data.
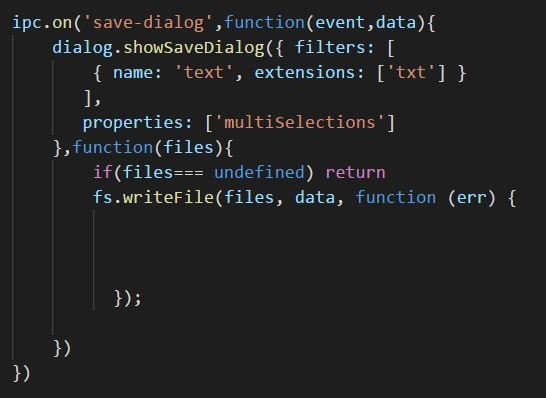
Using the file system writeFile method, we can save the data from the renderer process.
We used the showSaveDialog and writeFile methods to save the data.
showMessageBox()
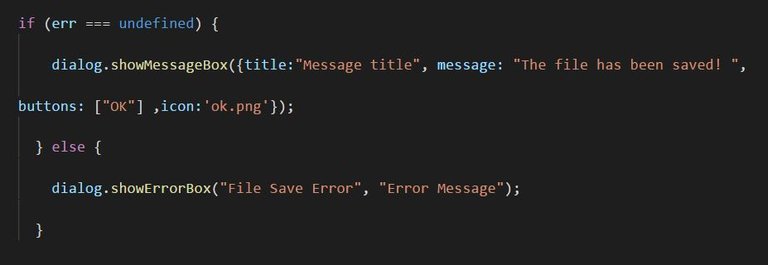
If we perform the save operation but leave the codes like this, there is no interaction, so we do not know that it is saved. After saving, we may print a message to the end user to find out that the file has been saved.
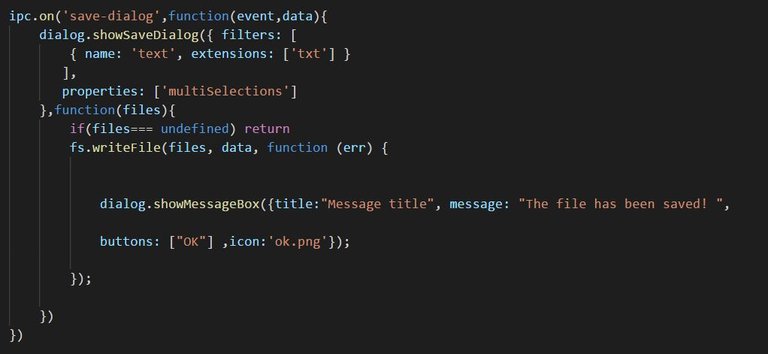
When using the message box, we can set many properties of the window. As an example, we can set title and message content and the icon to be used. It will suffice to place the folder where our main.js file is located.
If the save operation is successful, communicating our message
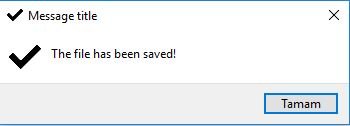
Our message will look like this.
showErrorBox()
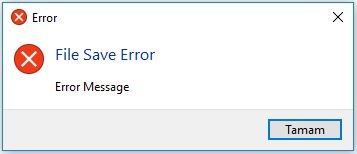
If we get an error while loading the file, we need to show the error message to the end user. For this we can use the showErrorBox method in the dialog module.
If we encounter any errors, the error message will be displayed on the screen
So we created a small desktop text editor. Thanks for be interested.
Proof of Work Done
https://github.com/pckurdu/standart-dialog-in-electron






Thank you for your submission. Your effort on contributing open source community is appreciated.
There are some key points missing in the contribution which we are looking for, to assure quality in contributions we reward. The contribution is not considered for the potential reward because of the reasons listed below:
Guideline Reference:
Considering the presentation of the contribution, I have some suggestions for your future contributions which might be helpful.
With this method, breaks the flow of the reading and irritate readers as a result. You can use colon punctuation in that kind of situations.I hope my clarification and suggestions are helpful enough to see you sharing better contributions for the open source community in the future.
Your contribution has been evaluated according to Utopian policies and guidelines, as well as a predefined set of questions pertaining to the category.
To view those questions and the relevant answers related to your post, click here.
Chat with us on Discord.
[utopian-moderator]Need help? Write a ticket on https://support.utopian.io/.
Hey @roj Here's a tip for your valuable feedback! @Utopian-io loves and incentivises informative comments.
Contributing on Utopian
Learn how to contribute on our website.
Want to chat? Join us on Discord https://discord.gg/h52nFrV.
Vote for Utopian Witness!
Comment deleted.
Yes @espoem ??
Hi, please make sure to use the correct tags when contributing to Uopian.io (second tag should be "tutorials").
Hi, I set the second tag as tutorials