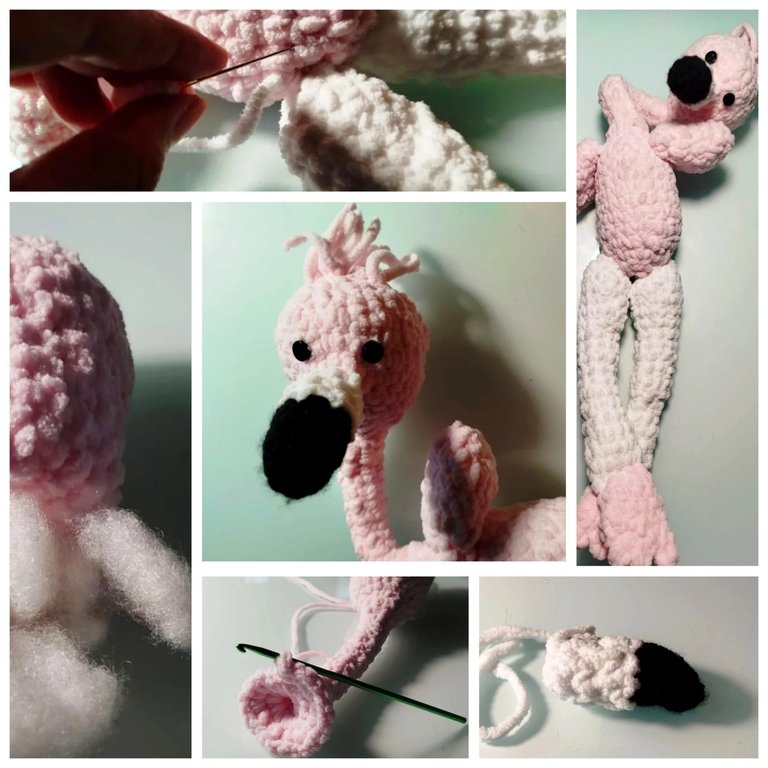
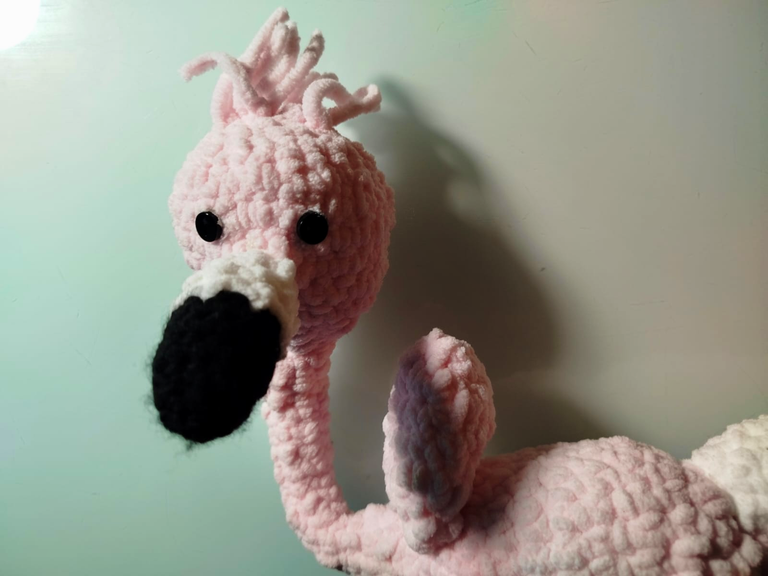
Crochet always surprises me—you never really know how things will turn out. I made a pink flamingo last night and hesitated to post this, but I changed my mind because it is funny!
Let’s just say it came out a bit awkward! But I think it has its own character.
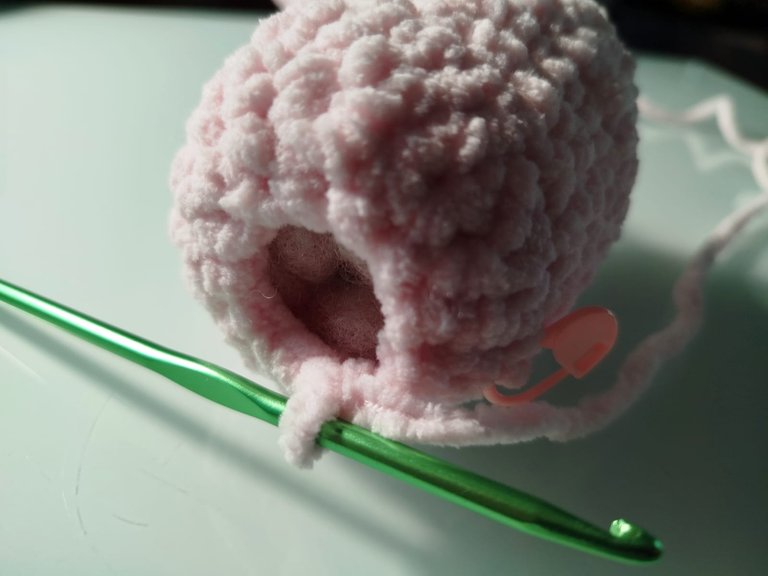
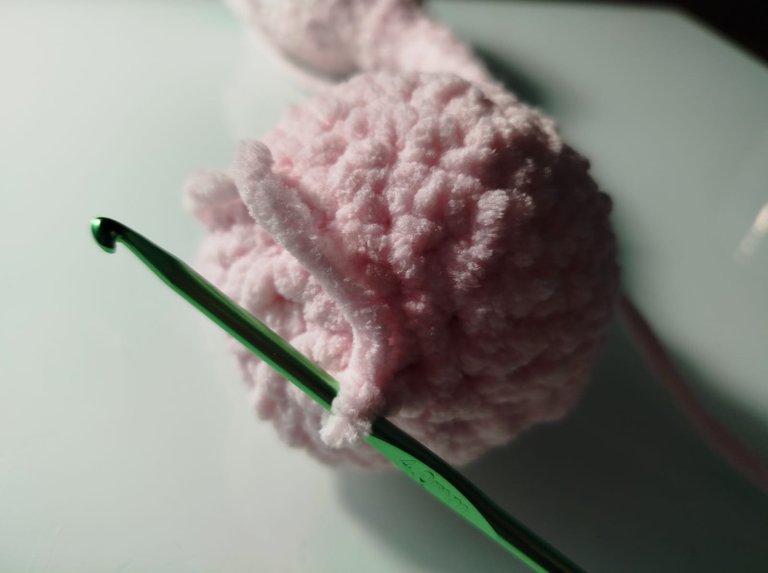
I used this super soft, fluffy yarn for the first time with my 4mm crochet hook, and it was so hard to see the stitches. I had to guess where to place them.
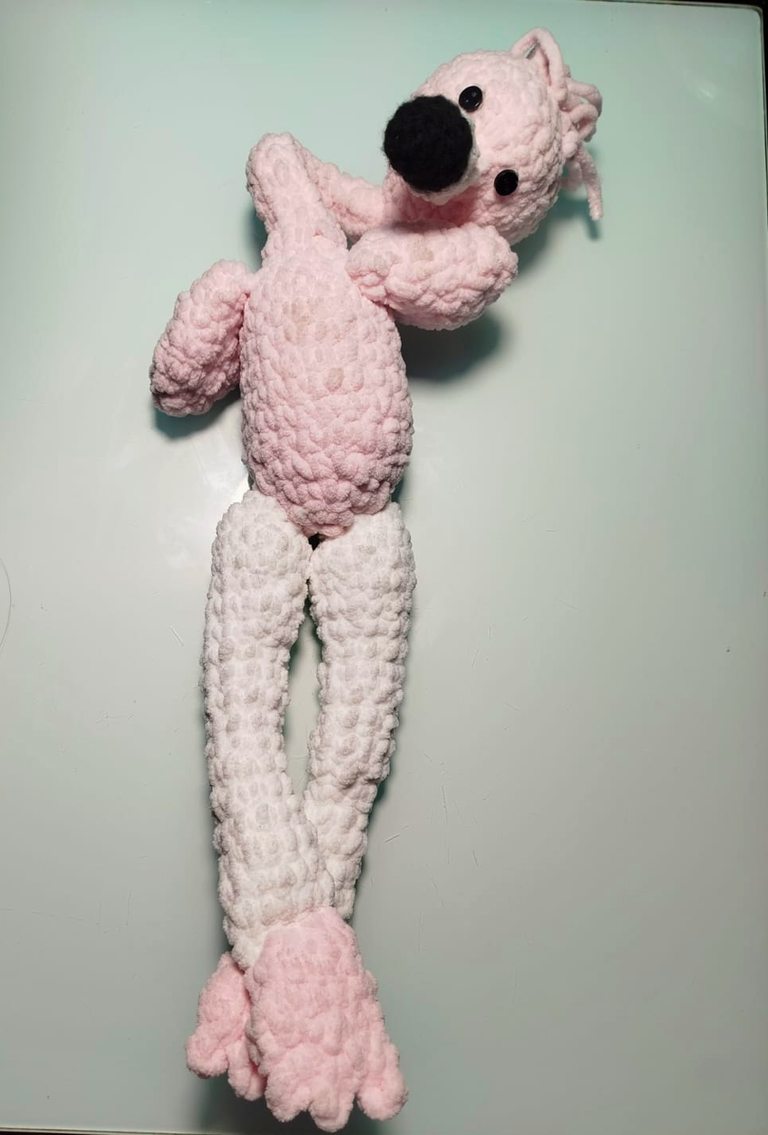
Halfway through, I almost gave up because it looked so silly. But I kept going, curious to see how it would end. In the end, it made everyone laugh, including me.
I documented a pattern if you fancy making this one or revising it to your preference.
Here it is 🦩
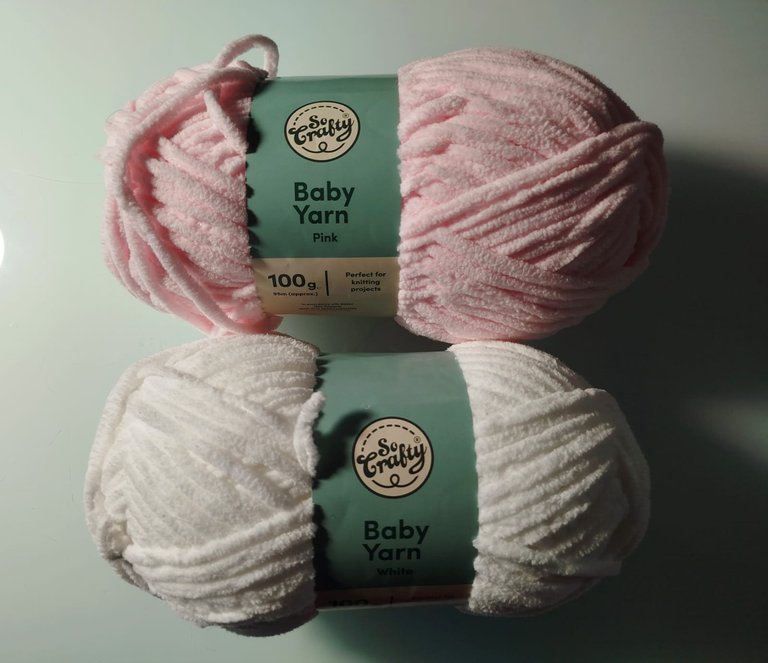
Materials Needed:
Yarn: Furry yarn in pink, white, black for beak.
Hook: 4 mm crochet hook.
Notions: Fiberfill stuffing, stitch markers, yarn needle, and buttons for eyes (optional).
Abbreviations 🦩
ch: Chain
sc: Single crochet
inc: Increase (2 sc in one stitch)
dec: Decrease (sc two stitches together)
sl st: Slip stitch
st(s): Stitch(es)
FO: Fasten off
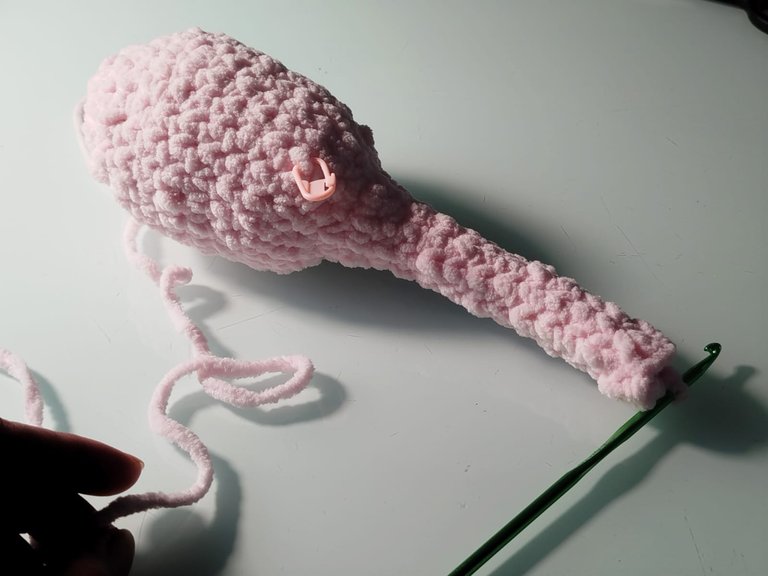
Body and Neck 🦩
Start with a magic ring using pink yarn; increase stitches in each round to form a sphere for the head.
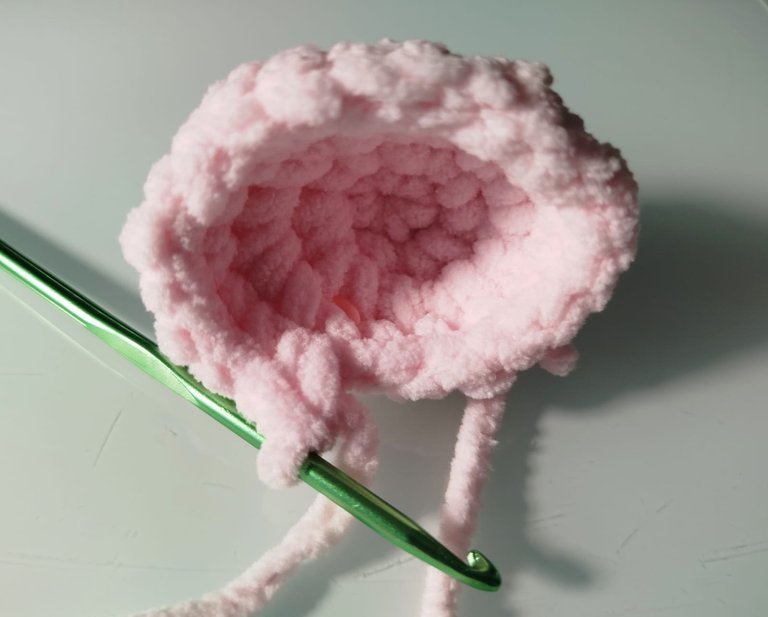
Round 1: MR, 6 sc in ring. (6)
Round 2: Inc in each st around. (12)
Round 3: (Sc in next st, inc) around. (18)
Round 4: (Sc in next 2 sts, inc) around. (24)
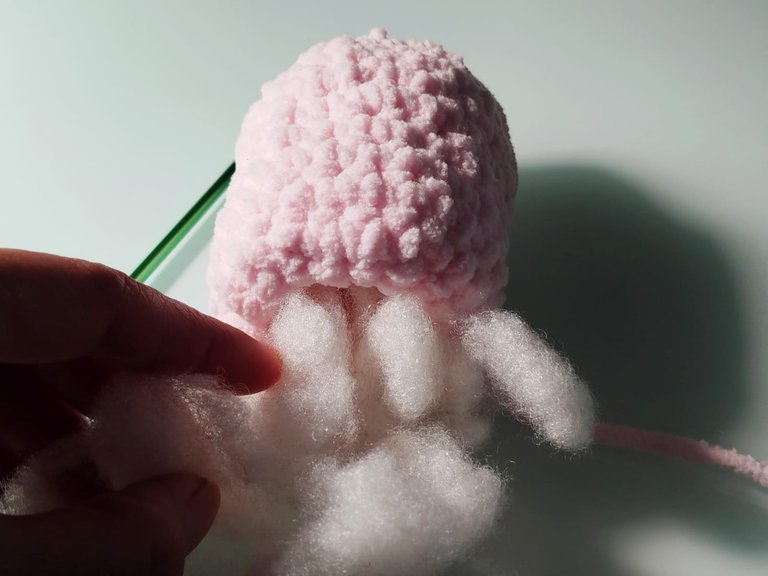
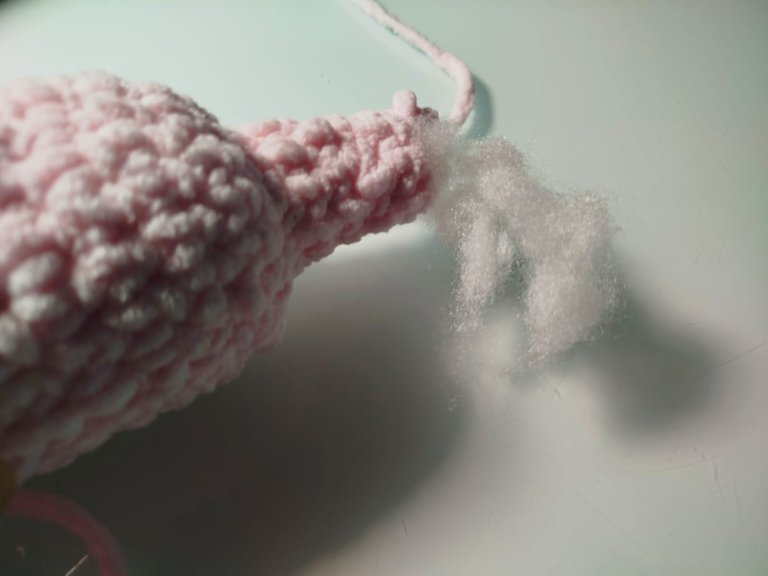
Insert stuffing before further decrease.
Rounds 5-10: Sc in each st around. (24)
Round 11: (Sc in next 2 sts, dec) around. (18)
Round 12: (Sc in next st, dec) around. (12)
Neck 🦩
Do more decrease if a thinner neck is preferred.
Round 1-12: Sc in each st around. (12) (adjust to your preferred neck length.)
Head 🦩
Without fastening off, continue working in rounds to create the head, decreasing stitches as you near the base.

Round 1: Inc in each st around. (12)
Round 2: (Sc in next st, inc) around. (18)
Round 3: (Sc in next 2 sts, inc) around. (24)
Rounds 4-8: Sc in each st around. (24)
Round 9: (Sc in next 2 sts, dec) around. (18)
Round 10: (Sc in next st, dec) around. (12)
Round 11: Dec around. (6)
FO, leaving a long tail for sewing.
Stuff firmly before closing.
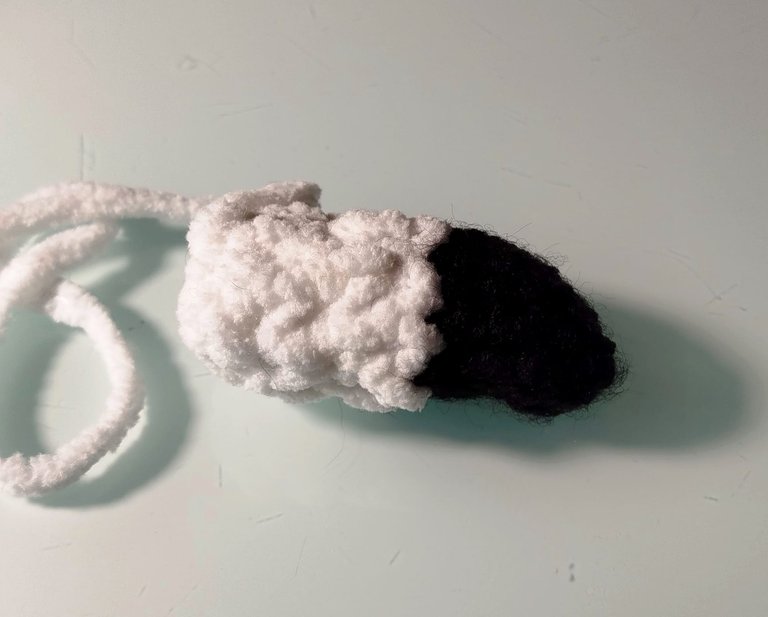
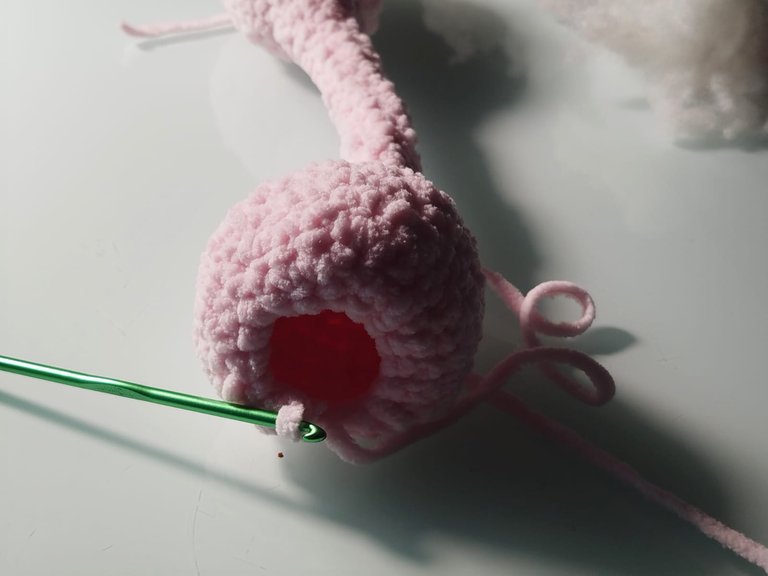
Beak 🦩
With black yarn, form a magic ring and crochet in rounds, switching to white yarn midway to achieve the flamingo's distinctive beak colouration.
Start with a magic ring.
Round 1: 4 sc in magic ring. (4)
Round 2: (Sc in next st, inc) twice. (6)
Switch to white yarn.
Round 3: Sc in each st around. (6)
Round 4: (Sc in next st, inc) around. (9)
Round 5: Sc in each st around. (9)
FO, leaving a tail for sewing.

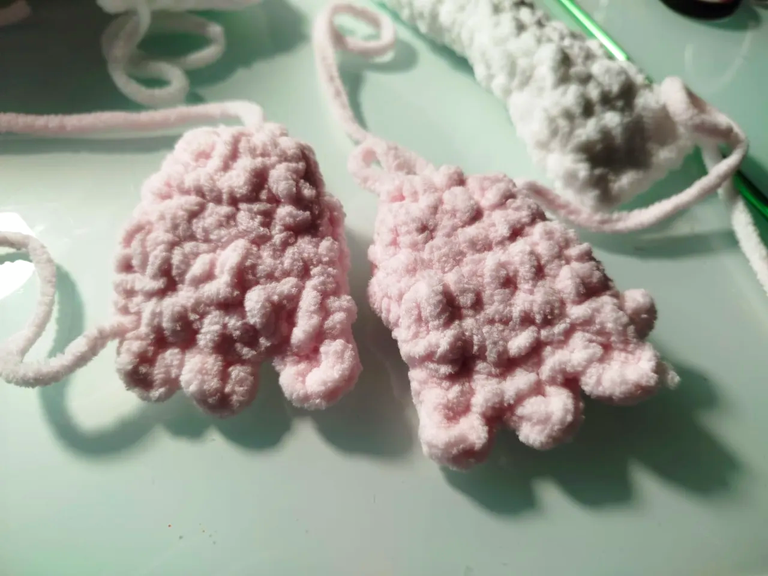
Wings (Make 2) 🦩
Create a magic ring with pink yarn and crochet in continuous rounds, increasing to form a flat, oval shape. Fasten off and sew each wing to the sides of the body.
With pink yarn, start with a magic ring.
Round 1: 6 sc in magic ring. (6)
Round 2: Inc in each st around. (12)
Round 3: (Sc in next st, inc) around. (18)
Rounds 4-5: Sc in each st around. (18)
FO, leaving a tail for sewing.
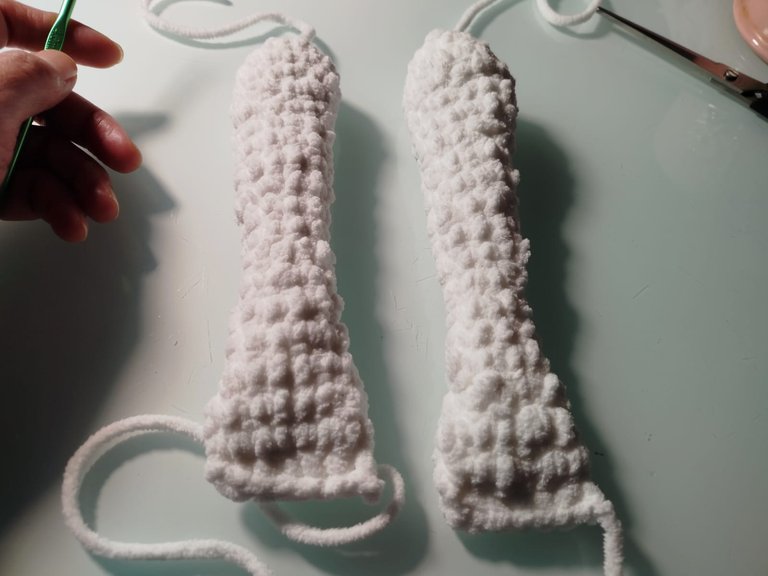
Legs (Make 2) 🦩
Using white yarn, start with a magic ring and work in rounds to create the length; lightly stuff, fasten off.
Round 1: Begin with a magic ring and work 6 single crochets (sc) into it. (6 stitches)
Rounds 2- 20: Sc in each stitch around. (12 stitches per round)
After completing Round 20:
Flatten the open end of the leg and crochet through both layers to close it.
Work 6 sc across the flattened end to seal it. (6 stitches)
Fasten off, leaving a long tail for sewing.
Feet (Make 2) 🦩
With pink yarn:
Round 1: Begin with a magic ring and work 6 sc into it. (6 stitches)
Round 2: Increase in each stitch around by working 2 sc in each stitch. (12 stitches)
Rounds 3-5: Sc in each stitch around. (12 stitches per round)
Make 3 picots stitches for the toes.
After completing Round 5:
Flatten the piece and crochet through both layers to close it.
Work 6 sc across the flattened end to seal it. (6 stitches)
Fasten off, leaving a long tail for sewing.
Sew the flattened end of each foot to the closed end of each leg.
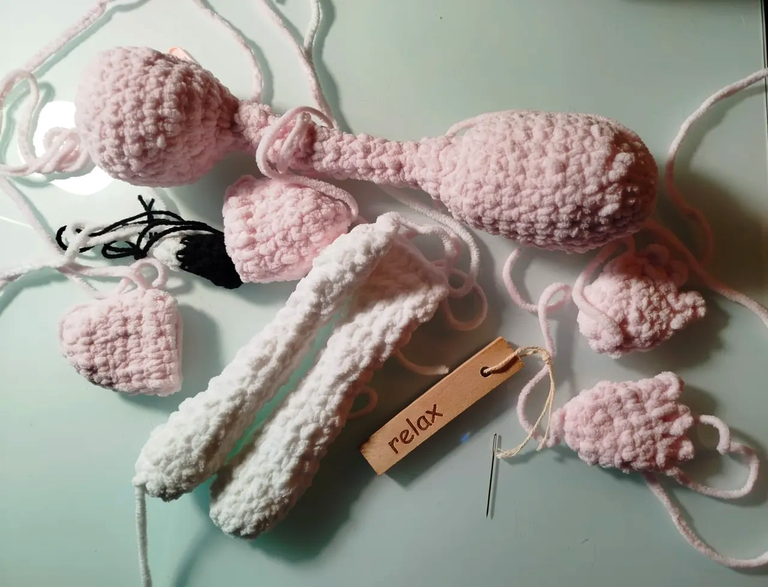
When all parts are done, go for a bit of rest and relax. I find that assembling them is the hardest part, and you really don't wanna mess up what you have worked hard for.
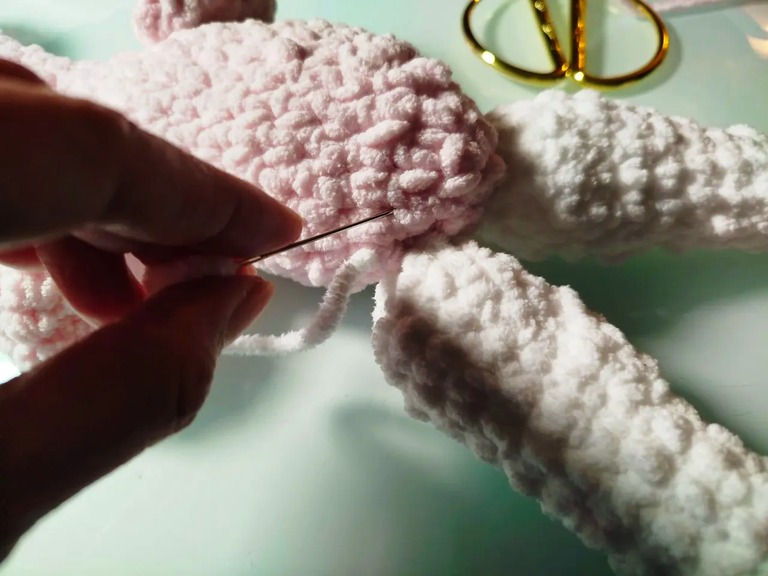
Making sure they are in the correct position.
All are attached except the eyes; mark the eyes with a pin. (oops, pinky, it's not time to chill yet!)
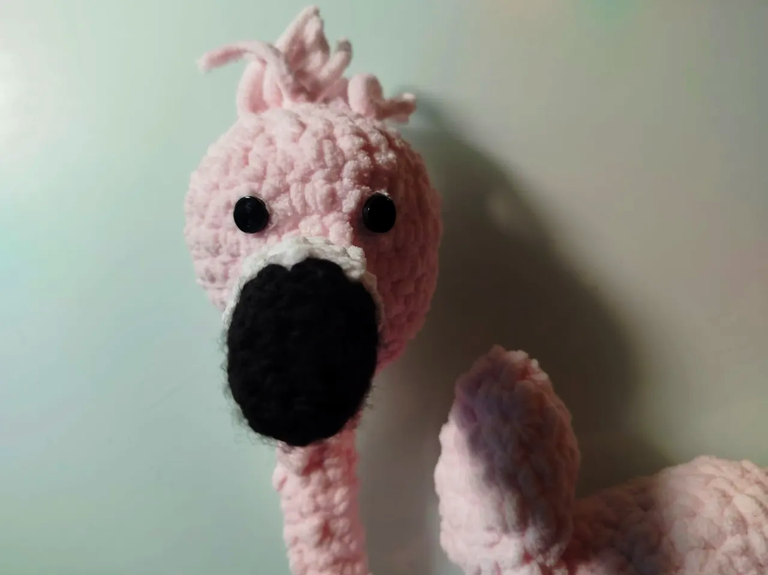
Attach the button eyes.
Add details, like hair, etc.
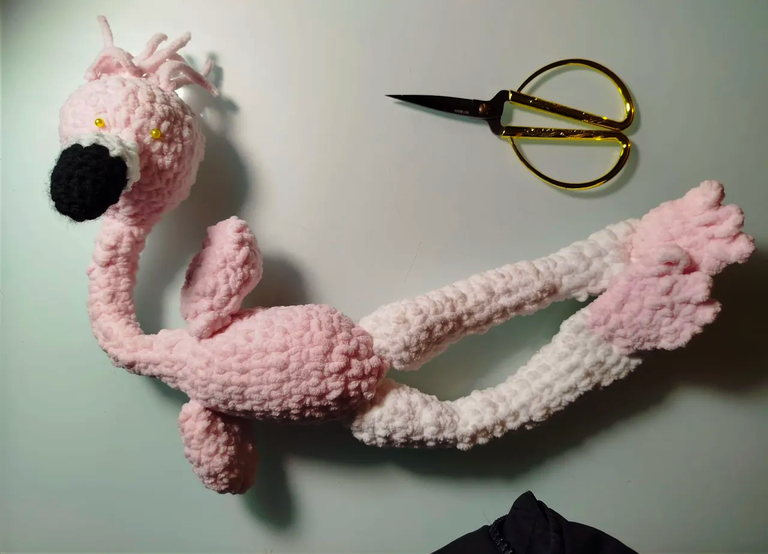
Done! Funny thing! 🤣
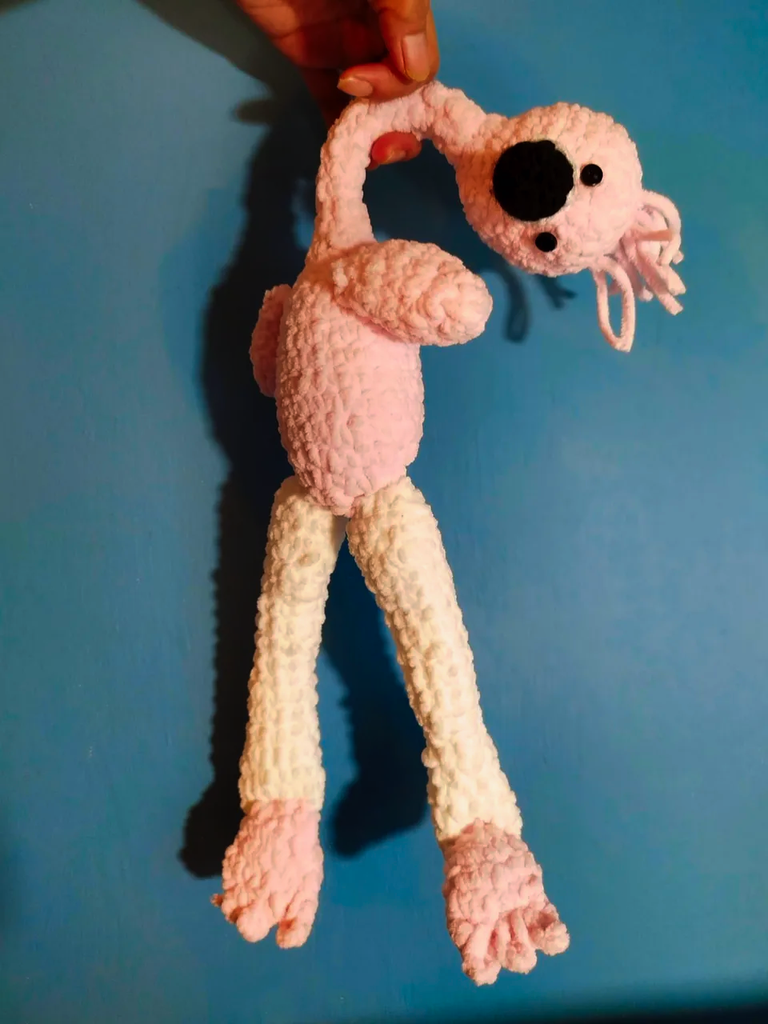
It is ok; I am not strangling her!
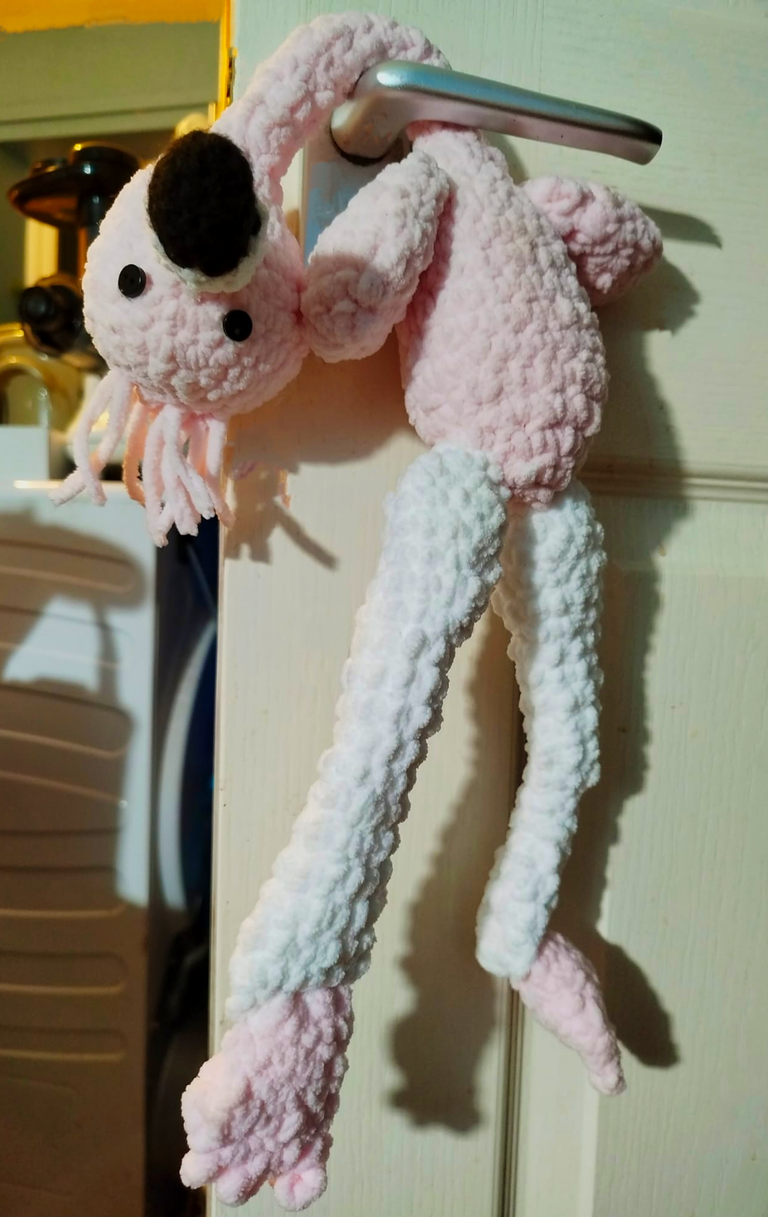
Great for doors, it will make you smile as you enter the room!
Have a lovely day!
Mariah 💗😊🦩
The rewards earned on this comment will go directly to the people( @theworldaroundme ) sharing the post on Reddit as long as they are registered with @poshtoken. Sign up at https://hiveposh.com. Otherwise, rewards go to the author of the blog post.
Great craft
Aww, thank you! 💗😊
🙏
🙏
Many thanks, 💗😊
You're welcome. I like the toy :)
Of course you had to publish it, he's quite a character, I'm glad you decided to do it. It's very cute and fun.
When we use different material these things can happen to us of getting lost in the knitting, try using a larger crochet hook.
Aww, thank you, great advice also; I did think of that but it was too late to change, haha! 💗😊
Aw, I think I know that yarn, it's very soft and beautiful. But I've never seen it in an amigurumi. This flamingo looks great! It has a slightly soft neck, but that's what makes it cute. It will definitely bring a lot of smiles. Thanks for sharing your project 💕.
Yes, it is very soft and nice and it made a few smile already. Thank you. 💗😊
Wow, wow, wow......this is such a beautiful Craft, I love it, I look nice and soft, you had amazing skill, well-done.
Thank you, I'm pleased you liked it. 😊🩷
Neat! I’ll share with my wife as she wants to re-learn crochet.
Aww, that's lovely. 😊🩷
i want to learn about the crochet, it so nice and interesting one
That's a lovely idea, you'll not regret it, you can make so many useful and entertaining things. Good luck. 😊🩷
That was fun to put it on the door. I haven't knitted with 4 mm crochet yet. I'm sure the dolls will be very big. I love the little legs of your Flamenco.
What a cute pink flamingo! Wow