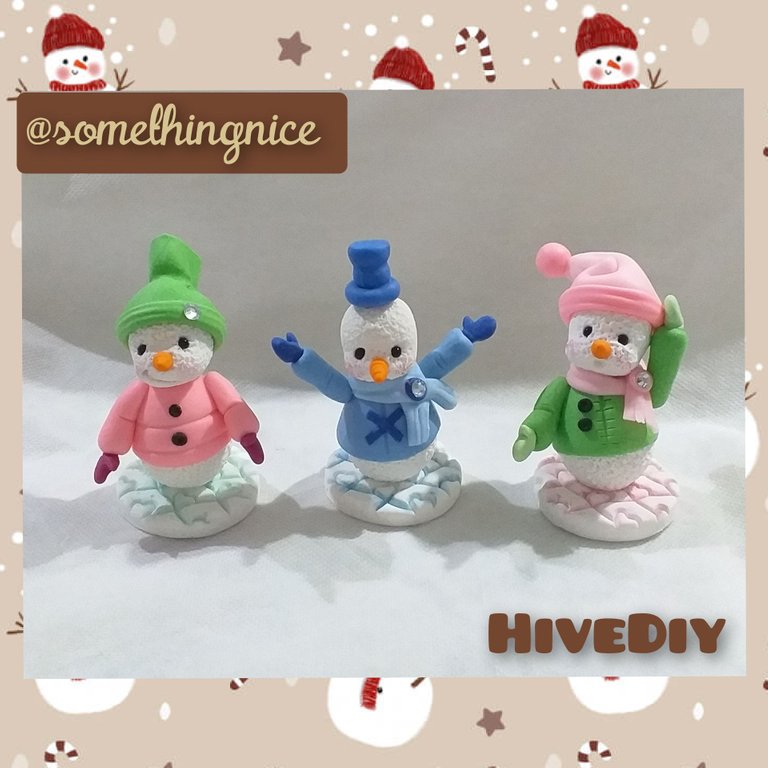
Good morning creative friends of #HiveDiy !!! I hope you are ending the week well. Today I am going to share with you the step by step of some beautiful snowmen to decorate some corner of the house.
Buenos días amigos creativos de #HiveDiy!!! Espero estén finalizando bien la semana. Hoy les voy a compartir el paso a paso de unos hermosos muñecos de nieve para decorar algún rincón de la casa.
I did this work like the last ones I published, following the step by step of a magazine by Leticia Suárez del Cerro from several years ago.
Este trabajo lo hice como los últimos que publiqué siguiendo el paso a paso de una revista de Leticia Suárez del Cerro de hace varios años.
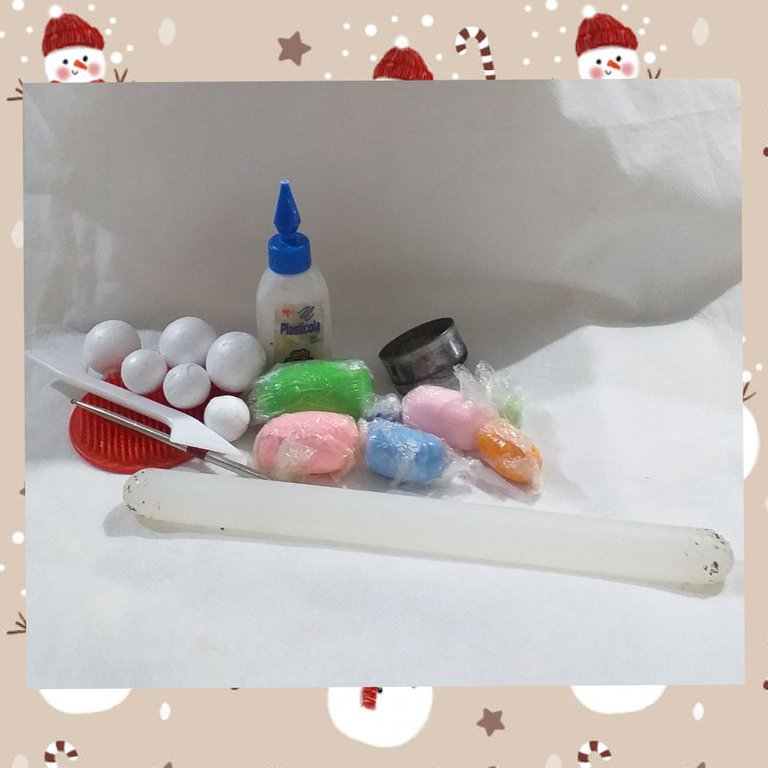
Materials
☃️ cold porcelain
☃️ vinyl glue
☃️ cuttings
☃️ rolling pin
☃️ Styrofoam spheres
☃️ black pearls
☃️ sharp
☃️ brush
☃️ strass
☃️ texture plate
Materiales
☃️ porcelana fría
☃️ cola vinilica
☃️ estecas
☃️ palo de amasar
☃️ esferas de telgopor
☃️ perlas negras
☃️ cortantes
☃️ cepillo
☃️ strass
☃️ placa texturadora
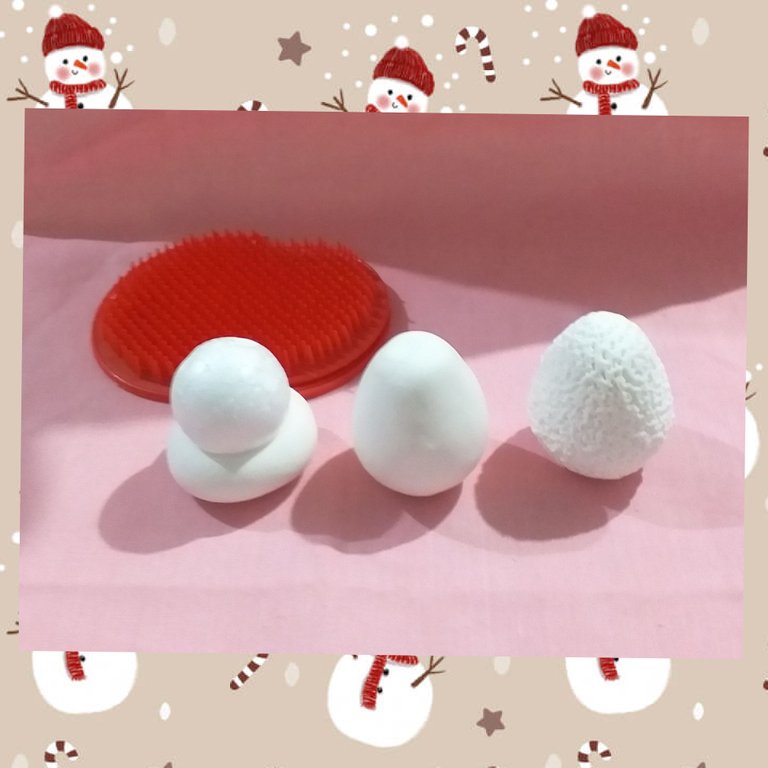
We start with the body using the larger sphere, make a ball, insert the sphere, close, shape a pear and texture with the brush.
Empezamos con el cuerpo usando la esfera de mayor tamaño, hacer una bolita, introducir la esfera, cerrar,dar forma de pera y texturar con el cepillo.
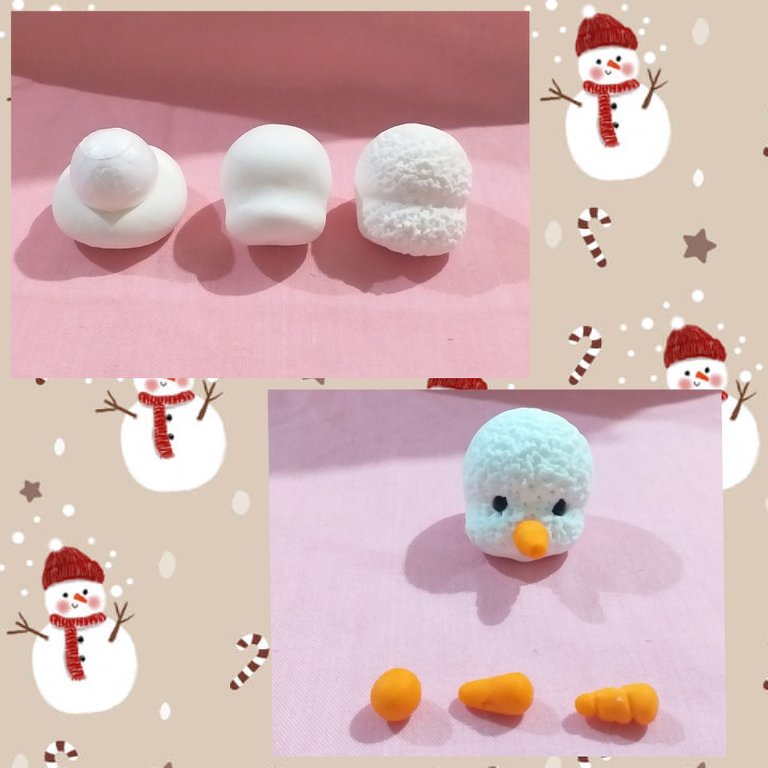
For the head, make a ball, insert the smallest sphere, close, gently mark the separation of the face and forehead. Texture with brush.
For the nose, make a ball, shape it into a cone and mark lines to simulate a carrot. Paste
Mark the eye sockets and put the black pearls.
Para la cabeza hacer una bolita, introducir la esfera más pequeña, cerrar, marcar suavemente la separación de la cara y la frente. Texturar con cepillo.
Para la nariz hacer una bolita, darle forma de cono y marcar líneas para simular una zanahoria. Pegar
Marcar las cuencas de los ojos y poner las perlas negras.
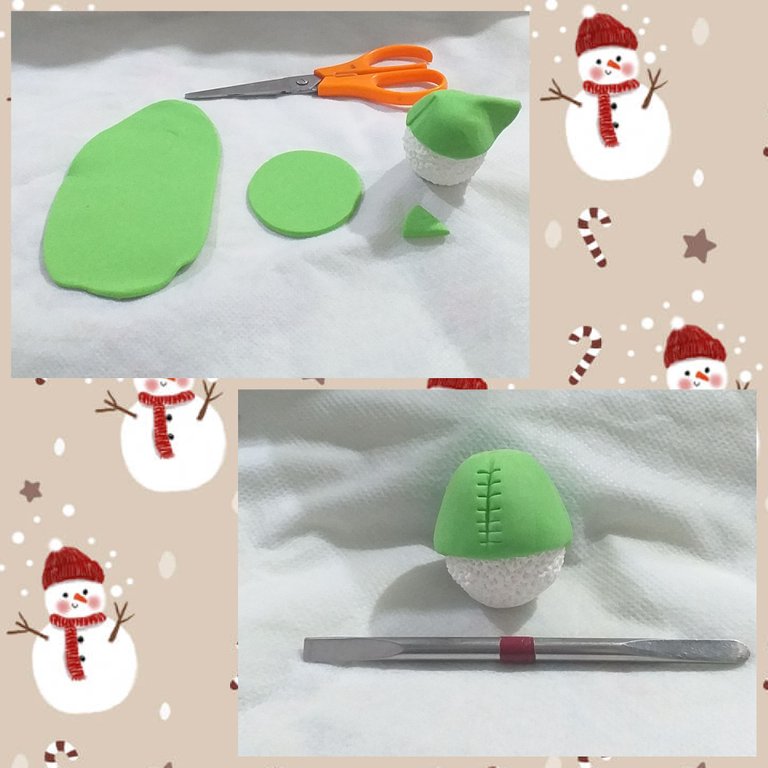
Stretch cold porcelain of the desired color, use the round cutter. Put the circle on the body, join the ends and cut off the excess.
On the front mark in the middle vertically and make short horizontal lines to make some detail.
Estirar porcelana fría del color deseado, usar el cortante redondo. Poner el círculo sobre el cuerpo,unir los extremos y cortar el excedente.
En el frente marcar a la mitad en forma vertical y hacer líneas cortas en forma horizontal como para hacer algún detalle.
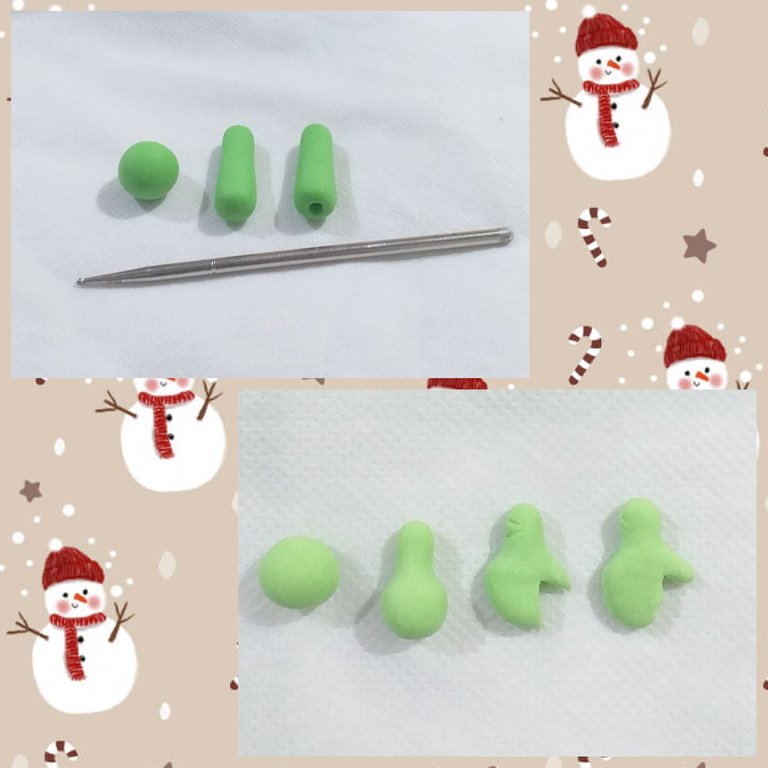
For the arms make two equal balls, stretch into a cylinder shape leaving a larger end and hollow out.
For the mittens, make two equal balls, stretch and mark the wrist, flatten, cut a "1" at one end and round.
Para los brazos hacer dos bolitas iguales, estirar en forma de cilindro dejando un extremo más grande y ahuecar.
Para las manoplas hacer dos bolitas iguales, estirar y marcar la muñeca, aplanar, cortar en un extremo un "1" y redondear.
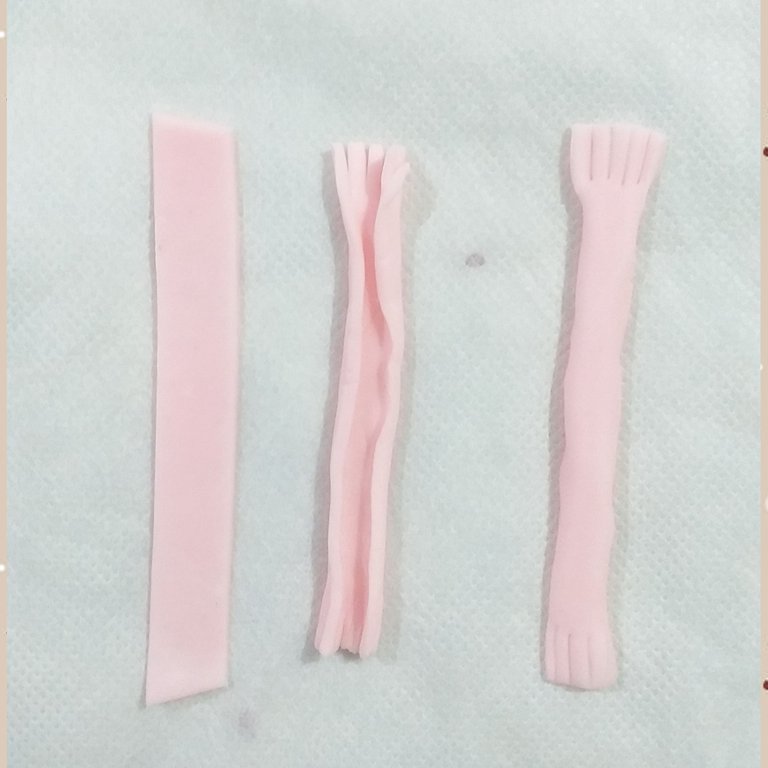
For the scarf, roll out dough and cut it into a rectangular shape, fold a little on each side and cut at the ends to simulate fringes.
Para la bufanda, estirar masa y cortar en forma rectangular, doblar un poco en cada lado y cortar en los extremos para simular los flecos.
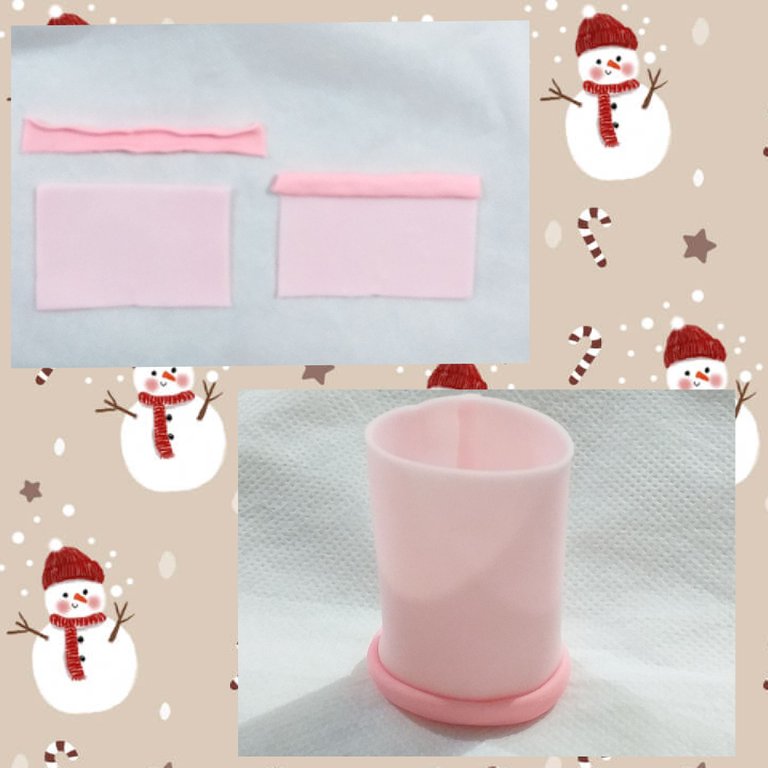
For the hat, stretch the dough in a rectangular shape and also a rectangular strip that we fold a little on each side, glue and give it a circular shape, melt the joint with water so that it is not noticeable. When we join it to the doll, gather.
Para el gorro estirar masa en forma rectangular y además una tira rectangular que doblamos un poco de cada lado, pegar ý dar forma circular, fundir con agua la unión para que no se note. Cuando lo unimos al muñeco fruncir.
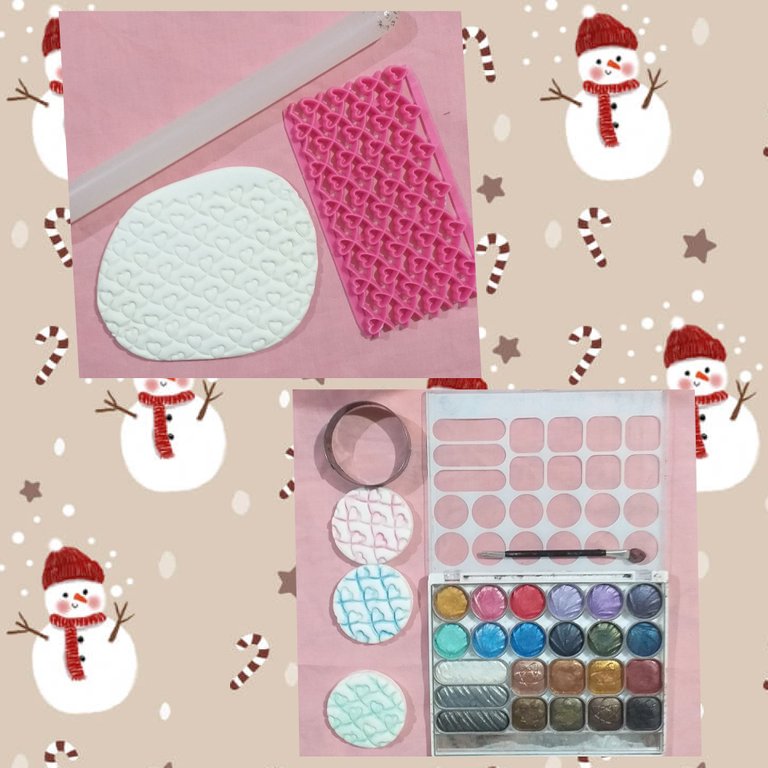
Roll out dough and use the texture plate (if you don't have it, you can use any object that can mark any shape, for example: hearts, stars, etc.), cut circles that will be the base. We can use makeup to highlight the texture.
Estirar masa y usar la placa texturadora (si no tenes podes utilizar cualquier objeto que pueda marcar alguna forma, ejemplo: corazones, estrellas, etc.), cortar círculos que van a ser la base. Podemos usar maquillaje para resaltar la textura.
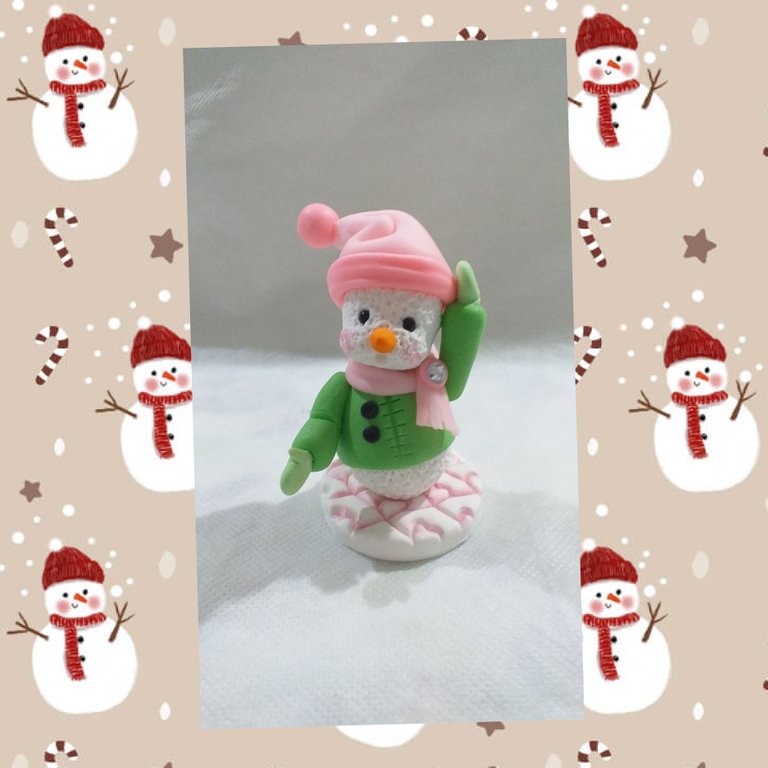
This is how our snowman is finished, at the tip of the hat I added a ball, on the front two buttons with black dough and on the scarf a strass stone. Finally make up.
Así queda terminado nuestro muñeco de nieve, en la punta del gorro le agregué una bolita, en el frente dos botones con masa negra y en la bufanda una piedra se strass. Finalmente maquillè.
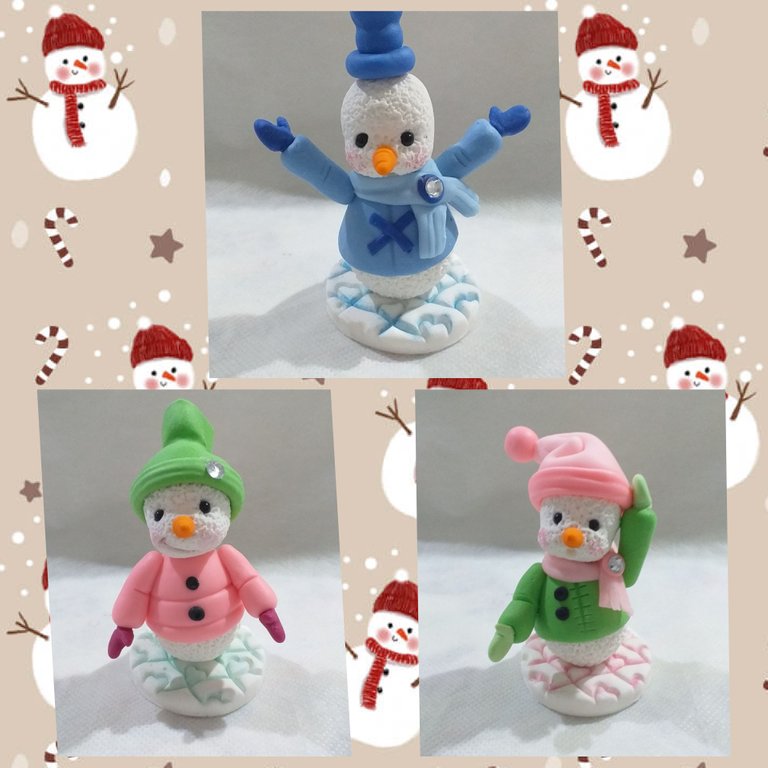
In the magazine it shows these three models but only the step by step of the one I showed you. The rest can be done perfectly and you just have to change a few details.
To make this post I took photos with my Samsung Galaxy j4 cell phone and used the Collage Marker application and the Google translator.
I hope you liked it. Greetings. Andrea❤❤❤
En la revista muestra estos tres modelos pero solo el paso a paso del que les enseñé. Los demás se pueden hacer perfectamente y solo hay que cambiar algunos detalles.
Para hacer este post tomé fotos con mi teléfono celular Samsung Galaxy j4 y utilicé la aplicación Collage Marker y el traductor de Google.
Espero les haya gustado. Saludos. Andrea❤❤❤

Este es un trabajo muy lindo y con un acabado bastante genial. Me gusta mucho cómo ha quedado la bufanda y el gorro, además de la textura del muñeco.
Haces trabajos geniales! Saludos!
Hola @gaboamc2393 ,gracias por tus observaciones. Siempre es bueno cuando un compañero te alienta. Muchas gracias 😊
Muy hermoso y tierno . Felicidades
Muchas gracias @jorgelissanchez 😊
Congratulations @somethingnice! You have completed the following achievement on the Hive blockchain and have been rewarded with new badge(s):
Your next target is to reach 90 posts.
You can view your badges on your board and compare yourself to others in the Ranking
If you no longer want to receive notifications, reply to this comment with the word
STOPTo support your work, I also upvoted your post!
Check out the last post from @hivebuzz:
Amiga te quedaron geniales esos muñecos de nieves, me encantan. Te felicito.
Muchas gracias @deisip67 😊
Amiga la felicito, ha hecho un gran trabajo, muy lindo los muñecos ✨✨
Muchas gracias @dilianny20 😊
Realmente sosprendente, me encantan esos muñecos de nieves para mi colección.
Muchas gracias @carlenis 😊